Point of Sale Solution Back Office Online Items

August 14, 2025

Description

How to import online items into the Point of Sale Solution Back Office

What's in this article?

Software PlanPro
 

Extend your in-store sales to a new online storefront by transferring over your inventory data in bulk to link the two inventories. When you complete an online sale, it will reflect one less unit from your overall shared inventory. Download your current inventory into a spreadsheet from the Back Office and a blank online product management template. After copying over the content, you will then import the transferred data back into Back Office. 

1. Download your item inventory spreadsheet

To download your current inventory into a spreadsheet
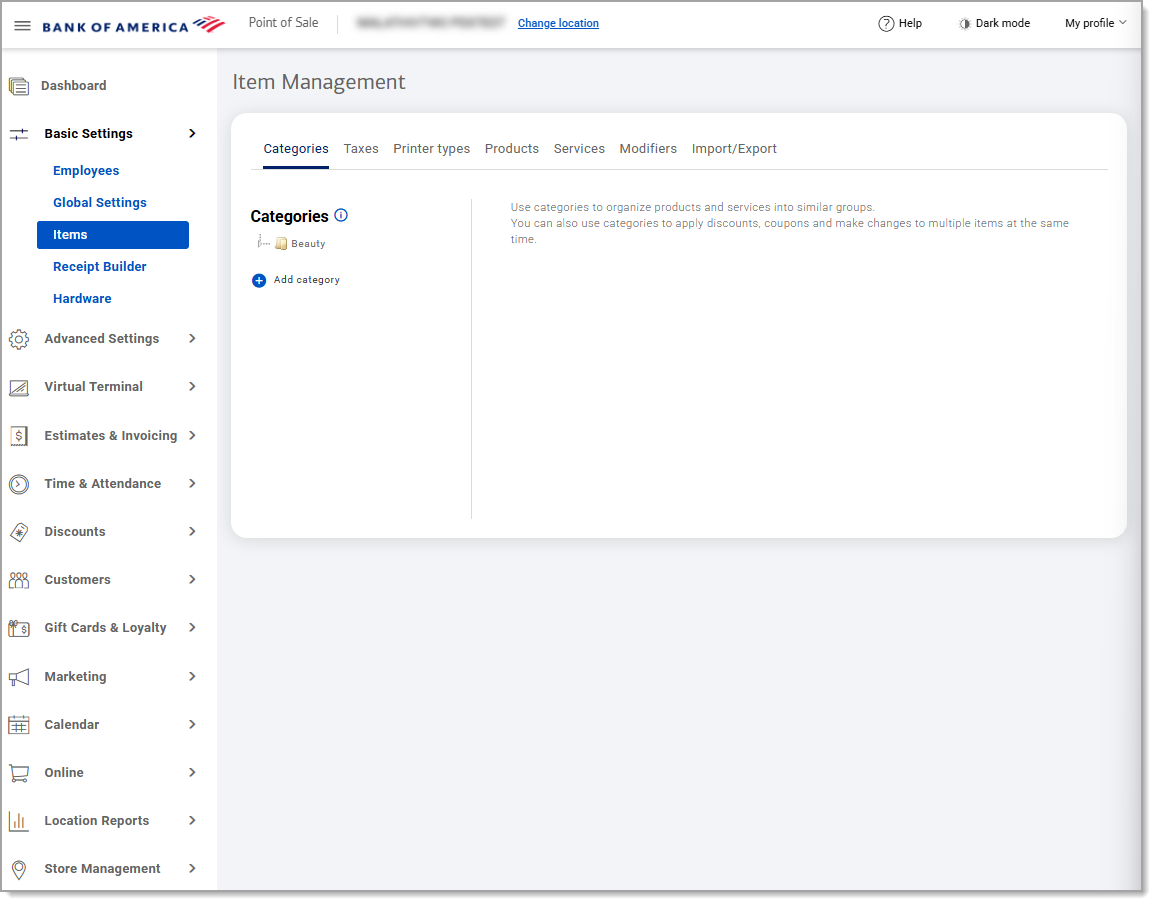
  1. In the Point of Sale Solution Back Office, select Basic Settings > Items.
     Items under the Basic Settings tab of the navigation menu.
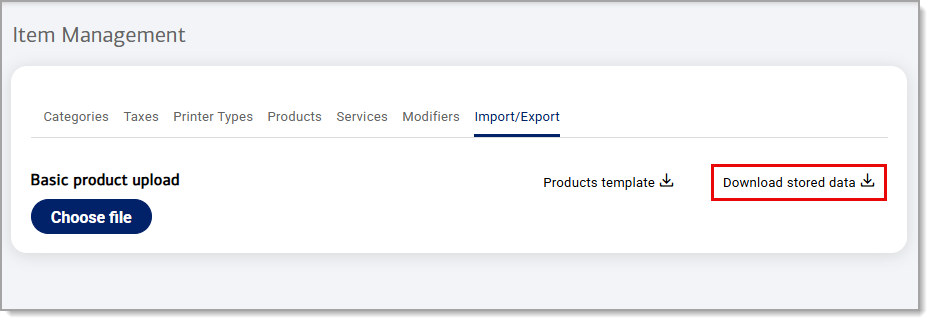
  2. From the Import/Export tab, select Download stored data to download a copy of your current inventory.

    Download stored data button highlighted under the import/export tab of Item Management.
  3. From your browser download options, choose Save to save a copy of the download. 

    TIP! By saving a copy of the inventory prior to making your edits, you will have a back up version in case you need to restore the original inventory.

  4. Open the file and then choose Save As to save an editable version.

2. Download Online Product Management template

To download template for bulk import


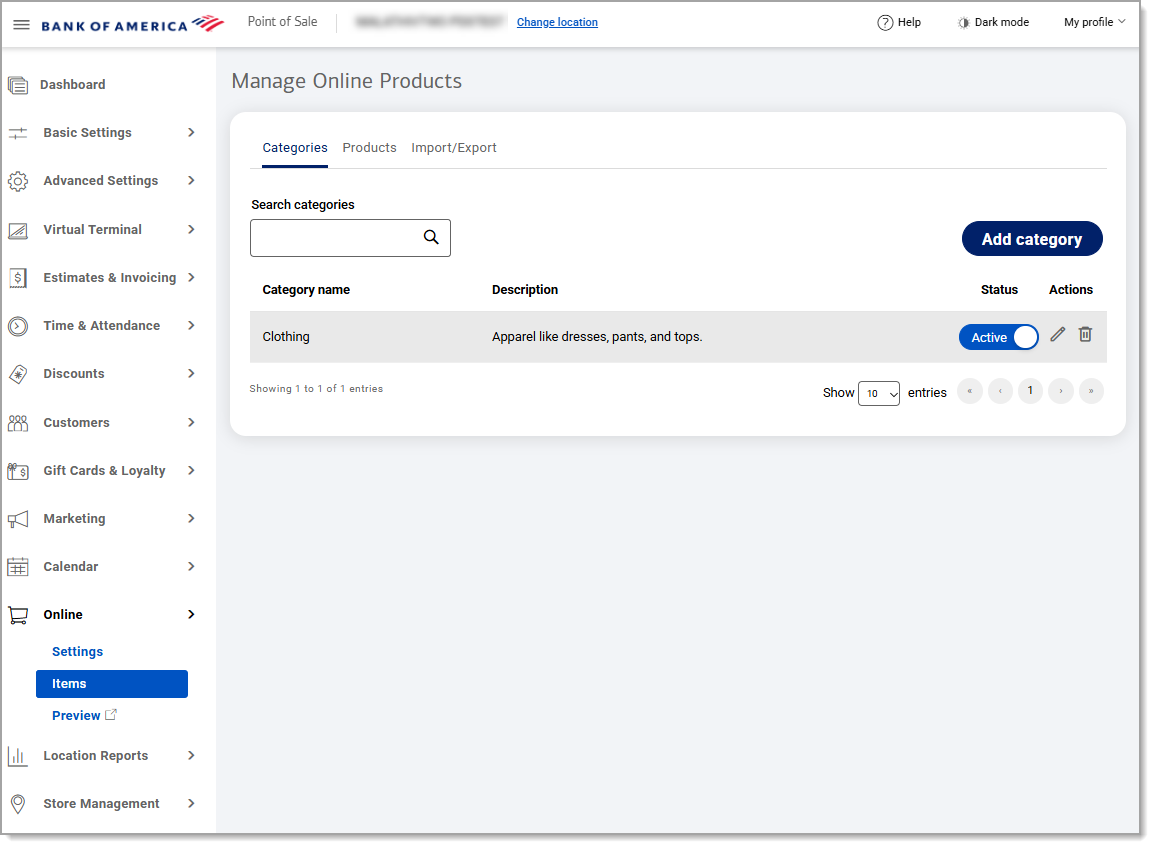
  1. In the Point of Sale Solution Back Office, select Online > Items.


    Items under the online tab of the navigation menu.

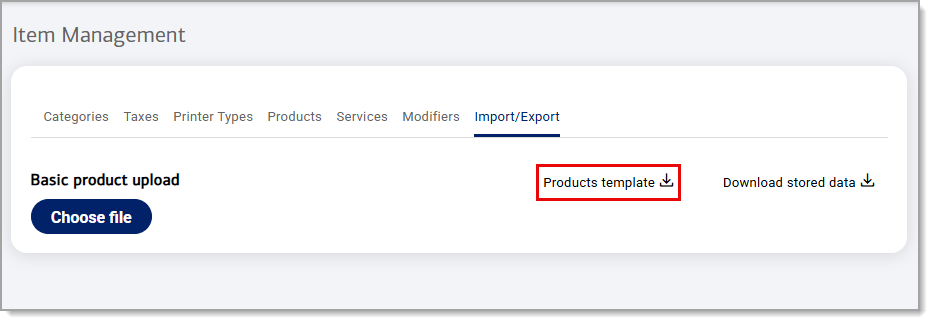
  2. From the Import/Export tab, select Products template to download a spreadsheet to fill out.
     Products template button highlighted under the import/export tab of Item management.
  3.  From your browser download options, choose Save to save a copy of the download. 

    TIP! By saving a copy of the inventory prior to making your edits, you will have a backup version in case you need to restore the original inventory.

  4. Open the file and then choose Save As to save an editable version.

3. Copy over content

Current inventory data can now be copied over into your blank template and be prepared for import. Both spreadsheets include tabs for different management options: categories, products, etc. Additionally, the spreadsheet will include an information tab that lists each worksheet and provides a definition for each column and indicates whether it is required information. 

NOTE:
 Information must be manually copied and pasted, over item by item to maintain the link between in-store and online inventory.

To transfer data to template

  1. Open your current inventory spreadsheet and your online product management template.
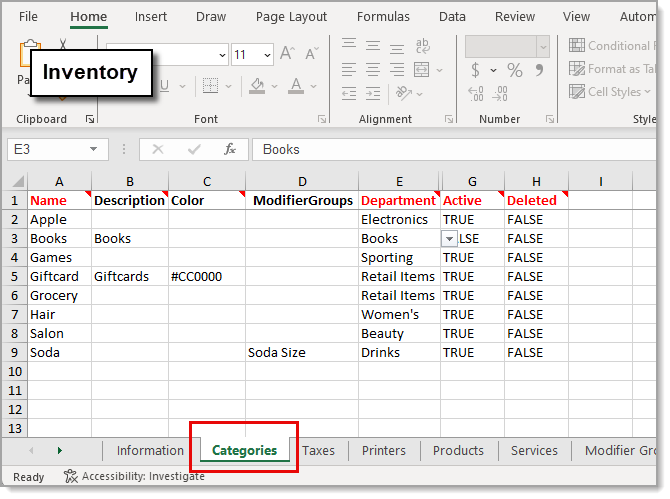
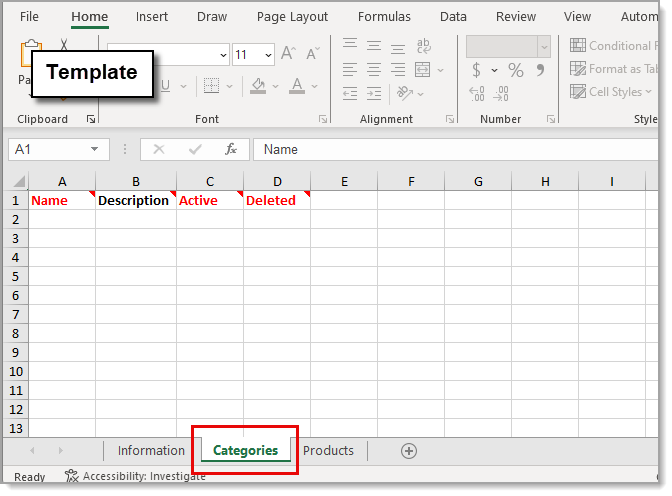
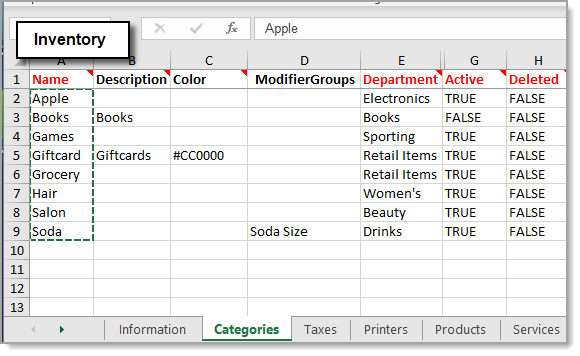
  2. Select the Category tab on both to display the data management category.

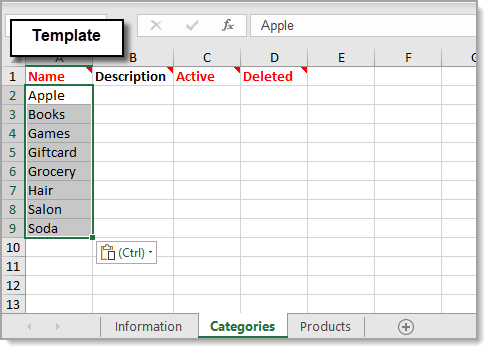
    Categories tab highlighted from the downloaded inventory spreadsheet.Categories tab highlighted on the downloaded template spreadsheet.
  3. In the template, fill out all red columns starting with Name directly copy over the inventory content. Repeat with Active and Deleted.

    TIP! Be sure to save periodically to prevent loosing your progress.

    Name column highlighted in the inventory spreadsheet.Name column filled in the template spreadsheet.
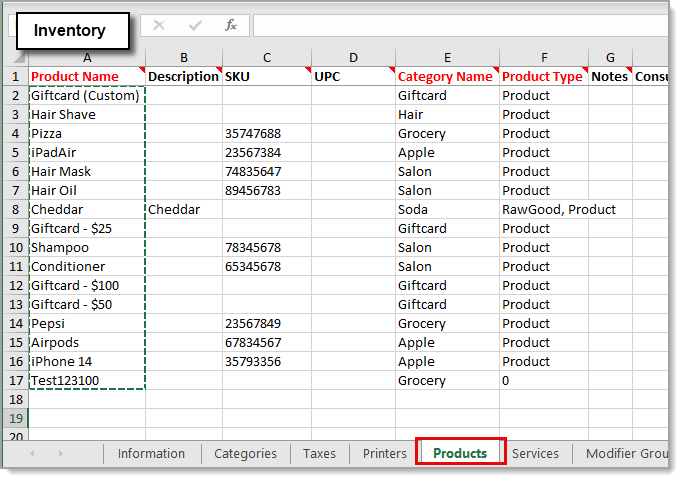
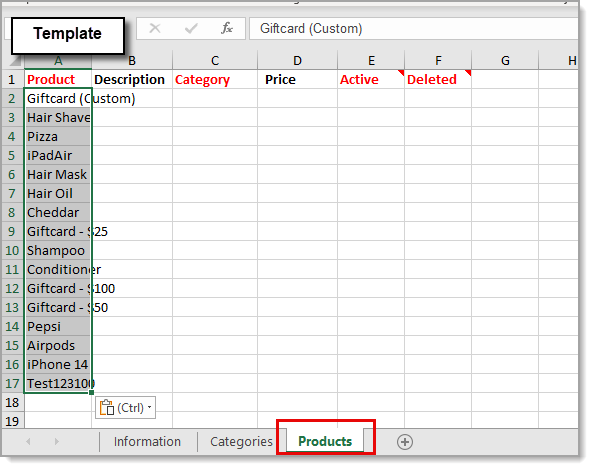
  4. Select the Products tab on both spreadsheets and fill out the red columns in the template by directly coping over the inventory content. 

    Products tab highlighted in the inventory spreadsheet.Products tab highlighted in the template spreadsheet.
  5. Save your completed template. 

4. Import inventory data

Once you've updated and saved your inventory spreadsheet, you are ready to import it to Back Office. If there are no errors in the right hand column of each tab, publish the uploaded file to your system. After successfully completing, the page will reload displaying the bulk uploaded details and showing any Errors/Warnings for you to correct.

IMPORTANT!
Make sure to check each tab after uploading your file. If there are any errors listed, the file will not publish. The line number column will guide you to the exact line number on the sheet that is causing the error.
To import transferred data

  1. In the Point of Sale Solution Back Office, select Online > Items.
  2. From the Import/Export tab, click Choose file.
     Choose file button highlighted under Import/Export of Online Product Management.
  3. Select the file of the completed template to import.
  4. Click Upload. If there are any errors highlighted clear the imported data from the screen, correct your file, save, and reupload. 
  5. If there are no corrections needed, click Publish

Did you find this article helpful?