Handheld Barcode Scanner Setup and Troubleshooting
Description
What's in this article?
Solution: Essentials Light | Essentials | Retail | Restaurant
To use a barcode scanner with your Point of Sale app, you will need to set up the scanner on the system. Setting up the scanner will vary depending on whether you have Essentials or Retail solution or the Restaurant solution. Once the scanner is ready to use, you'll also need to add items to your inventory that have barcodes. You can do that by creating a new item with the scanner or by linking the barcode that you scan to an existing inventory item.
Set up the barcode scanner
- To add a barcode scanner to Essentials and Retail Solution
- Connect the scanner cable to the scanner.
- Connect the USB end of the scanner cable to one of the USB ports on the POS device.
- Tap OK to allow the app to access the USB device.
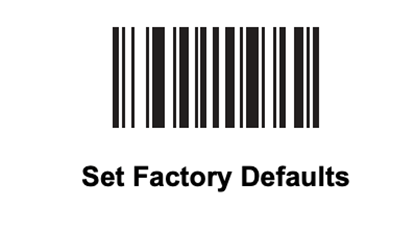
- Scan the Set Factory Defaults barcode below. Go slowly to ensure the scanner completes each scan. If the scanner won't scan this screen, you may need to print out the barcode and scan on paper.
- Scan the following barcode. The scanner will beep.

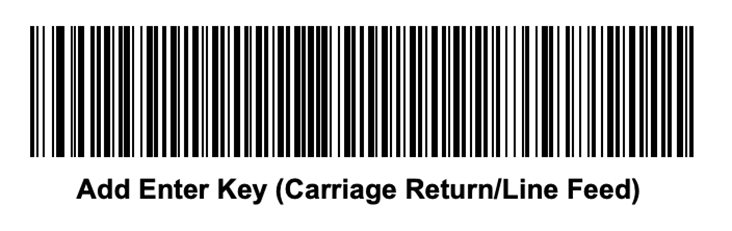
Scan the following barcode to add an Enter Key:
- Hold down the Power button to restart the POS.
- Open the Point of Sale app and log in using your PIN.
- From the slide-out menu ☰, tap My Hardware.
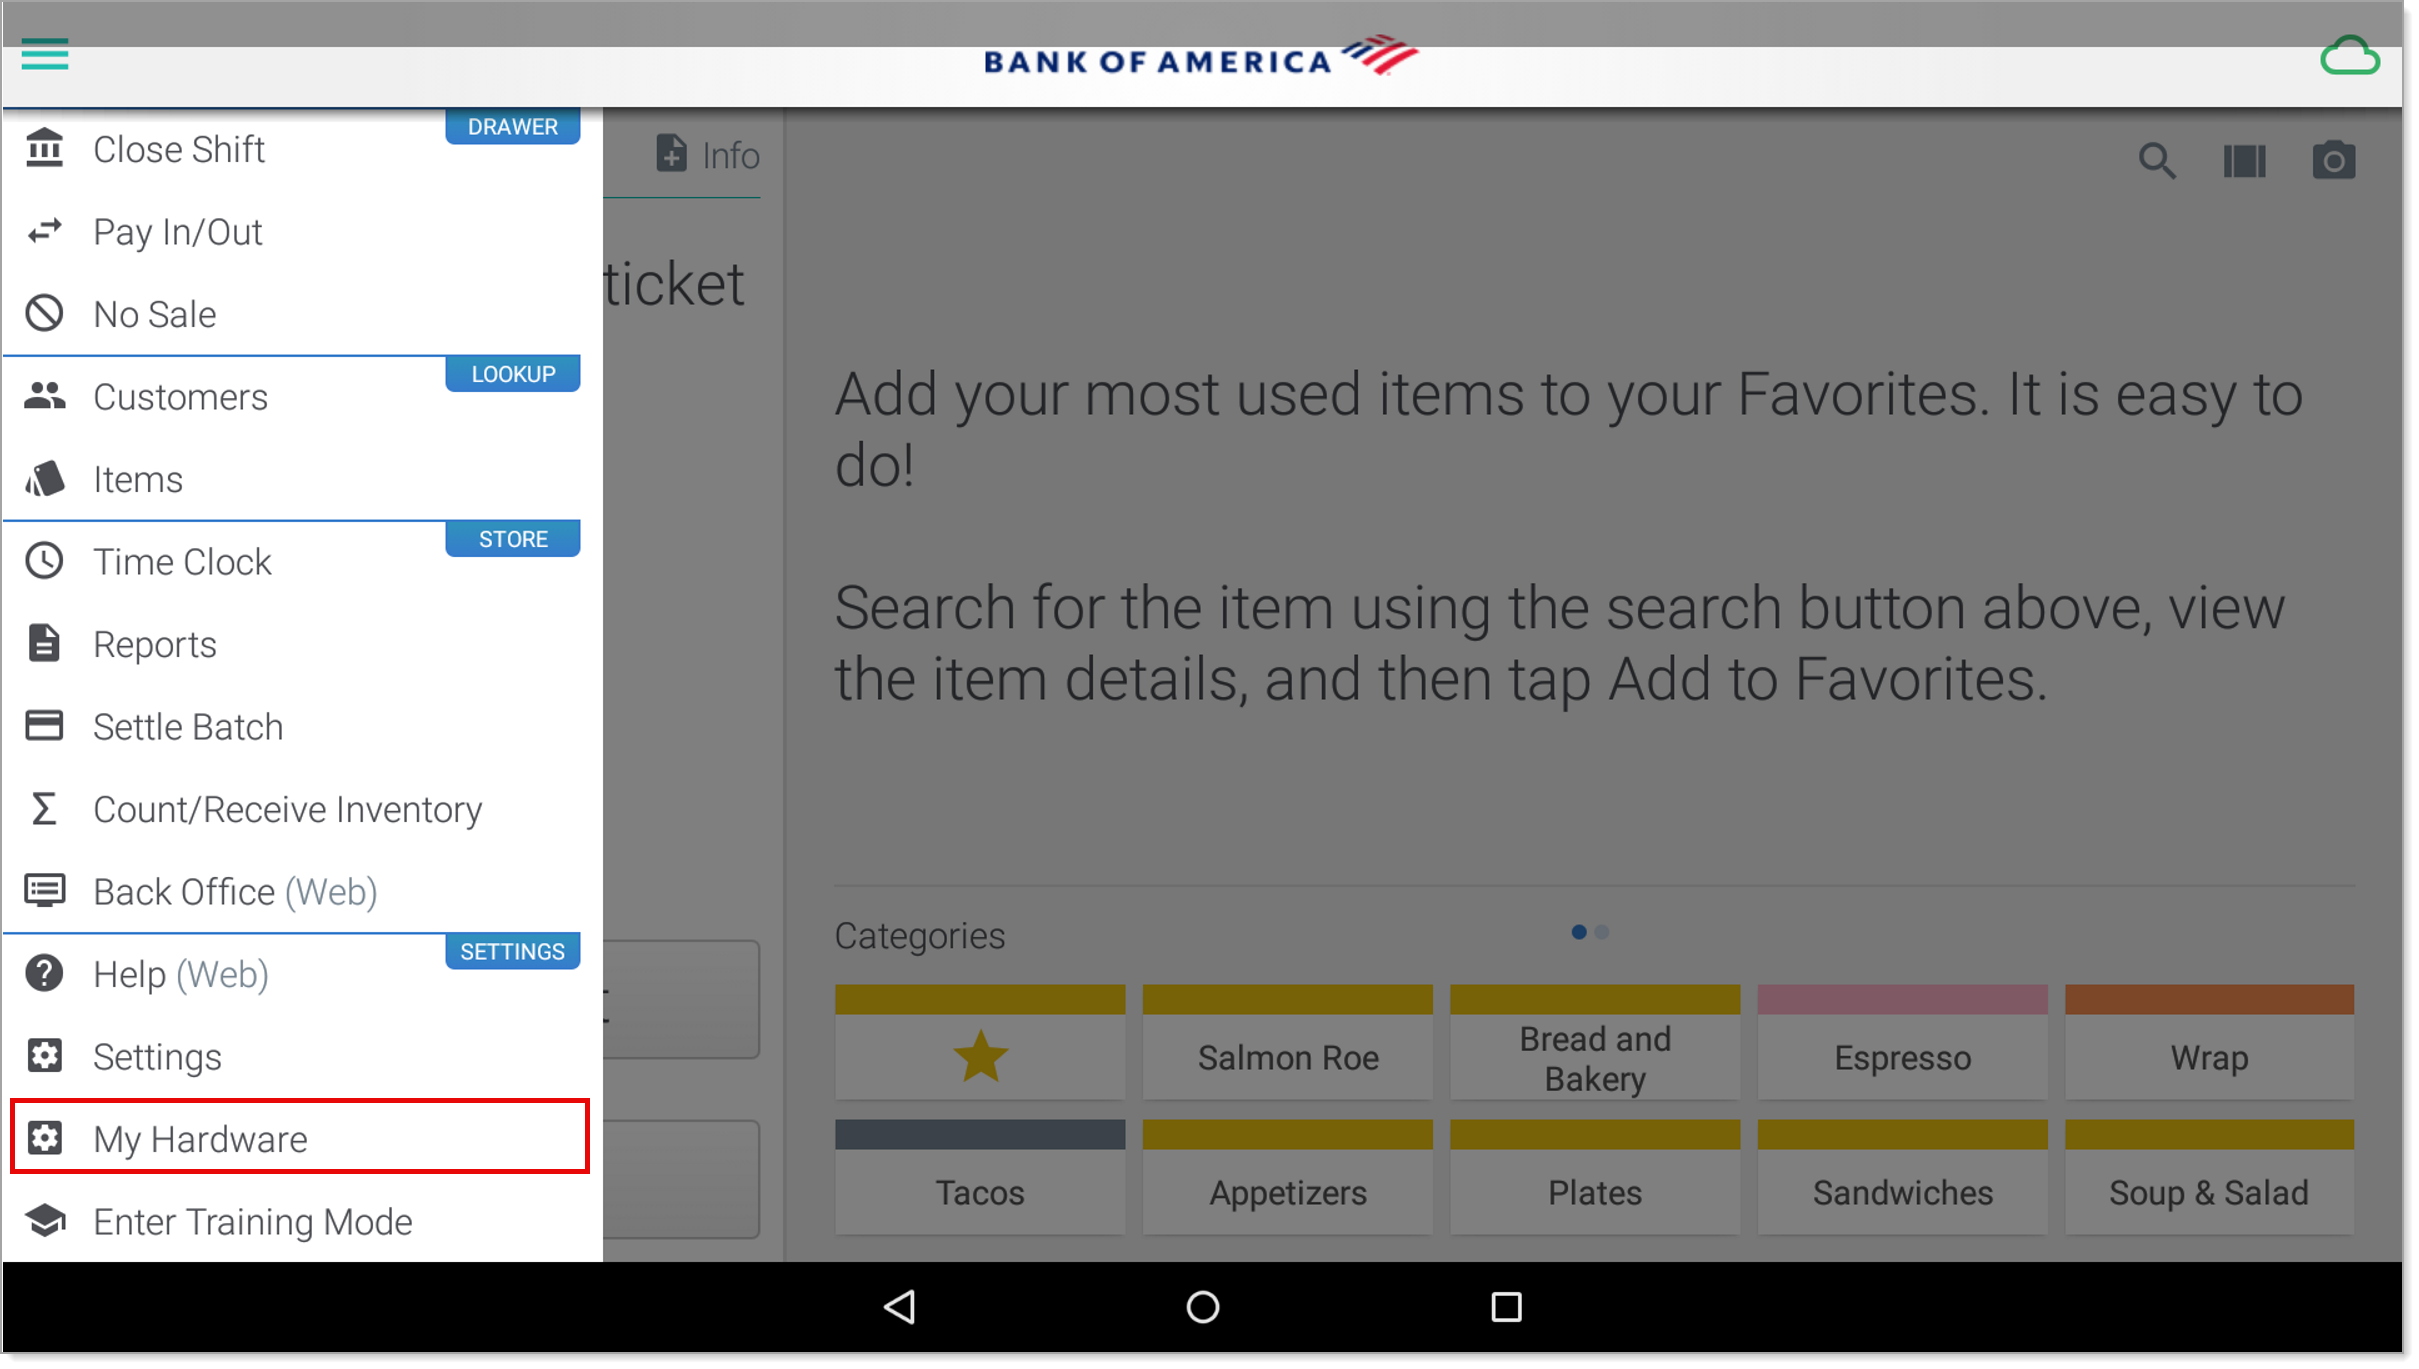
- Verify that the Barcode Scanner line shows connected.
- Tap the Test button. Follow the on-screen instructions to test the scanner.

- Tap Close.
- To set up the barcode scanner in Restaurant Solution
- Connect the scanner cable to the scanner.
- Connect the USB end of the scanner cable to one of the USB ports on the POS device. You are ready to begin scanning items.
- Troubleshooting scanner setup
If the scanner did not connect. Use the following process to set it up:
- Connect the scanner.
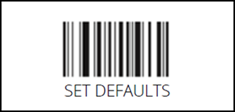
- Scan the Set Defaults barcode below. Wait approximately 15 seconds until you hear the 3-tone "beep" indicating the reboot is complete:
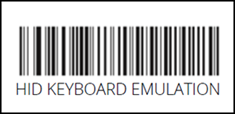
- Scan the HID Keyboard emulation barcode.
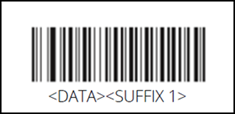
- After the confirmation beep, scan the following code to complete the registration.
- After the scanner beeps, wait 5 seconds for the registration to complete and then restart your terminal.
- Troubleshooting scanner setup
Barcode not found error
When you scan an item and the barcode isn't found, the system will alert you via a "negative" sound and display a pop-up screen to alert you that the system did not find the barcode. From the Barcode not found screen, you can follow the on-screen instructions to link to an existing inventory item or create a new item or delete the scanned item from the ticket by clicking Delete line.
- To create a new inventory item
- Confirm that you have the appropriate user role to add items to inventory.
- Scan the item. If the barcode is not in your inventory, the Barcode not found message appears.
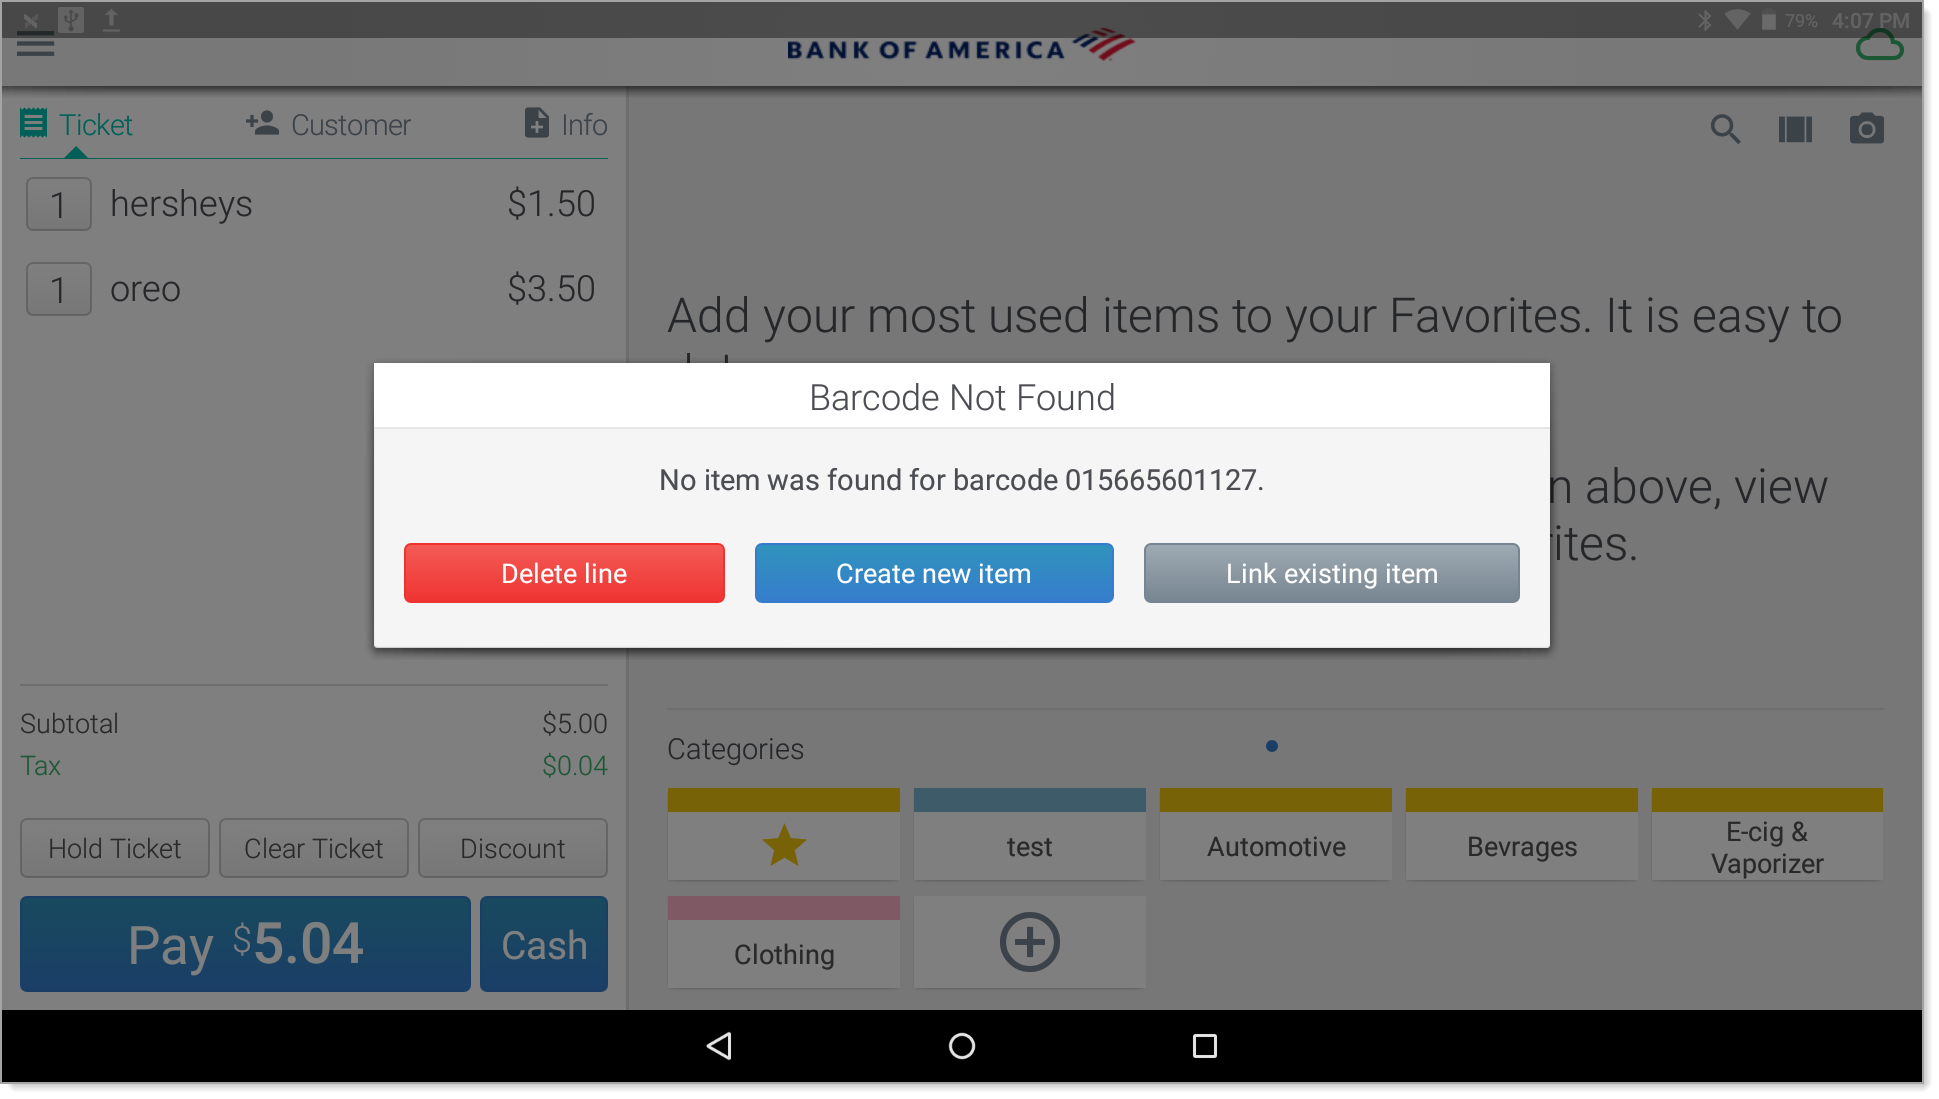
- Tap Create new item.
- Enter an Item Name of up to 20 characters.
- Tap Each or Weight to indicate whether you sell the item by quantity or by weight.
- Enter the Sales Price for the item. If you sell the item by each (quantity), enter the unit price of the item. If you sell by weight, enter the price per unit of measure.
- (Optional) To prompt users to specify a price during the sale, tap to turn on Prompt for Price at POS.
- Tap Tax Category and then tap the appropriate tax category for the item.
- (Optional) Tap Extended Item Setup to set up the following options, when complete tap Done:
- Select a Printer Group to assign to the item.
- Set variations for the item, choosing a variation group and then adding variations.
- Assign modifier groups to the item.
- When finished, tap Save to add the item.
- To link an existing inventory item to a barcode
- Login to the Point of Sale app. Confirm that you have the appropriate user role to add items to inventory.
- Scan the item. If the barcode is not in your inventory, the Barcode Not Found message appears.
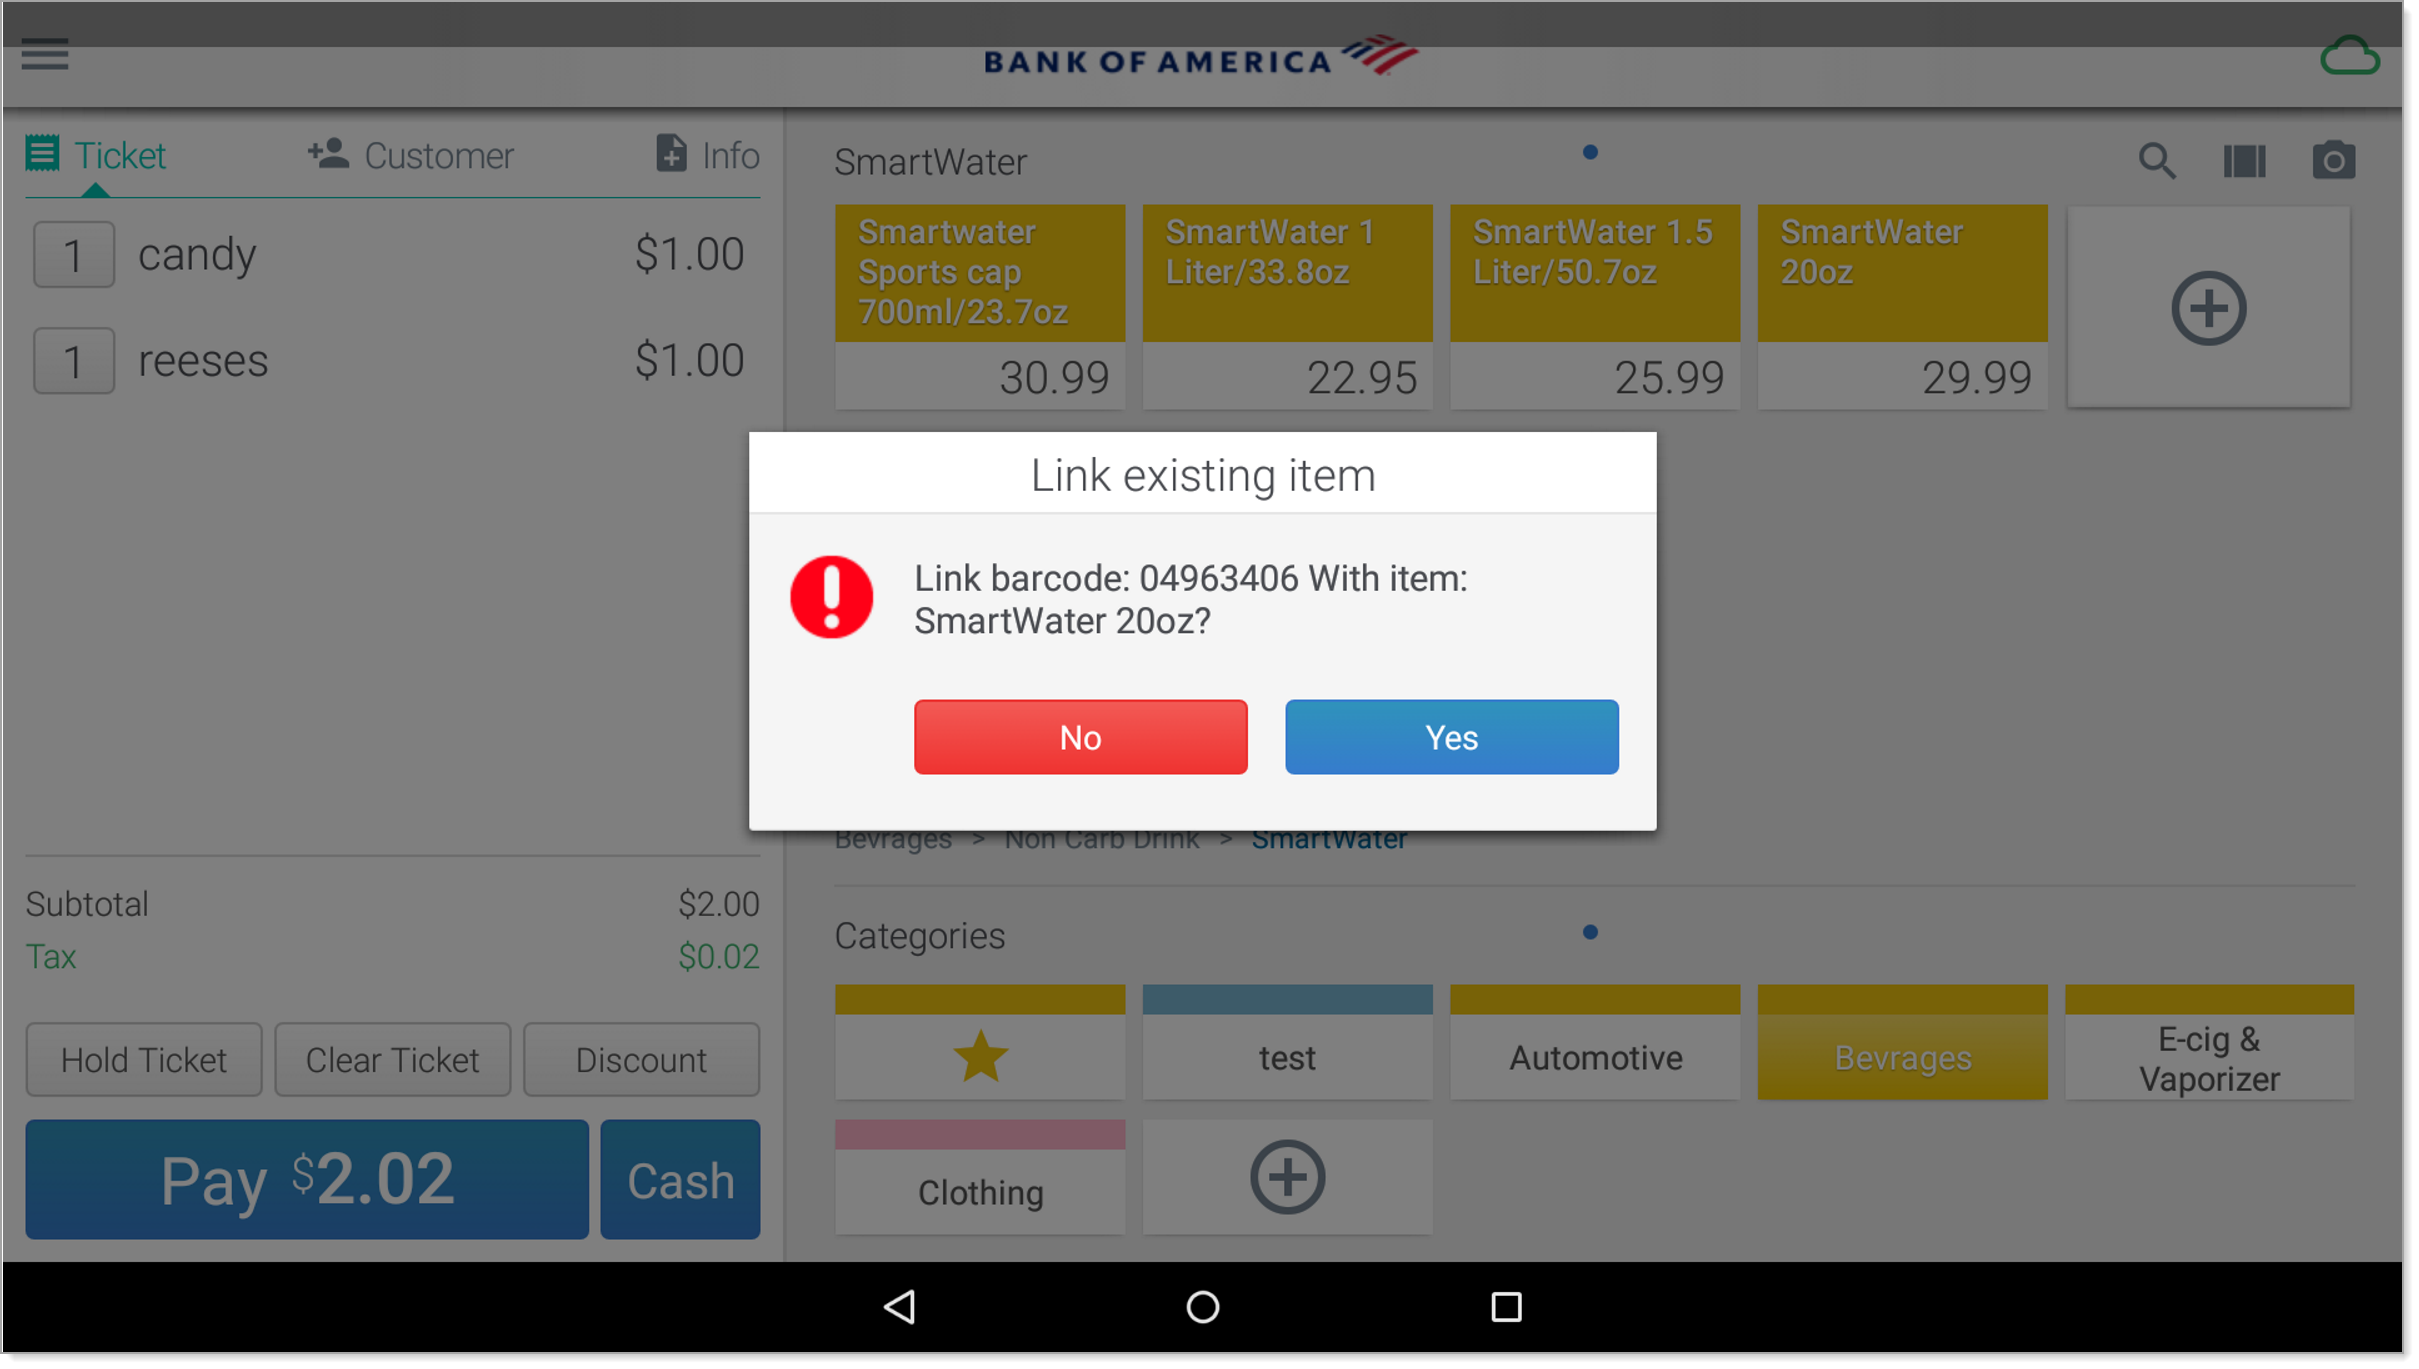
- Tap Link existing item.
- Tap OK at the prompt to select an item.
- Locate and select the item in the inventory.
- Tap Yes when prompted to link the existing item.
NOTE: You can confirm the barcode is linked to the item by tapping the item in your cart, then selecting the Item Detail tab from the top of the screen. The barcode field should contain the new barcode.
IMPORTANT!
Items added will be store-specific for the store you are currently logged into on the Point of Sale app. If this item needs to be available for multiple stores, assign the item to all stores in the Back Office.
Troubleshoot the barcode scanner
The barcode scanner used with the Point of Sale app can read 1-D bar codes that are made up of alphanumeric characters only.
- Verify the barcode has been entered correctly in the Back Office. This includes entering all numbers on the barcode, including the leading check digit, manufacturer and item code, and the trailing check digit in one string. For example: 123456789012. If you are having difficulty entering the barcodes for your items, you can use the Point of Sale app to scan the barcode for your item and enter the item details directly into the Point of Sale app. On the next data sync, the Point of Sale app will push the new barcode to the Back Office.
- Verify the item has been downloaded from the Back Office to the Point of Sale app by performing a data sync.