Point of Sale Solution Back Office Printer Types
Description
How to add a printer type to associate with items
What's in this article?
Software Plan: Starter | Growth | Pro
If your business uses prep-printers, warehouse printers, kitchen displays or kitchen printers, you can create individual Printer Type names, such as "prep-printer 1", "bar printer", "salad printer", etc. to assign a printer or KDS to an item. When an item is assigned to a printer is ordered, a ticket will print on that printer or the ticket will display on the KDS screen.
Watch the video:
- In this video, you will learn how to add a printer type to the Back Office of your Point of Sale Solution.
- In Point-of-Sale Back Office select Basic Settings > Items.
- On the Printer Types tab, click Add New.
- Enter the name of the new printer type.
- Click Save. The printer type you create will be added to the dropdown options that display when you are adding a product.
- To edit the name of the printer, click the Edit icon. To Delete the printer, click the Delete icon to remove the printer type.
To add a printer type
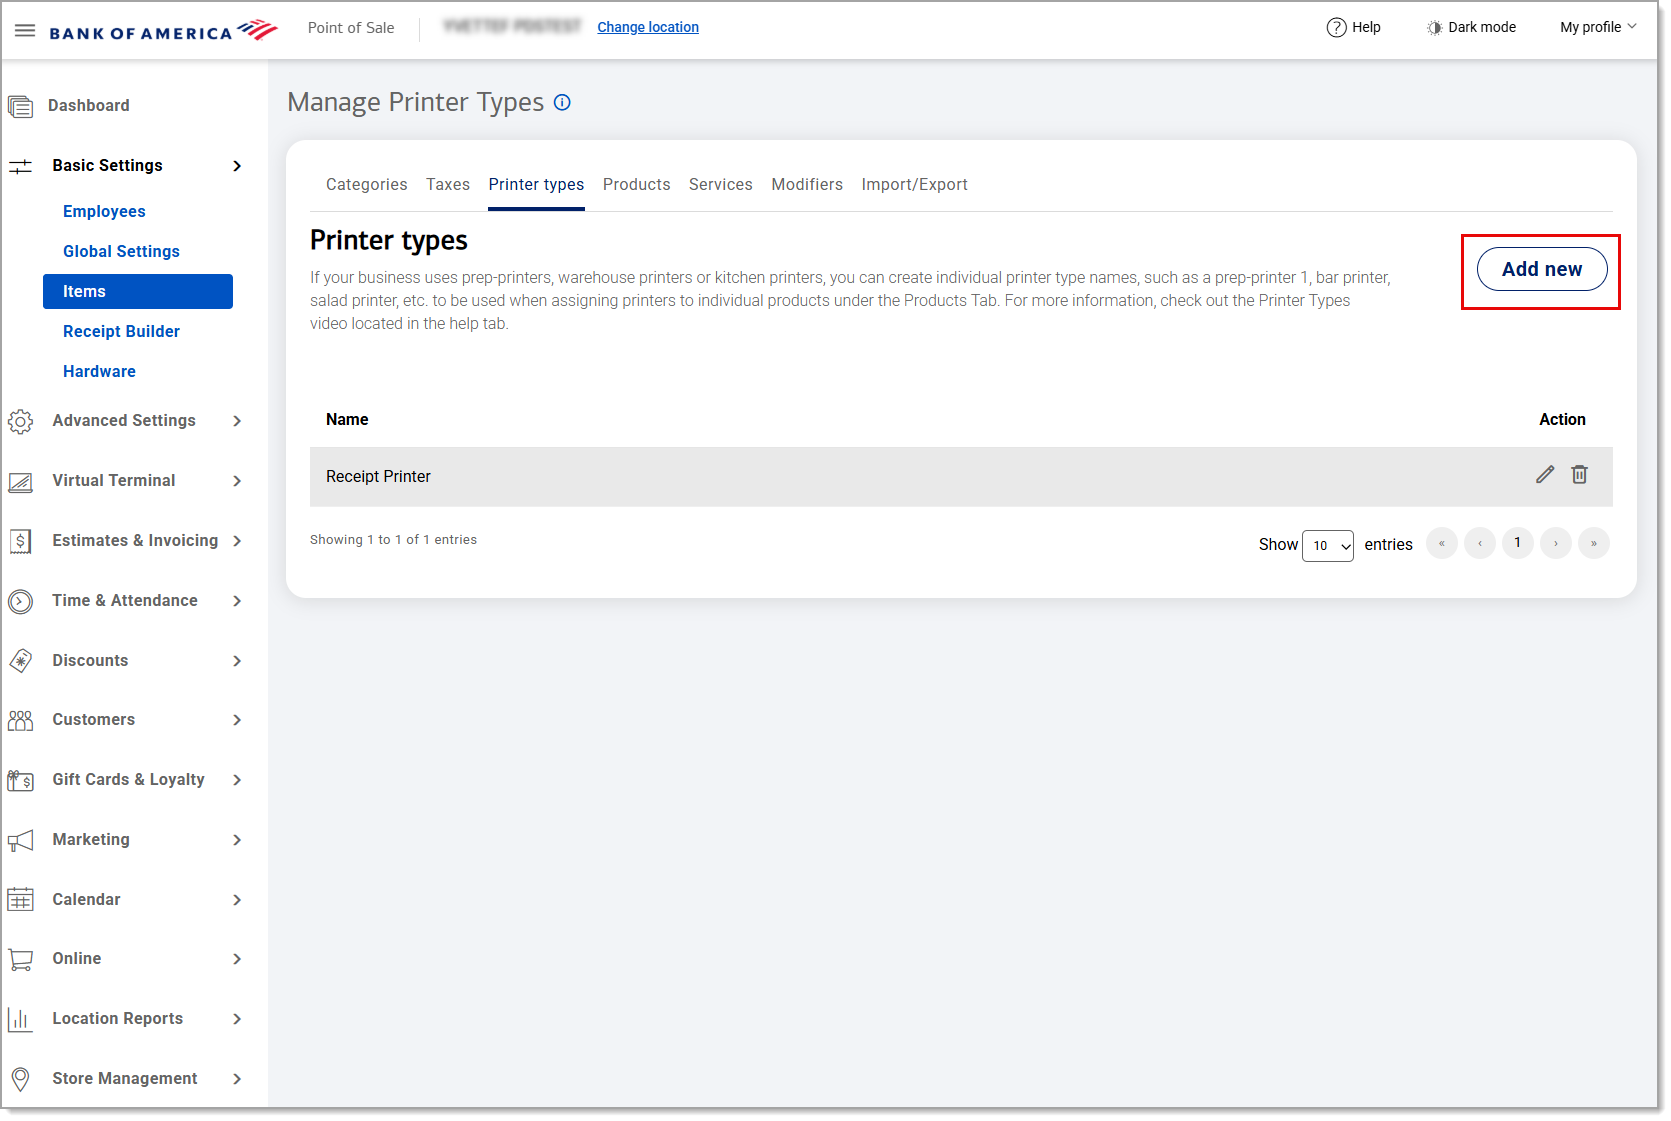
- In the Point of Sale Solution Back Office, select Basic Settings > Items.
- On the Printer types tab, click Add new.
- Enter the name of the new printer type.
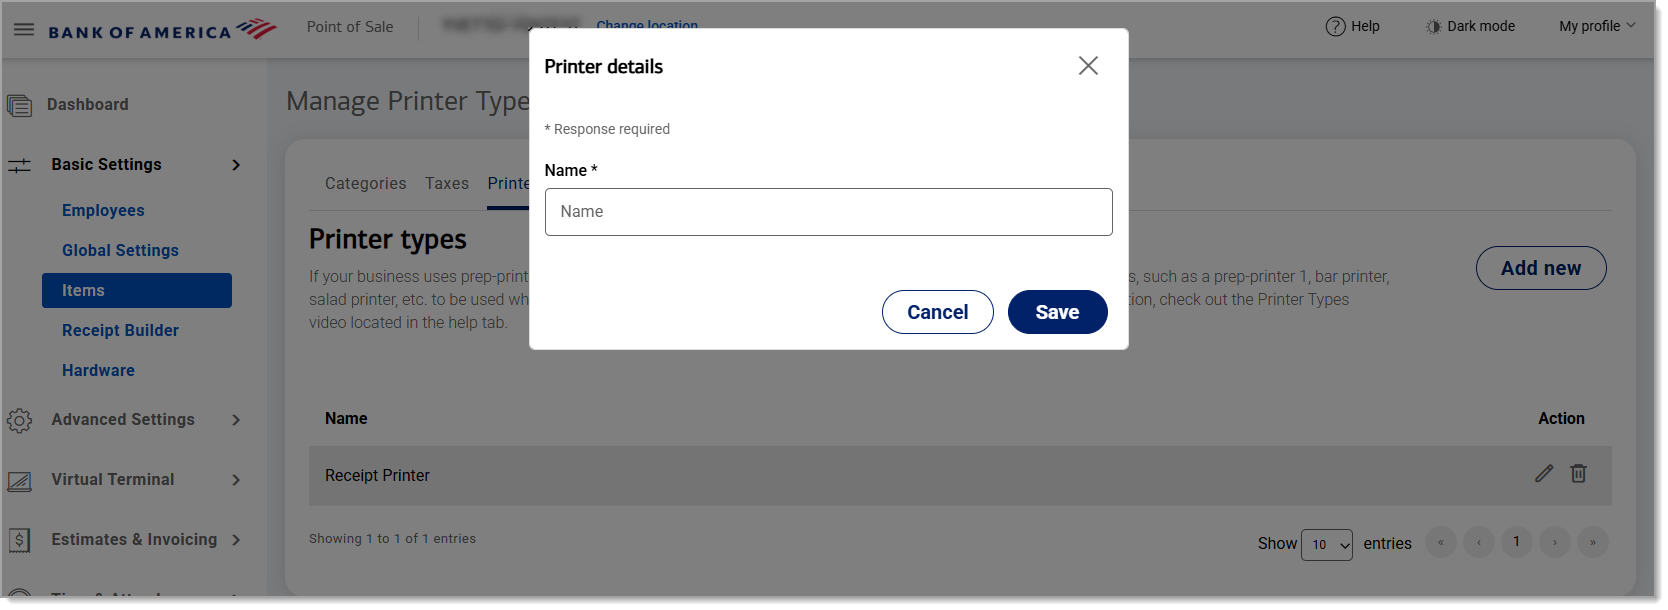
- Click Save. The printer type you create will be added to the dropdown options that display when you are adding a product.
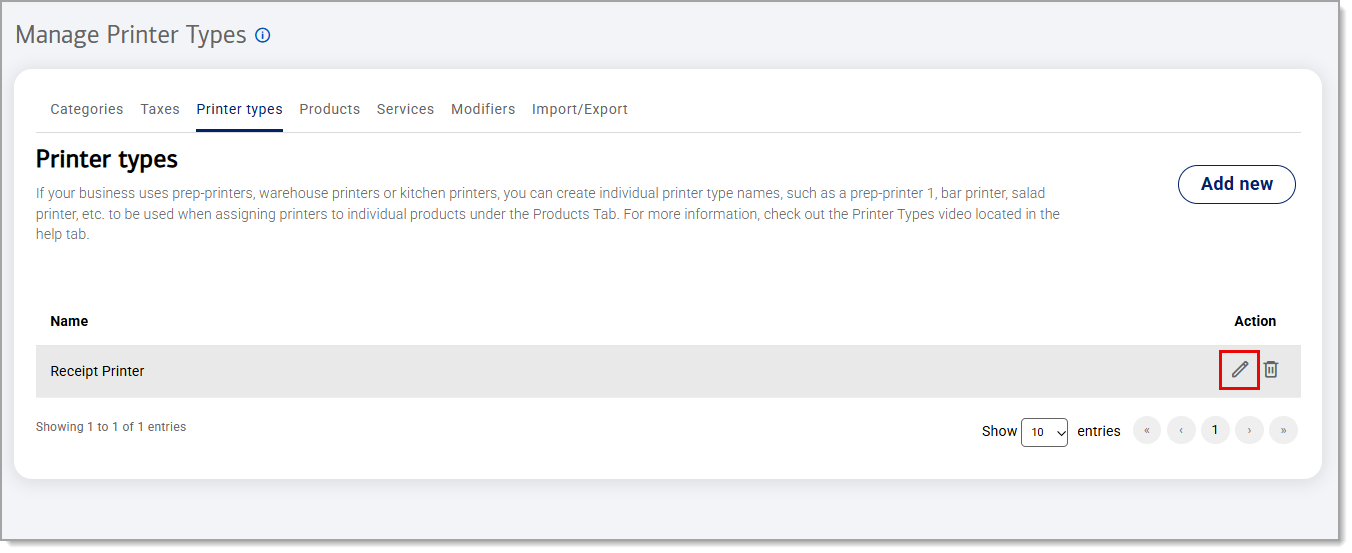
- To edit the name, click the Edit icon or click the Delete icon to remove the printer type.
Once you have created a Printer type, you will need to associate a printer with the printer type.