Point of Sale Solution Back Office Hardware
Description
What's in this article?
Hardware Management lists your active registers and printers. When a new terminal is purchased and its registration is activated, it will appear in your Registers list. You can add printers and associate a printer to the register. We recommend adding your item printer types prior to associating the printer to the register. All printers, including those that are integrated into the point of sale register, will need to be associated with a register.
NOTE:
If you added a KDS as a printer type, you will not need to add it as a printer and assign the KDS to a register.
- *music*
- This video covers how to manage registers and printers from the Point of Sale Solution Back Office.
- Start by adding a new printer in your Back Office Hardware Management. Click the menu icon, select Basic Settings, then Hardware. Click Add Printer.
- In the Printer details form, create a name and description, and select a model from the drop-down list.
- If it is an external printer, you will need to enter the IP endpoint, which can be found in the Point of Sale Solution application. Under the Settings, Printer Details.
- If it's an internal printer, you won't need an IP or Endpoint. Click save.
- The new printer will populate within your printer's list and can be edited or deleted.
- All printers must be assigned to a register. Activated registers automatically populate into your register list.
- To assign your new printer to a register, click the assigned printer option, align to the desired register. In the assigned printer form, select a printer from the drop-down list to associate it with the printer type. Click save.
- You can edit register details by clicking the register name, make updates, then click Save.
- To reflect any Back Office hardware additions or changes in the app, tap the sync icon in the app's homepage.
- *music*
Manage printers
After physically setting up your printer or a device with an integrated printer, add the printer in Hardware Management. All printers should be added, including printers that are integrated into your point of sale device. Later, you can edit or manage the printer as needed.
To add a printer
- In the Point of Sale Solution Back Office, select Basic Settings > Hardware.
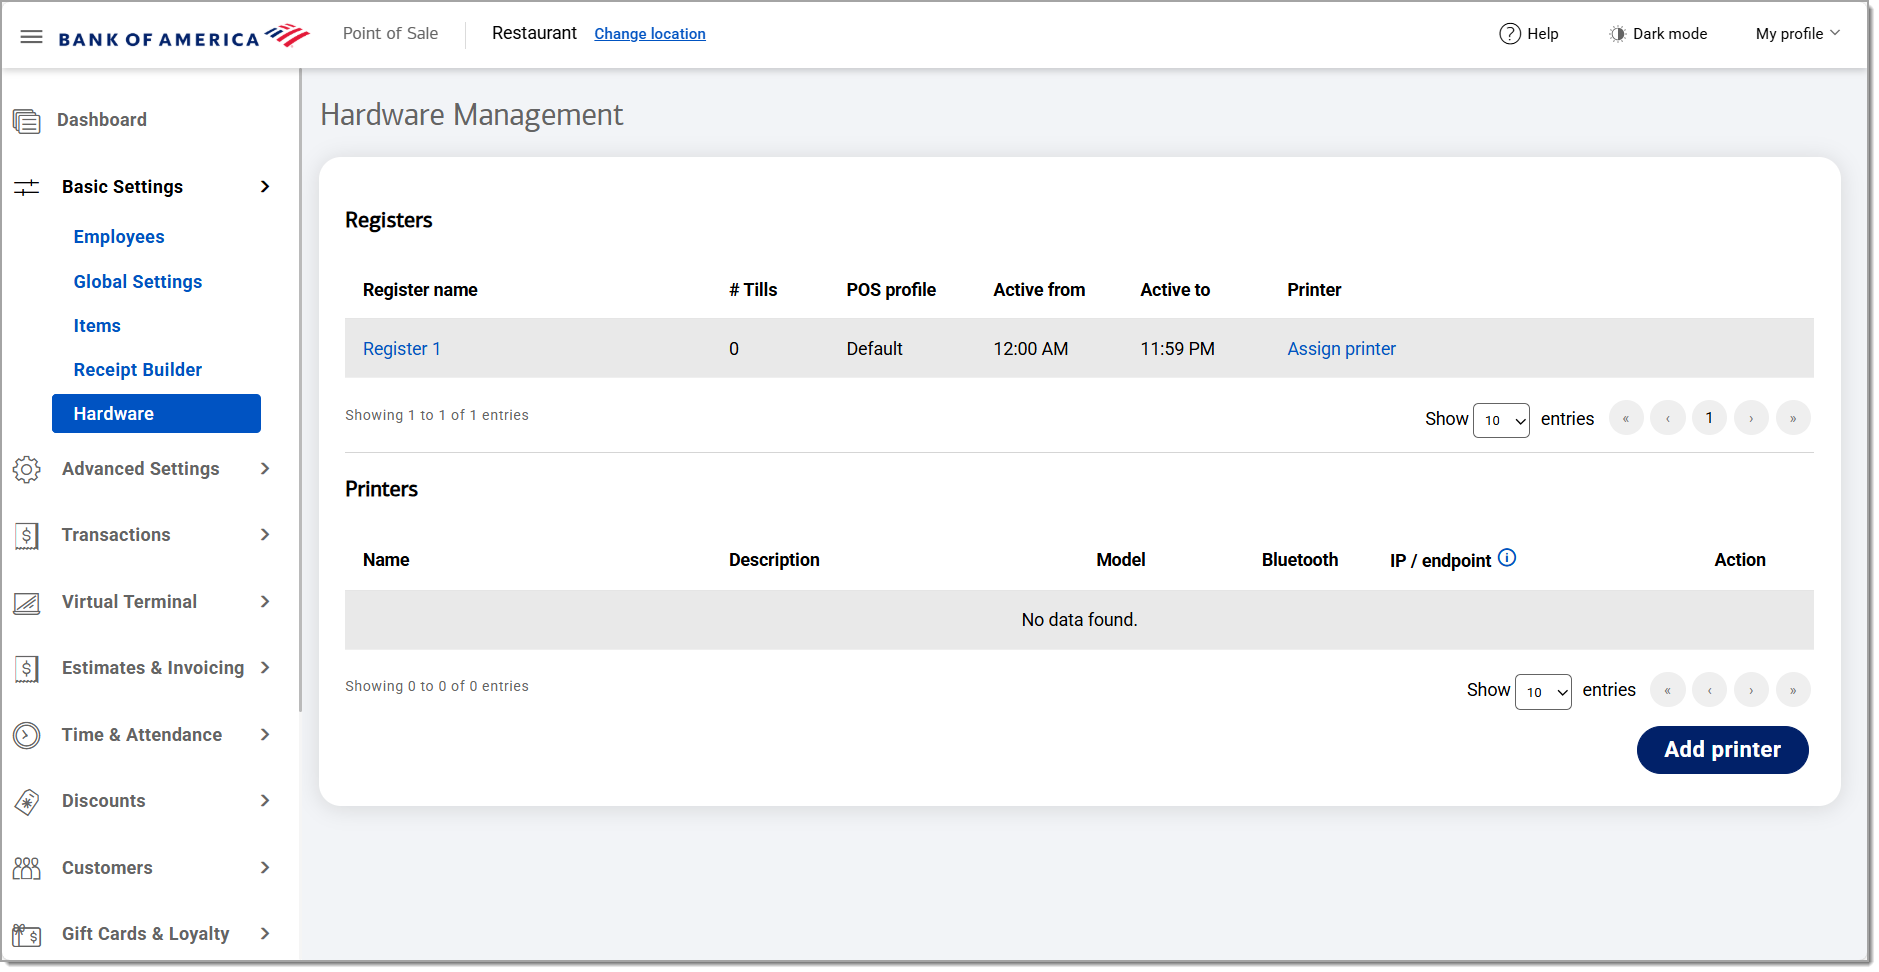
- Click Add printer.
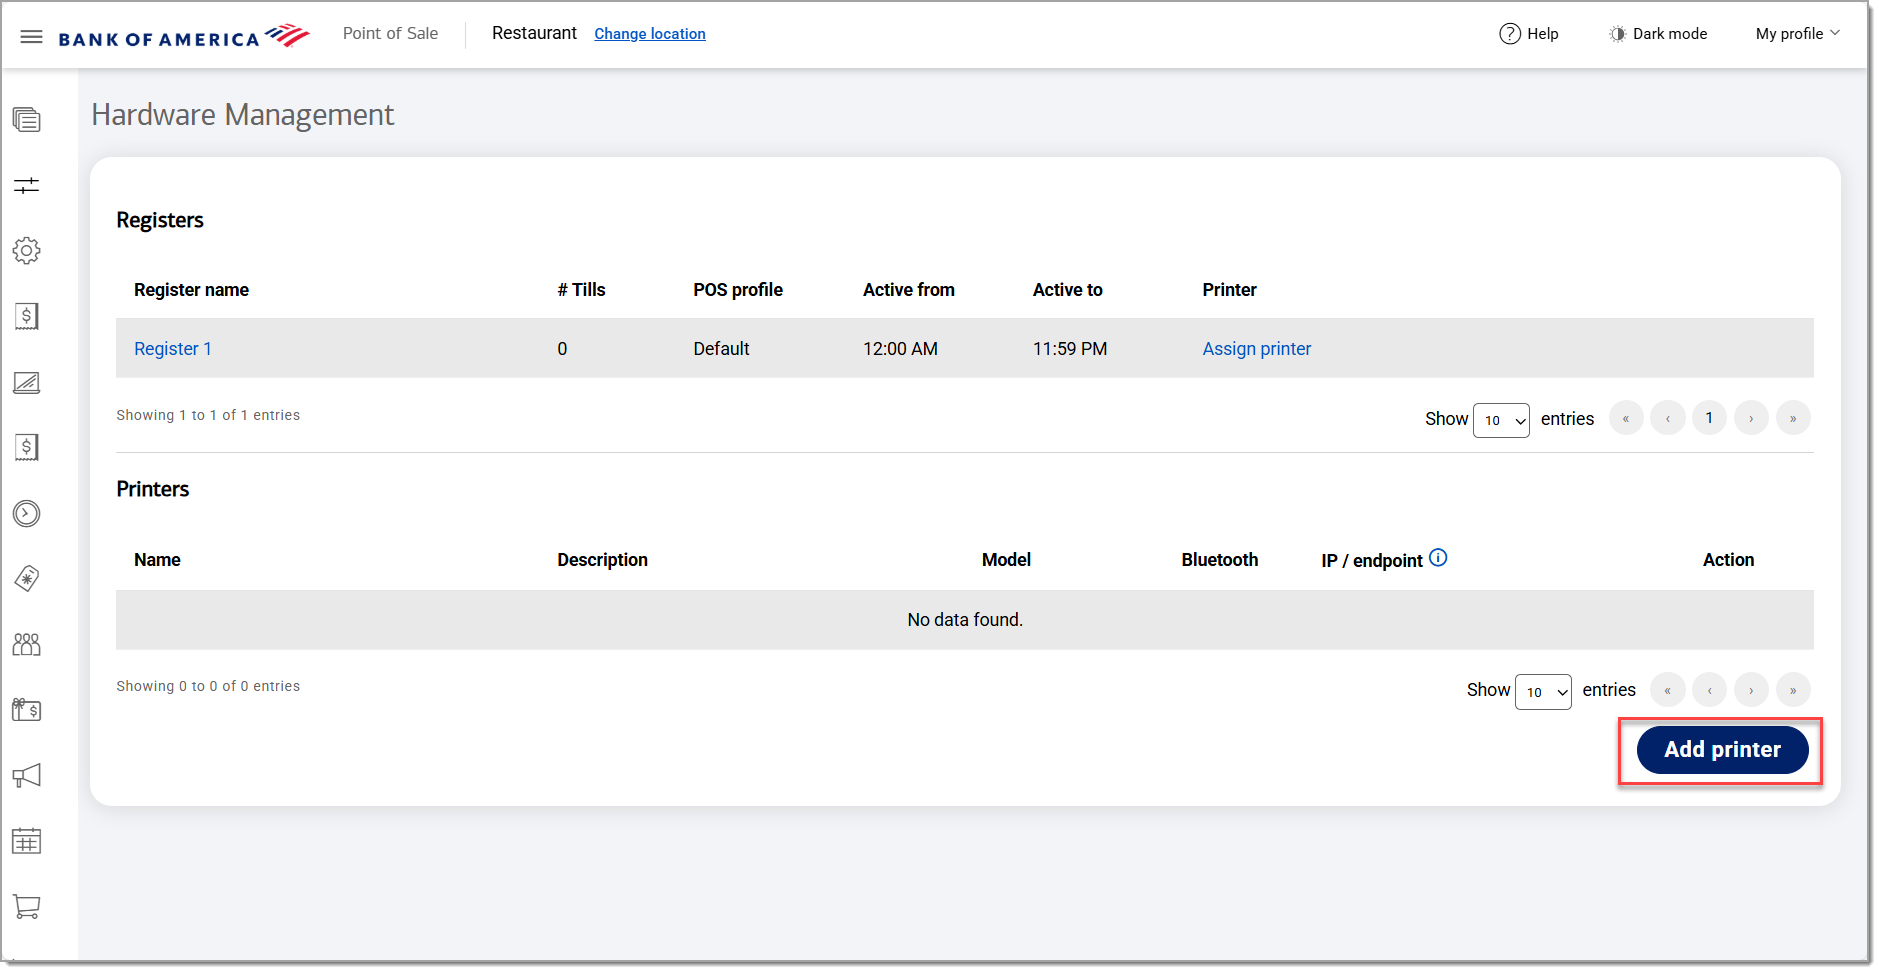
- Enter the name of the printer and a description that will be meaningful to your users.
- Select the printer model from the dropdown list.
- If it's an external printer, enter the value from the IP/End Point field in the Point of Sale App Hardware Settings, then click Save.
NOTE: If it's an internal printer, this information is not required.
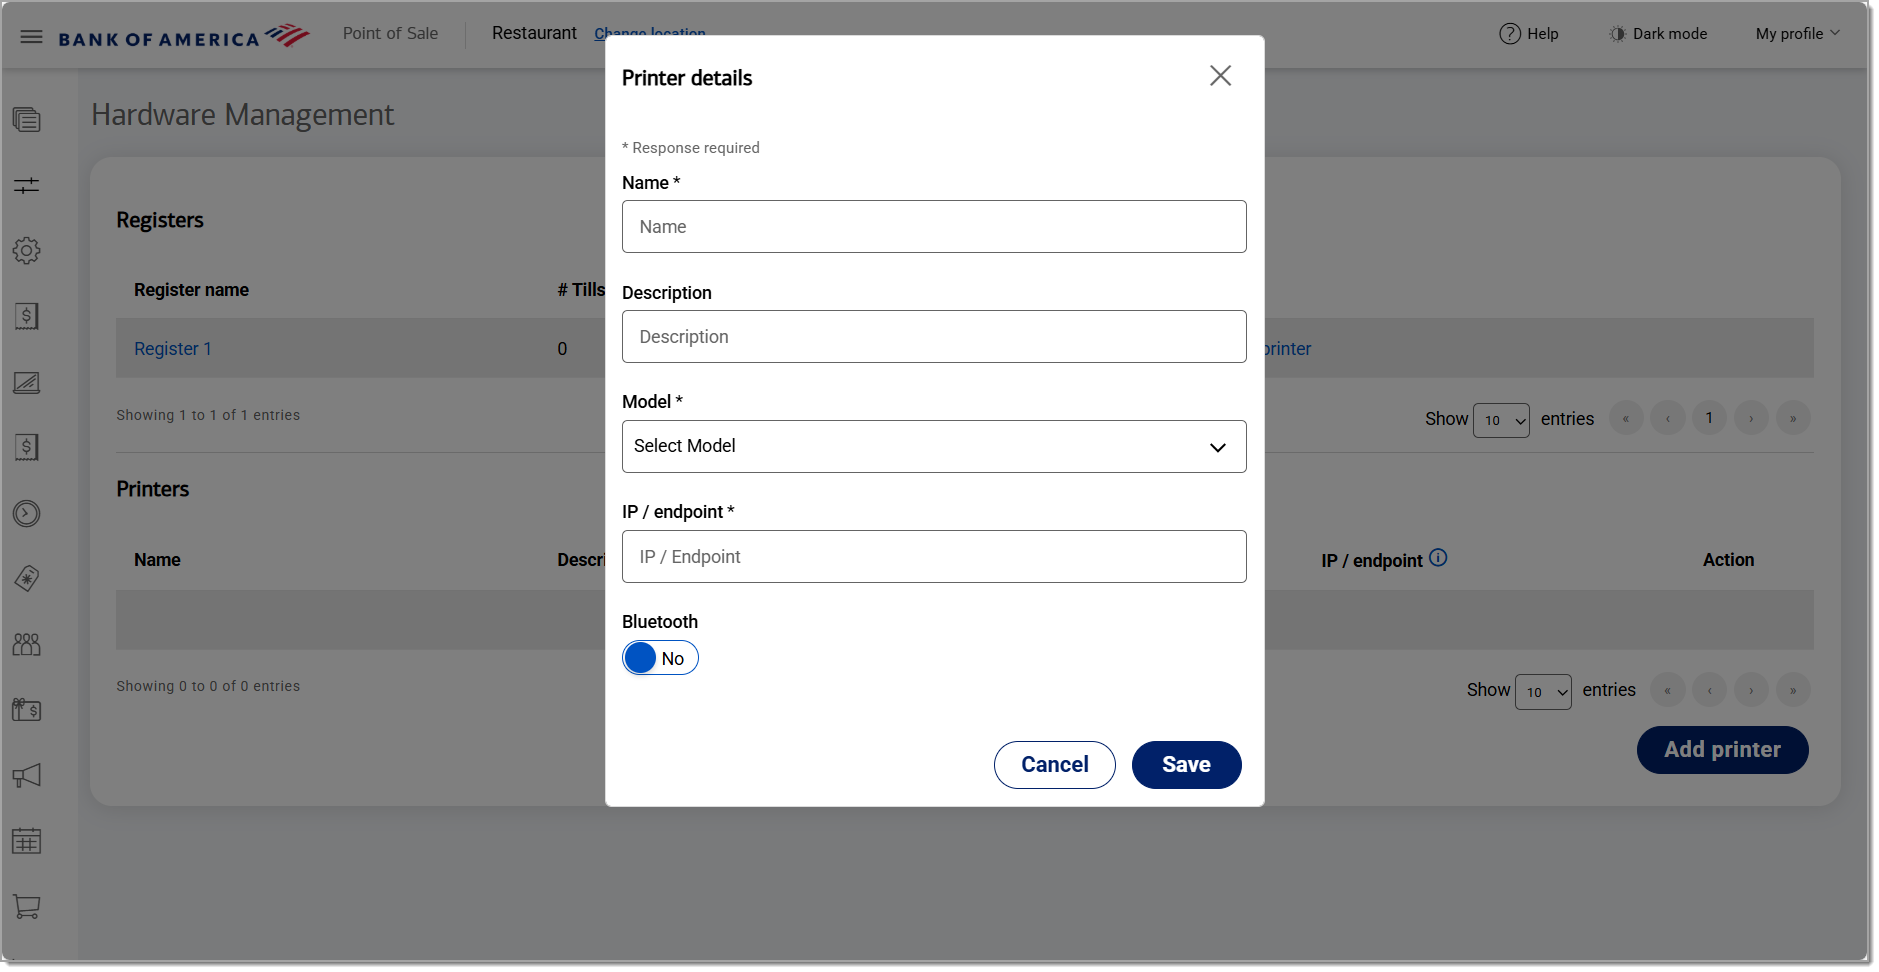
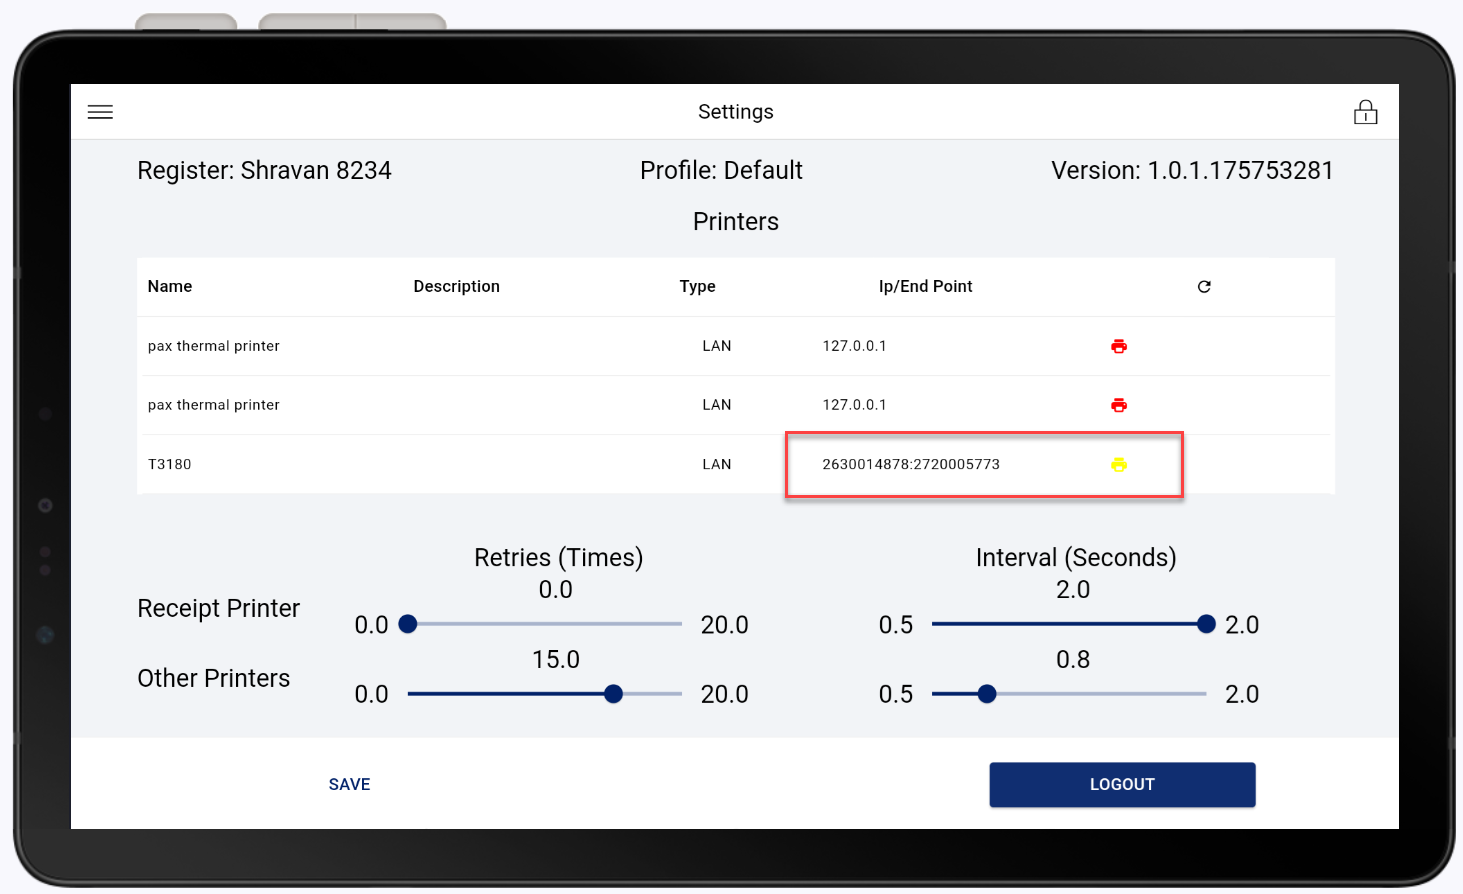
To locate IP/endpoint information
- Once you have connected the printer, log in to your Point of Sale app on the register.
- From the left navigation, select Hardware Settings.
- Tap the refresh icon to refresh settings.
- Obtain the Ip/End Pointnumber for the connected printer. Icons indicate the connection status:
- Yellow: Connected and communicating, but not configured in Point of Sale Solution Back Office yet.
- Red: Configured in Back Office but not on communicating on the network.
- Green: Active on the network and configured in Back Office.
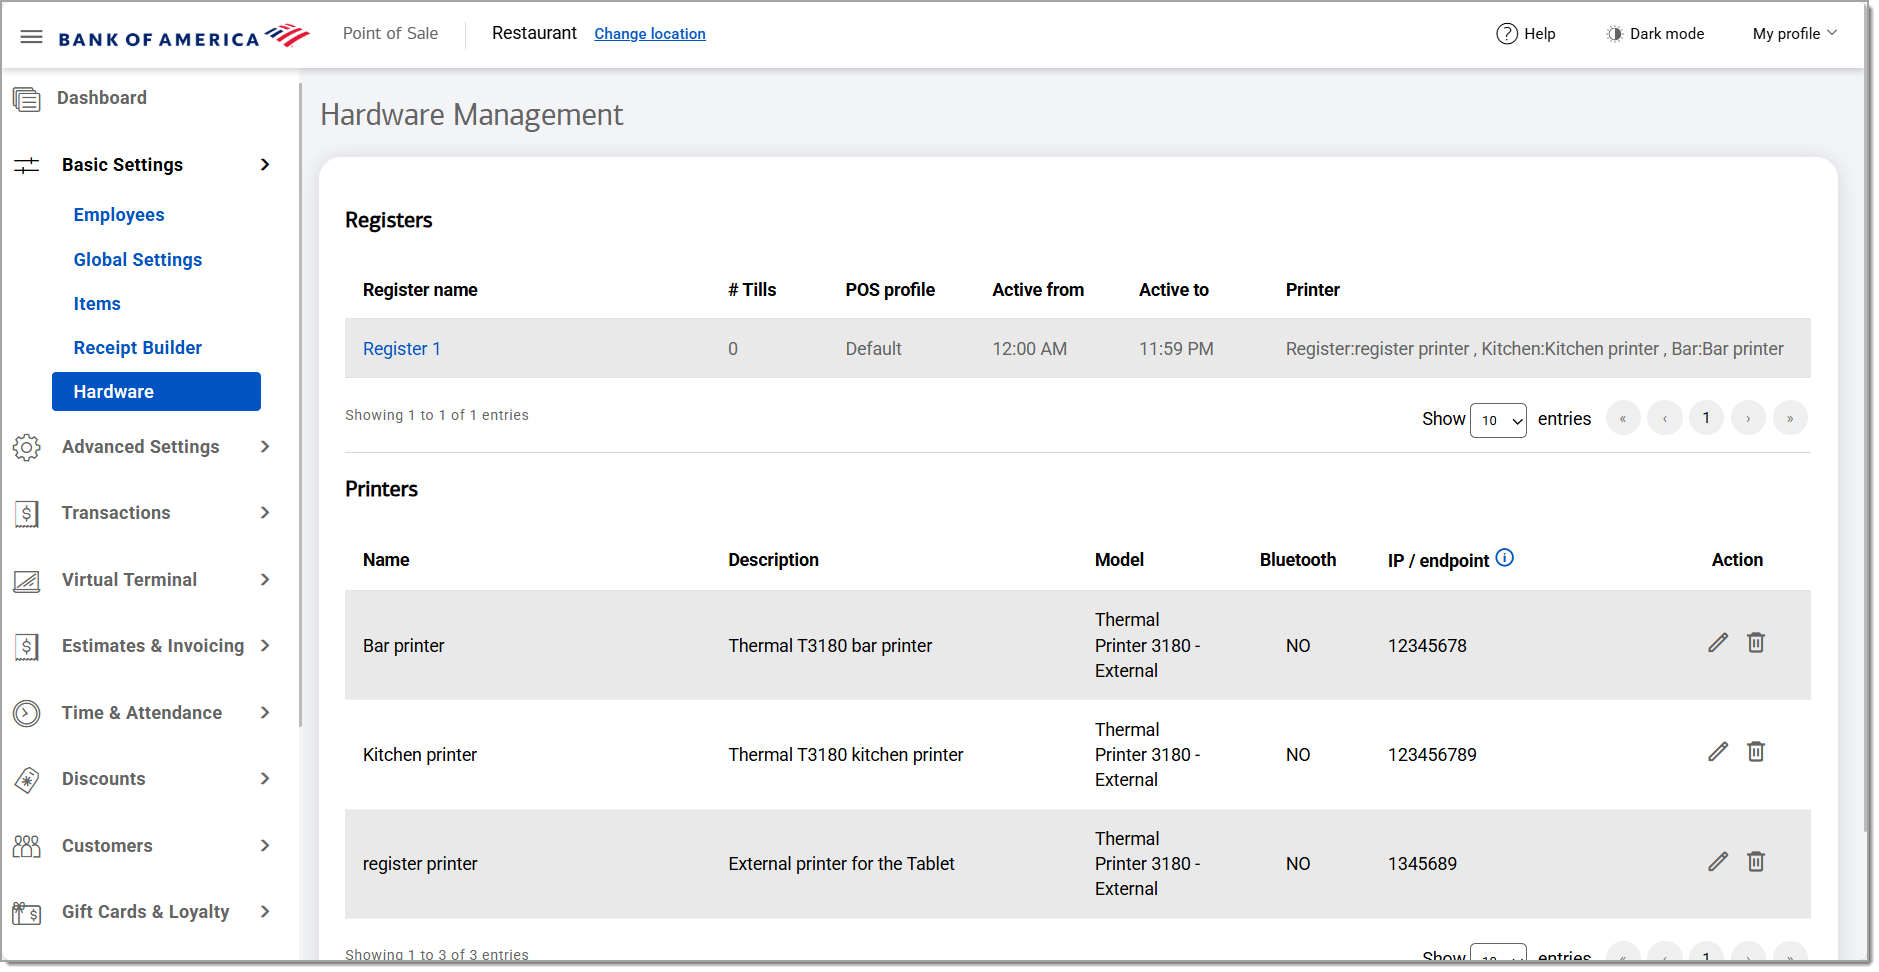
Manage registers
Associate an added printer to a register and edit details for your registers. When you associate a printer with a register, the printer types that display are pulled from the printer types that you created in item management. The Register printer type is automatically created and does not need to be created as a printer type. Printers integrated into the point of sale register must also be associated with the register.
To associate a printer with a register
- In the Point of Sale Solution Back Office, select Basic Settings > Hardware.
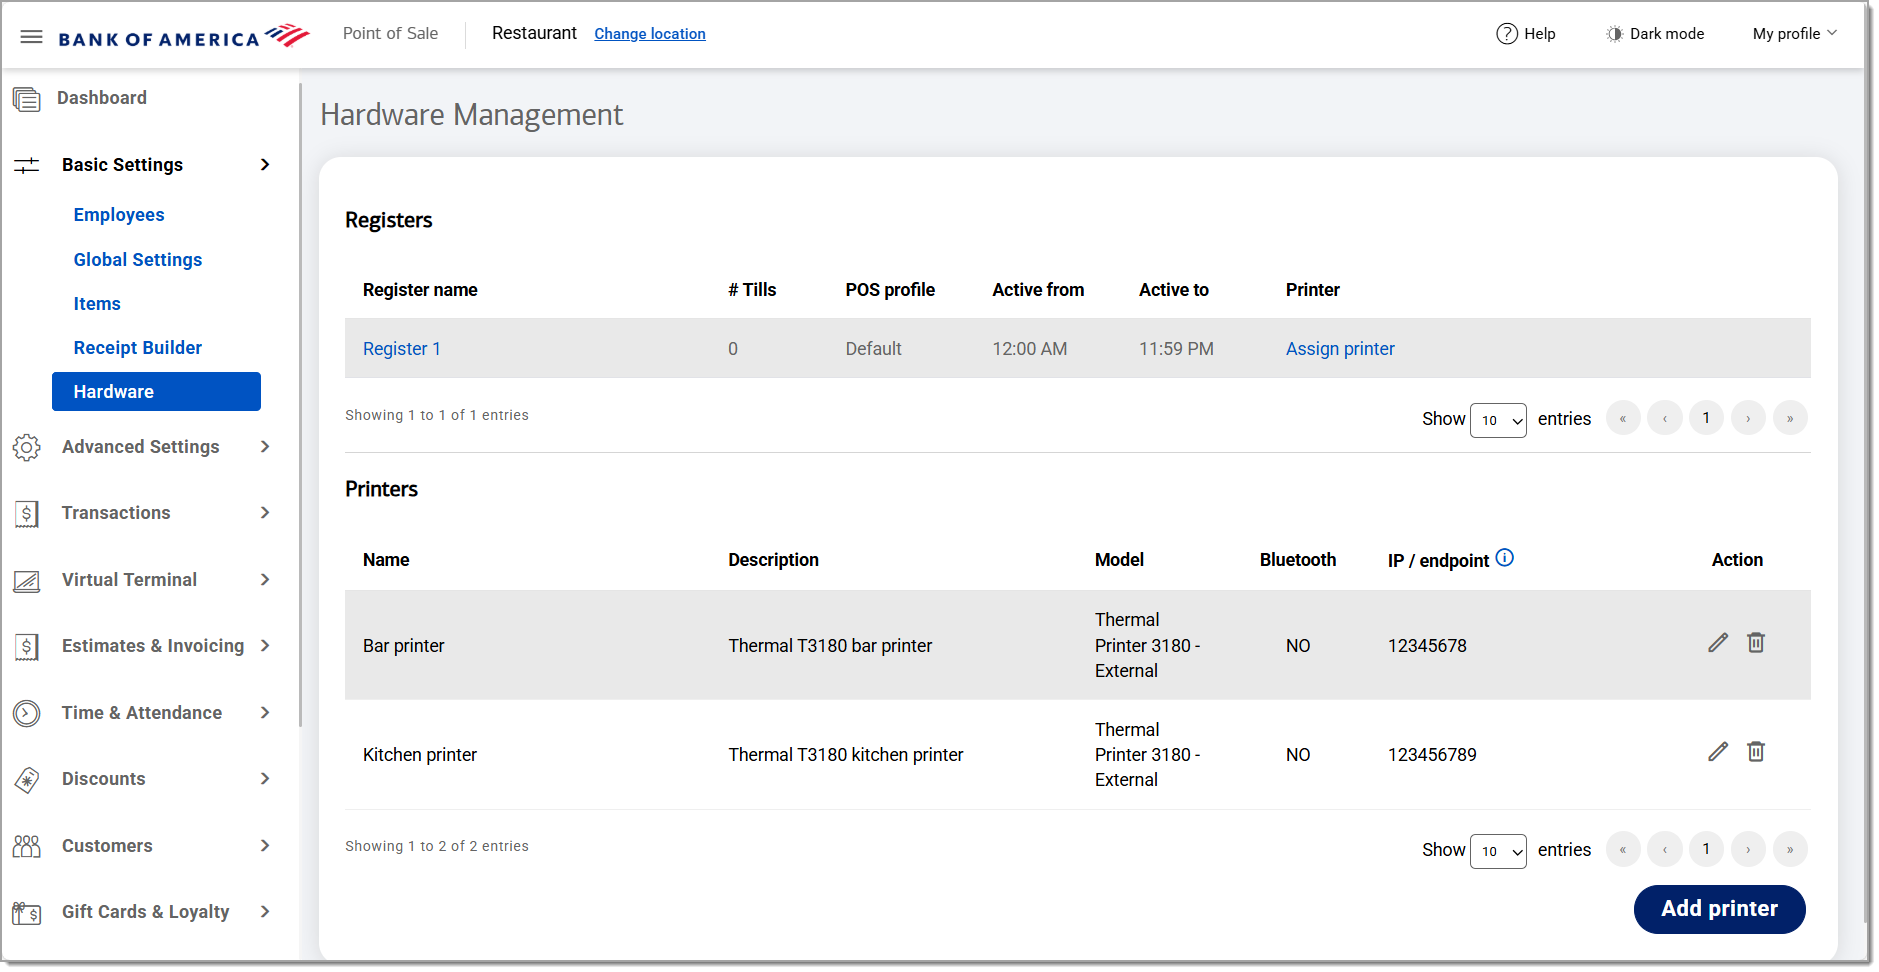
- Click Assign printer.
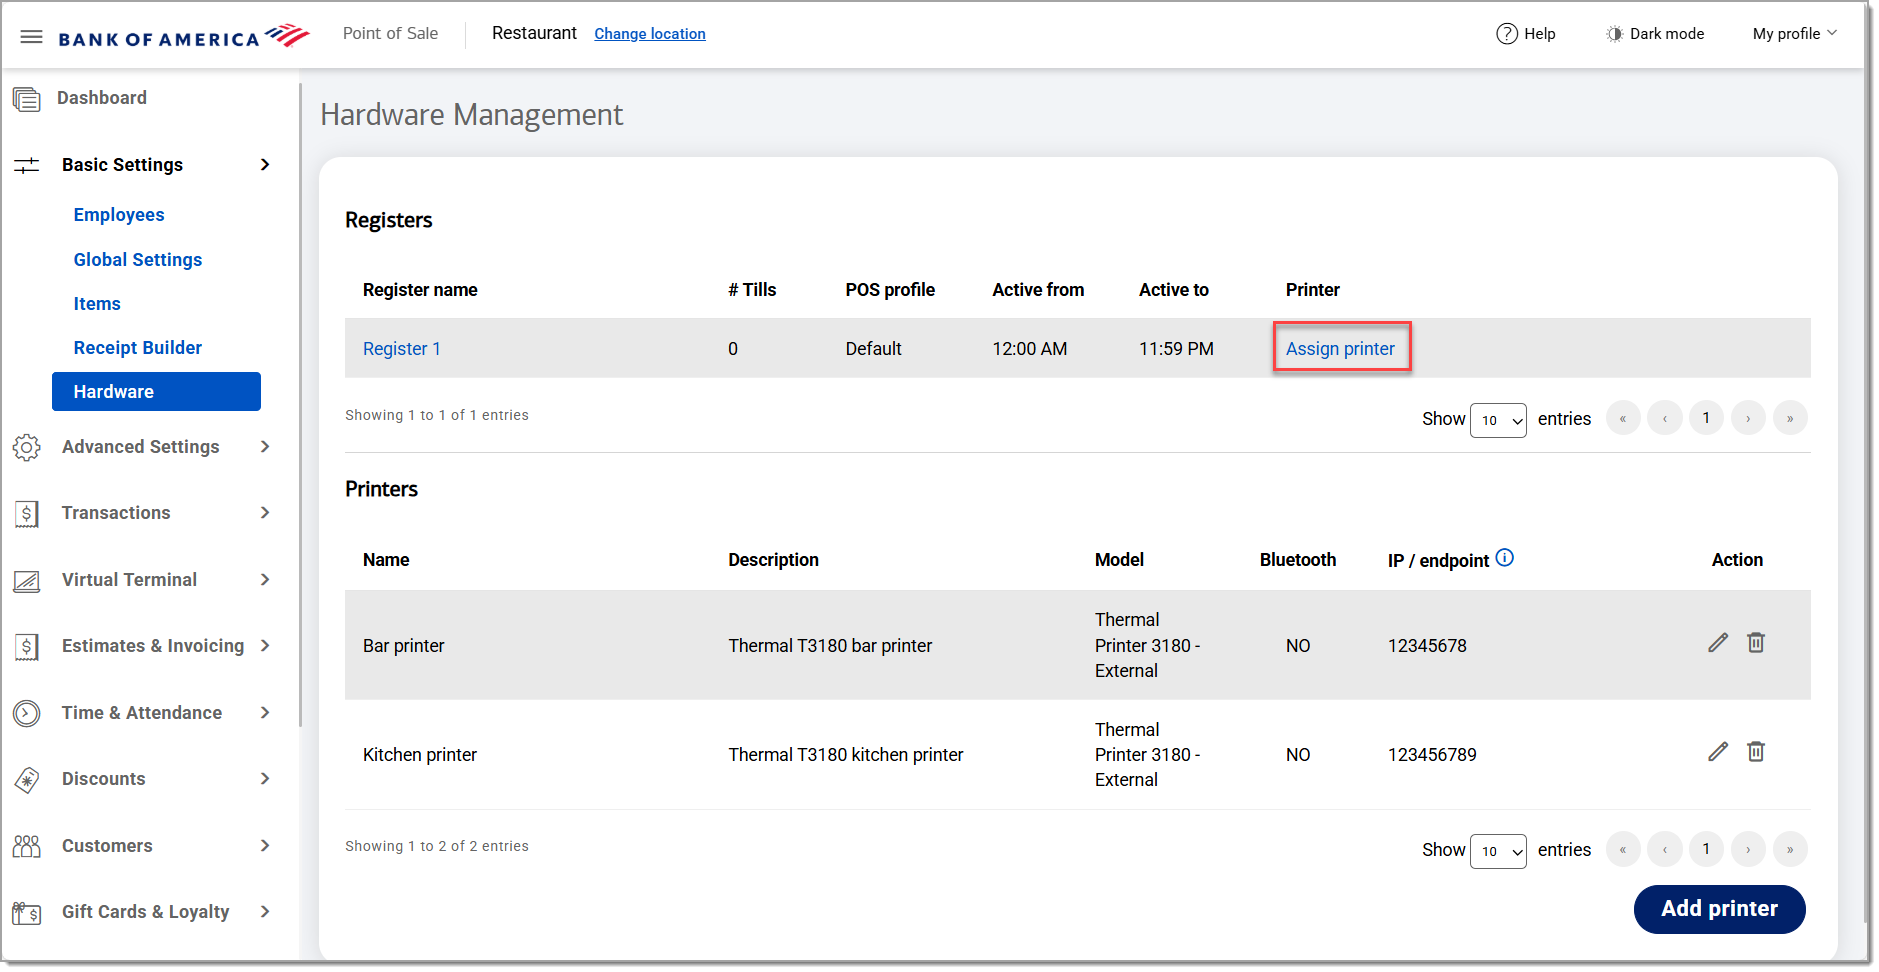
- For each printer type, select an existing printer from the Printer dropdown list. The Printer types match the printer types created in Item Management. In the example below, the printer types Kitchen and Bar have been created. The Register printer type is automatically created for a register. The options available in the printer dropdown list correspond to the names of the printers you have added above.

- Click Save.
To edit register details
- In the Point of Sale Solution Back Office, select Basic Settings > Hardware.
- Click on the register name to open the Edit register dialog.
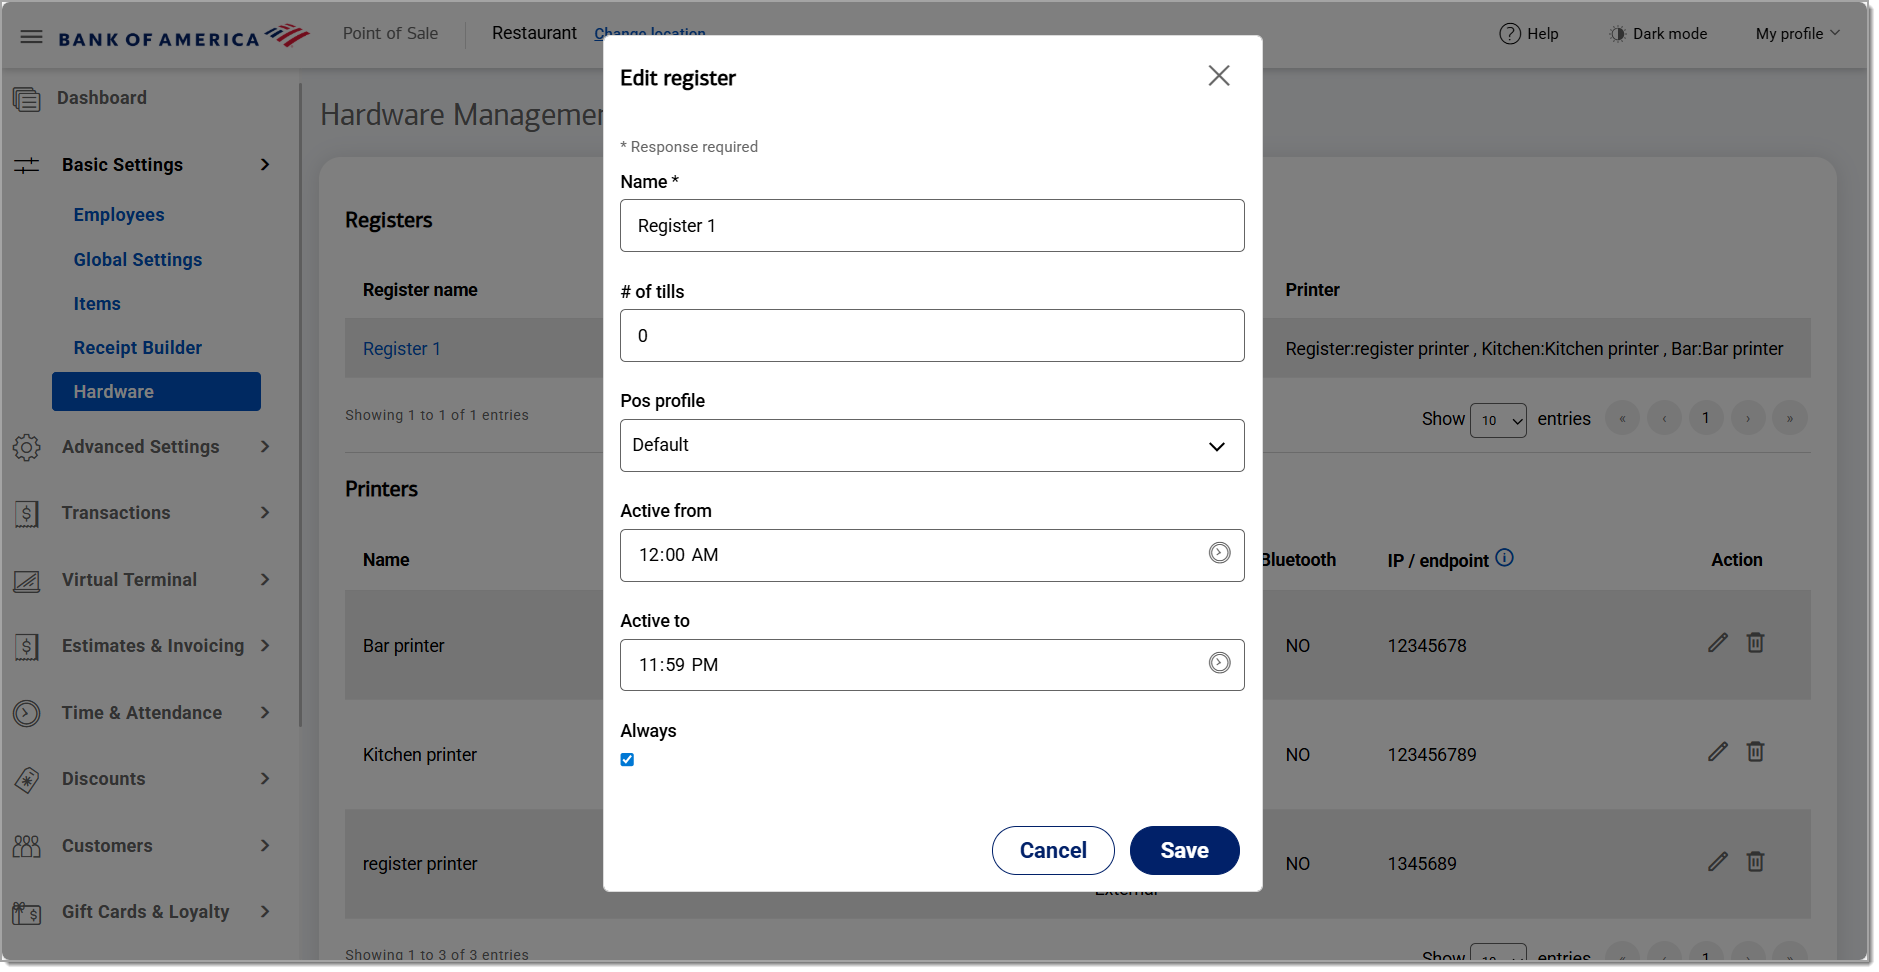
- Edit the register details:
Register field options and descriptions Field Description Name The name of the register. # of tills The number of tills:
0 - Set to 0 to allow multiple users to use the same till.
1 - Set to 1 to assign a till to a specific employeePos profile Associate a profile with the register by selecting from the dropdown list. Learn more about how to create profiles for the register. Active from / Active to Set the active hours for the register for enhanced security. Click the clock icon to set the active from and to times. Always Select to have the register always remain active. - Click Save and sync your point of sale registers.