Terminal Ethernet or Wi-Fi Setup
Description
What's in this article?
Terminals can connect to your router with an Ethernet cable or through Wi-Fi. The system works best with an Ethernet connection in your store. If you are using a Wi-Fi connection, we highly recommend using a Wi-Fi that is dedicated to your business and ensuring your connection is configured for privacy. Your wireless router manufacturer should have provided instructions for ensuring appropriate setup. Dial-up connection via a phone line is not supported.
NOTE:
Learn about Internet connection settings for the Point of Sale Solution in the Device Internet (Wi-Fi and Ethernet) Connection and Troubleshooting article.
Enable wired Ethernet
If your terminal has an Ethernet port, connecting the terminal to your internet router using an Ethernet cable is the recommended option.
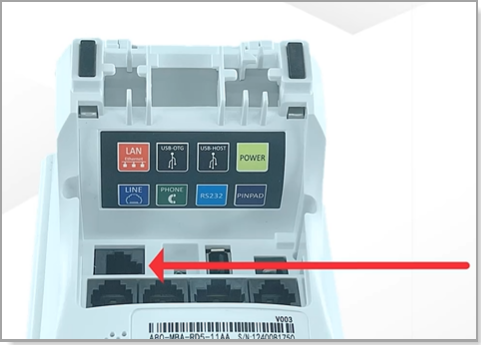
- To connect the Ethernet cable
For some devices, the Ethernet port connections are located on the charging base.
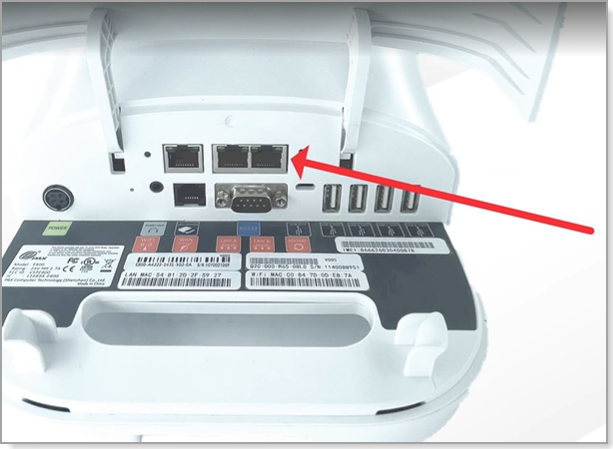
- Smart Register E800
The Ethernet ports are located on the device. Either port can be used.
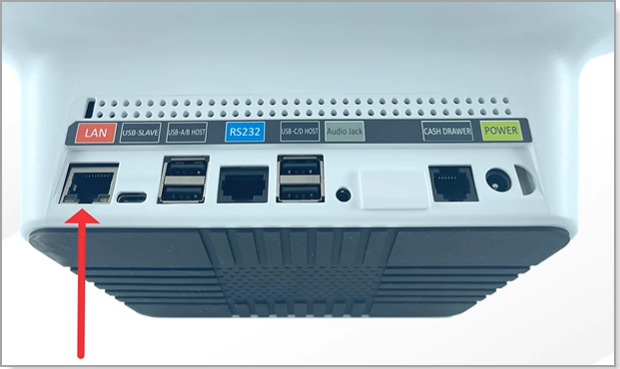
- Smart Terminal E700
The Ethernet port is located on the device.
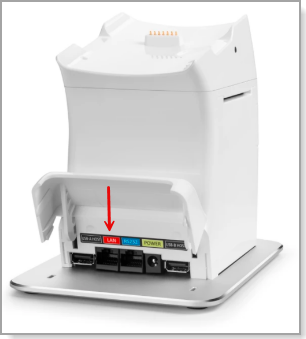
- Portable A920
The Portable A920 has two charging base options. The Ethernet port is located on the optional Portable A920 Charging Base with Communications Port. The standard A920 Charging Base provides power connectivity only.
- Portable A60
The Ethernet port is located on the A60 Docking Station with Printer.
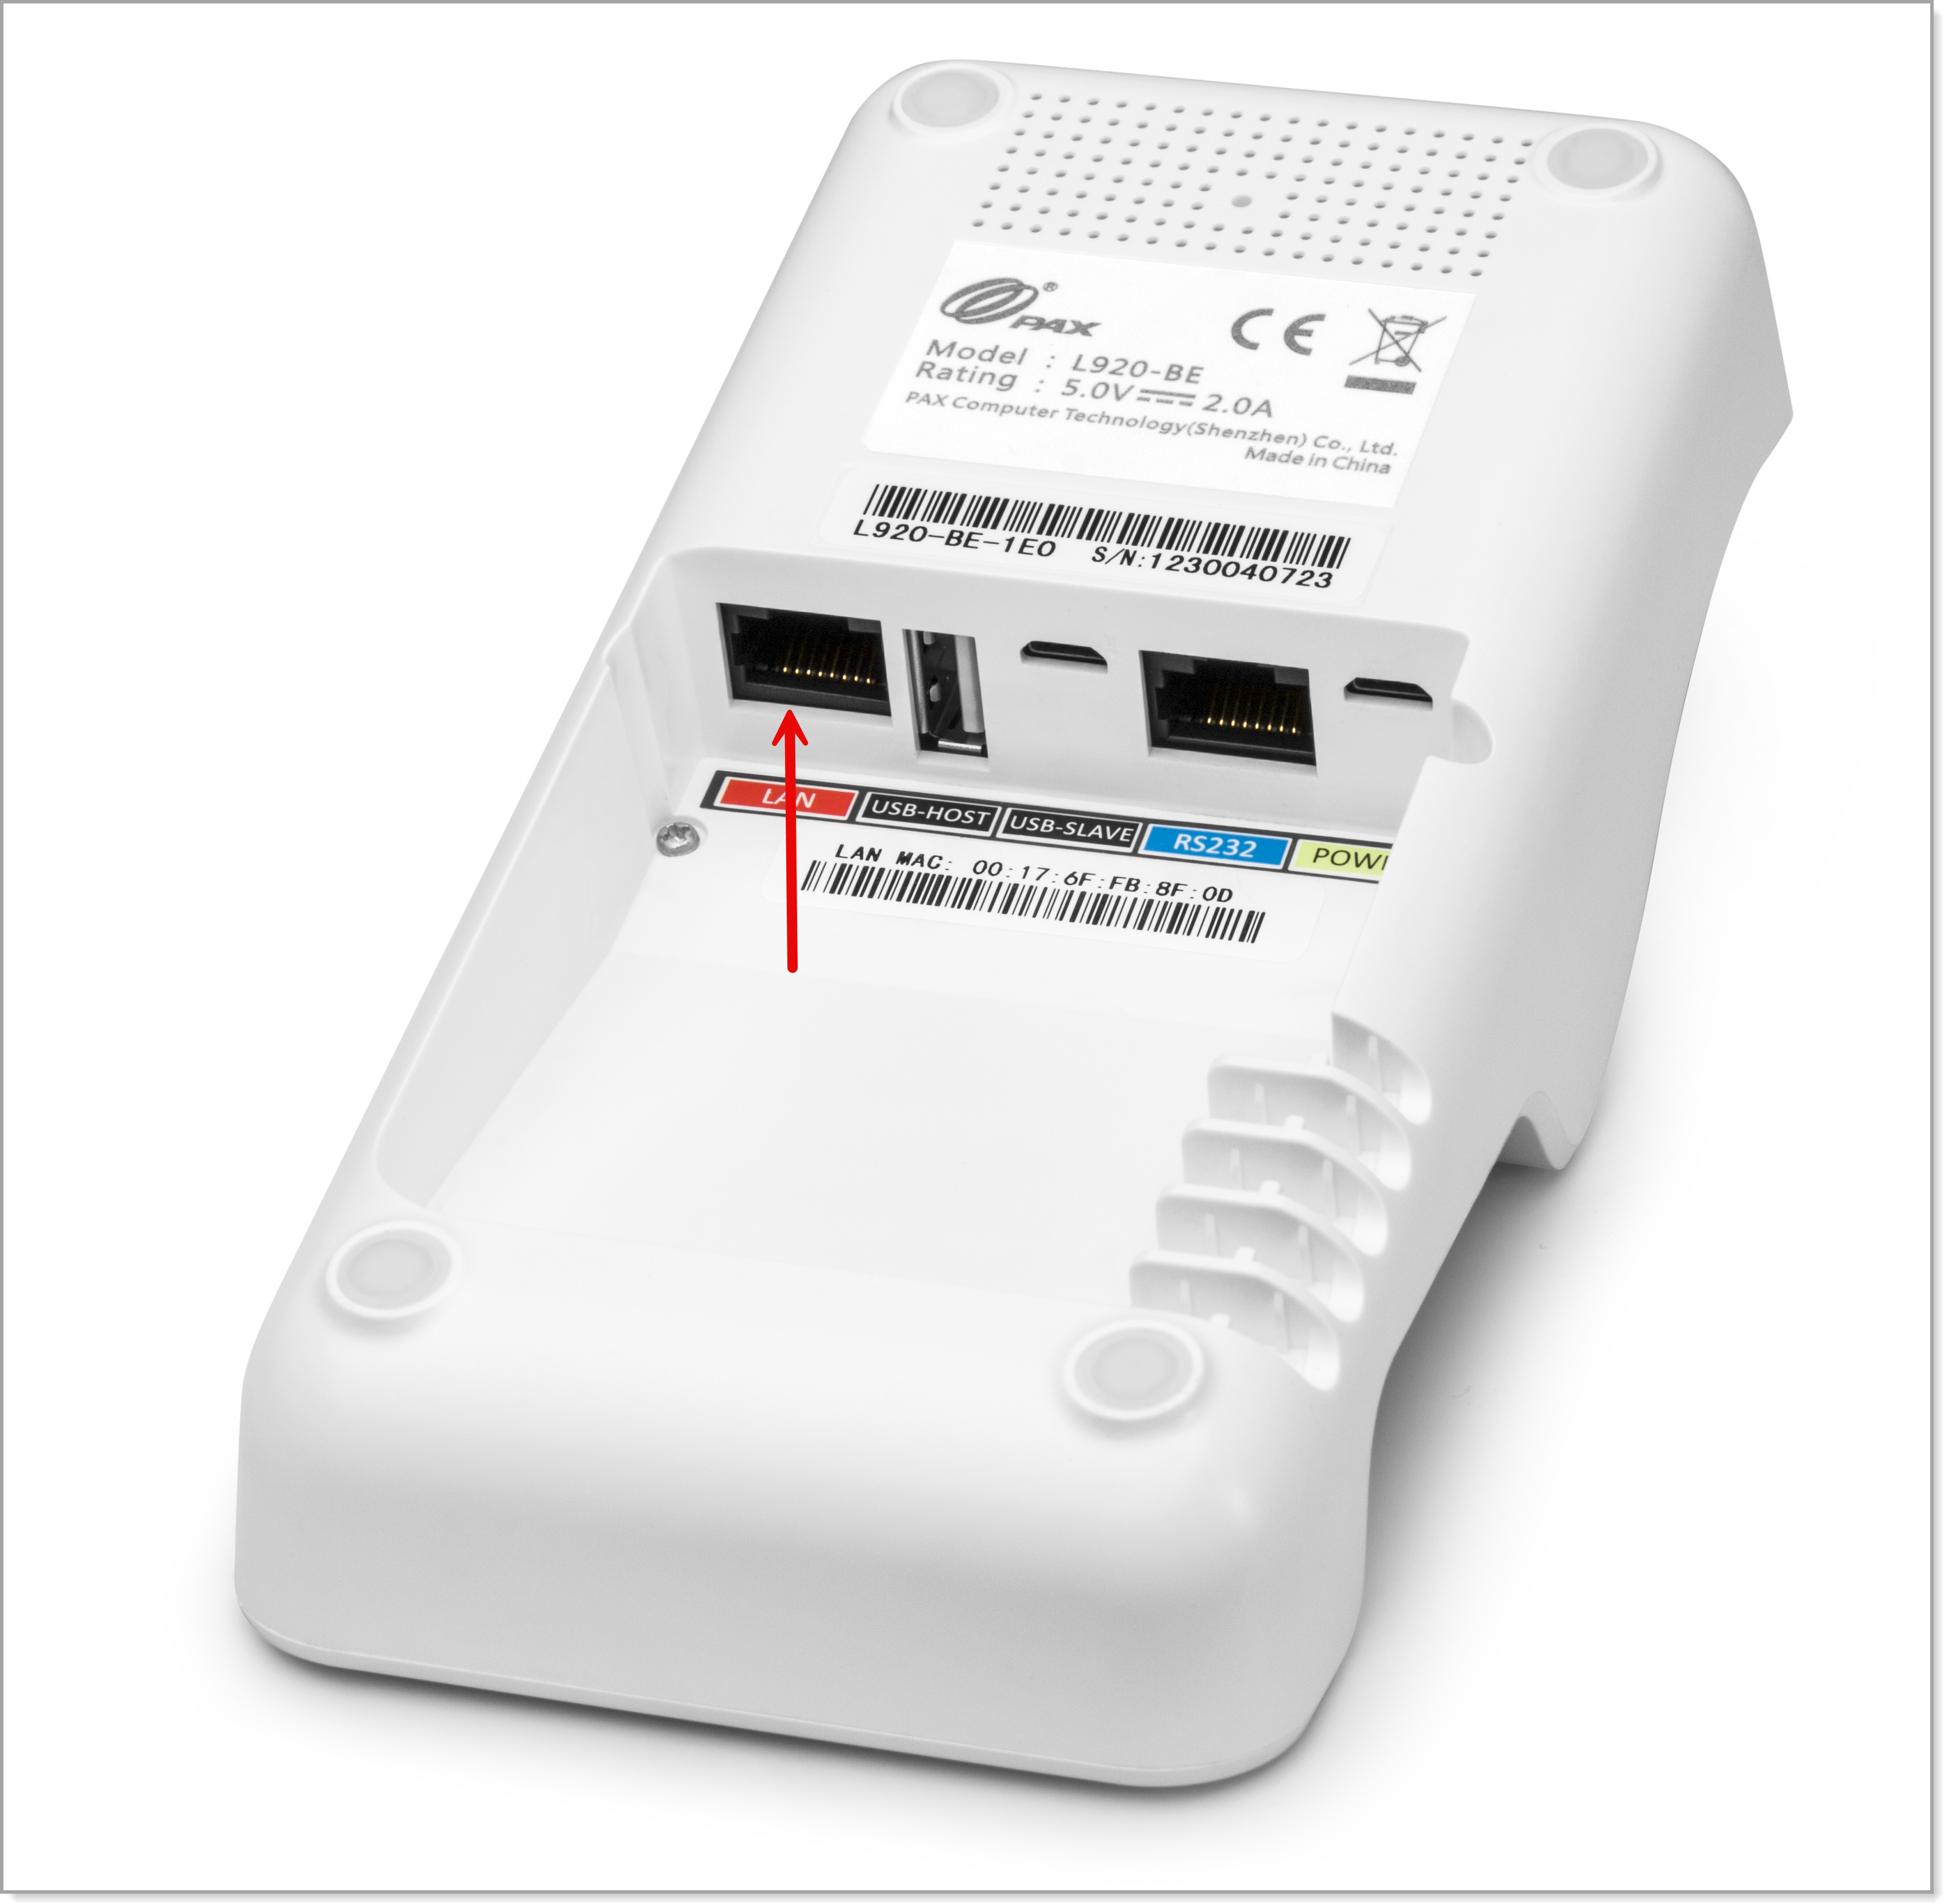
- Countertop A80
The Ethernet port is located on the device.
- Smart Register E800
Enable Wi-Fi
If connecting using Wi-Fi, we recommend using a Wi-Fi that is dedicated to your business.
NOTE:
Hotspots are supported for Wi-Fi connectivity; however, we do not recommend them for Essentials, Retail, Essentials Light or Restaurant Solutions due to increased latency and connection issues.
- To enable Wi-Fi
- Tap Settings on the device home screen.
- Enter the password using the touch screen keyboard, then tap the green check mark.

- Tap OK to open the Settings options.
- Tap Wi-Fi.

- Tap the desired Wi-Fi network on the list of available networks.
NOTE: If a network is not secured, it will not appear as an available network.

- Type the Wi-Fi password into the Password field using the onscreen keyboard, then tap Connect.

- If the payment terminal successfully connected to the Wi-Fi network, you will see the word Connected under the Wi-Fi network.

- If the payment terminal successfully connected to the Wi-Fi network, you will see the word Connected under the Wi-Fi network.
- To manually set up Wi-Fi
If the Wi-Fi network is not broadcast or is private, the IP information will need to be manually entered.
- Tap Settings on the Home screen.
- Enter the password using the onscreen keyboard and click on the green check mark.
- Click OK.
- Tap Wi-Fi .
- Tap ⋮ to open the submenu and then tap Add network to manually add the hidden network.

- Enter the SSID of the Wi-Fi network and then tap the down arrow next to None.
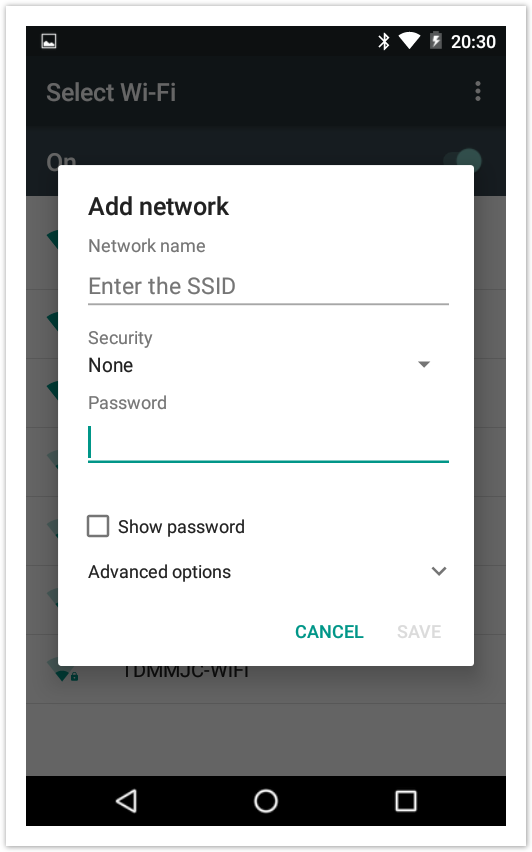
- Choose a Wi-Fi Security setting: WEP or WPA/WPA2 PSK.
- Enter the password using the onscreen keyboard and tap Save to connect to the Wi-Fi network.
- To set up static IP for Wi-Fi
Follow these steps to set up a static IP:
- Tap Settings on the Home screen.
- Enter the password using the onscreen keyboard and tap the green check mark button.
- Tap OK.
- Tap Wi-Fi on the Settings screen.
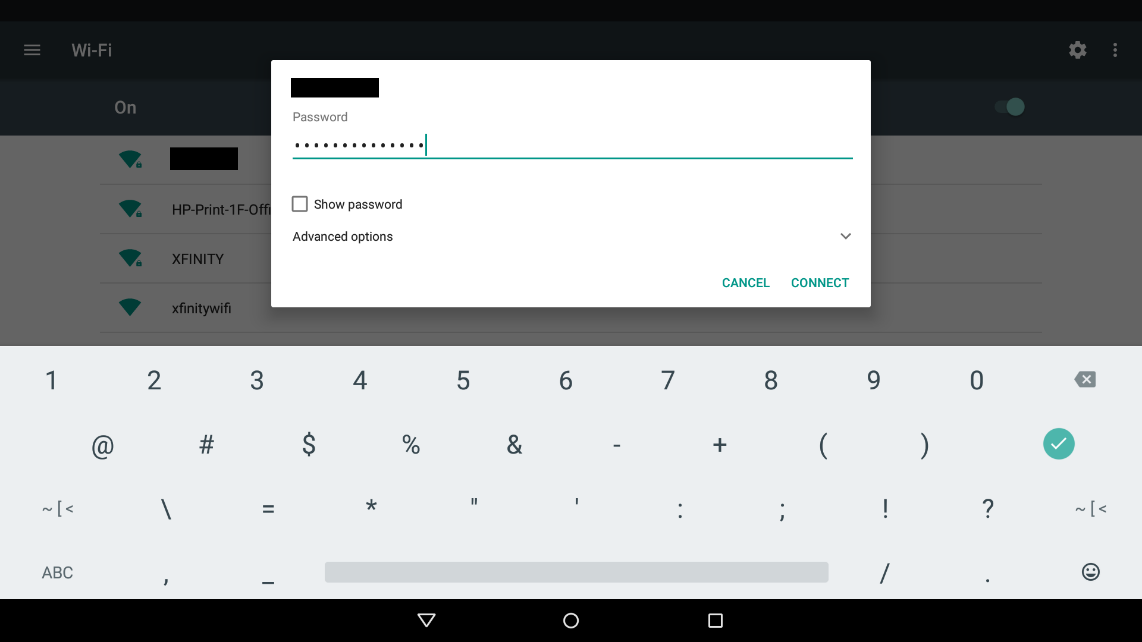
- Tap the desired Wi-Fi network on the list of available networks.
- Type the Wi-Fi password into the Password field using the onscreen keyboard.
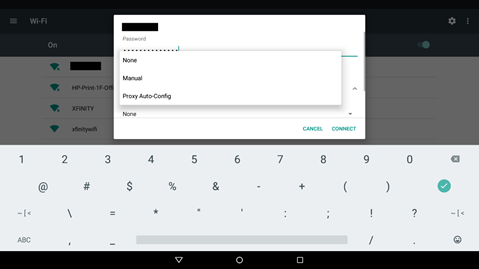
- Tap Advanced Options.
- Tap the down arrow to the right of "None".
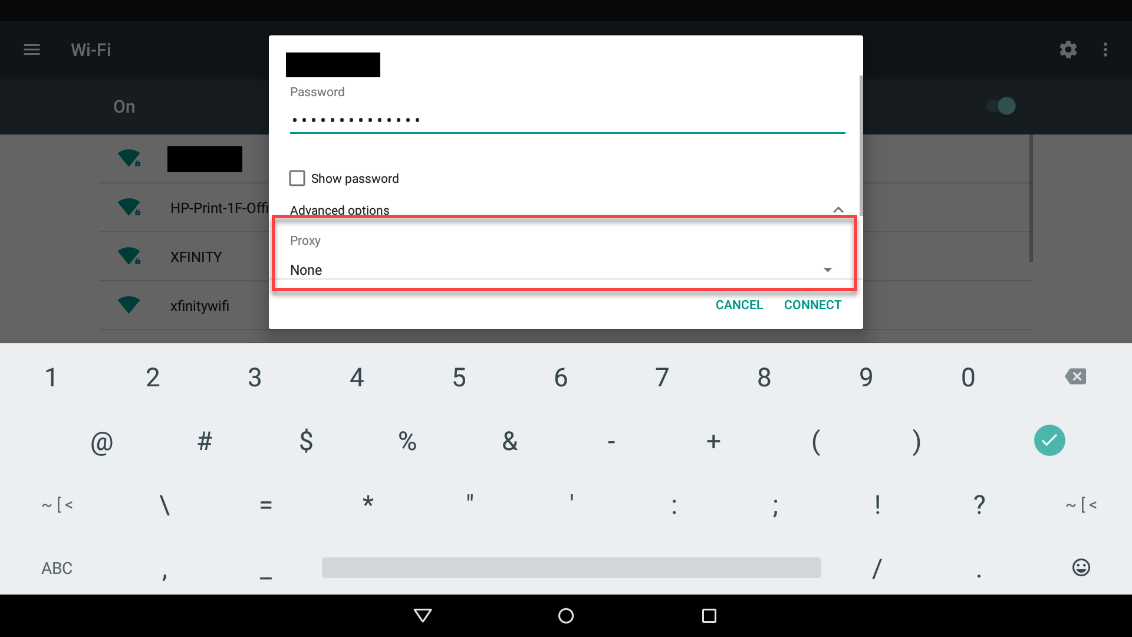
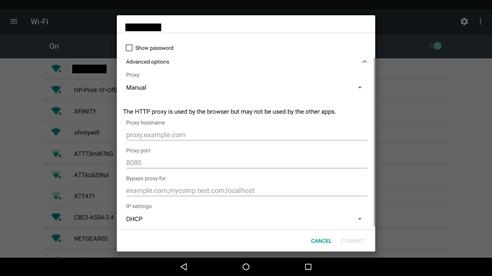
- Tap Manual.
- Tap on the green check mark to hide the keyboard.
- Select IP settings from the dropdown list.
- Tap Static to enable Static IP.
- Enter the Static IP information that is necessary to connect to the router using the payment terminal touch screen keypad in the proper fields.
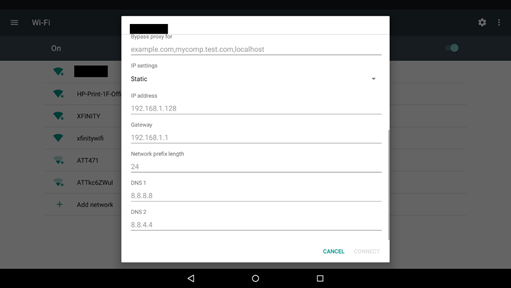
- Once the new information has been added, tap Connect to finalize the Static IP connection.
- Check that the Wi-Fi icon is visible and Wi-Fi connection is enabled, then try the transaction again.
- Power cycle the terminal and try the transaction again. If Wi-Fi is connected after the terminal is already powered up, the terminal should detect the connection upon the next communication attempt and does not require power cycle.
- Ensure the security protocols for your router are set to WPA or WPA2. You cannot use the older WEP or WAP formats.
- Ensure your terminal is connected to a secured network that requires a password. Unsecured networks will not appear in the available networks list and a terminal will not connect to an unsecured network.
- To ping test a connection
- From the Payments (Payments P2PE) application, tap the FUNC tab.
- Tap Ping. URL and Ping Timeout(ms) fields will default. The Timeout(ms) value determines how long the app will wait before ending a connection test.
- Tap Confirm. Ping Test results will display. The packet loss should say 0%. Lost packets indicate an unstable connection.
- Use the following table to troubleshoot the results of the ping test, then tap OK. issue and troubleshooting task.
scenario and troubleshooting task If Then Network ping succeeds Continue troubleshooting other options. Network ping fails
Error message: Unknown domain! please check your input appears.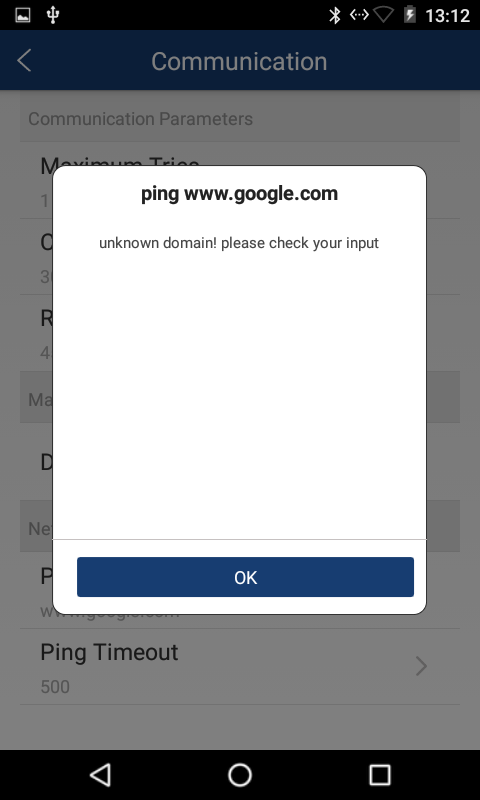
Repeat the process to test the router connection. Router ping succeeds, unable to run transaction Internet service may be down. You should check your internet service by checking other equipment in your facility to see if it is working or by calling your internet service provider.
Often after a service interruption, your router may need to be powered off and back on to restore the connection.
After power cycle, wait at least 2 minutes before trying the transaction again.Router ping fails The terminal is unable to connect to the router. Contact your router manufacturer.
Having trouble connecting to Wi-Fi?
If you are having trouble connecting to Wi-Fi, try the following first:
If you still are having trouble, some common troubleshooting scenarios are provided below:
Troubleshoot network issues
If you suspect that your internet connection is unstable, you can attempt a PING from the terminal to either your router or an outside server.