Back Office Events in Retail or Restaurant Solution
Description
How to set up an event in the Back Office of the Retail or Restaurant Solution
What's in this article?
Solution: Retail | Restaurant
Use the Events menu to establish special pricing for use during specific times of the day, such as during happy hour, or on a specific day of the week, such as every Sunday. First, define when each event is to occur, and then access each of the items subject to the special pricing and designate which events apply to the items and at what price you wish to sell the item during the event time frame.
At the company level, you create events, and then add the event and event price for each item you desire. If you have multiple stores, setting up the events at company level also allows you to apply an event to the desired store(s). Price lists may be applied to an event.
To create an event
- In the Back Office, select the Inventory tab if Retail or Menu tab if Restaurant.
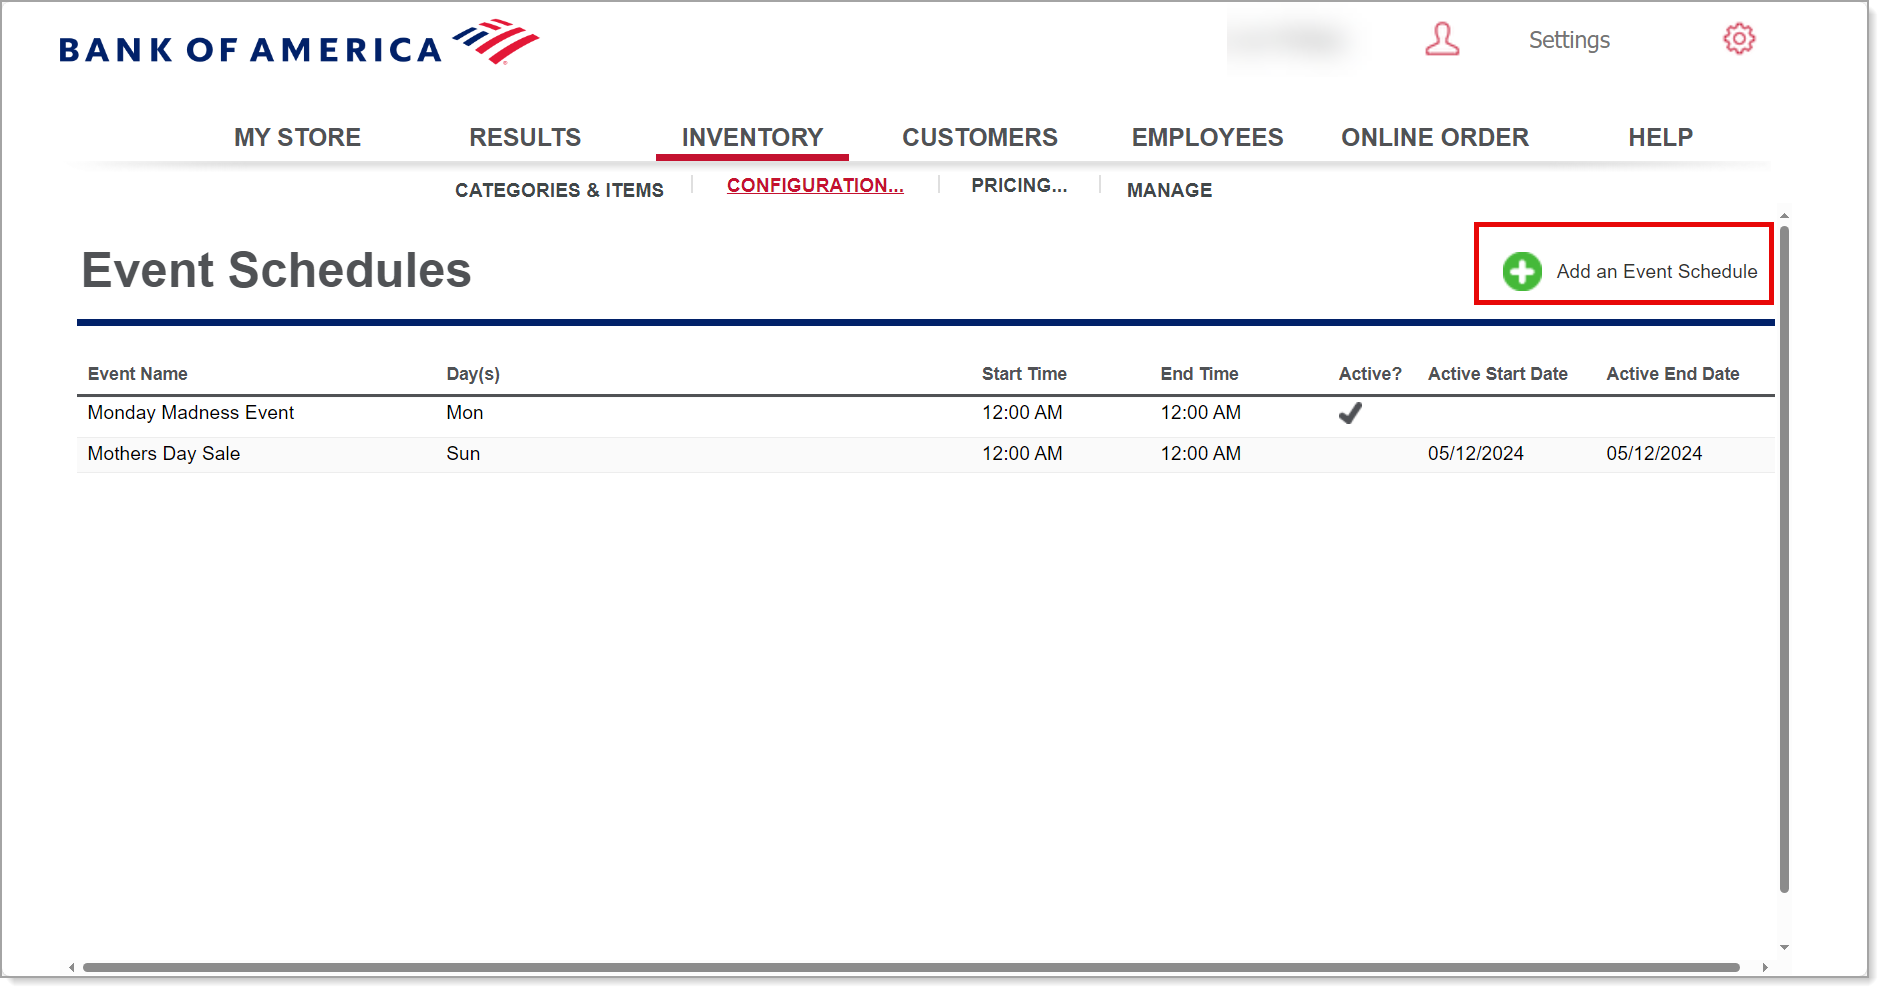
- Select Configuration subtab> Events.

- Click the Add an Event Schedule button on the right side of the screen.

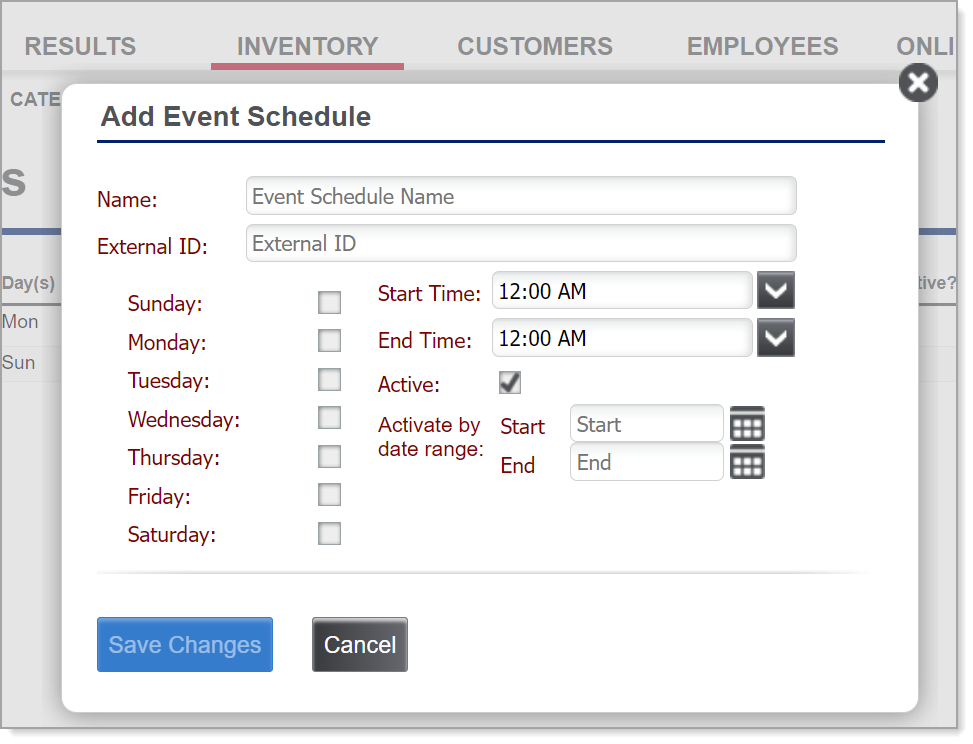
- Enter an event name.

- Select the days of the week for the event.
- Choose an event Start Time and End Time from the dropdown lists.
- Do one of the following:
- To make the event active now, select the Active checkbox to make the event active immediately. Events without a specific start and end date will have a black checkmark in the active column.
- To make the event active for a specific date range, choose an Activate by date range Start and an Activate by date range End from the dropdown lists. Events enabled for a specific date range will have a green checkmark in the Active column.
- Click Save Changes.