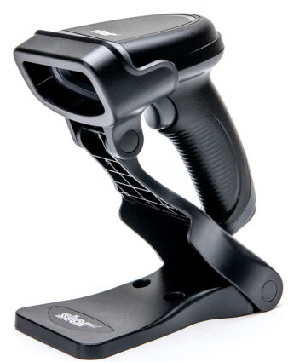
Countertop Barcode Scanner
Description
What's in this article?
The Countertop Barcode Scanner BSH-20B is compatible with the Station L1400, Mini Station A3700P and the Tablet A3700.
The Countertop Barcode scanner reads both 1D and 2D barcodes by capturing the barcode image. The scanner can read mainstream 1D barcodes, standard 2D barcodes (all versions of PDF417, QR Code M1/M2/Micro and Data Matrix) and GS1-DataBarTM (RSS) barcodes. This scanner can read barcodes on paper, plastic cards, an LCD screen and other mediums.
What's in the box?
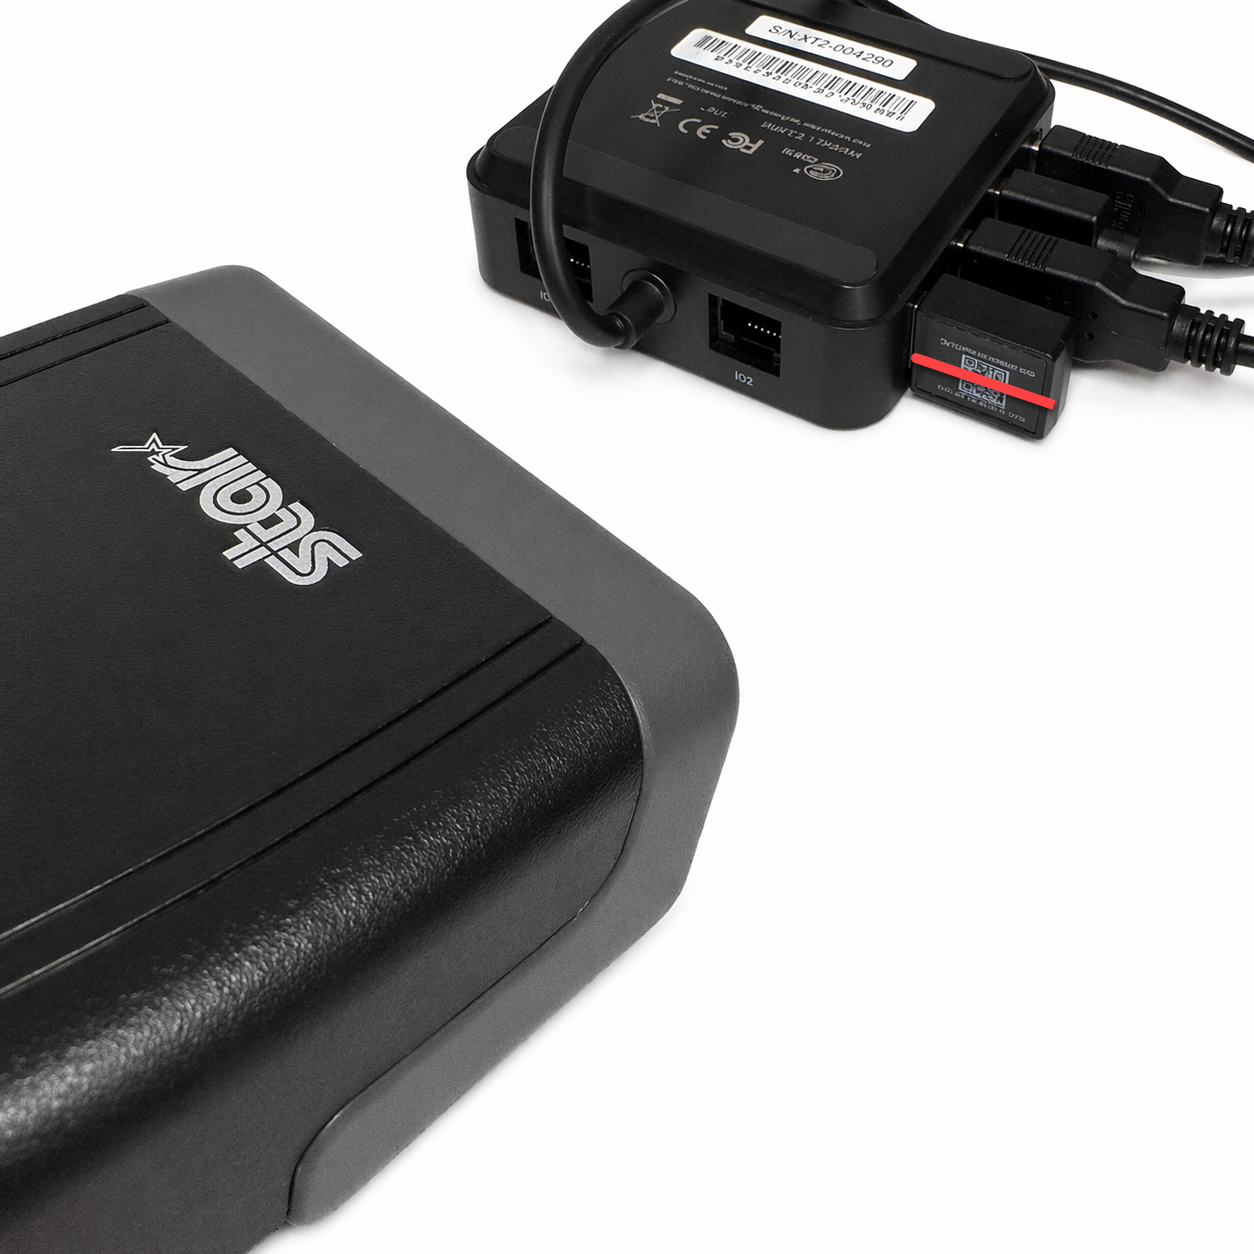
Your Countertop Barcode Scanner BSH-20B includes a stand, a USB dongle, and a charging cable.
Charge the scanner
Before first use, charge the scanner using the provided USB charging cable, plugging the charging cable into the scanner and the powered Communications Hub. The scanner should charge fully in about 5 1/2 hours. A full charge should last 12 hours of continuous battery use.
Connect the scanner
You can connect the scanner to your register through USB or Bluetooth:
USB connection
- Insert the USB dongle into the Communications Hub L1400/A3700P. Make sure that the QR code on the dongle is visible.
- Using the scanner, scan the QR code on the dongle. The scanner beeps and a blue light illuminates to indicate that the connection is made.
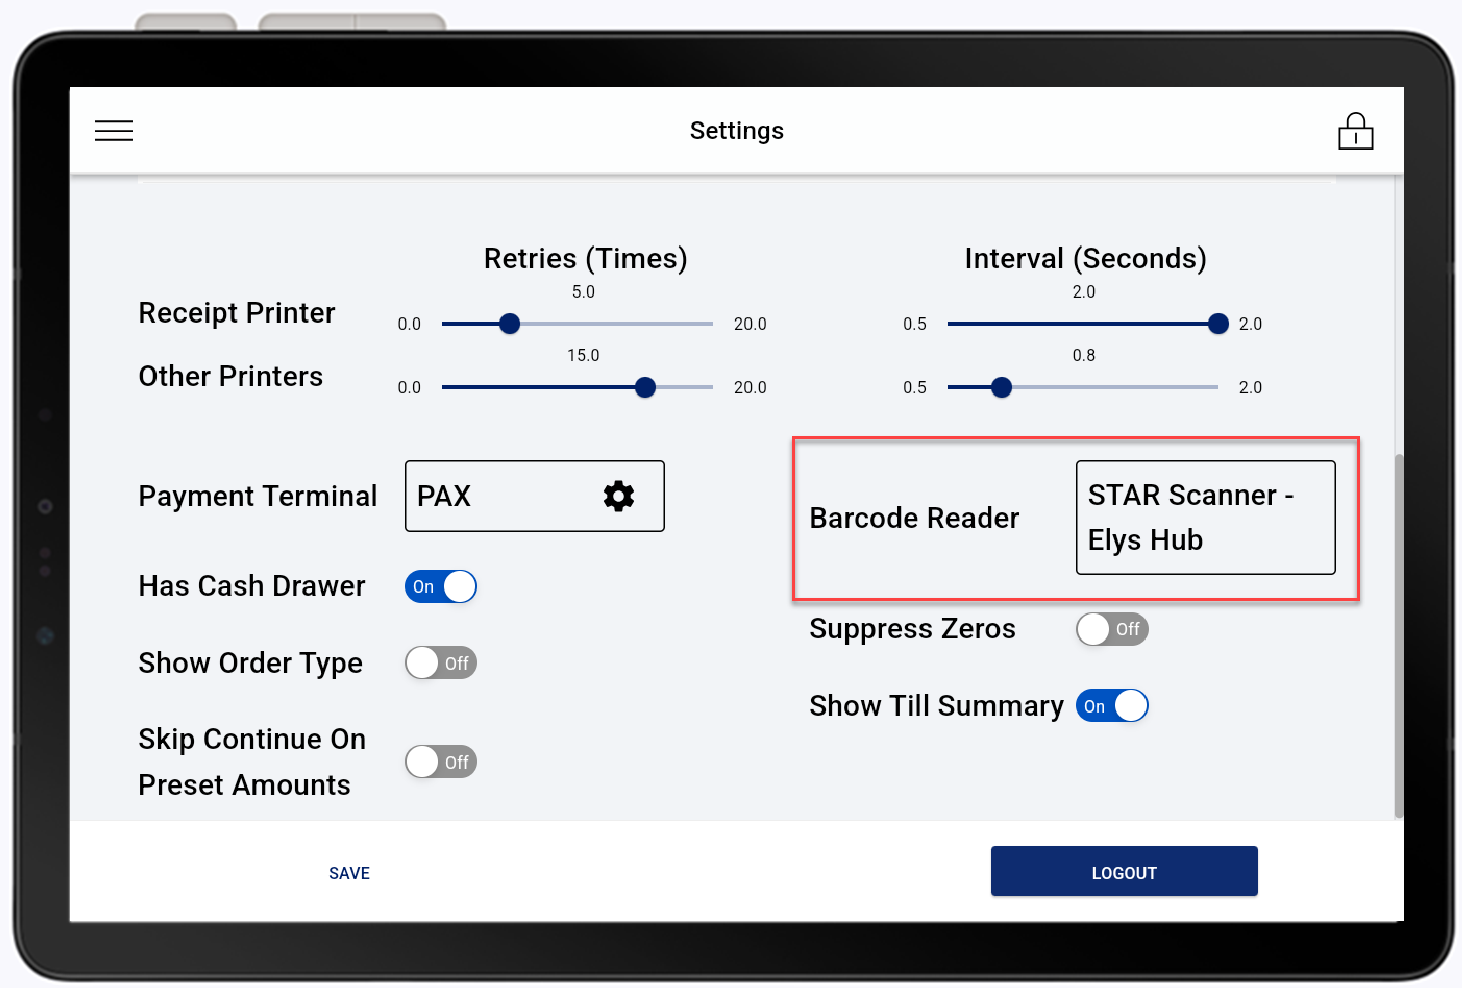
- On the register, open Menu > Settings.
- Select STAR Scanner - Elys Hub from the Barcode Scanner dropdown menu, then Save.
- Tap Yes and then restart your register by pressing the Power button and selecting Restart.
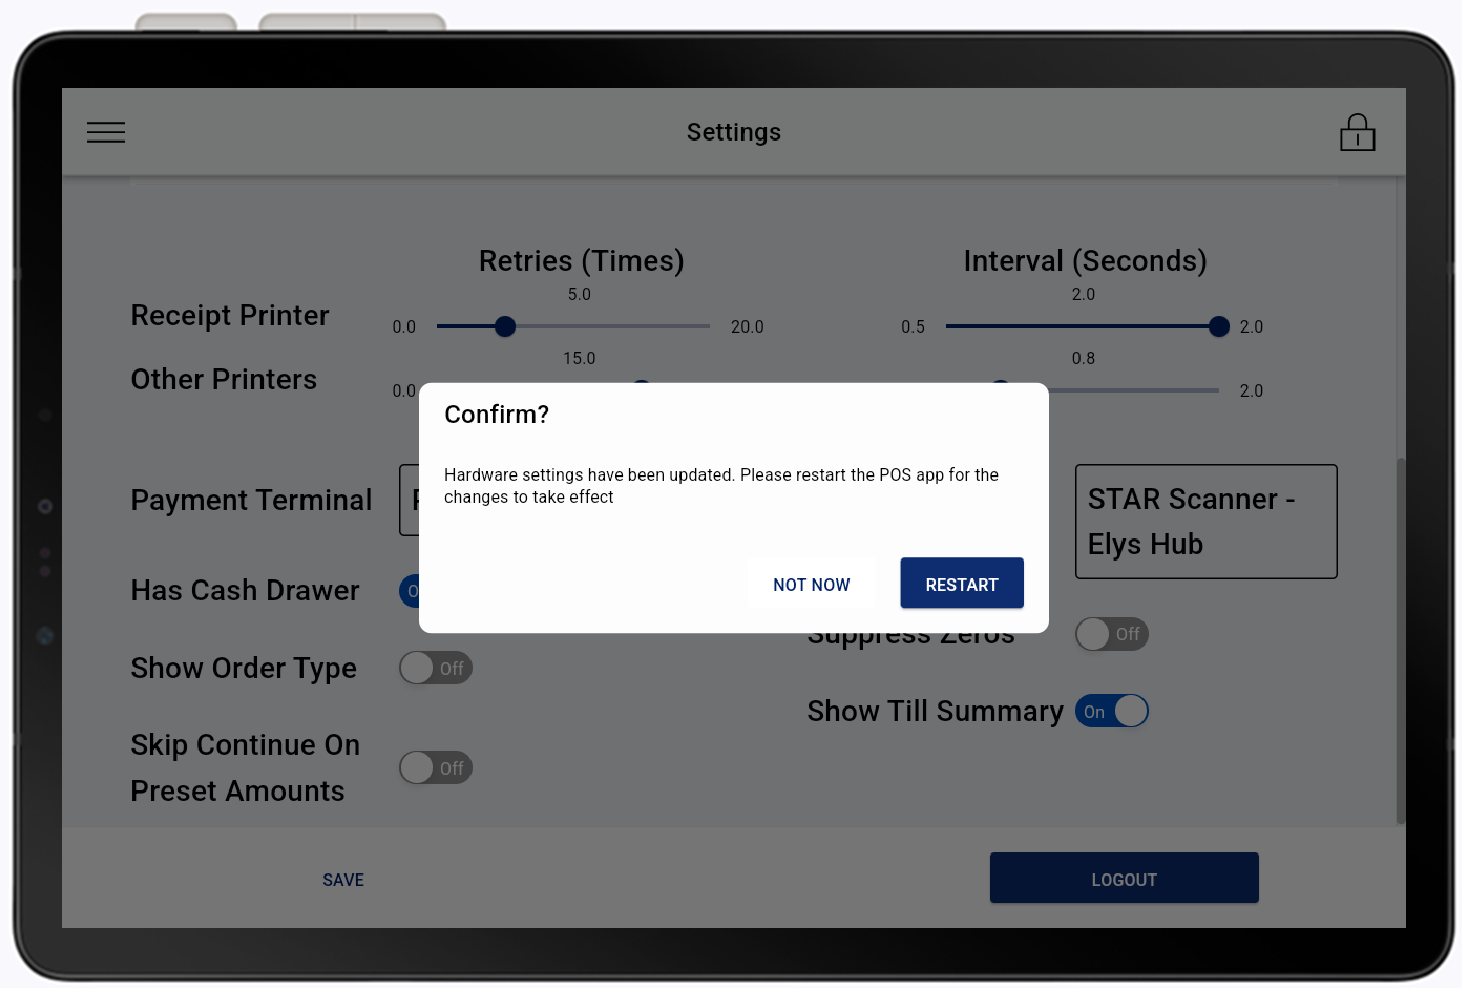
- Power the register back on. The scanner is ready to use.
Bluetooth connection
- Pull the trigger of the scanner to wake it up. The LED will turn blue and the scanner will beep.
- Scan the following barcodes in sequence to configure the scanner settings:
- Restore all factory defaults

- Enter Setup mode:

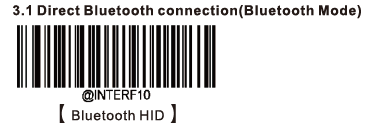
- Direct Bluetooth connection:
- Exit setup:

- Restore all factory defaults
- On the register, open Menu > Hardware Settings.
- From the Barcode Reader dropdown menu, select STAR Scanner - Bluetooth, then click Save.
- Tap Yes to restart your register.
- Power the register back on. The scanner is ready to use.
Scanning
To scan a barcode, aim the scanner at the barcode and press the trigger button to scan. Ensure the barcode is within the specified field of depth for accurate scanning. To maximize battery life, avoid continuous scanning for long periods.
When scanning, you may need to move the scanner in and out to zoom in or out the illumination pattern to center it on the barcode. The scanner will beep when it successfully reads a barcode and the green LED will illuminate.
Your products will need to be configured for scanning. If you scan a product that is not configured, the option to add the product will appear.
Scanner indicators
LED lights indicate a successful read, when it is time to charge the scanner or if it is fully charged, and whether it is connected to your register
| LED | Flashing | Scan |
|---|---|---|
| Green | Once | Good read |
| Green | None | Fully charged |
| Red | Slow flash | Low battery alert |
| Red | None | Scanner is charging |
| Blue | Slow flash | Paired but no connection is established |
| Blue | None | Scanner is paired and connected |