Point of Sale Solution App Hardware Settings
Description
What's in this article?
Hardware Settings provides information about and control over the hardware configuration for your Point of Sale system. From Hardware settings, you can view the register name and profile version, configure printer timing, connect payment devices and adjust app-level settings such as suppressing UPC code zeros or prompting for order type during checkout.
- *music*
- This video is an overview of the Hardware Settings in the Point of Sale Solution application.
- To access the hardware settings, tap the menu icon in the top left corner of the main screen and select Settings.
- You can review the details and status of the printers connected to the register.
- A green icon means the printer is connected and set up in the Back Office.
- Yellow means the printer is connected, but not yet set up in the Back Office.
- And a red status icon means the printer is not connected.
- If you need to test the printer configuration, tap the printer icon to initiate a test print.
- To connect a point of sale device to your system, tap the Payment Terminal gear icon, edit the settings, and tap Save. Barcode Reader sets the barcode scanner model.
- Additional configuration settings can be enabled or disabled to customize your experience at the register.
- Has Cash Drawer opens the cash drawer during a transaction when enabled.
- Suppress Zeros prevents the system from adding additional zeros to UPC barcodes when enabled.
- Show Order Type promotes you to select an order type at the start of each order when enabled.
- Show Till Summary shows a summary of total sales at each sale when enabled.
- Skip Continue On Preset Amounts skips the step to tap Continue after accepting an exact preset amount from a customer.
- If you change settings, make sure to tap Save.
- *music*
Access hardware settings
To access hardware settings, select Settings from the left navigation menu. The Settings page appears.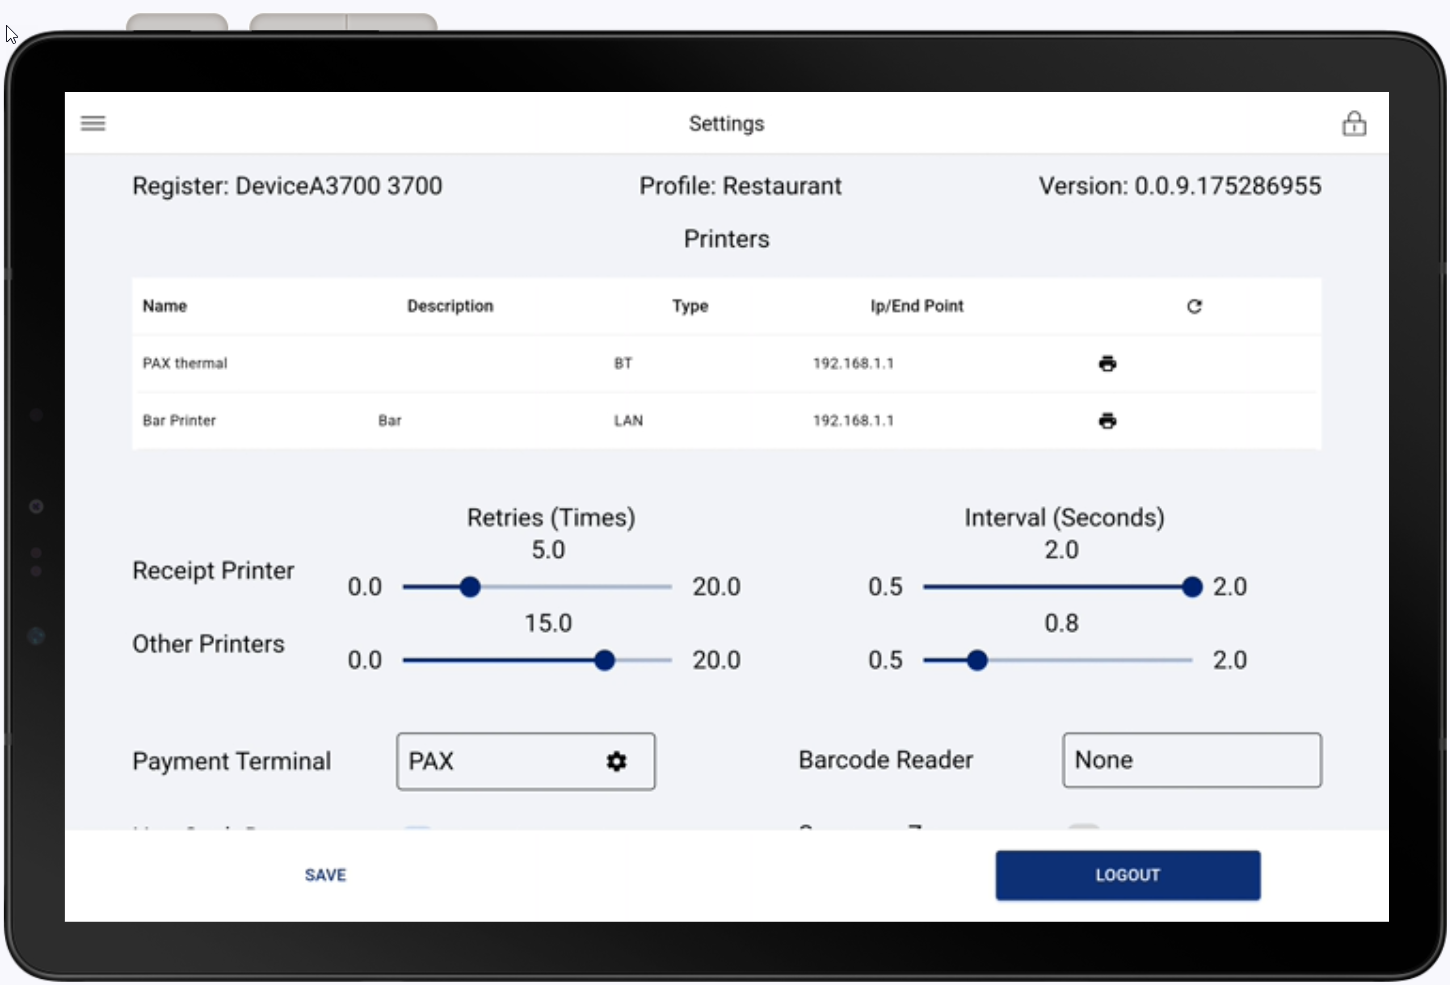
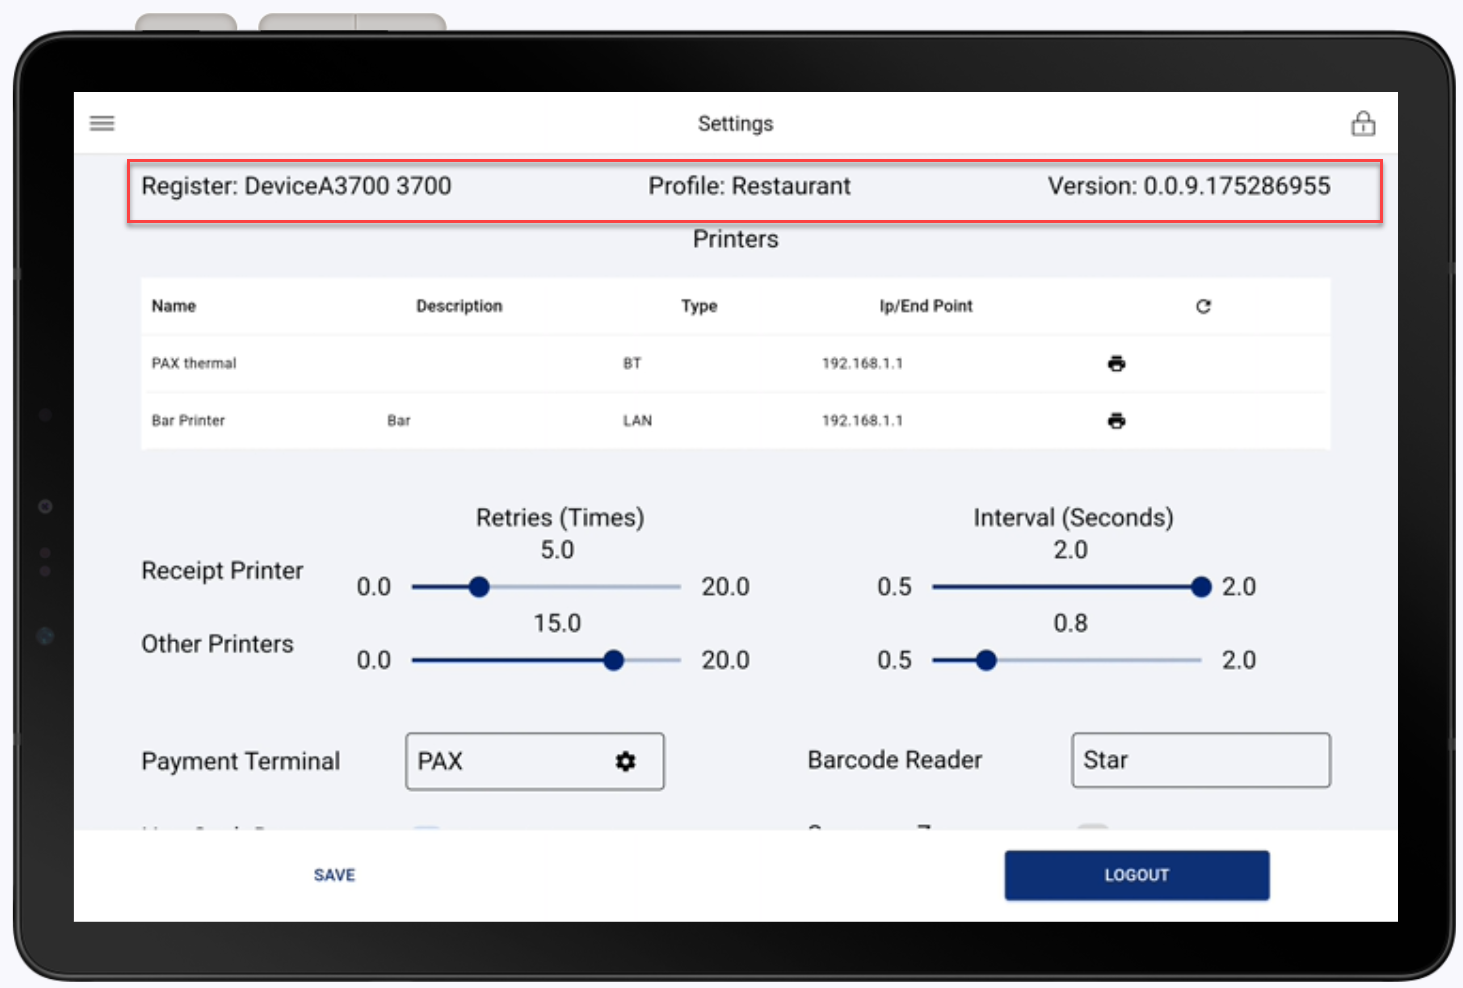
Register and profile information
You can review the register name and profile version currently running on the device. Profiles are created and managed in Back Office. Learn more about how to create and manage profiles.
Printer settings
View details for printers connected to the register and adjust the Retries and Interval settings. Modifying these values can help troubleshoot printer connectivity issues.
Printers are added in the Point of Sale Solution Back Office. Learn more about how to add a printer.
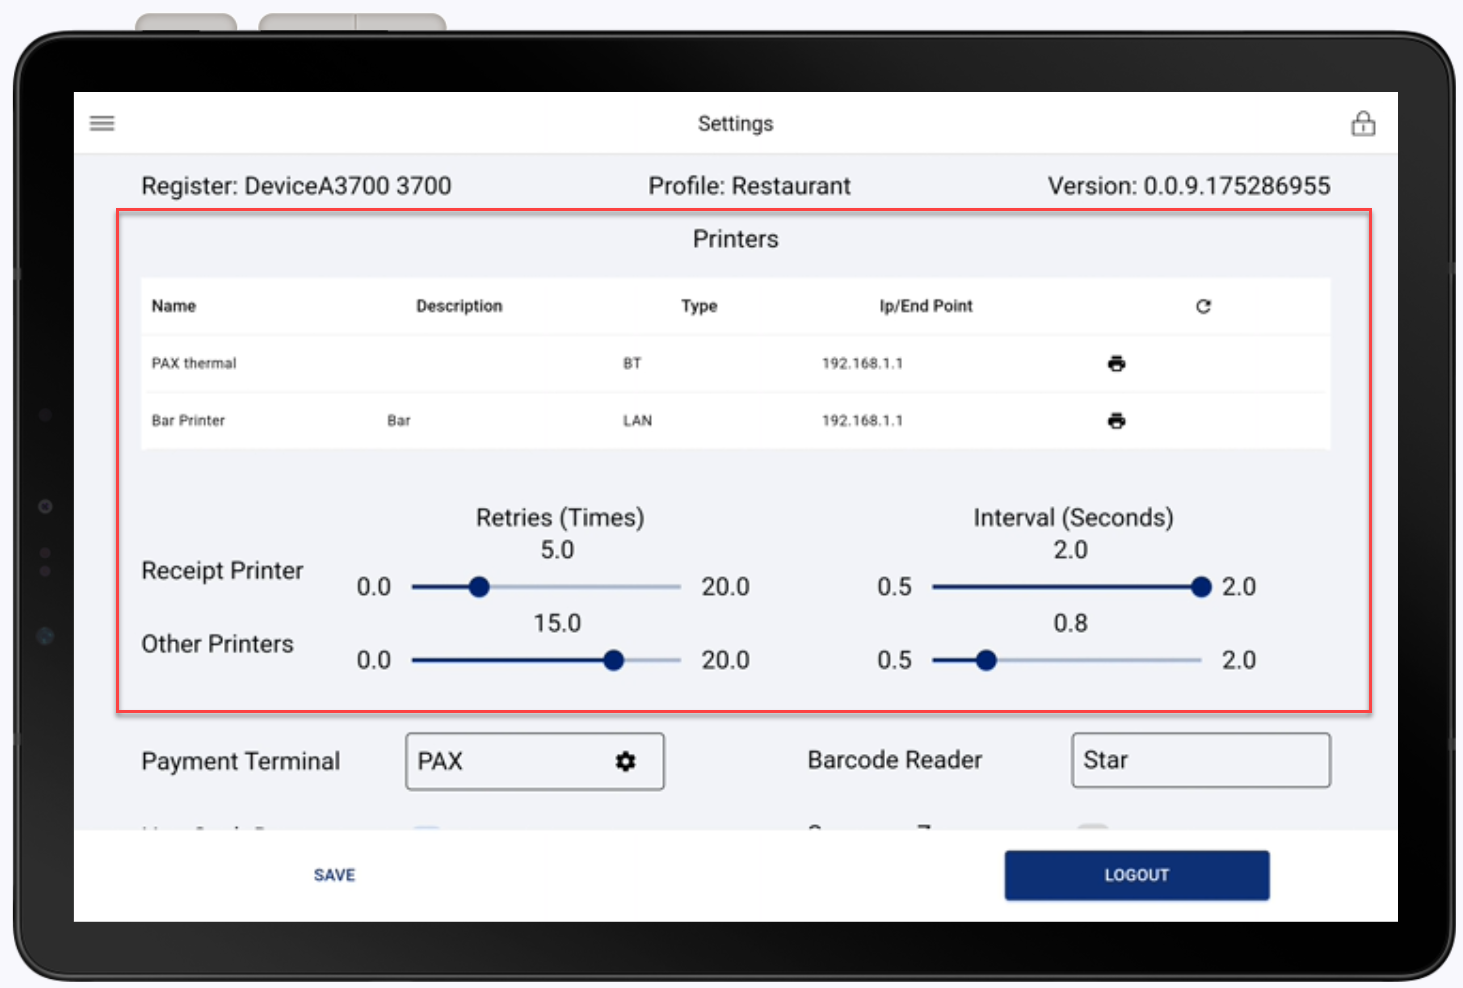
To adjust printer retry and interval settings
Use the sliders to:
- Change the number of retry attempts to contact the printer.
- Adjust the interval between retry attempts.
Payment terminal settings
Payment Terminal settings connect the point of sale to your system. When adding a device, you must configure:
- Communication type
- IP address
- Port settings
To edit Payment Terminal settings
- Tap the Gear icon in the Payment Terminal field
- Enter or update the required information.
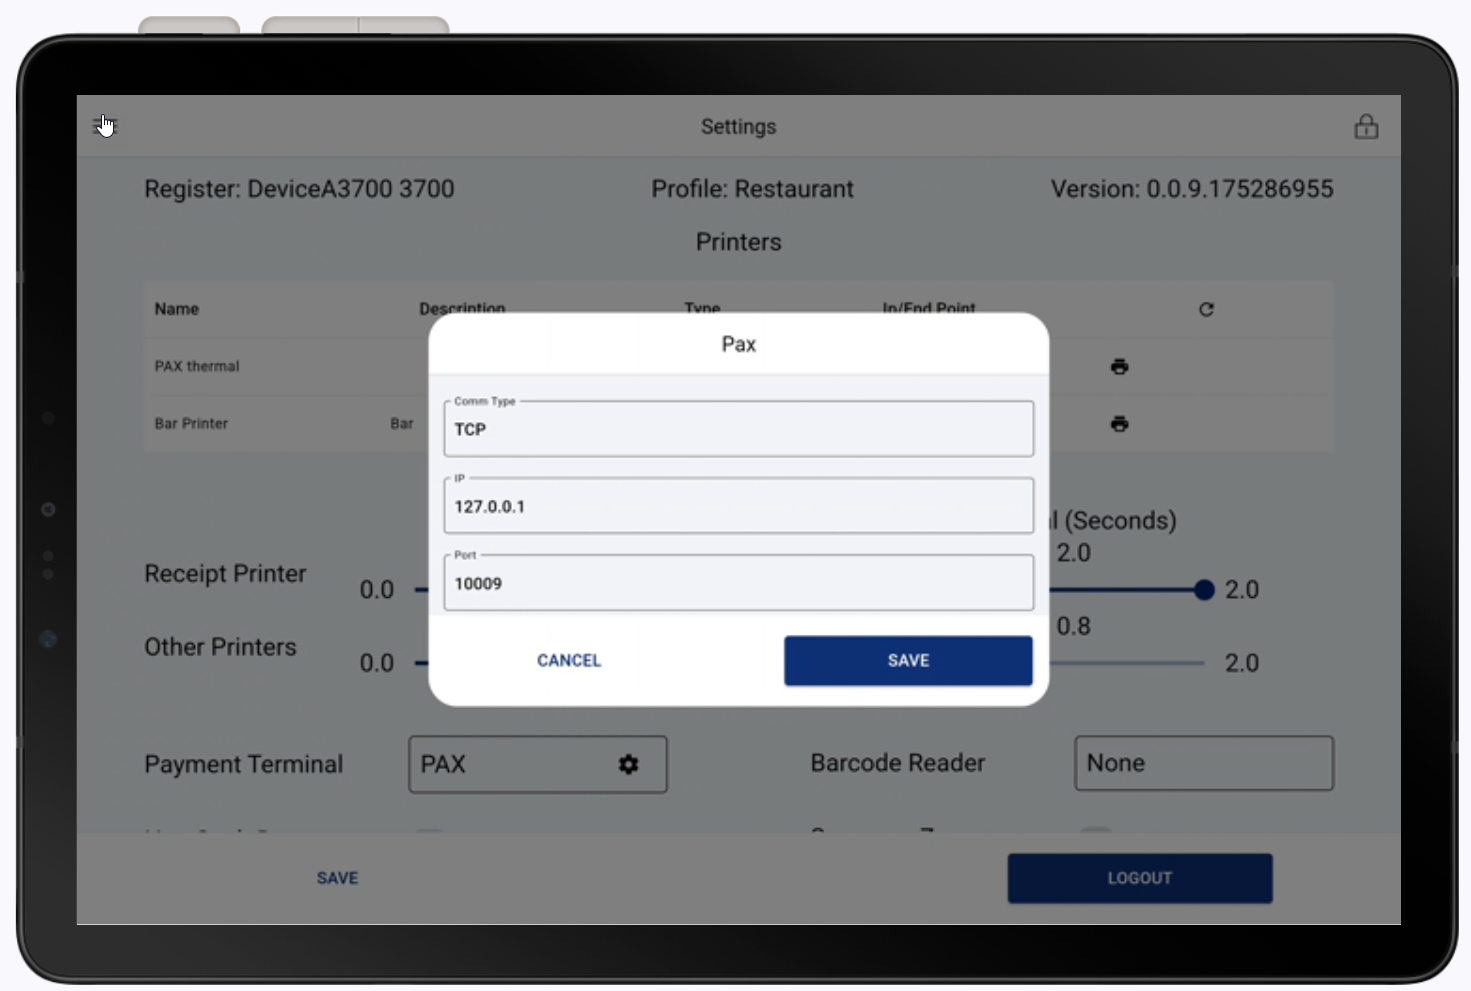
- Tap Save.
Other settings
Additional configuration options allow you to customize the register to meet your business needs. Scroll to view all available options. Y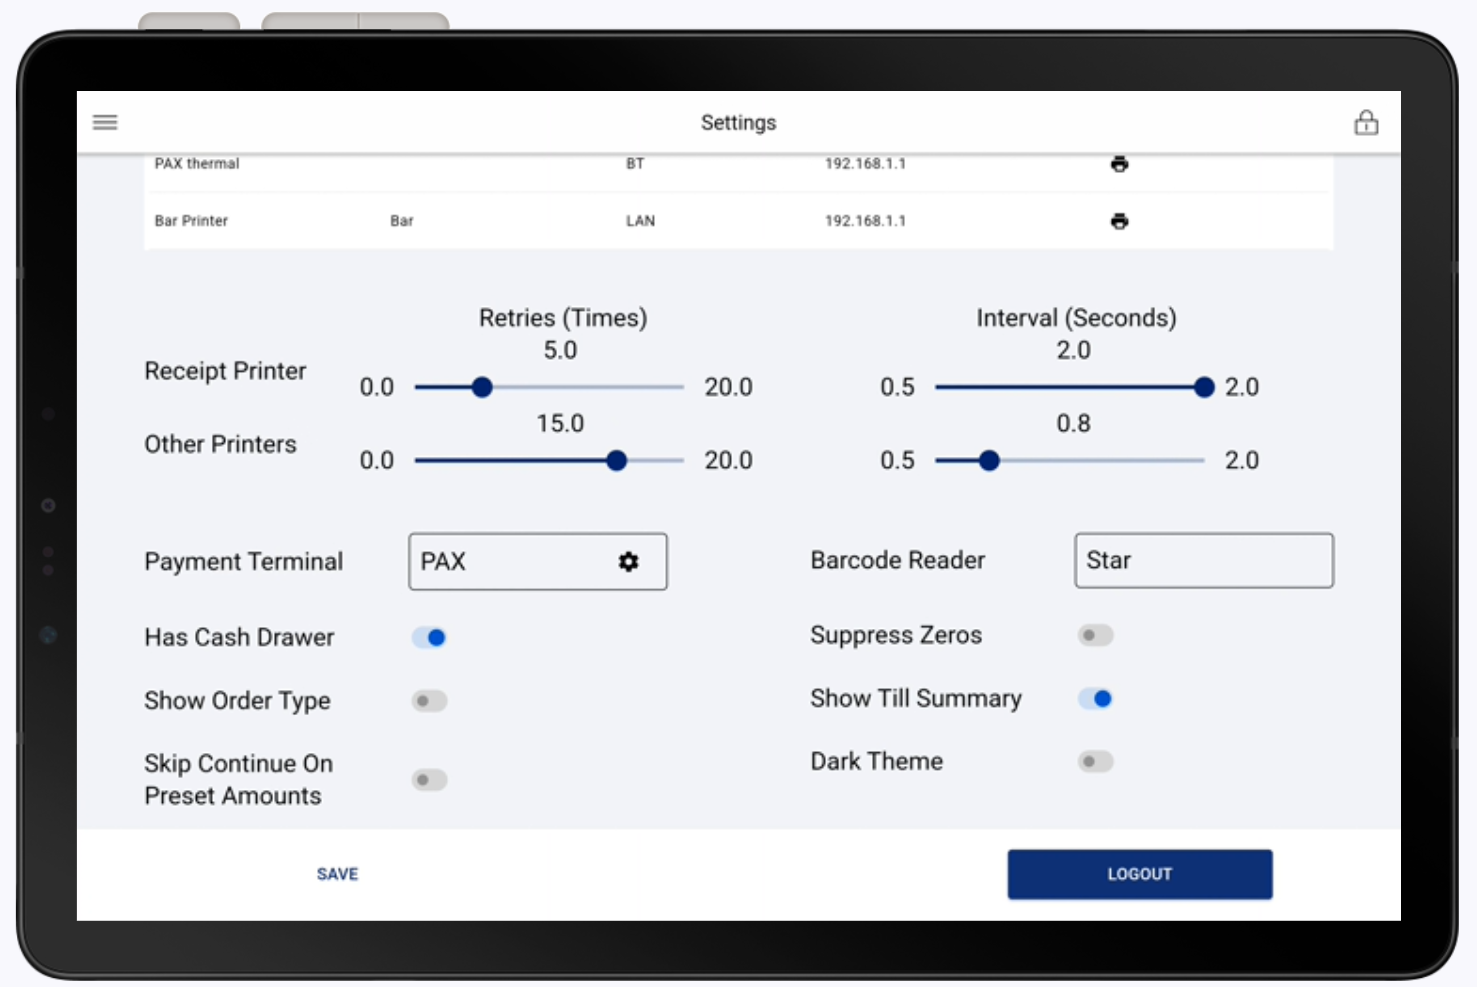
Barcode Reader model
When setting up a barcode scanner, select the appropriate barcode reader model from the list. Refer to your device setup guide for more information.