Point of Sale Solution Back Office Recurring Billing
Description
What's in this article?
Recurring subscriptions allow you to automatically charge customers for goods or services on a prearranged schedule. After setting up the initial subscription and obtaining customer authorization, charges are processed automatically based on the agreed billing schedule.
Any product or service with regularly scheduled payments is a good candidate for recurring billing. Recurring billing may also be referred to as automatic bill payment.
- *music*
- This video covers how to create and manage subscriptions in the Point of Sale Solution Back Office.
- To create a new subscription, click Virtual Terminal, then Recurring Billing.
- Click Add new subscription. In the Subscription price detail section, enter the customer'sname and select from the populated drop-down list. If the customer is new, they must be created before proceeding.
- If the order includes items from your inventory, click Itemized subscription, then search and select an item from the drop-down list. Click Add Item.
- Continue to add additional items if desired.
- If the order does not include a product, ensure the Itemized subscription toggle is clicked off.
- Enter the subscription amount and select a tax option. Click Next.
- In the Subscription detail section, enter the name of the subscription, the date of when the subscription starts, the recurring billing date, how frequently it will be charged, and the subscription duration. Click Next.
- In the Address detail section, review the address, then click Next.
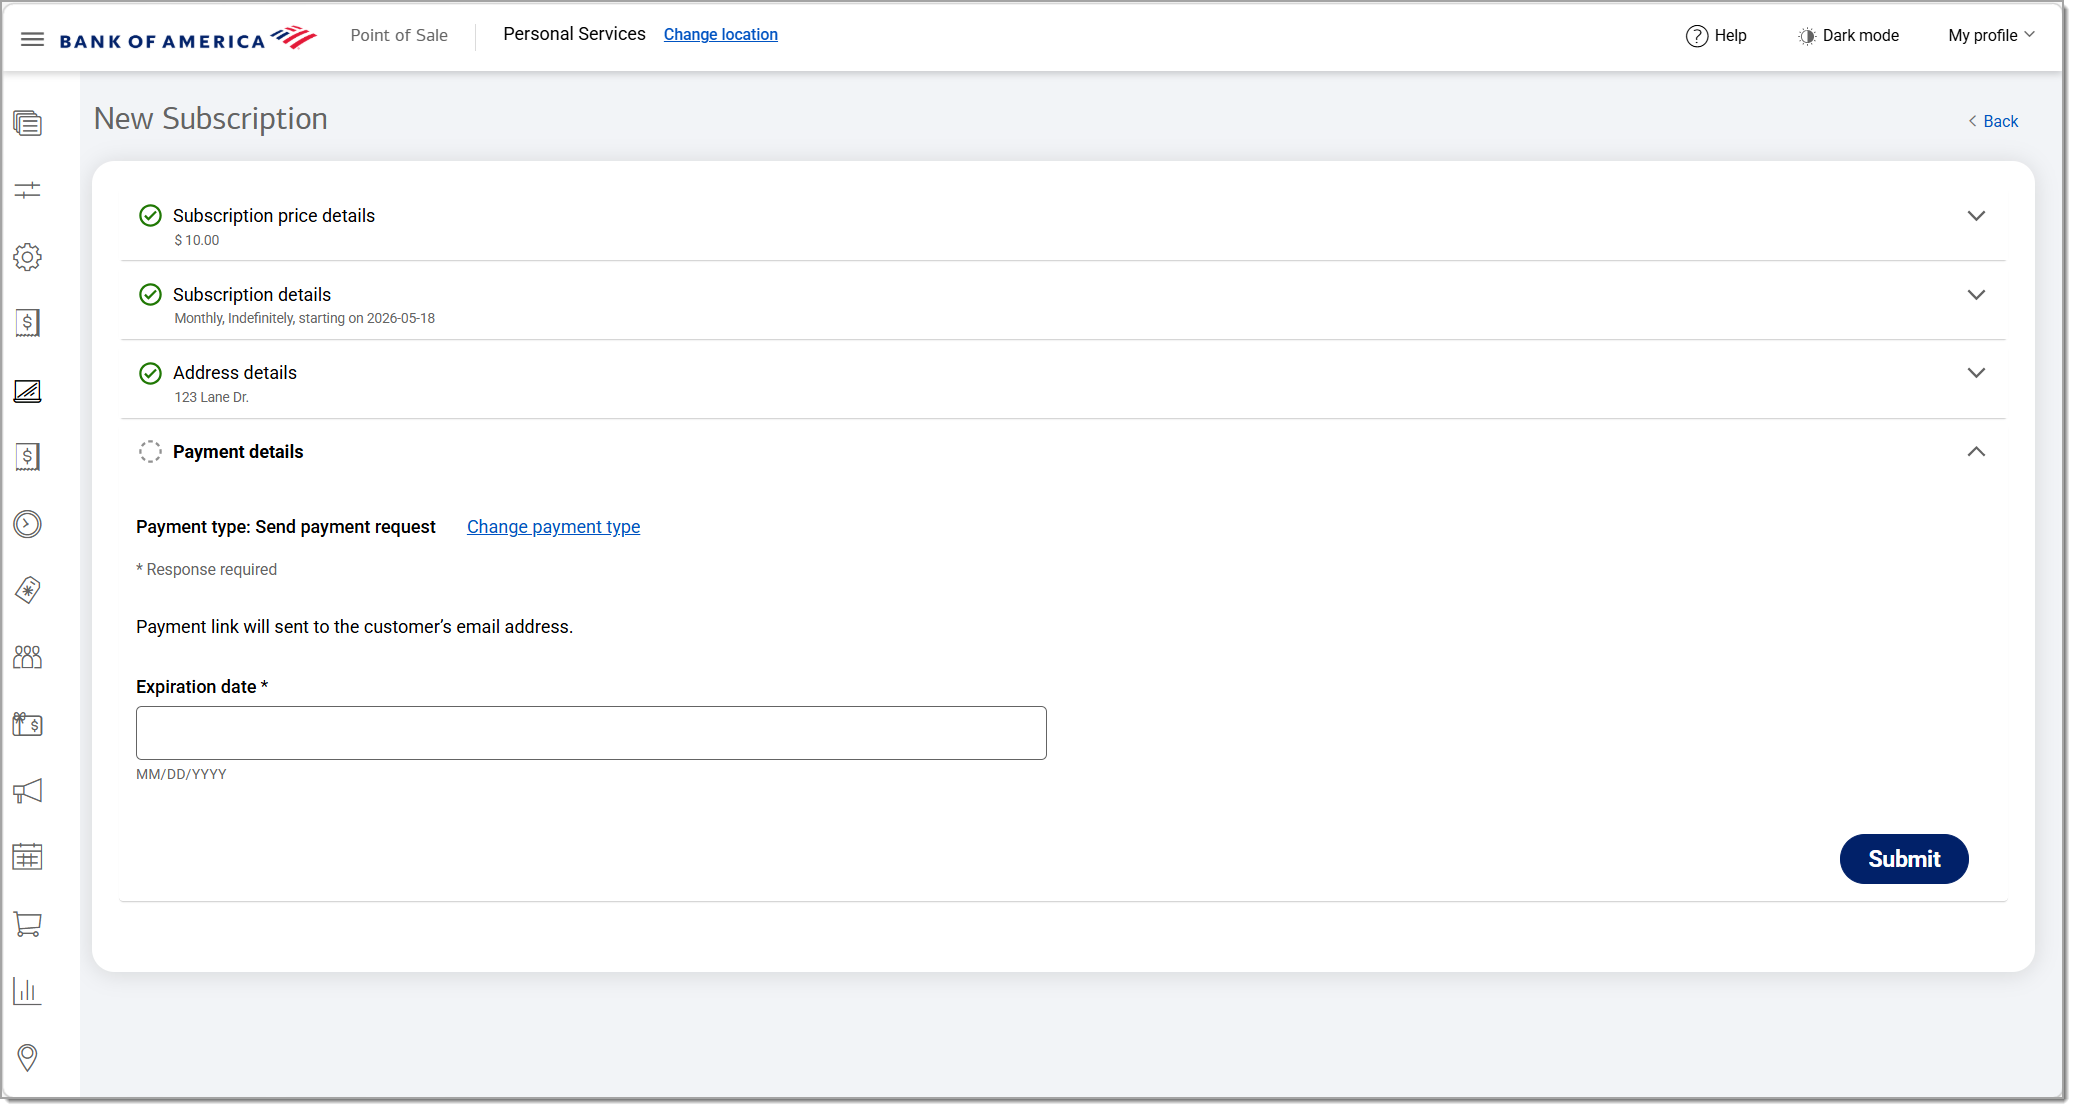
- In the Payment detail section, select a payment type. To pay with the credit card, click Credit card and complete the fields.
- You can also select a payment request by sending a payment link to the customer's email on file and set an expiration date for the link.
- Click Submit. Subscriptions are managed from the Recurring Billing display.
- The Subscription summary highlights the number of active subscriptions and the total billing activity over the last 30 days.
- The Subscription overview displays the list of your subscriptions.
- Additional management options include the Status toggle, which temporarily pauses billing when switched to Inactive, Edit to update subscription details, Add manual transactions which allows you to process a manual one-time payment and Delete, to permanently delete a subscription.
- *music*
The Subscription Summary provides a quick view of:
- The total number of active subscriptions
- Total billing activity over the past 30 days
You can search subscriptions using keywords and filter results by status.
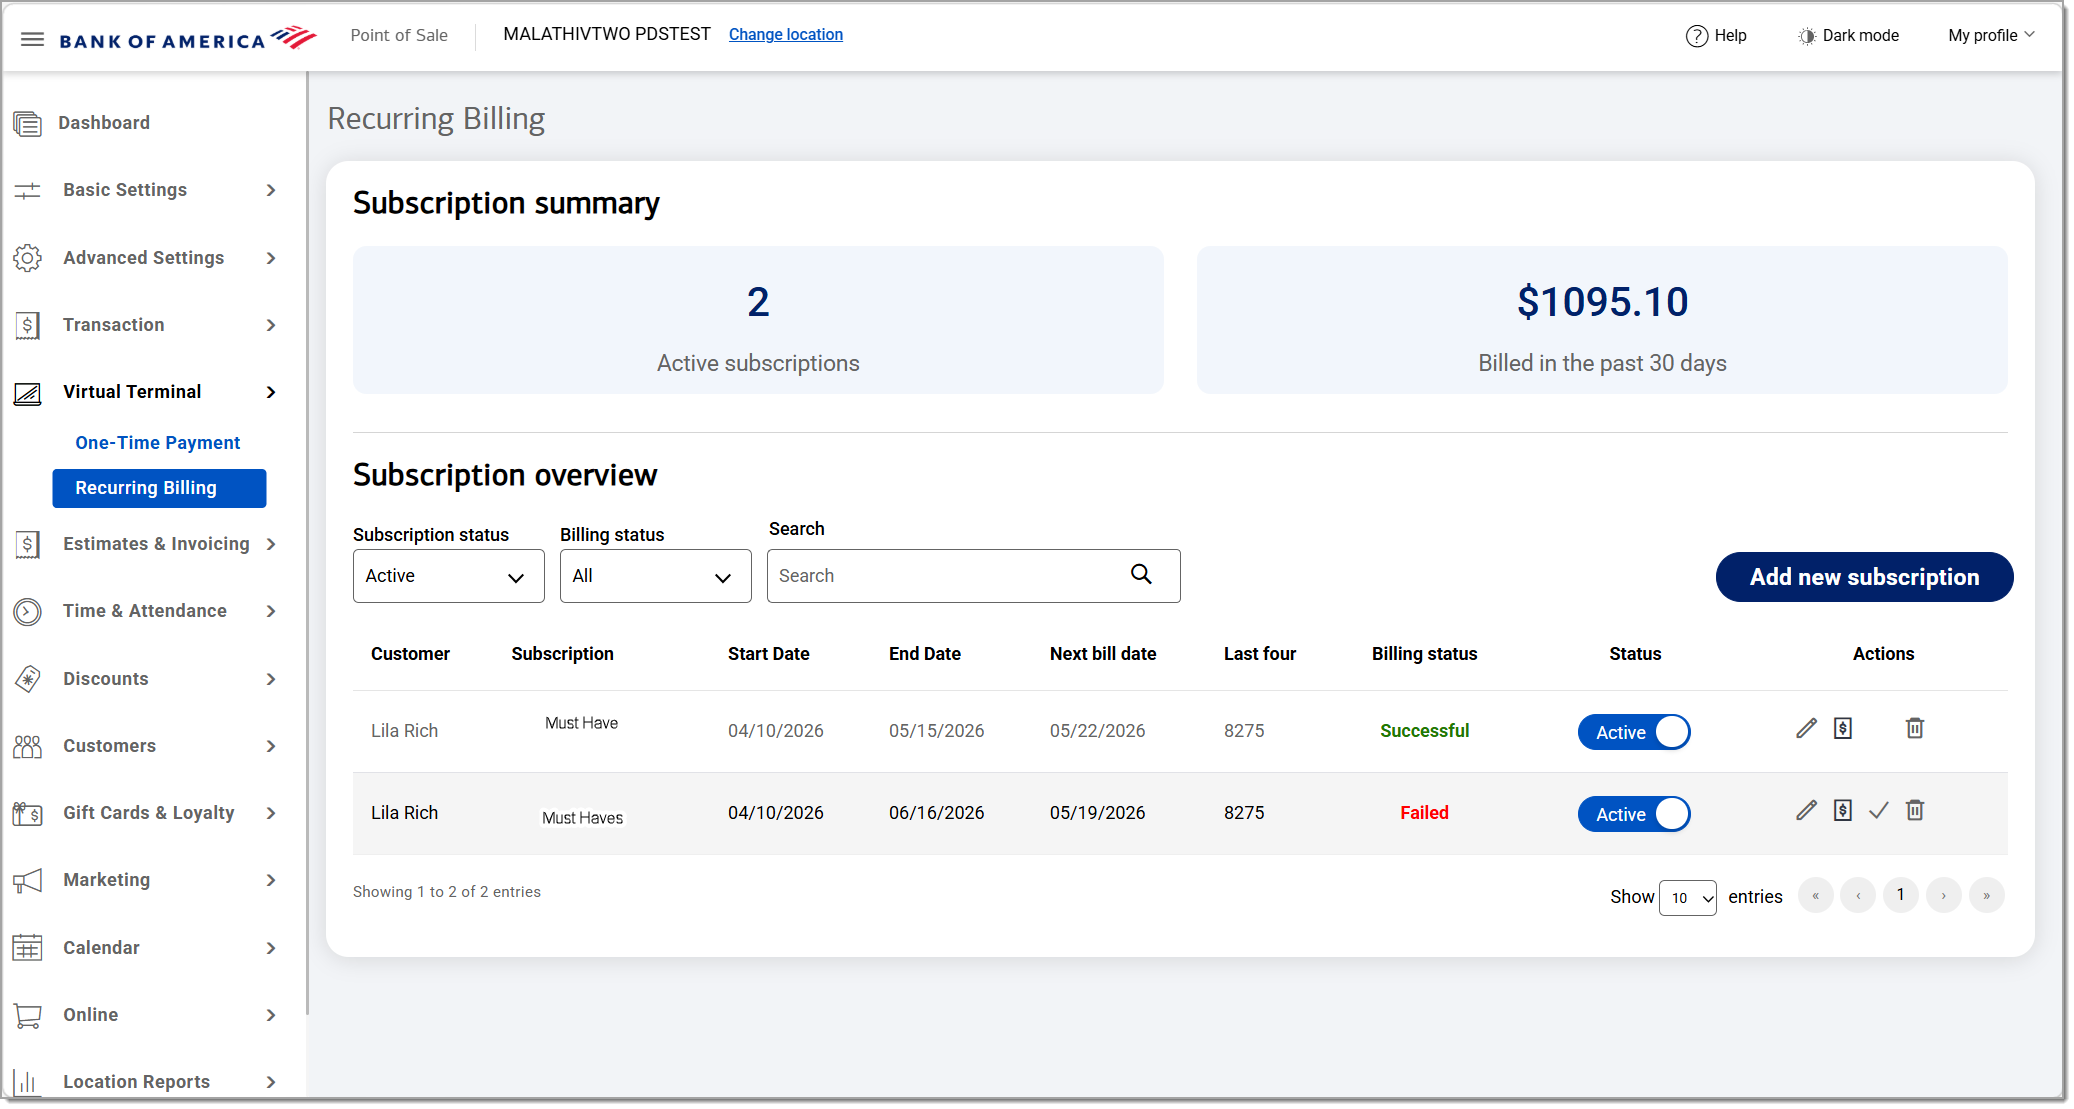
Manage subscriptions
Review your subscriptions, their billing status, billing cycle, and manage details like customer name, subscription type, start and end date, next bill date, and the last four digits of the card being billed.
If needed, you can also take a manual payment on a subscription or override a subscription status.
NOTE:
If a customer would like to temporarily stop their subscription, change the status to Inactive to pause. Deleting the subscription will permanently delete it.
To update subscription details
- In the Point of Sale Solution Back Office, select Virtual Terminal > Recurring Billing.
- Review the Billing status.
Table of Billing Statuses Billing status Description Successful Billing was completed successfully. Pending Billing is scheduled but has not yet been processed. Retrying A billing attempt failed and is being retried. Failed Billing failed after three attempts. - Choose an Action or change the Status:
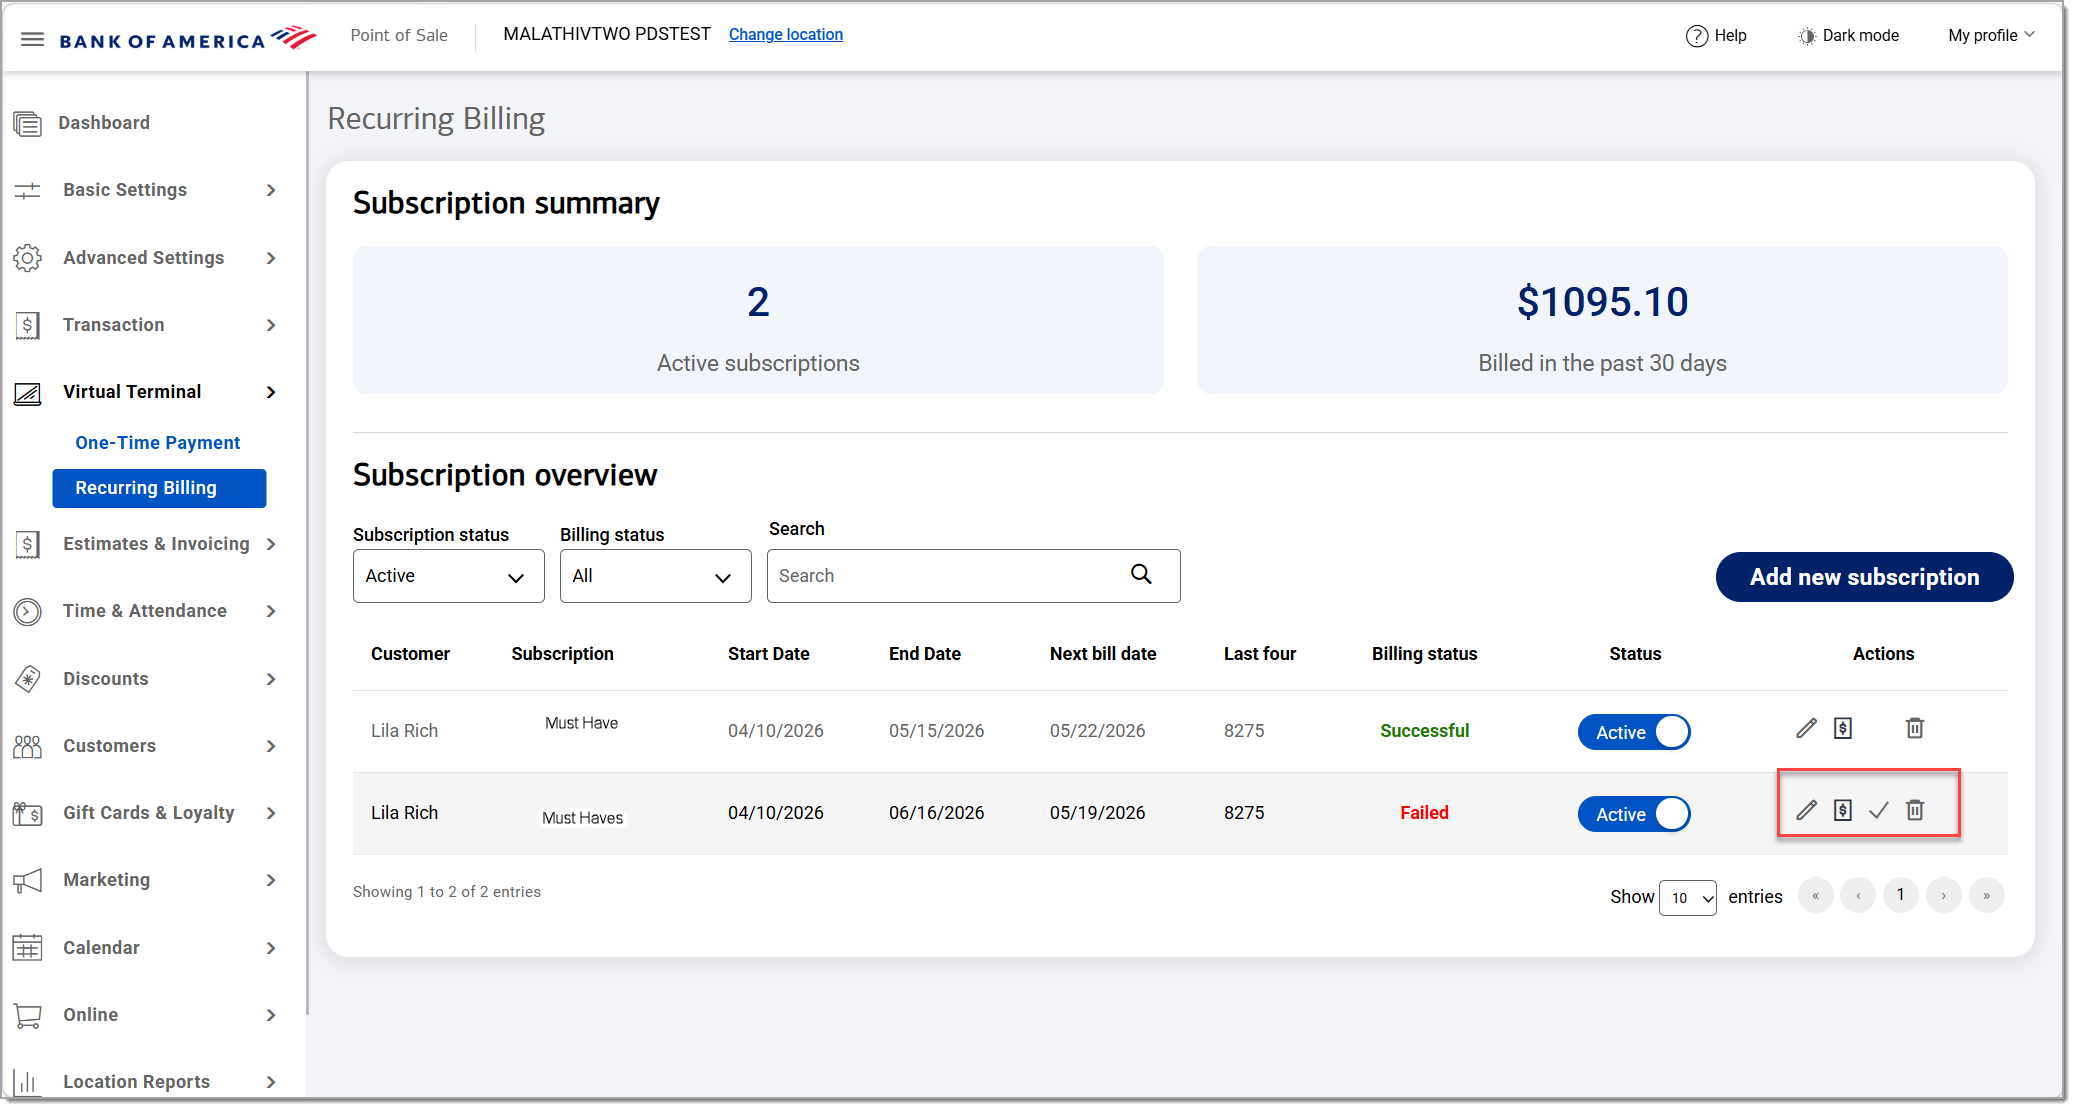
Table of Action and Status Options and Descriptions Action and status options Description Status Switch between Active and Inactive. Setting a subscription to Inactive temporarily pauses billing. Edit subscription Update payment details, such as credit card information. Add manual transaction Process a one-time payment if a payment link expired, billing failed or the customer requests a manual charge. Set to paid Mark the subscription as paid without processing a transaction (for example, if payment was received in cash). NOTE: A note is required when using this option. Inventory counts will not be updated. Delete subscription Permanently delete the subscription.
Add a new subscription
When creating a new subscription, you must provide additional setup details like billing frequency, amount, and a billing date. Once payment is collected, the transaction will appear in your Orders report. If you send a payment request, it will be recorded in your open invoices until paid.
To add a new subscription
- In the Point of Sale Solution Back Office, select Virtual Terminal > Recurring Billing.
- Click Add new subscription.

- In the Subscription price details section:
- Begin entering the customer name and select the customer from the dropdown.
- If the customer is new, click Add new customer and enter the customer details.
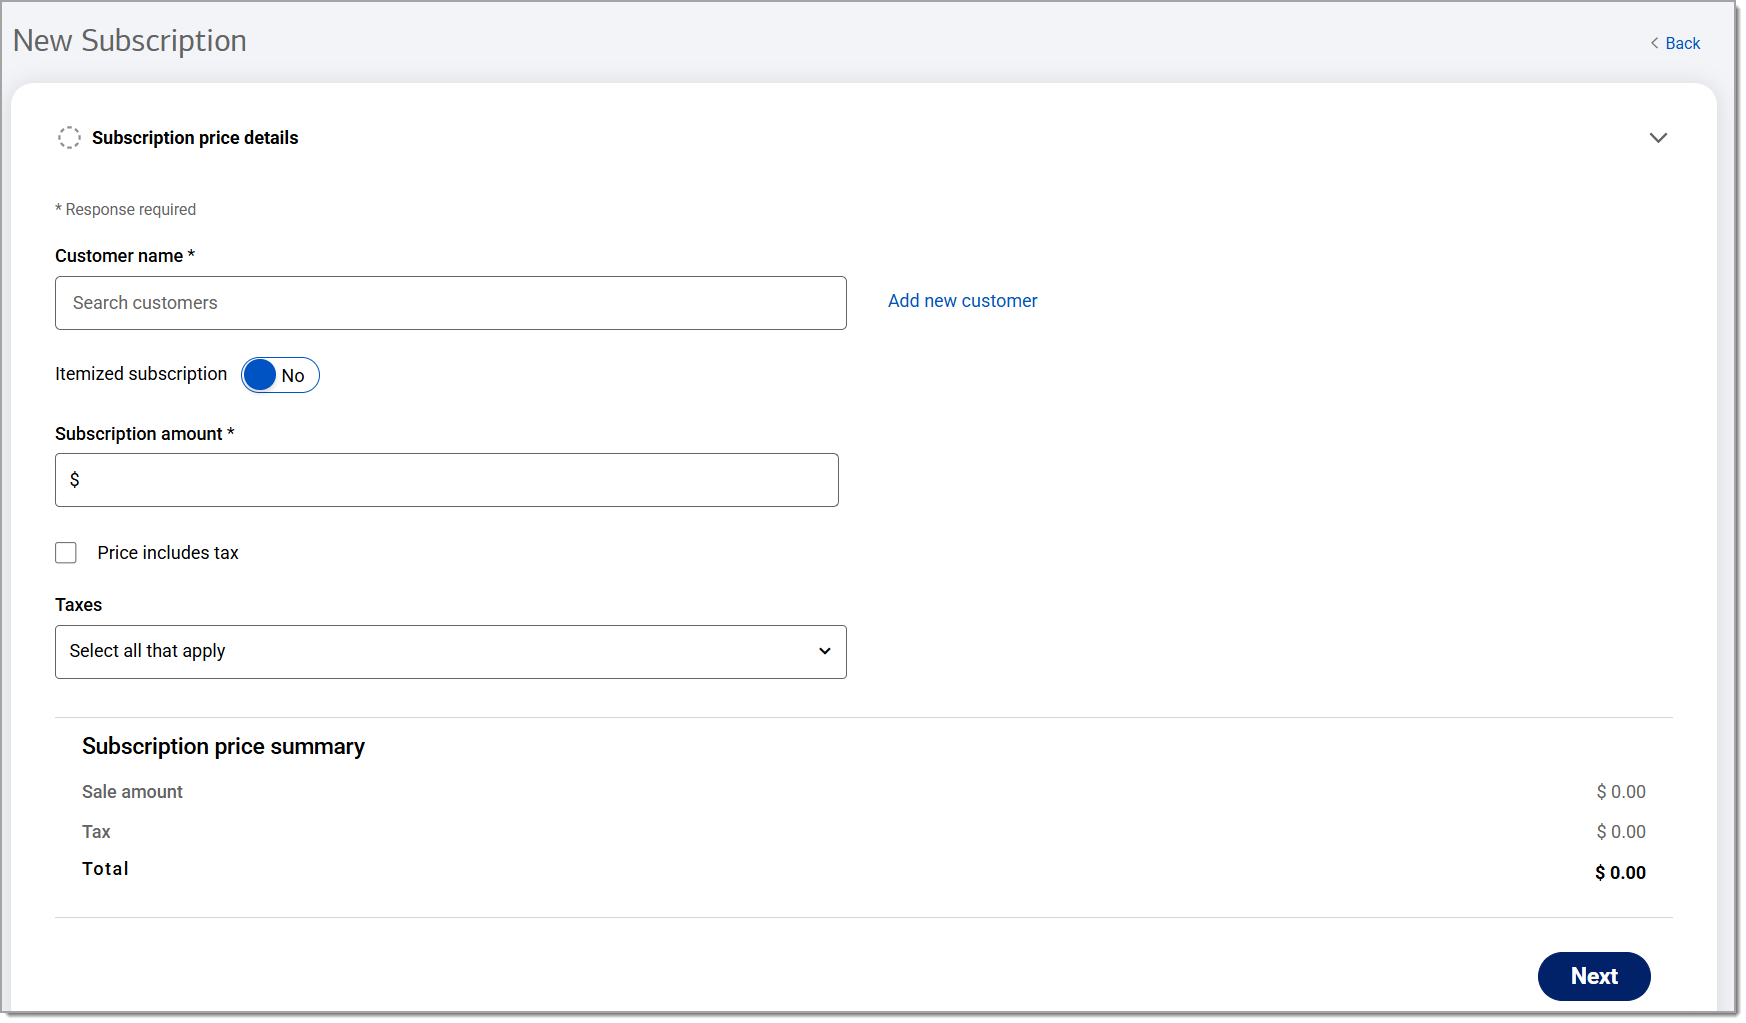
- (Optional) Enable Itemized subscription, then choose the product(s) to create an itemized subscription.
- Enter the subscription amount.
- Select tax options:
- Choose applicable taxes from the dropdown list, or
- Select the Price includes tax checkbox, if applicable
- Click Next.
- In the Subscription details section, enter a Subscription name.
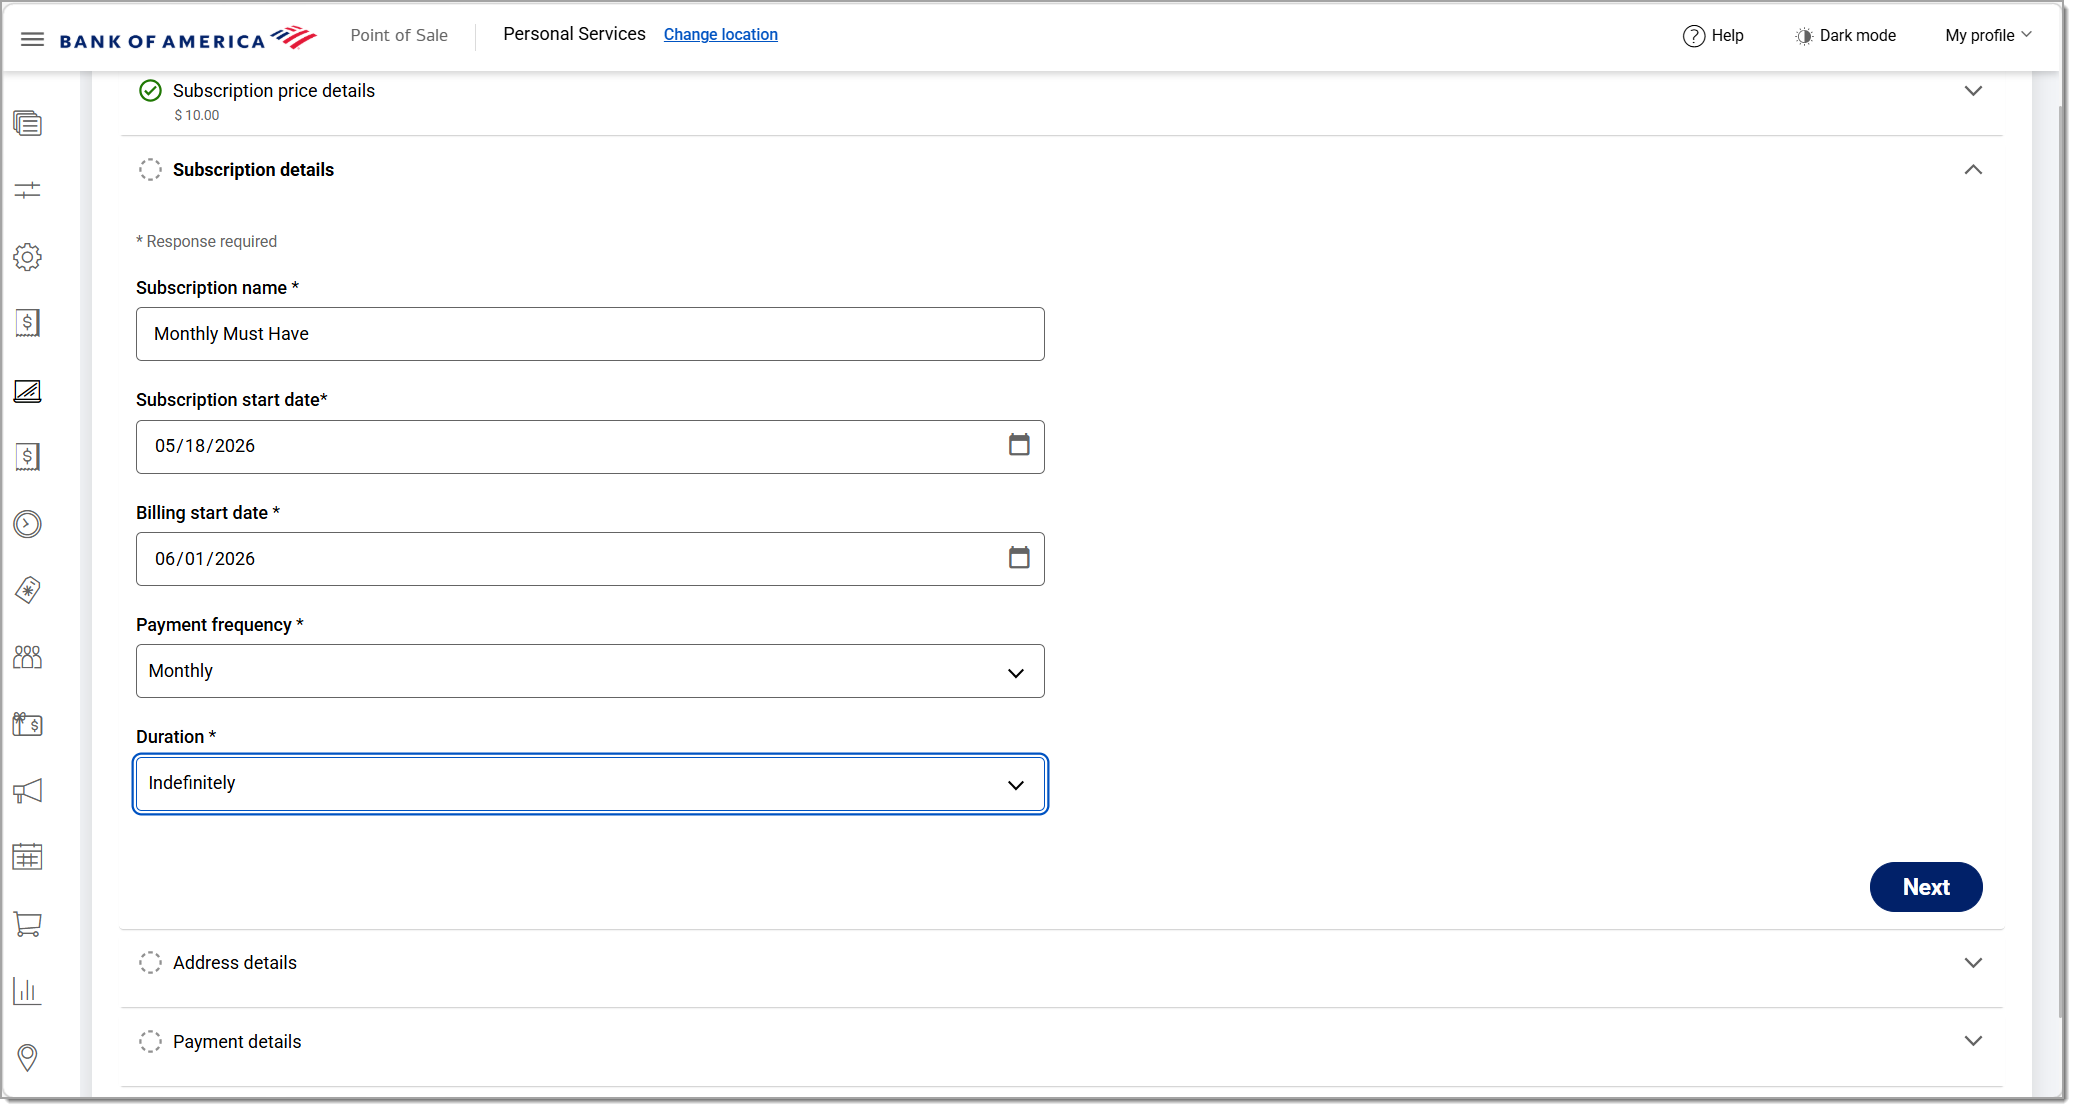
- Enter Subscription start date and Billing start date.
- Choose a Payment frequency and a Duration option from the dropdown lists.
- Click Next.
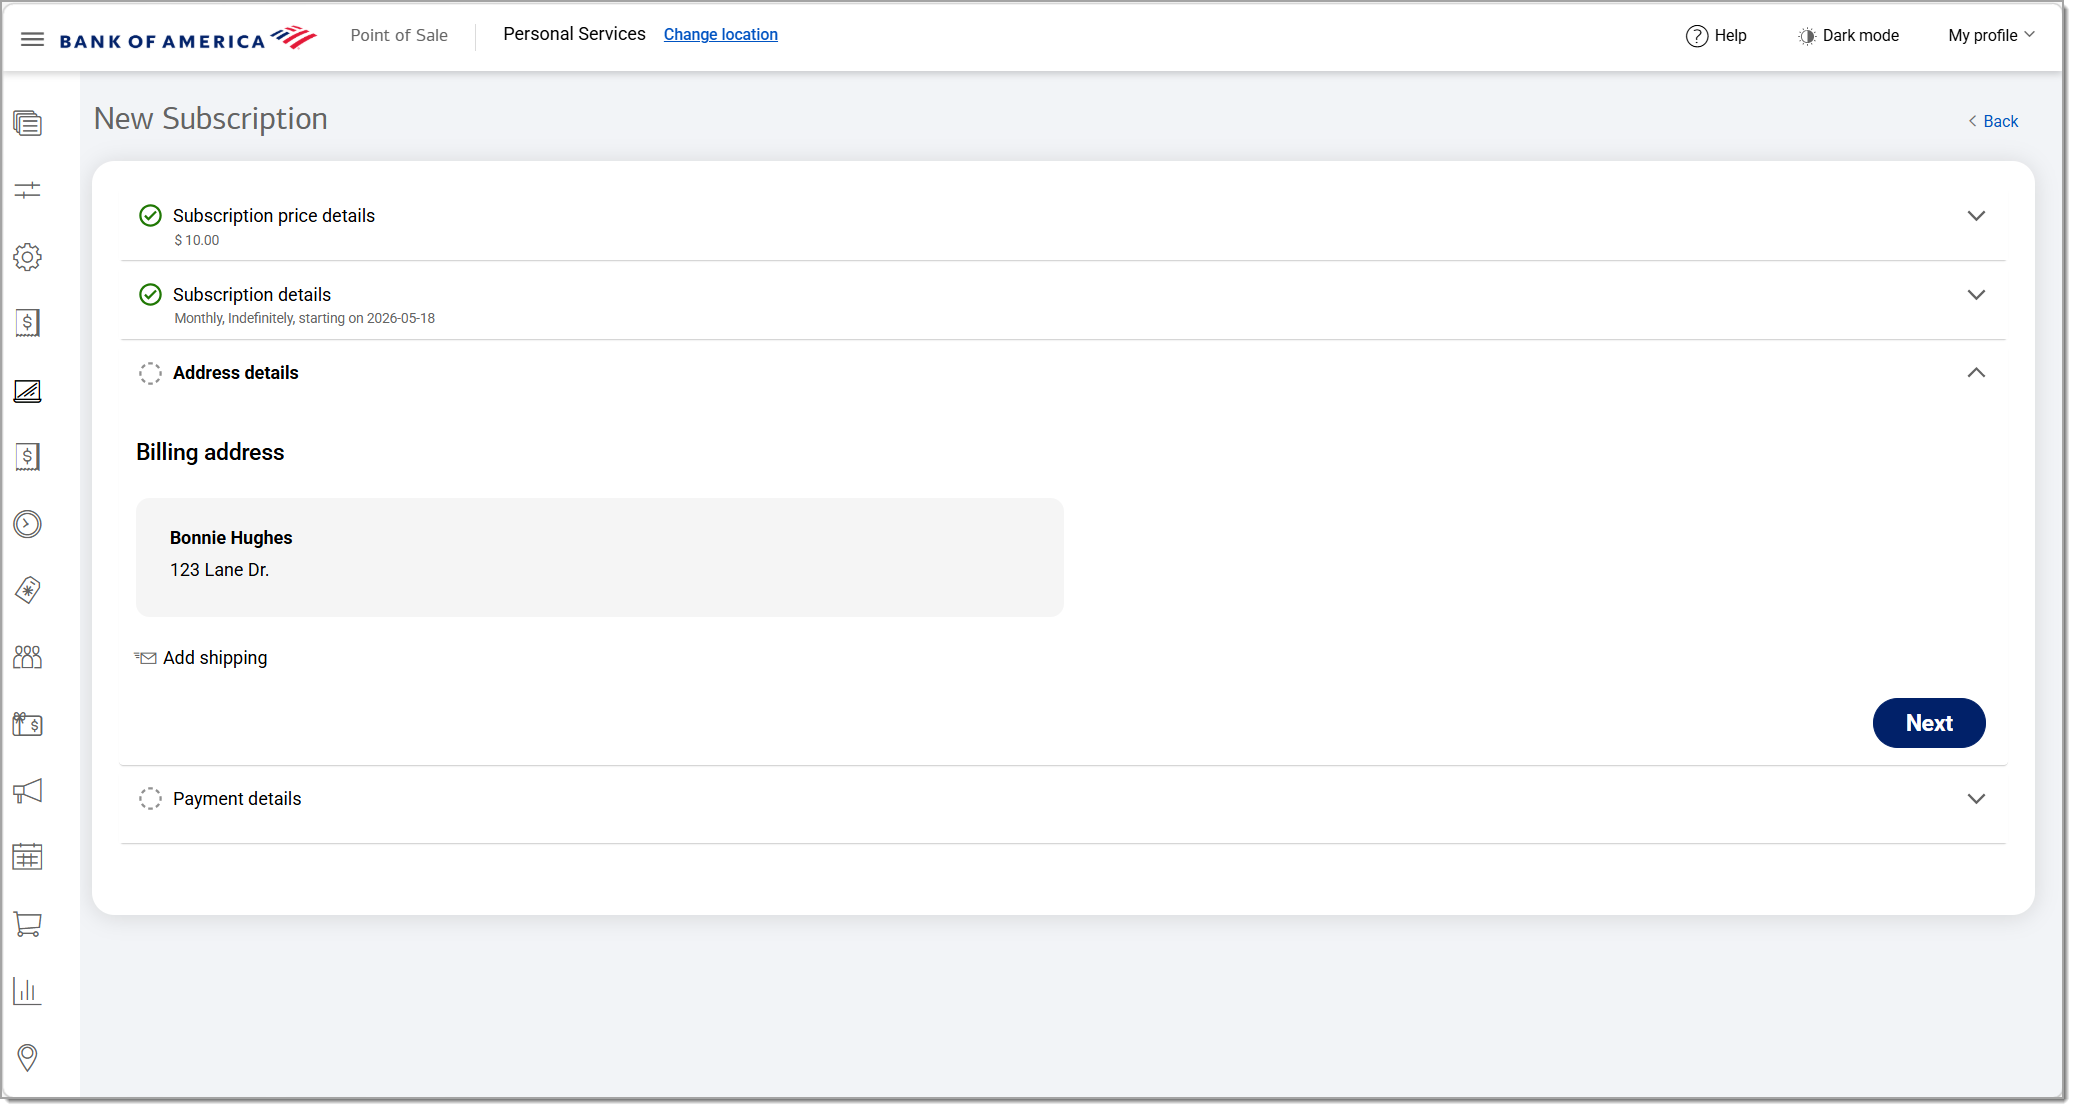
- In the Address details section, confirm the billing address.
- If the shipping address will be different, click Add shipping and enter the shipping address information.
- If the shipping address will be different, click Add shipping and enter the shipping address information.
- Click Next.
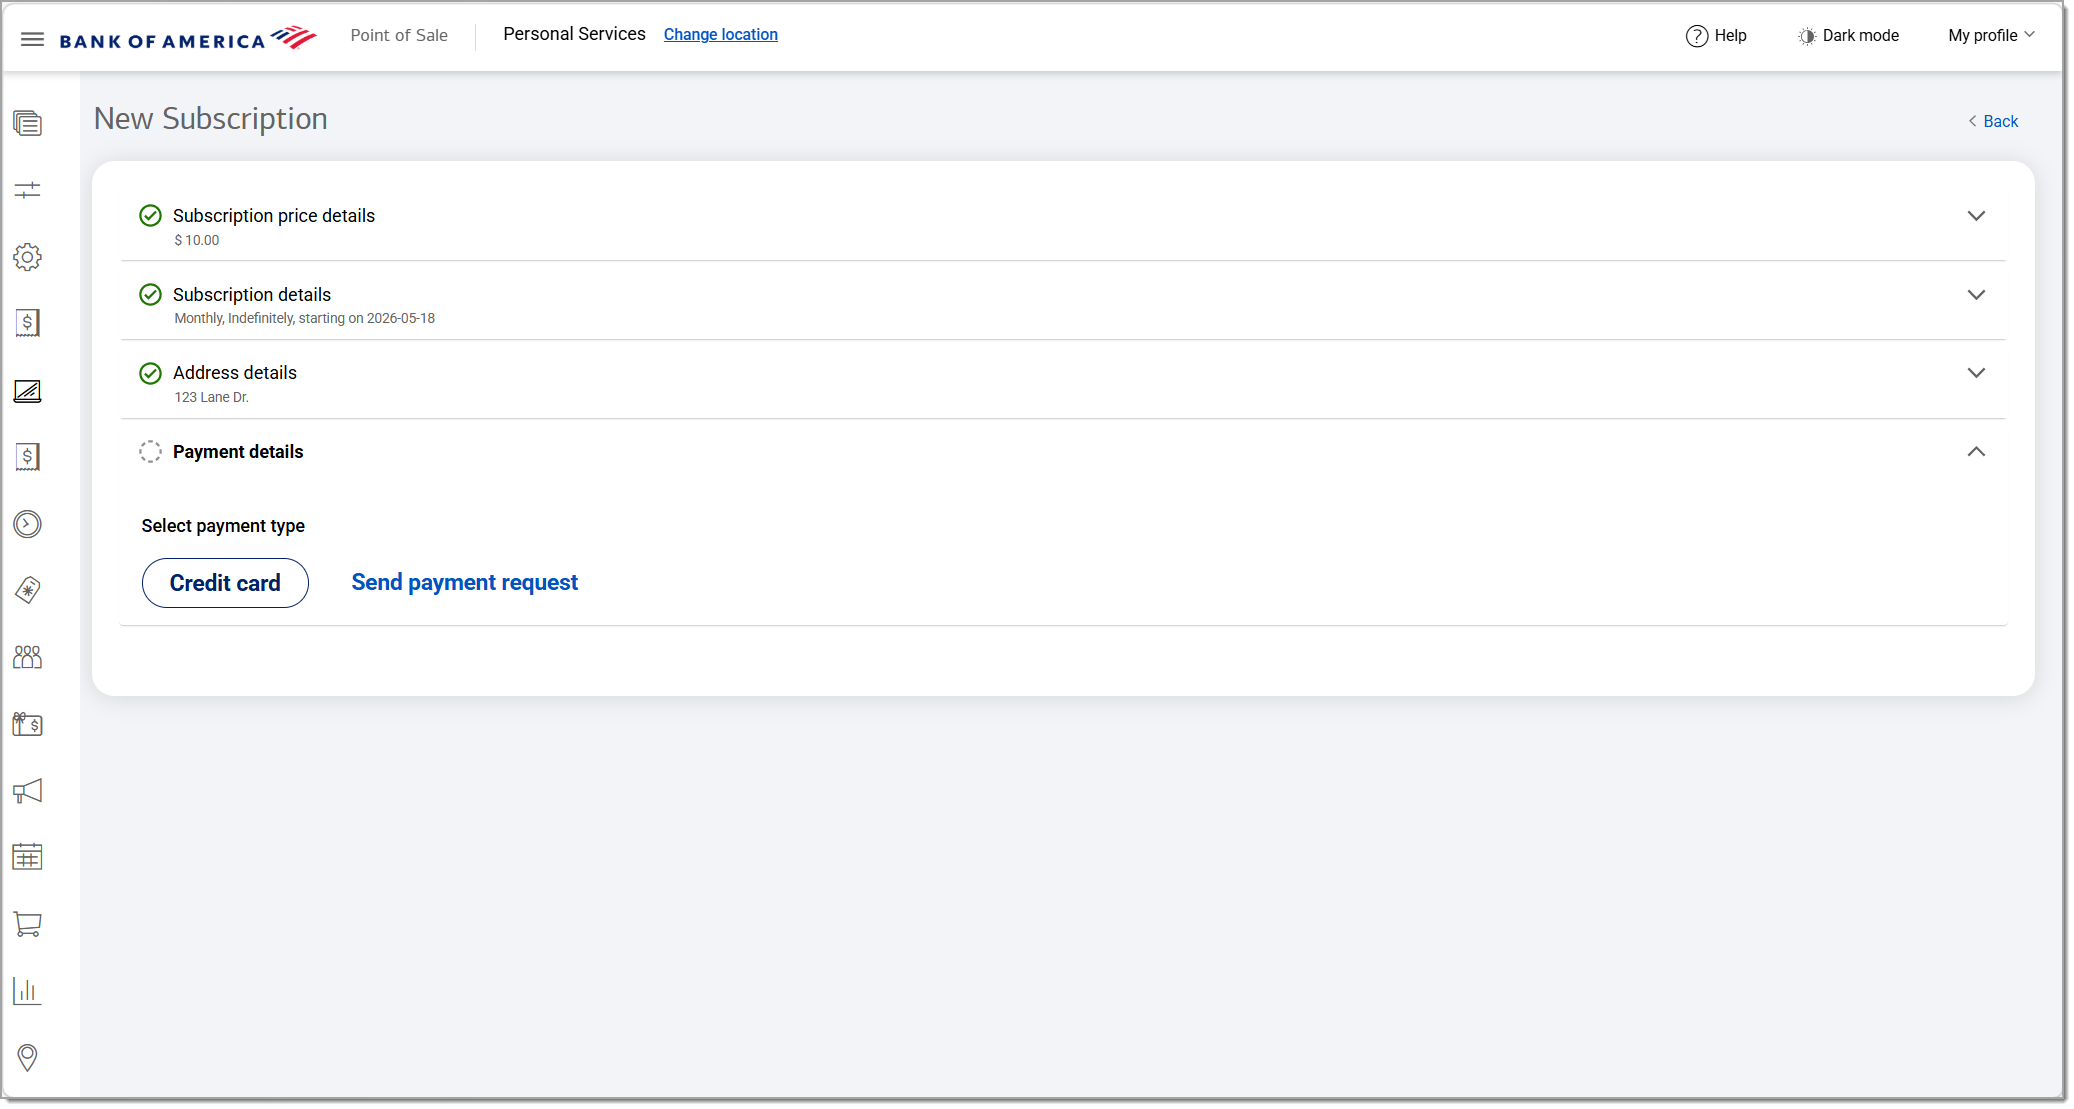
- In the Payment details section, choose a payment type:
- Click Credit card, then click Checkout with Card and confirm the customer's contact information. Enter the card number, expiration date, and security code, or
- Click Send payment request, then enter an expiration date for the payment link that will be sent to the customer's email address.
- Click Submit.