Back Office Charges in Restaurant Solution
Description
What's in this article?
Solution: Restaurant
Charges allow you to add non-sales revenue items to an order, such as a delivery charge, membership fee, bottle deposit, or other miscellaneous fees. You can manually add charges to a guest check, or you can assign a charge to an order mode, such as takeout or delivery, which will cause the system to automatically add the charge every time you select the order mode.
A Charges button appears on the payment screen to enable you to manually add a charge to a guest check. Once added, you can change the quantity of the charge. For example, iIf you require a bottle deposit on growlers and a customer orders three, you can add the bottle deposit charge and increase the quantity to 3.
Charges appear as a line item on the guest check. The Back Office reports display charges on the Store Summary report as a separate line item and outside of the net sales calculation.
Regarding charges:
- Upon adding a charge to a ticket, the system considers the charge finalized. If you remove a charge, the system considers the action a void. If the removed charge was percentage based, the voided amount reflects the charge at the time of the void.
- When multiple charges appear on a guest check, the system ignores the other charges when calculating a percentage-based charge.
- You can apply an item level discount to a charge, but you cannot apply a ticket level discount to a charge.
- You can identify a charge as ‘House Account,’ which allows the charge to be used for house account payments in the Point of Sale app.
- To create a charge in Back Office or apply a charge in the Point of Sale app, assign features to the appropriate user role:
- Charges controls which users can access the Charges page in the Back Office
- Add Charge to a Ticket controls which users can manually add a charge to a guest check. Review your user roles to ensure the appropriate access levels are assigned.
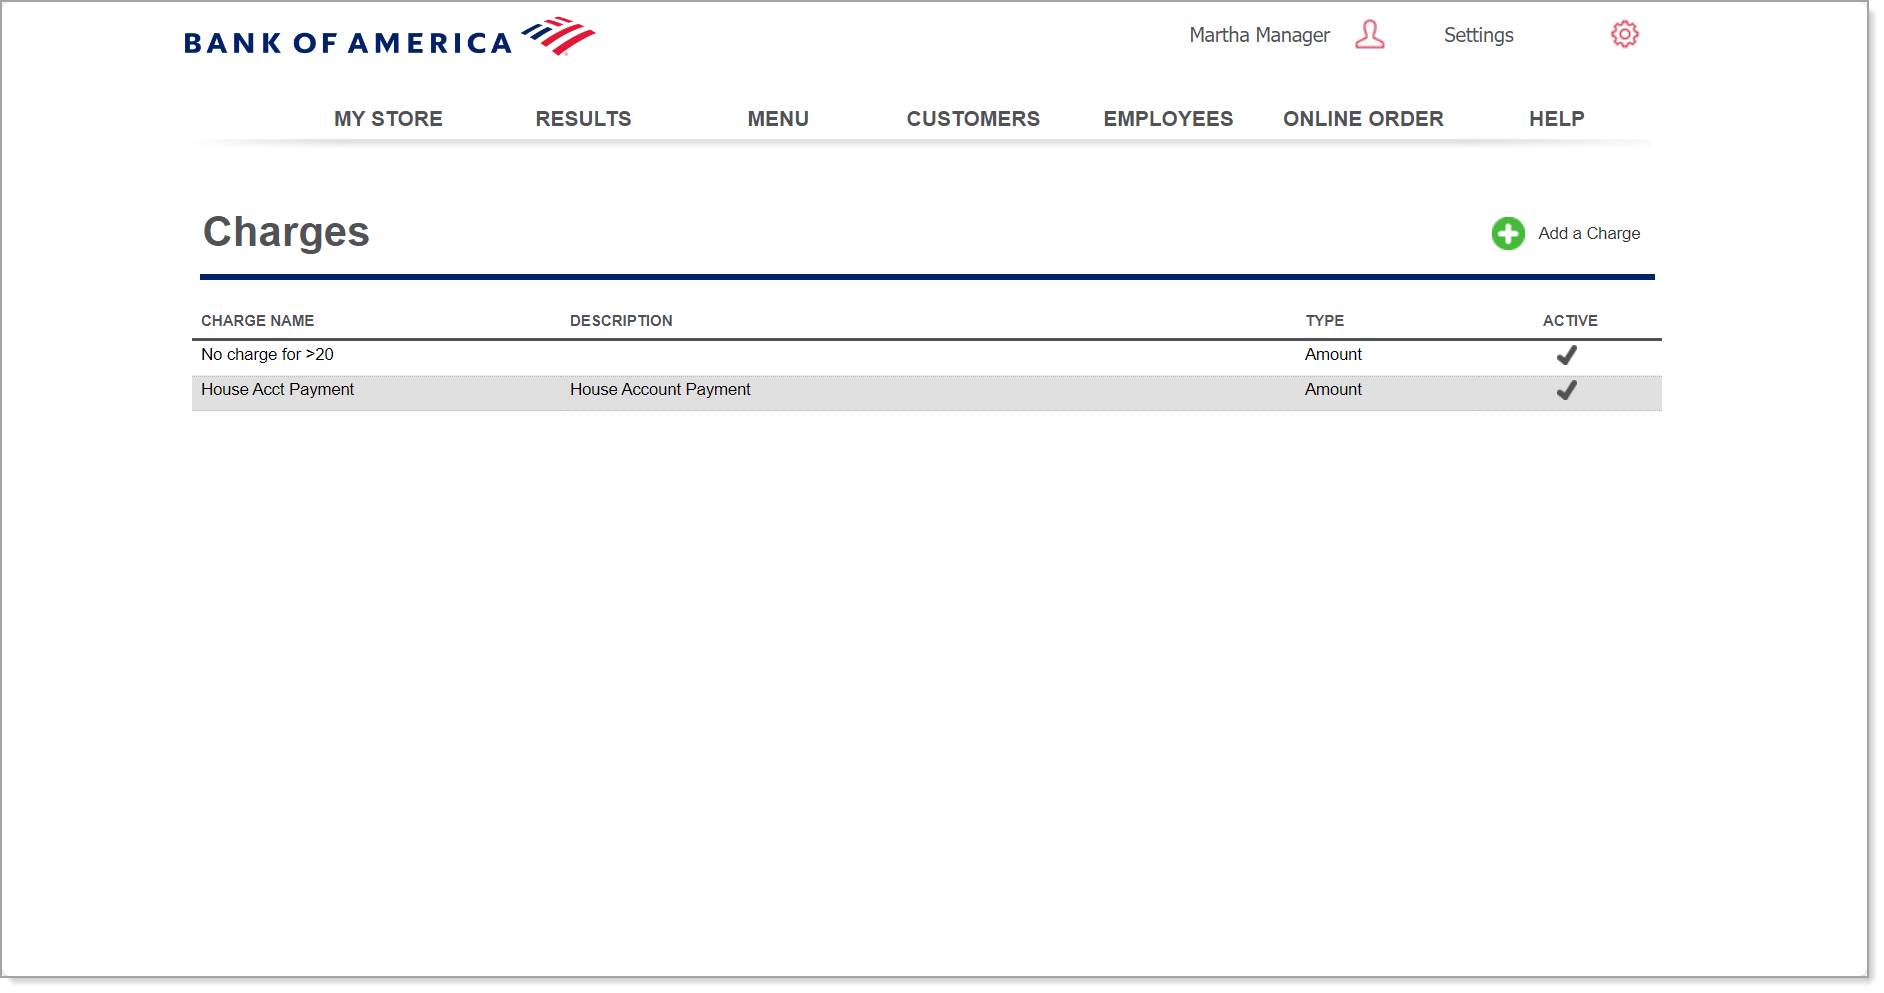
View active charges
A checkmark underneath the active column indicates if the charge is active or not active.
Managing charges
Once you configure your charges, you can assign a charge to an order mode so the charge applies automatically when the order mode is applied. For multi-site operations, you configure charges at the company level. You cannot create or edit charges at the store level.
- Add a charge
Charges may be set as: a defined flat amount, a prompt for price, or as a percentage of the ticket subtotal. All charges must be assigned a tax category.
- In Back Office, select Settings > Charges in the upper left corner of the screen.
- Click Add a Charge.

- Enter a Charge Name.
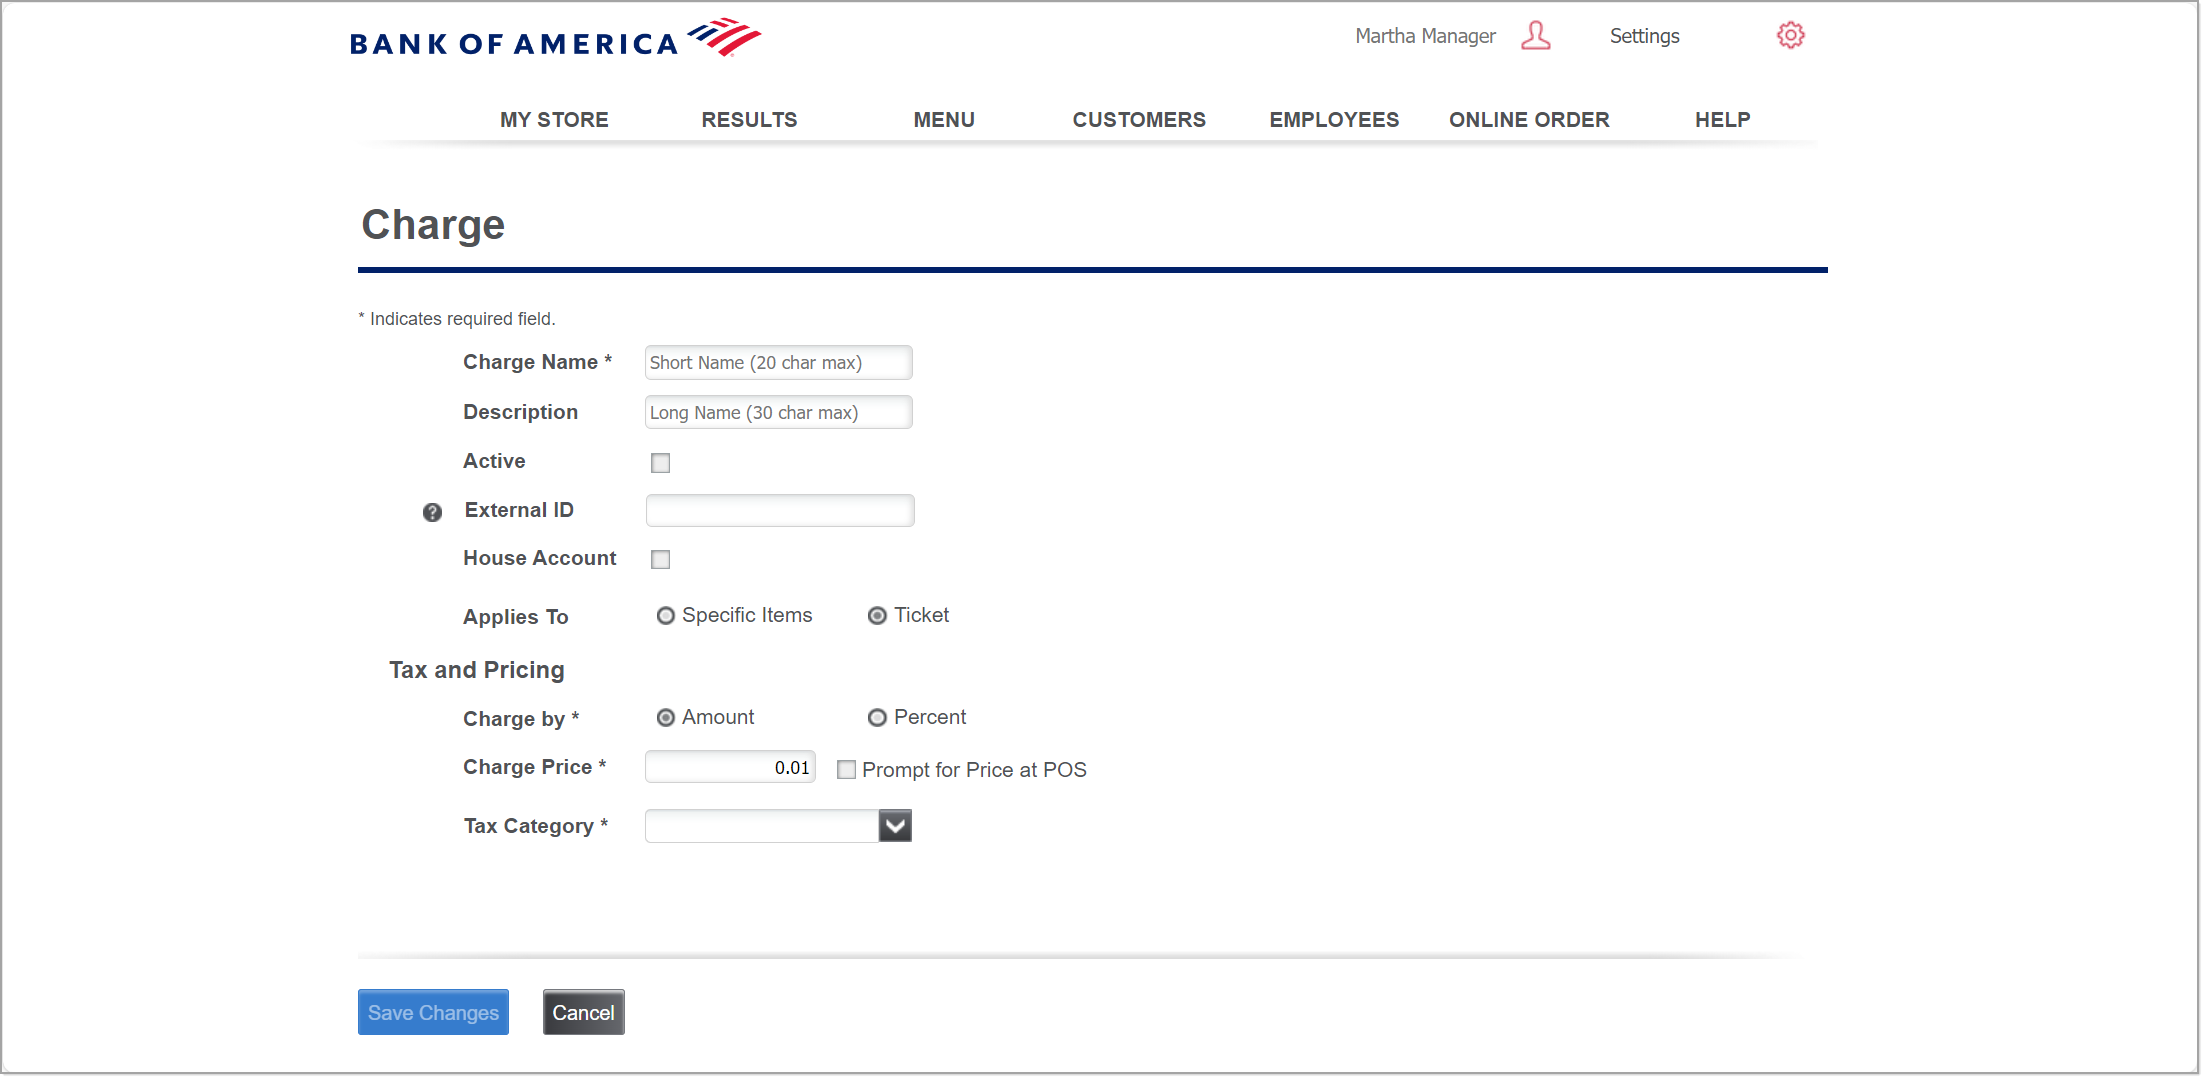
- (Optional) Enter a Description for the charge.
- Select the Active checkbox to make this charge available in the Point of Sale app.
- (Optional) Type an External ID number for the charge. If you leave External ID blank, the system automatically assigns an External ID to the charge after you save the record.
- (Optional) Select whether the charge is related to a House Account. This option will only display if a house account has been set up for your Restaurant. Creating a House Account will automatically create the House Acct Payment charge type, which you would use when accepting payments toward the house account tab.
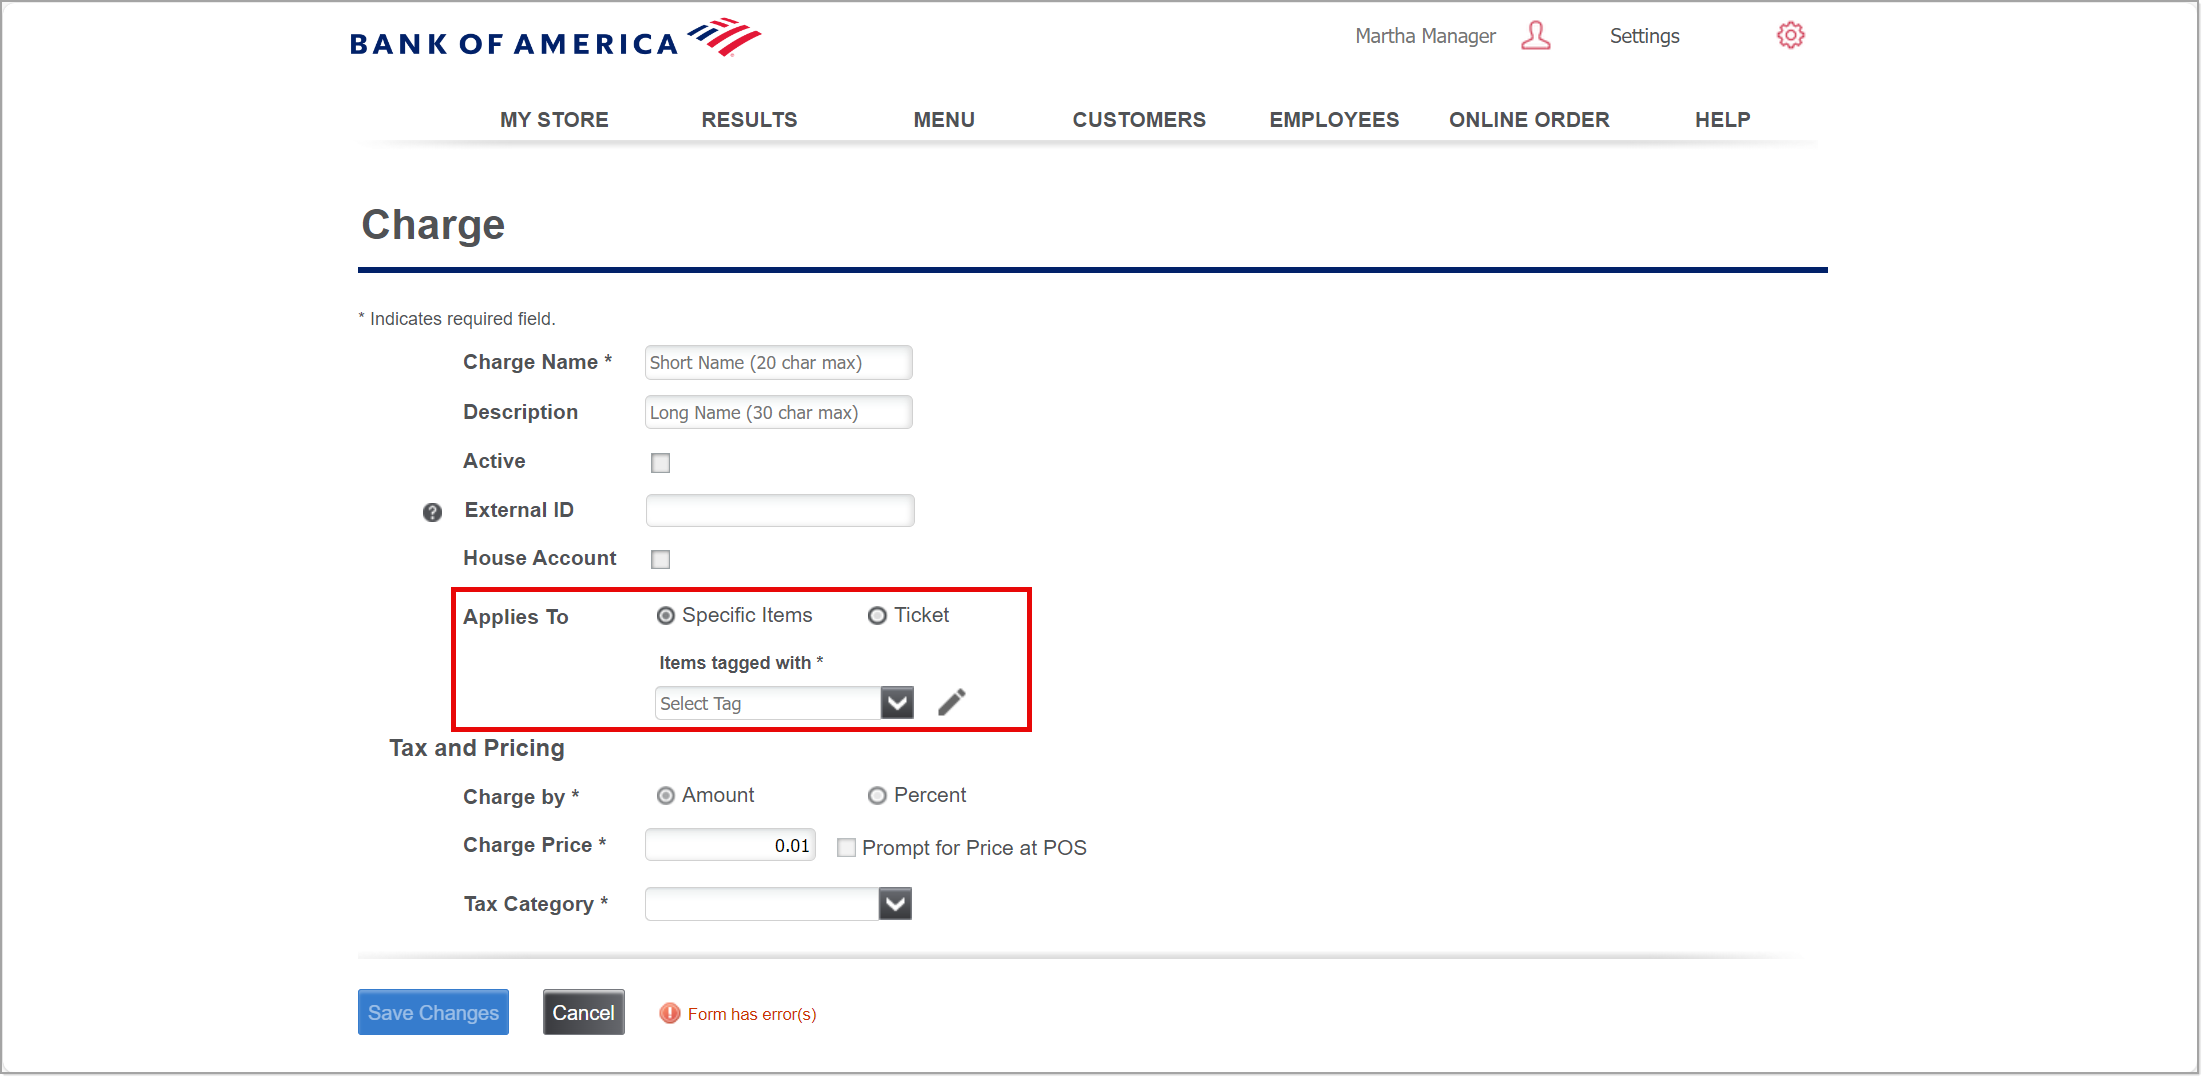
- Select whether the charge applies to a specific items or to the whole ticket.
- If the charge applies to a particular item, select the tag for the items from the dropdown list.
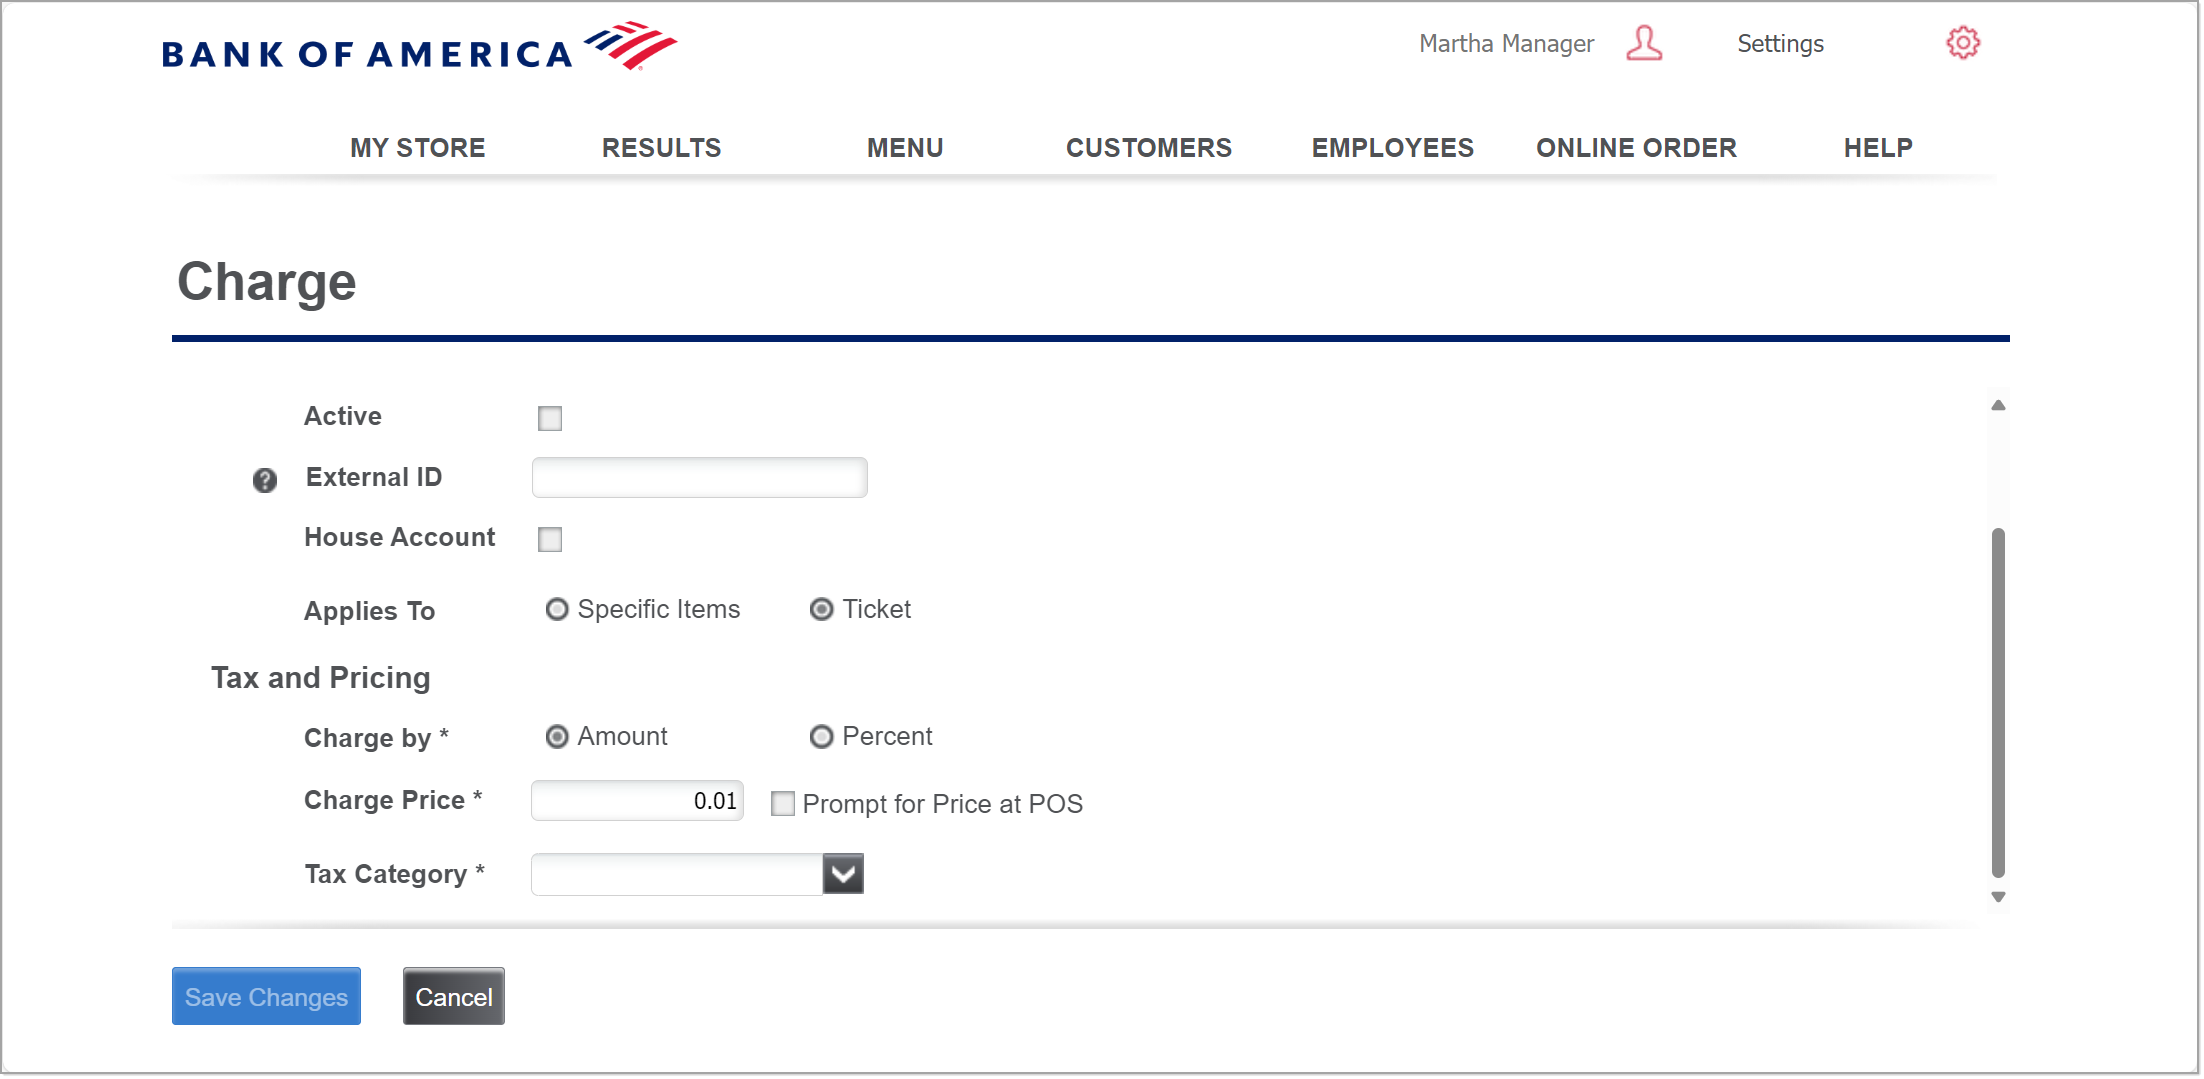
- Select the Charge by option:
- Charge a specific amount
- Select Charge by: Amount.
- Do one of the following:
- Enter a Charge Price, which is the amount charge. For example, enter 5.00 to charge $5.
- (Optional) To prompt for a charge price, select the Prompt for Price at POS checkbox. When entering this charge on the Point of Sale app, a dialog box will open for the user to a charge amount.
- Select Charge by: Amount.
- Charge a percentage of total ticket
- Select Charge by: Percent.
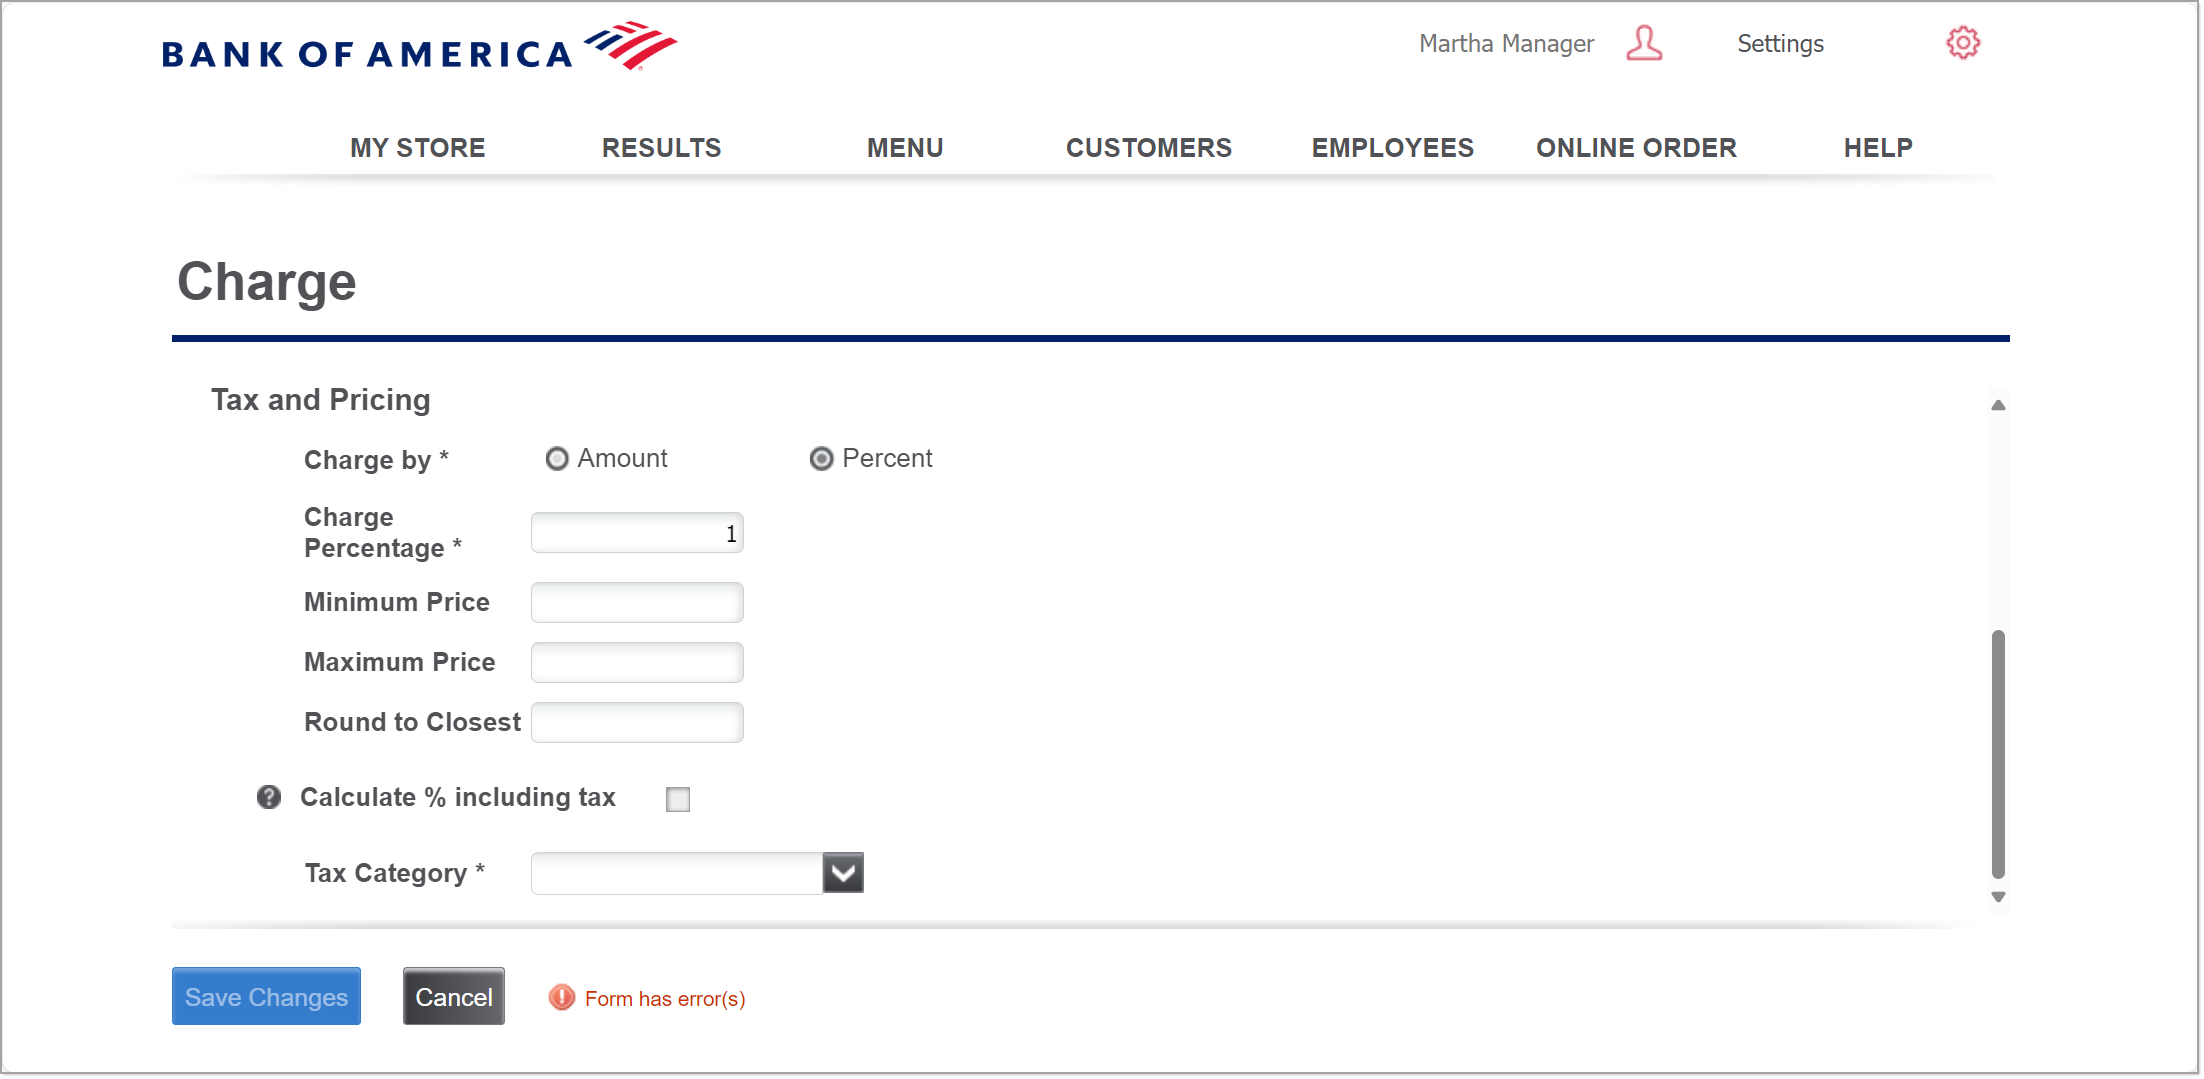
- Enter the Charge Percentage to use.
- (Optional) Enter the Minimum Price for the charge.
Example: You enter the minimum price as $2.00 and the charge percentage as 10%. If a guest check subtotal is $5.00, rather than the charge being .50, it will be $2.00, which is the minimum amount. - (Optional) Enter the Maximum Price for the charge.
Example: You enter the maximum price as $10.00 and the charge percentage as 10%. If a guest check subtotal is $500.00, rather than the charge being $50.00, it will be $10.00, which is the maximum amount. - (Optional) Enter the Round to Closest amount for which to round the charge amount.
Example: The rounded amount is .10. If the charge amount is $1.07, the system will round the charge to the nearest .10. In this example, the charge will be $1.10. - (Optional) Select Calculate % including tax checkbox. This will calculate the percentage based on the ticket subtotal after any discounts, including the taxes.
- Select Charge by: Percent.
- Charge a specific amount
- Click Save Changes. If enabled, the new charge will be available on the Point of Sale app when data synchronizes.
Assign a charge to an order mode
After creating a charge, you can assign a charge to an order mode. When you do so, the Point of Sale app automatically assigns the charge to the guest check when the order mode is selected.
- Assign a charge to an order mode
- In the Back Office, select Settings > Store.
- From the left navigation, Select Store Options.
- Under an enabled order mode, select the Takeout charge from the dropdown list.
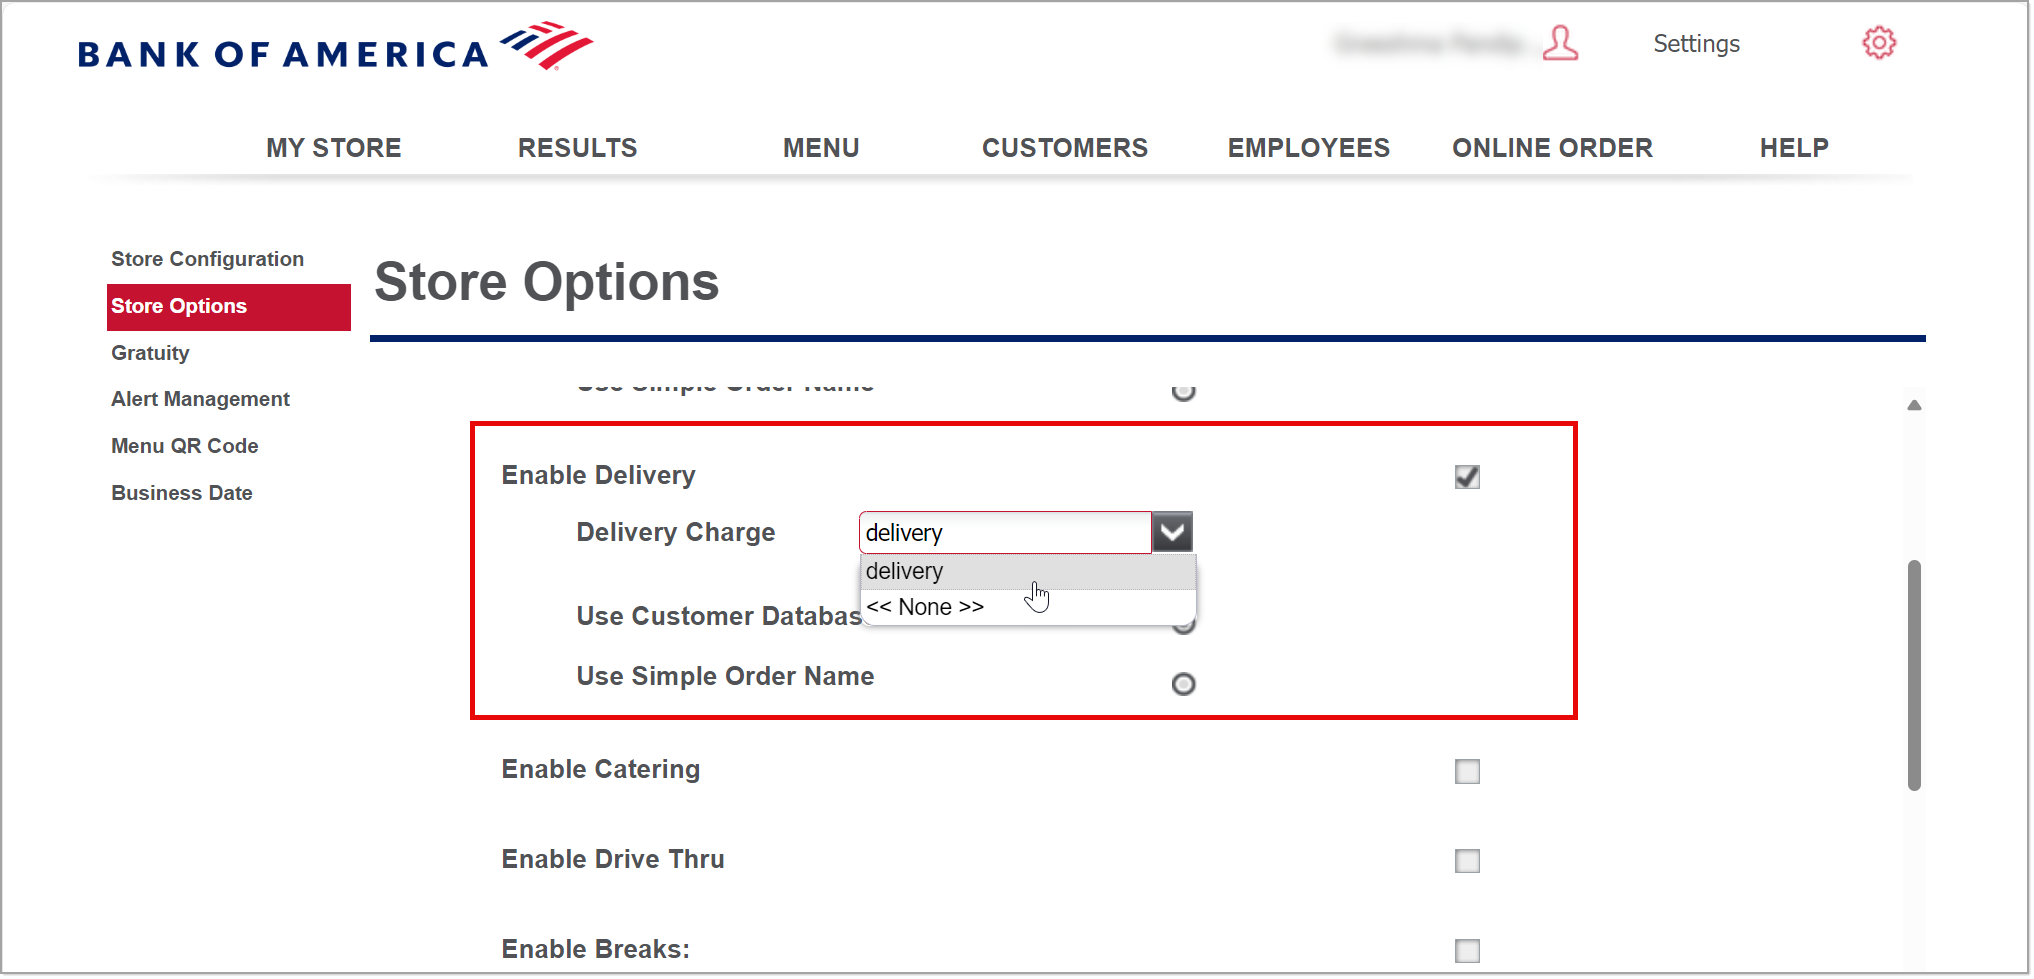
- Click Save.