Back Office Item Import
March 10, 2025
Description
How to import items to your inventory in the Back Office
Solution: Essentials Light | Essentials | Retail | Restaurant
Once you have created categories, you can create an item record for each item you sell. You may enter items one at a time using Item Setup or you can import your inventory.
IMPORTANT!
Before you begin, ensure that you have at least one tax category set up and selected as your default. If you will sell items that have different tax categories, such as food, alcohol, general merchandise, etc., create those tax categories too. Then, ensure you have the same exact name for the tax categories in your import file, and the system will assign all your items to your selected tax categories during the import process.
You can use an Excel or .CSV file to transfer inventory to our system. The file item limit for importing is 500 items. If you have more items than the limit allows, separate your master file into smaller files and import them one at a time.
NOTE:
Essentials Light users have an inventory limit of 500 items.
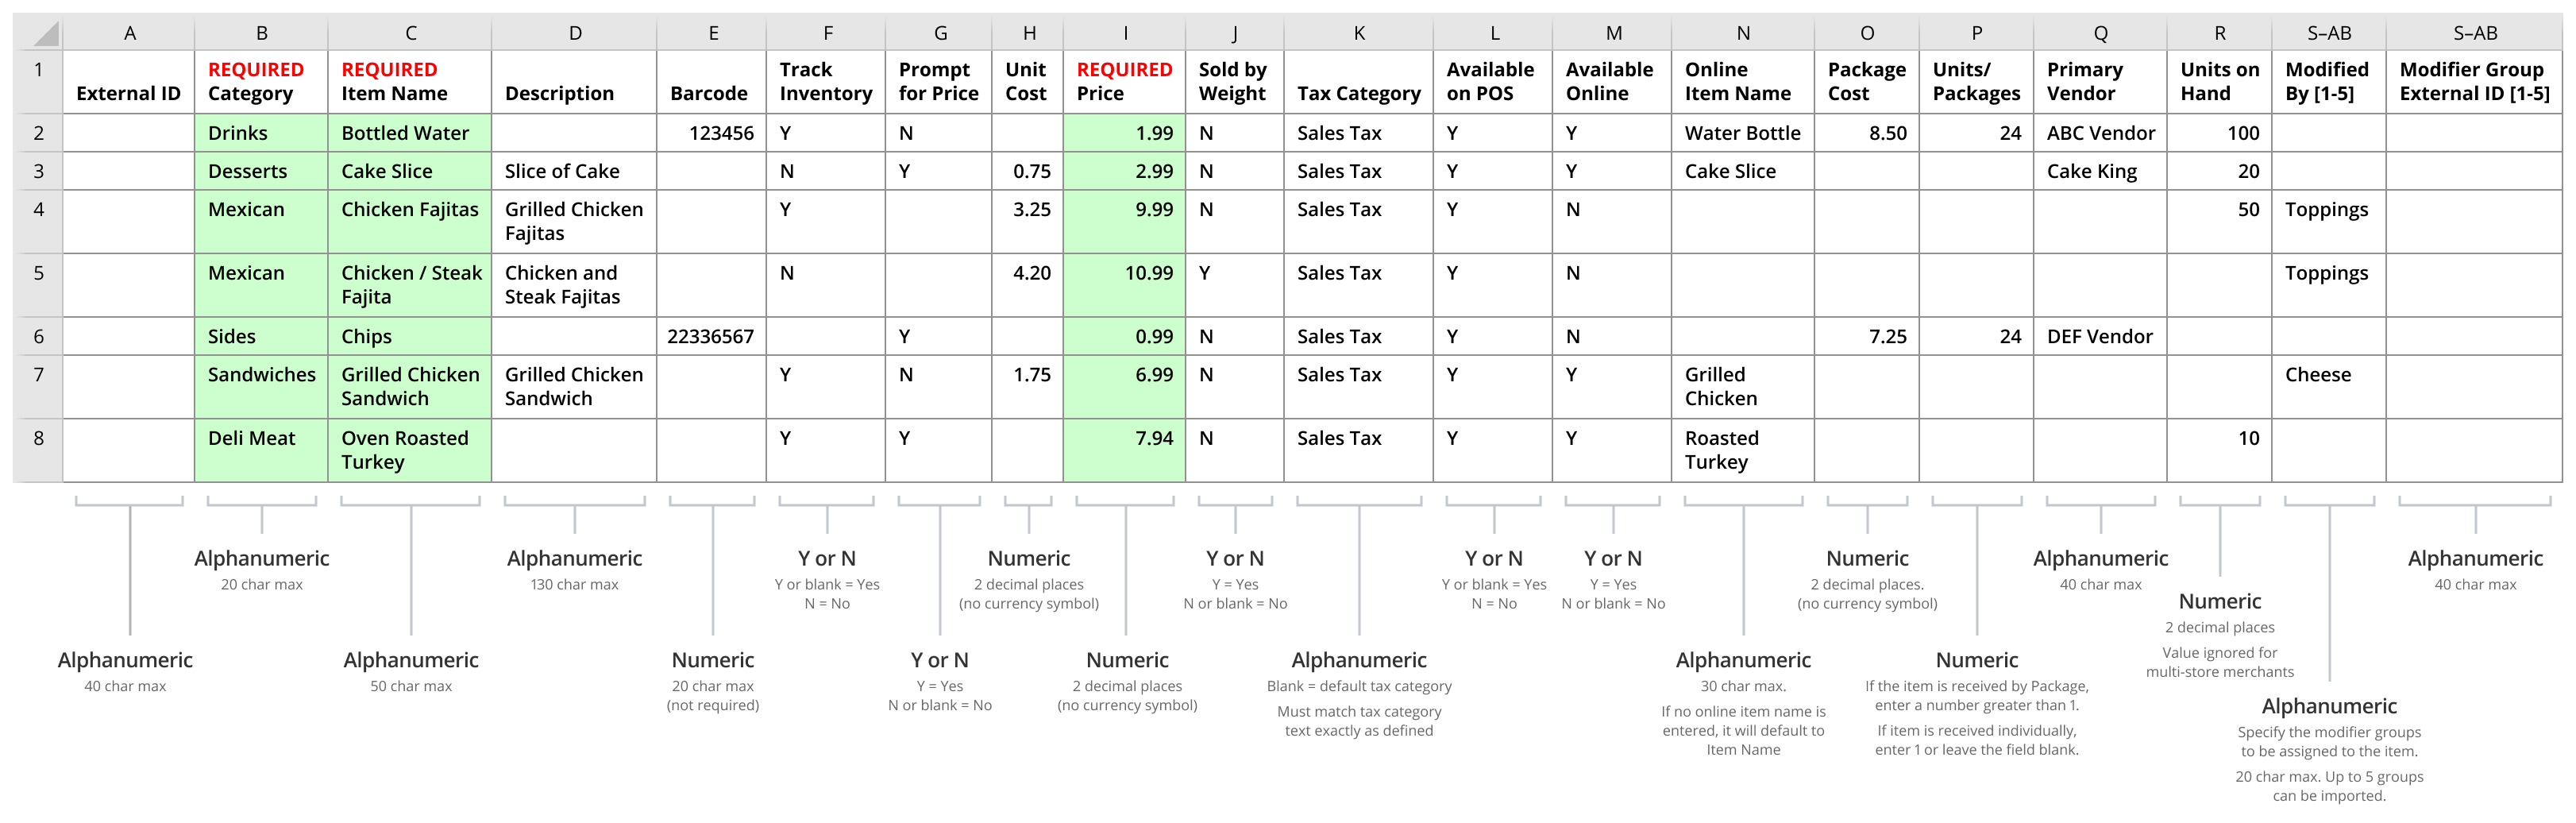
- Make sure that you have entered values for all of the required fields (Category, Item Name, Price).
- When you begin your import, a pre-test checks for file size and that all required fields have a value. If the test fails, the system will alert you.
- You can assign up to five modifier groups to an item when using the standard Back Office item import template.
- The item import tool will edit any information for existing items, so every time you do an import you need to make sure that all of the information for existing items is correct. This means you can edit information using the import tool, but if you miss a box on the import of an existing item, that field or flag will be empty once imported. A best practice is to complete an item list export before importing so that you start with the most current information.
- To create an import file
- In the Back Office, select the Menu or Inventory tab, depending on your business type.
- Select the Categories & Items subtab.
- Click Import Items.
- Review the sample file on the screen, as well as the instructions for each field in the file.
- Click Download Template to download the file template.
- Copy your inventory data into the sample file or modify an existing item list to match the format of the sample file.
- Save this file to your local computer with a name you will recognize. Ensure your data matches up with the appropriate column headers. Also, make note of the required fields.
- To import your inventory
- In the Back Office, select the Menu or Inventory tab, depending on your business type.
- Select the Categories & Items subtab.
- Click Import Items.
- Click Browse to Select File and select your inventory data file and click Open.
- Click Review Item List and review the data in your inventory file for red exclamation points at the beginning of the row, which indicate an error.
- If an error occurred, click on the red exclamation point for each row to see the error(s) on that row.
- You can edit the information on the screen or, if you have multiple errors, you may cancel your current import and go back to fix the errors in your source file before beginning the import process again with your updated file.
- The file item limit is 500 items per file.
- Confirm that the checkbox is selected for each item you want to import.
WARNING!
An item import will update any information that has changed for existing items.
- Click Import Item List, then click Yes to start the import. When the import is finished, the Import Details screen displays the results of the import, including the number of items that were successfully imported and the number of items that could not be imported (these are usually duplicates).
- Review the inventory records that were not imported, so you can make the necessary corrections to your file and import them again.
- Click Exit to close the Import Items screen.
- Click the refresh icon to display the newly-imported items.