Back Office Modifier Groups
Description
What's in this article?
Solution: Essentials | Retail | Restaurant
Typically used for food items, modifiers allow a server or cashier to give special instructions to the kitchen or bar about menu items and how they should be prepared. Modifiers are set up in the Back Office and provide a quick way to specify options and prep instructions when ringing up items at the POS. Each modifier item can be assigned a price. For example, adding the modifier “bacon” to an item adds an extra $2 to the item price, while adding mustard costs nothing.
Modifier groups
Modifier items are organized into modifier groups. They are created separately from items so any item can use them. For example, the modifier group “condiments” is created once and then used by all burgers and sandwiches.
- Once you create your modifier groups and modifiers, these will be available on the POS.
- You can select which modifier groups are displayed at the POS for each item.
- If you do not have any modifiers set up in the Back Office, you can only add kitchen notes.
- If you have set up modifiers and you do have a kitchen printer, you can use the kitchen notes and modifiers.
- If you have modifiers set up, but you do not have a kitchen printer, the modifiers will only print on the customer's receipt (but the kitchen notes will not print).
NOTE:
Modifiers are not available in Essentials Light.
- To create a modifier group
- In the Back Office, select the Menu or Inventory tab, depending on your business type.
- Select the Modifiers subtab.
- Click Add a Modifier Group.
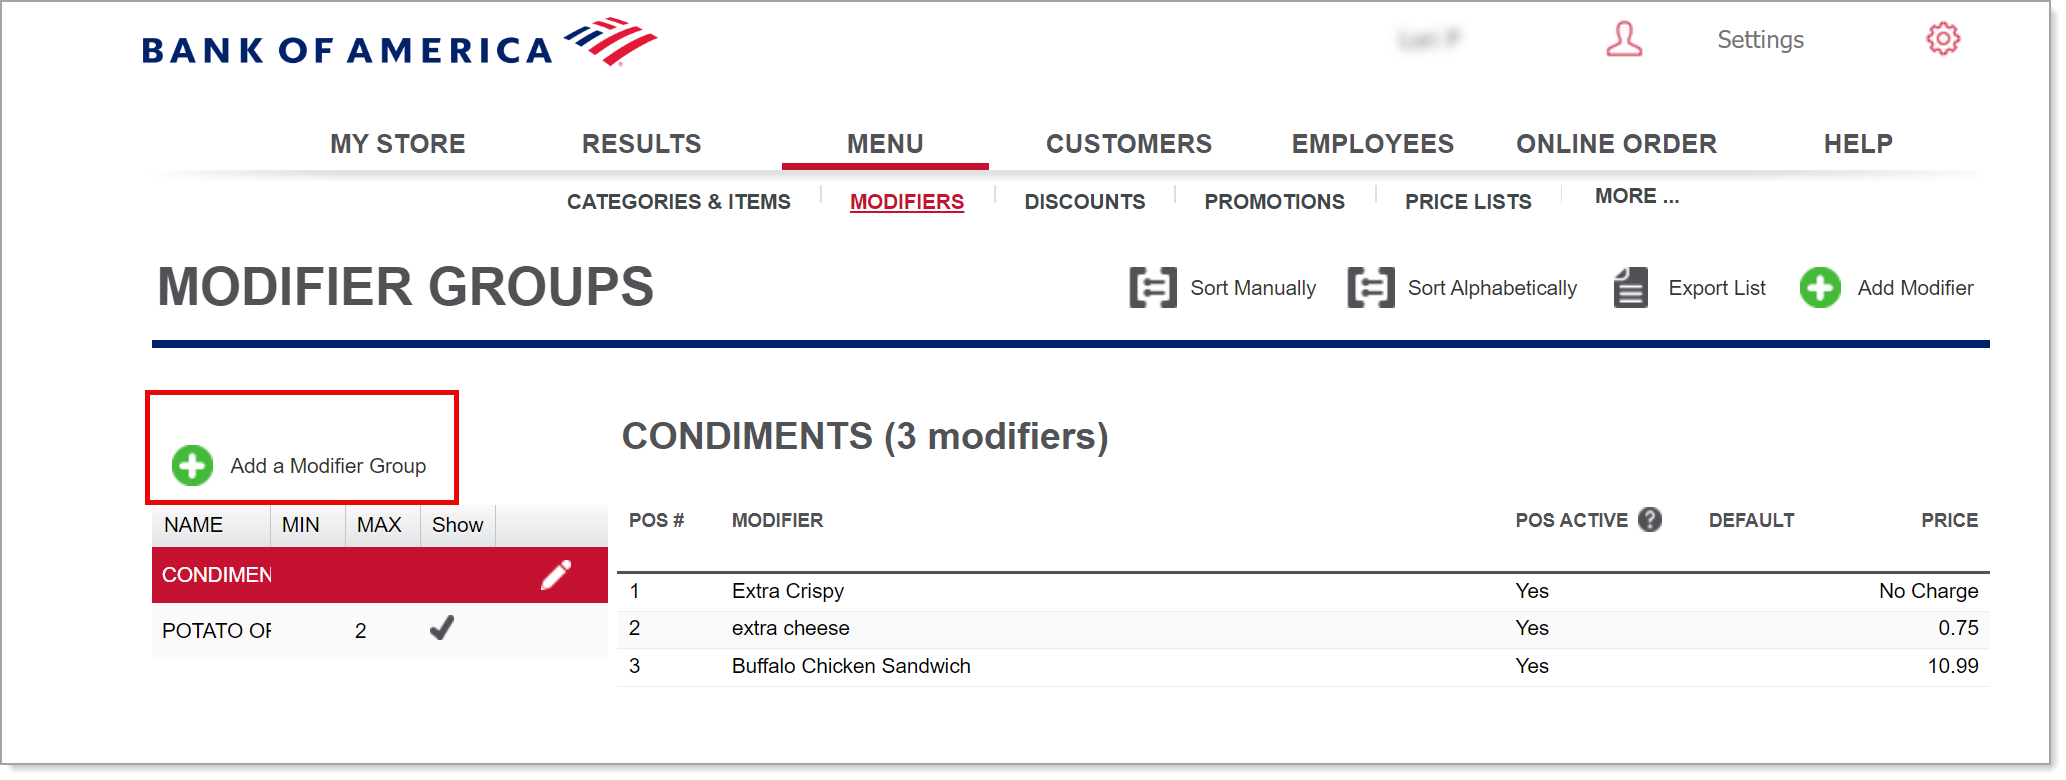
- Enter a Modifier Group Name.

- (Optional) Enter External ID. This is an optional identifying number you may have from other systems you use to track inventory.
- Enter minimum and maximum quantities for the modifier group, which limits the maximum number of modifier items a customer can select for the item.
- A minimum of 1 and maximum of 1 means that the modifier is required but only a single modifier may be selected. For example, meat temperature, such as ’Well Done’ or ’Rare,’ or a side choice, such as ‘Fries’ or ‘Chips.
A minimum of 1 and maximum of 2 means a customer must choose at least one modifier but can select no more than two modifier choices.
- (Optional) Select Auto-show modifier group when item is added to a ticket.
- Click Save Changes.
- To add an item to a modifier group
- In the Back Office, select Menu.
- Select the Categories & Items subtab.
- Search for the item and select it.
- Select the Modifier Item and the Menu Item option checkboxes.
- Click Assign Modifier Groups, check the desired modifier group, and select Done.
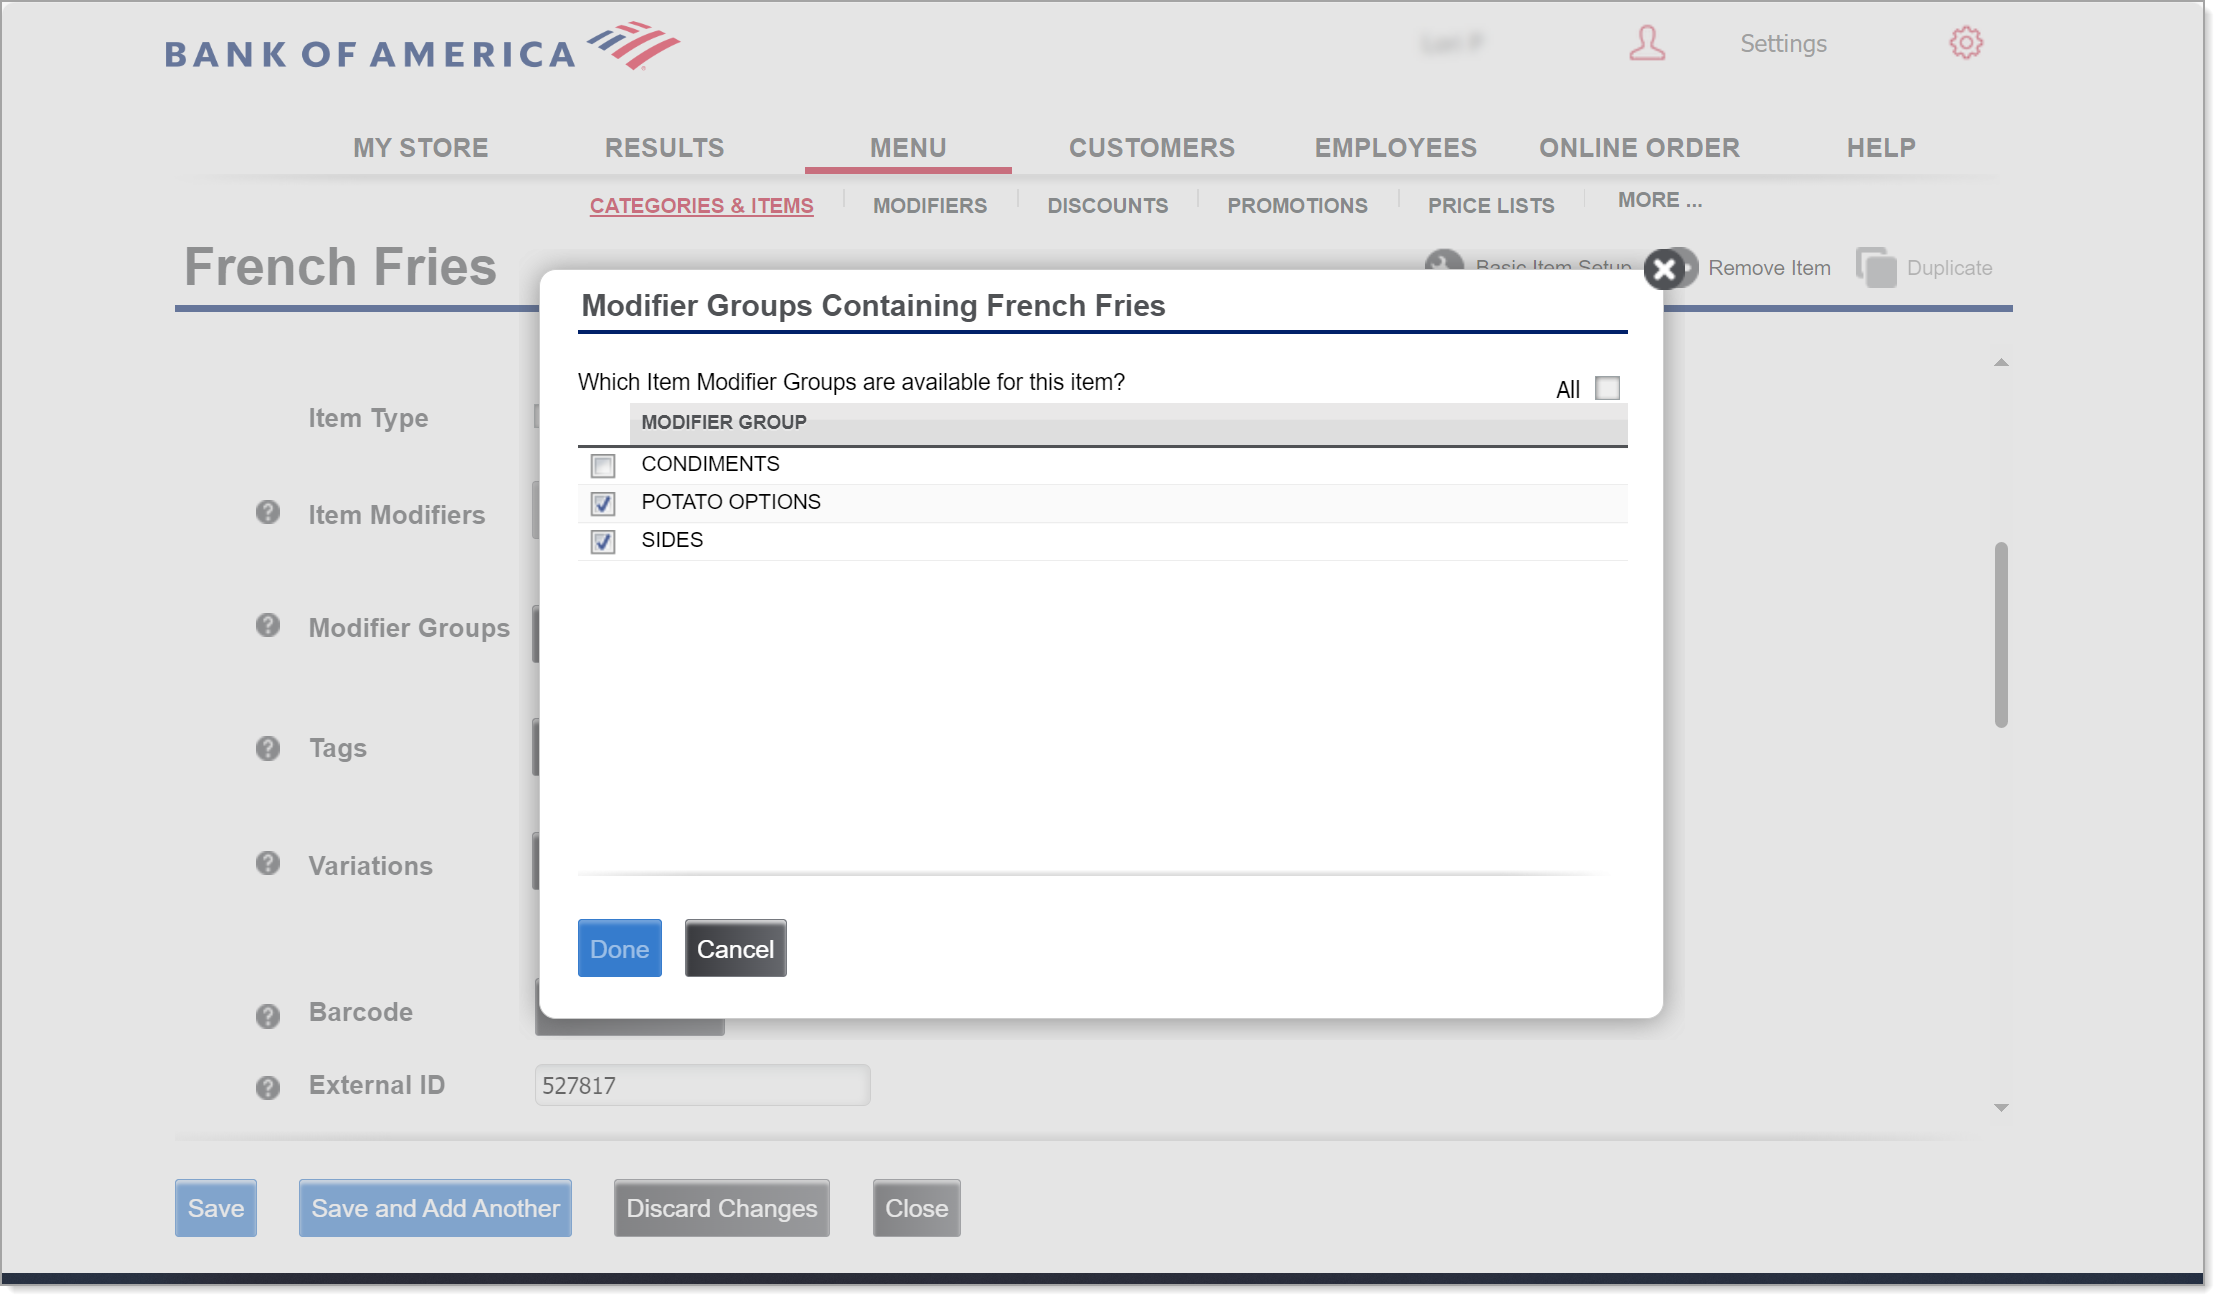
- Click the Assign to Groups button, check the desired modifier group, and select Done.
- Click Save.
Assign modifier groups to an item
All modifier groups and modifier items can be available for all items—they do not have to be tied to a specific item. For example, you could use a modifier group of Sandwich Toppings for turkey burgers, beef burgers, turkey sandwiches, chicken sandwiches, etc. So, just create them once and use them for any item.
You can limit the modifier groups that are available with items. For example, let's say you have a café, but you also sell t-shirts with your logo on them. The modifier groups you might set up for your sandwiches, such as bread and cheese wouldn't make much sense when associated with t-shirts. You could then choose to not have any modifier groups tied to your t-shirt item.
Rank modifier groups
You can rank modifier items within a modifier group or sort them alphabetically.
Modifier settings
You can use modifier settings to automatically sort and move required modifiers to the top of the list, change the view of optional modifier groups as collapsible, automatically close the minimum required groups after selection, or, for Restaurant Solution, choose whether to hide modifiers on the kitchen chit that do not impact how the food is cooked.
To choose modifier settings
- In the Back Office, select Menu.
- Select the Modifiers subtab.
- Select Modifier Settings.
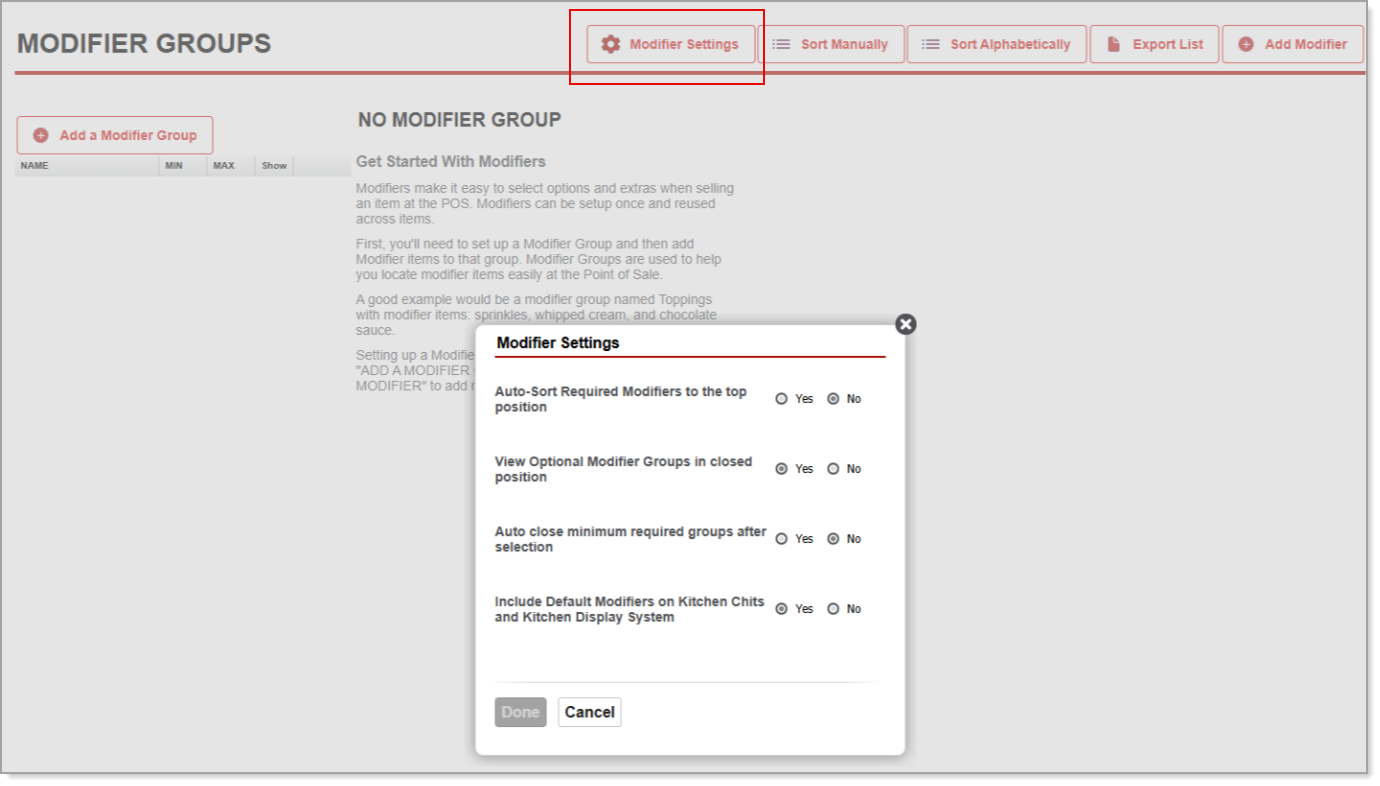
- Choose your setting options.
Modifier settings options Option Description Auto-Sort Required Modifiers to top position Select Yes to display modifiers in the required modifier groups at the top of the list during modifier selection. View Optional Modifier Groups in closed position Select Yes to view optional modifier groups in the collapsed view. Auto close minimum required groups after selection Select Yes to auto-collapse required modifier groups after making selections. Include Default Modifiers on Kitchen Chits and Kitchen Display System Restaurant Solution Only
This option is enabled by default. Select No to prevent default modifiers from printing on kitchen chits and the kitchen display system. - Click Done.