MobilePOS Dashboard User Management
October 24, 2024
Description
How to add, delete, view and edit users, roles and system permissions
There is no limit to the amount of users that can be added to the MobilePOS Dashboard. You can manage all user profiles, including: adding and deleting users, assigning roles, resetting passwords or passcodes to access the MobilePOS app, and viewing user status and activity.
- Add new users
- In MobilePOS Dashboard, select Users > Users in the left navigation.
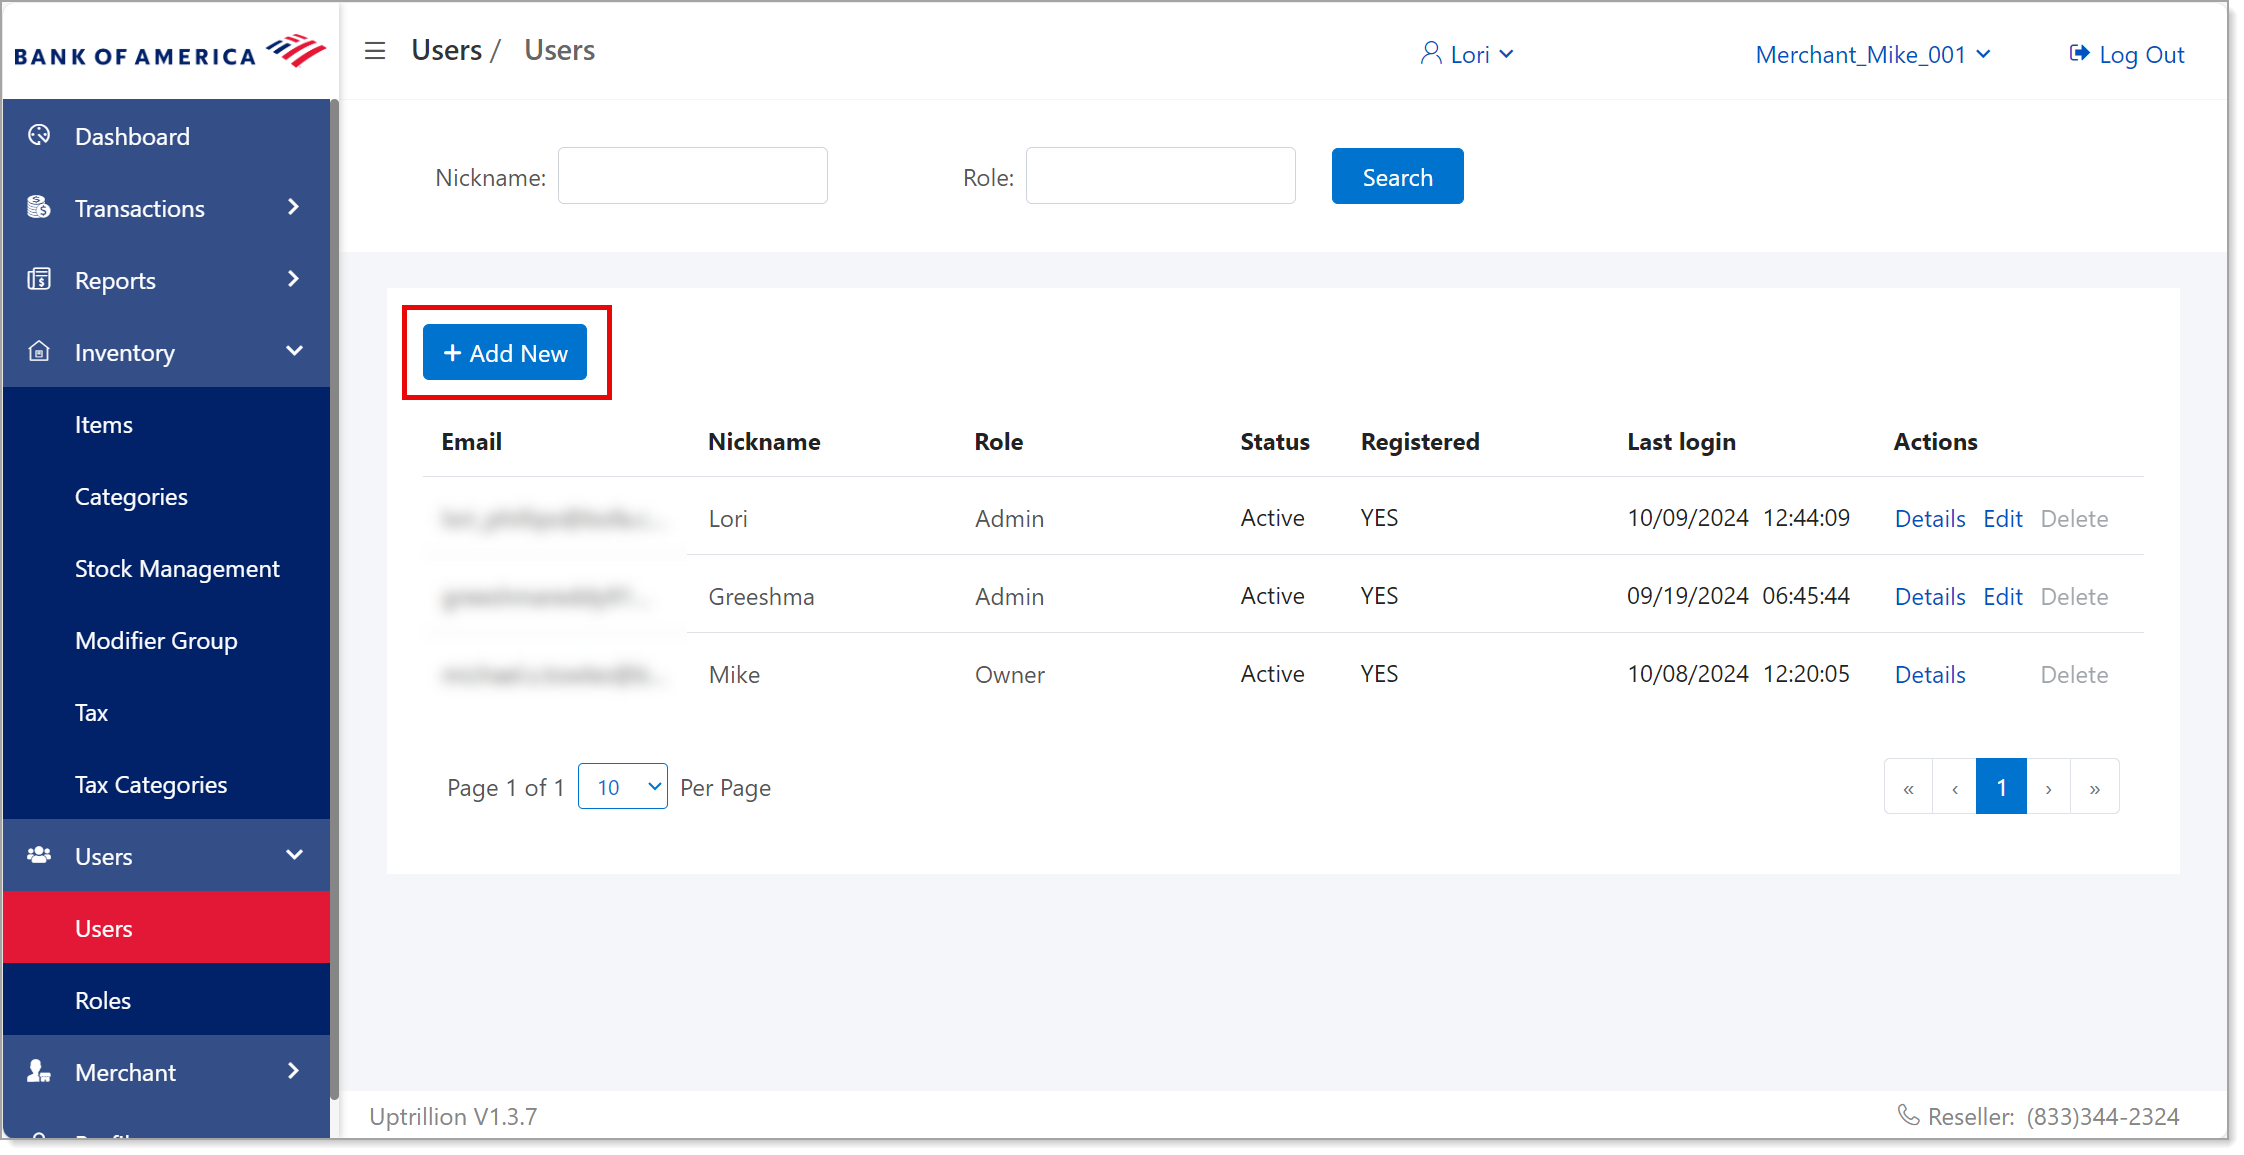
- Click the Add New button.
- Enter the new user information.
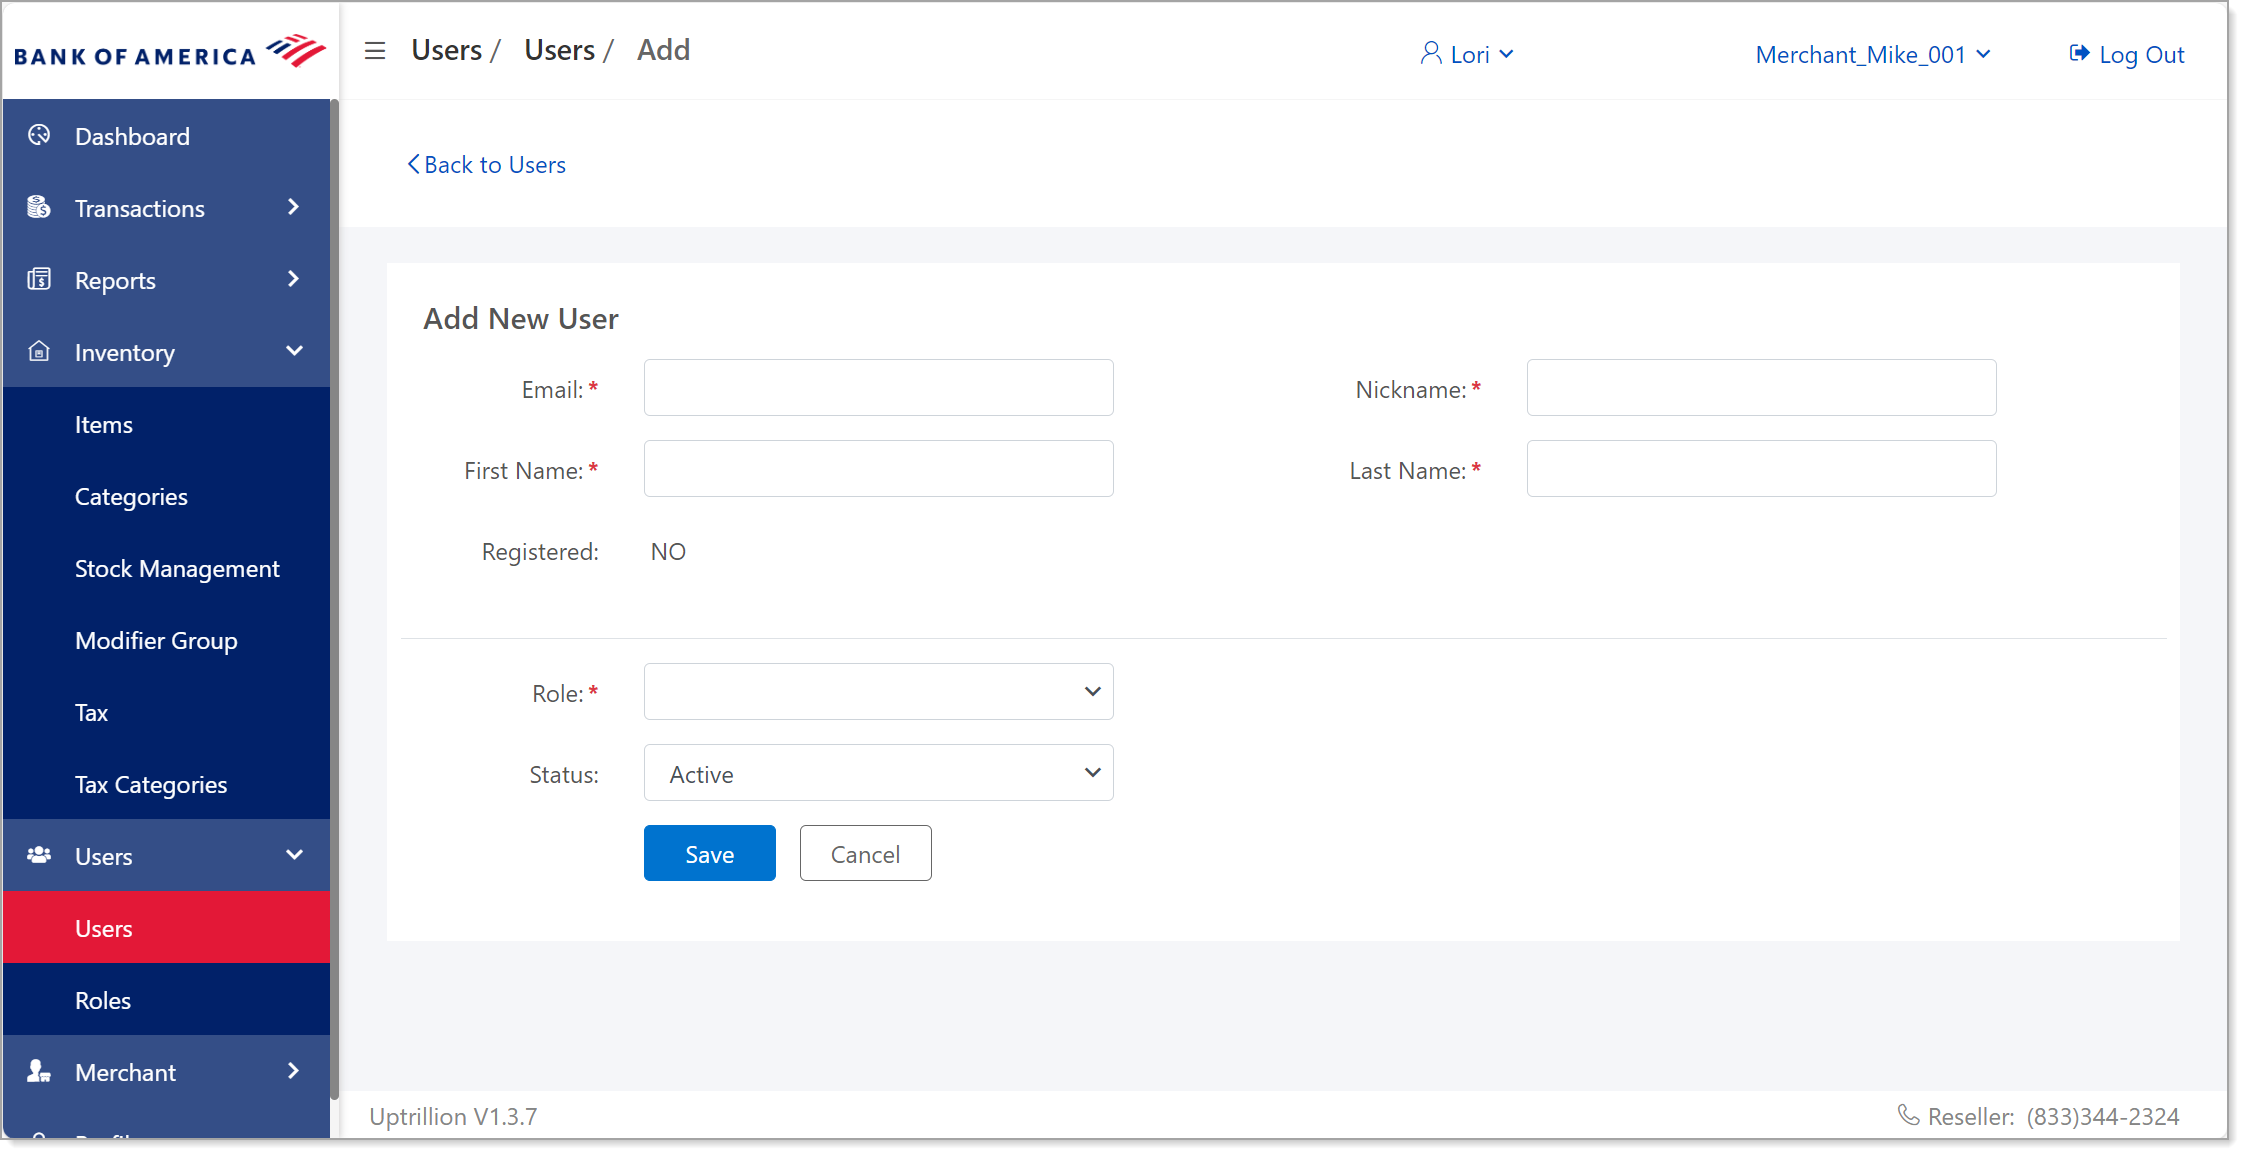
- Select the user's role from the dropdown list. The default roles for the system are Admin, Manager, and Employee, but you can create custom roles for your business.
- Set the status of the new user to Active or Inactive. Active is the default.
- Click Save. When set to active, the new user will receive an email with activation steps to create their own password.
- Delete users
Only users with Admin permissions can delete a user profile.
- In MobilePOS Dashboard, select Users > Users in the left navigation.
- Select the user from the list and click Edit under the Actions column on the right.
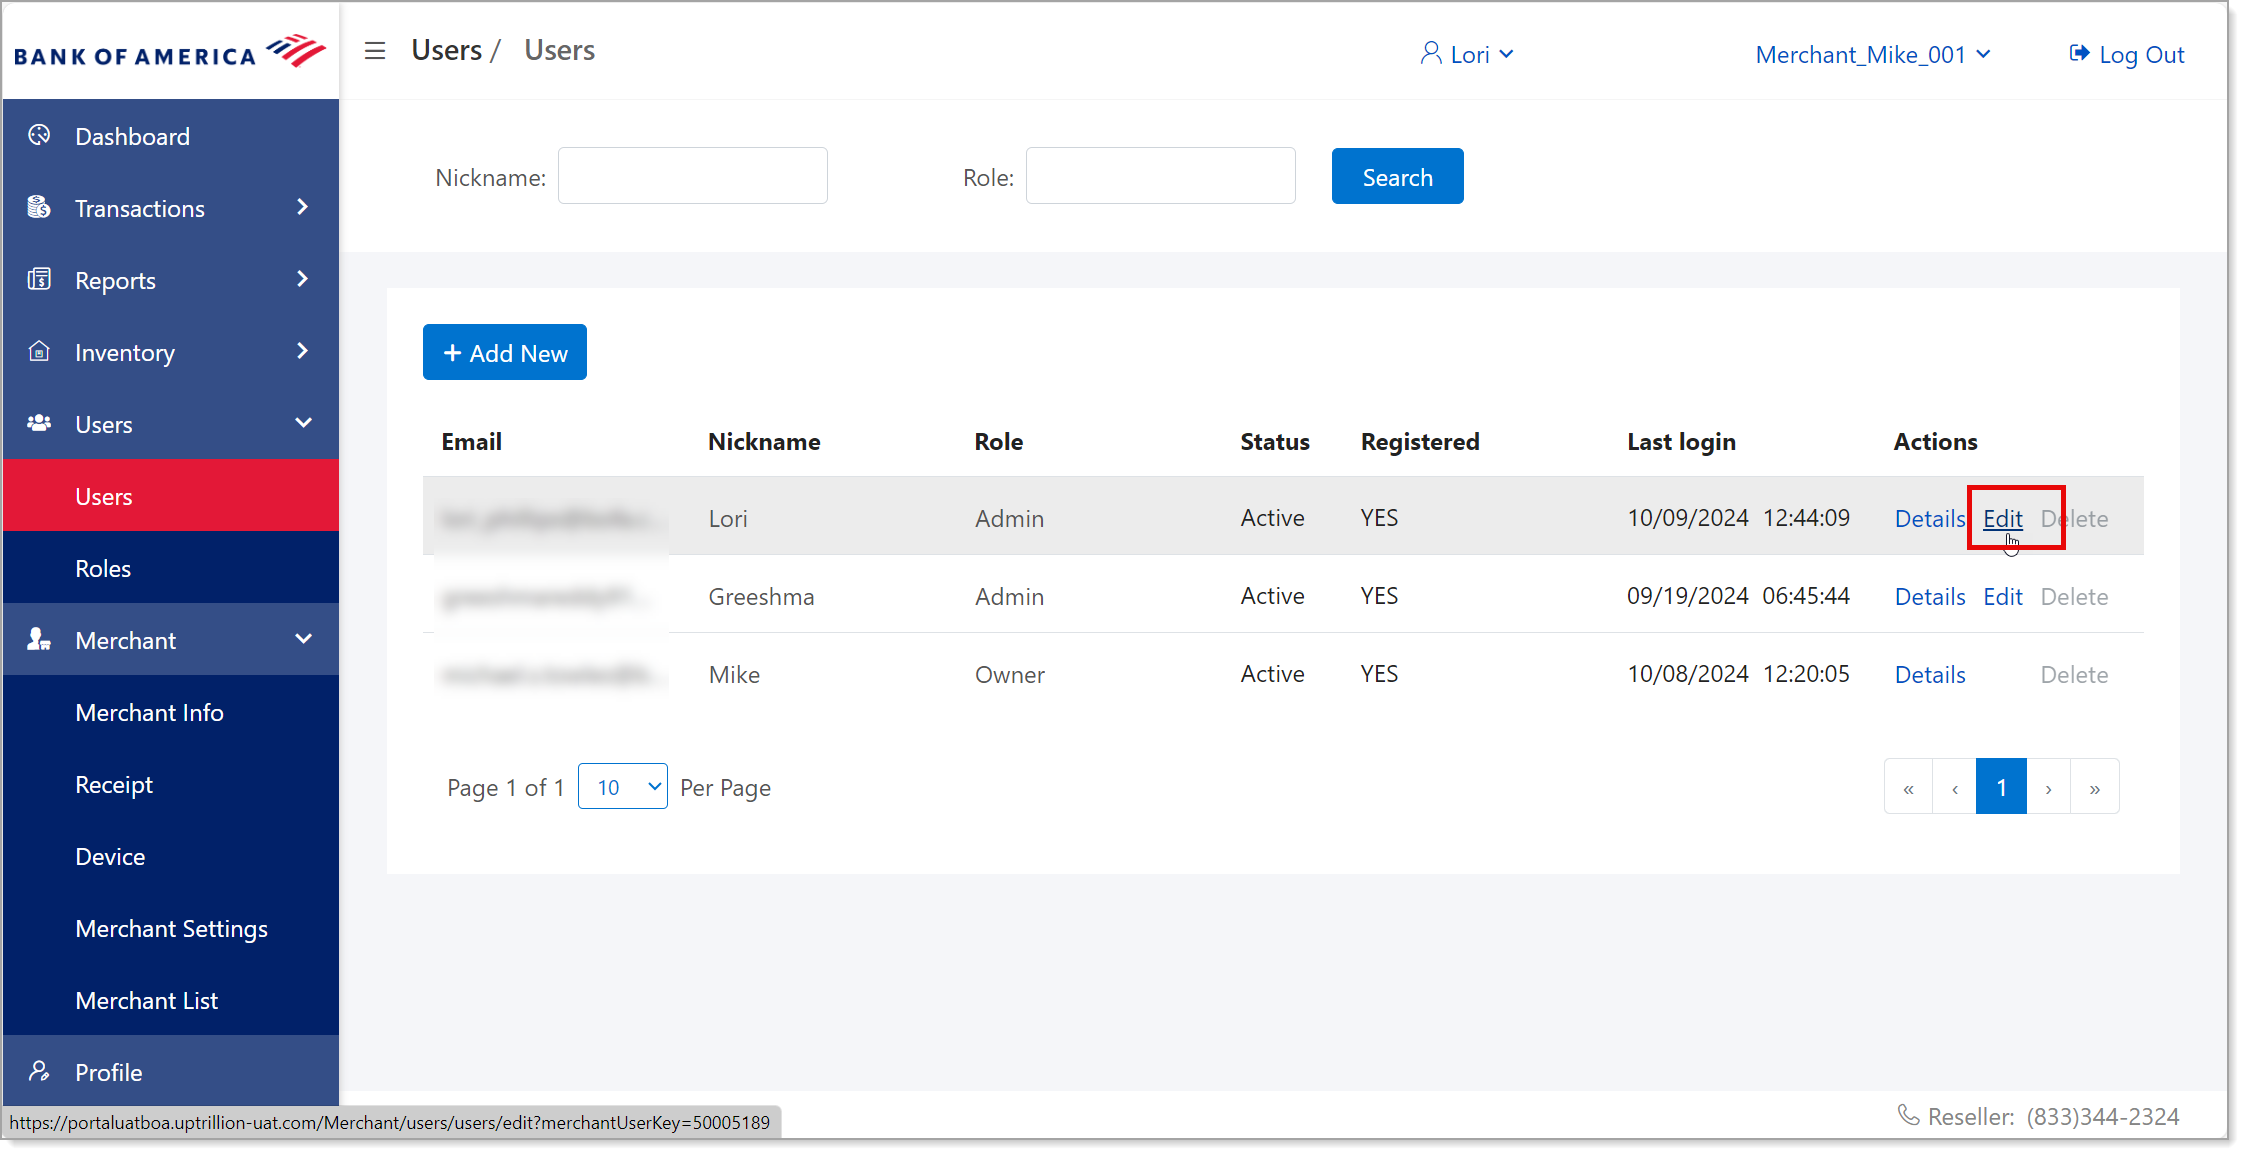
- On the User Information screen, change the Status to Inactive.
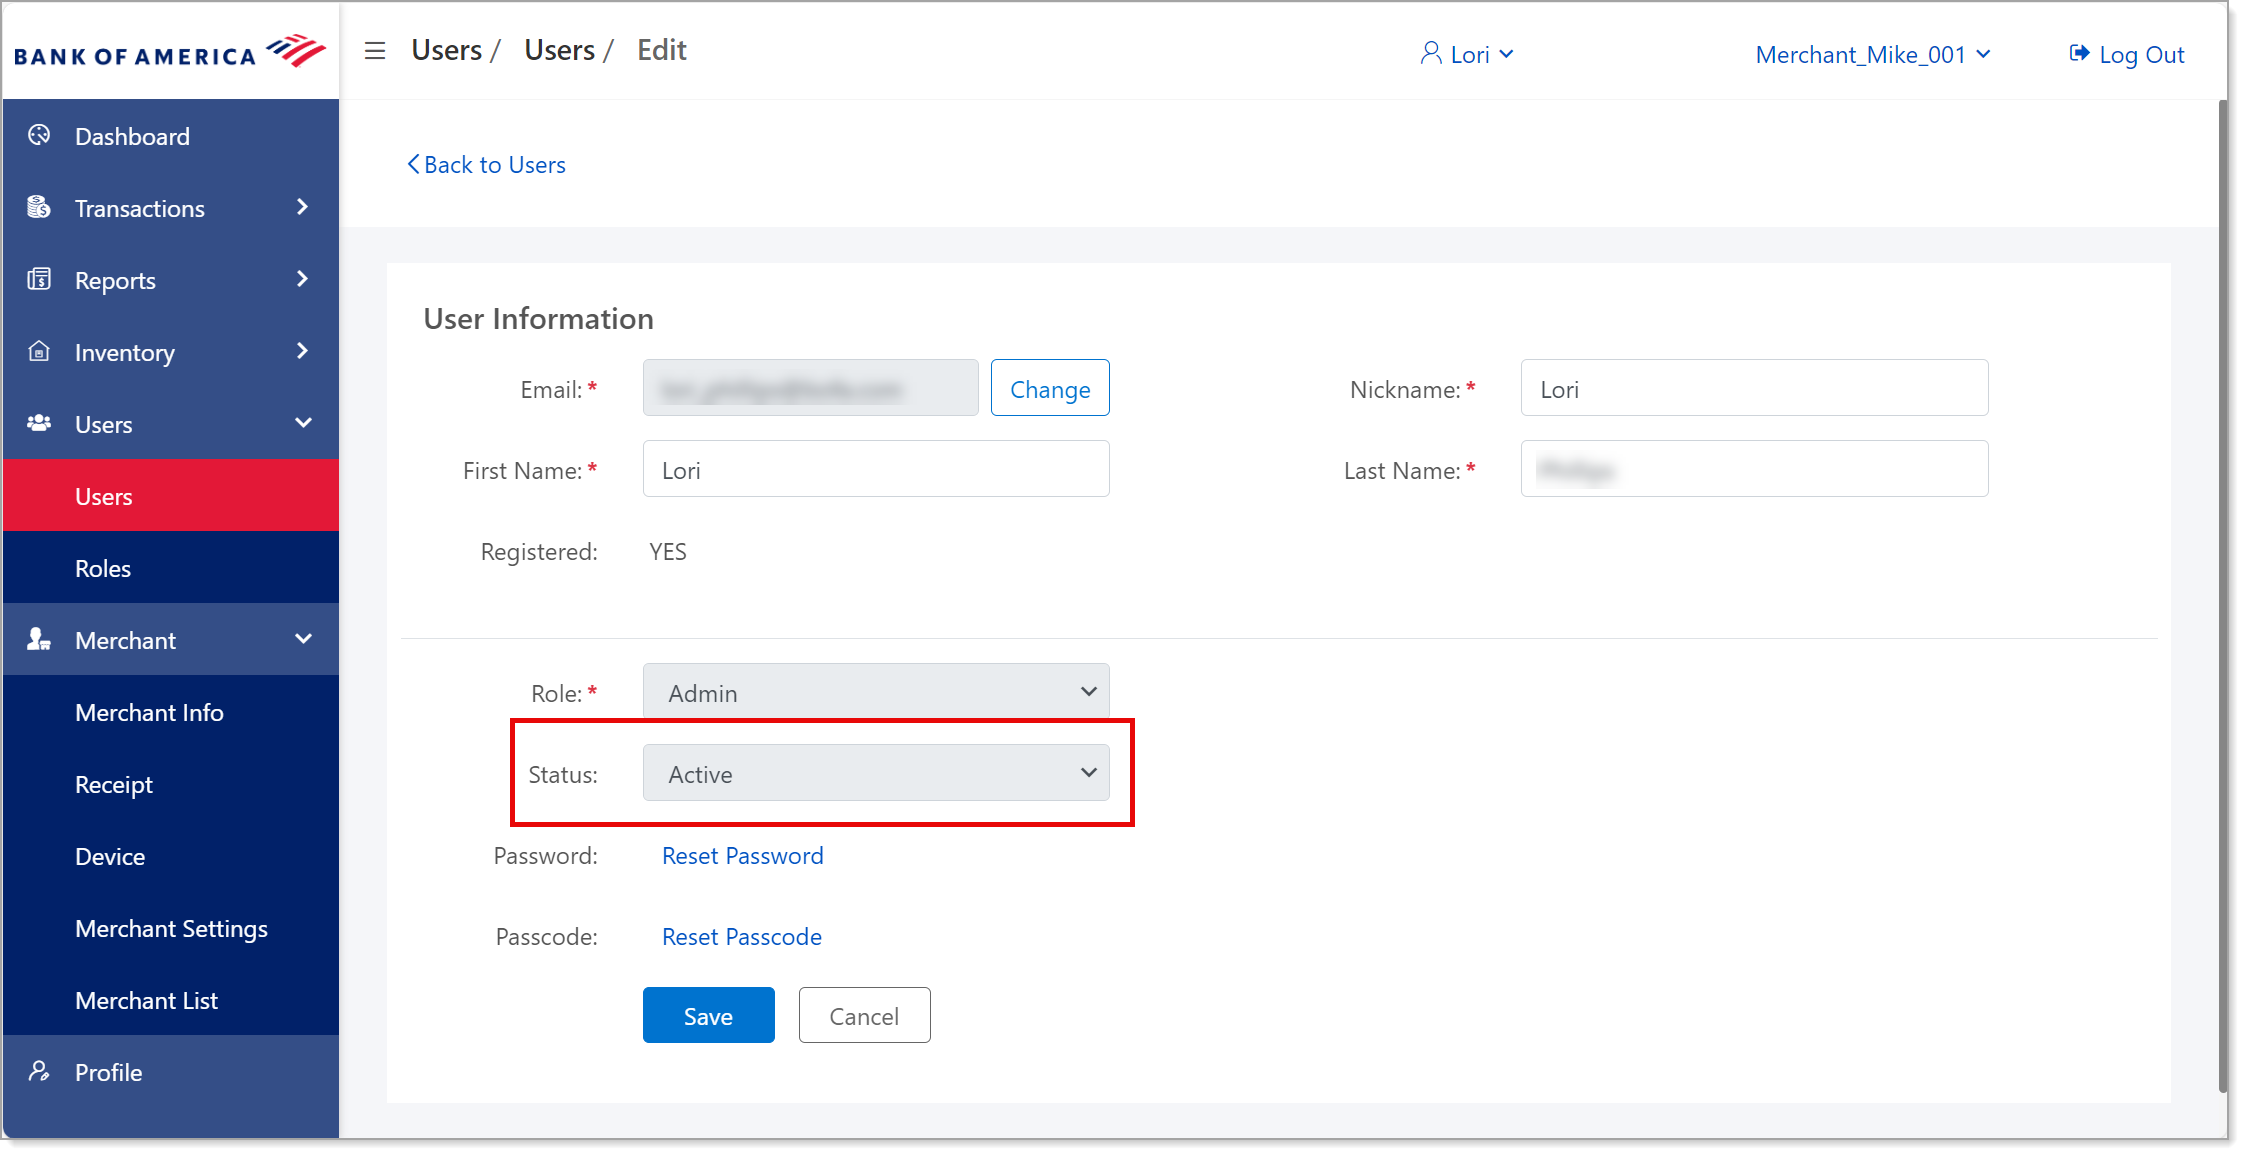
- Click Back to Users in the top left of the screen to go back to the list.
- Select the user again and click Delete under the Actions column on the right (the Delete function shows as red vs greyed out).
- Confirm the deletion and click Save.
User roles
Each user is assigned to a role which limits what they are able to do in the system. You control the permissions for each role. The default user roles are Admin, Manager, and Employee, but you may create additional roles that make sense for your business.
- Add a new user role
- In MobilePOS Dashboard, select Users > Roles in the left navigation.
- Click the Add New button.
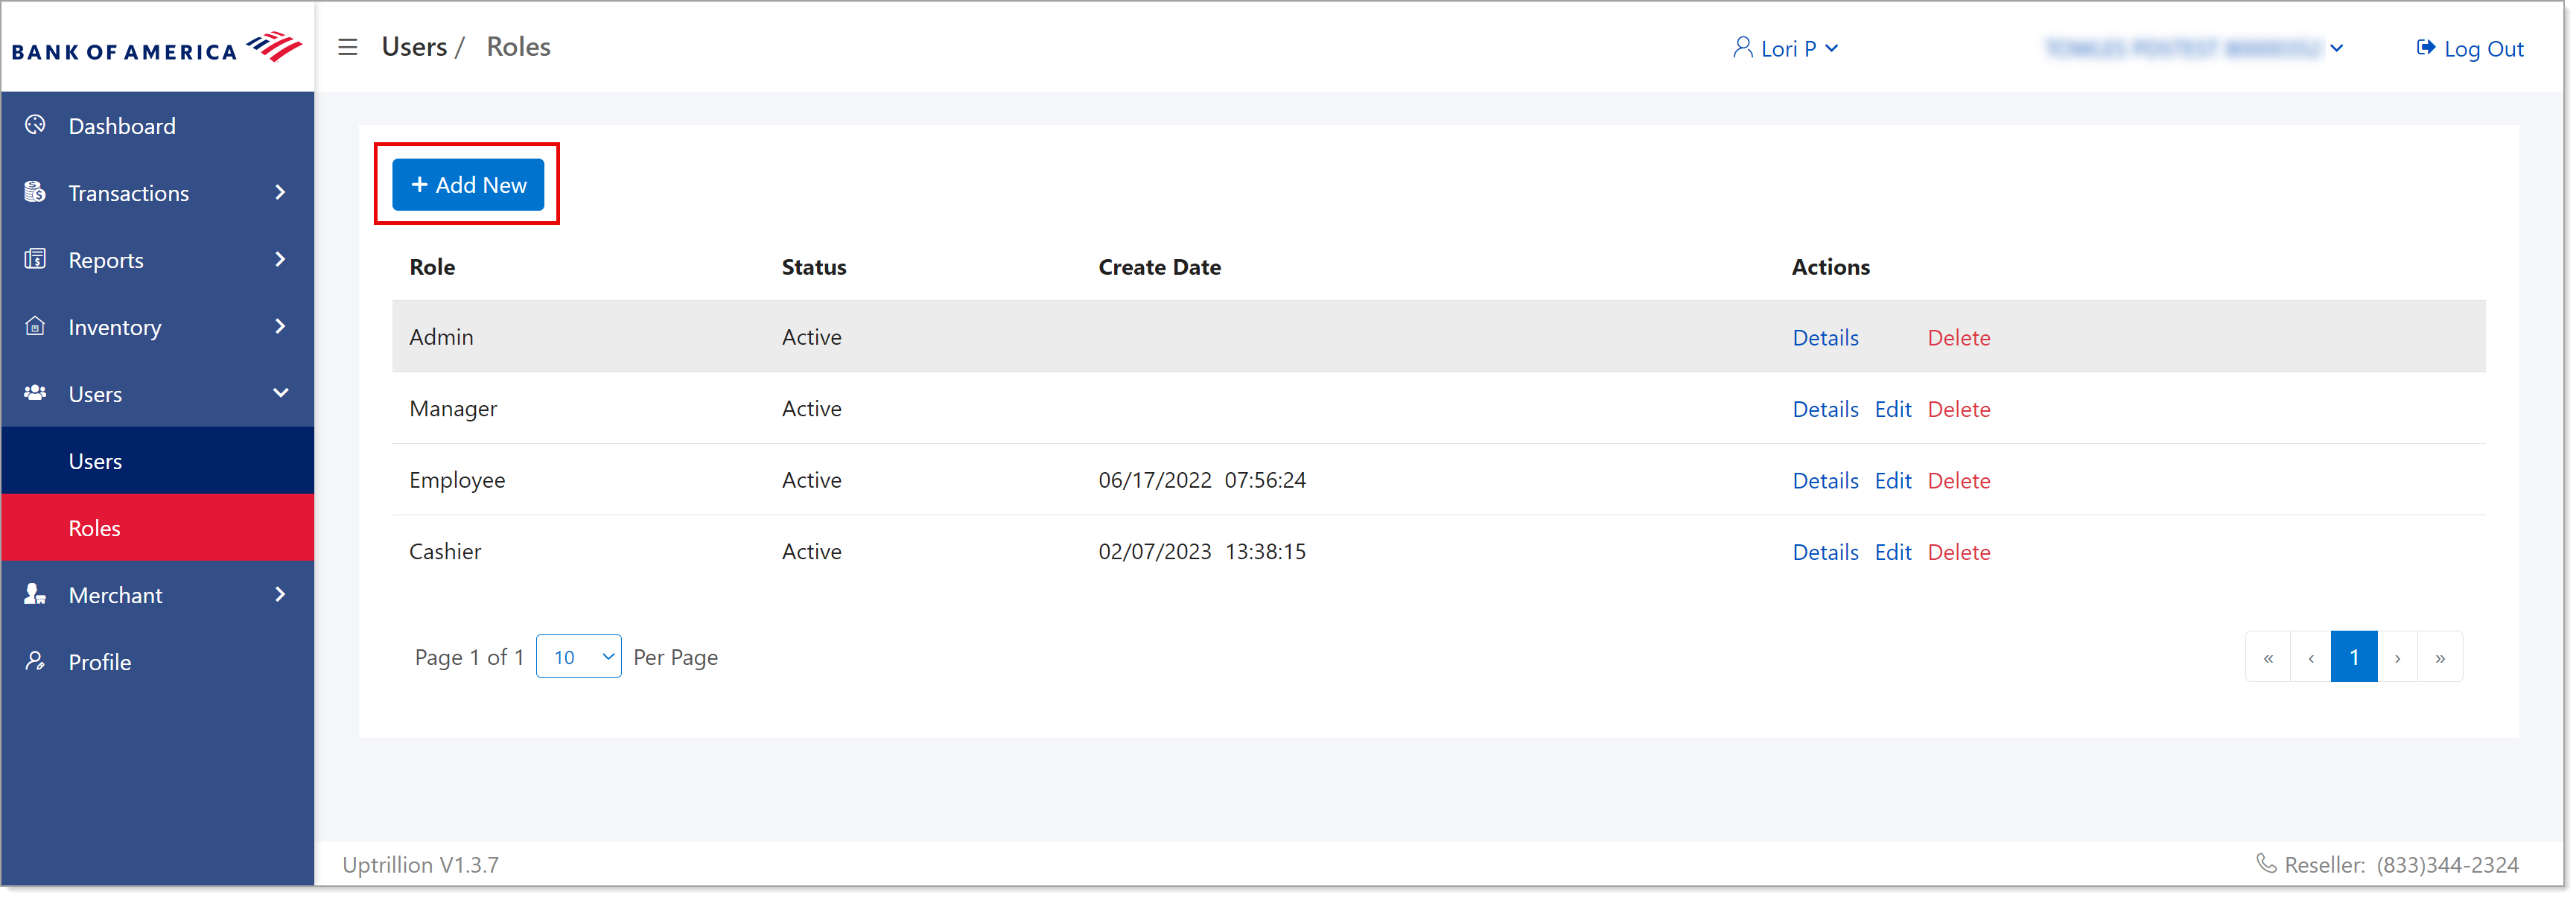
- Enter the new user role name.

- Click Save, then OK.
- Find the new user role and click Edit to set the permissions for the role. Expand the permission groups to select specific permissions for that group.
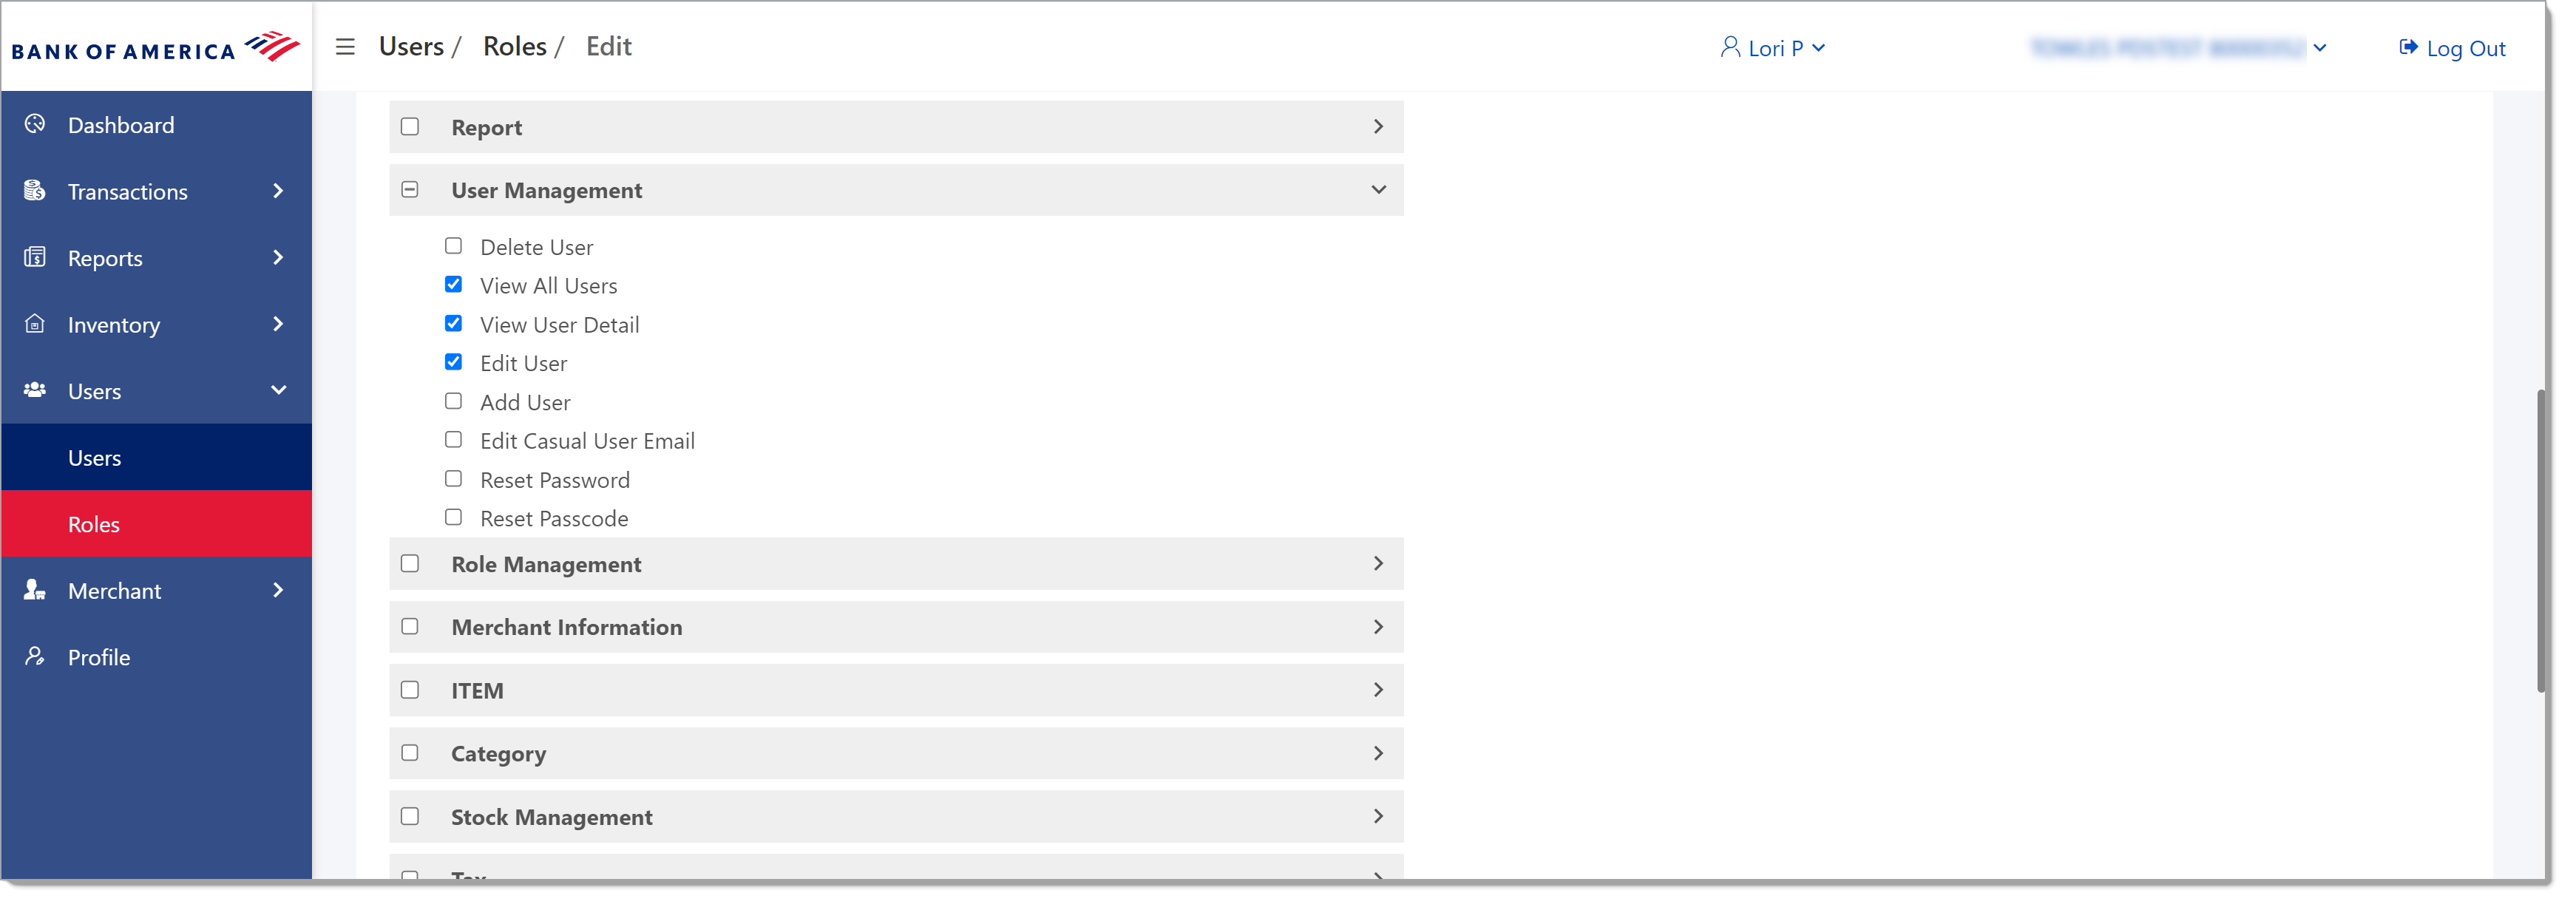
The table below describes each permission and the roles that are assigned to that permission by default.Table listing permissions and the roles assigned| Permission | Role assigned |
|---|
| Dashboard | View the dashboard in the MobilePOS Dashboard - All Roles |
Payments
| Only an option through registered mobile POS devices. No option in the MobilePOS Dashboard for creating transactions.
Sale - All Roles
Void - All Roles
Return - Managers and Admins
Manual Sale - Admins |
| Transactions | View All Transactions - All Roles
View Void Transactions - All Roles
View Refund Transactions - All Roles
Download Transaction |
| Report | Transaction Report - Managers and Admins
All Transactions
Employee Report - Managers and Admins
Download Detail Report - All Roles |
| User Management | View All Users - Managers and Admins
View User Detail - Managers and Admins
Edit User - Managers and Admins
Add User - Managers and Admins
Edit Casual User Email - No Roles
Reset Password
Reset Passcode |
| Role Management | View All Roles - Admins
Edit Role - Admins
View All Roles
Delete Role |
| Merchant Information | View Merchant Detail - Managers and Admin
Edit Merchant - Managers and Admins
View Terminal - All Roles |
| Item | View Item - All Roles
Edit Item - Managers
Add Item - Managers
Delete Item - Managers |
| Category | View Category - Managers
Edit Category - Managers
Add Category - Managers
Delete Category - Managers |
| Stock Management | View Stock Management- All Roles
Manage Stock Management - All Roles |
| Tax | View Tax - All Roles
Override Tax Category
Edit Tax - Managers and Admins
Add Tax - Managers and Admins
Delete Tax - Managers and Admins |
| Tax Category | View Tax Category - All Roles
Edit Tax Category - Managers and Admins
Add Tax Category - Managers and Admins
Delete Tax Category - Managers and Admins |
| Order | All orders - All Roles
View Order - All Roles |
| Setting Config | View Setting Config - All Roles
Edit Setting Config - Managers and Admins |
| Receipt | View Receipt Template - All Roles
Edit Receipt template - Managers and Admins |
- Click Save and then OK to save the changes.


