Point of Sale Solution Back Office Employee Scheduling
Description
What's in this article?
Once you add an employee to the Point of Sale Solution Back Office through Basic Settings, and assign a job role, you can schedule the employee to work. You can view the schedule for all of your employees by the day, week, or month.
Watch the video:
- **music**
- This video will show you how to set up an employee schedule
- In Point of Sale Back Office, go to Time and Attendance and scheduling
- Select either the plus button next to the employee's name under the desired date
- Or the Add Shift button
- To schedule a shift for an employee, choose the date and select the employee
- Tip: if you use the plus button, the employee's name and the date selected will automatically fill in
- Enter the details of the schedule
- You can use the same schedule for multiple days and weeks.
- Toggle the repeat to on position, then select the days that you would like the schedule to repeat for each given employee
- Please note, if you choose to repeat a schedule, you will be required to set an end date for the schedule.
- Click Save
- **music**
Manage employee schedules
Use the Employee schedules tab to manage and view the employee shifts by day, week, or month. Shifts assigned to an employee are not active and viewable by the employee until they are published.
- Schedule an employee
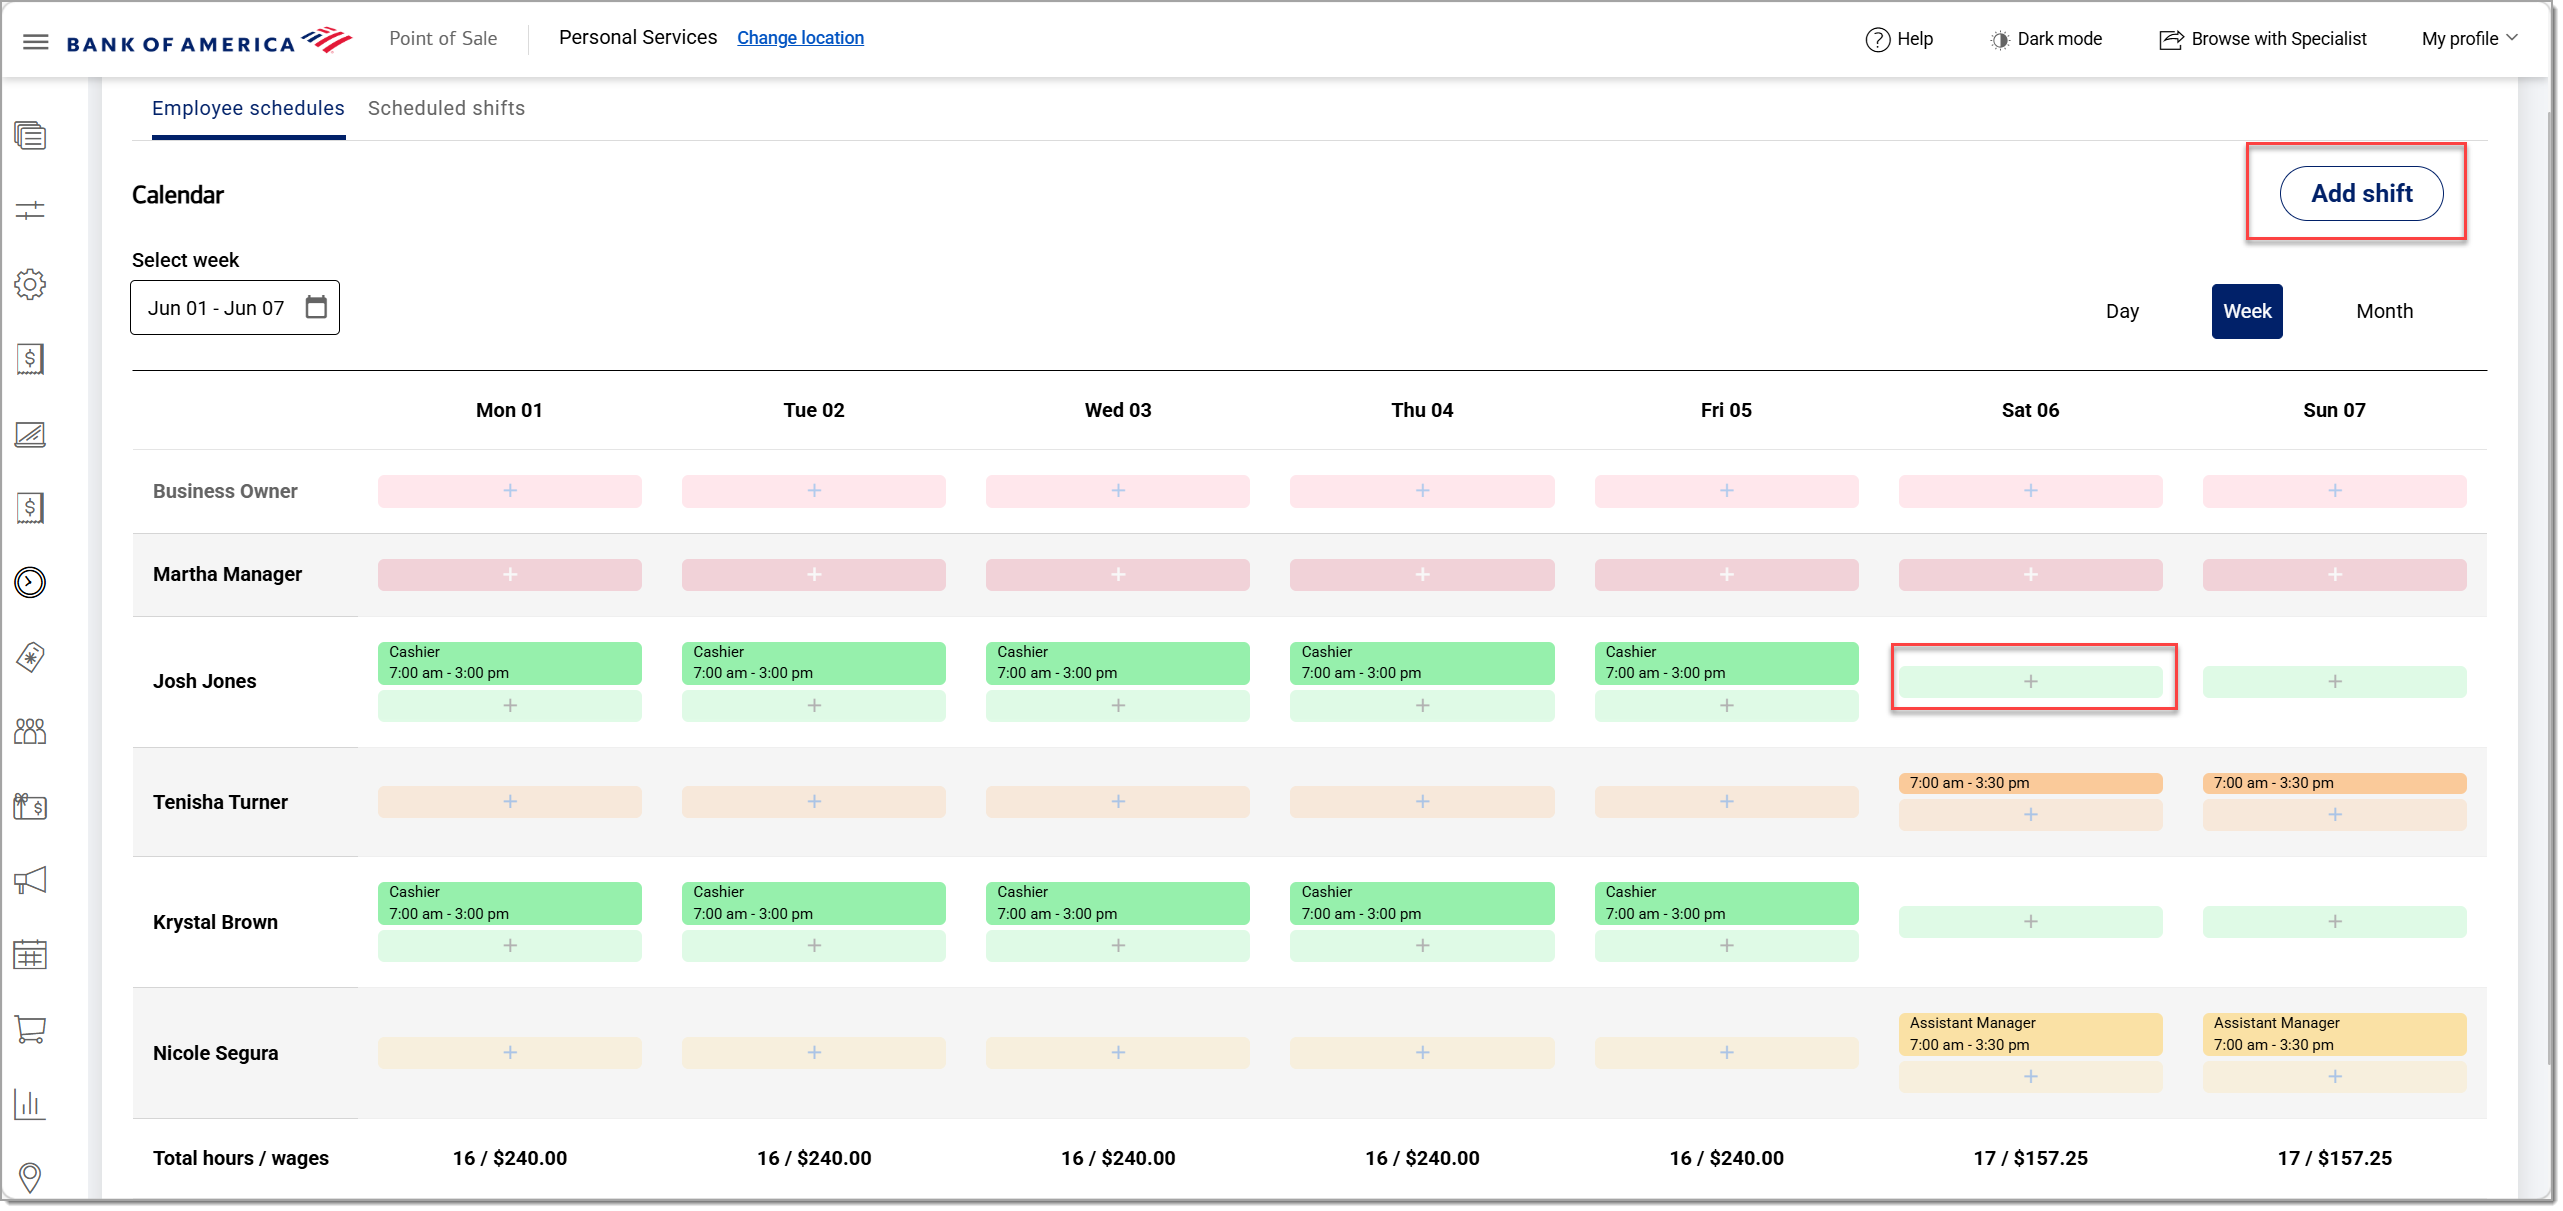
- In the Point of Sale Solution Back Office, go to Time & Attendance > Employee Scheduling > Employee schedules tab.

- Click either Add shift button or the + button next to the employee's name under the desired date.
- If needed, choose the date for scheduling, and select the employee. If you used the + button, the employee name and the date selected will automatically fill in.
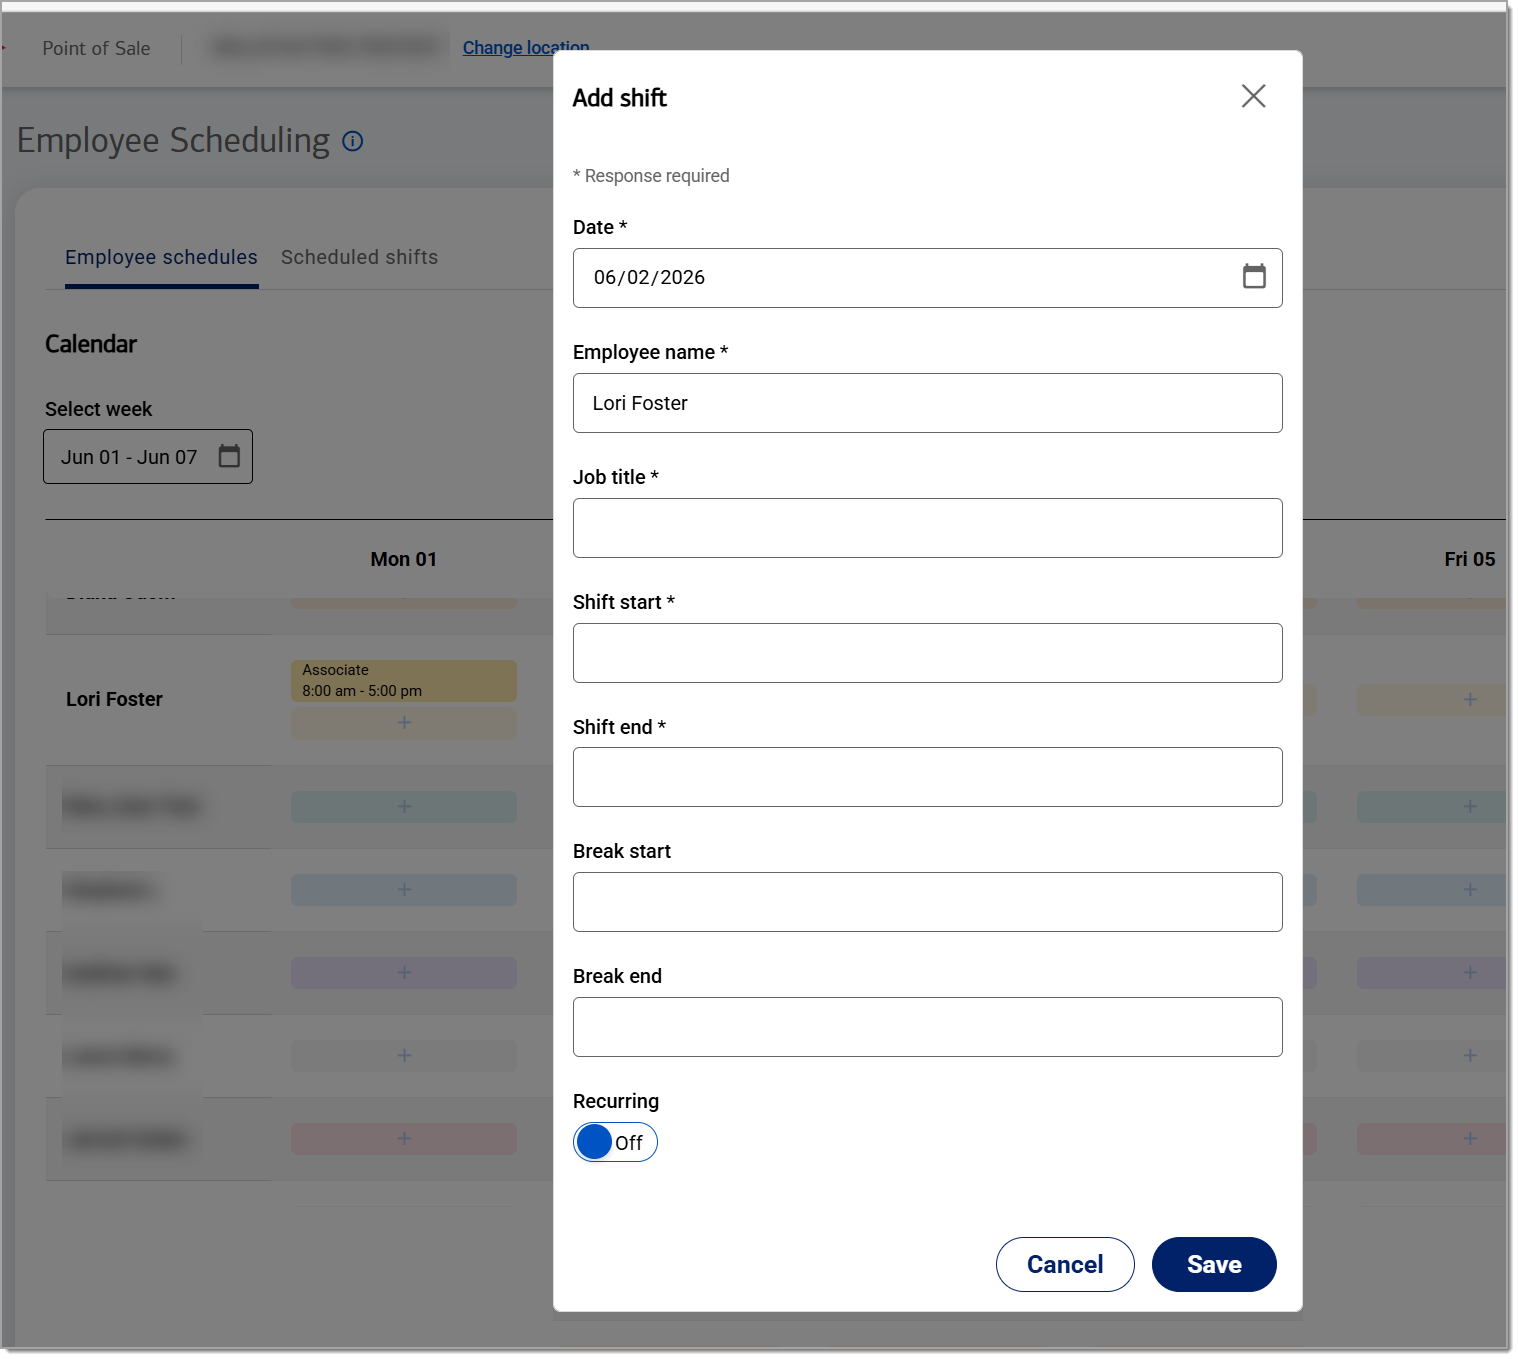
- Enter the details of the schedule. Fields with an asterisk are required fields.
Shift field name and description Shift field Description Date Required. The date of the shift, if not automatically filled in. Employee name Required. The name of the employee, if not automatically filled in. Job title Required. The job title of the employee. Shift start Required. Shift start time. Begin typing to auto-fill options. Shift end Required. Shift end time. Break start If scheduling a break, enter the break time. Break end If scheduling a break, enter the break end time. Recurring Repeats the schedule if enabled and the days of the week, and end date, are selected. - To use the same schedule for multiple days/weeks, enable Recurring and then select the days that the schedule will repeat for the employee. If you choose to repeat a schedule, set an End date for the schedule.
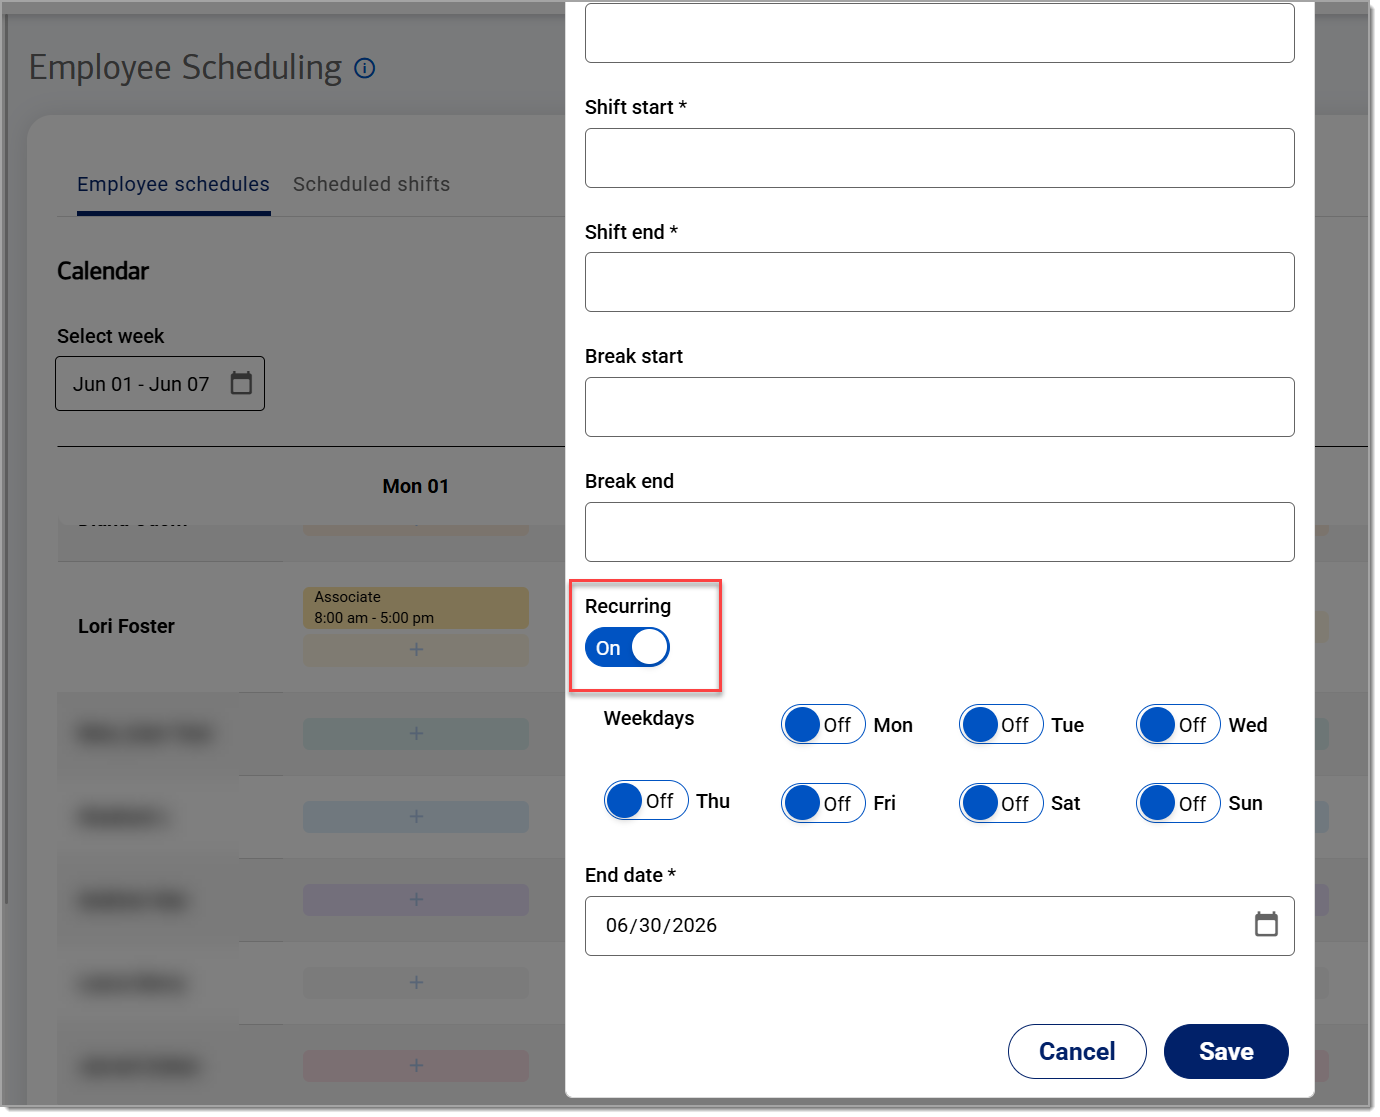
- Click Save.
- In the Point of Sale Solution Back Office, go to Time & Attendance > Employee Scheduling > Employee schedules tab.
- View scheduled employees for the day, week, or month
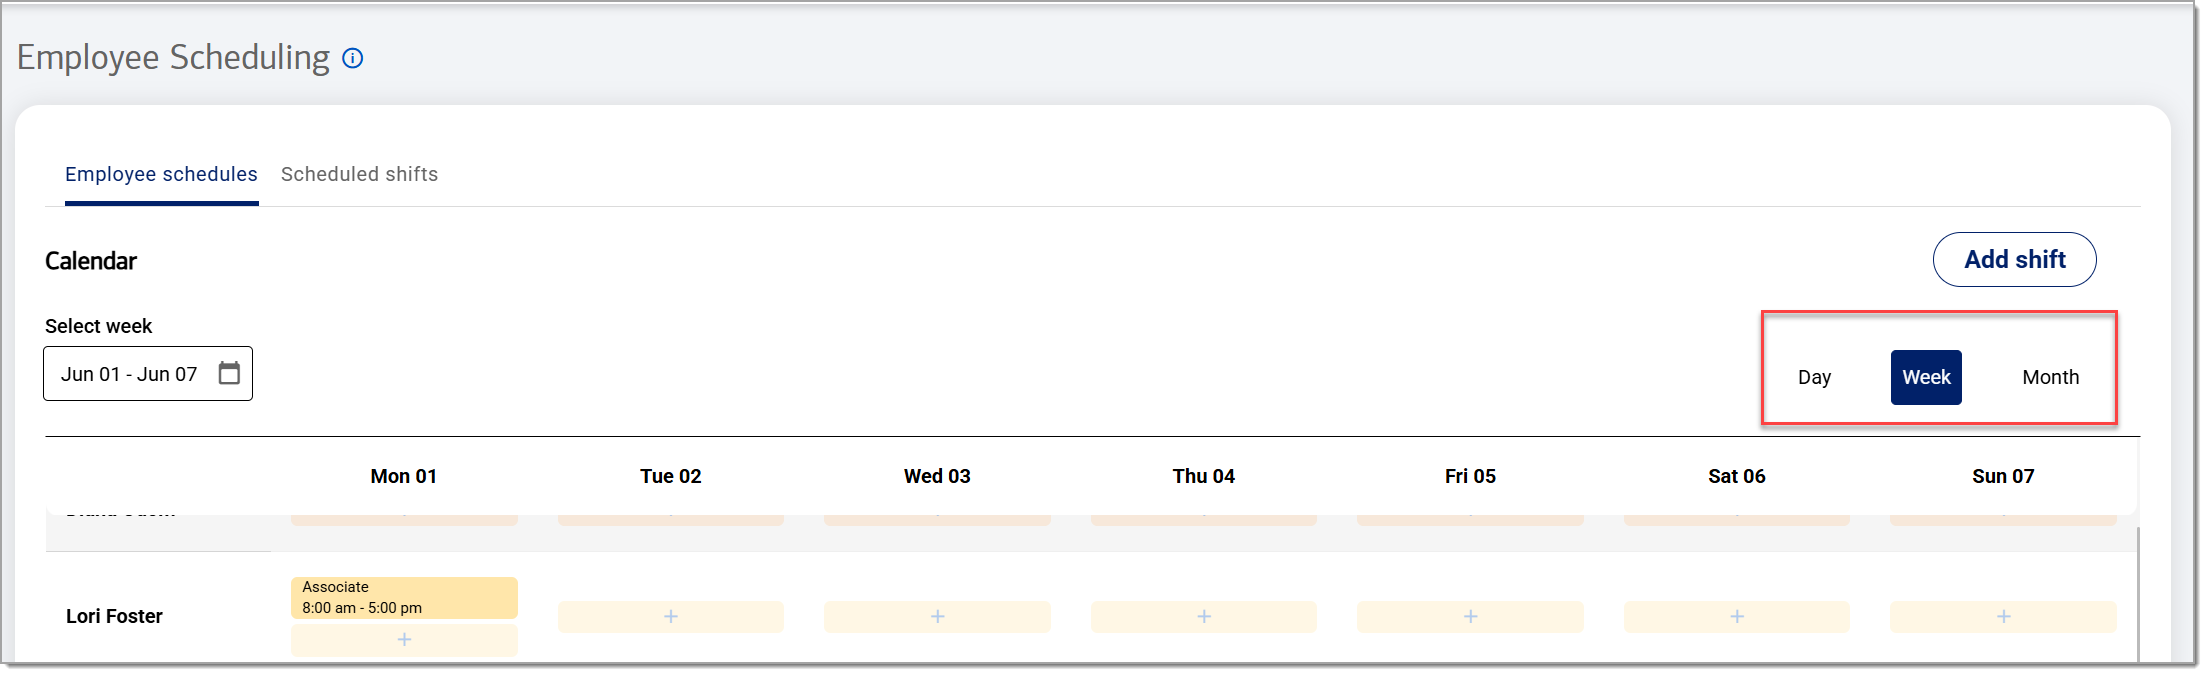
- In the Point of Sale Solution Back Office, go to Time & Attendance > Employee Scheduling.
- Choose whether to view by day, week or month.
- View scheduling requests
When an employee has submitted a time off request in the Point of Sale Solution App, an indicator will appear next to the employee name.
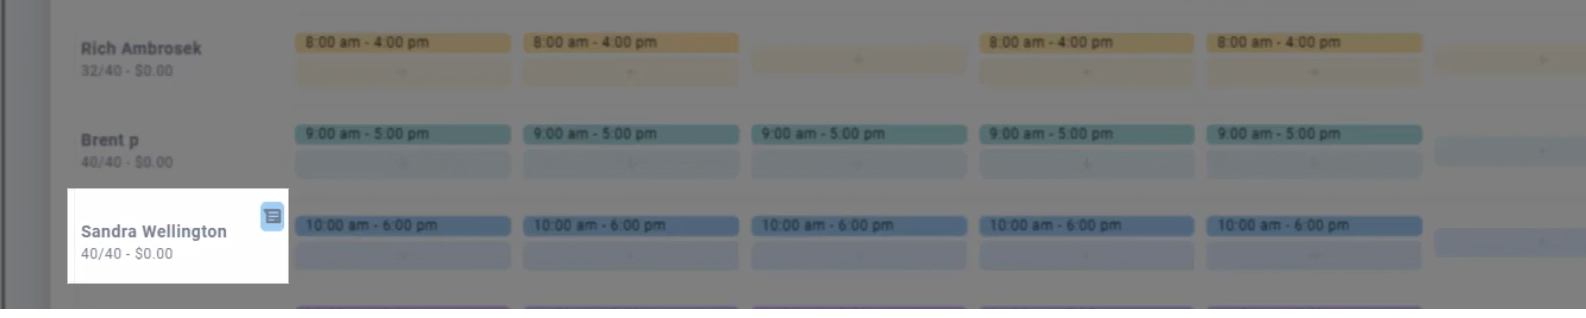
Click on the message icon to view the scheduling request message.
Publish the shift schedule
Once employees are assigned shifts, you can publish the scheduled shifts, emailing to the employees or printing the schedule.
Publish a shift schedule
- In the Point of Sale Solution Back Office, go to Time & Attendance > Employee Scheduling > Scheduled shifts tab.
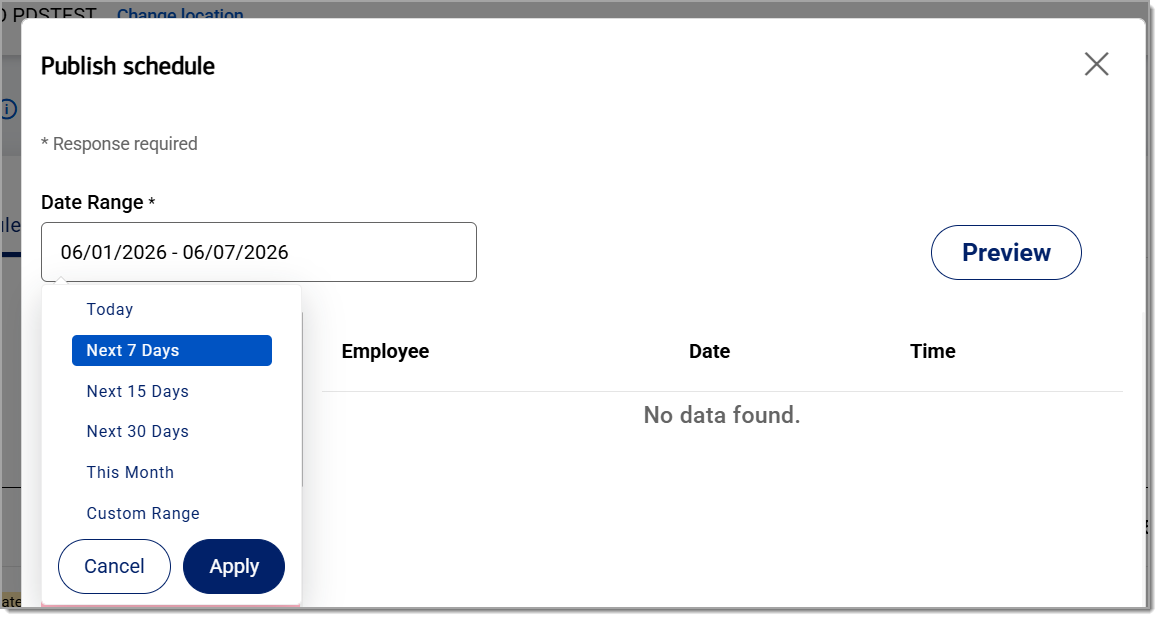
- Click Publish.

- Choose a Date Range for the shifts that you want to publish.
- Select Staff to publish the schedule for all employees or choose specific employees. Click Preview to see the shifts assigned.
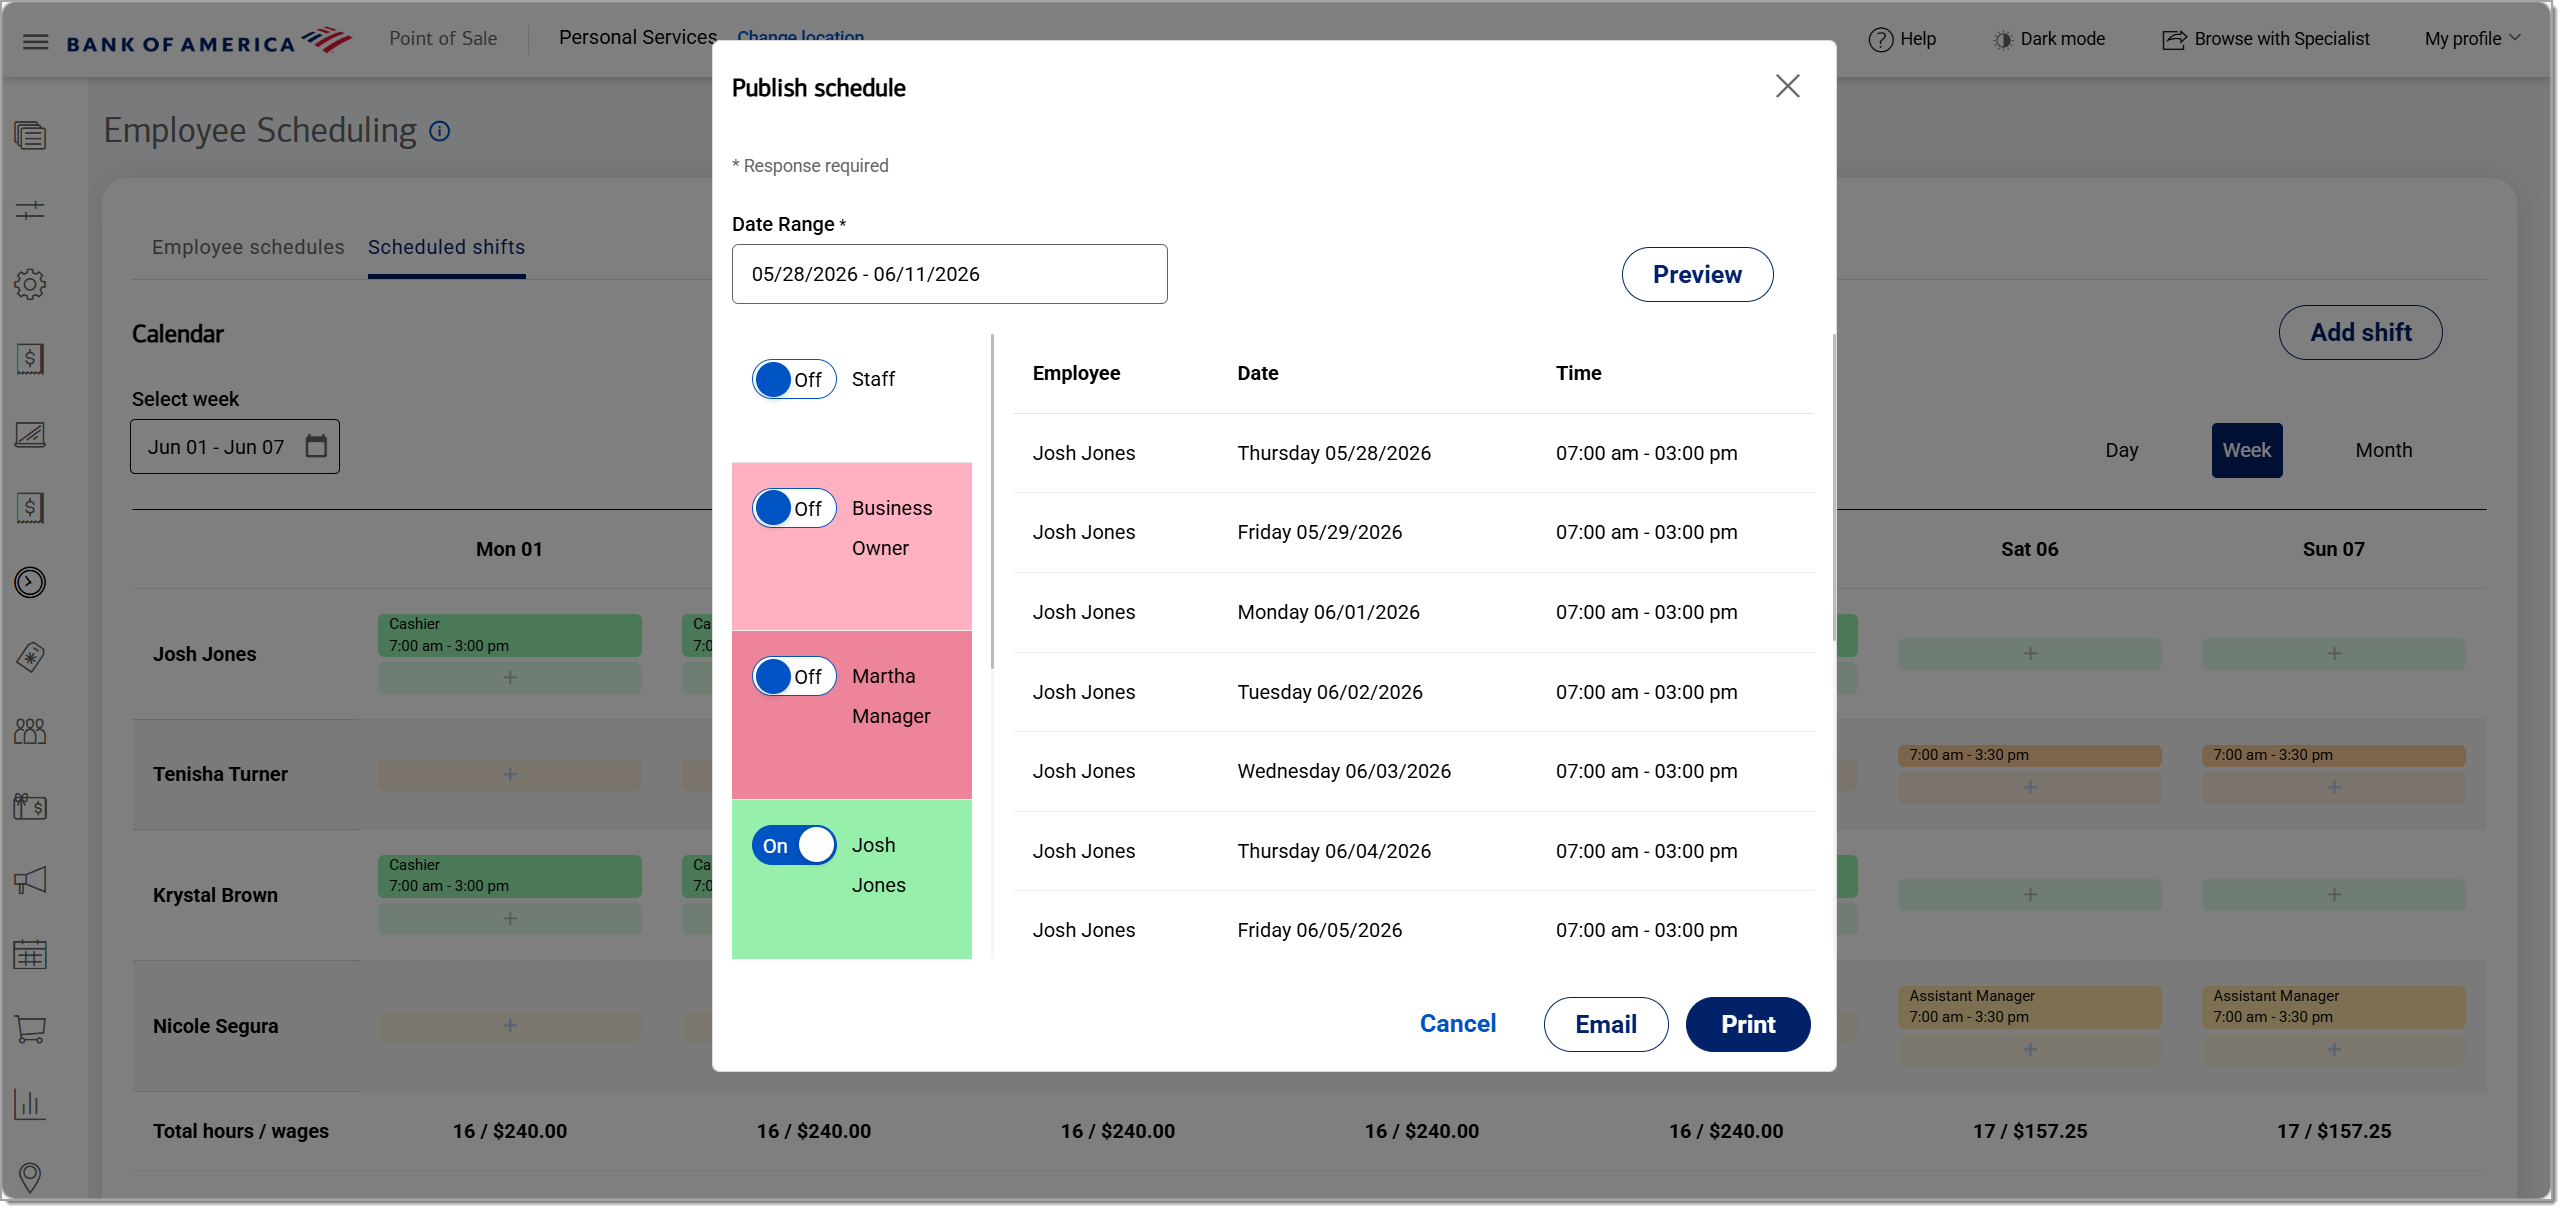
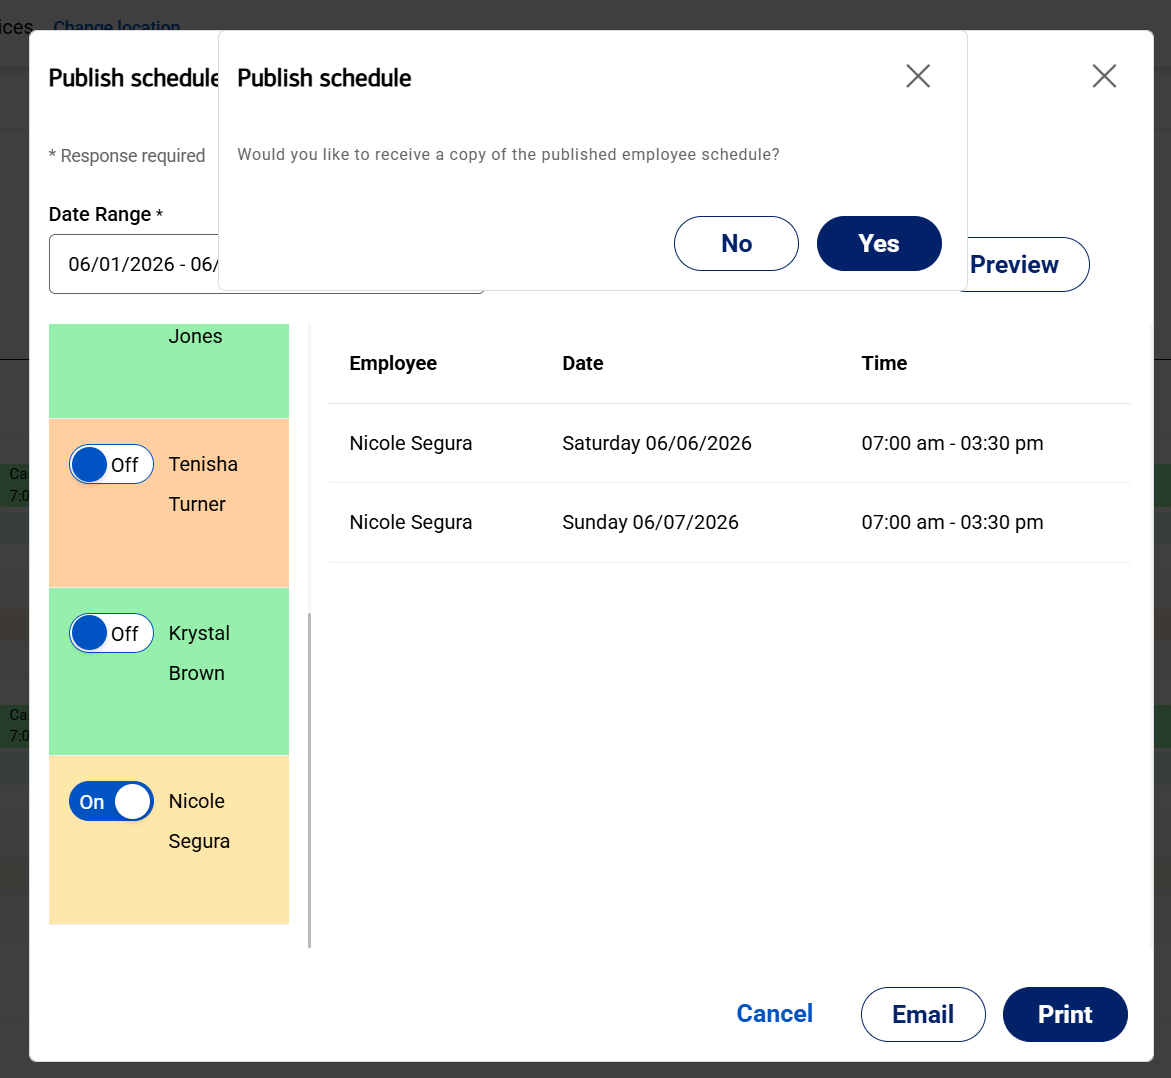
- Click Email or Print to publish the schedule and send the schedule to the employee(s) selected.
- Click Yes to receive an emailed copy of the shift information.
- If you've requested a copy, click Confirm to confirm your email address.
- A confirmation displays when the schedule has been sent.