Point of Sale Solution Back Office Employee Management
Description
What's in this article?
Employee settings are managed in your toolbar under Basic Settings. This is where you create and manage job titles, create and manage employee contact information, and set pay rates. You can add a new employees or edit existing employee's contact information, role, pay rate or permissions. You can set the permissions based on job title or give an individual employee special permissions.
NOTE:
Employees that require access to the Back Office must have an email address.
Add a store job (job title)
Create store jobs (job titles) first to save time when setting up your employees. Store jobs include the name of the job, a description of the job, hourly and overtime pay rates. You can also assign a color code to a job title to color code your schedule by job.
Watch the video:
- This video will show you how to add, edit, store, or service a store job from the Point-of-Sale Solution Back Office.
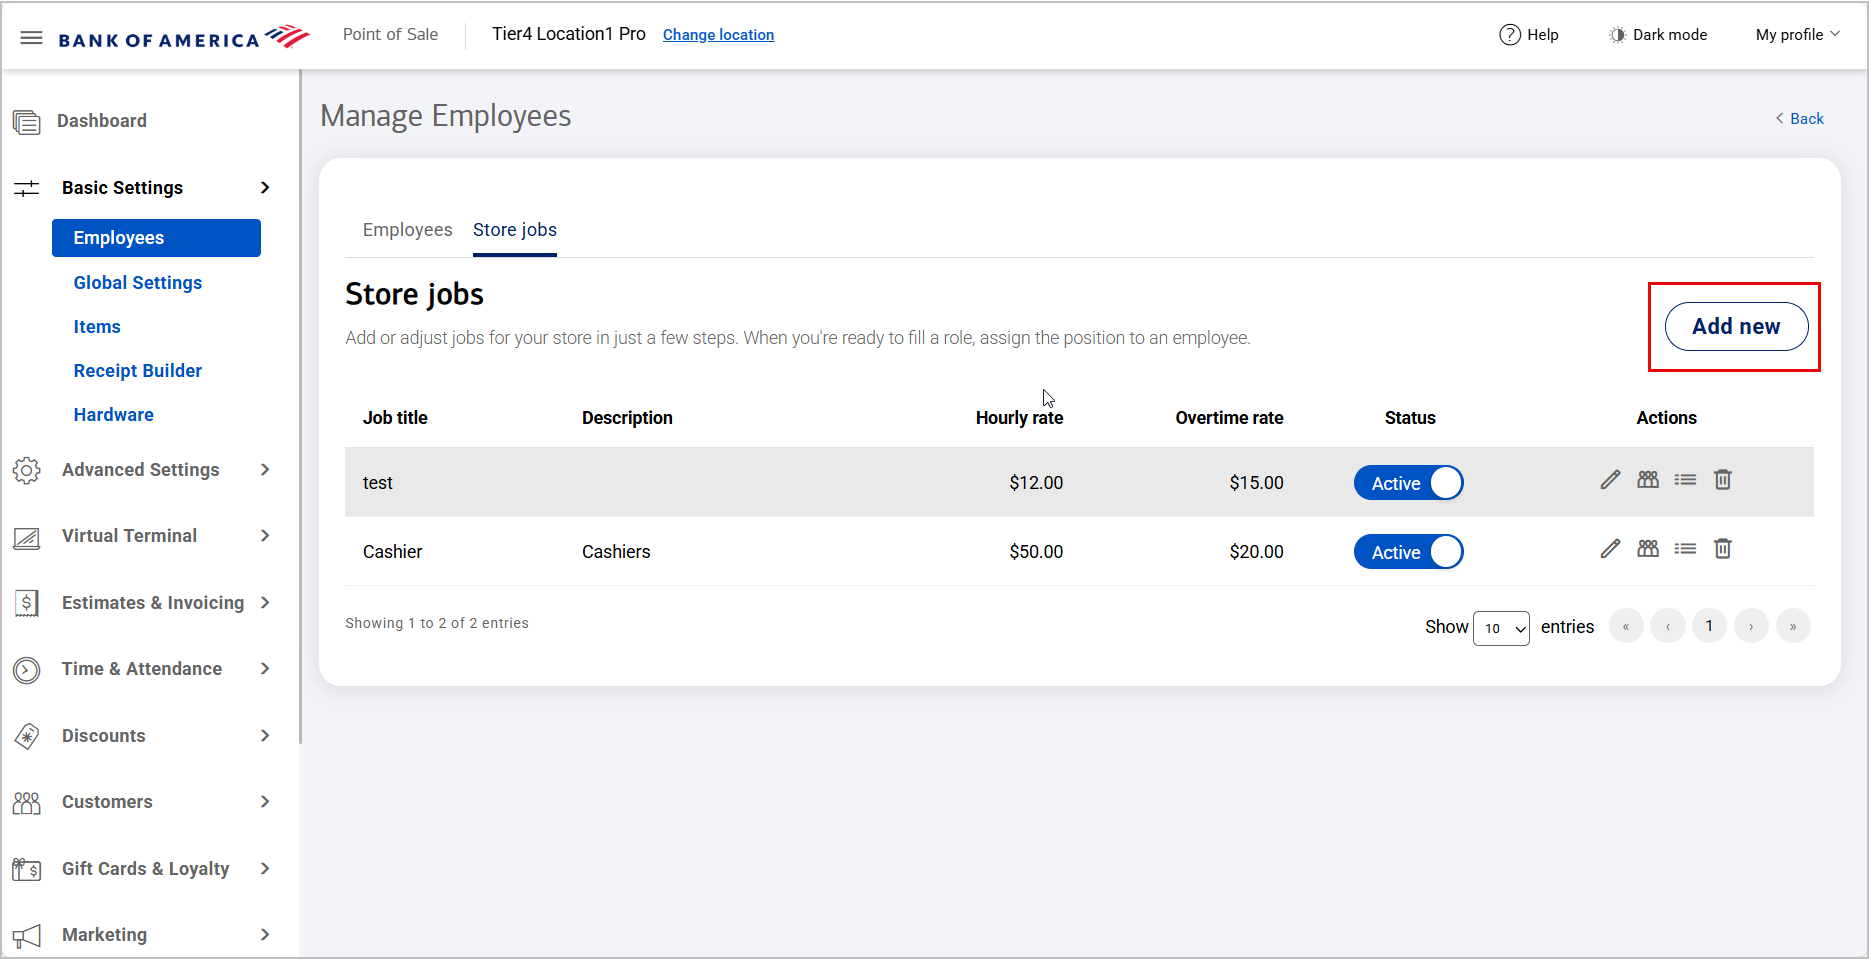
- To add a store job from the Point-of-Sale Back Office, select Basic Settings > Employee
- On the Store Jobs tab, click Add New to create a new job.
- Enter the new Job title. This is a required field.
- You have the option to do the following:
- Enter a job description and the hourly rate and overtime rate.
- Assign the job a color to color code your scheduling. Assign the color to the job, if desired.
- Click Save
- To edit a store job from the Point-of-Sale Back Office, select Basic Settings > Employees.
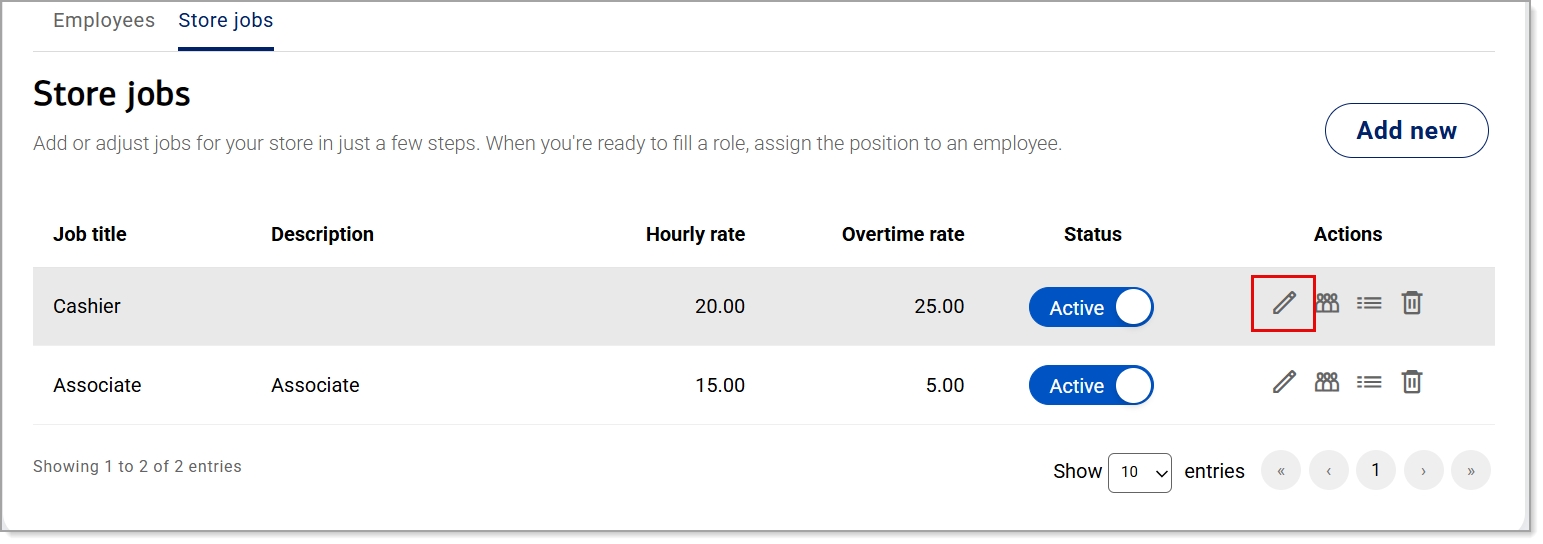
- To edit an existing job title, click the Pen icon.
- To delete a store job from the Point-of-Sale Back Office, select Basic Settings > Employees.
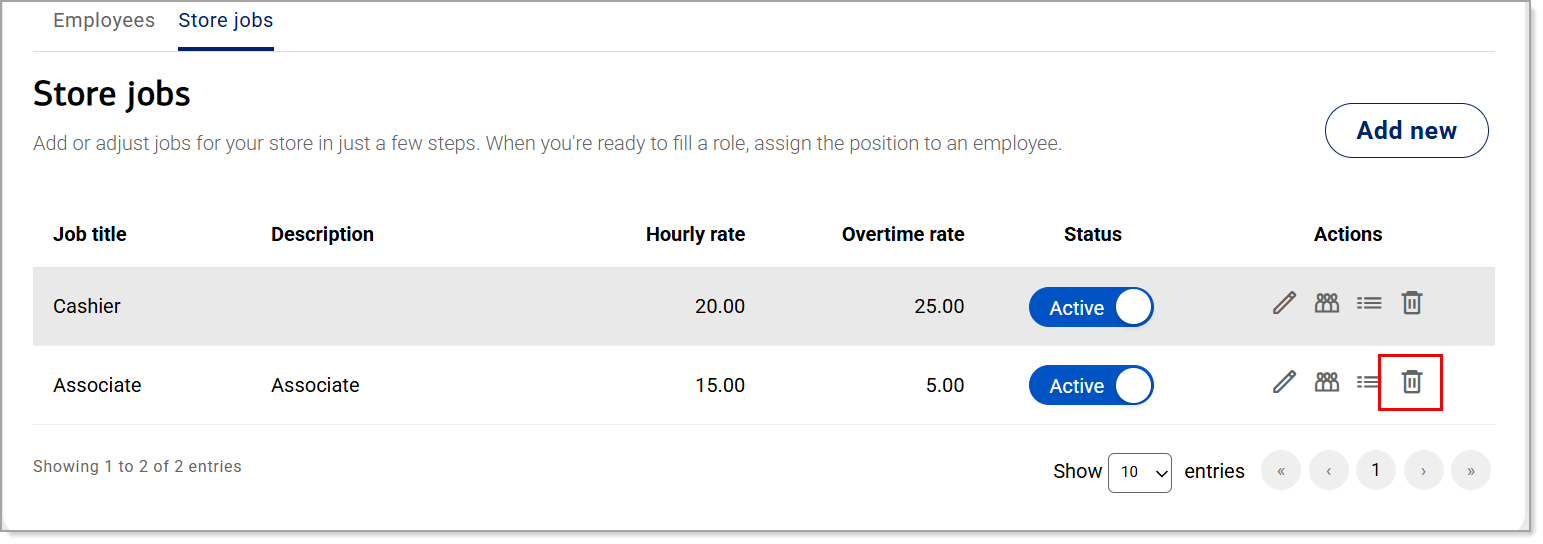
- To remove the job title, click the Trash icon.
- To service a store job from the Point-of-Sale Back Office, select Basic Settings > Employees.
- Click Store Jobs
- Click the Job Services icon to add a service to the store job.
- Begin typing in Services to find the service you wish to assign to the job role, then click the service to select it. You can add multiple services to a job role.
- Click Save Services
- For more information, visit bankofamerica.com/MerchantHelp.
- To add a store job
- In Point of Sale Solution Back Office, select Basic Settings > Employees.
- On the Store Jobs tab, click Add New to create a new job.
- Enter the new Job title. This is a required field.
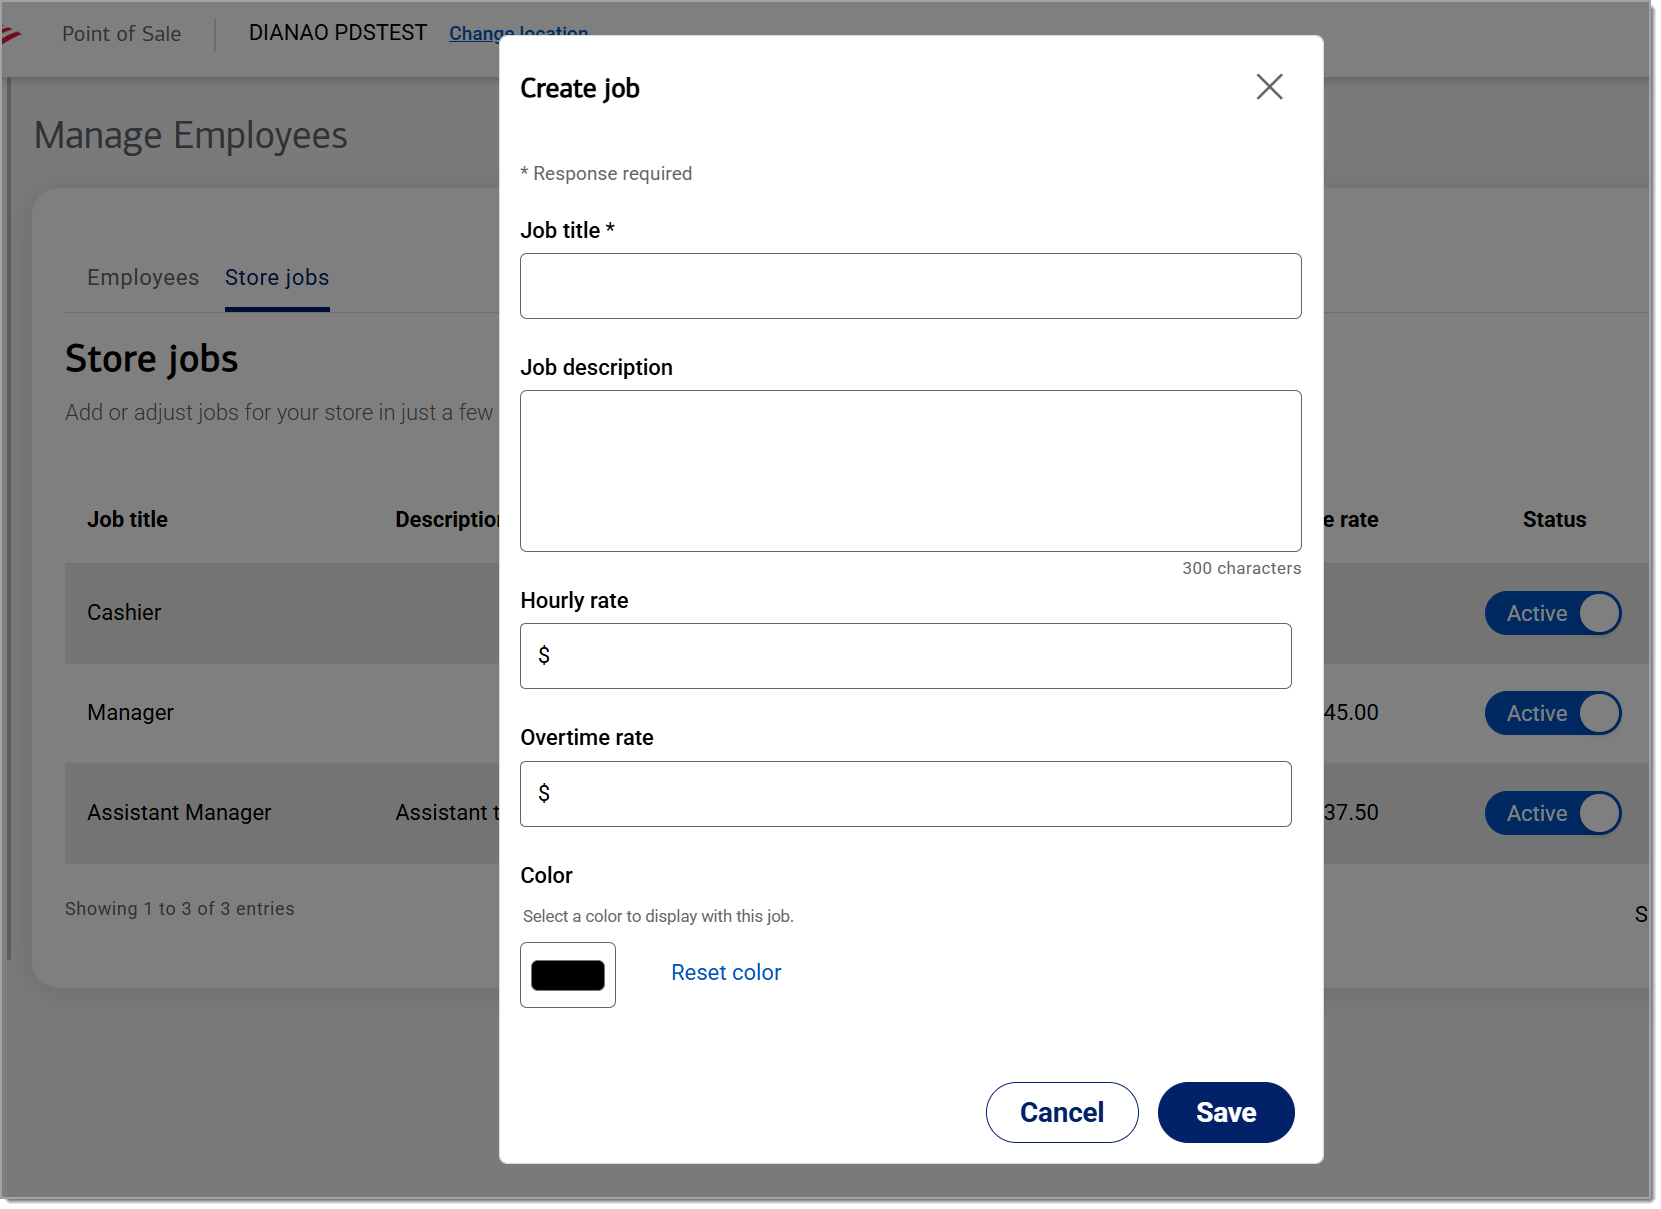
- (Optional) Enter a job description, the hourly rate and overtime rate assigned to the job, if desired.
- (Optional) Assign the job a color code to color code your scheduling.
- Click Save.
- To edit a store job
- To edit an existing job title, click the Edit icon, edit as necessary, then click Save.
- To edit an existing job title, click the Edit icon, edit as necessary, then click Save.
- To delete a store job
- To remove the job title, click the Delete icon, then click Delete to confirm the deletion.
- To remove the job title, click the Delete icon, then click Delete to confirm the deletion.
- To add a service to a job
- In Point of Sale Solution Back Office, select Basic Settings > Employees.
- Click the Store Jobs tab.
- Click the Job Services icon to add a service to the store job.

- Begin typing in services to find the service you wish to assign to the job role, then click the service from the dropdown to select it. You can add multiple services to a job role.
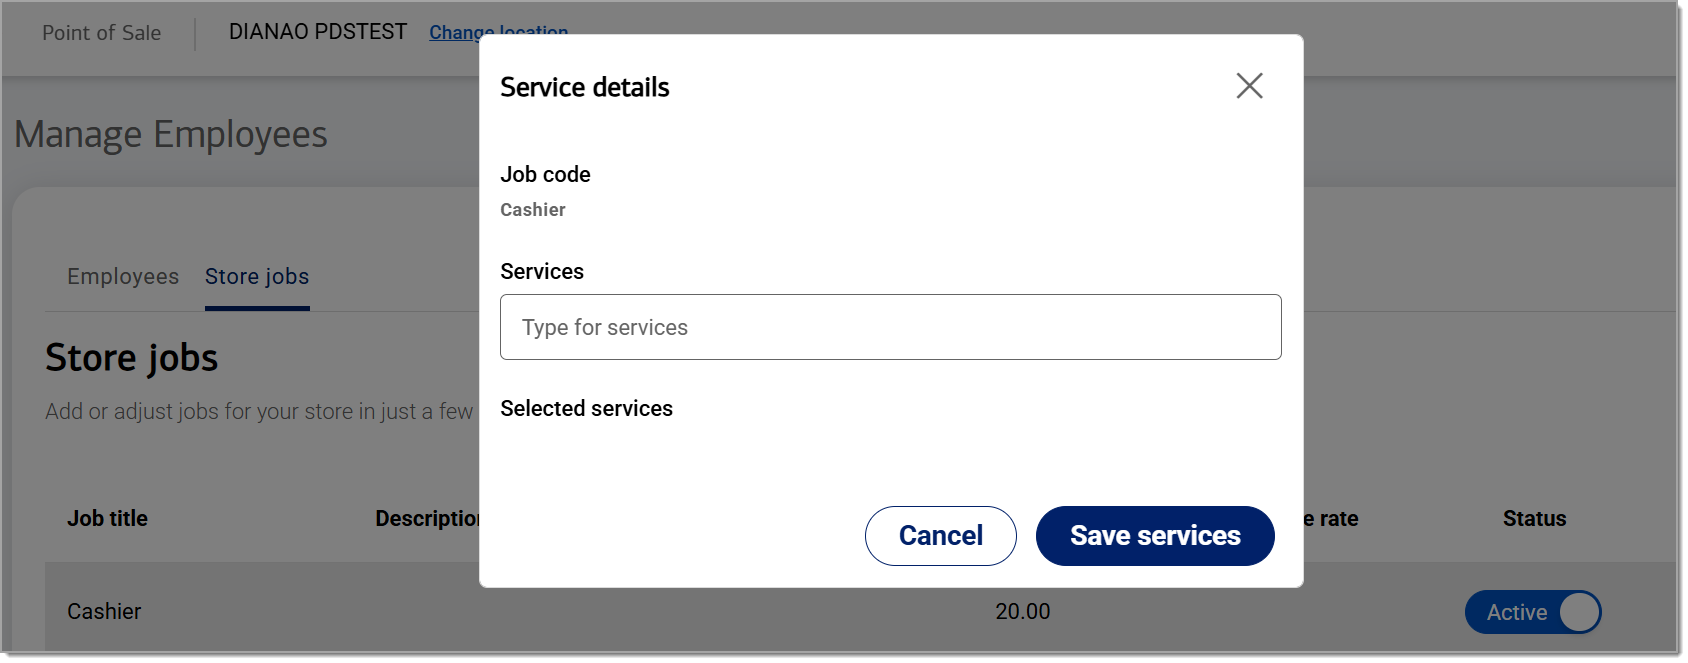
- Click Save services.
Add an employee or edit employee details
Add an employee or edit an employee's information including their email address, assigned job title, mobile phone number, and whether they are active or not.
Watch the video:
- *music*
- This video will show you how to add and edit a new employee from Point of Sale Back Office
- In Point of Sale Back Office, select Basic Settings > Employees.
- Click Add employee
- Enter the contact information for the new employee. First and last name, along with a phone number, are required.
- Adding an email is optional, but if the employee you are adding needs access to the Back Office, you need to add an email.
- Adding a job title is optional, but if you have them created, select a job title for the employee from the dropdown list.
- Click the add button, then click Next
- Now you will enable the permissions and create a quick access code you want for this employee
- Once your done, click Save.
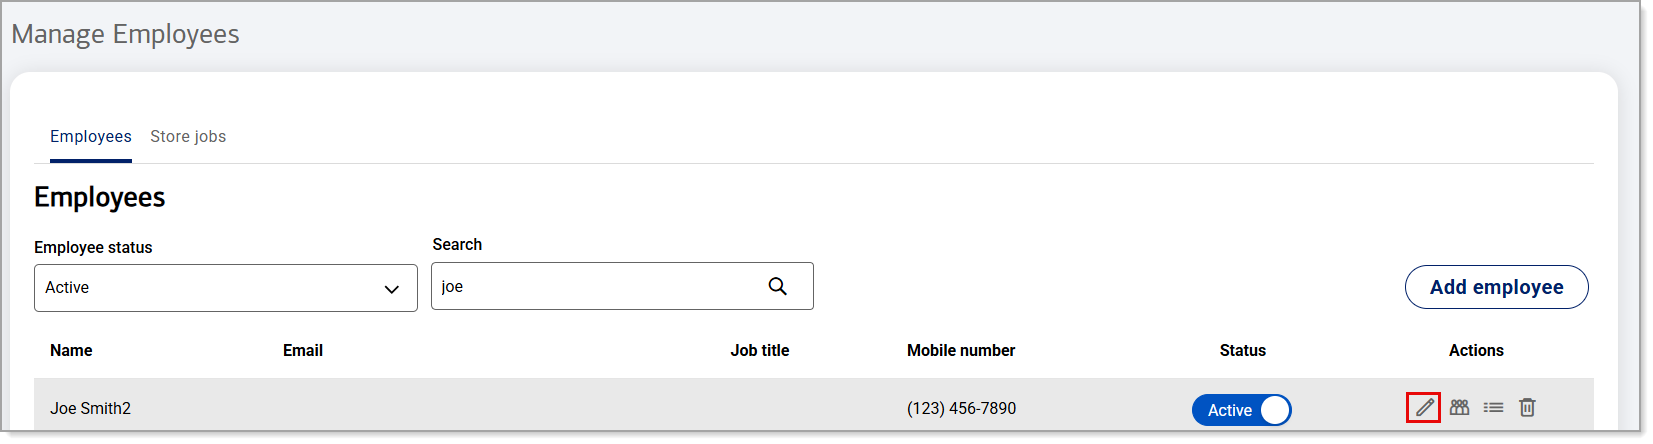
- To edit an existing employee, click the Edit employee icon.
- *music*
- To add a new employee
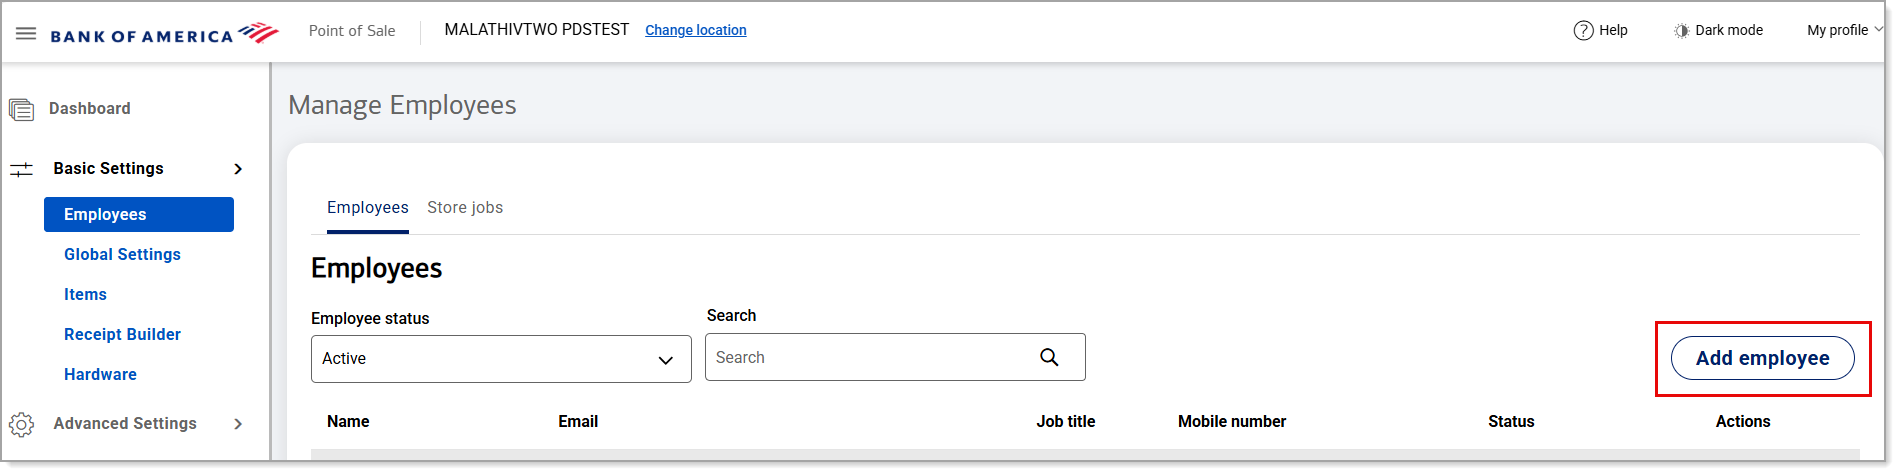
- In Point of Sale Solution Back Office, select Basic Settings > Employees.
- On the Employees tab, click Add employee.
- Enter the contact information for the new employee. First and last name and a phone number are required fields.
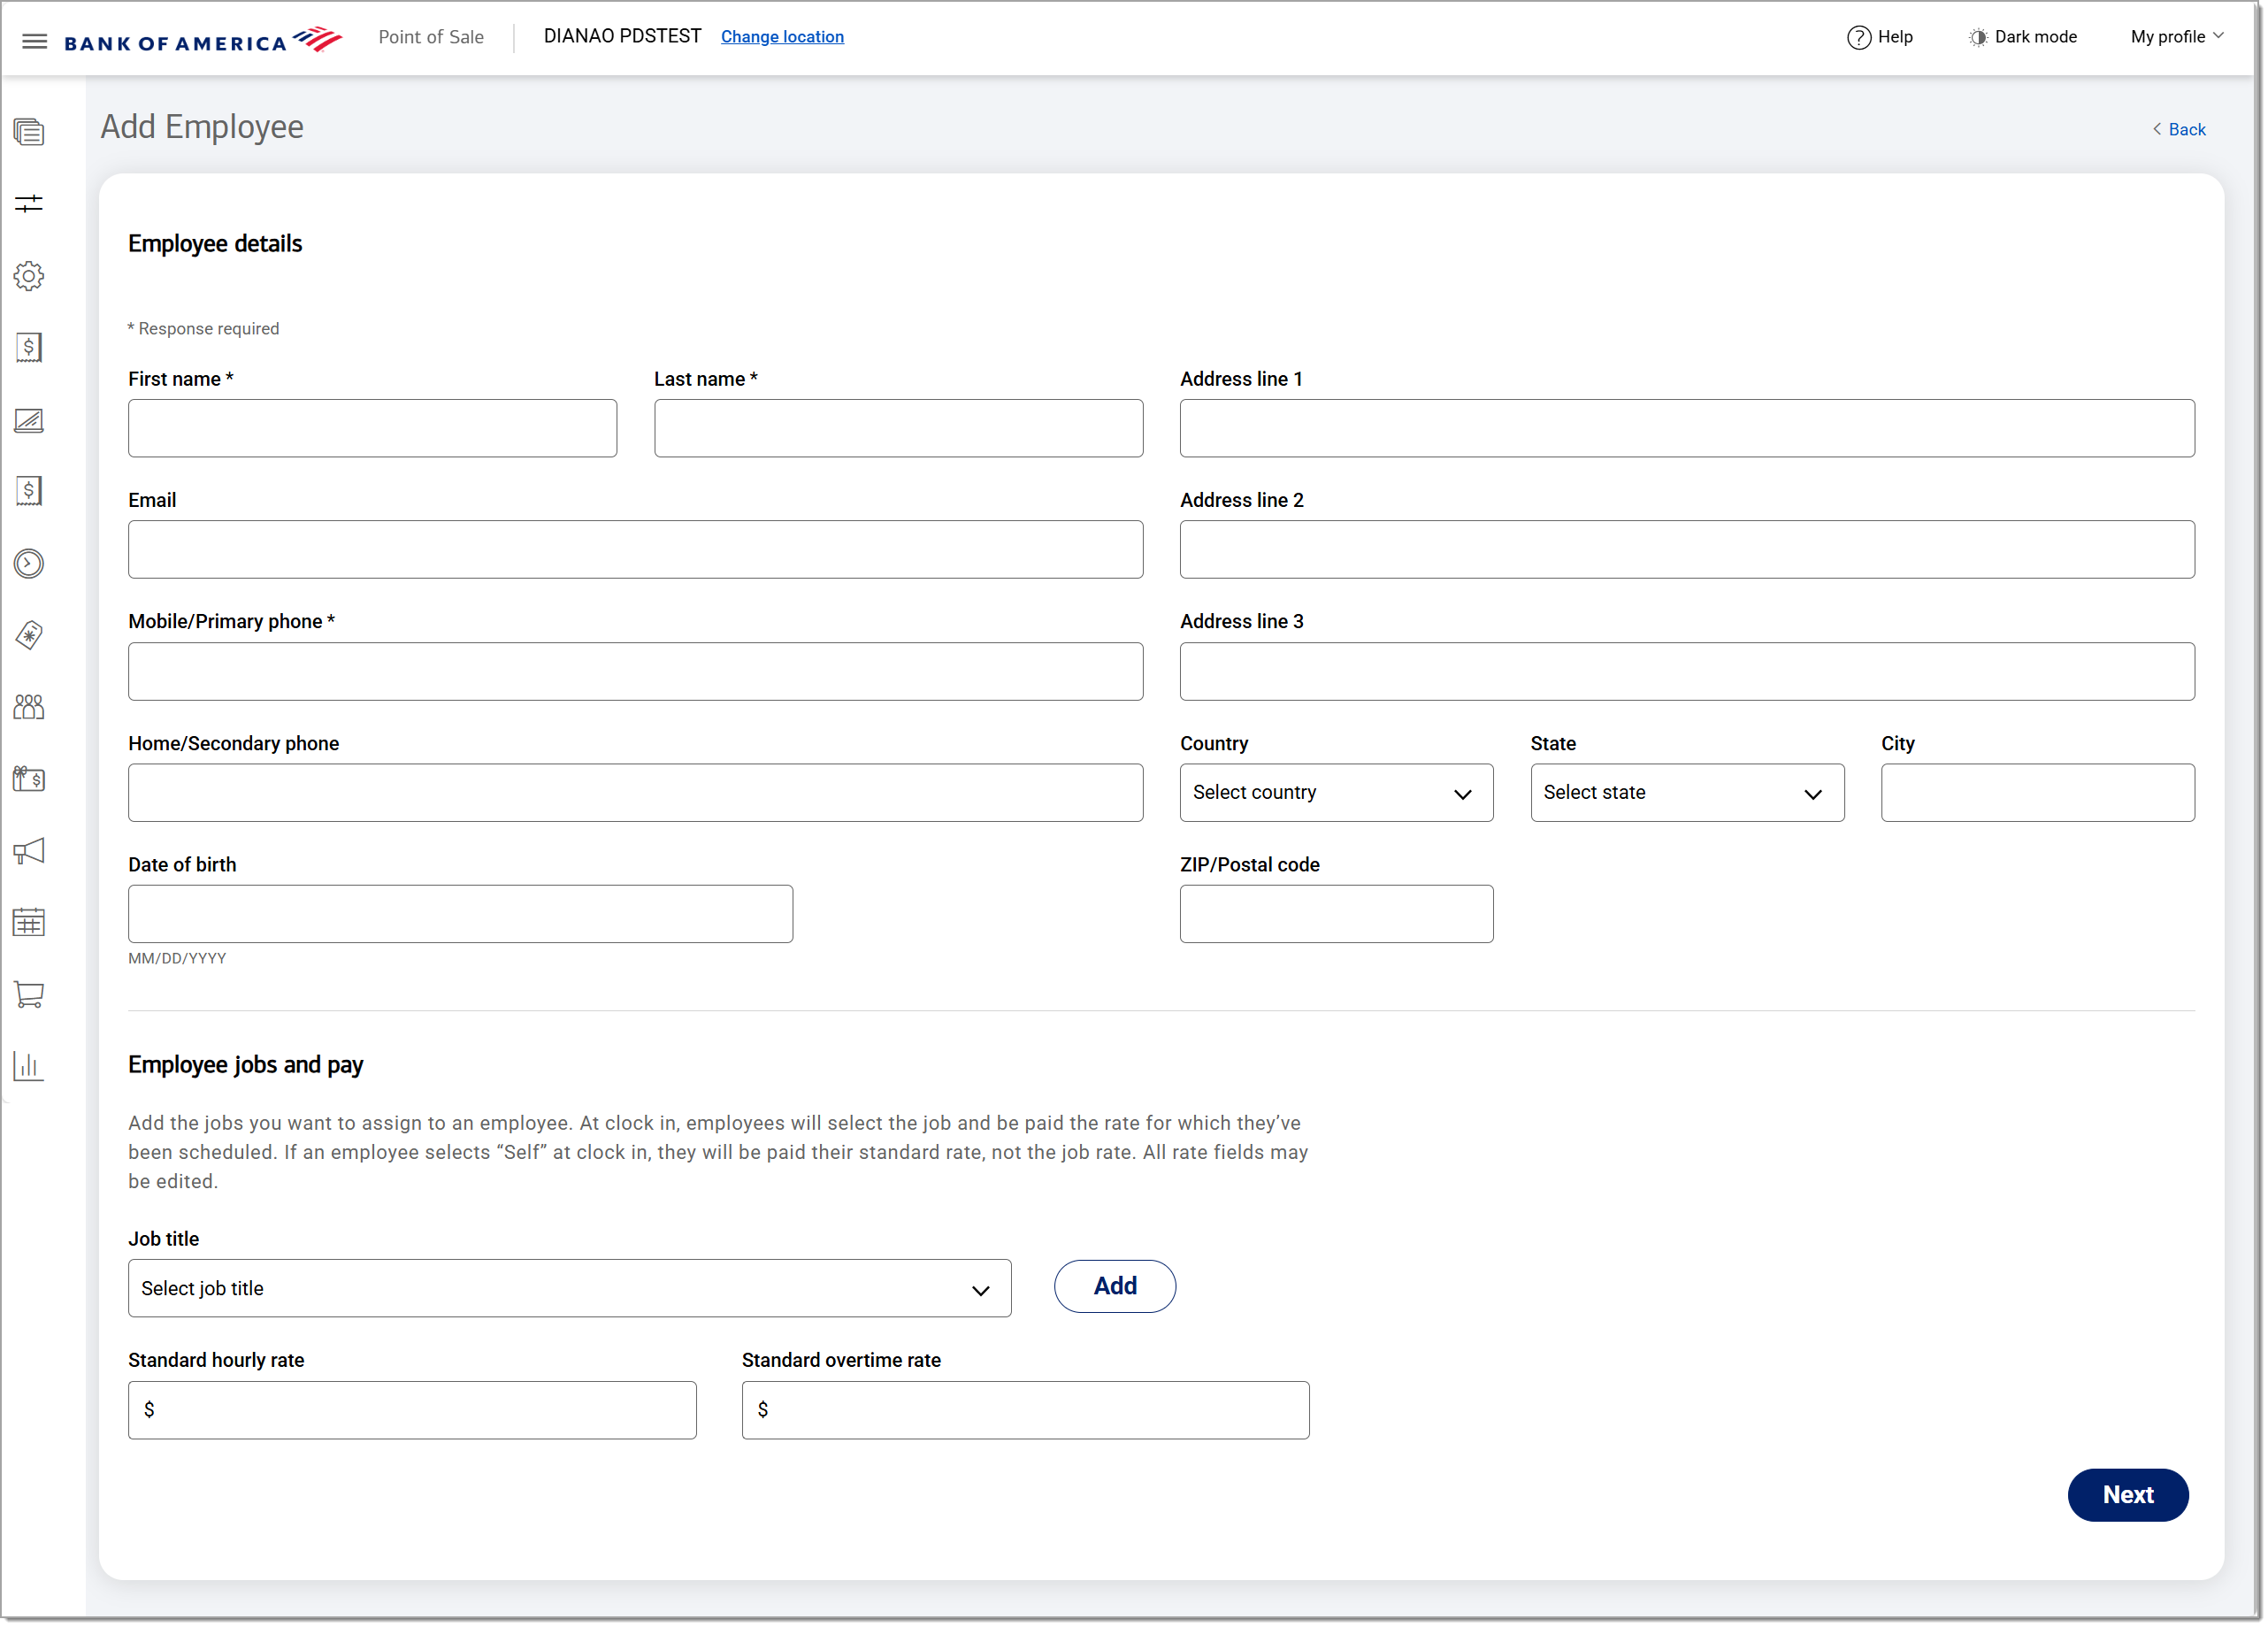
- Select a job title for the employee.
NOTE: To add a new job title, click the Add button and create a new job role.
- Click Next to assign the employee's permissions. Permission options will vary depending on your software plan and you may not see all of the fields shown in the example screens below.
- Click Save.
To edit an existing employee
- To edit employee information, in Basic Settings > Employees, click the Edit icon next to the employee you wish to edit information for, edit as necessary, then click Save. The Search field can be used to search for an employee name.
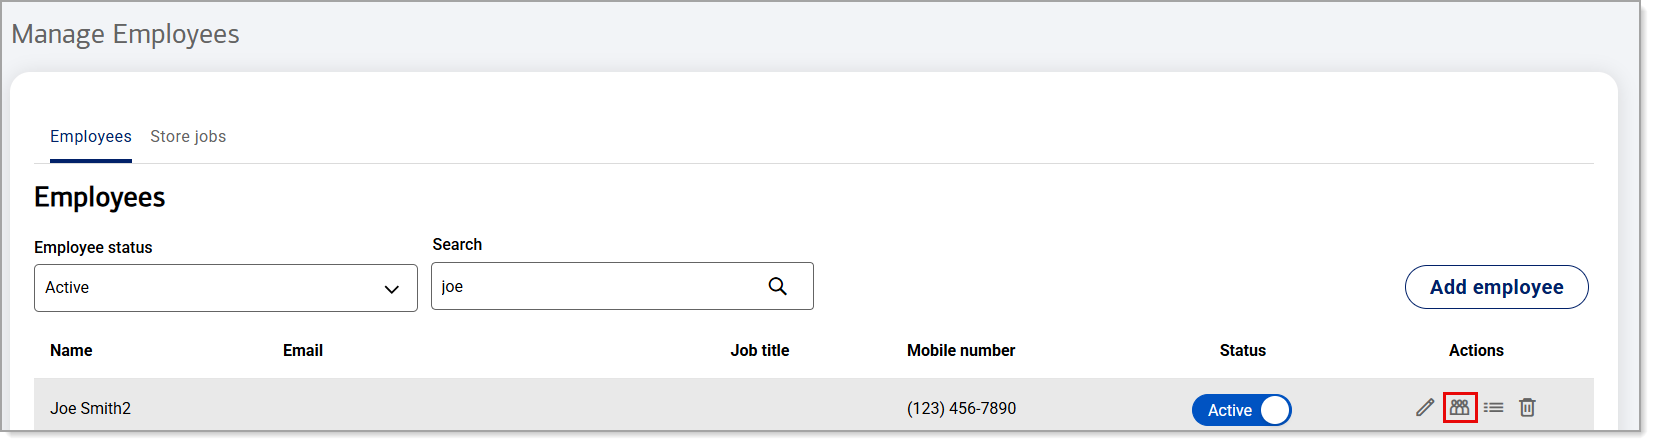
- To assign or edit services associated with an employee, click the Staff services icon next to the employee name, select the service you wish to assign them to, then click Save services. In order to schedule a service for a customer with a specific employee, the service must be assigned to the employee. Availability for booking the service with that employee will depend on the employee's schedule.
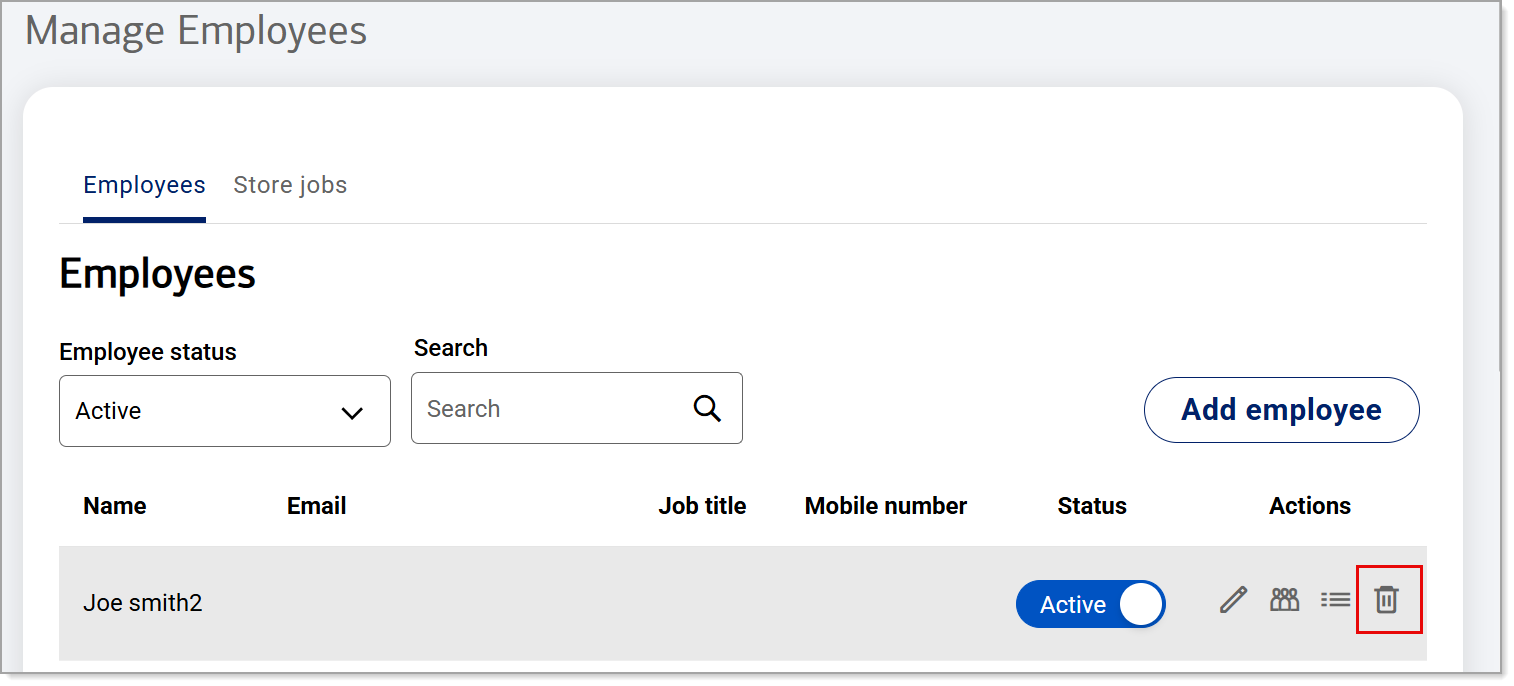
To delete an employee
- In Basic Settings > Employees, click the Delete staff icon next to the employee name you wish to delete, then click Delete to confirm.
Assign permissions
Permission settings control access to the Back Office or the Point of Sale solution app features based on job role or individual employee. For example, you might give your managers the ability to void a sale, but not provide that option to a cashier. You might further allow a trusted cashier to have that void option.
NOTE:
Permissions availability is dependent upon your software plan and type of business.
- To assign permissions to a job or employee
- In Point of Sale Solution Back Office, select Basic Settings > Employees.
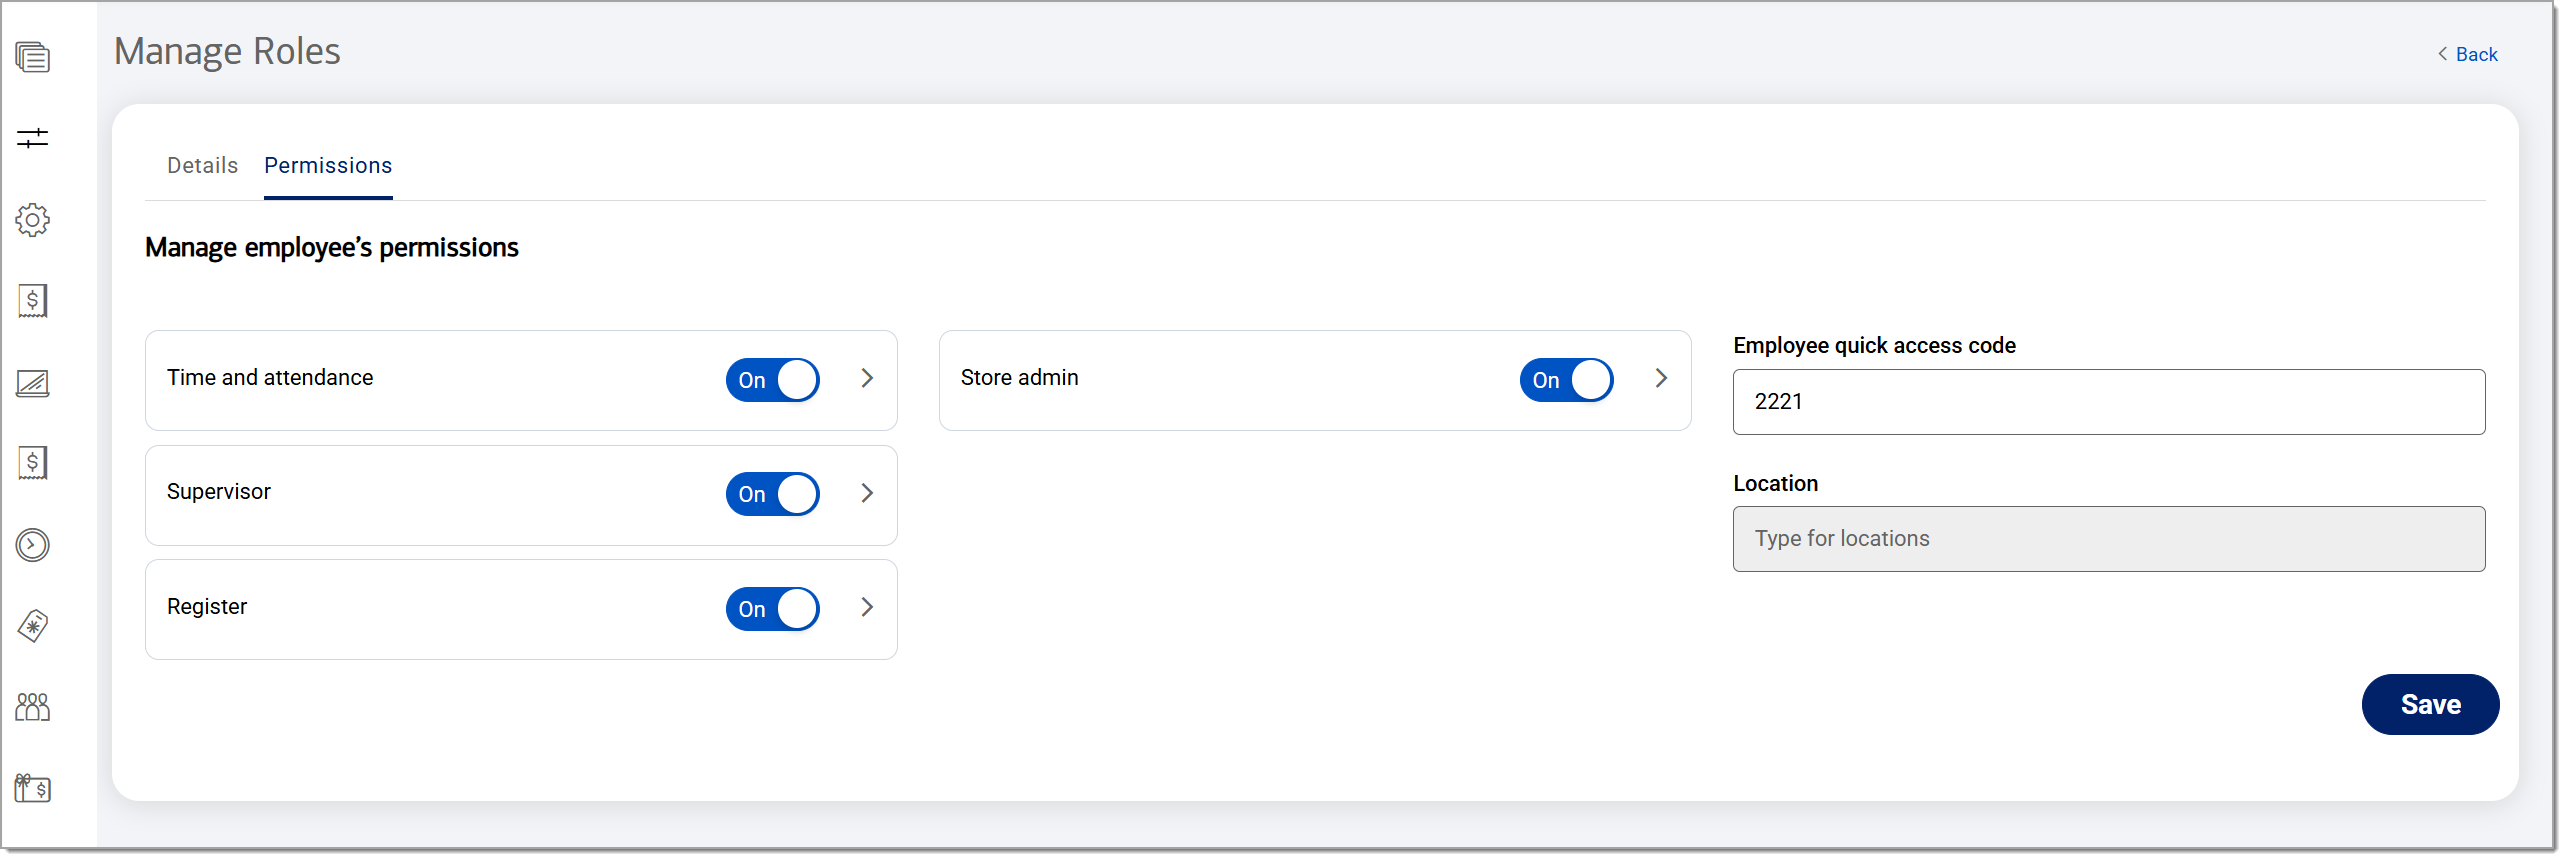
- Select an employee and click the Edit staff roles icon to edit the employee information.

- Assign the job permissions for Time and Attendance, Supervisor, Register, and Store Admin. Turn a permission group to On to assign all the permissions in the group or click the arrow to open the group and assign specific permissions. If one or more permissions in a group are enabled, the permission group status will still display as Off.
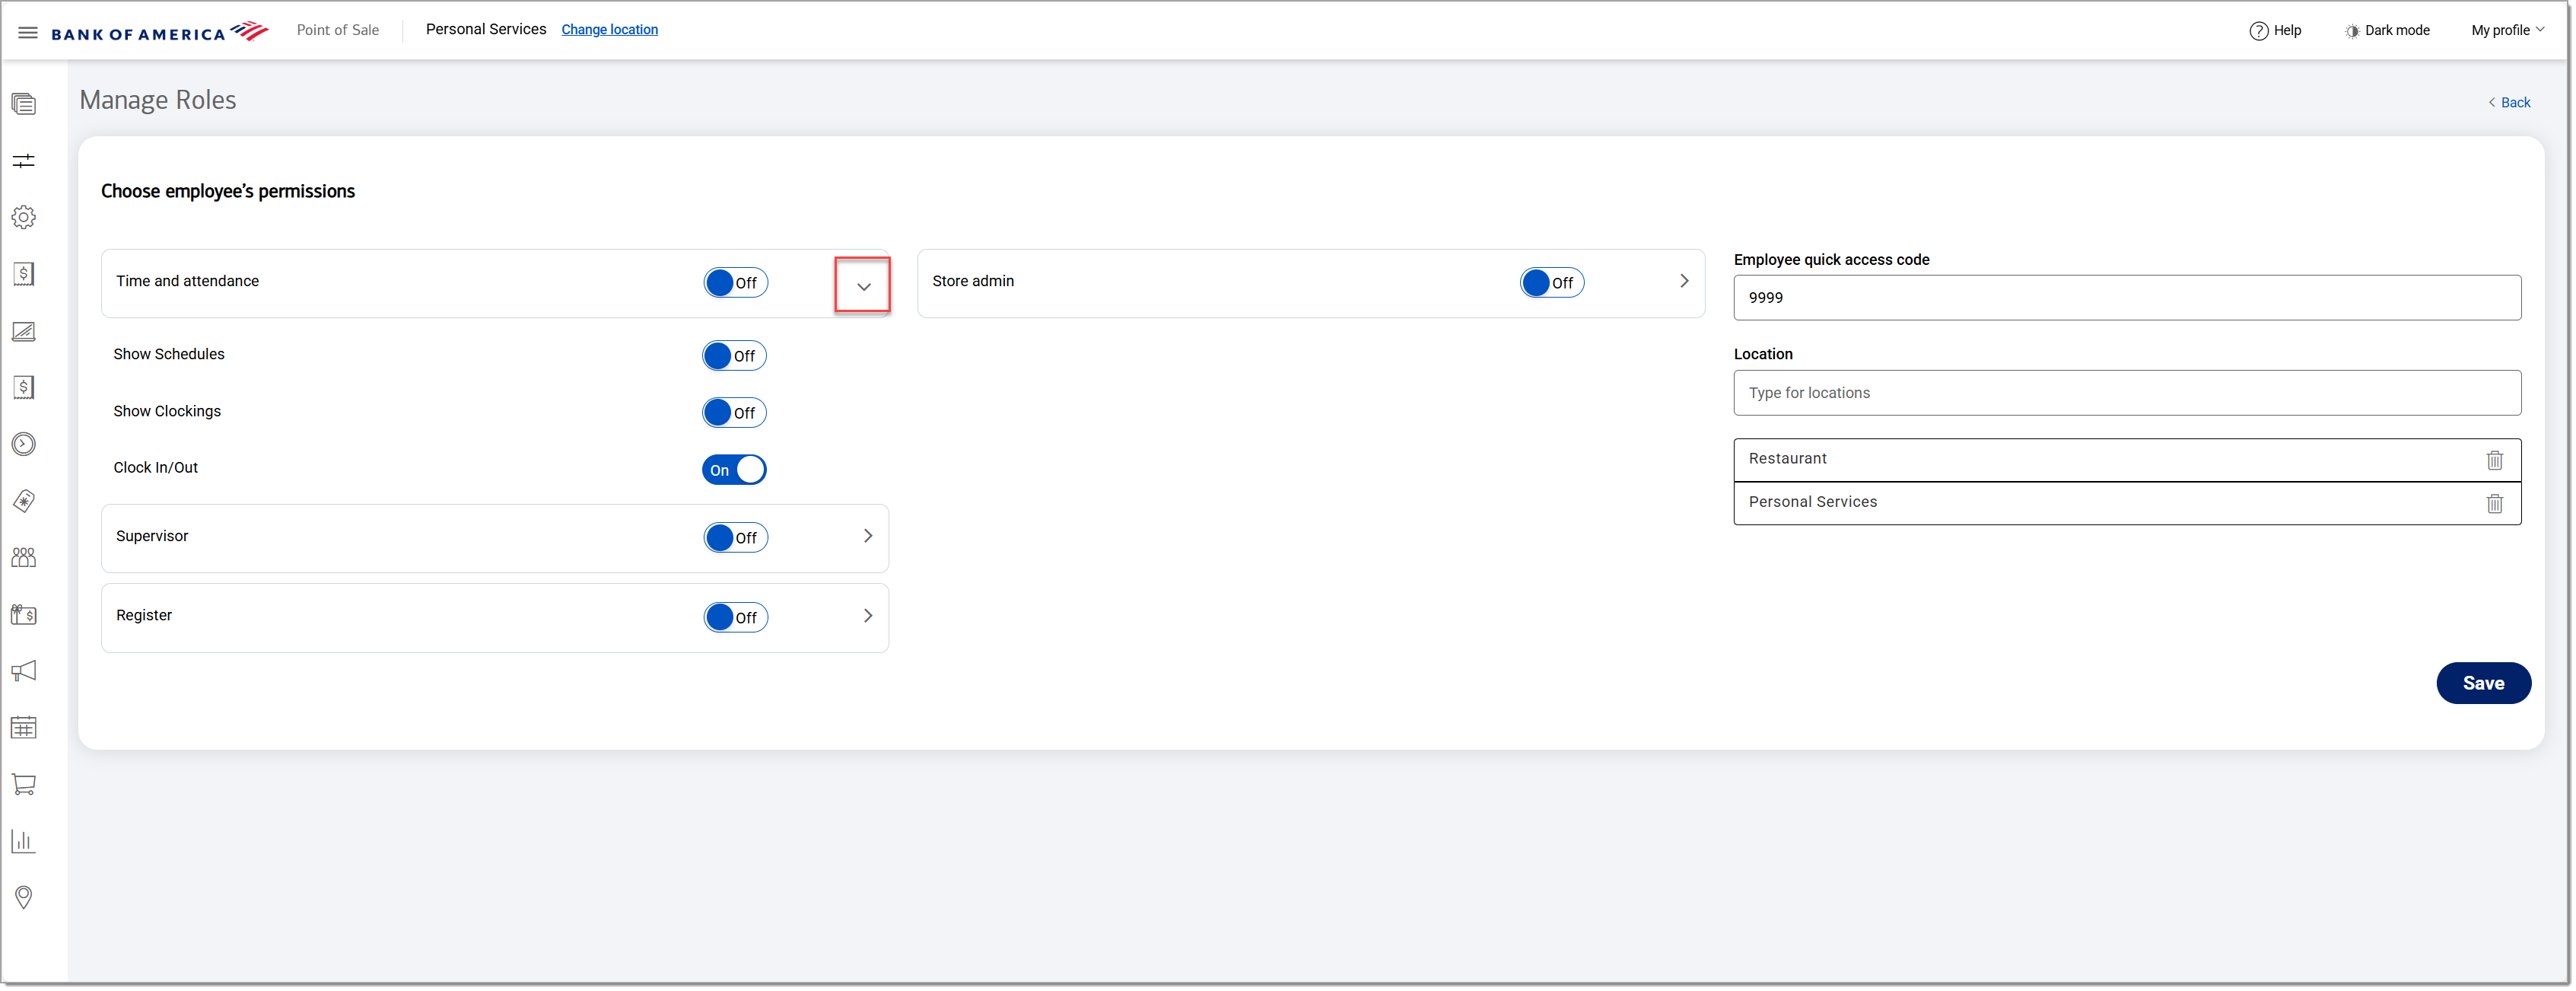
- Assign an employee quick access code and, if desired, location(s).
NOTE: The quick access code can be four digits for all staff or a six-digit quick access code for more security.
- Click Save.