Point of Sale Solution Back Office Categories
Description
What's in this article?
In addition to using categories to organize products and services into similar groups, you can also use categories to apply discounts, and make changes to multiple items at the same time. As they are a requirement for the setup of products and services in the Back Office, it is recommended that you determine and create your categories beforehand.
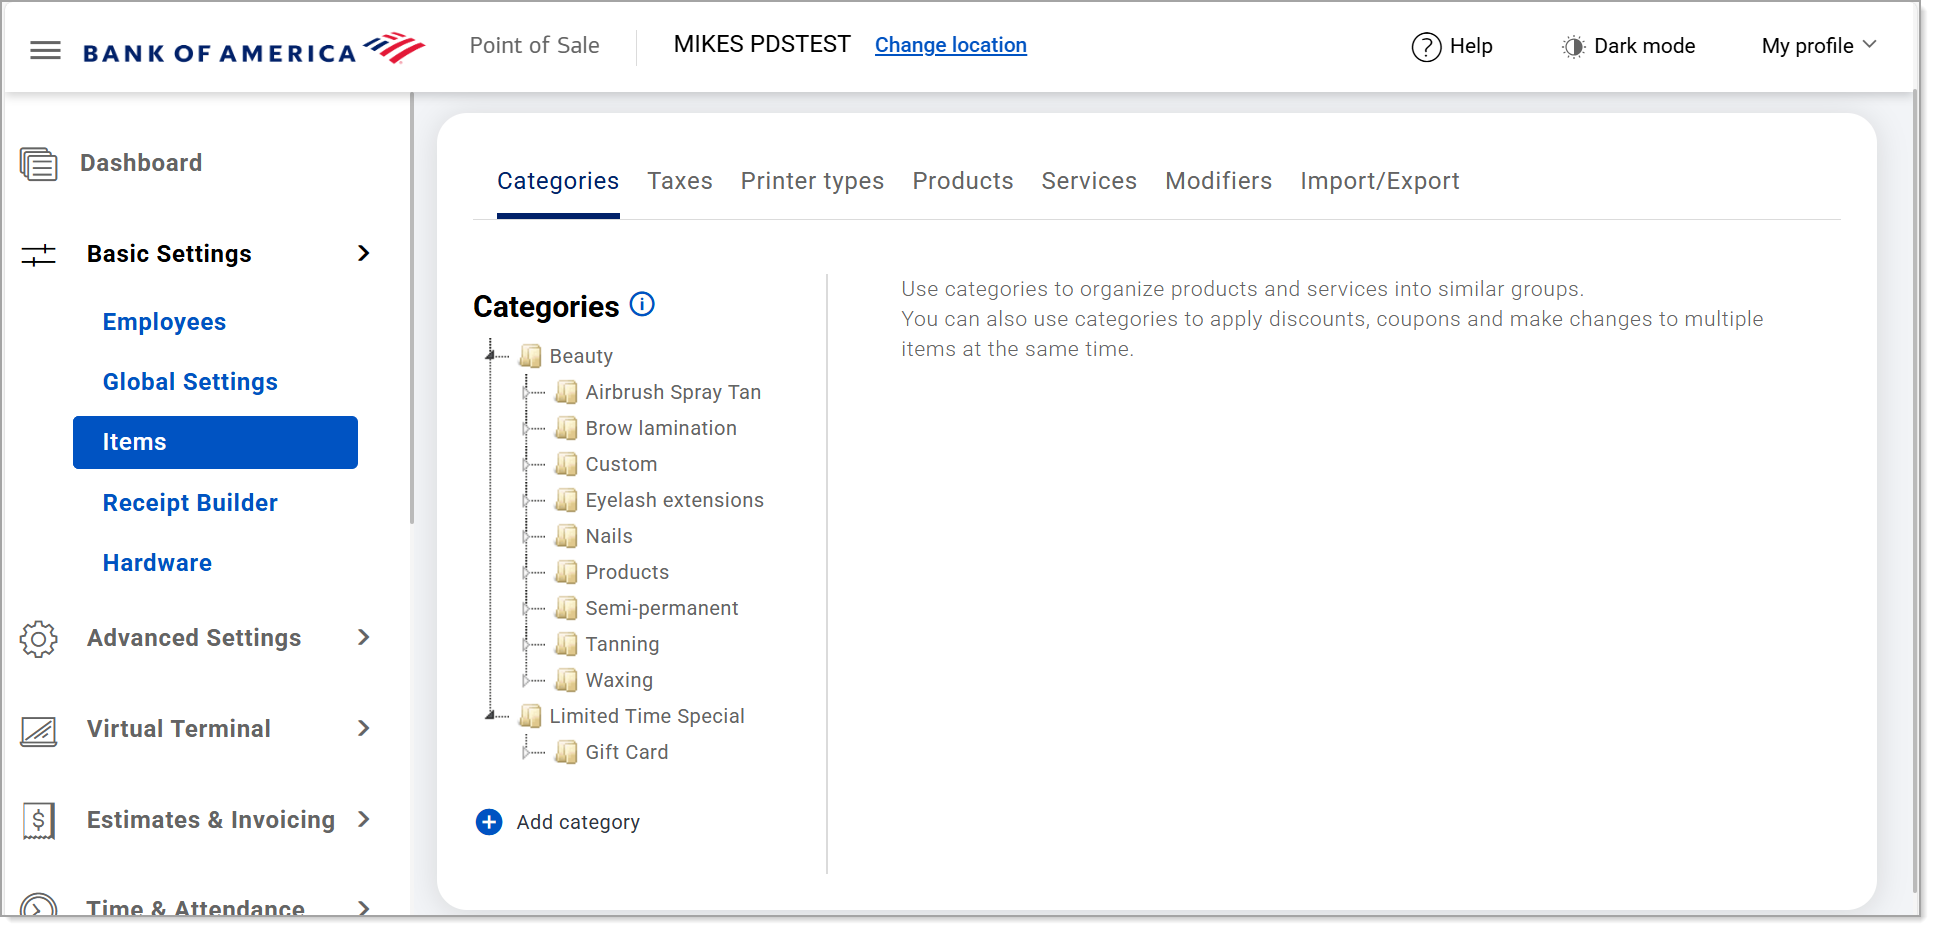
Category hierarchy
When you create a category, you assign it to a department name that you select from a predetermined list. Once created, categories display in Basic Settings > Items > Categories based on alphabetical order of the department name you assigned them to. You can click on a carrot in the hierarchy to expand the view of categories.
This hierarchy will determine the default order of buttons on your Point of Sale app, but the order can be customized to your preference using the Profiles feature in the Back Office.
Create and manage categories
Create categories to organize your products and services. You can create subcategories by creating the higher level category first, then selecting that higher level category as the parent category when you create your subcategory. Categories can be edited or deleted as needed.
Watch the video:
- *music*
- In this video, you will learn how to create and edit item categories from the back office of your Point of Sale Solution.
- In Point-of-Sale Back Office select Basic Settings > Items.
- From the Categories tab, click the "+" icon to add a new category.
- Enter the new category name. Note this is a required field.
- Select a department from the dropdown list. Note this is a required field.
- Choose a color for the category.
- Enter a description for the new category, if desired.
- If you are creating a category within a category, choose the parent category.
- Click "Create" to save the new category.
- To edit a category in the Category Hierarchy, navigate to the desired category and click on it.
- Click Edit to update the category.
- Update as needed, then click Save.
- To delete a category, In the Category Hierarchy, navigate to the desired category and click on it.
- Click Delete to remove the category.
- Click Delete again to confirm and complete your edit.
- *music*
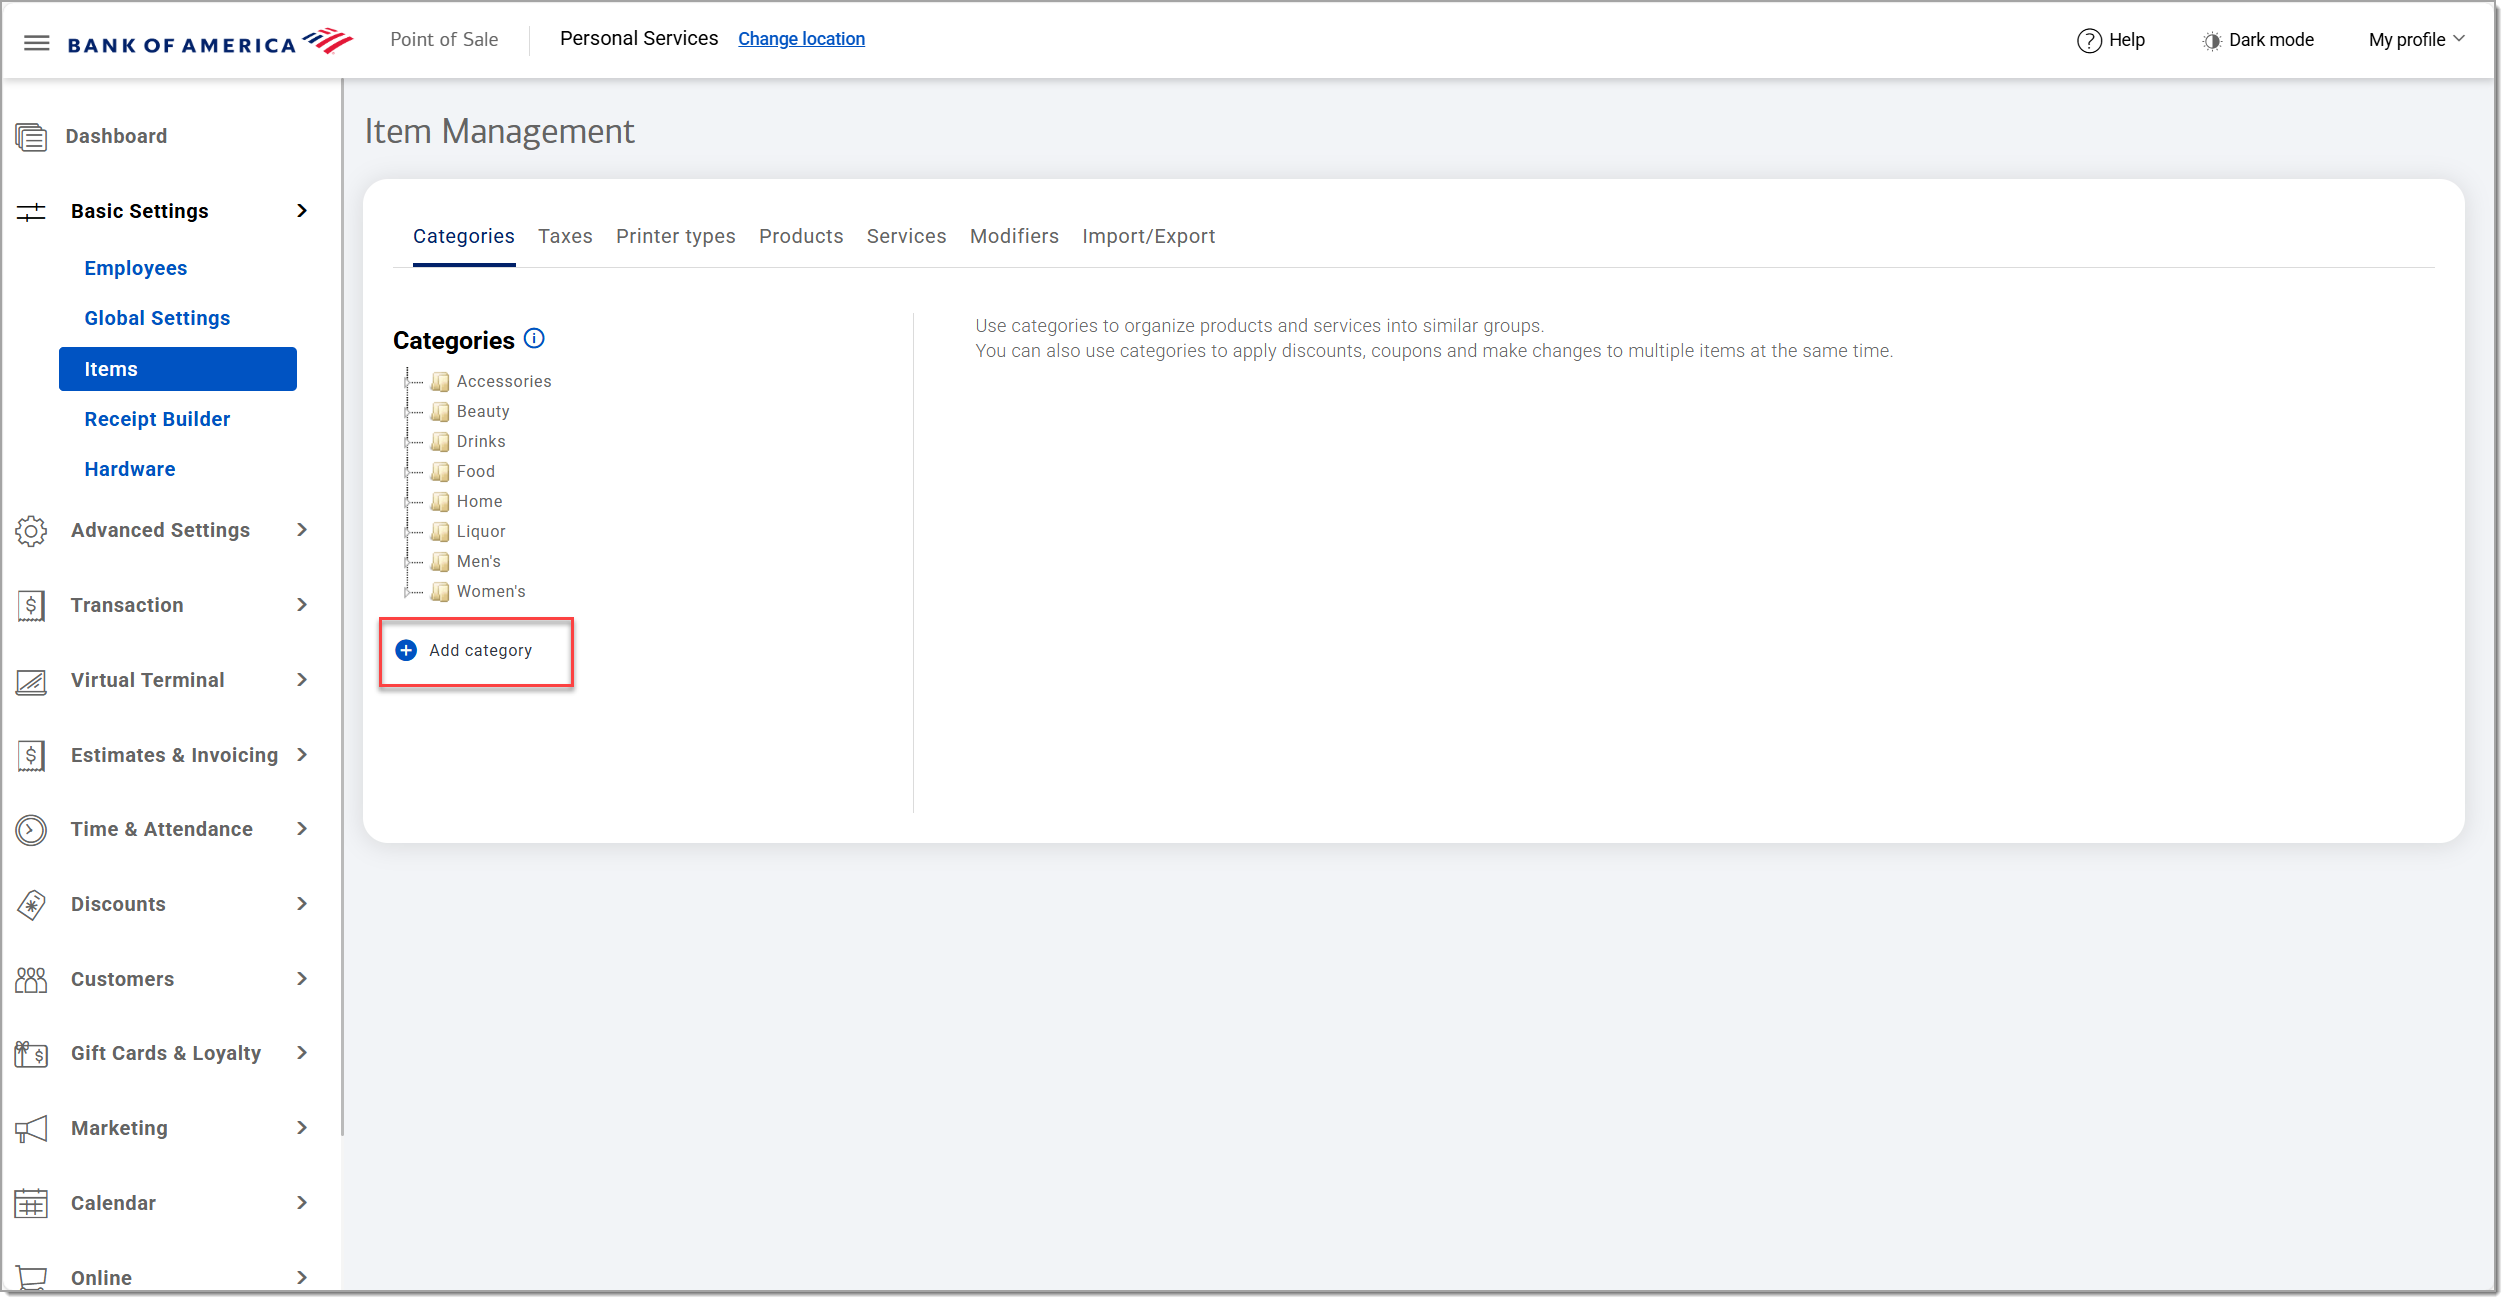
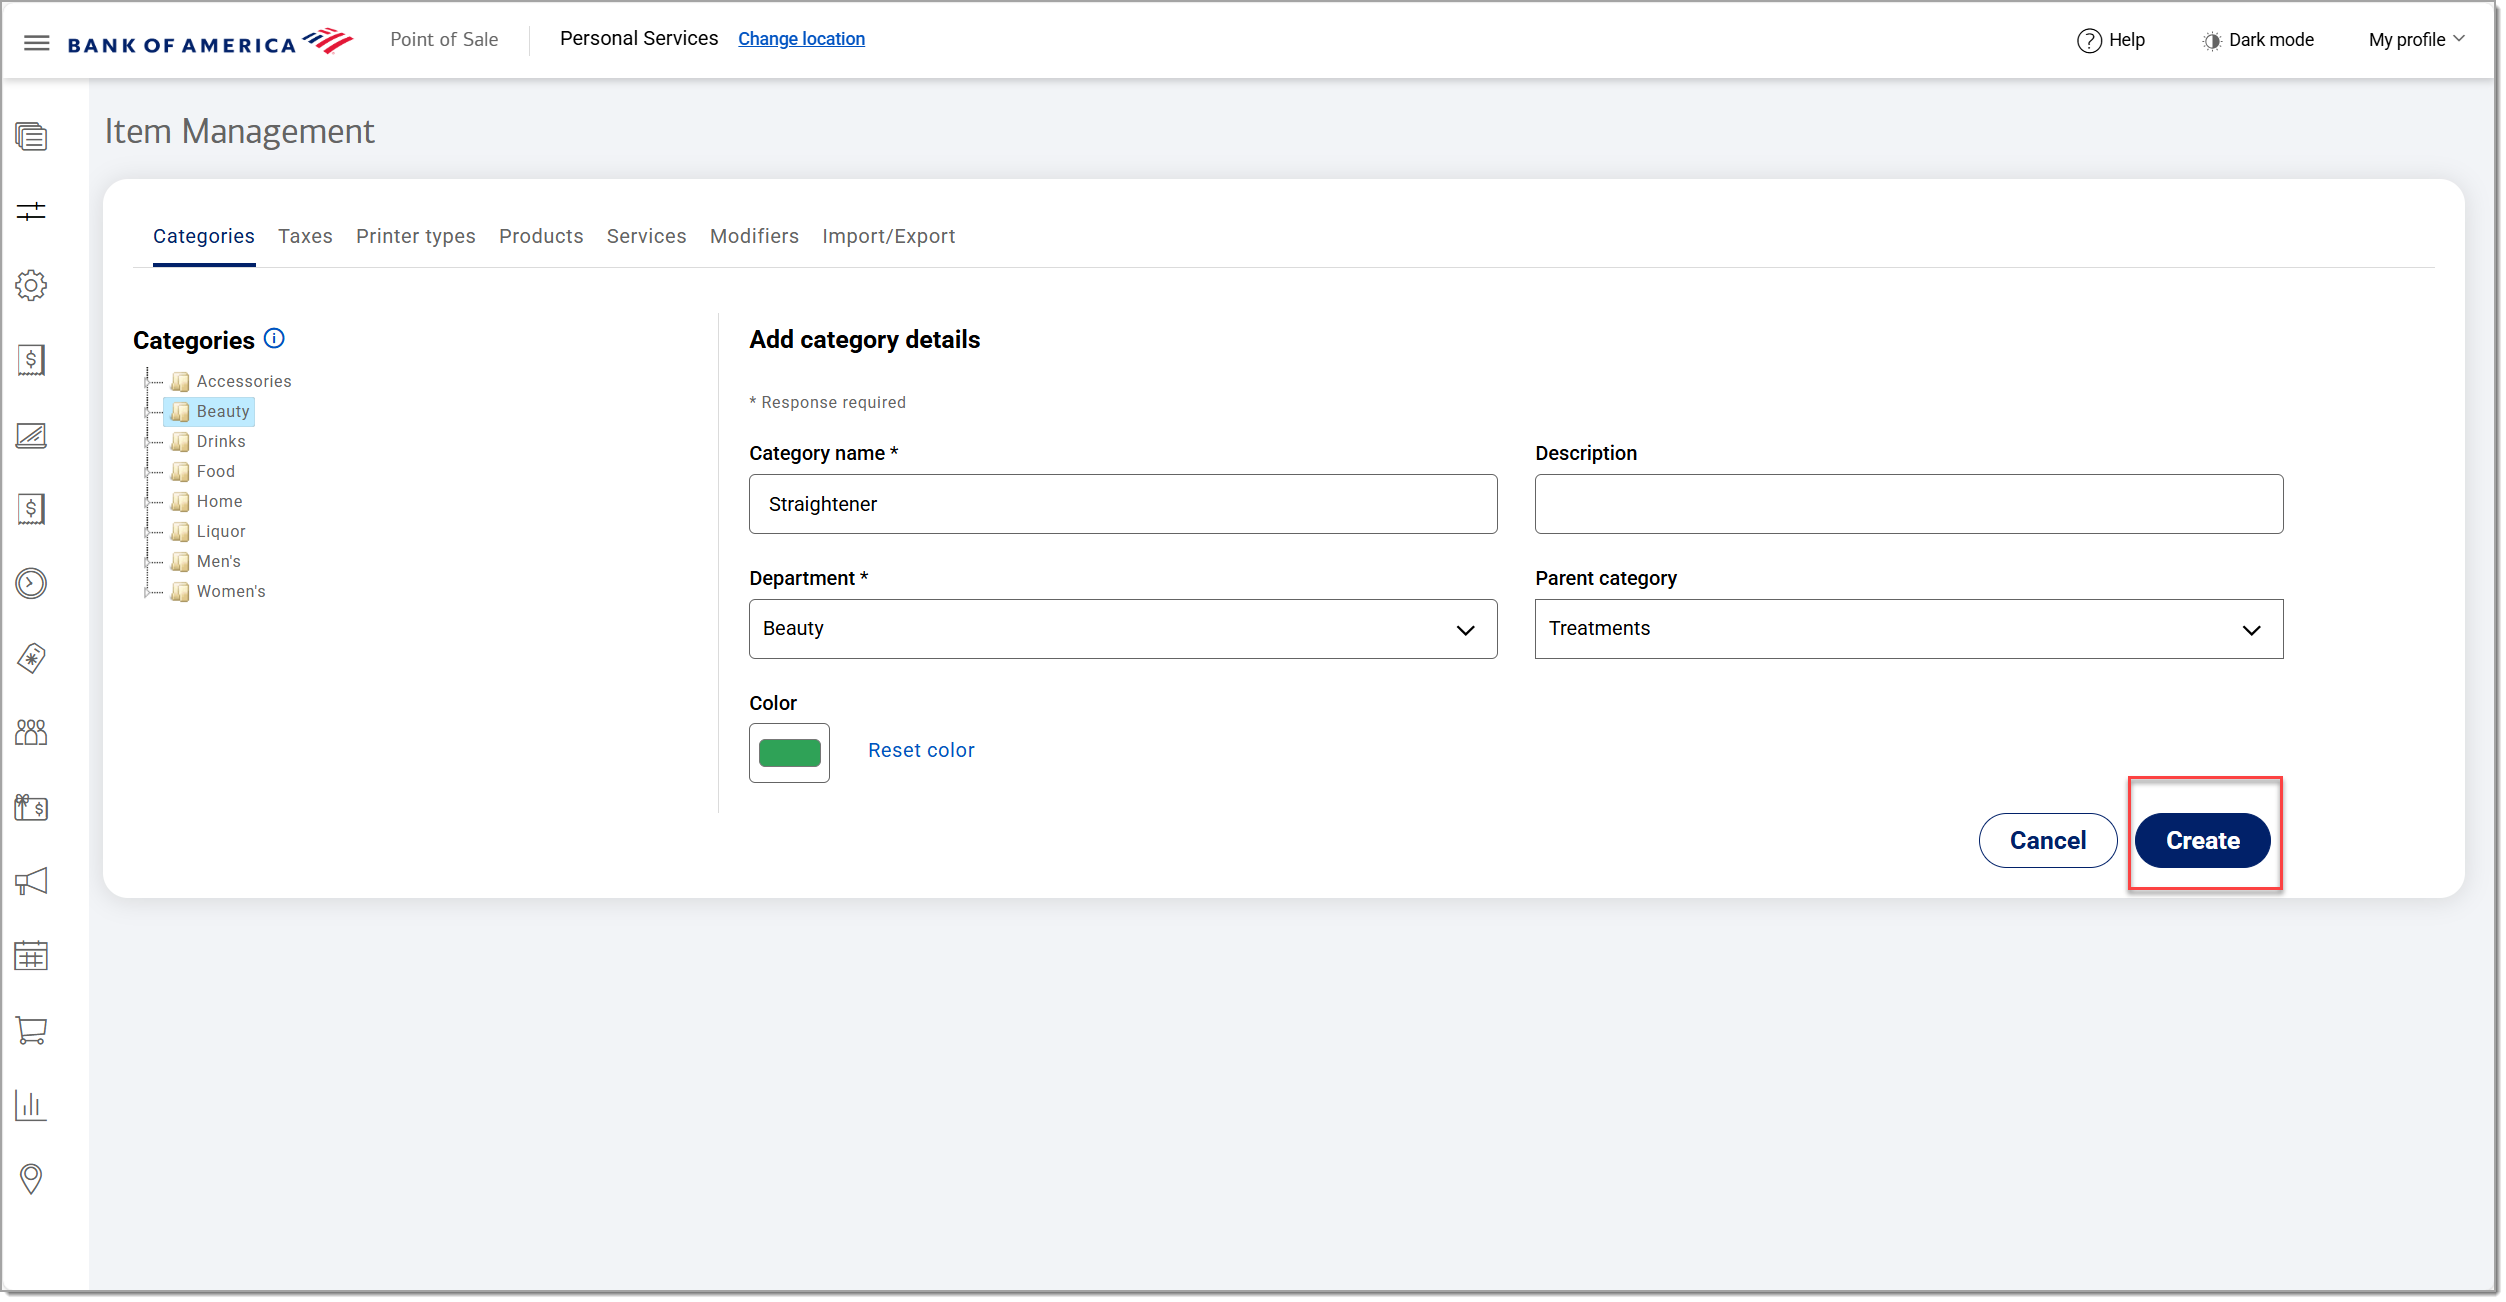
To create a category
- In the Point of Sale Solution Back Office, select Basic Settings > Items.
- From the Categories tab, click Add category to add a new category.
- Enter the Category name you would like. This is a required field.
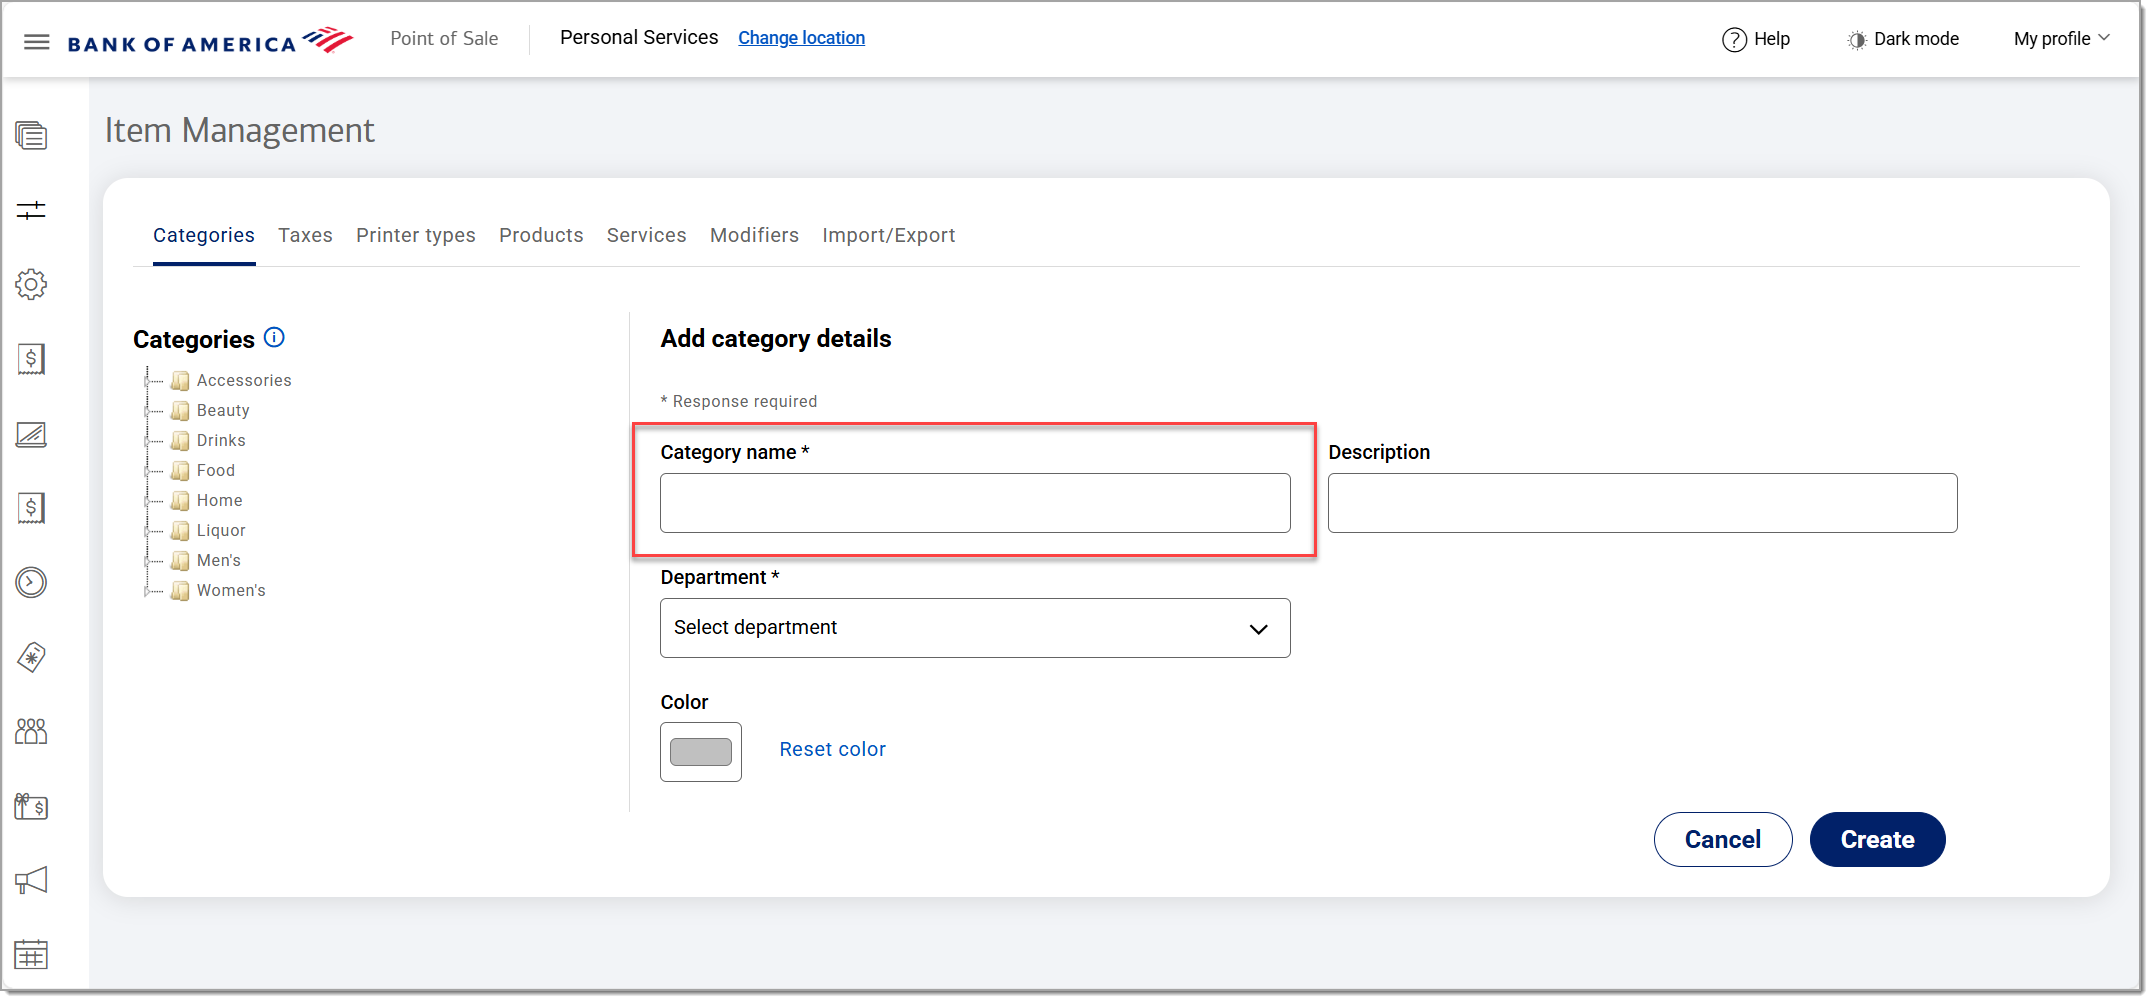
- Select a department from the dropdown list to assign the category to. This is a required field.
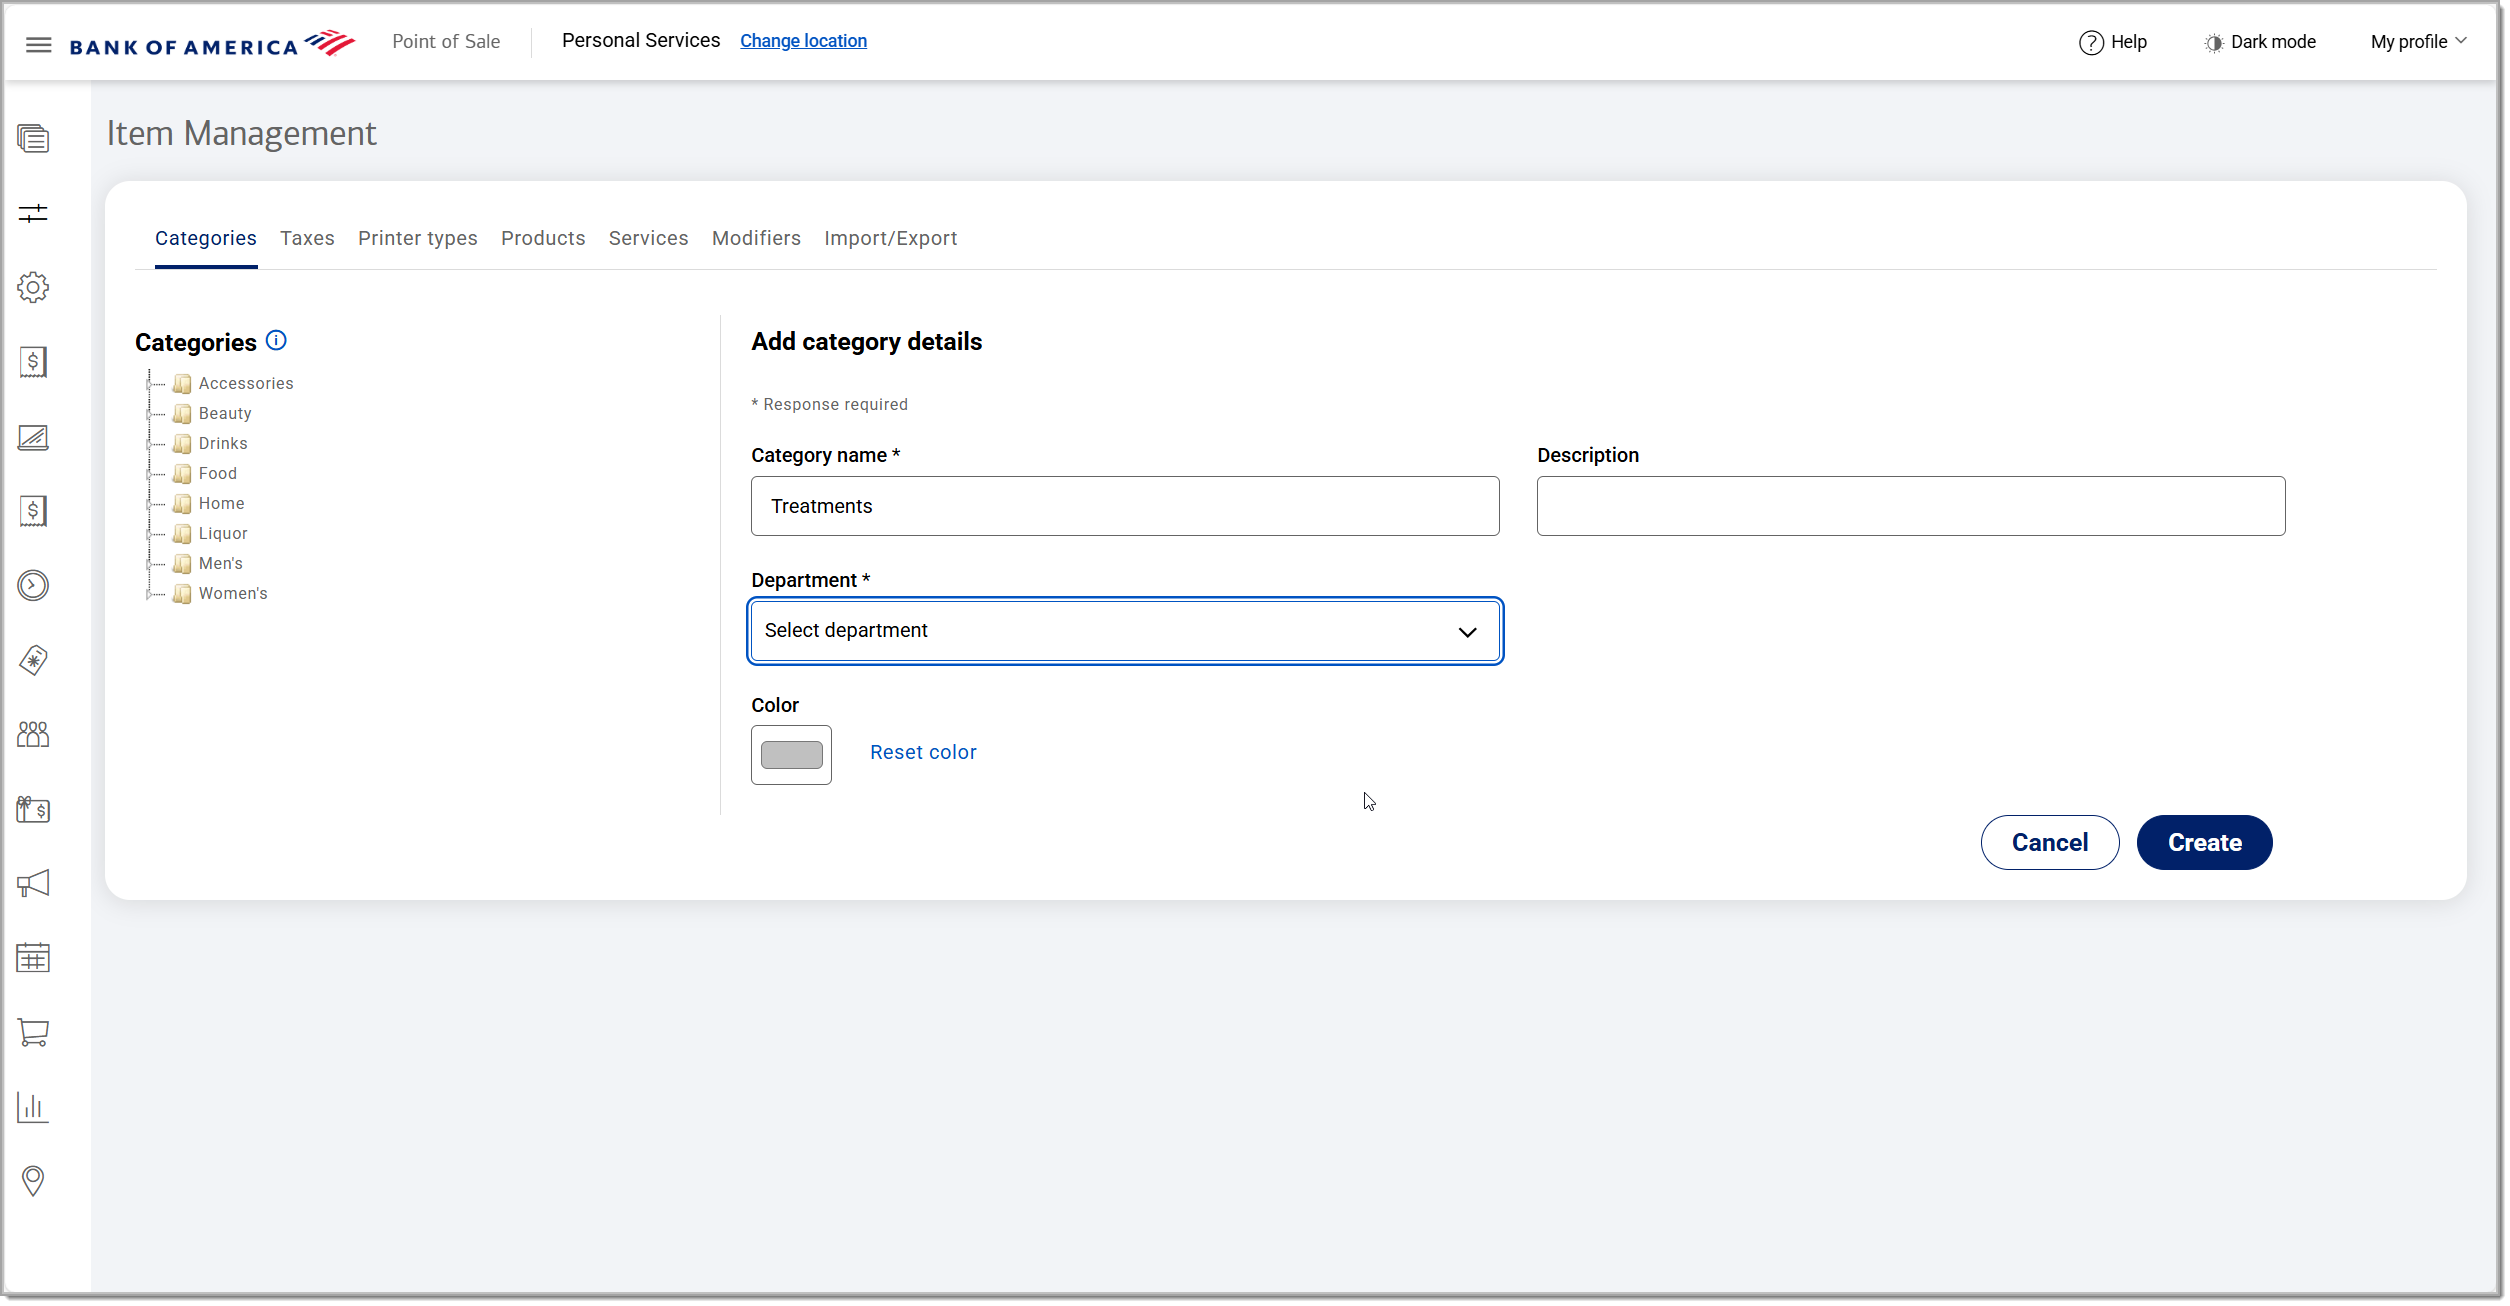
- Click the Color icon to set a color for the category and click on the color field to select the color. This is the color of how the category button will appear on your Point of Sale app. It can also be set or changed if you choose to create a custom app layout profile.
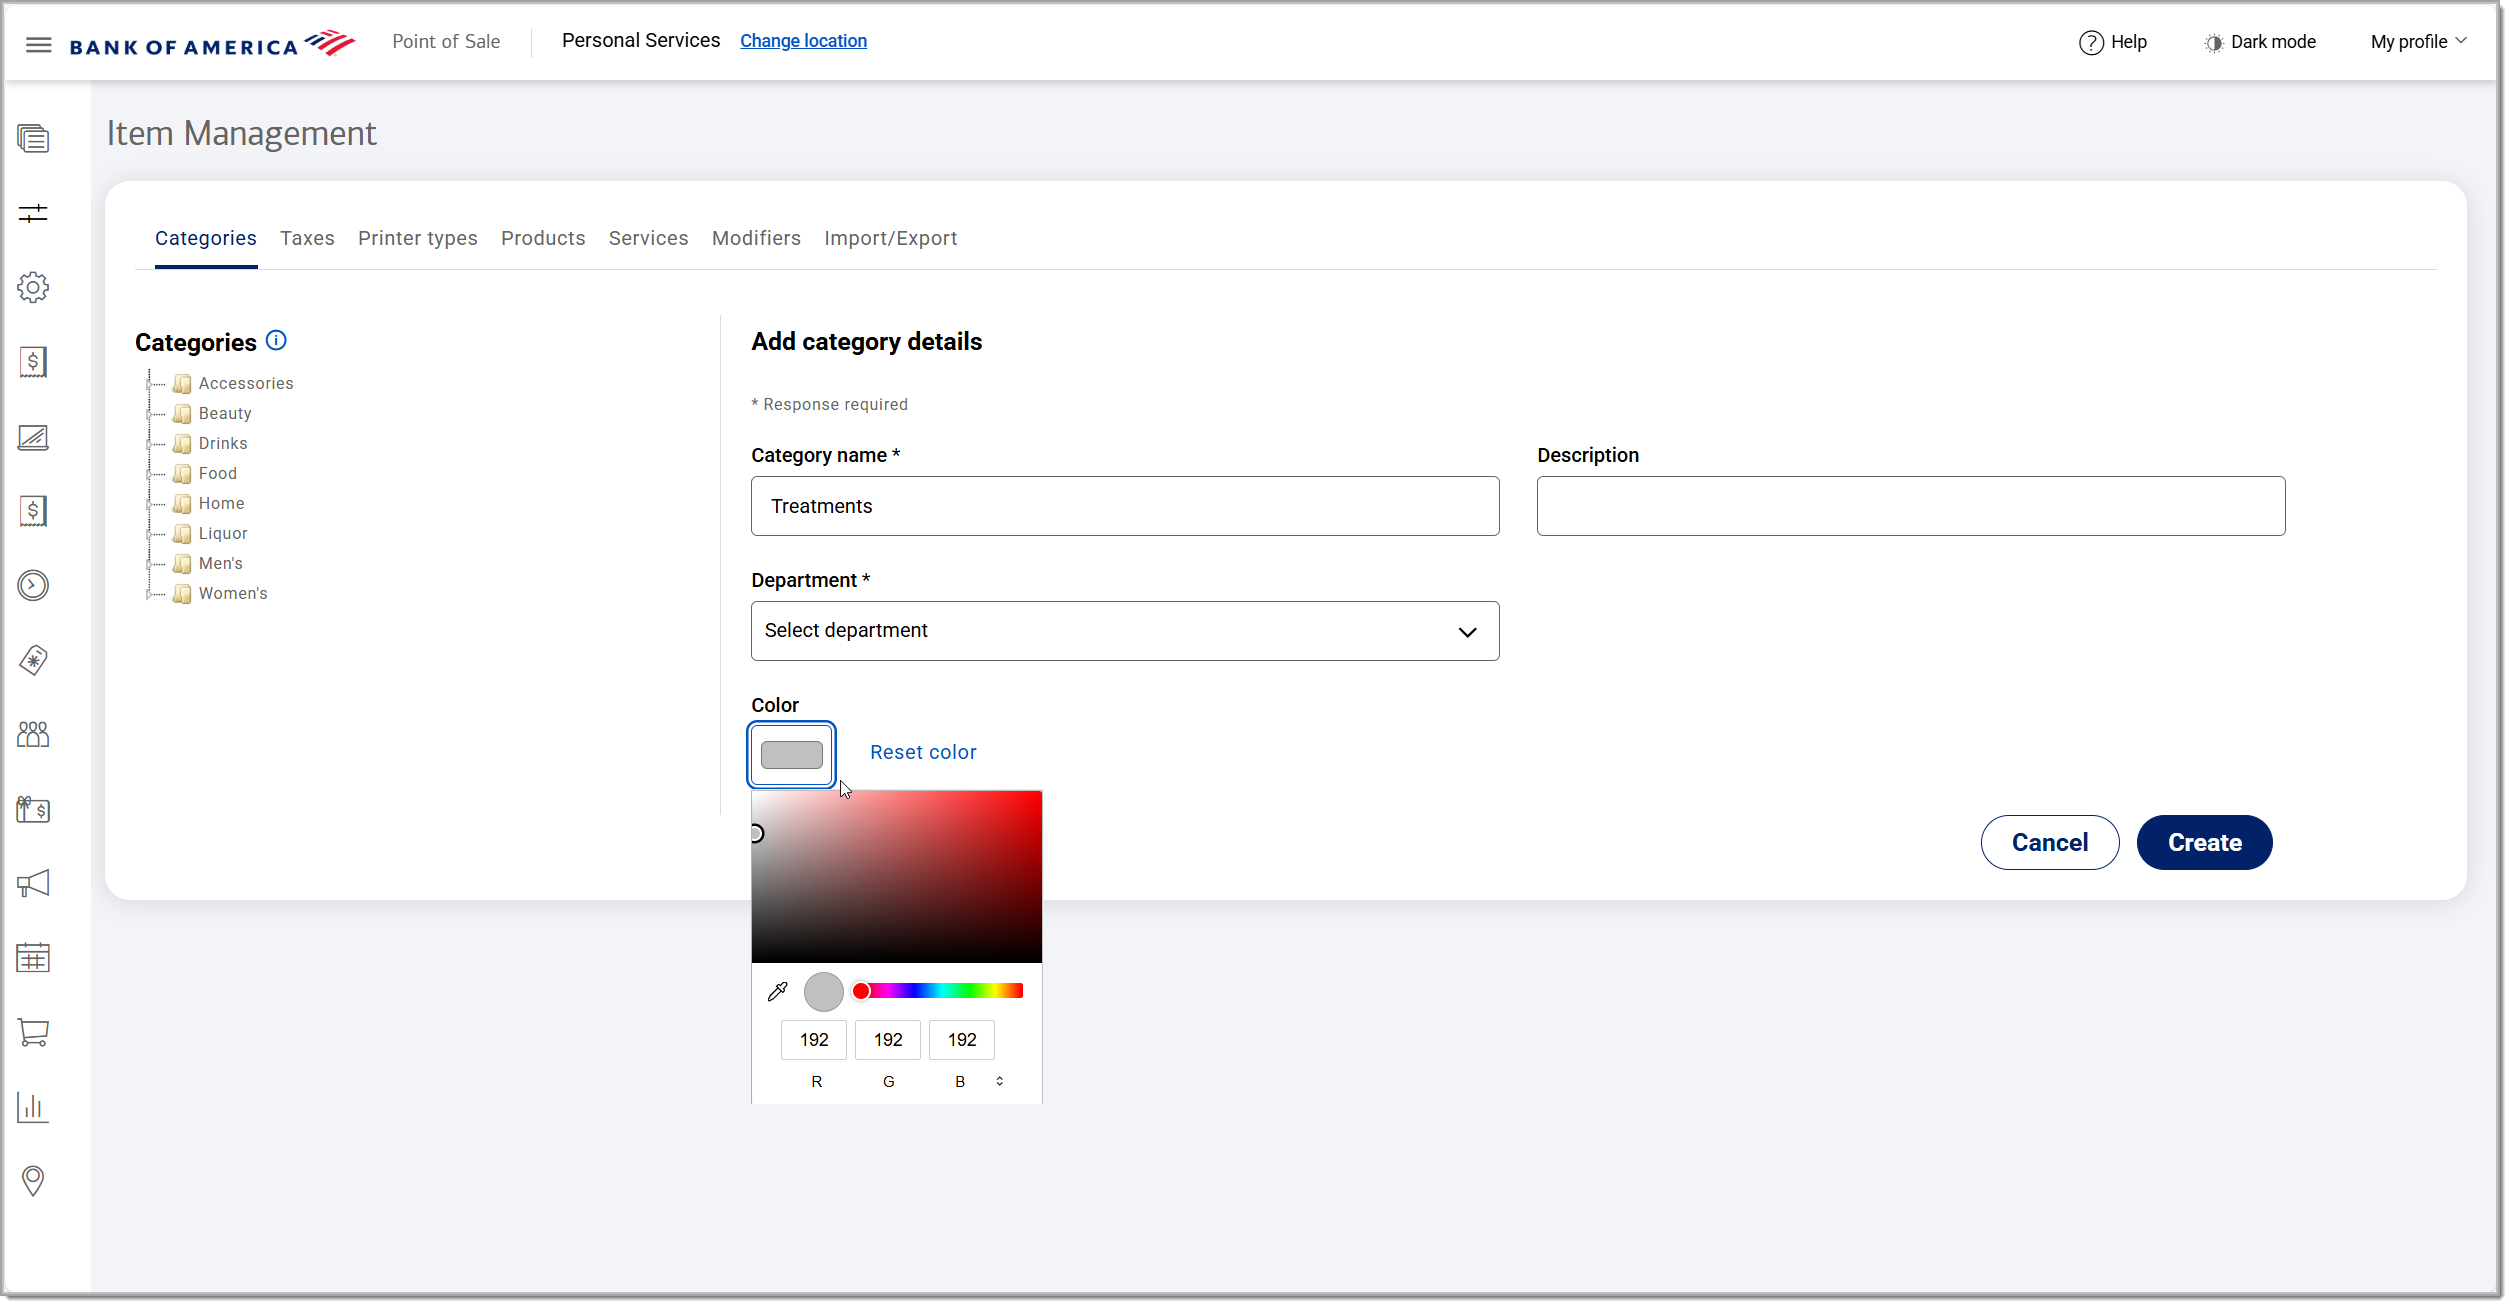
- (Optional) Enter a description for the new category if desired.
- If you are creating a category within a category, select the Parent category from the list.
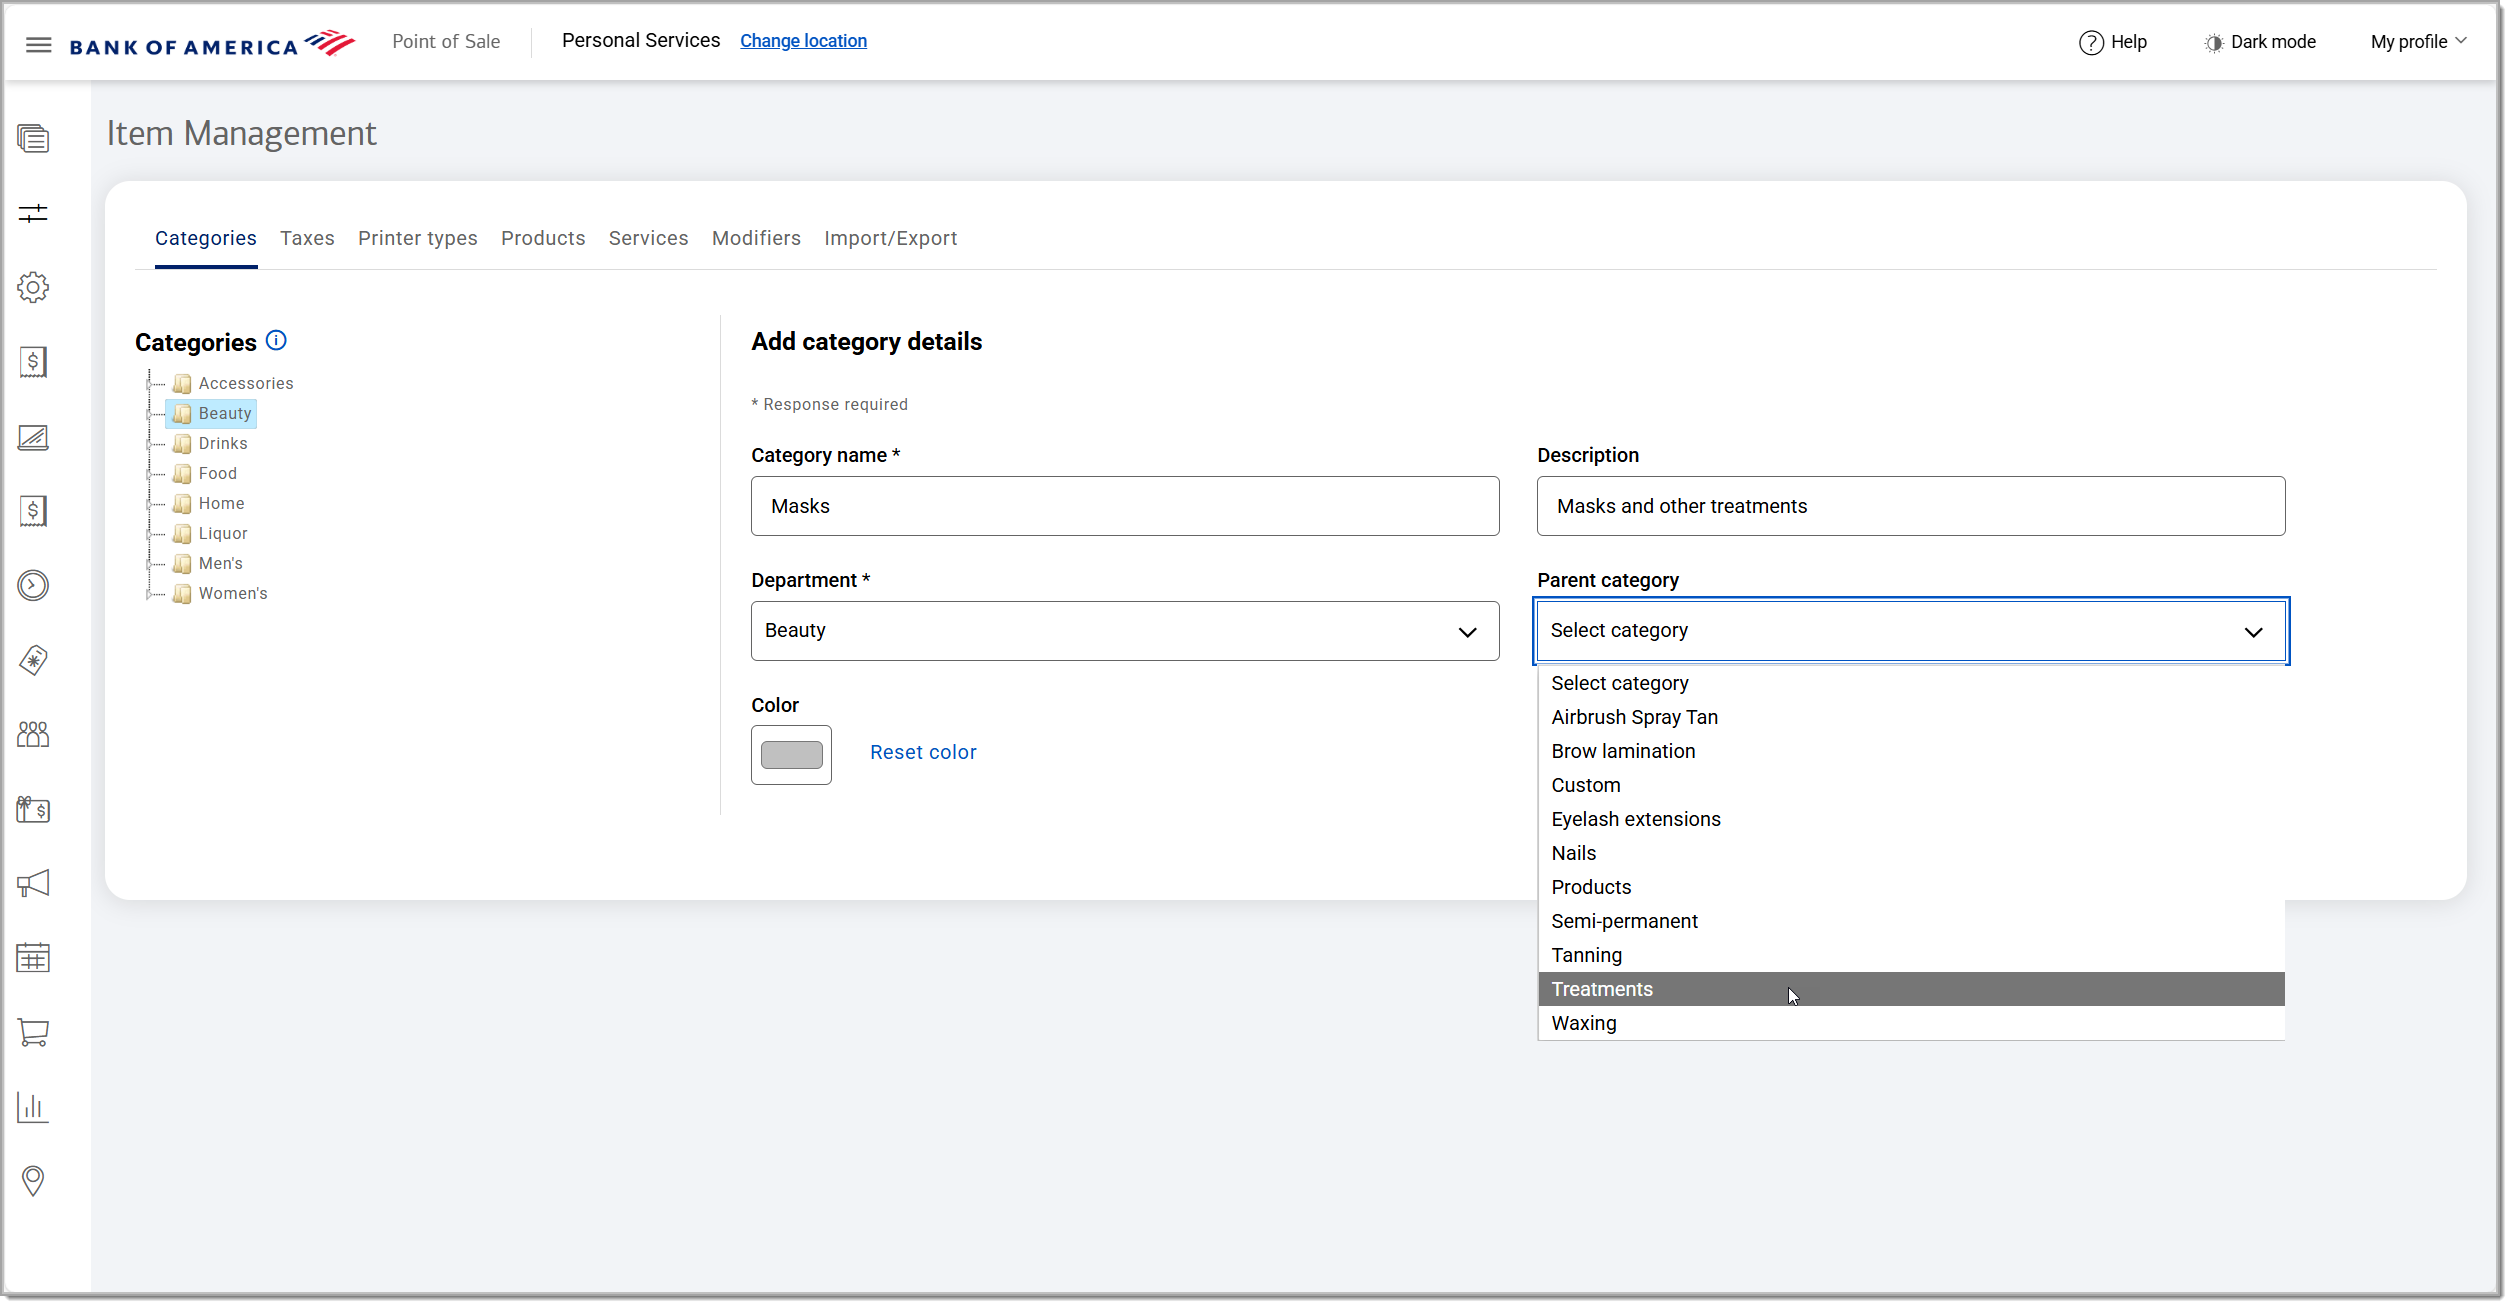
- Click Create to save the new category.
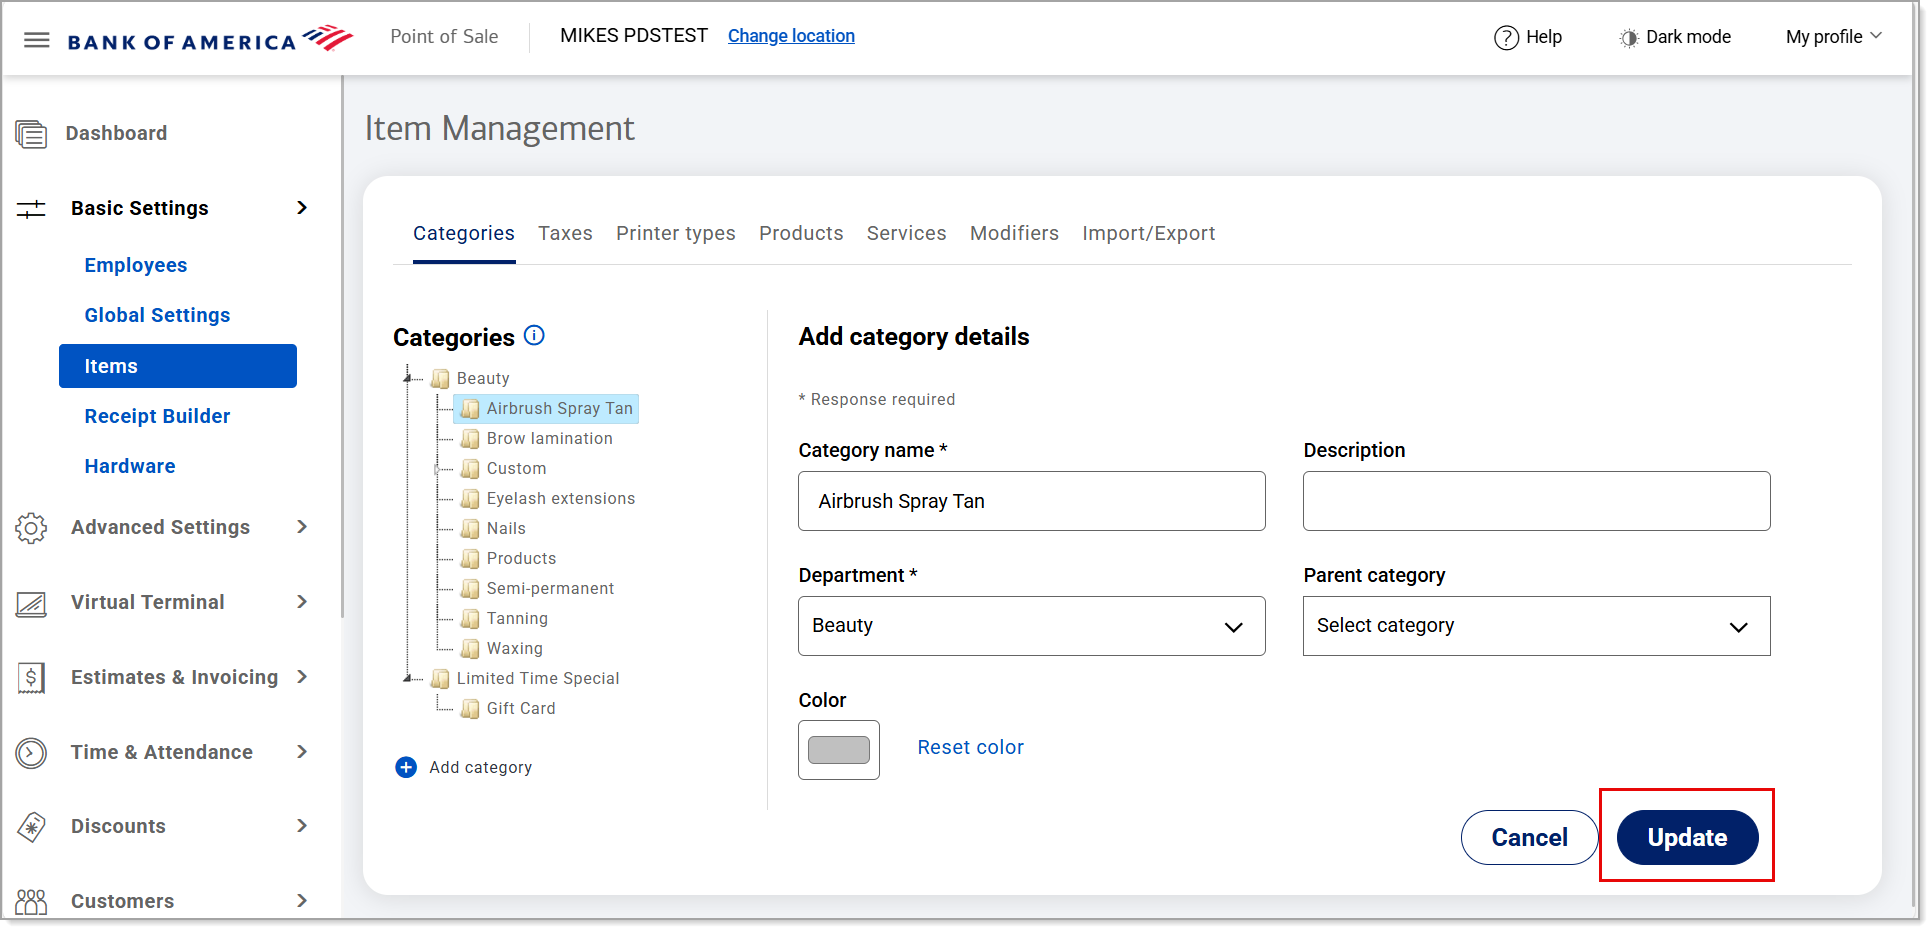
To edit a category
- In the category hierarchy, navigate to the desired category and click on it.

- Click Edit.
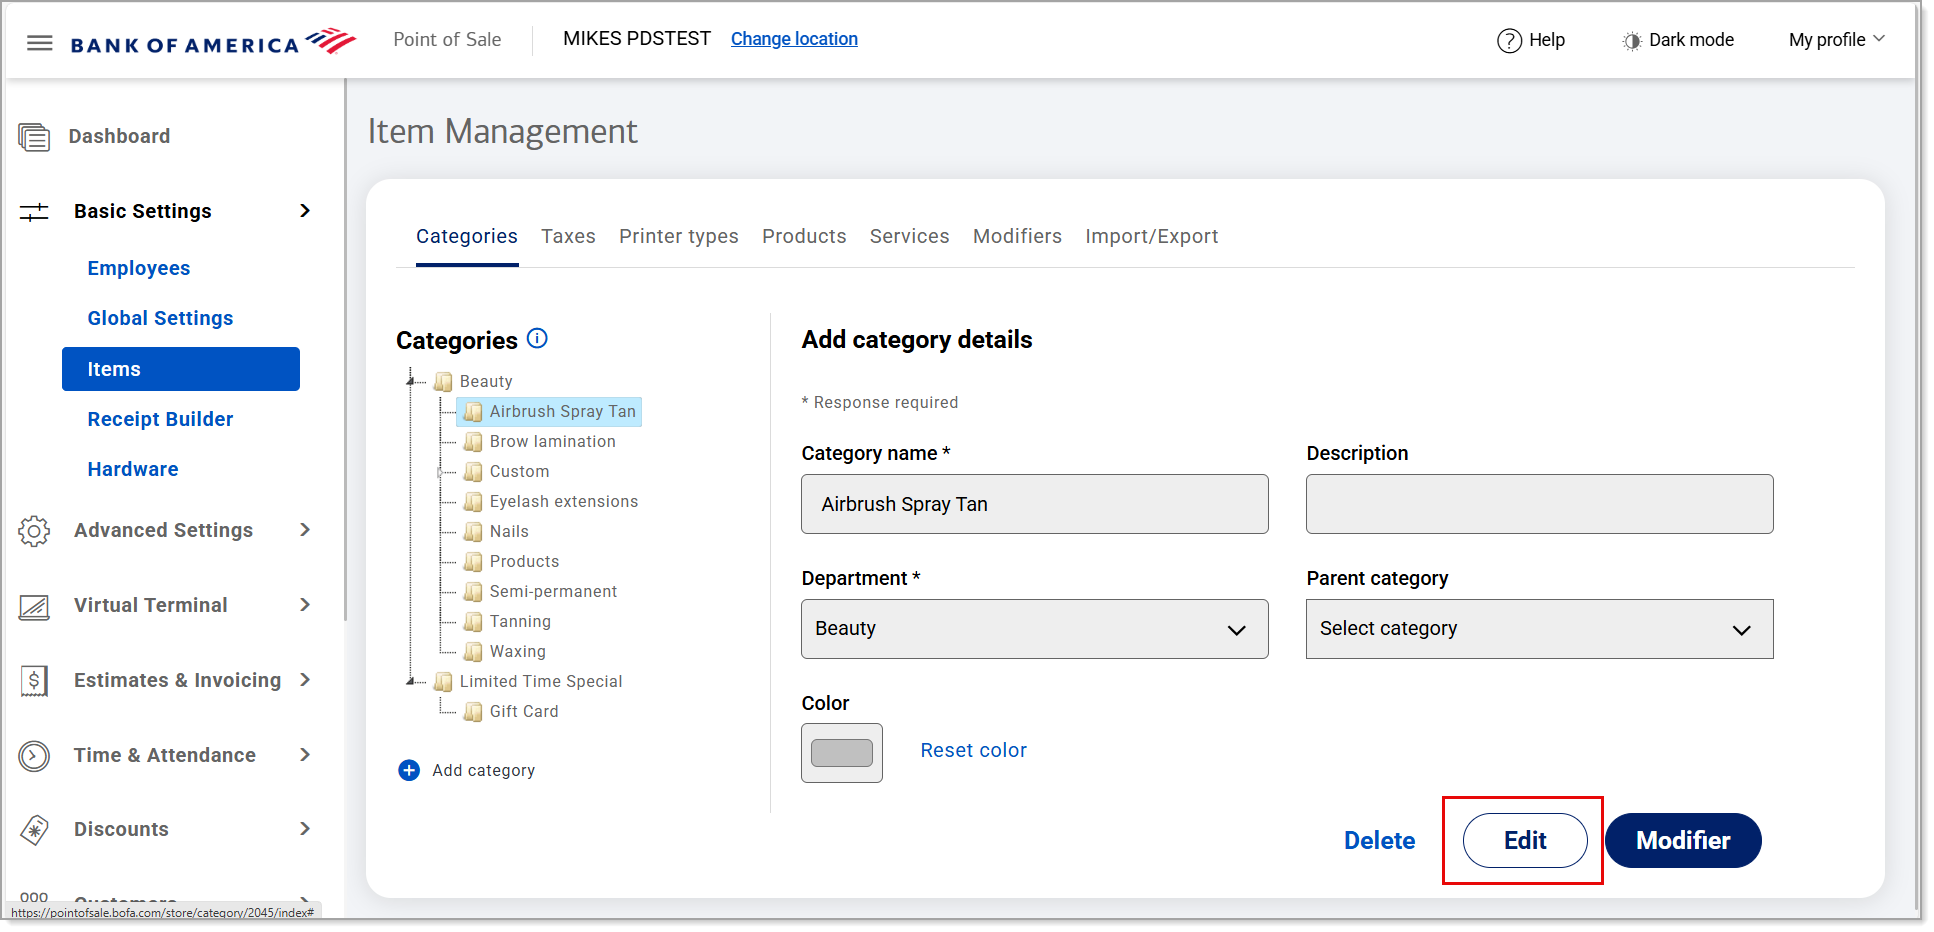
- Edit as needed, then click Update to save your changes.
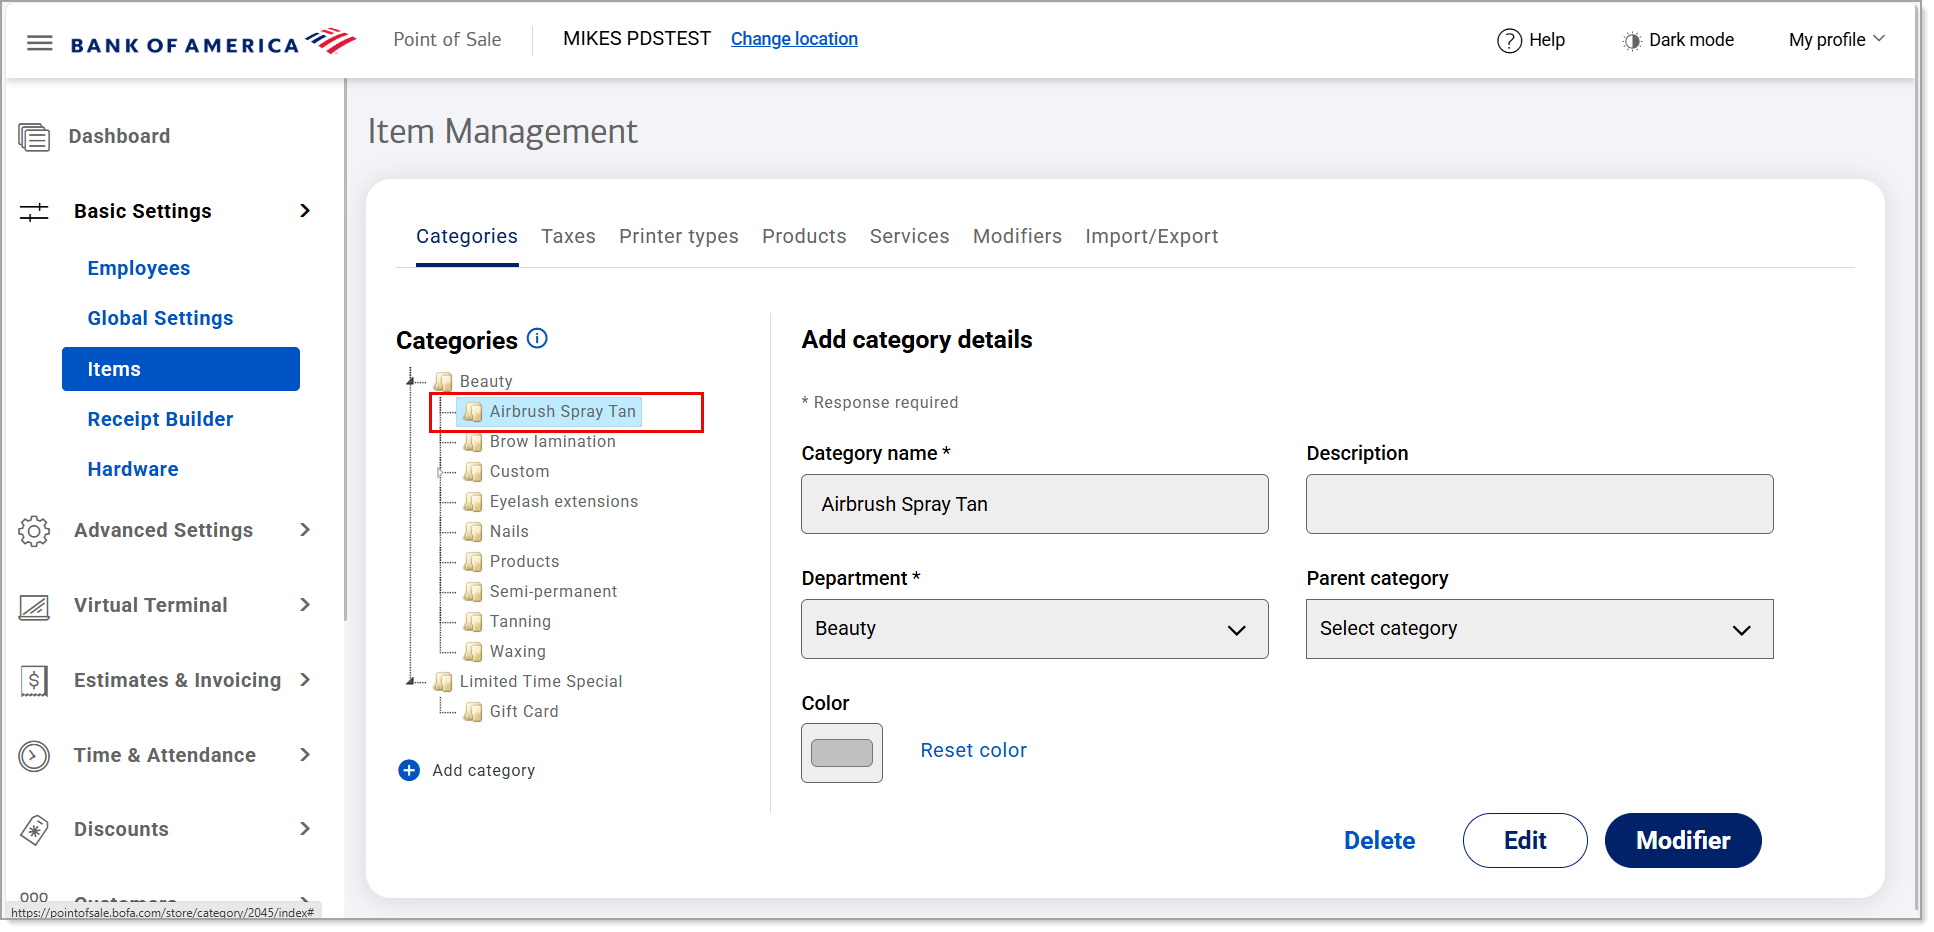
To delete a category
- In the category hierarchy, navigate to the desired category and click on it.
- Click Delete to remove the category.
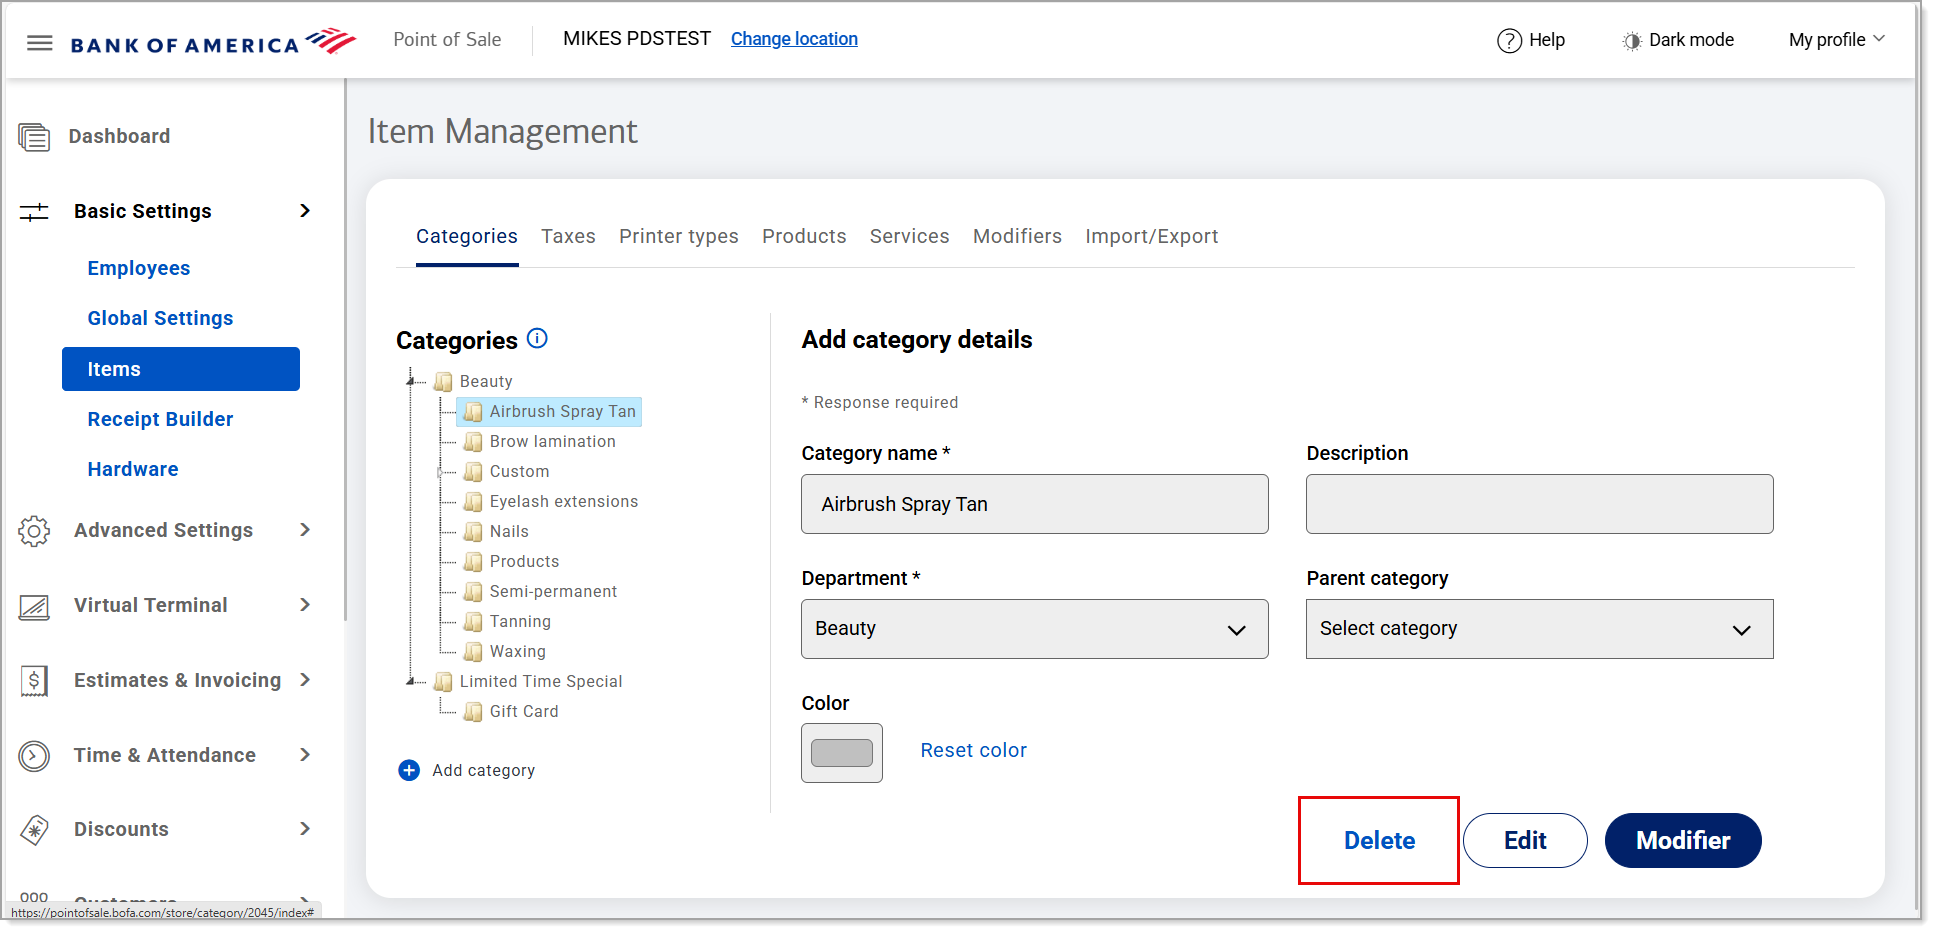
- Click Delete again to confirm.