Point of Sale Solution Back Office Discounts
Description
What's in this article?
There are two types of discounts that can be configured for your account:
- Auto discounts are discounts that are automatically applied to an order. They can be assigned to a specific item (product or service), category or department and days and times that the discount is active can be set. For example, you might discount tacos on Tuesdays or discount all drinks during a happy hour on weekdays.
- Manual discounts are discounts applied when a customer presents a coupon. Coupons can be applied to an entire order or to purchases for specific items (products or services) or in specific categories or departments, similar to the way that auto discounts work.
To apply more than one discount to a sale, estimate or invoice, enable Multiple discounts in the Back Office Basic Settings > Global Settings.
Watch the video:
- *music*
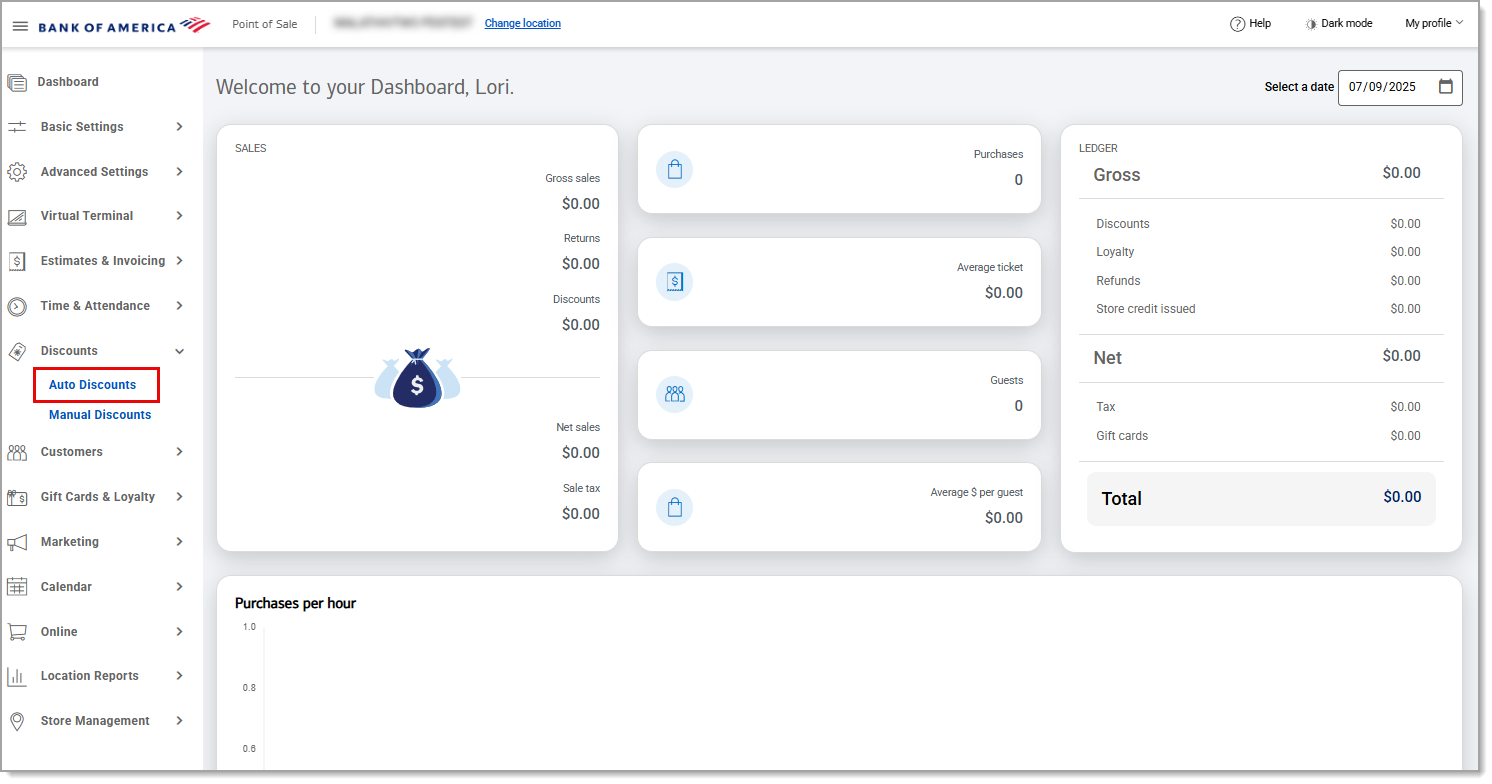
- To create an auto discount, In the Point of Sale Back Office, select Discounts > Auto-Discounts.
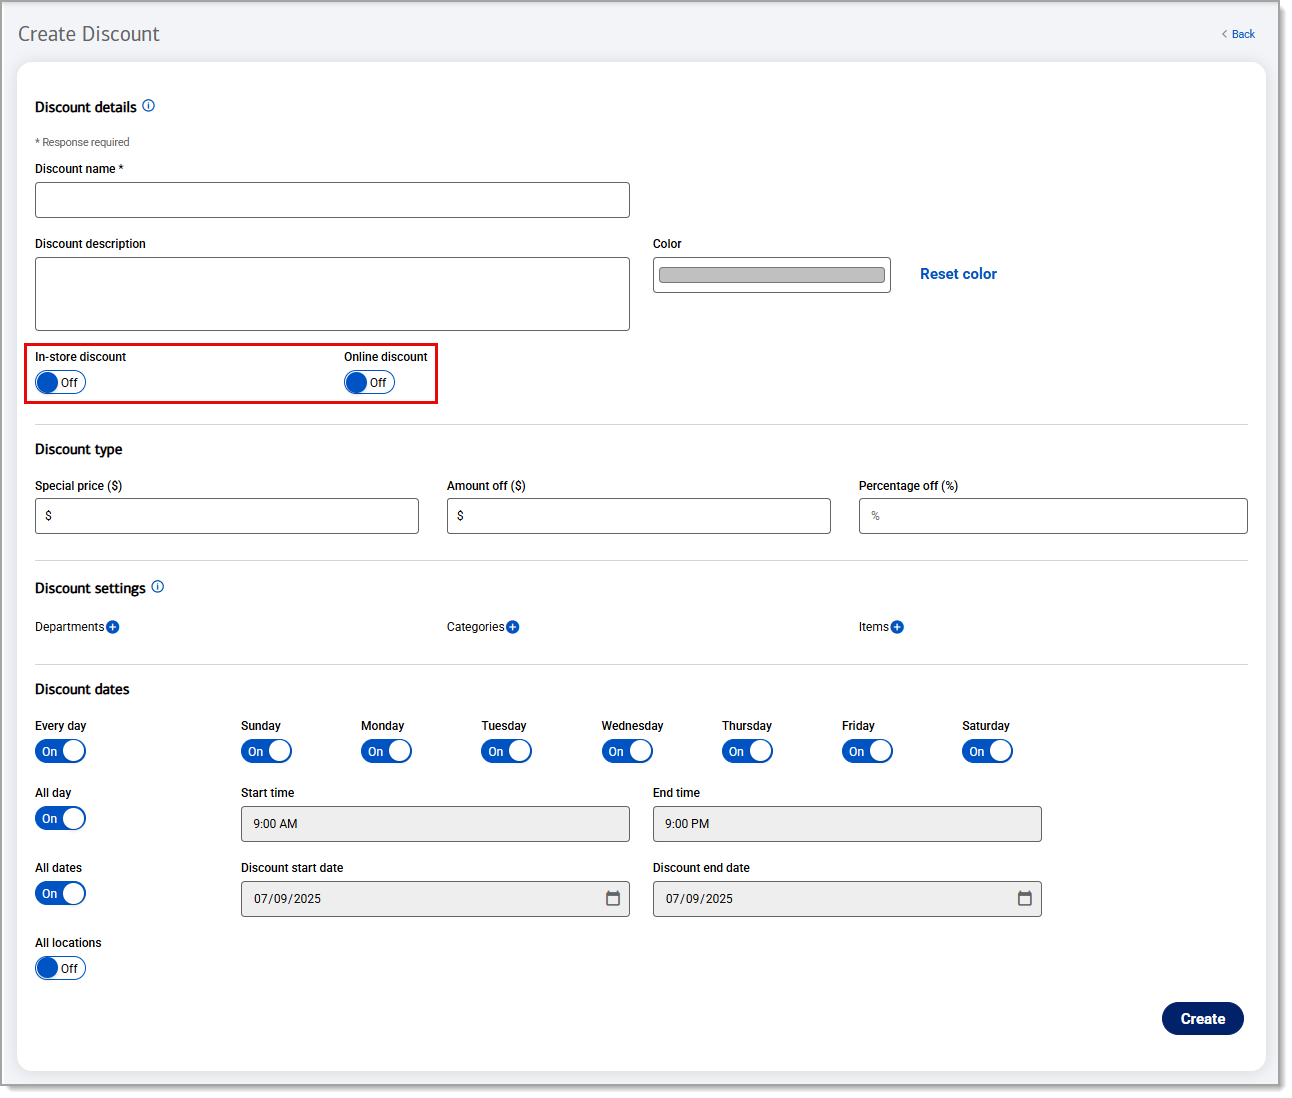
- In the create Discount dialog box, enter a Discount Name. In addition, toggle the In Store and/or Online options as needed to select when the discount will apply.
- Note: These are required fields.
- In the create Discount dialog box, if desired, you can also enter a Discount description and select a color for the discount.
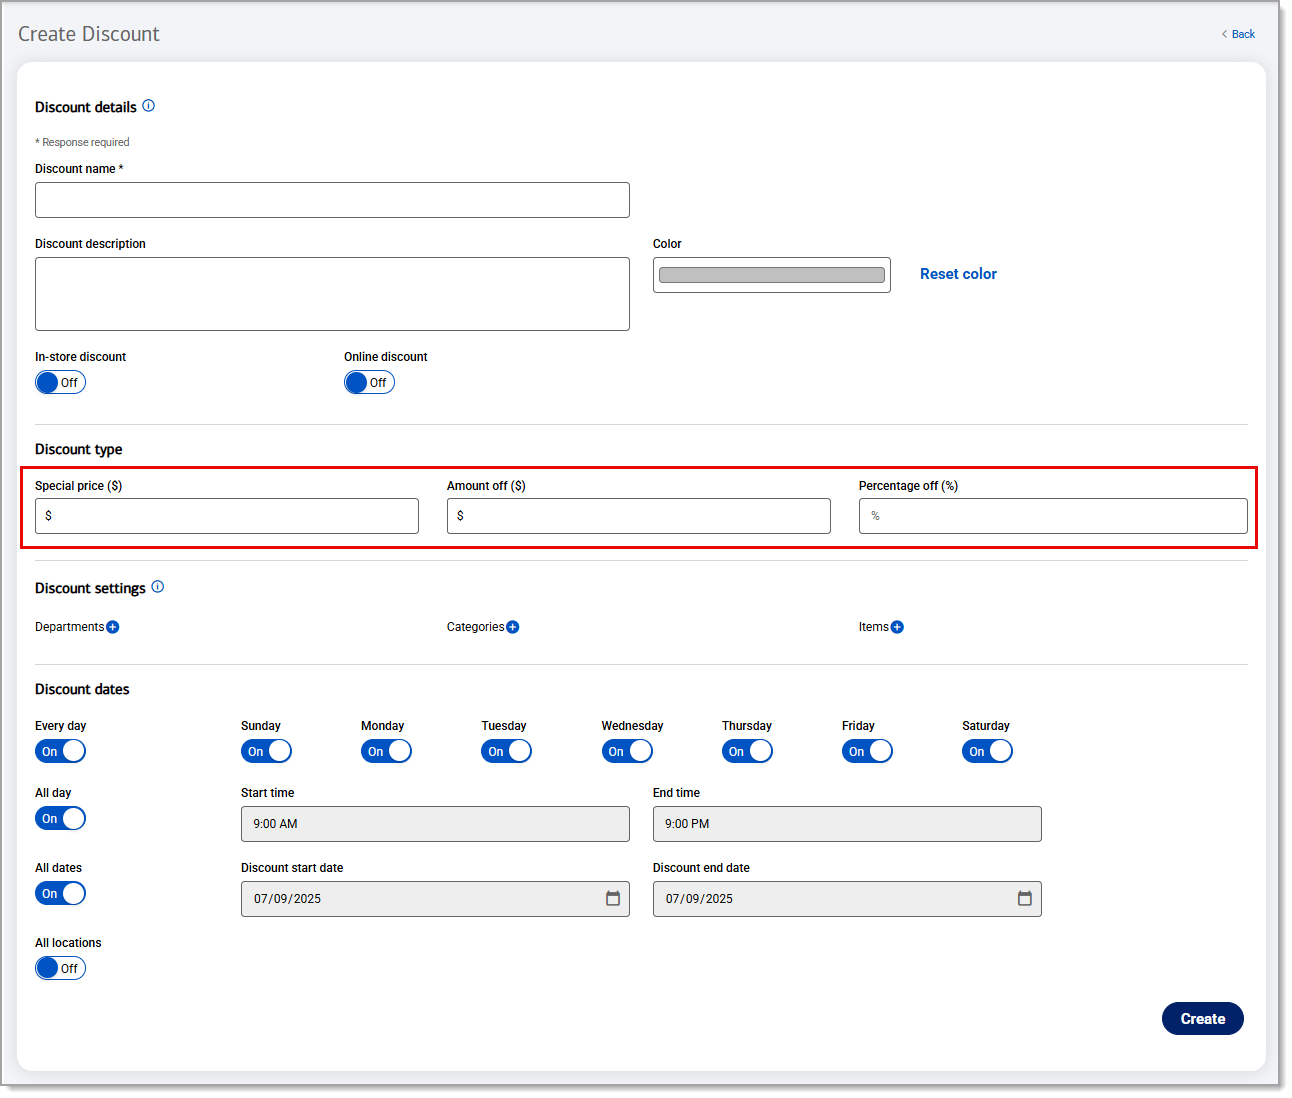
- In the Discount Offer section, select the offer as an Alternate Price, Amount Off, % Off by completing the corresponding field.
- In the Discount Settings section, set whether the discount applies to a Department, Category, or Products by clicking the corresponding + icon.
- Note: If you do not select a specific department, category, or product, the discount will apply to all options.
- In the Discount Schedule section, you can select one or more options that apply to the discount.
- On the left, you can toggle the All Days, Whole Day, All Dates and/or All Locations options.
- If the discount applies to a specific day of the week, time, or date range, rather than selecting the options on the left, set the discount schedule by toggling on the day of the week that applies or completing the time and date fields, as desired.
- then Click Save
- In the create a manual discount dialog box, enter a Discount Name. Toggle the Tickets, Items or All Items options as needed to select when the coupon will apply.
- Note: These are required fields.
- In the create manual discount dialog box, if desired, you can also enter a discount description and select a color.
- In the Manual discount Offer section, set the offer as an Alternate Price, Amount Off, % Off by completing the corresponding field.
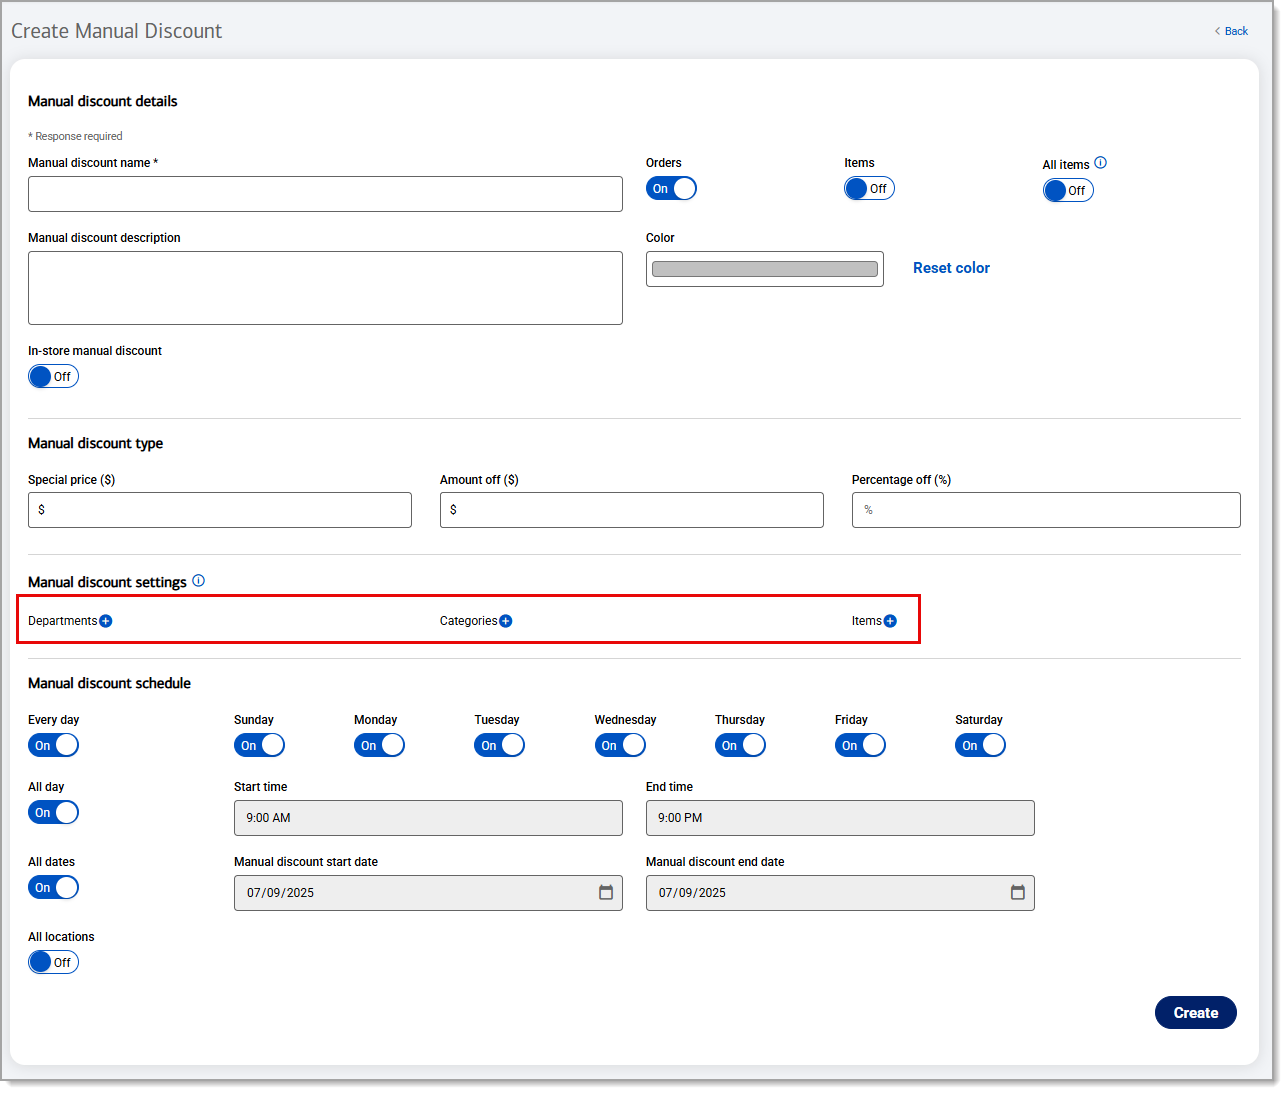
- In the Manual discount Settings section, set whether the discount applies to a Department, Category, or Product by clicking the corresponding + icon.
- Note: If you do not select a specific department, category, or product, the discount will apply to all options.
- In the Manual discount Schedule section, you can select one or more options that apply to the discount.
- On the left, you can toggle the All Days, Whole Day, All Dates and/or All Locations options.
- If the discount applies to a specific day of the week, time, or date range, rather than selecting the options on the left, set the discount schedule by toggling on the day of the week that applies and/or completing the time and date fields, as desired.
- then Click Save
- *music*
Auto discounts
Auto discounts are those that are automatically applied to an order when certain conditions are met.
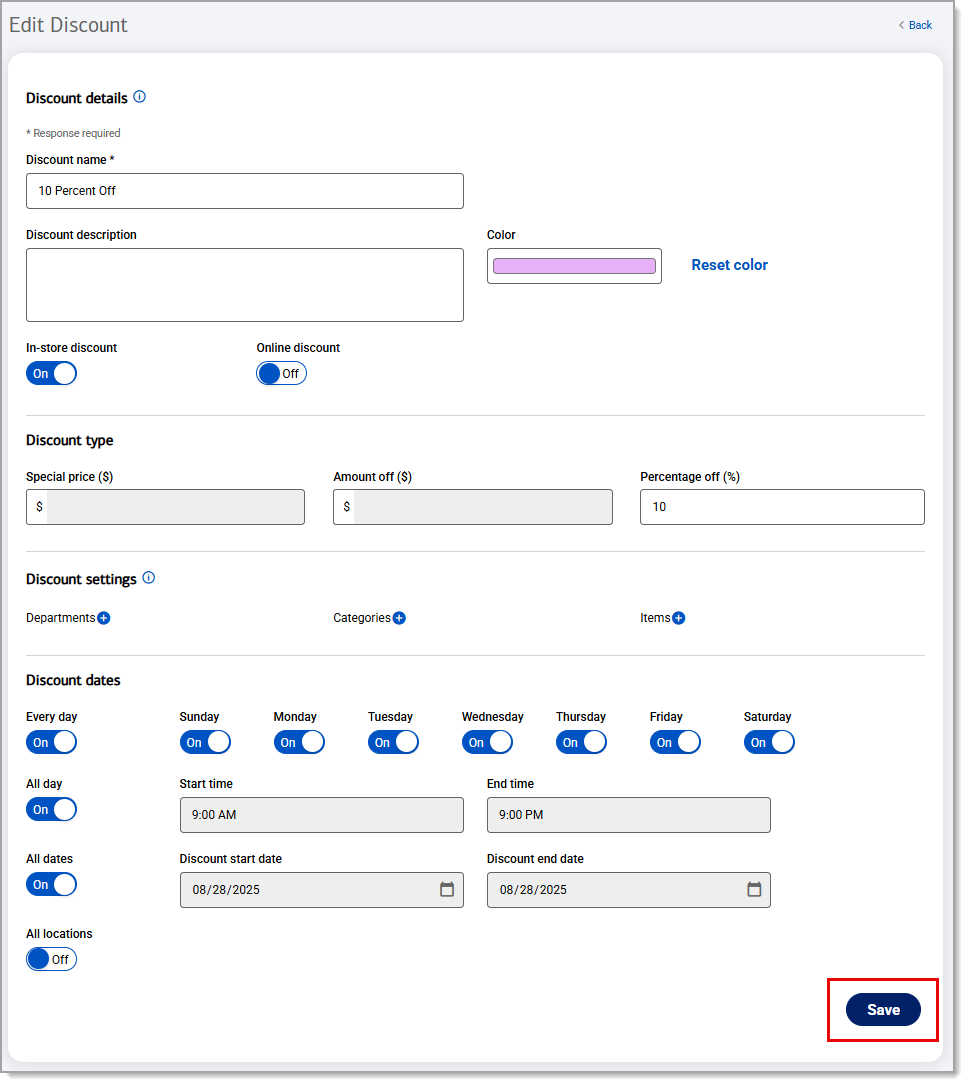
To create an auto discount
- In the Point of Sale Solution Back Office, select Discounts > Auto Discounts.
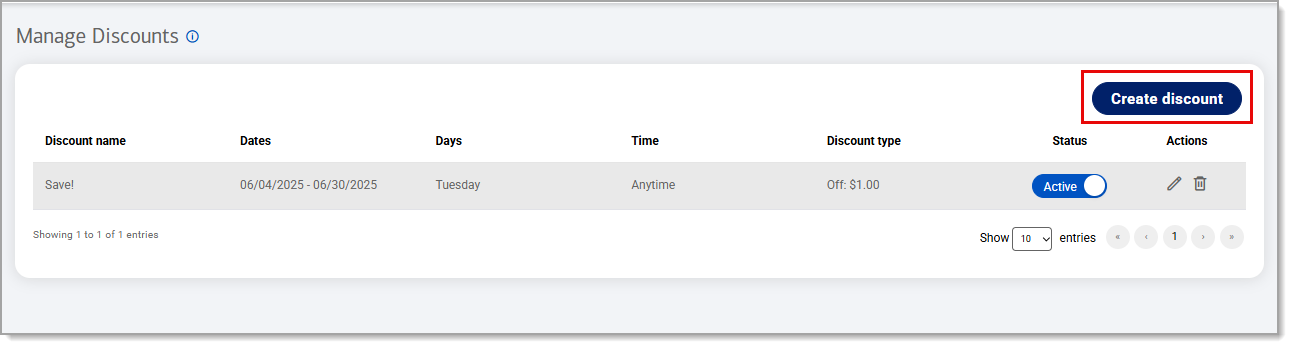
- Click Create discount.
- Enter a Discount name.
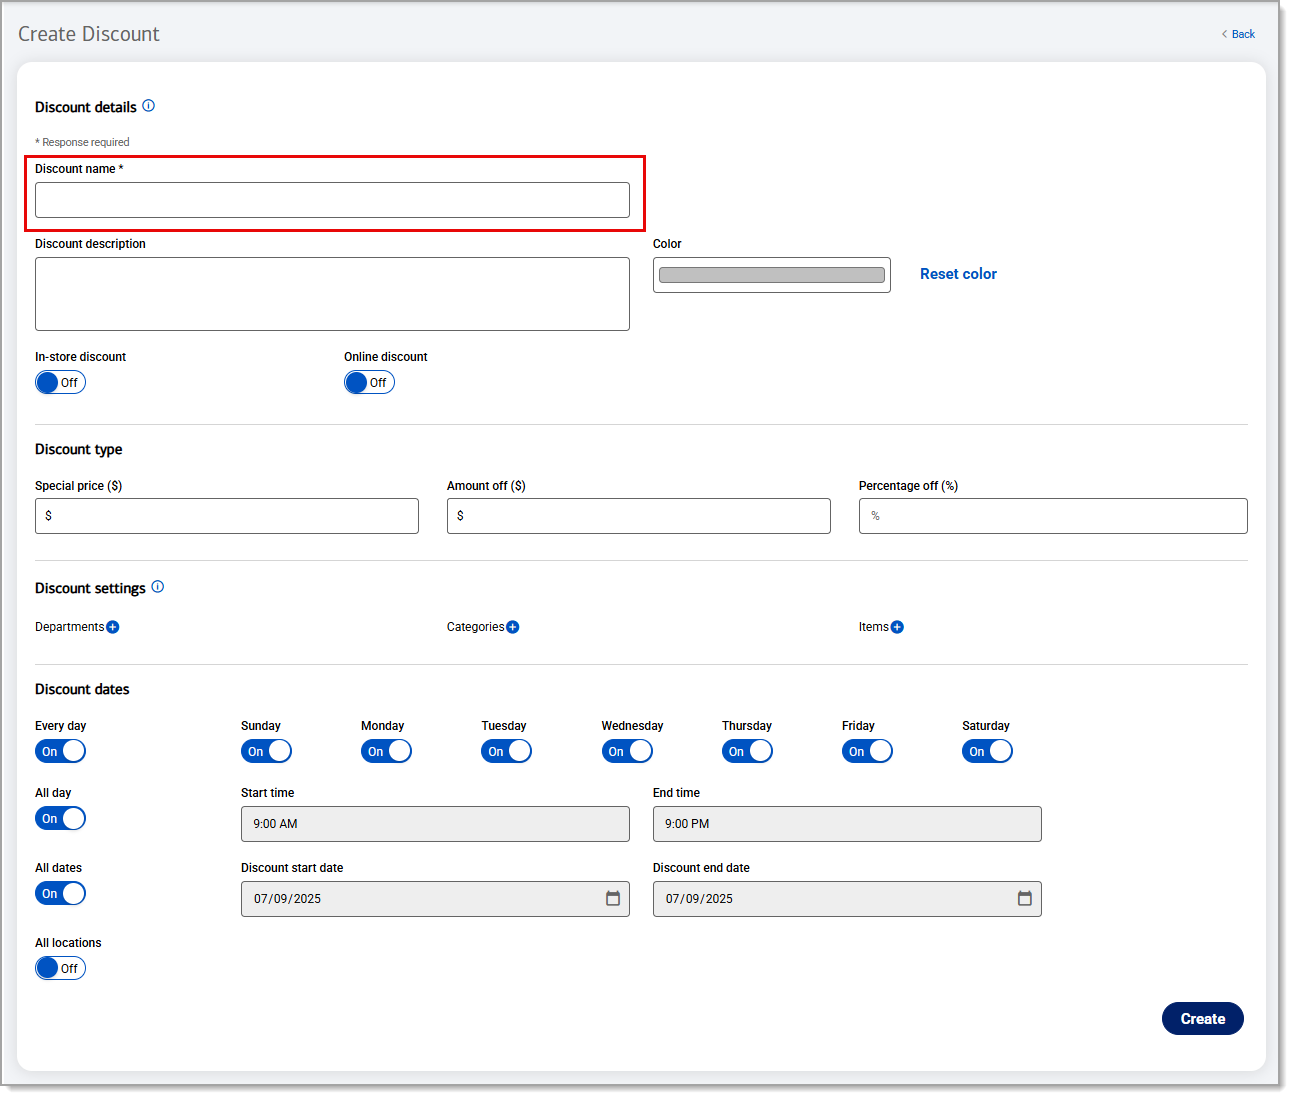
- Enter a description and set a color for the discount, if desired.
- Enable this to be an In-store discount, and Online discount, or both.
- In the Discount type section, set the discount as a Special price ($), an Amount off ($), or a Percentage off (%).
- In the Manual discount settings section, set whether the discount applies to Departments, Categories, or Items. Click the + symbol and start typing in the field what department, category, or item you would like the discount to be applied to. Select it from the dropdown list. Repeat as needed to add additional selections.
NOTE: If you do not select a specific department, category, or item, the discount will apply to all options.
- Set the Discount dates.
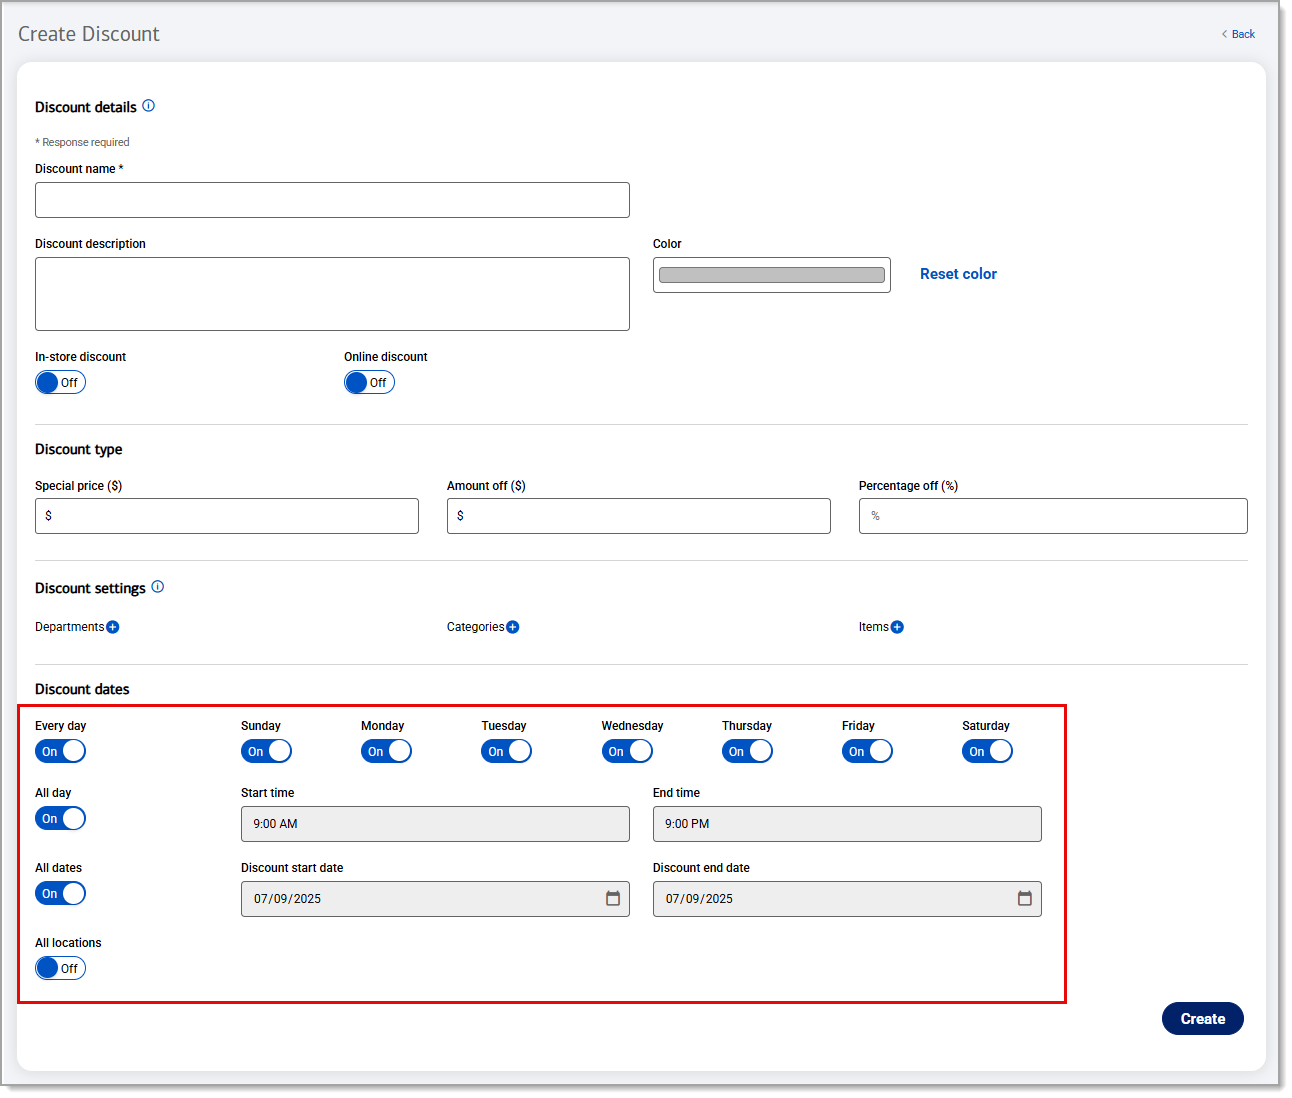
Discount dates setting options and description Discount dates settings Description Every day Enable this to apply the discount to all days of the week or disable it to select the specific days of the week that the discount will be active.
All day Enable this to make the discount available all day or disable it to select a custom Start time and End time for when the discount should be active.
All dates Enable this to make the discount available immediately with no end date, or disable it to select a custom Discount start date and Discount end date.
All locations Enable this to make the discount available at all store locations.
- Click Save.
NOTE:
Allowance for multiple discounts can be set in Global Settings.
Manual discounts
Similar to an auto discount, a manual discount provides an amount or percentage off an item, department, category, but it must be applied manually.
To create a manual discount
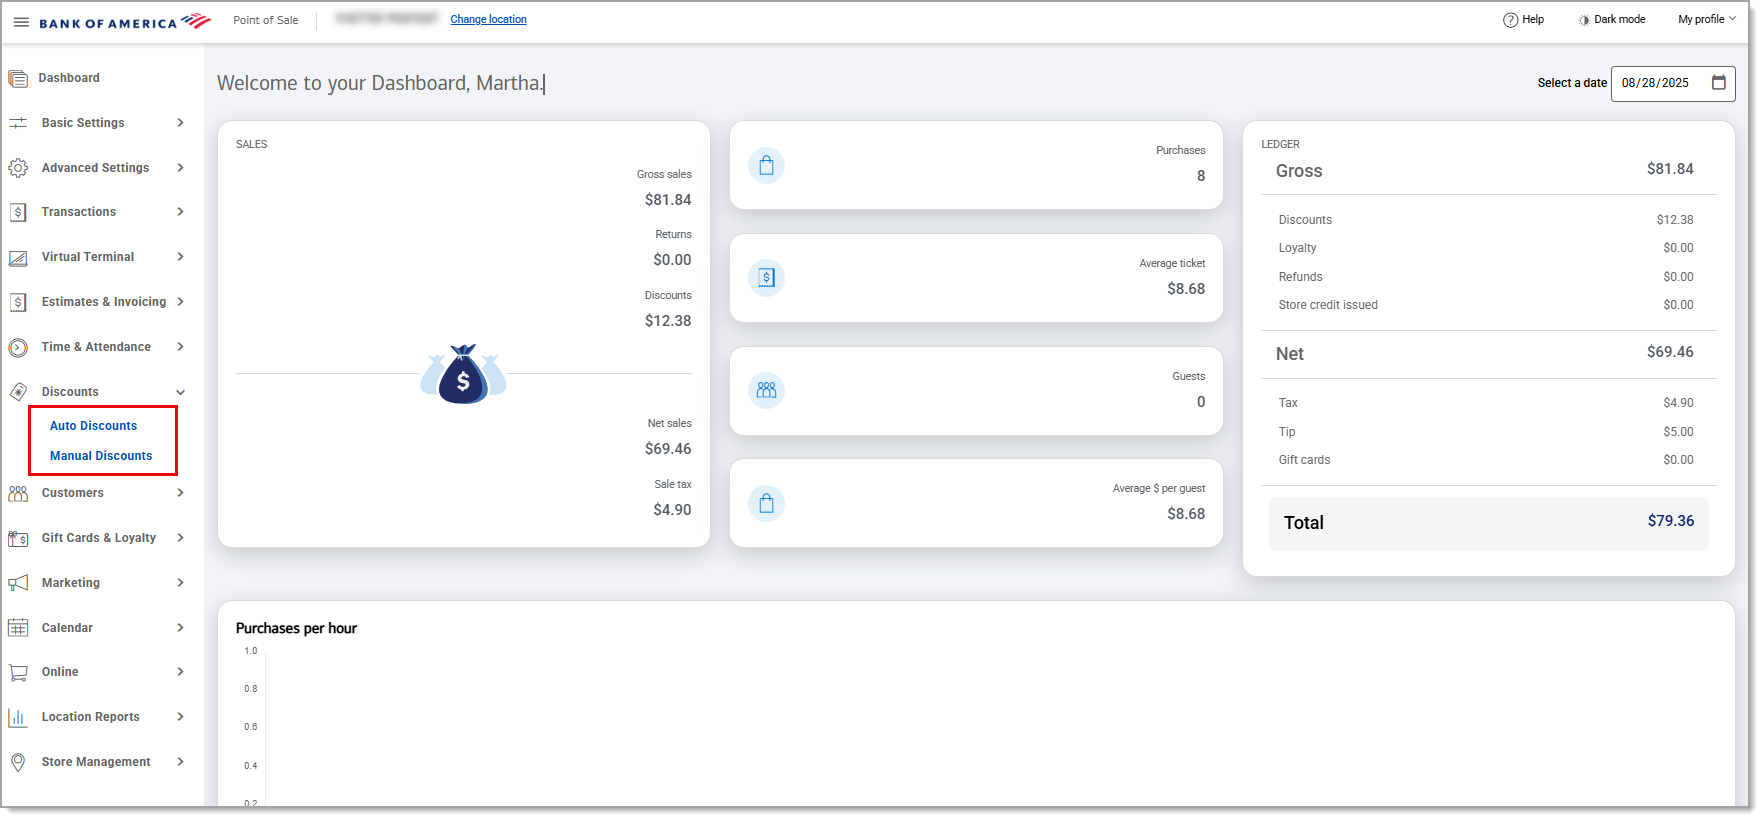
- In the Point of Sale Solution Back Office, select Discounts > Manual Discounts.
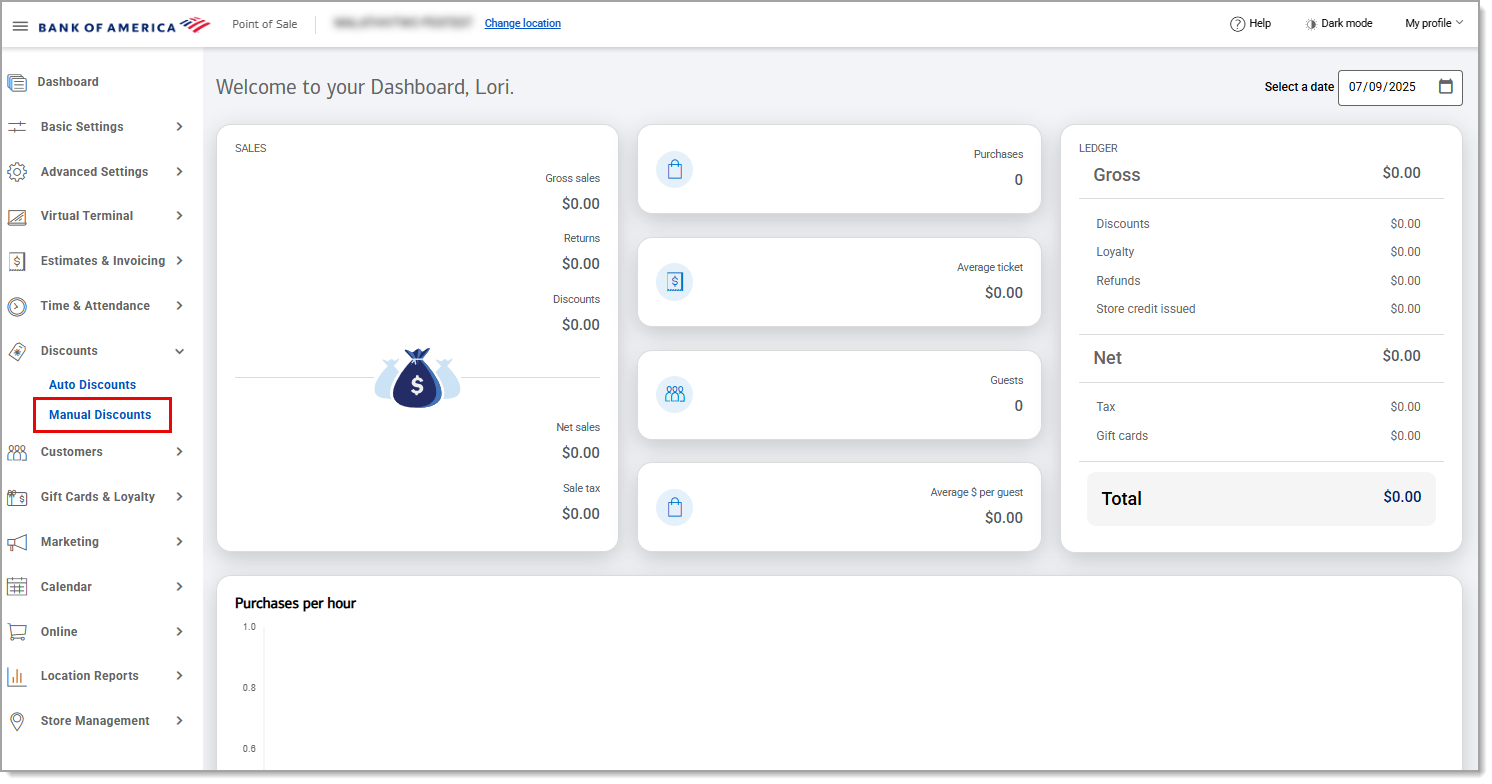
- Click Create manual discount.

- Enter a Manual discount name.
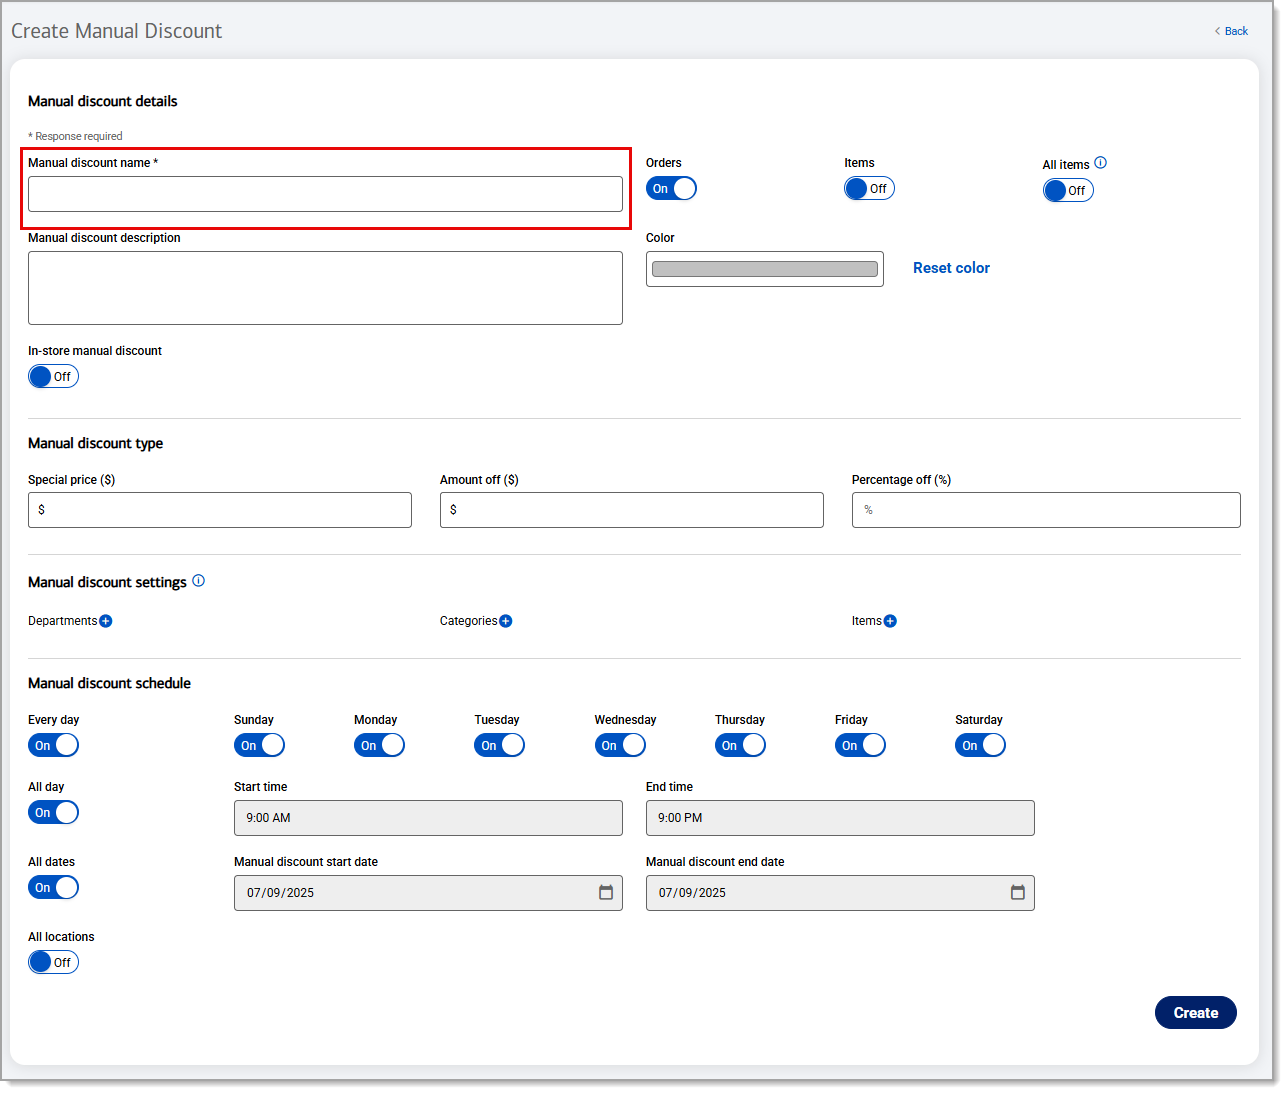
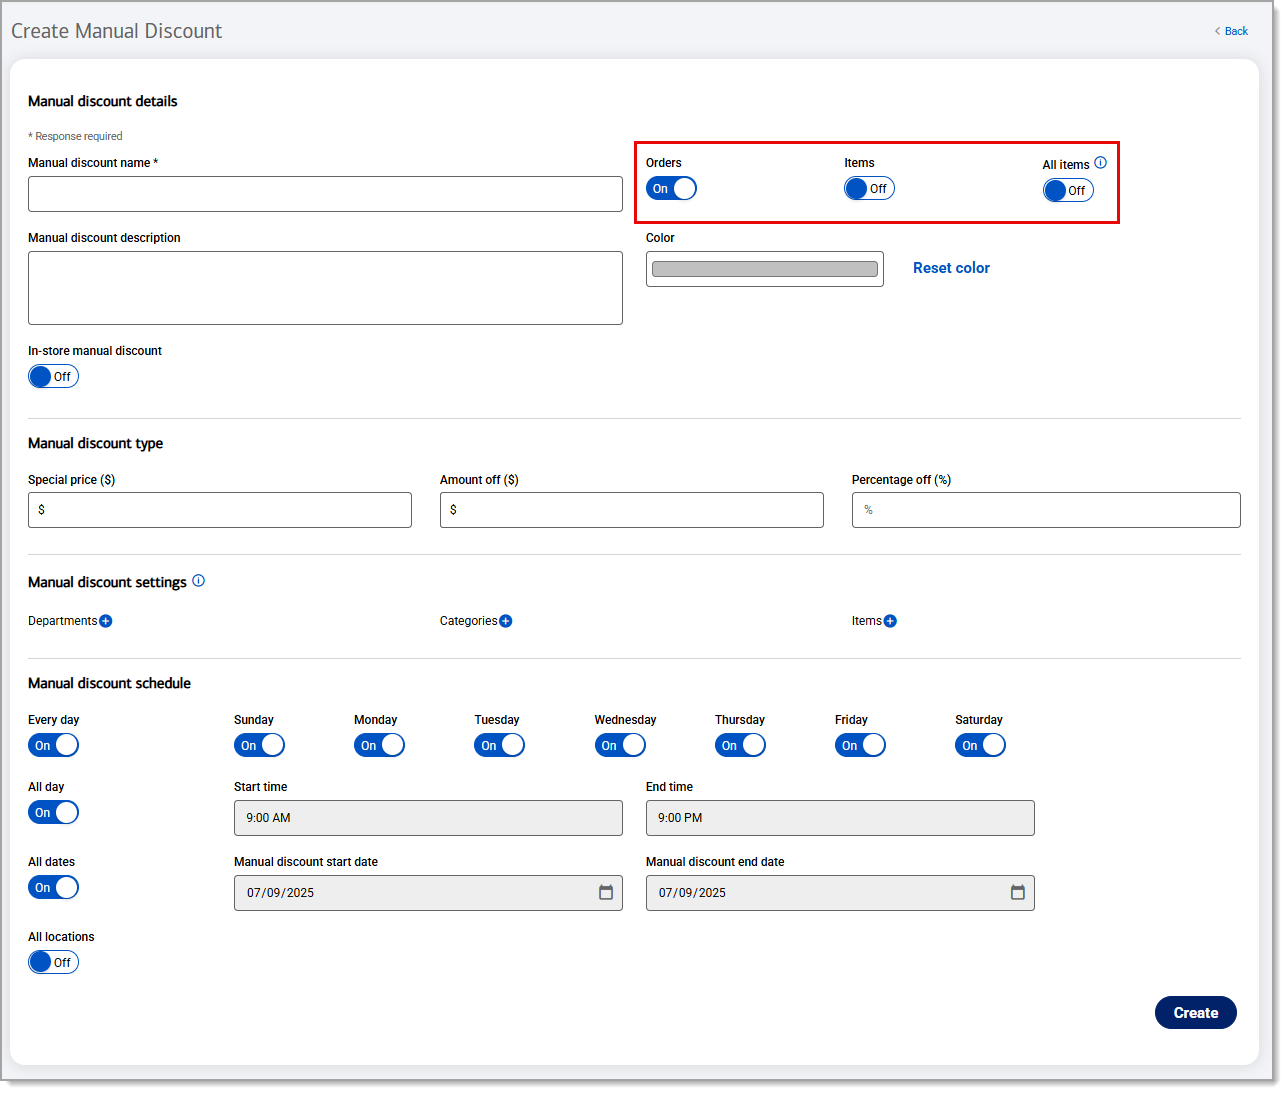
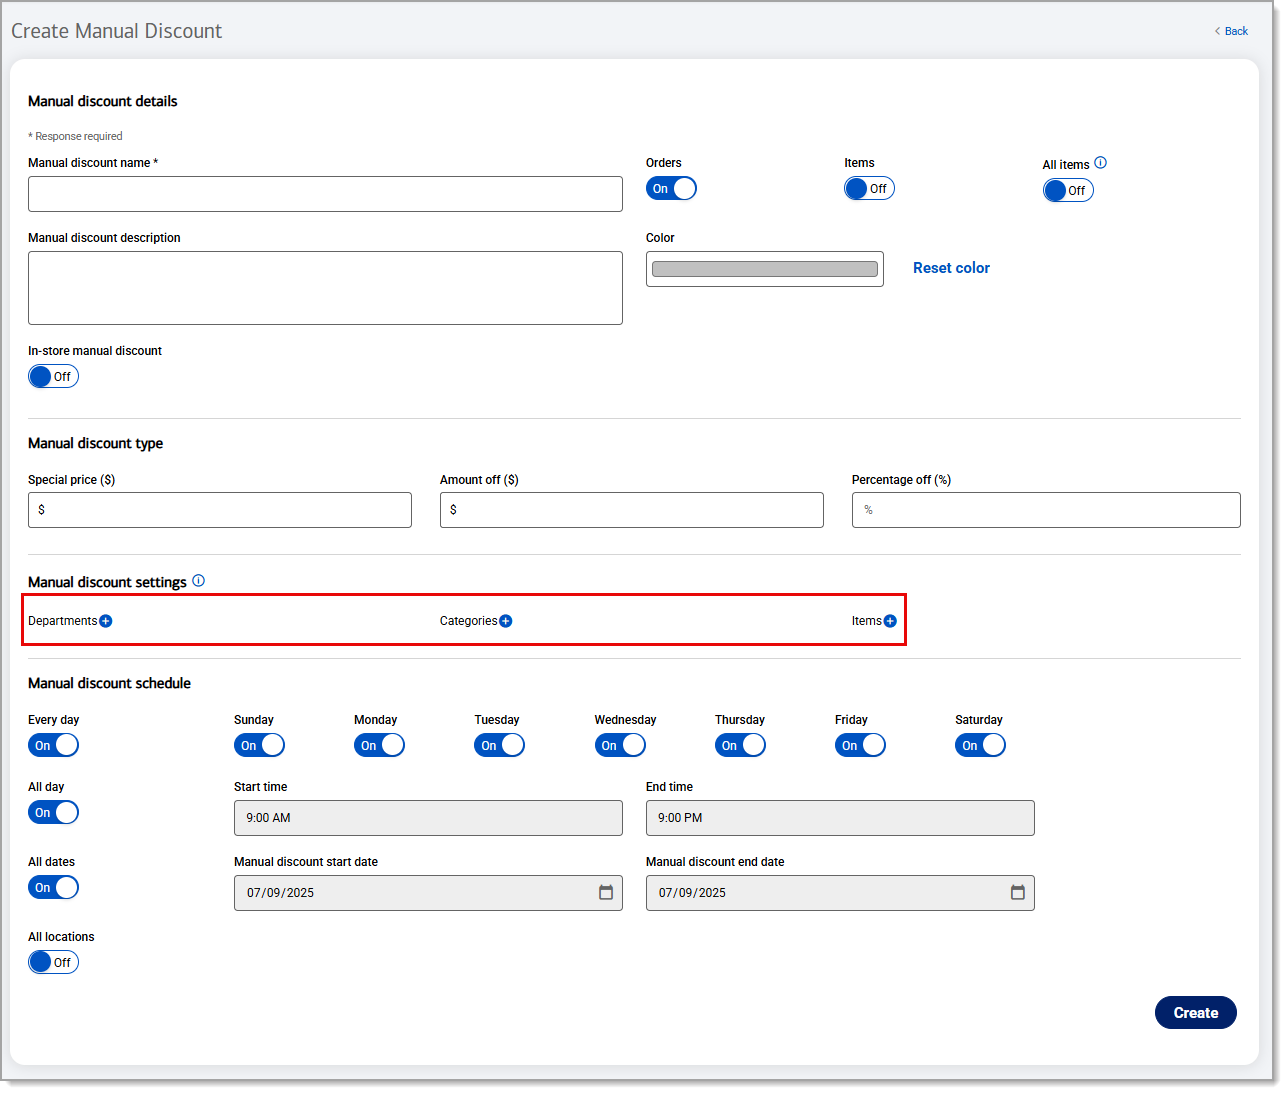
- Select whether the manual discount applies to Orders, Items, or All items on a ticket.
- Enter a description and set a color for the manual discount, if desired.
- Enable In-store manual discount if the discount applies to purchases in-store.
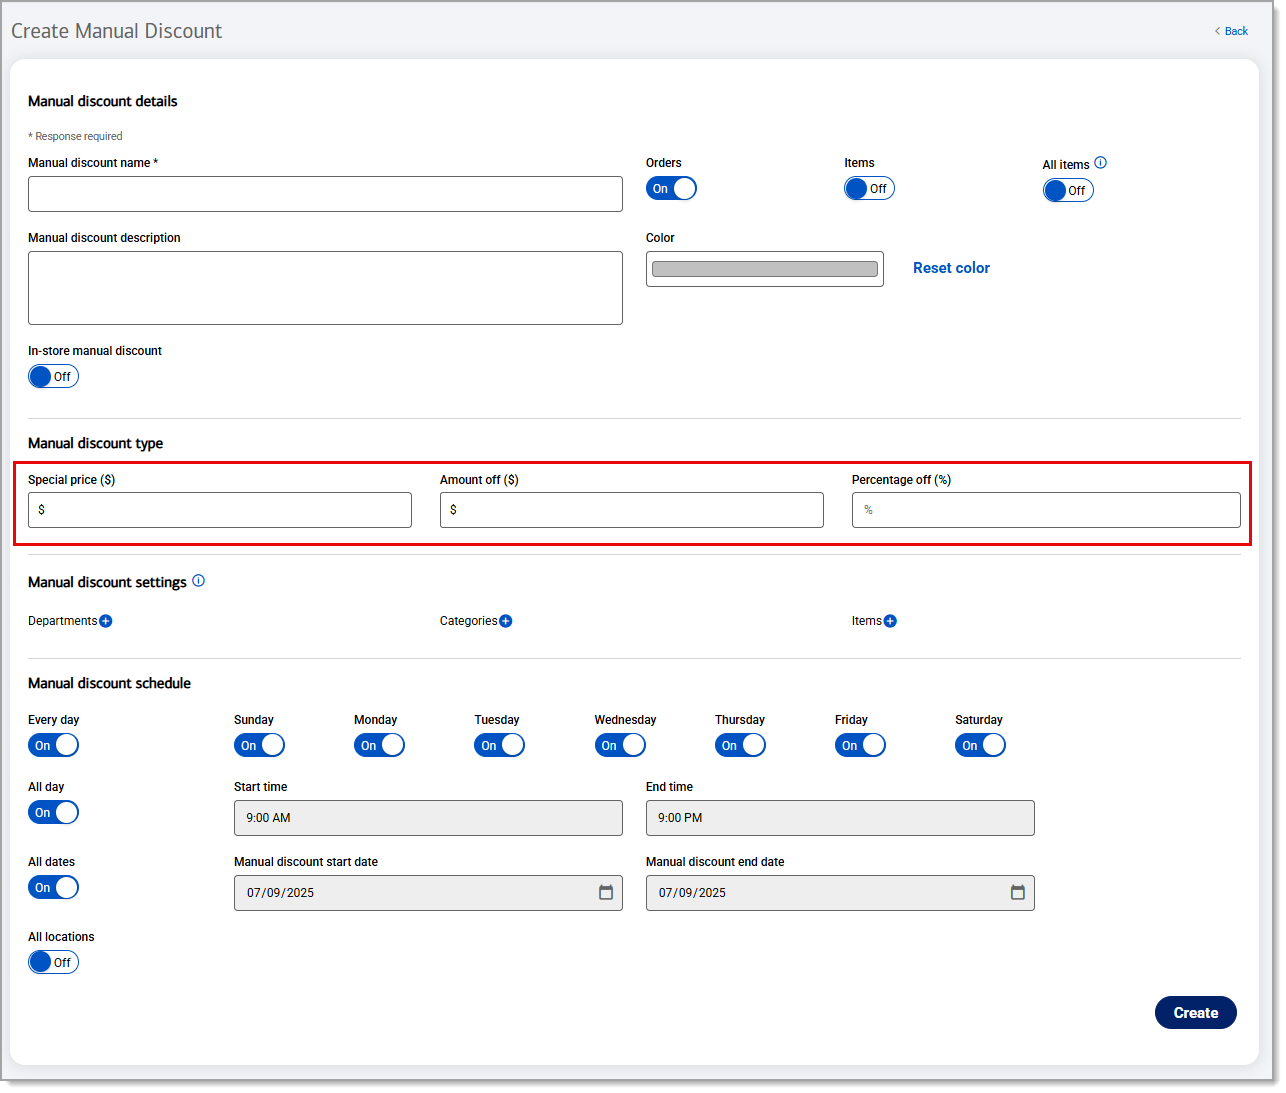
- In the Manual discount type section, set the discount as a Special price ($), an Amount off ($), or a Percentage off (%).
- In the Manual discount settings section, set whether the discount applies to Departments, Categories, or Items. Click the + symbol and start typing in the field what department, category, or item you would like the discount to be applied to. Select it from the dropdown list. Repeat as needed to add additional selections.
NOTE: If you do not select a specific department, category, or item, the discount will apply to all options.
- Set the Manual discount schedule.
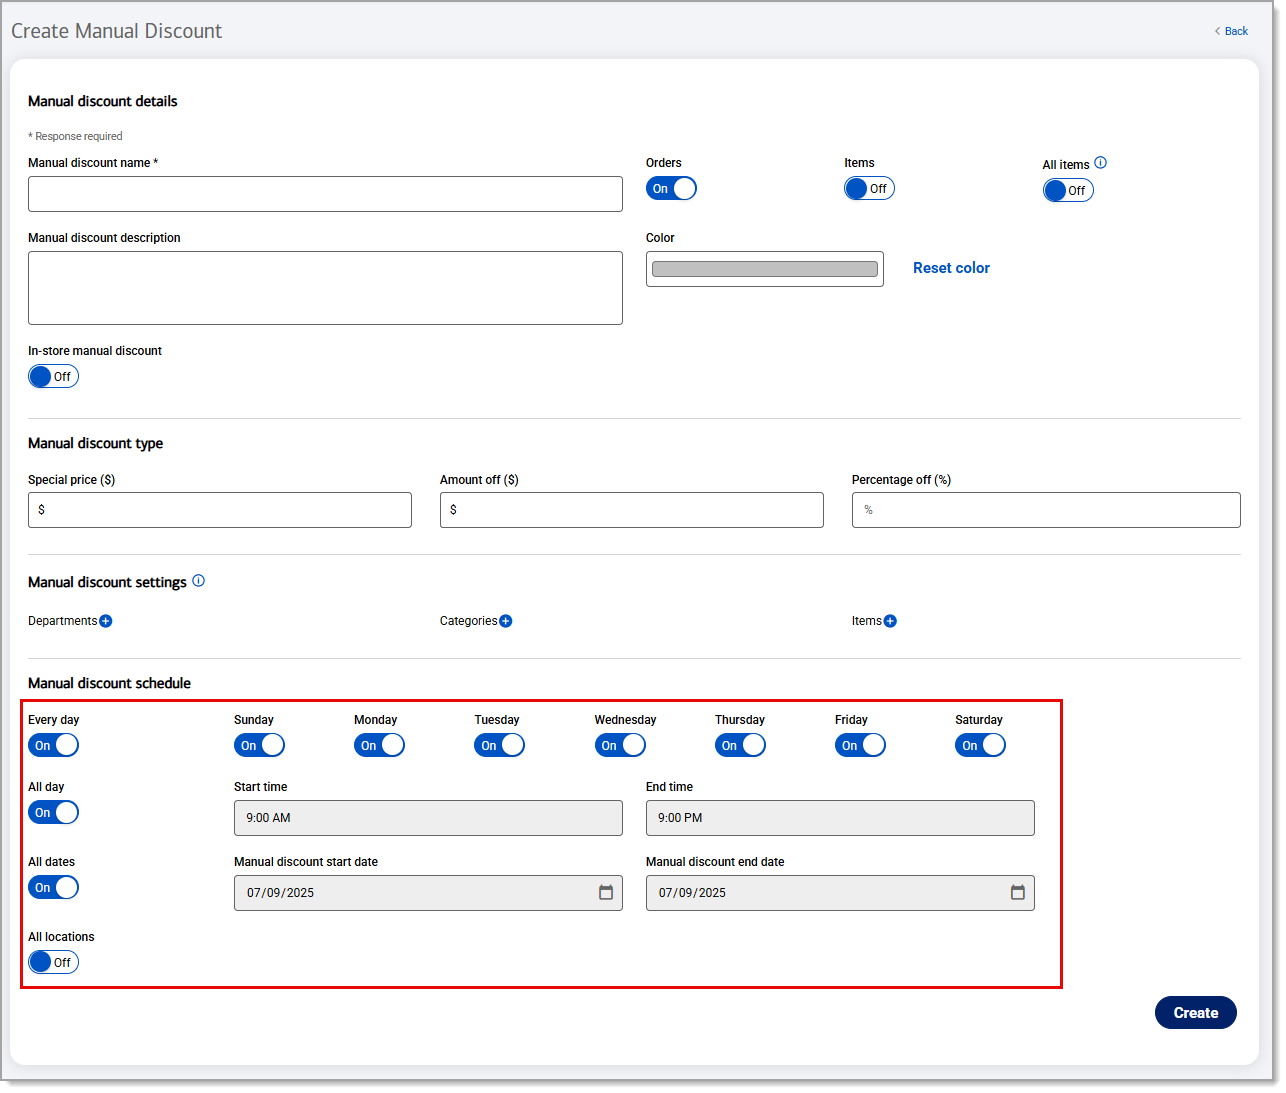
Manual discount schedule settings options and description Manual discount schedule settings Description Every day Enable this to apply the discount to all days of the week or disable this to select the specific days of the week that the discount will be active.
All day Enable this to make the discount available all day or disable it to select a custom Start time and End time for when the discount should be active.
All dates Enable this to make the discount available immediately with no end date, or disable it to select a Manual discount start date and Manual discount end date.
All locations Enable this to make the discount available to all locations.
- Click Save.
Edit or delete a discount
Once a discount is created, it can be edited or deleted.
Edit a discount
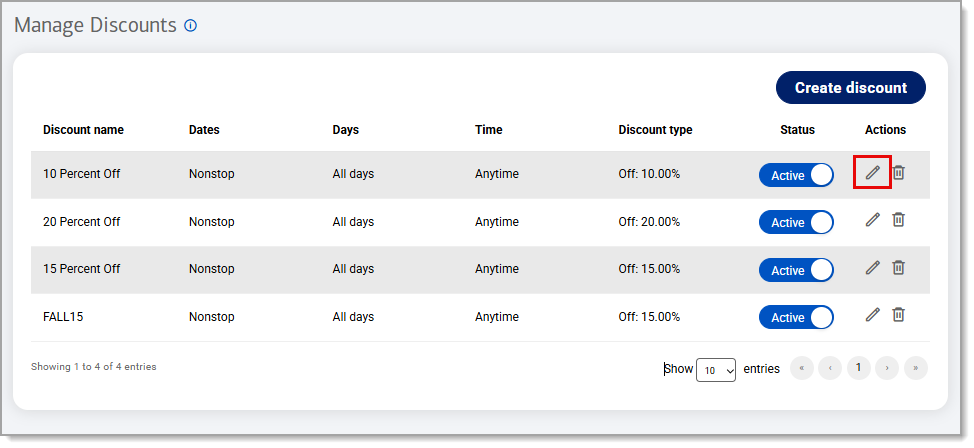
- In the Point of Sale Solution Back Office, select Discounts > Auto Discounts or Manual Discounts, depending on the type of discount you wish to edit.
- Click on the Edit icon next to the name of the discount that needs editing.
- Make the desired edits and click Save.
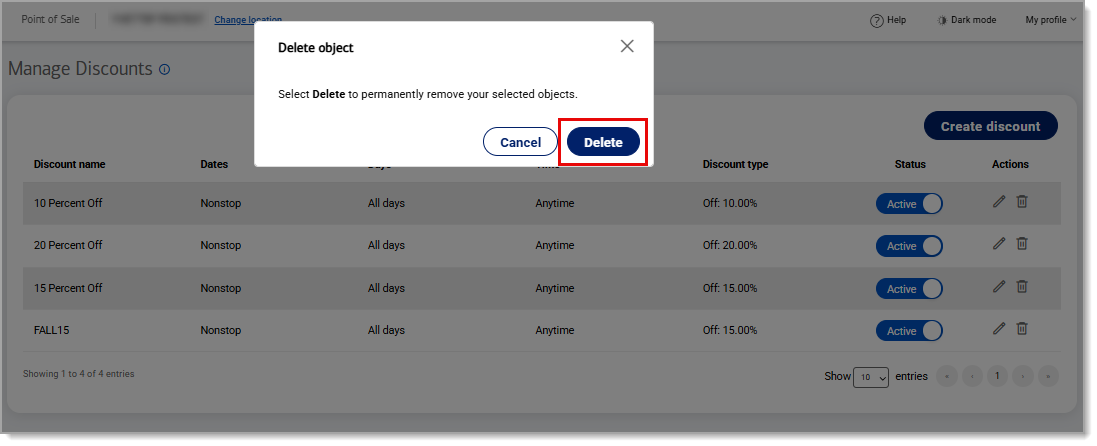
Delete a discount
- In the Point of Sale Solution Back Office, select Discounts > Auto Discounts or Manual Discounts, depending on the type of discount you wish to delete.
- Click on the Delete icon next to the name of the discount that need to be deleted.
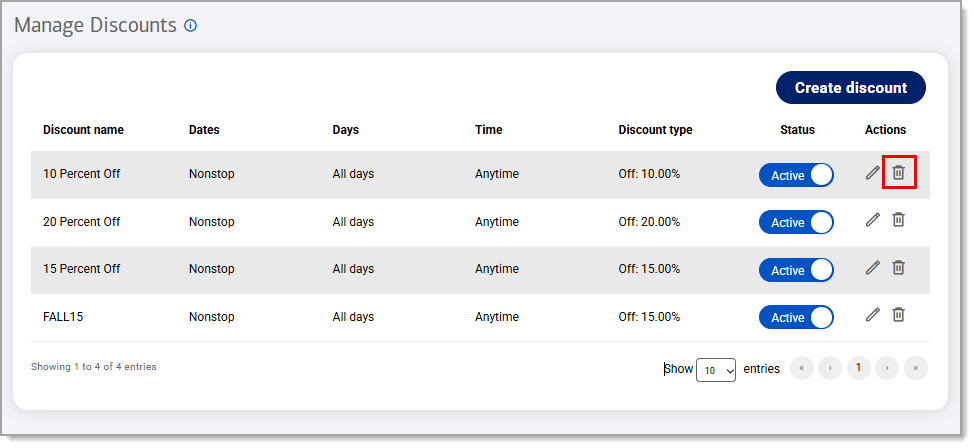
- Click Delete to permanently remove the discount.