Restaurant App Guest Check or Item Split
Description
What's in this article?
Solution: Restaurant
In Table Service mode, you can split a check by seats or into equal payments. Additionally you can split an item between seats. In Quick Service mode, splitting a check into equal amounts is the only option.
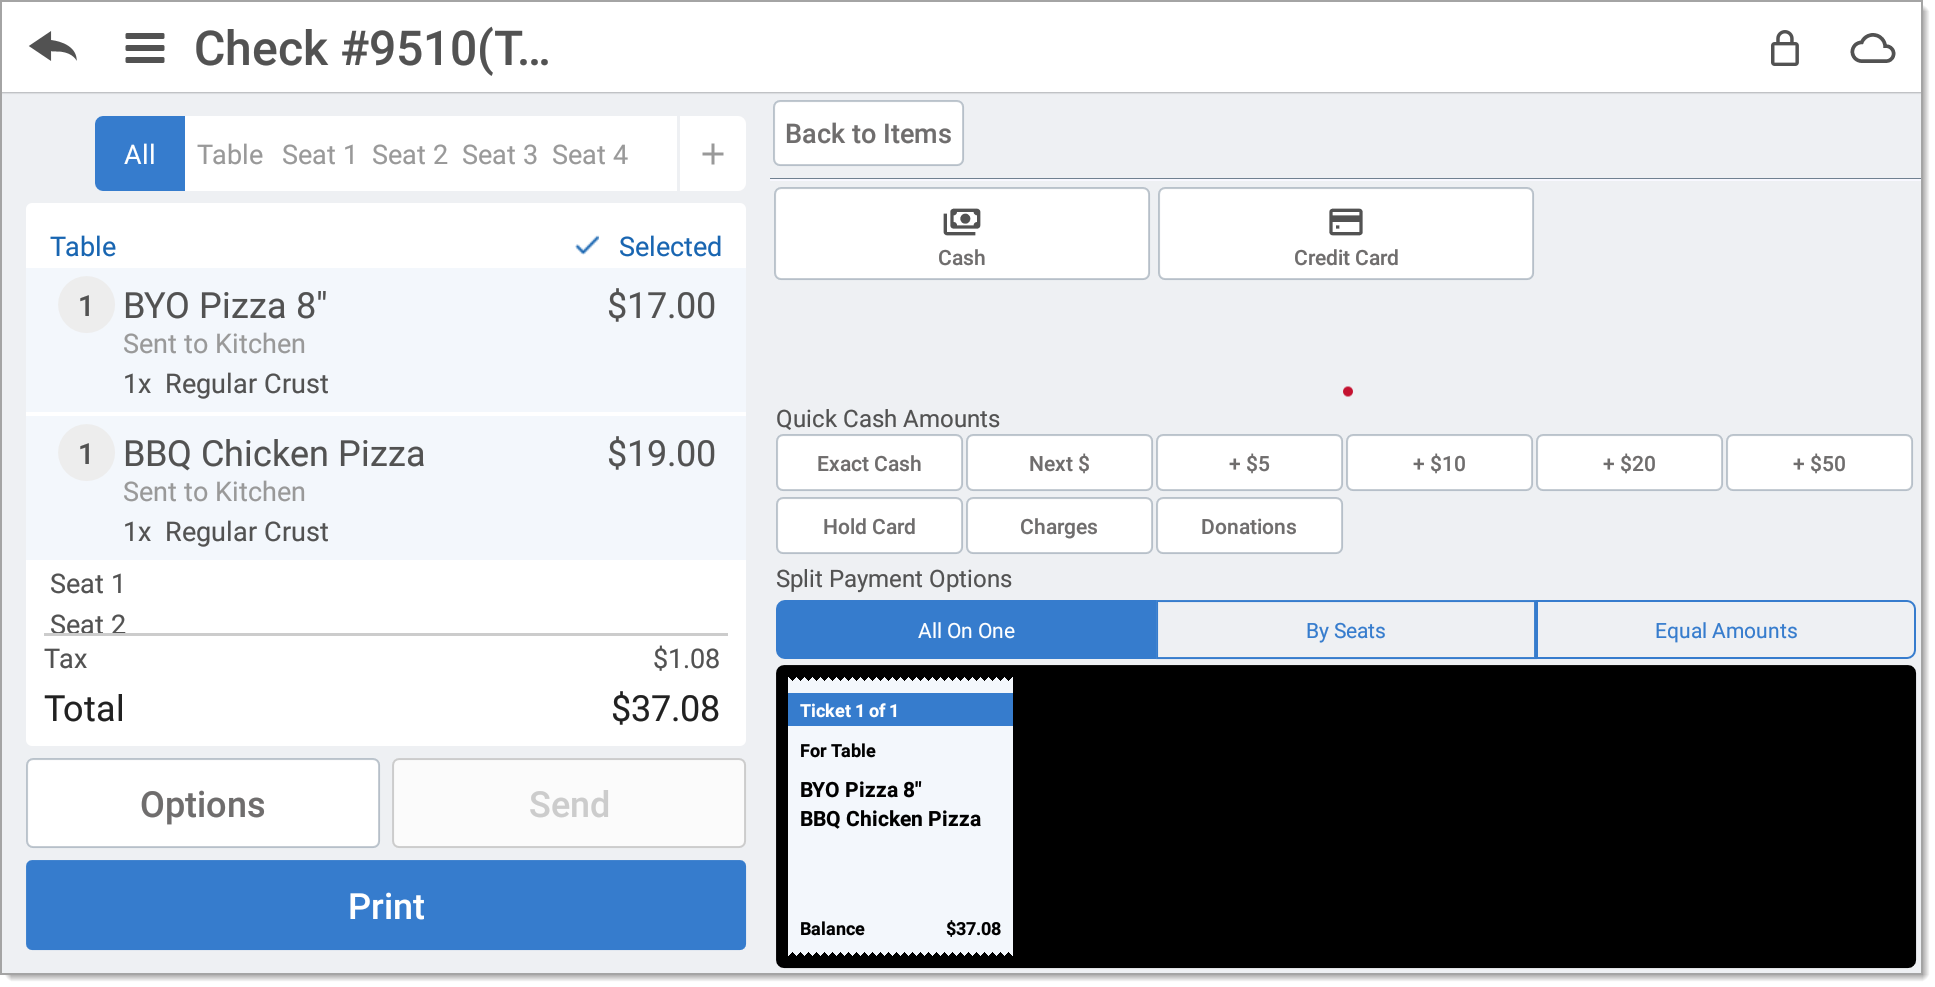
All on one check
The default All on One option places all items on a single check.
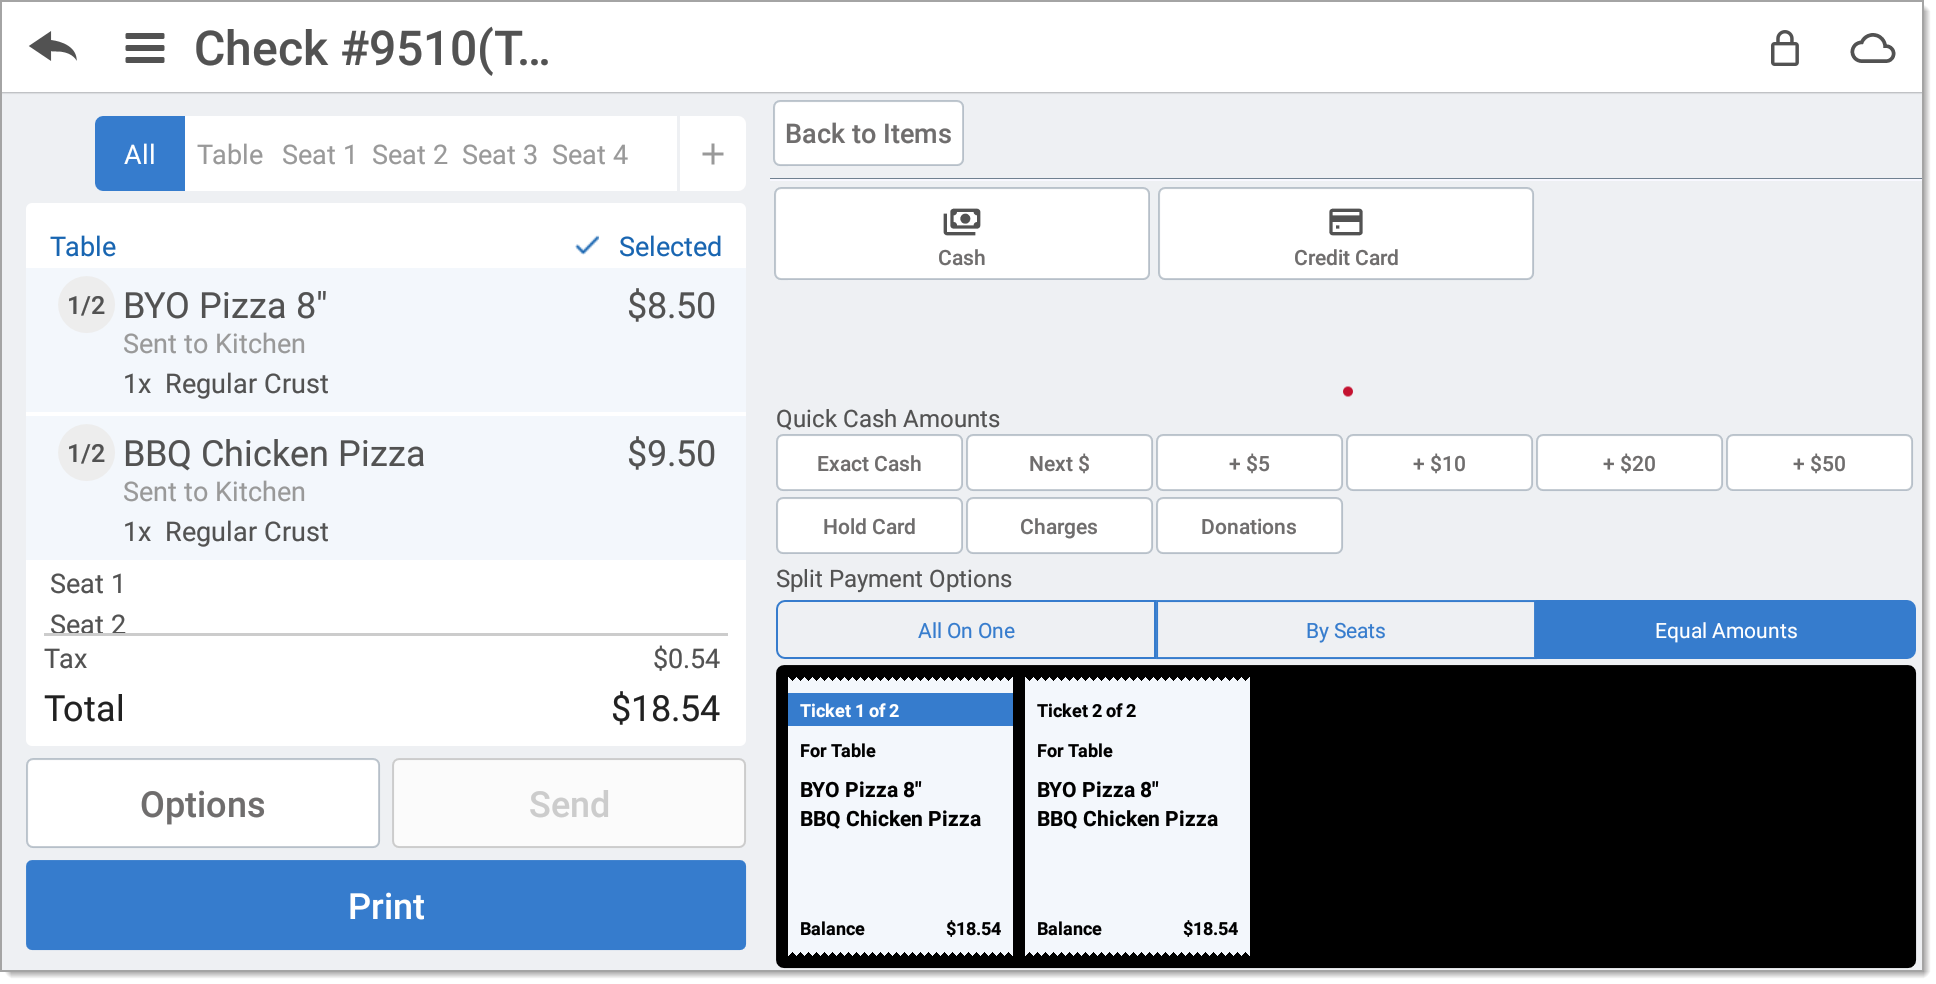
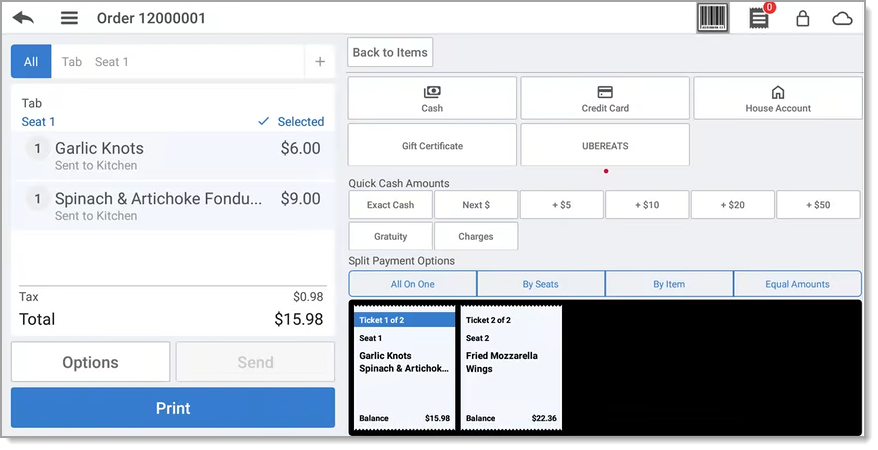
Splitting a guest check by equal amounts
Available in both Quick Service and Table Service modes. If guests would like to pay for the entire check equally, you can split the check into equal payments.
To split a check into equal amounts
- With the guest check active, tap Pay. The Tender screen appears.
- Tap Equal Amounts and enter the number of guests splitting the payment.
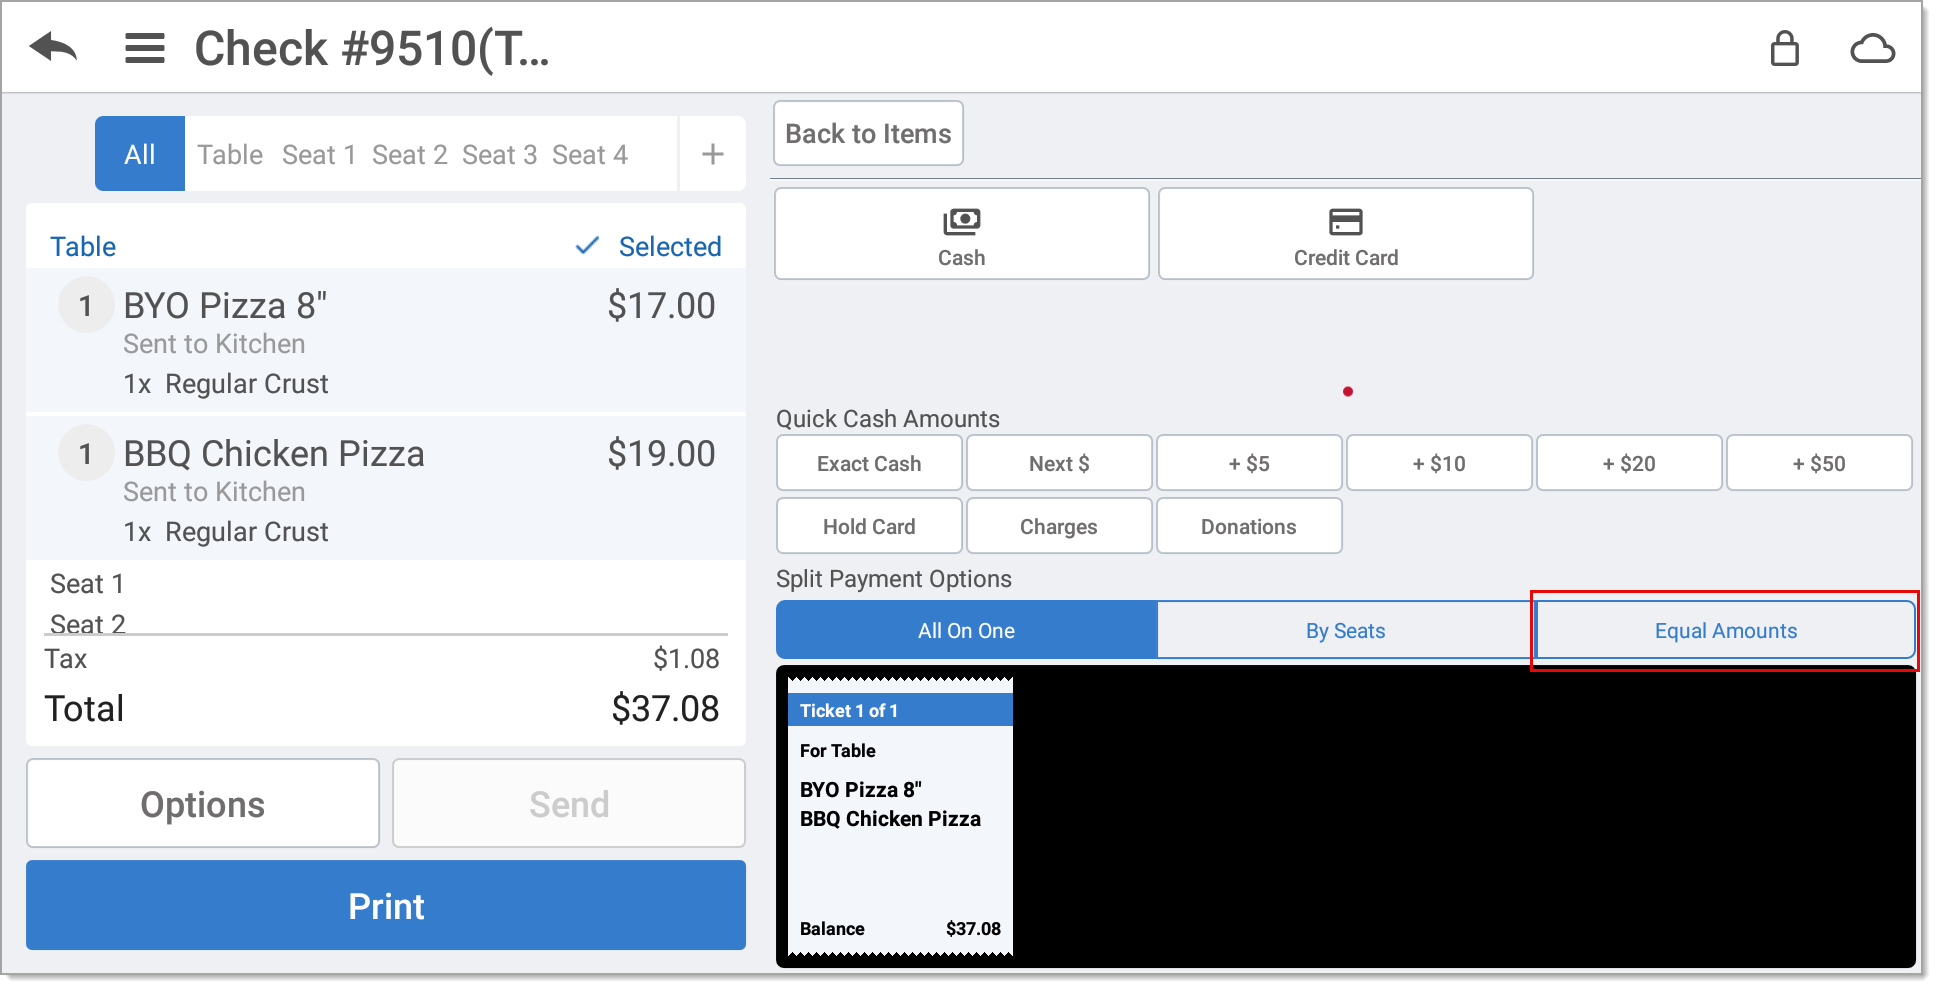
- Tap Done to return to the Tender screen. The new tickets appear under Equal Amounts.

- Continue to close the check.
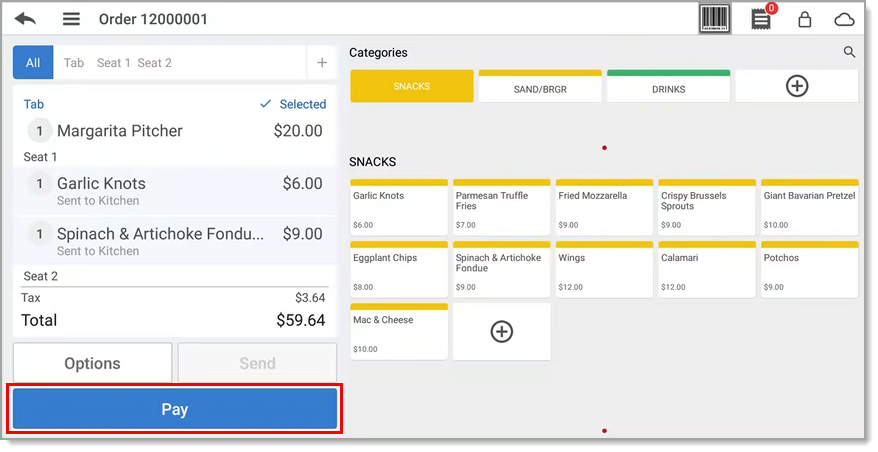
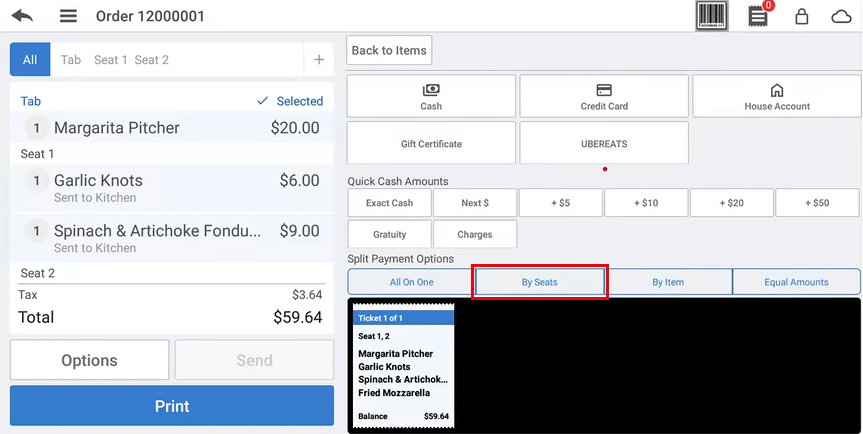
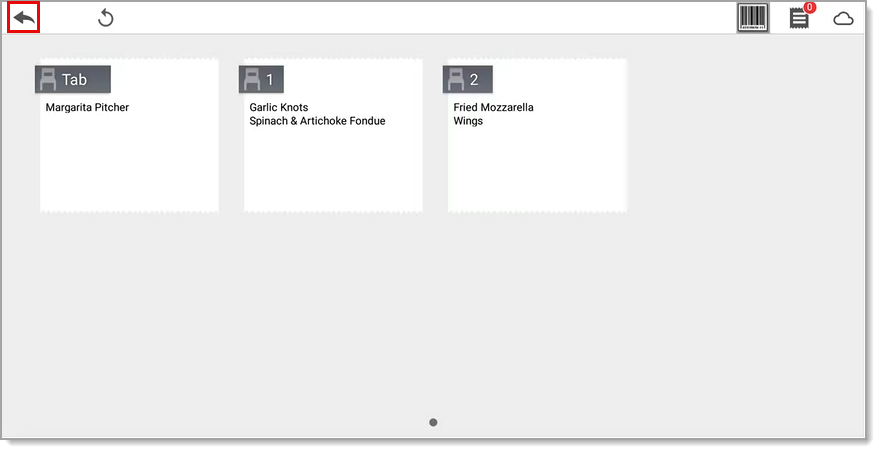
Splitting a guest check by seats with no shared items
In Table Service mode, you can split a check by the table seat. For example, the guest in seat one wants to pay for the guest in seat two, and the guest in seat three wants to pay for the guest in seat four.
To split a check based on seats:
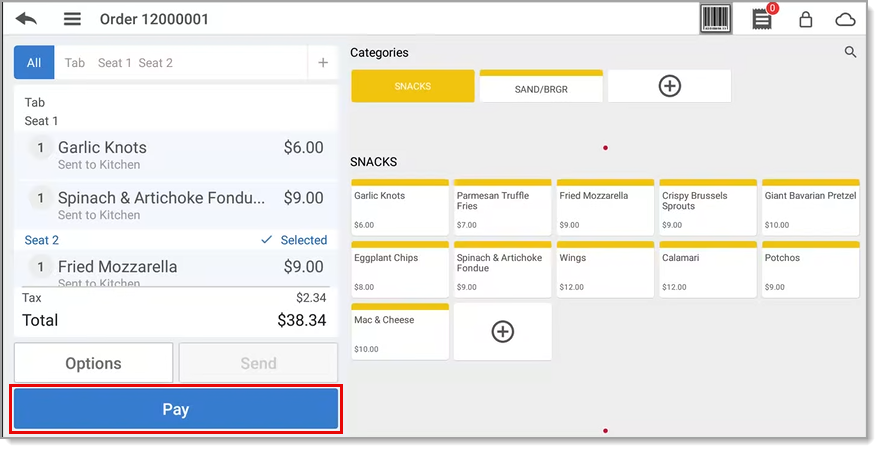
- At the guest check, tap Pay.
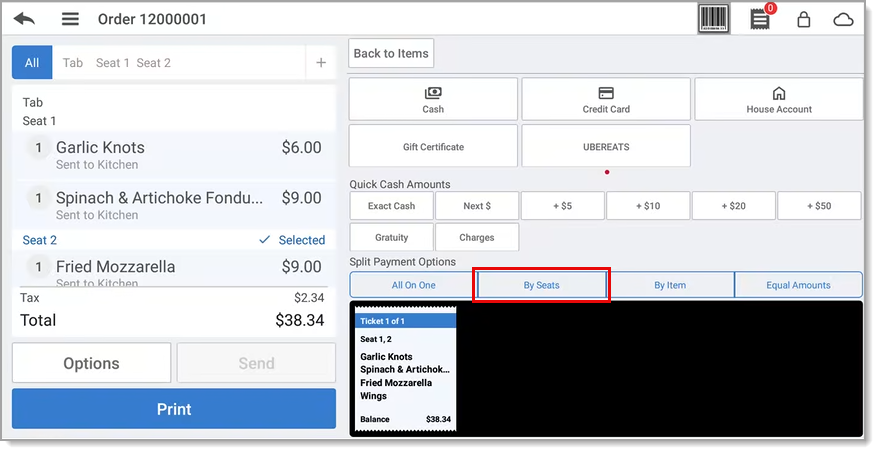
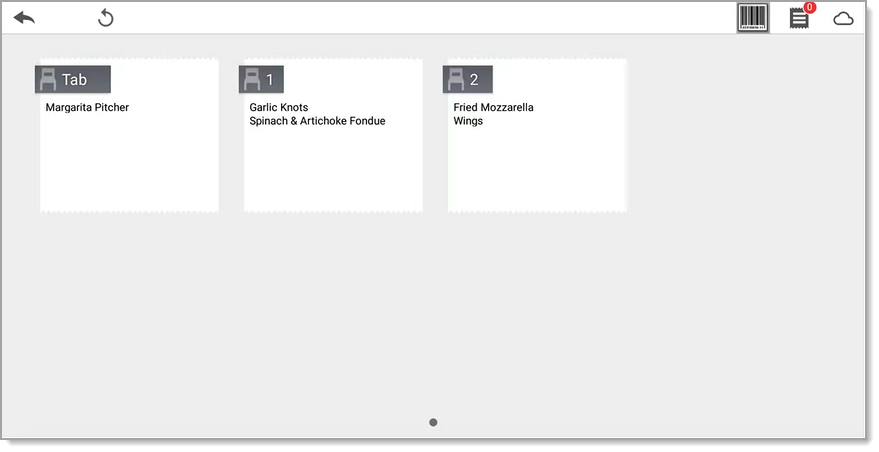
- On the Tender screen, tap By Seats. The order appears on the screen, separated by seat.
- Touch a seat and drag it to the seat with which you want it to combine.
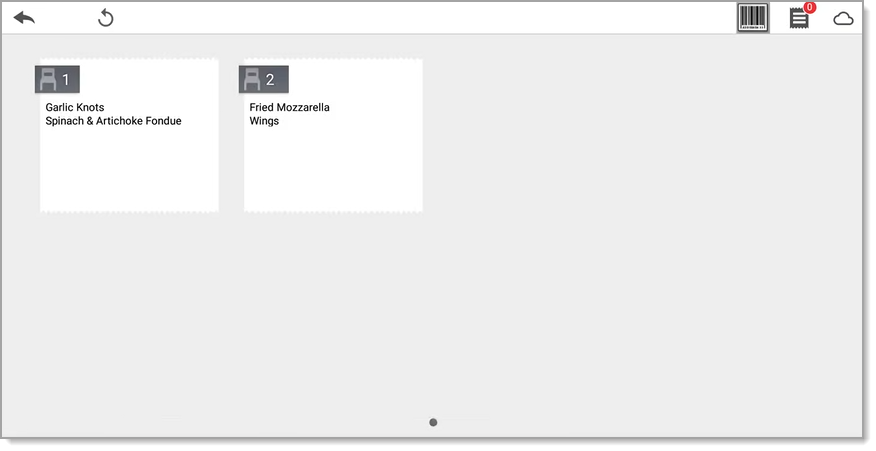
- To ungroup a combined guest check, press and hold the combined seats, and tap Ungroup Seats.
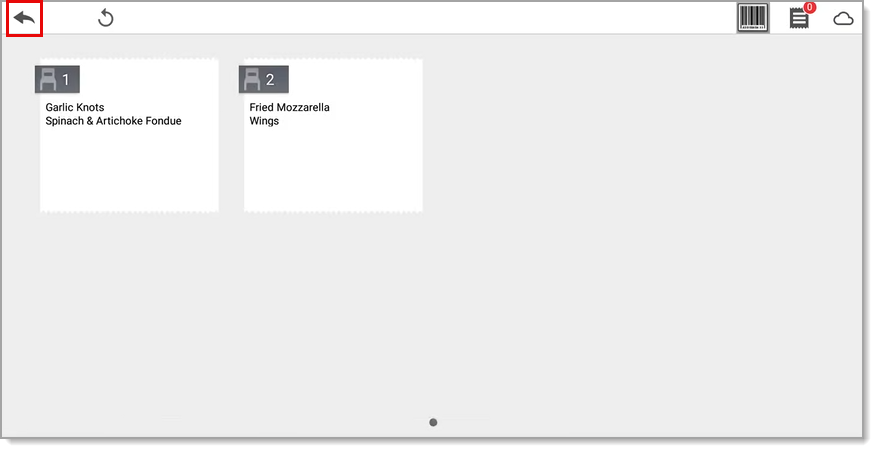
- Tap to return to the Tender screen. The split checks appear under By Seats, with the number of tickets for the table.
- Continue to close the check.
Splitting a guest check by seat with shared items
In Table Service mode, you can split an item into multiple guest checks. For example, a table of four is sharing a bottle of wine and wishes to split the cost of the wine. You can split the item among the four people equally. If the table consists of couples, you can split the cost of the wine across the couples by grouping the seats. Splitting an item among seats is only available with tables and tabs in Table Service.
To split an item among seats at the table
- Assign the item to For Table.
- Tap Pay.
- Tap By Seats. The split check screen appears.
- (Optional) Group seats, if needed, dragging seats into seat groups.
- Tap to return to the Tender screen.
- Tap OK to acknowledge the notification.
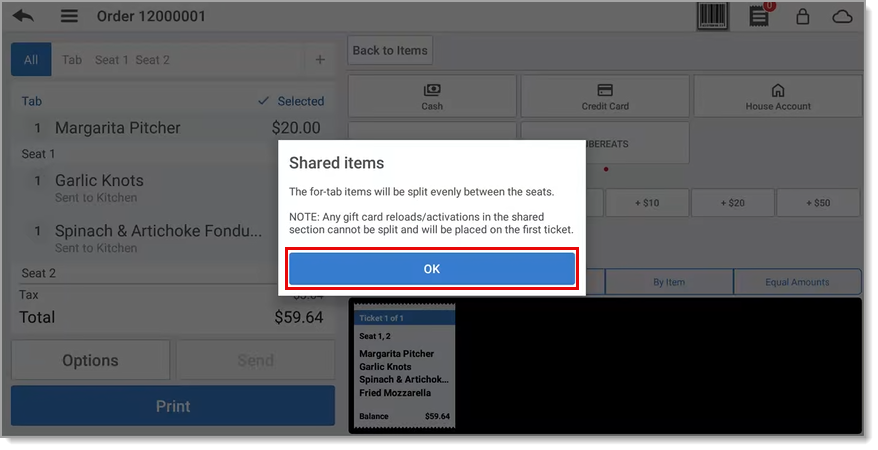
- At the Tender screen prompt, tap By Seats to split the item equally among all guests or tap By Seat Groupings to split the item equally by seat groups.

- Continue to close the check.
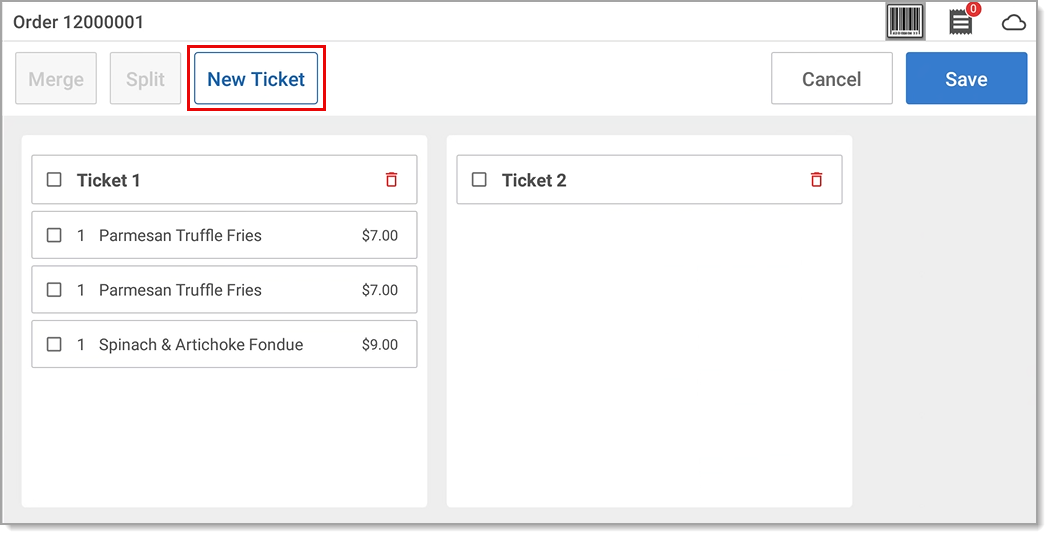
Splitting a guest check by item
In Table Service mode, you can split an item between guests. For example; A group of guests orders the same item and wants to share the cost by item, or if a guest needs to share the bill with another guest for some reason such as non-availability of funds to pay, you can split a check by item.
- With the guest check active, tap Pay. The tender screen with split payment options appears.
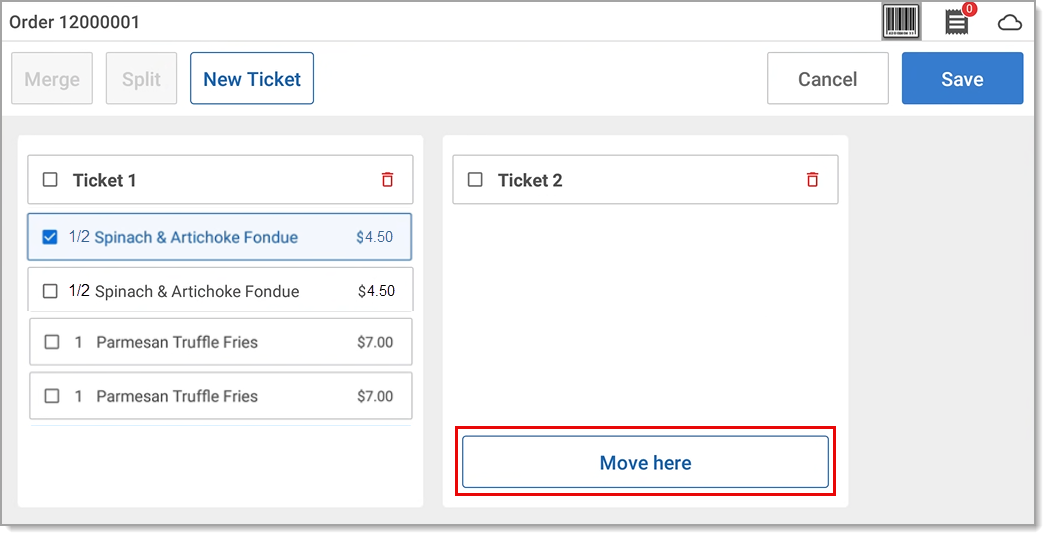
- Tap By Item. The split by item screen with the New Ticket active appears. By default, Ticket 1 and Ticket 2 are visible with the ordered items listed under Ticket 1.
- You can add a new ticket by selecting the New Ticket option at the top, or you can delete a ticket by using the delete icon to the right of each ticket. Items from the deleted ticket move to the existing ticket on the left.
NOTE: You can add a maximum of 25 tickets.
- Select the desired item(s) to split. The Split tab becomes active.
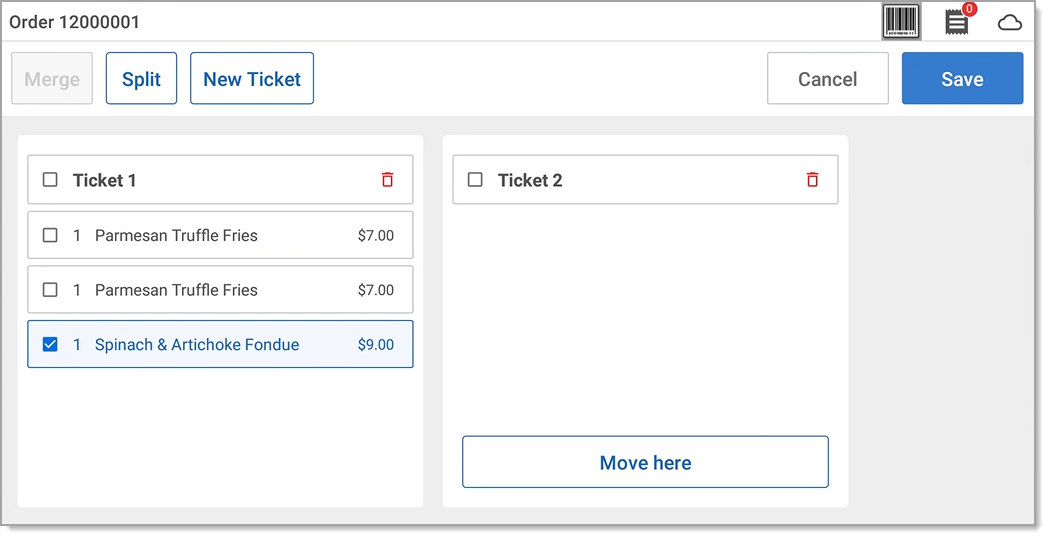
- Tap Split tab. The Split Item pop-up appears.
NOTE: You can split an item into a minimum of '2' and a maximum of '25' quantities.

- Tap the + or - option to adjust the quantity as required.

- Tap Split to save the changes. The split items appears on Ticket 1, and the 'Move here' option is available on Ticket 2.

- Select the desired split item(s) and tap Move here. The selected items appear on Ticket 2.
NOTE: You can also merge split items using the Merge option.
- Click Save to confirm the changes. You can view the tender screen with split tickets by items.
