Restaurant App Check Close Options
Description
What's in this article?
Solution: Restaurant
Use check close options to define how you capture customer’s signatures, on printed paper or electronically on the device screen, and how you provide receipts to customers. You can set receipts to auto-print, or to provide your customers with the option of receiving their receipts in an email message, which can be a great way to capture customer information and build your mailing list.
Customer signatures
You can configure the app to always print a receipt for customers to sign when using a credit card to pay for their order.
- To configure the receipt to always print
- From the slide-out menu ☰, tap Settings.

- Tap Check close options.

- Choose a signature option:
- Tap Digitally on screen to capture the signature electronically.
- Tap On paper to print a receipt for the customer to sign.
- (Digital Signature) Tap Tip Configuration to change the default tip percentage amounts. You can define up to three tip percentages or dollar amounts for your customers to select from when they digitally sign for a credit card purchase. The default percentage amounts are: 15%, 18%, and 20%. The customer can also elect to provide a different tip percentage or dollar amount on the screen.
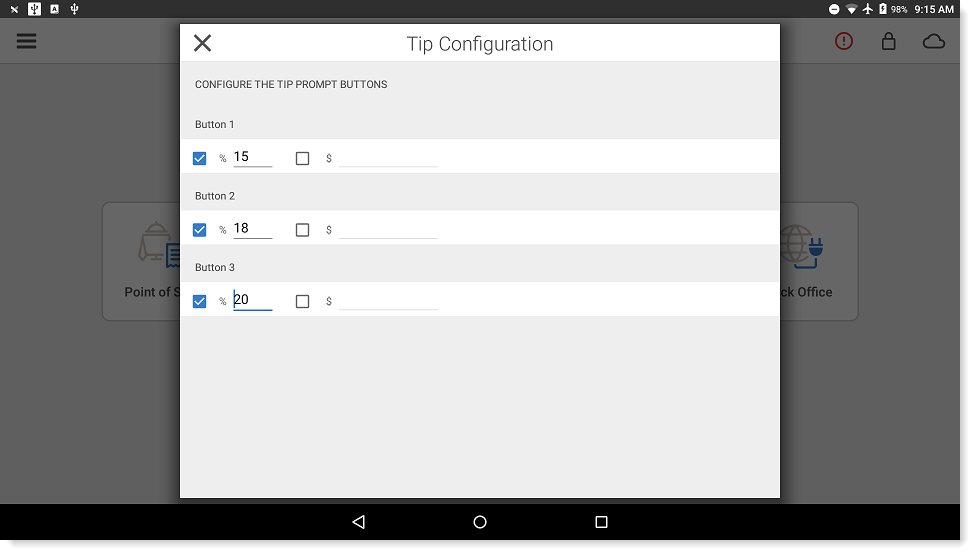
- To turn off a percentage option, clear the checkbox for the option.
- To change the percentage, tap the percentage number, type a new percentage, and tap Done.
- To use a dollar amount instead of a percentage, select the checkbox for the individual dollar amount to the right. The system turns off the corresponding percentage button. Tap the dollar and enter a dollar amount, and tap Done.
- Tap Settings to return to the Settings screen.
- From the slide-out menu ☰, tap Settings.
Receipt option configuration
You can provide your customers options for receiving their receipts.
- If Quick check close is disabled, the Receipt screen appears when you close a guest check and provides the option to email, print, reprint, or not provide a customer with a receipt.
- If Quick check close is enabled, the Receipt screen does not appear and customer receipts print to the local printer when you close a guest check.
- To enable/disable Quick Check Close
- From the slide-out menu ☰, tap Settings.
- Tap Check close options.
- Select Quick check close to prevent the Receipt screen from appearing and to have the system automatically advance to the next ticket. If Quick Check close is selected, the Print customer receipt appears and is enabled by default.
- Enable Required Pin Entry to automatically close completed checks and require a cashier to enter their POS PIN in order to access the POS.
- Tap Settings to return to the Settings screen.
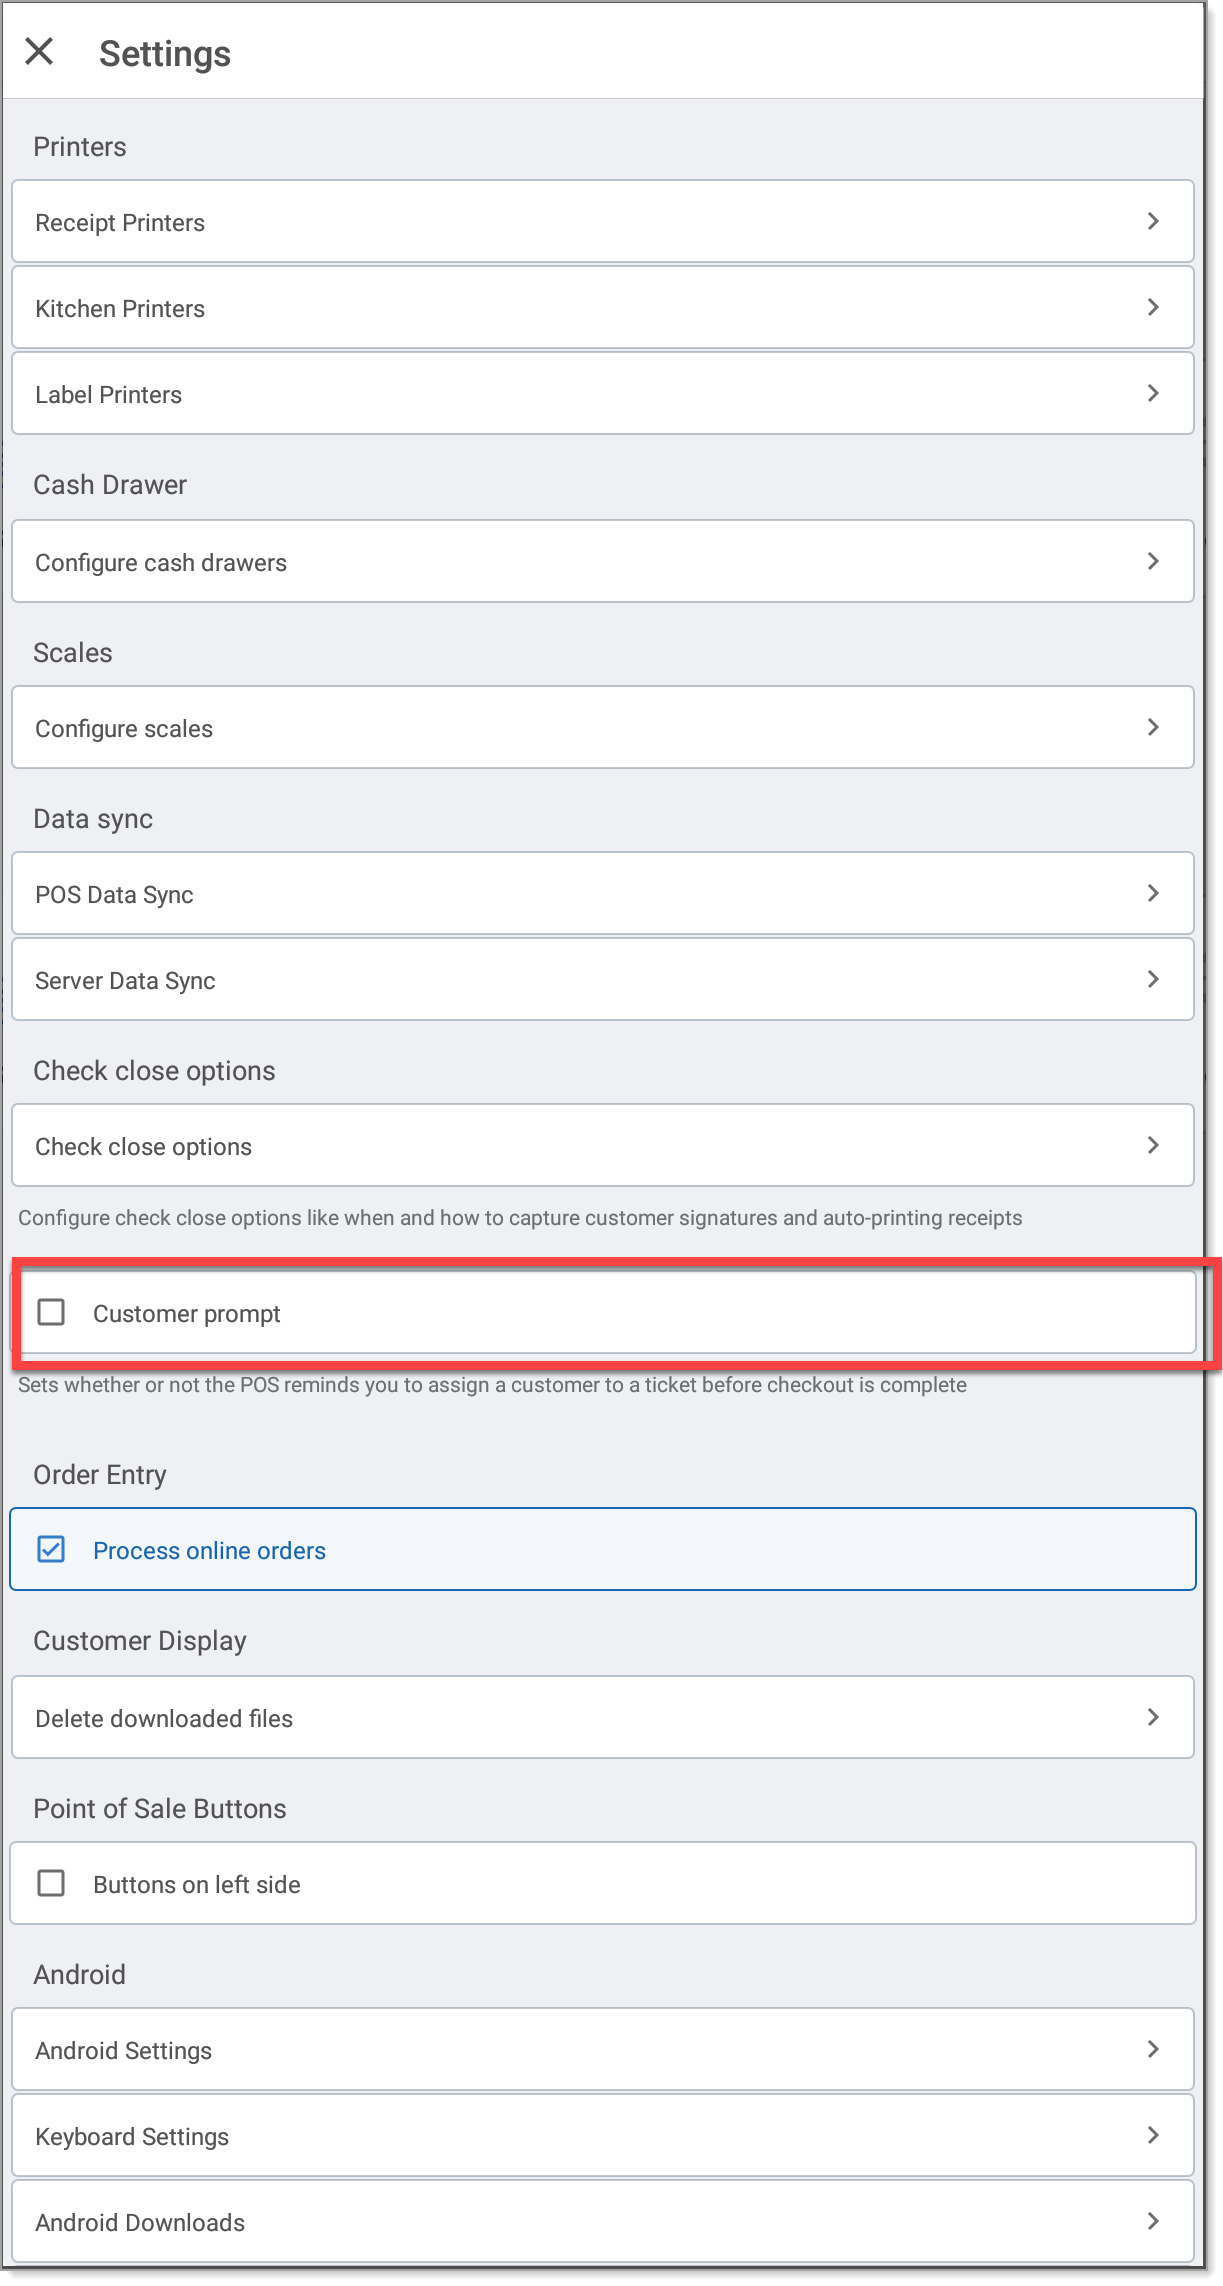
Customer Prompt
Use Customer prompt to remind you to assign a customer to a guest check when closing a guest check, which can be a great way to collect customer information and build your marketing list. The Customer prompt button is disabled by default.
- To enable the Customer Prompt
- From the slide-out menu ☰, tap Settings.
- Enable the Customer prompt to activate the prompt for a customer.