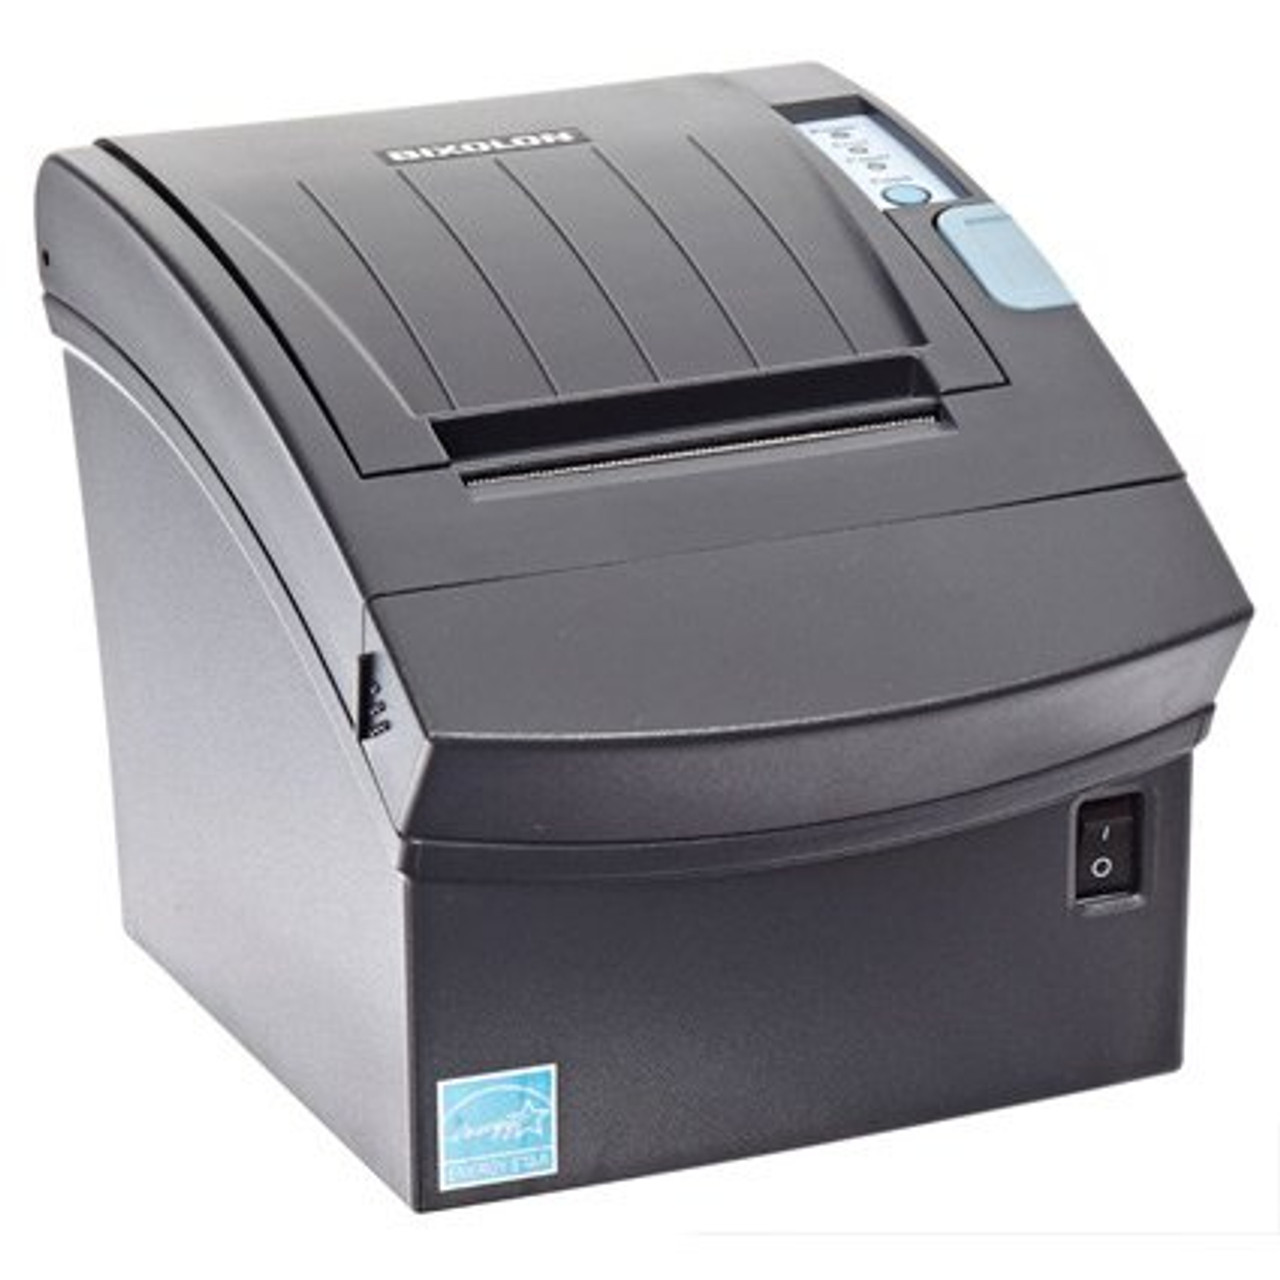
Thermal Printer SRP-350 Setup
Description
What's in this article?
Solution: Essentials Light | Essentials | Retail | Restaurant
In addition to the built-in printer included with your point of sale terminal, you may need to add an external printer for times such as when you need a kitchen printer to receive chits. The SRP-350 Bixolon thermal printer can connect to your network through a wired connection to your terminal or to your router. Connecting the printer to your router allows multiple point of sale devices to be able to print.
What's in the box?
Your thermal printer will arrive with a power adapter and 6' power cord along with receipt printer rolls. Additional accessories are included but not necessary for setup such as an RS-232 cable, ethernet extender and back panel for covering cable connections.
Load printer paper
Thermal printers use a special paper that is heat sensitive instead of using ink. Rolls of 3.125" (80mm) x 230' thermal receipt paper are included with your initial order of the printer and can be purchased at an office supply store or from Bank of America. A kit that includes 24 thermal rolls and one thermal print head cleaning card, which should be used regularly to maintain receipt quality, is available.
- To load printer paper
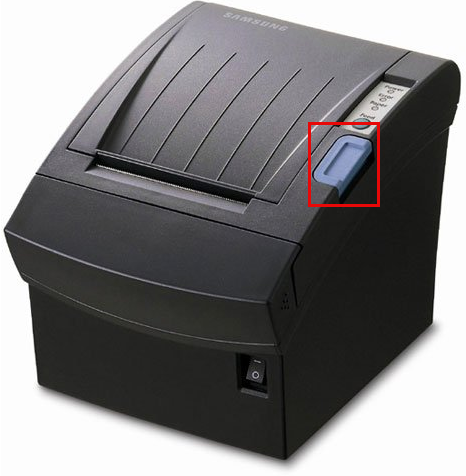
- Press the cover open button on the top right side of the printer.
- Place a paper roll inside the compartment with the end of the roll on the bottom.
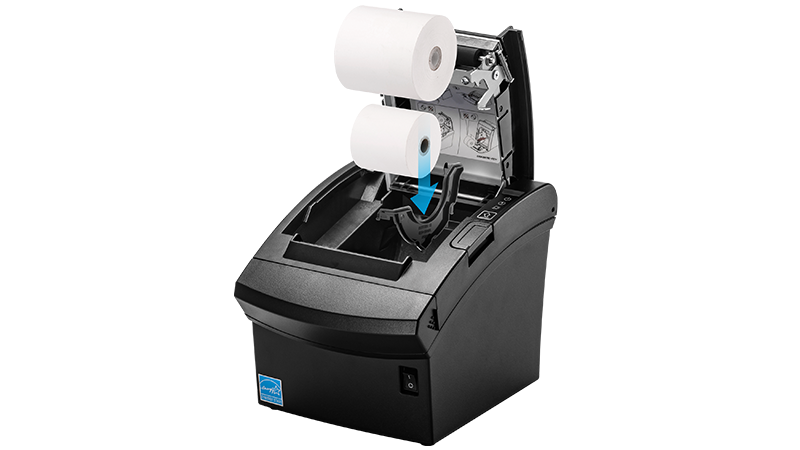
- Pull a portion of paper over the receipt paper roller and close the cover lid.
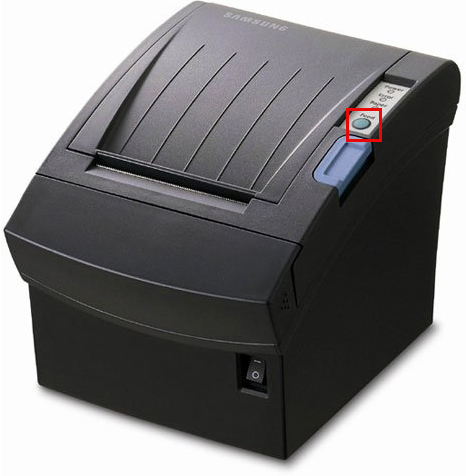
- Press the Feed button once to test the paper loaded correctly.
- Tear off the excess paper.
- Press the cover open button on the top right side of the printer.
NOTE:
Hot or humid environments can affect printing. If you have such an environment, an impact printer may be a better fit for you.
Connect the printer
Connect the printer to the terminal using the provided USB cable or connect the printer to your router using an Ethernet cable.
- USB connection to terminal
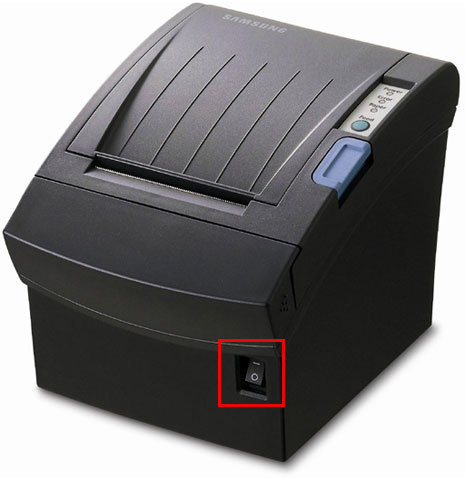
- Plug the terminal into power and power on the terminal.
- Plug the USB cable into the USB port on the back of the printer.
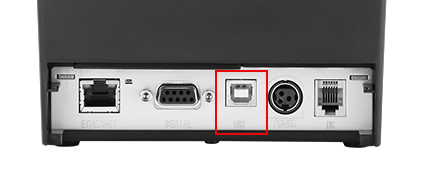
- Plug the other end of the cable into the USB port on your terminal. The terminal will display a popup message to allow access to the USB device.
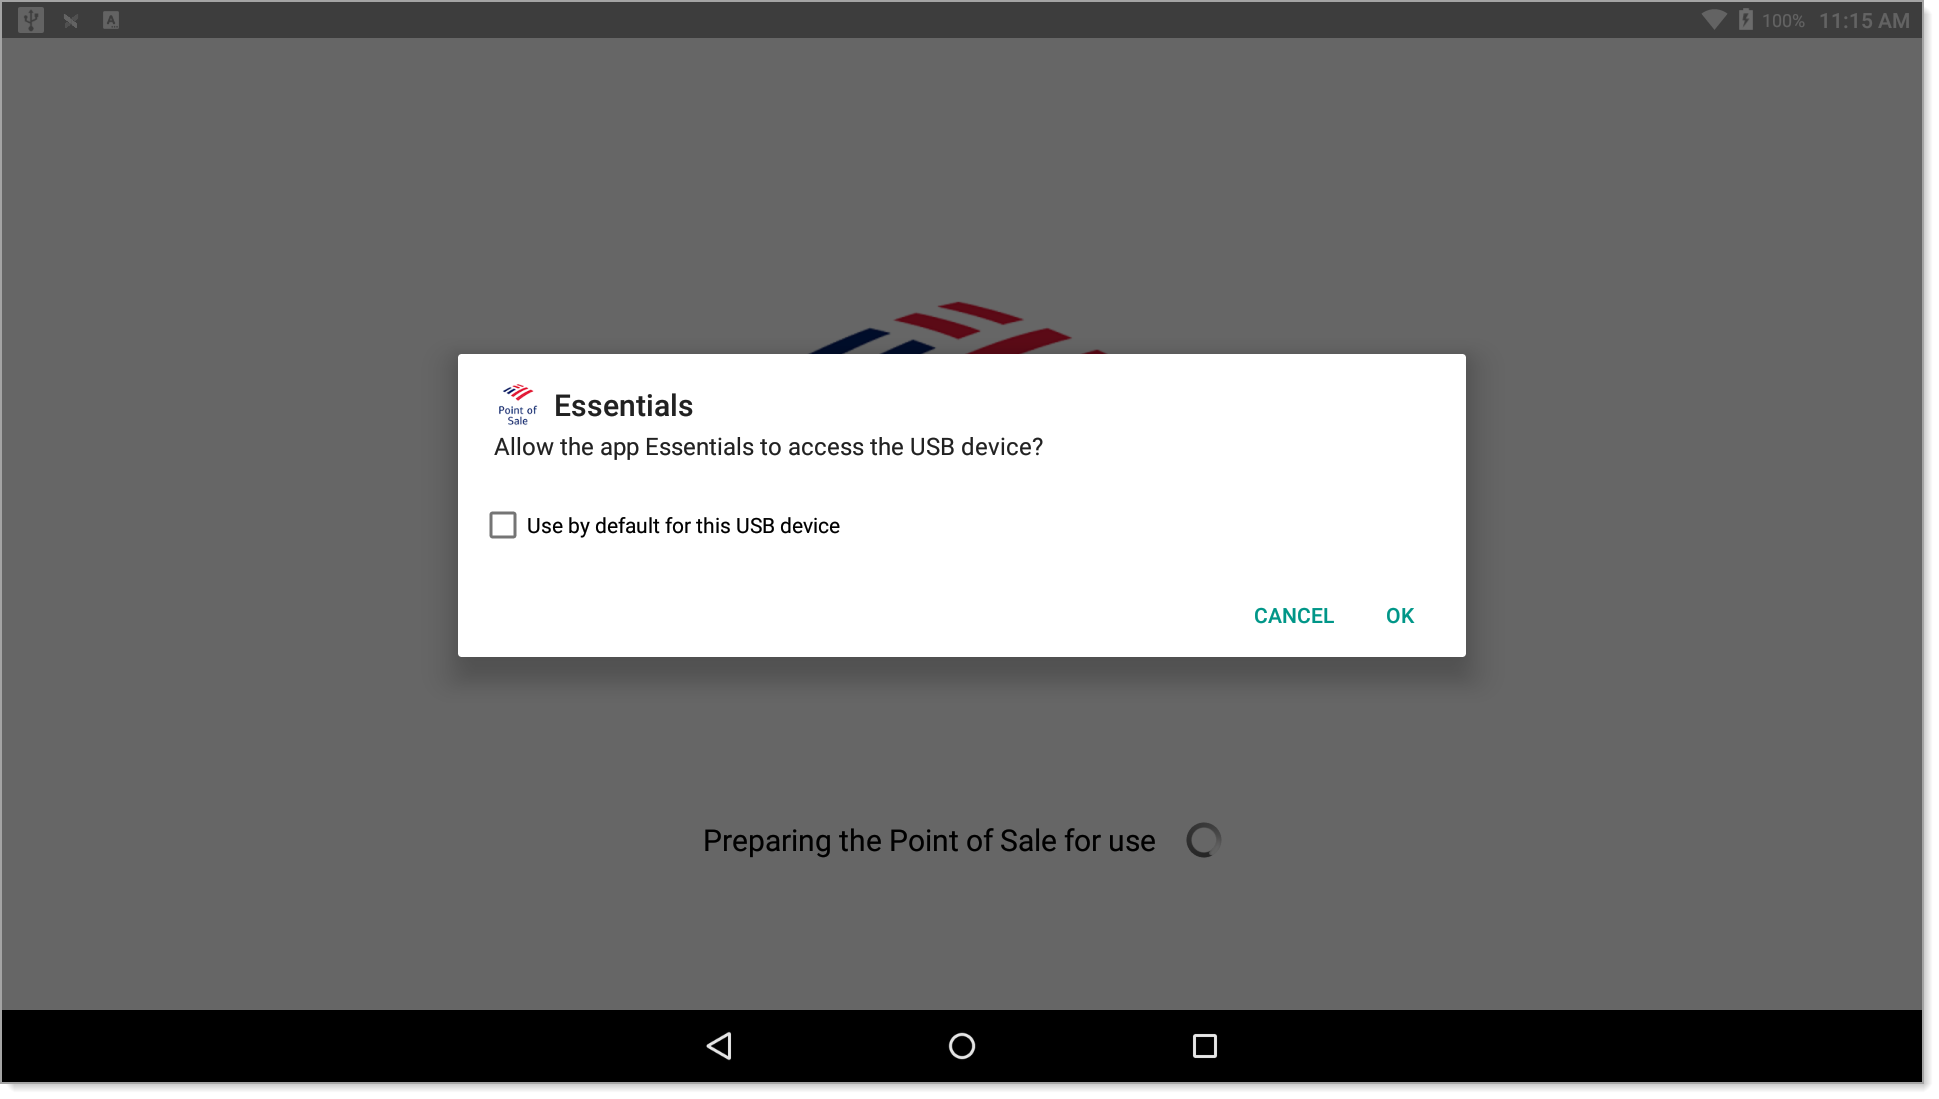
- If desired, select the checkbox to make the printer the default printer.
- Tap OK.
- Configure the printer in the Point of Sale app and print the test receipt. See below for instructions.
- Plug the terminal into power and power on the terminal.
- Ethernet cable connection to router
- Plug the terminal into power.
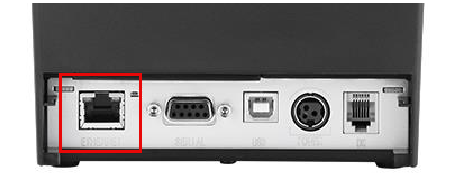
- Connect the printer to the router using an Ethernet cable, inserting the Ethernet connection into the LAN port on the back of the printer.
- Power on the printer and wait at least 10 seconds.
- Using a paperclip or similar tool, press the Function button on the back of the printer. A receipt showing Ethernet settings will print.
- Configure the printer in the Point of Sale app and print the test receipt. See below for instructions.
NOTE:
Bluetooth connection is not supported. Connecting using a USB or Ethernet cable is the recommended configuration.
Configure the printer in the Point of Sale app
Once connected, configure your printer. The printer configuration steps will vary depending on which solution you are using and whether you connected the printer using USB or Ethernet cable.
- To configure the printer for Essentials or Retail Point of Sale
- On your terminal, log in to the Point of Sale app.
If prompted, click OK to allow the app to access the USB device.
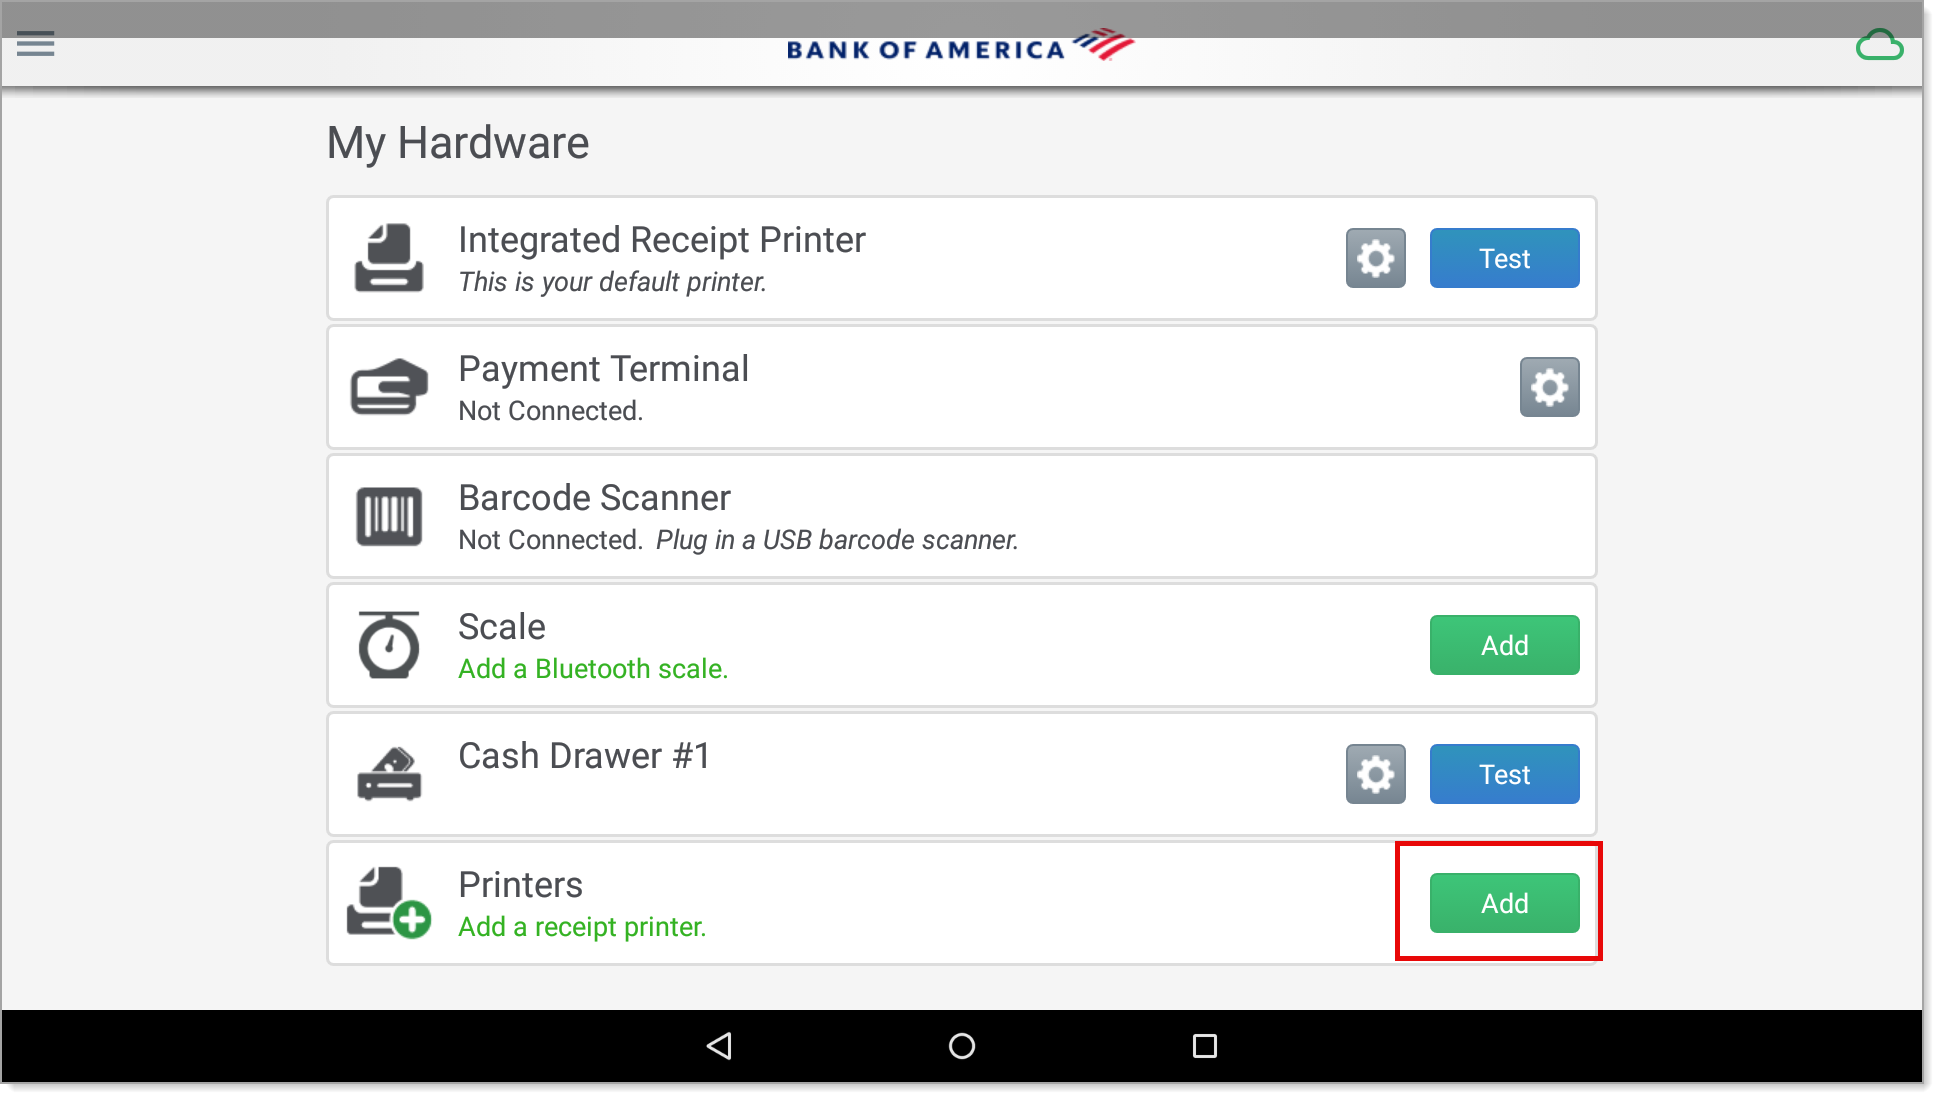
From the slide-out menu ☰, tap My Hardware.
In the Printers section, tap Add.
- Do one of the following, depending on how you connected the printer:

- Network Printer (Ethernet)
- Tap Network Receipt Printer.
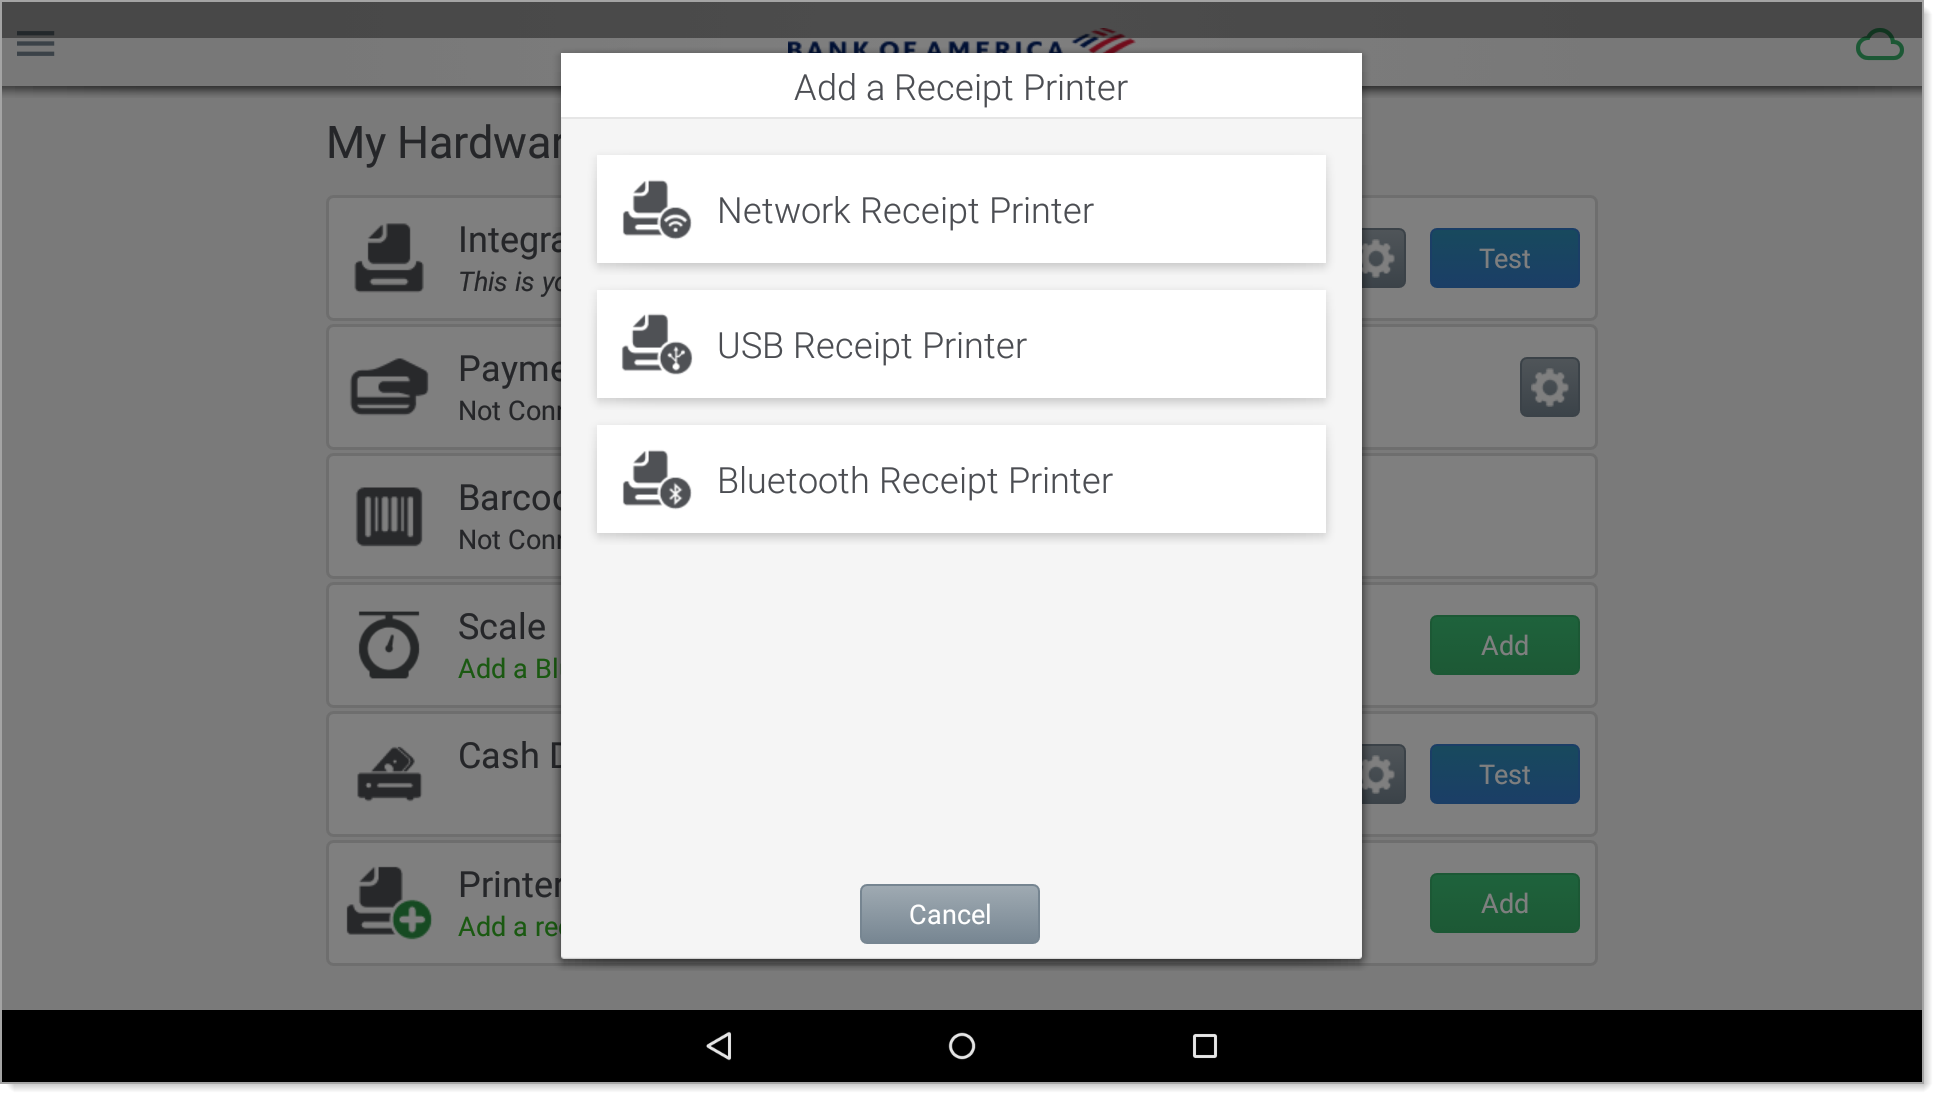
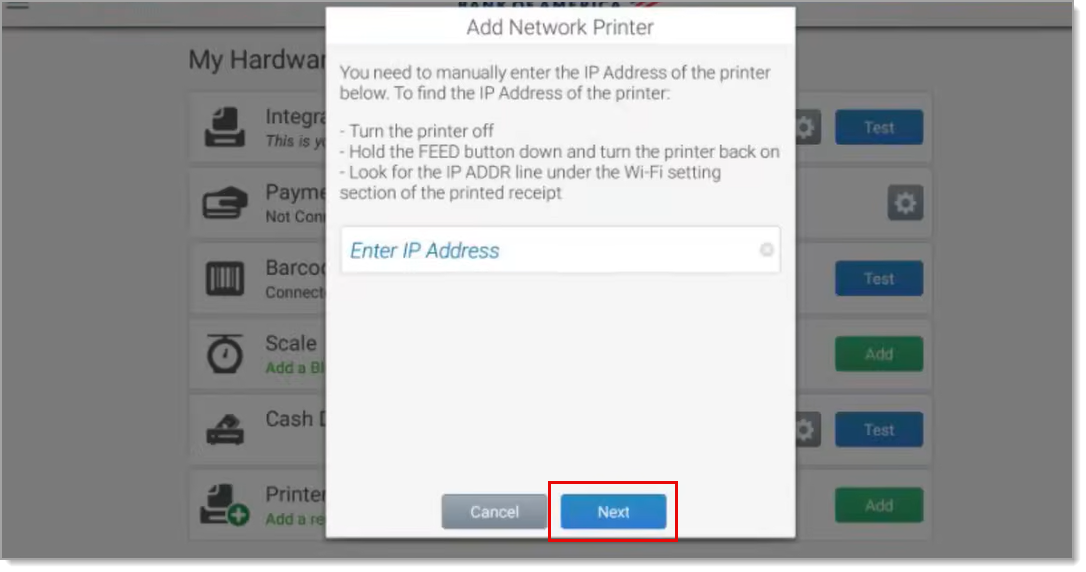
- Enter the IP address from the Ethernet printout, obtained by pressing the Function button after connecting to the router. Tap Next.
- Tap Network Receipt Printer.
- Network Printer (Ethernet)
- Name the printer.
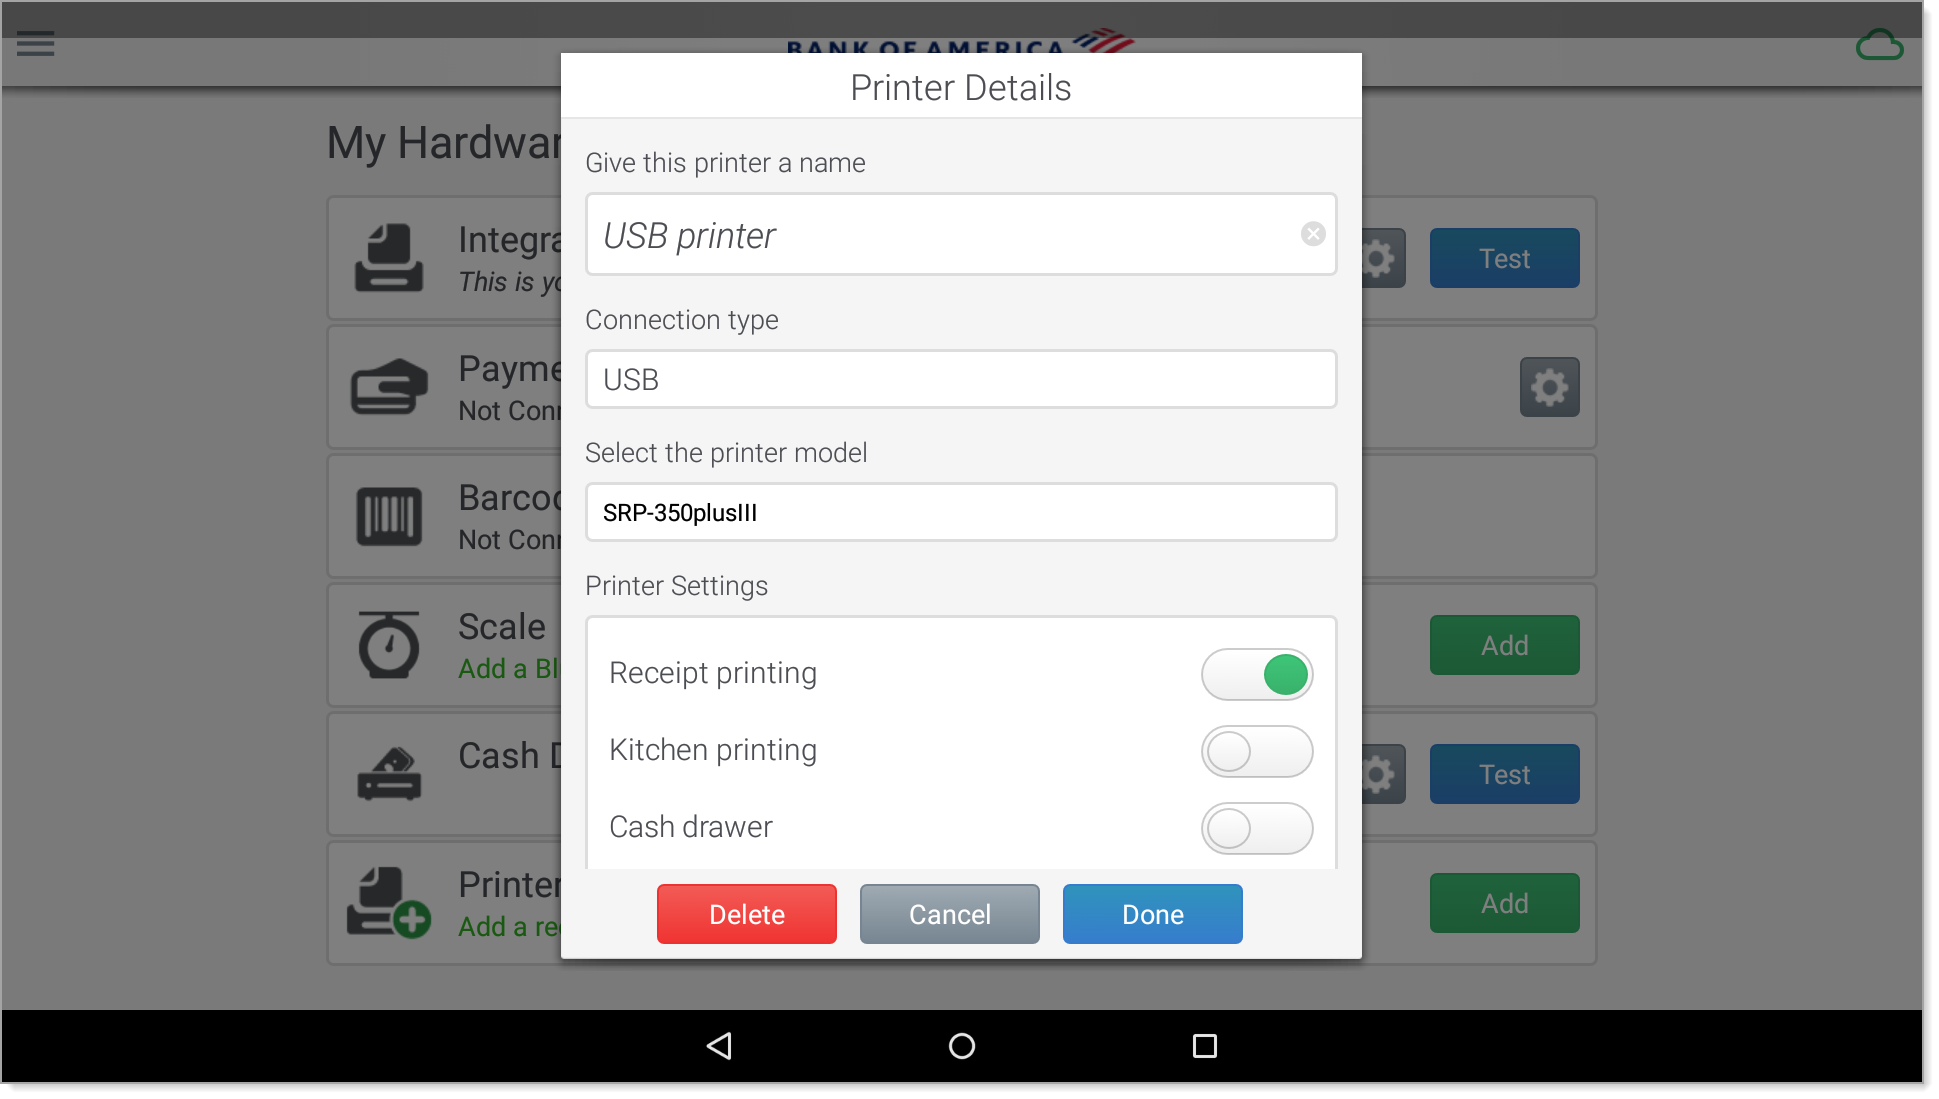
- Define the printer’s settings. If you only have one printer, it can be used as both a receipt printer and a kitchen printer.
- Turn on Kitchen printing to print kitchen chits, which instructs the kitchen on which items to prepare, how to prepare an item, and customer or table information. They do not look like regular receipts or include any prices.
- Turn off Receipt printing unless you plan to use the printer to print customer receipts.
- If you have a cash drawer connected directly to the back of the printer, turn on the Cash drawer option. See Cash Drawer Configuration for more detail.
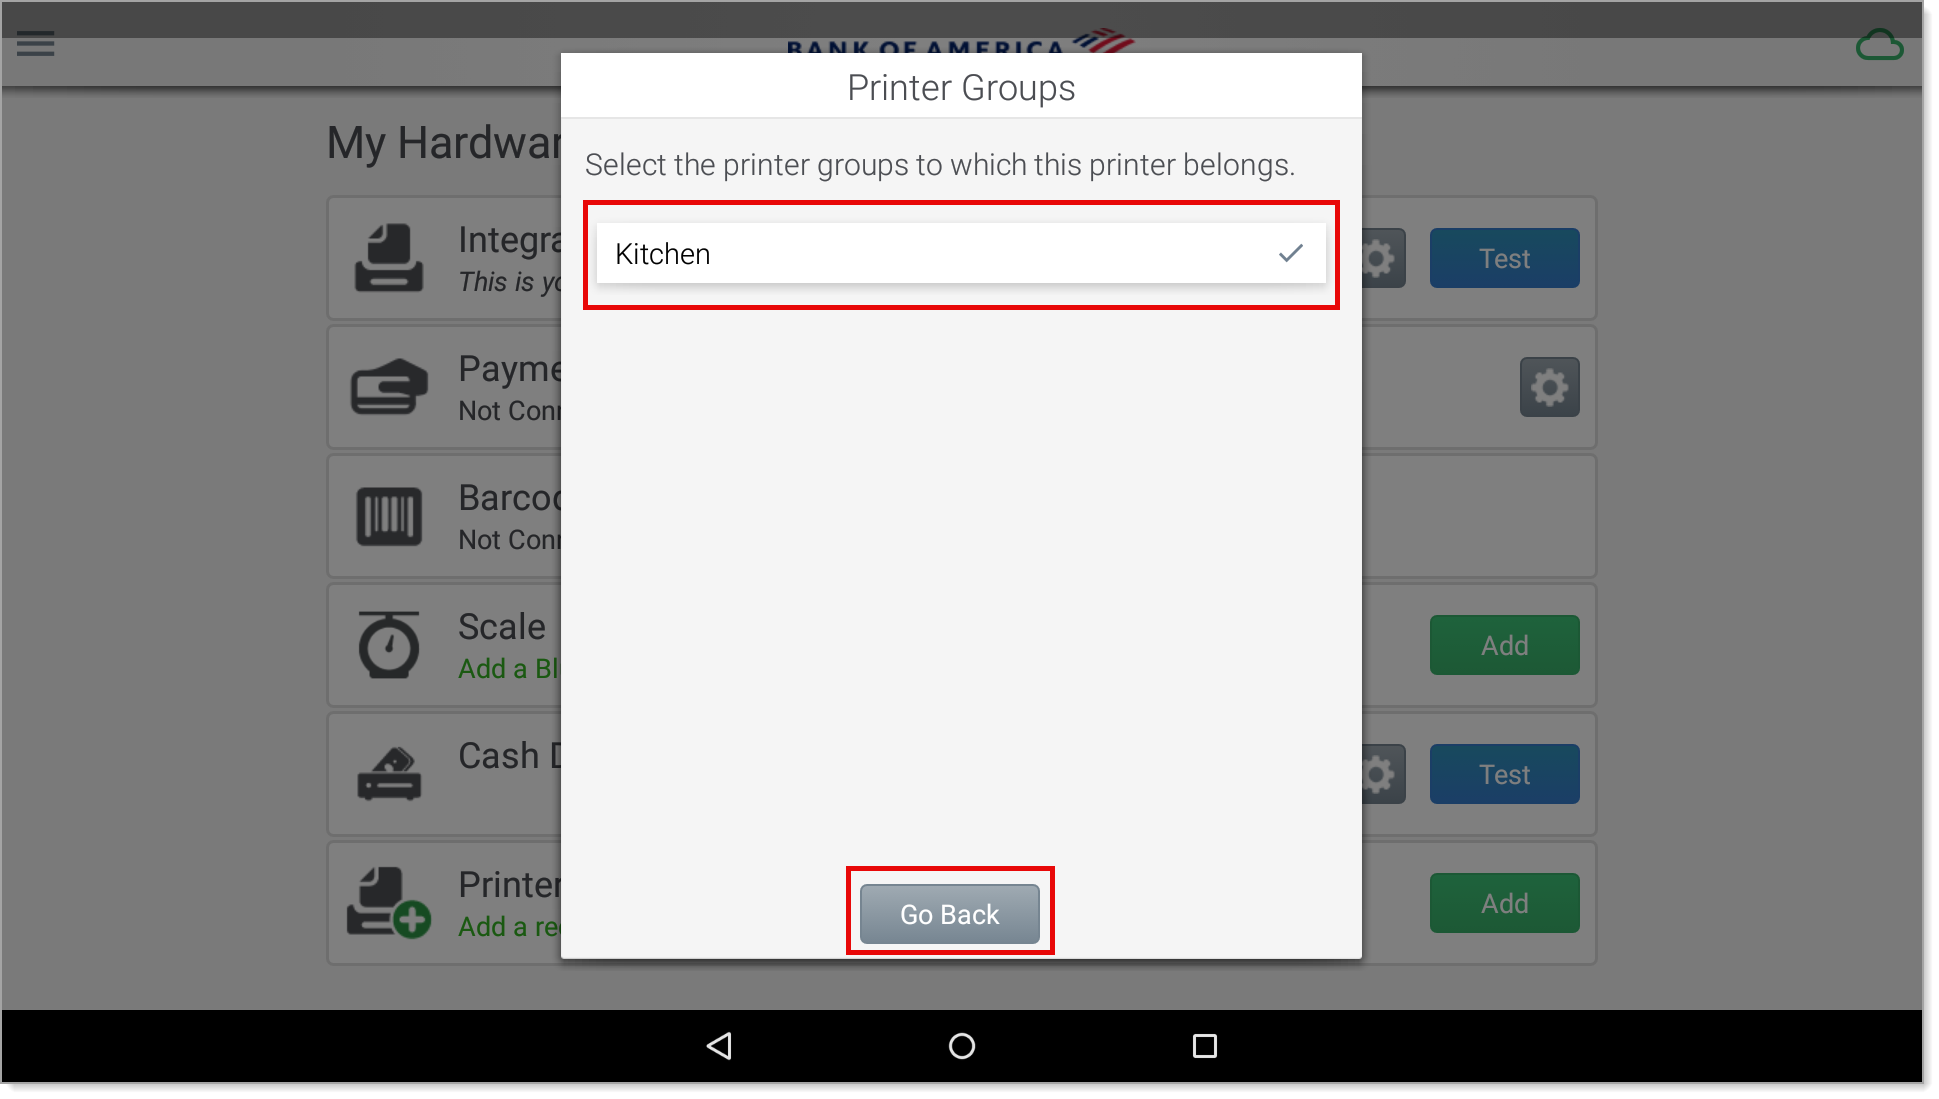
- If you select Kitchen Printer, tap Kitchen to add the printer to the Kitchen printer group and then tap Go Back.
- Tap Done. A new line will appear on the My Hardware screen for the printer that was added. A test receipt will print automatically. If the receipt does not print, tap Test to print a test receipt to ensure the printer is connected and configured properly.
- To configure the printer in Restaurant Point of Sale app
- Connect the printer using USB or Ethernet, as described above.
- From slide-out menu, tap Settings.
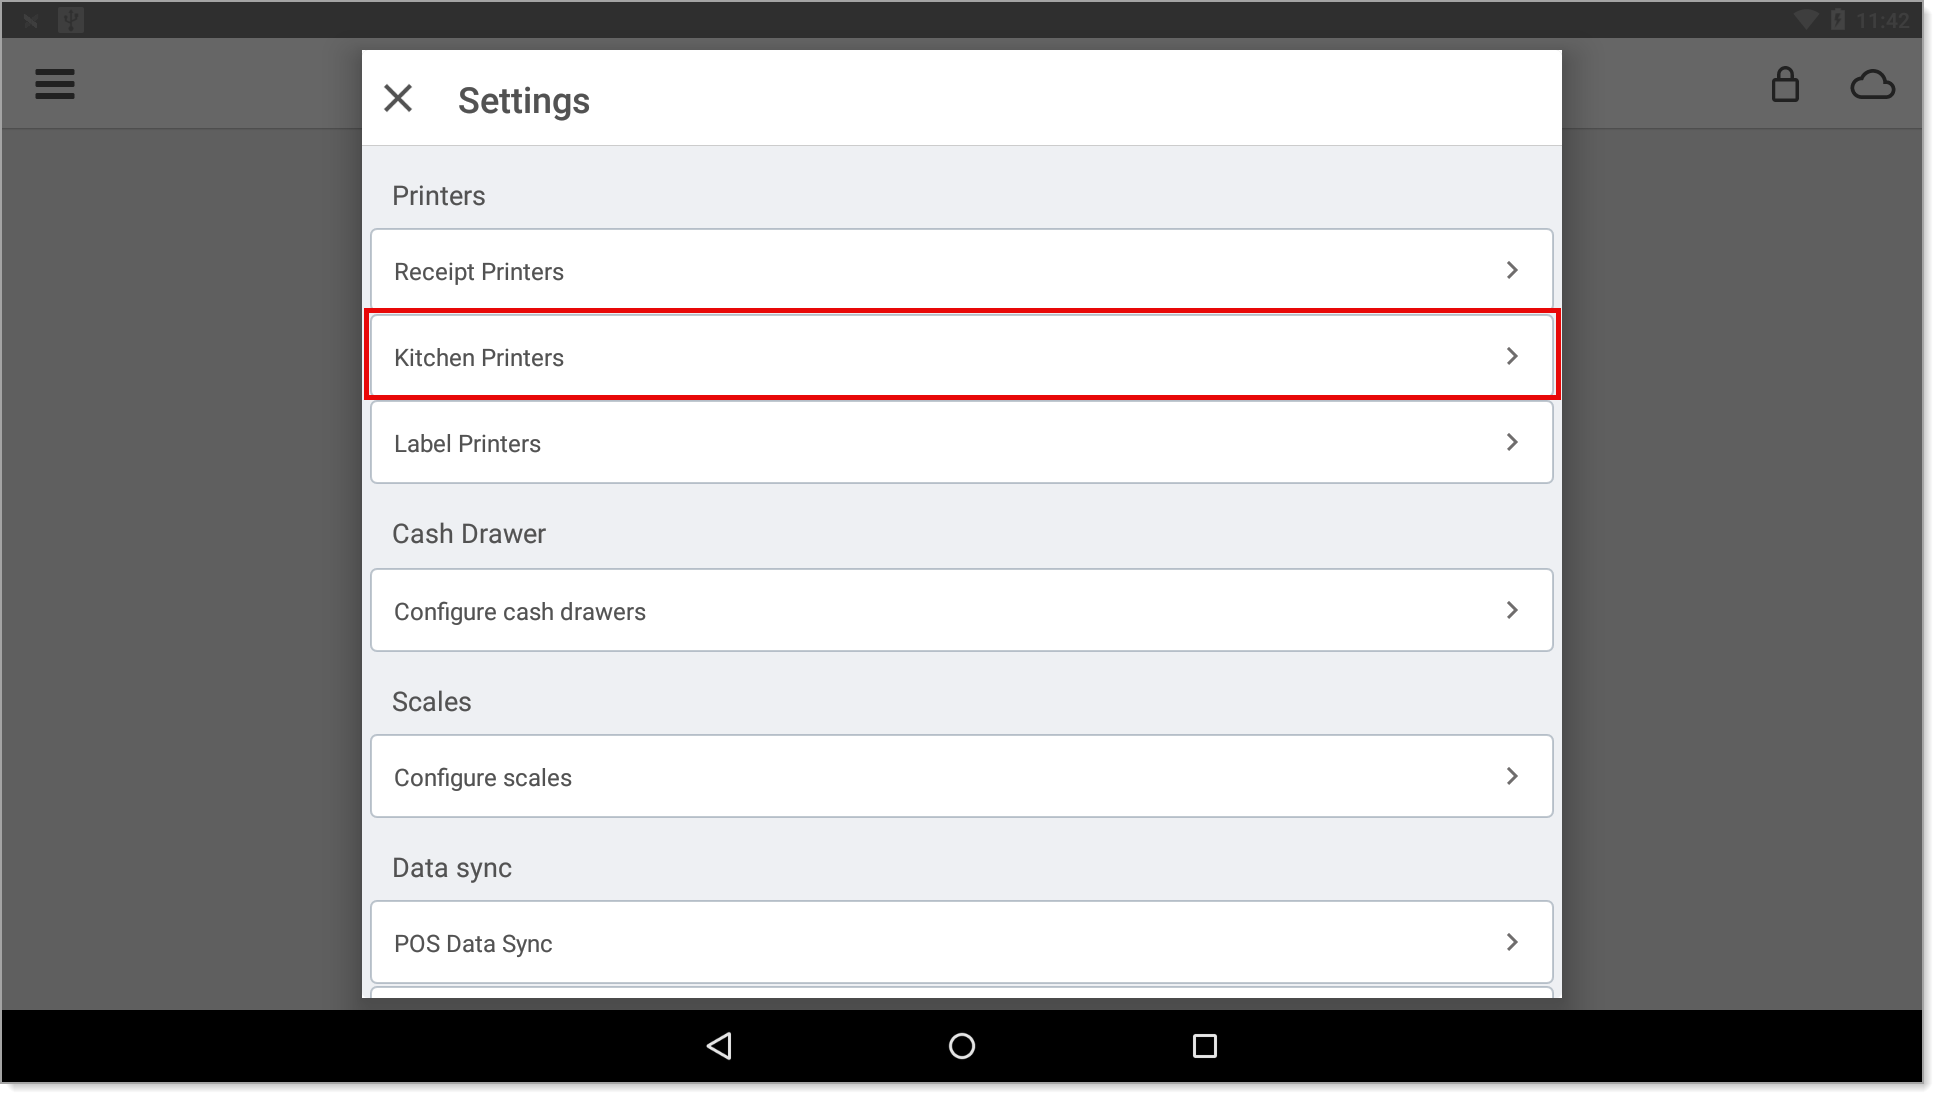
- Depending on how you want to configure the printer, tap Receipt Printers, Kitchen Printers, or Label Printers, depending on what role the new printer will have.

- Kitchen Printer Setup
- From the Settings menu, tap Kitchen Printers.
- Tap one of the following:
- To set up the printer for just one terminal, tap Add Local Printer.
- To make the printer available for all your devices, select Add Shared Printer.
- Tap the Bixolon printer in the list of discovered printers. It will show as Bixolon - USB or Bixolon - Network depending on how it is connected. If the printer does not display in the list, you can manually add it:
- Select the printer group for this printer. The groups that display are configured in Back Office.
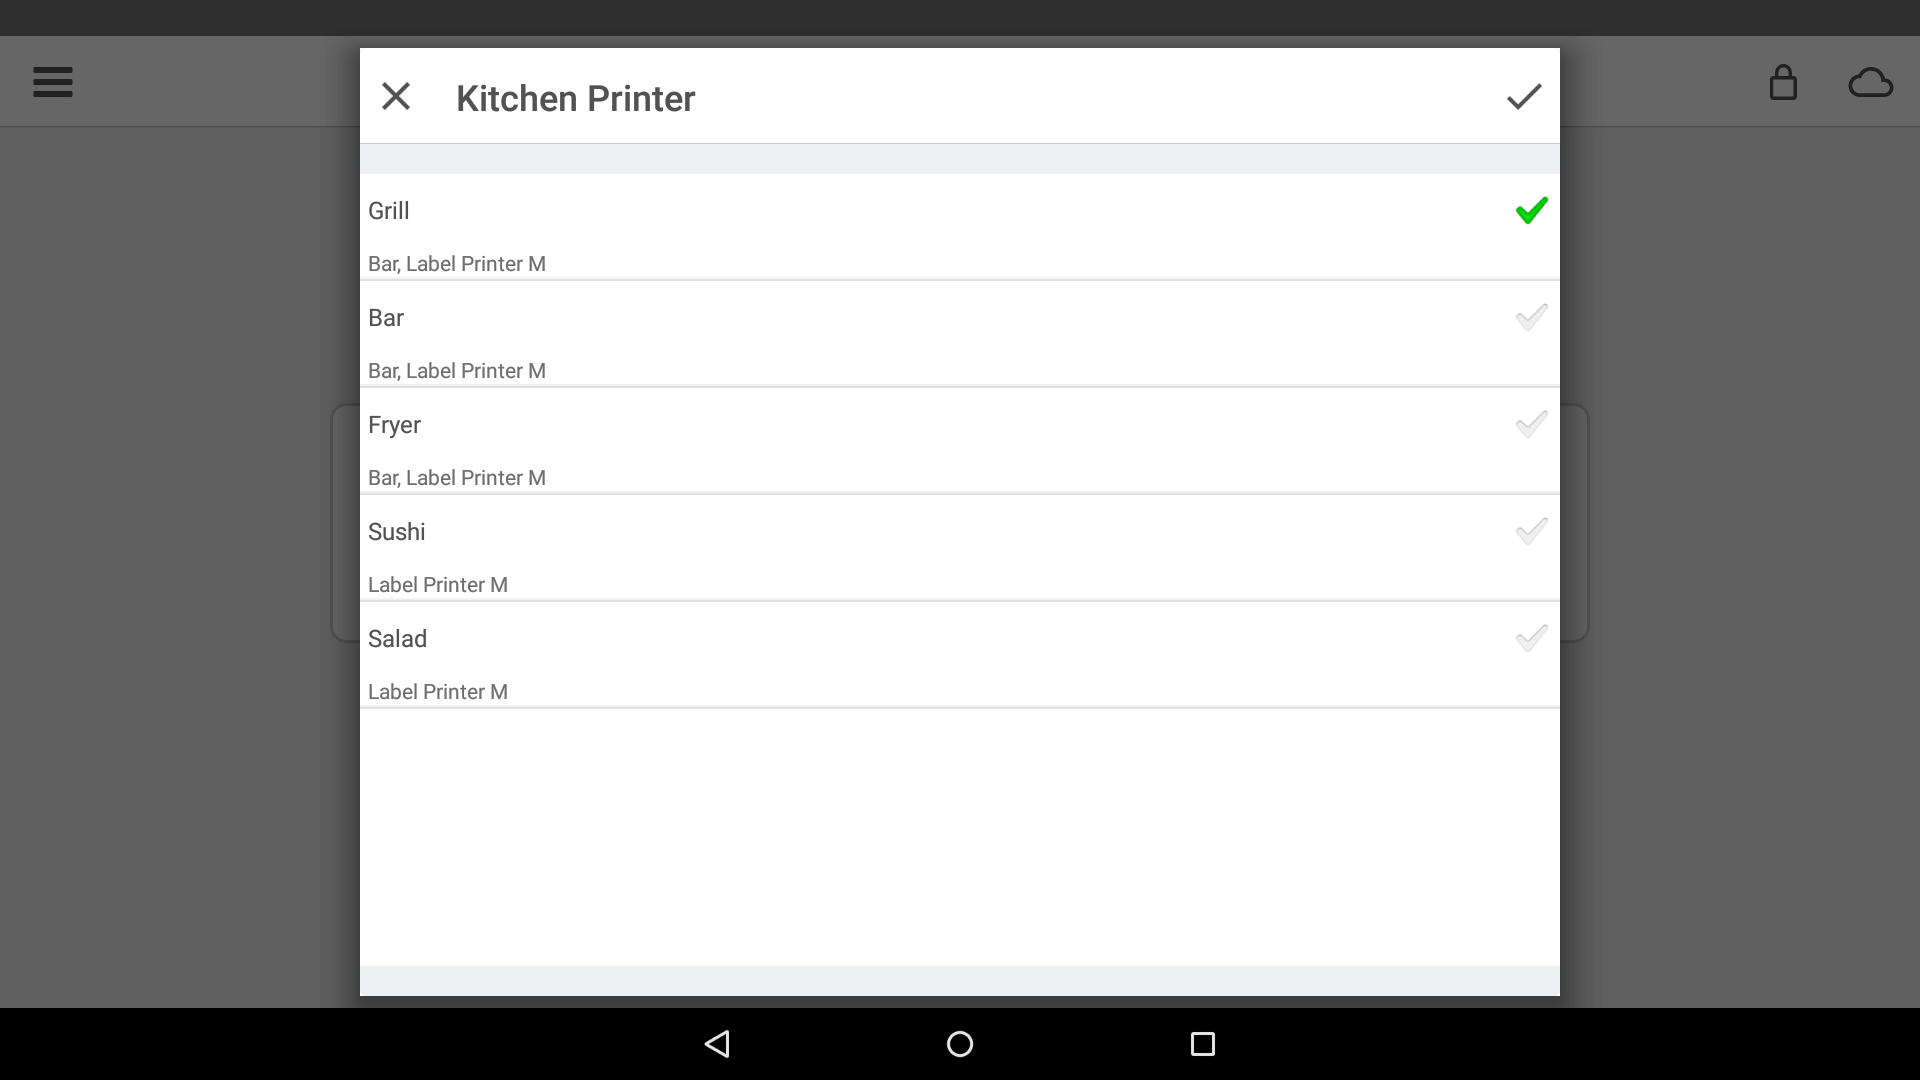
- Tap OK to use the configured kitchen device.
- Enter a name for the printer. Give your printer a name that indicates its purpose and/or location, such as "Kitchen Printer" or "Front Counter Printer".
- Tap Print test receipt to confirm that the printer is configured.
- Tap the checkmark in the top right corner to save and exit.
- From the Settings menu, tap Kitchen Printers.
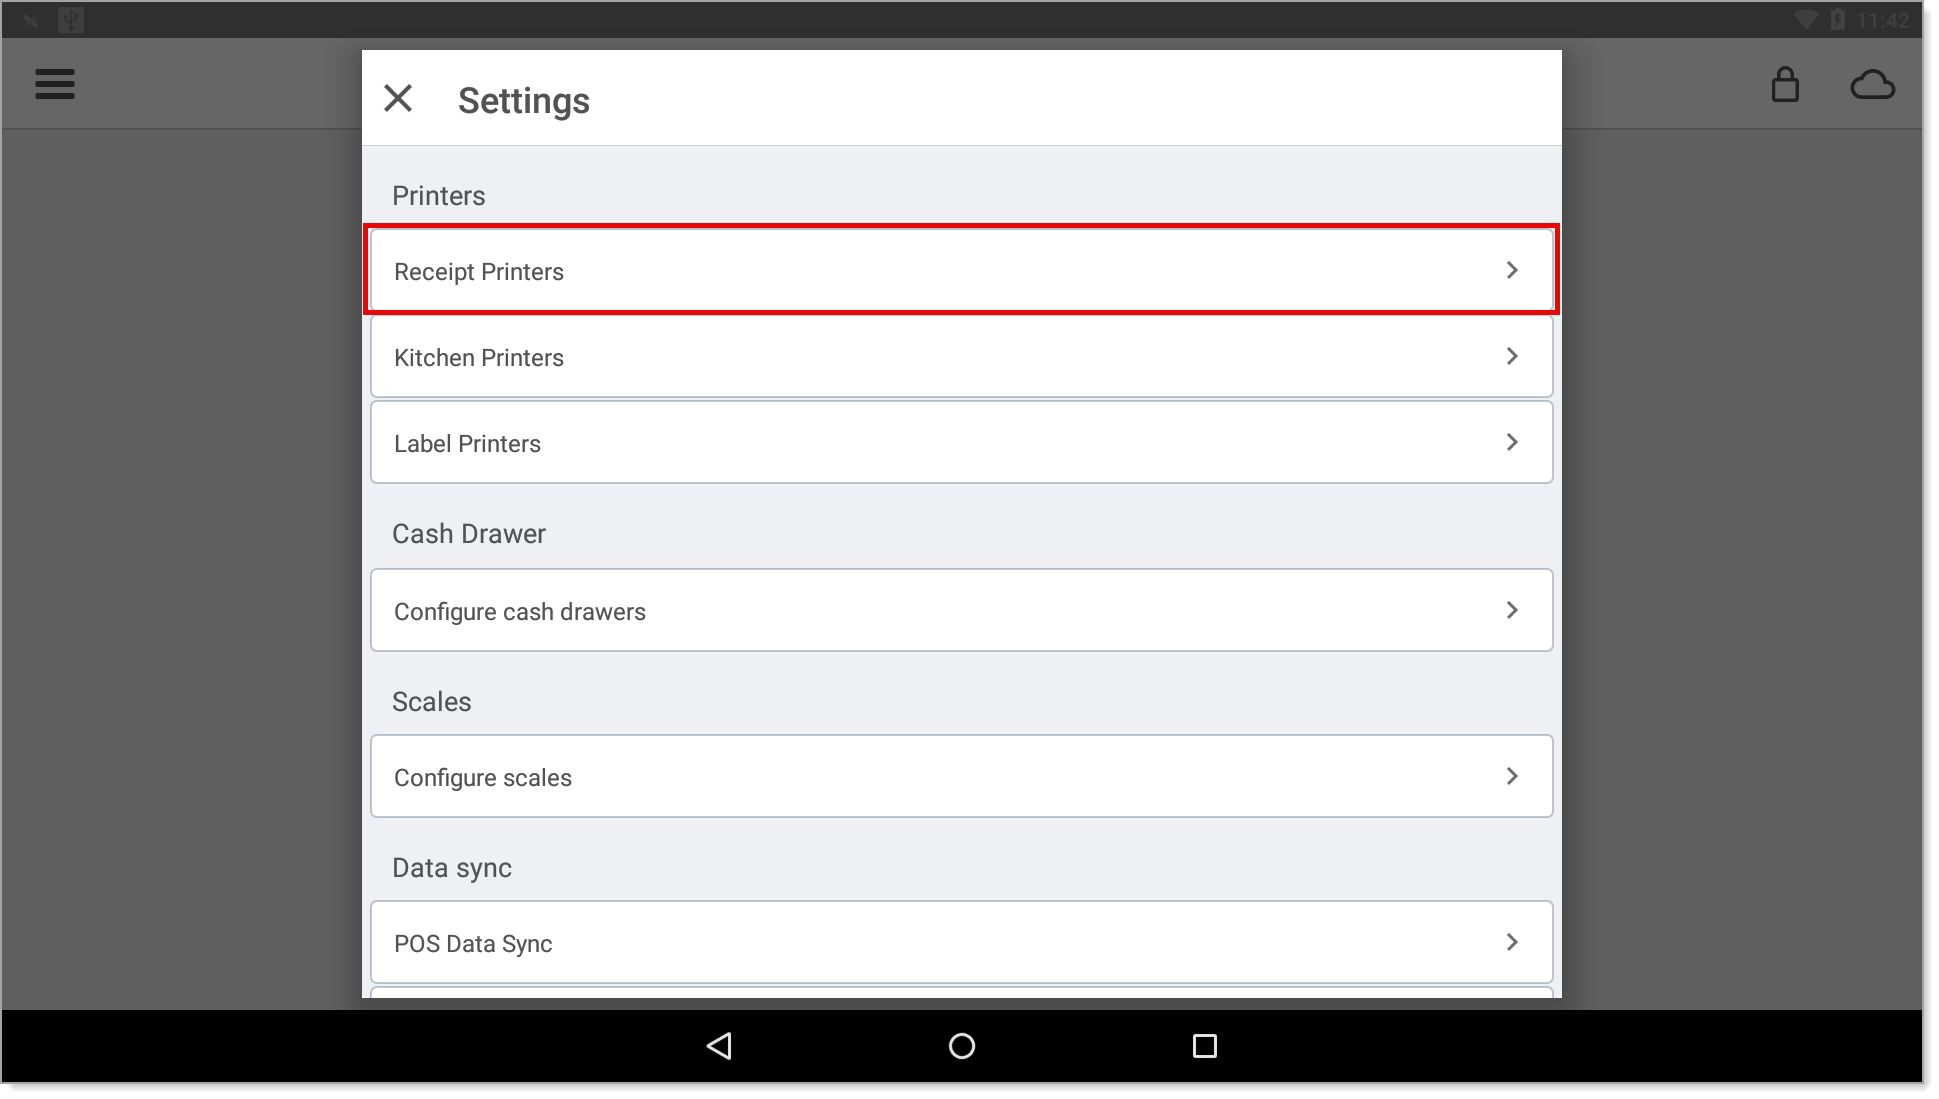
- Receipt Printer Setup
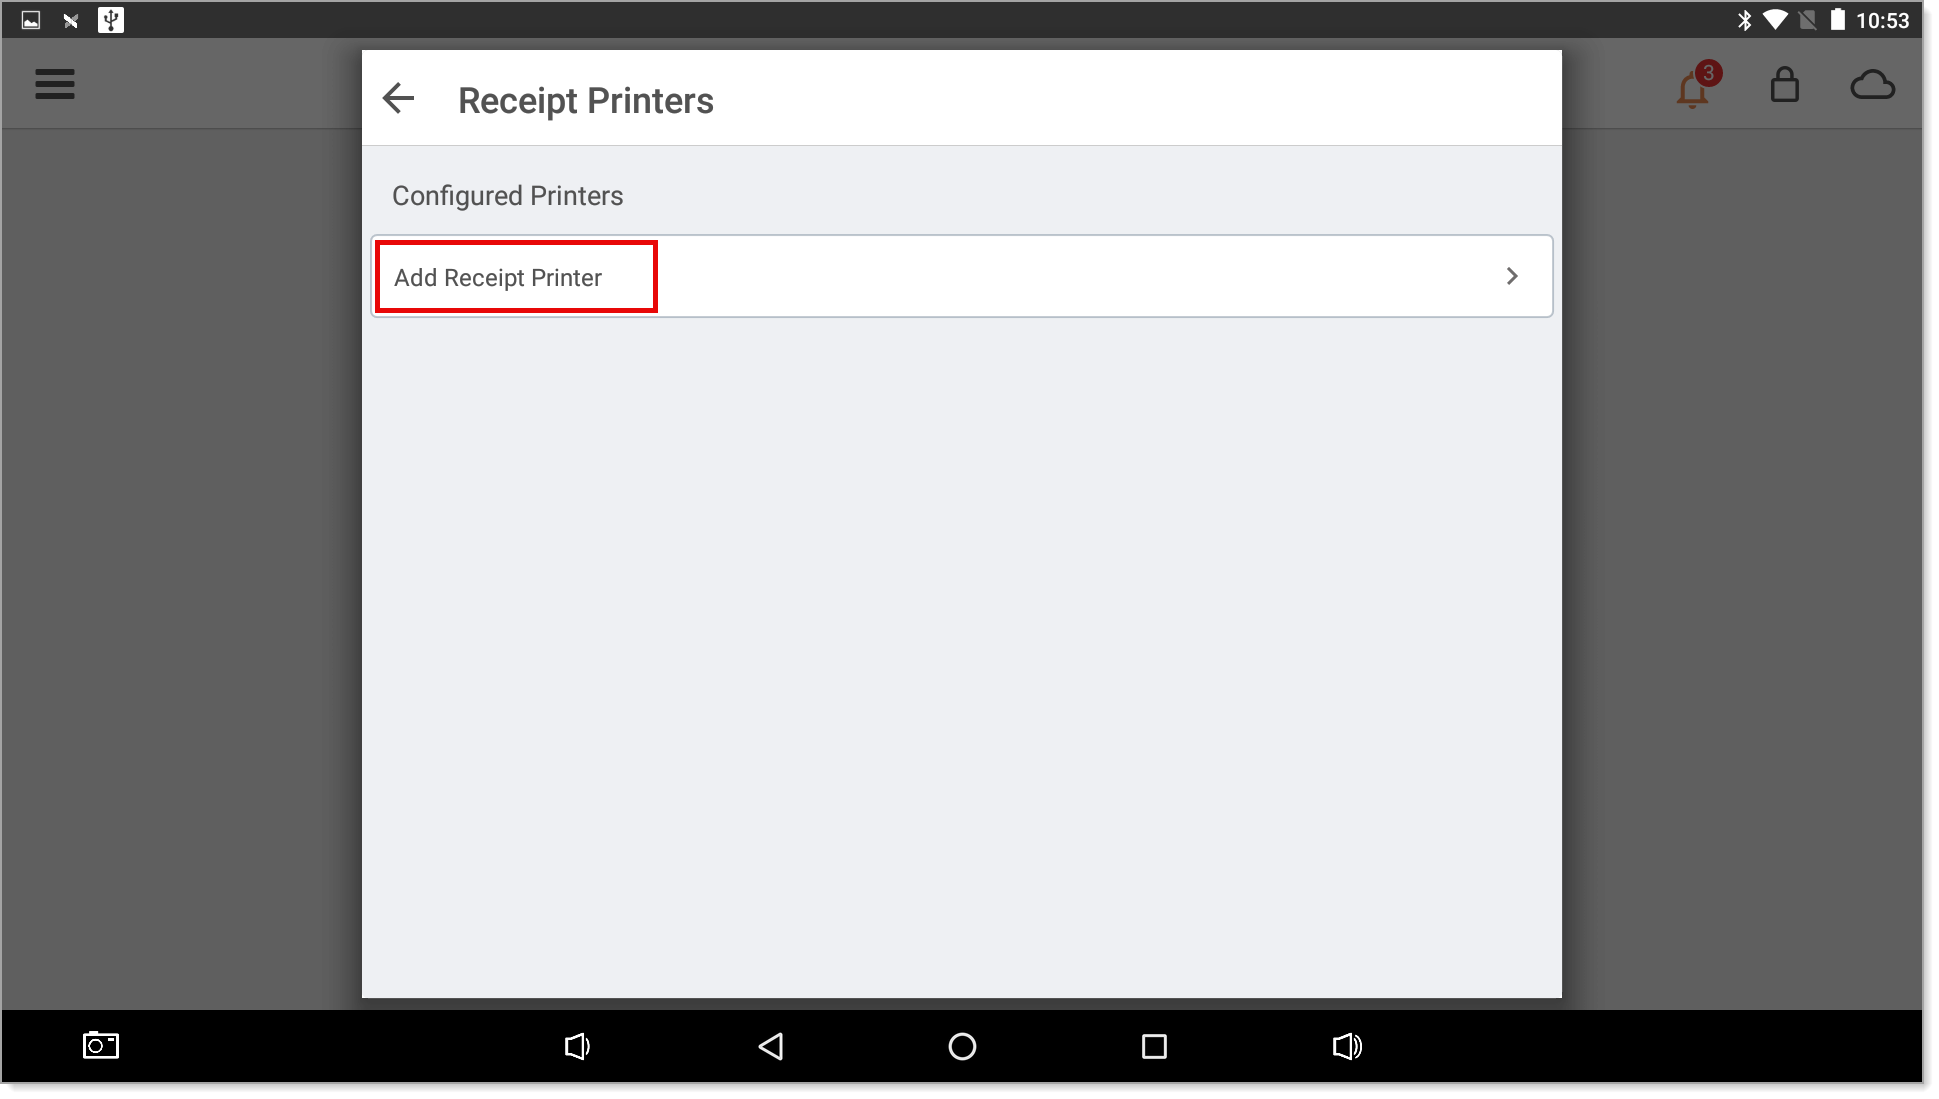
- From Settings > Printer, tap Receipt Printers.
- Tap Add Receipt Printer.
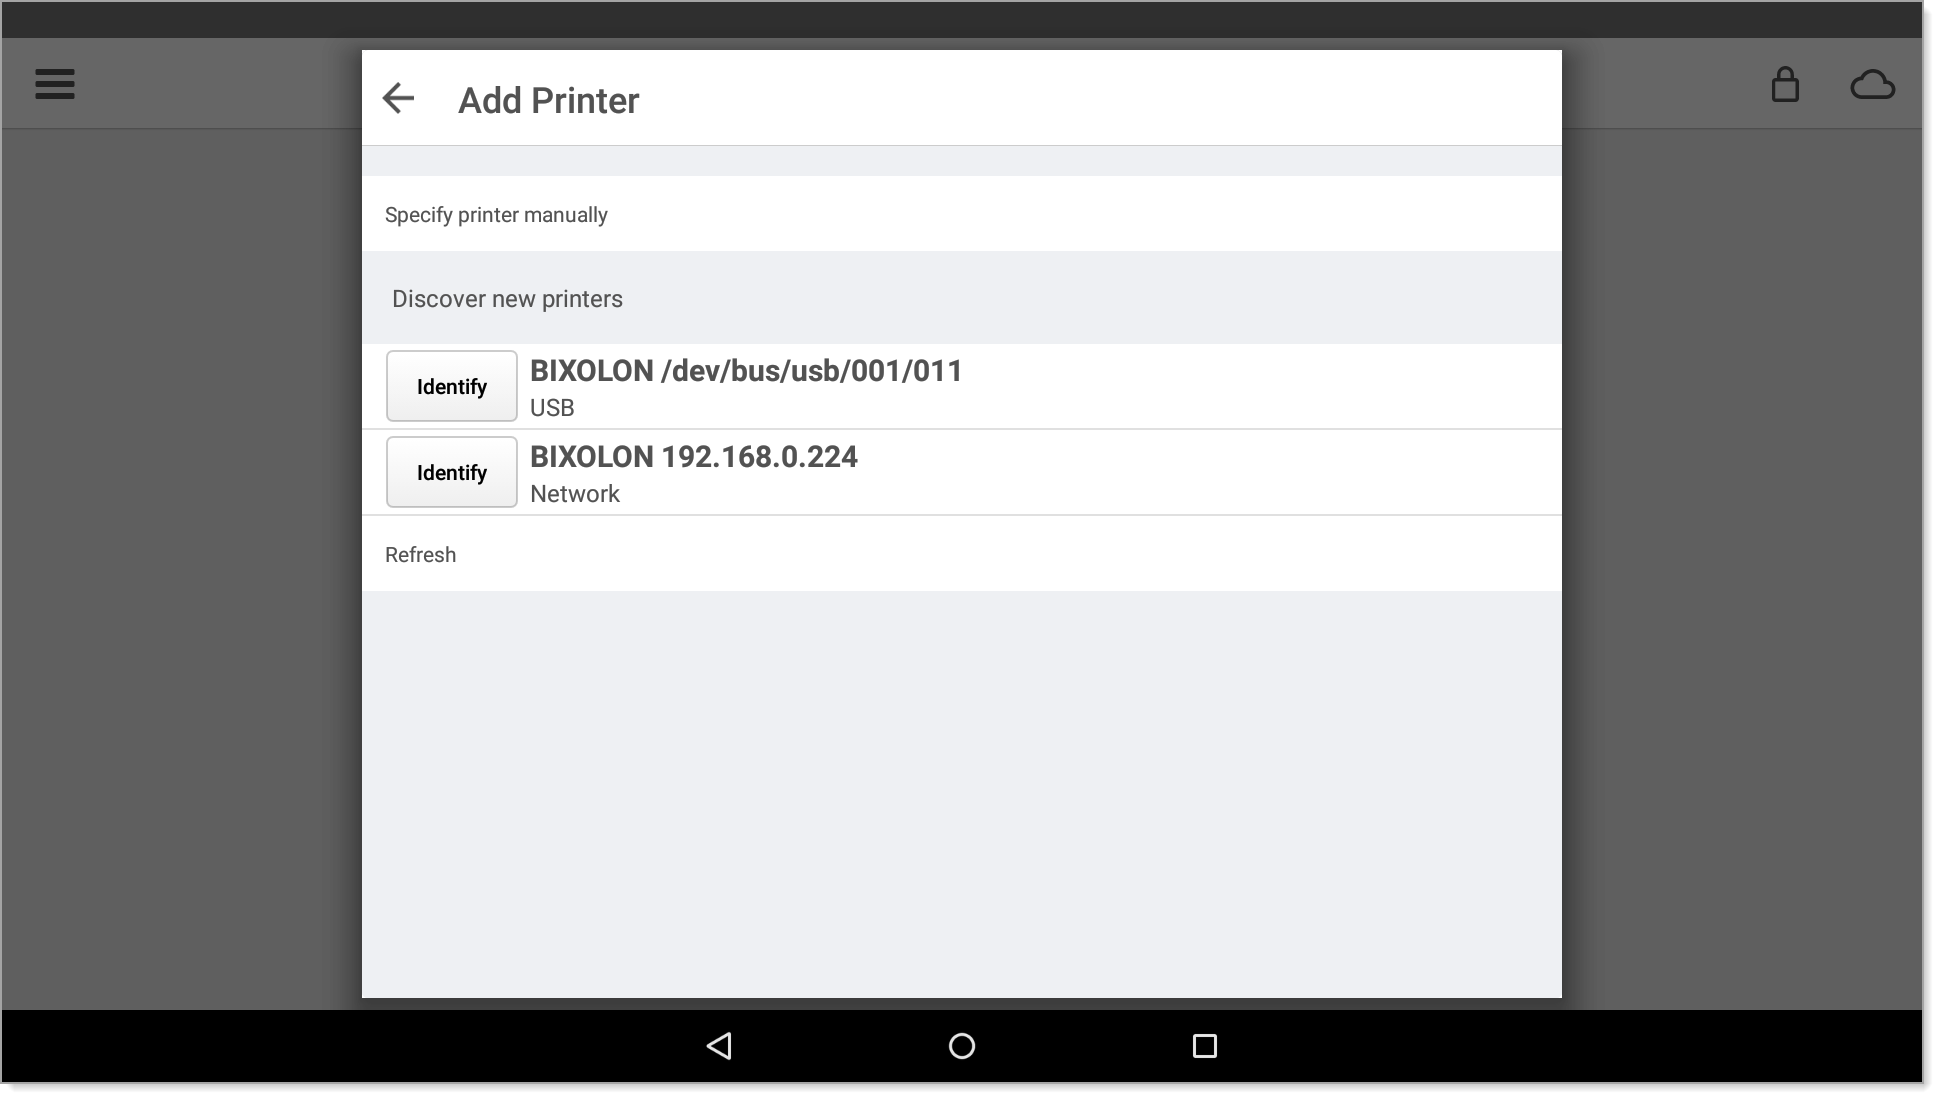
- Tap the printer from the list of discovered printers. Note that if you have configured the terminal's printer, it may also display in the list. If the printer does not display in the list, you can manually add it:
- Name the printer.
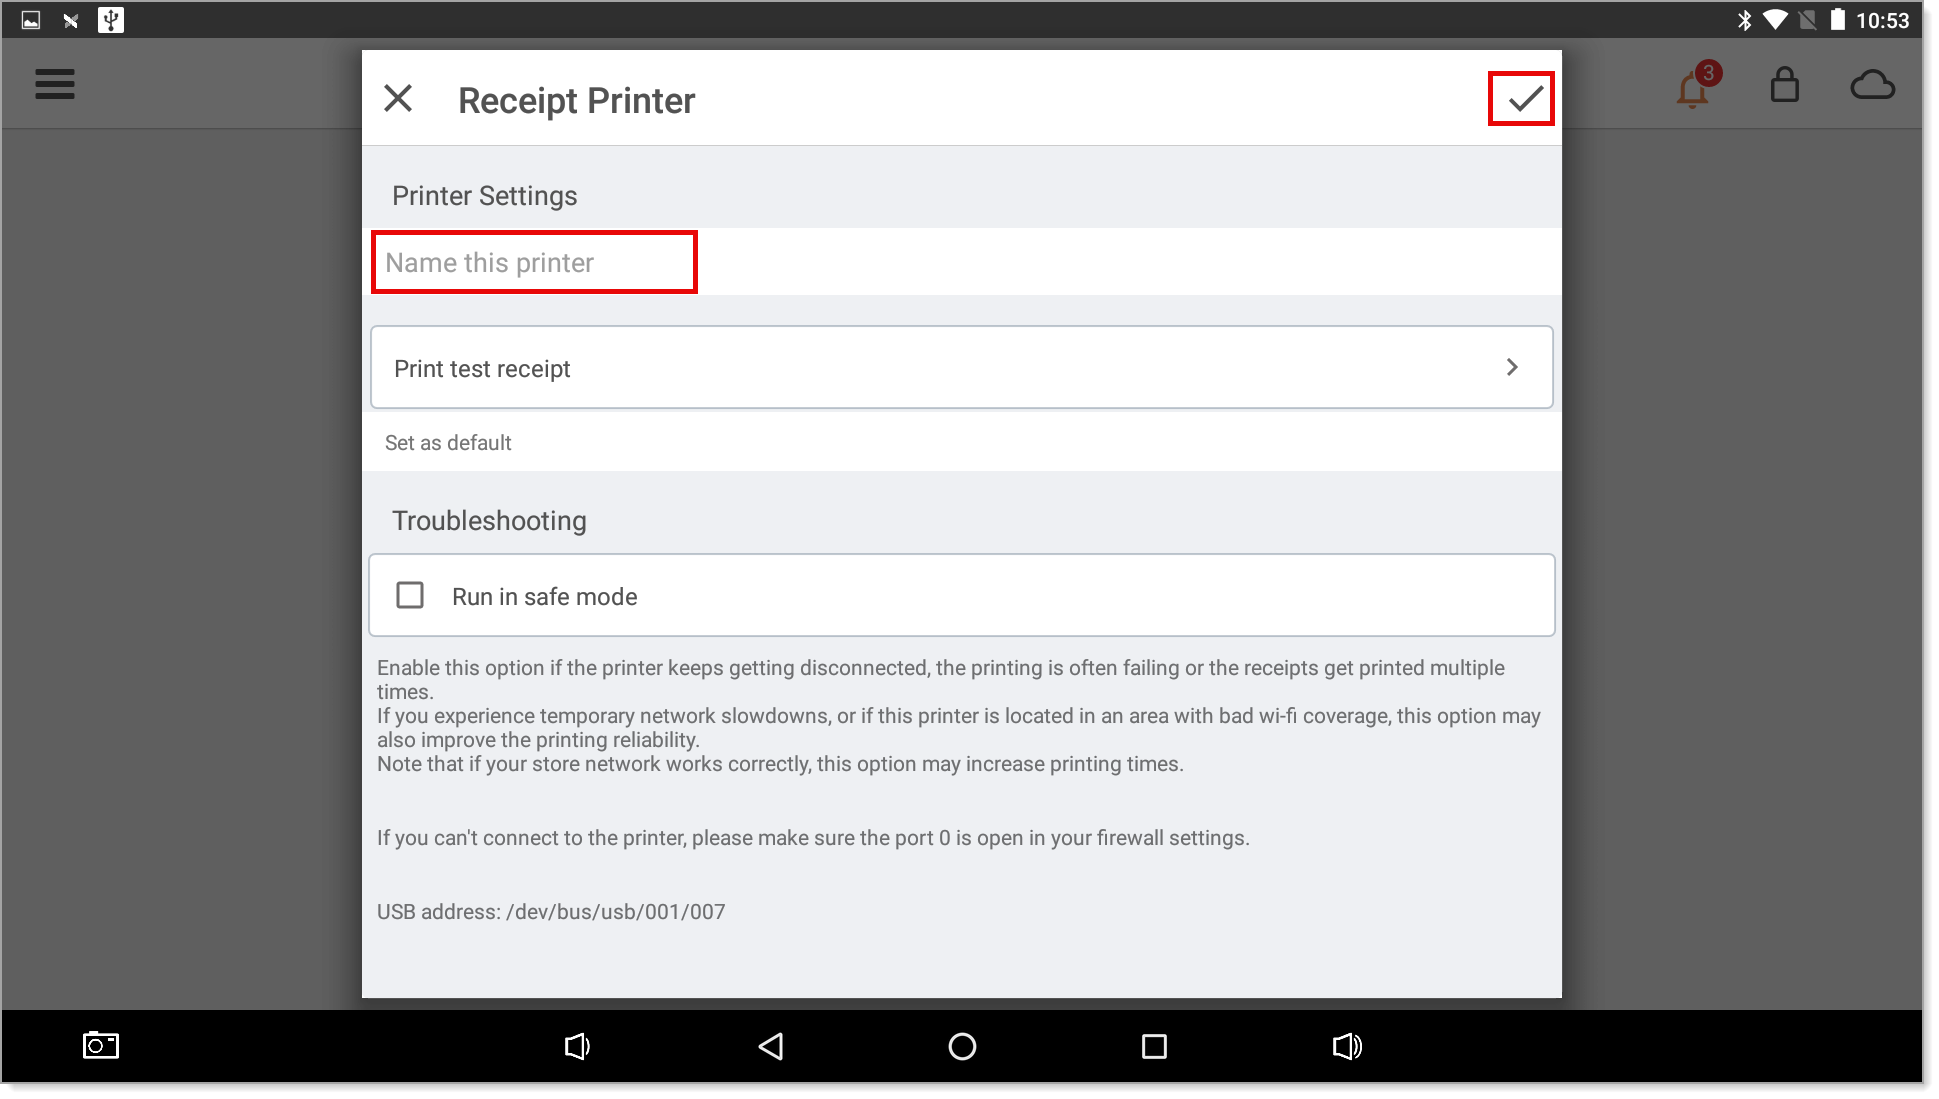
- Tap Print test receipt to test the printer.
- Optionally, select the Run in safe mode checkbox.
- Tap the checkmark at the top right to save. The new printer will display as a Configured Printer in Receipt Printers. Tap the Back arrow to return to the Settings menu.
- From Settings > Printer, tap Receipt Printers.
NOTE:
You may set the printer as a label printer, similar to the setup of the Kitchen printer. When the thermal printer prints a "label" it will print a short receipt. The thermal printer does not print labels. - Kitchen Printer Setup
Support for other thermal printers
Bank of America supports the Bixolon SRP-350iii and Bixolon SRP-350v thermal printer. We do not recommend using other printer models. Bank of America has tested and can support integration to this recommended model.