Back Office Kitchen Routing Setup in Restaurant Solution
Description
What's in this article?
Solution: Restaurant
Kitchen Routing controls how menu items are routed to kitchen devices (kitchen printer or KDS). Menu items are associated with a kitchen routing group. A routing group can include more than one kitchen device. For example, you may have a grilled chicken salad entrée that needs to be routed to your salad station to assemble the salad and to your grill to cook the chicken. Once you have created kitchen routing groups, you can associate your menu item with a routing group. See Back Office Menu Item Setup in Restaurant Solution for more information. When you install and configure your hardware, you will indicate which hardware is associated with a kitchen device.

- 1. Set up a kitchen routing group
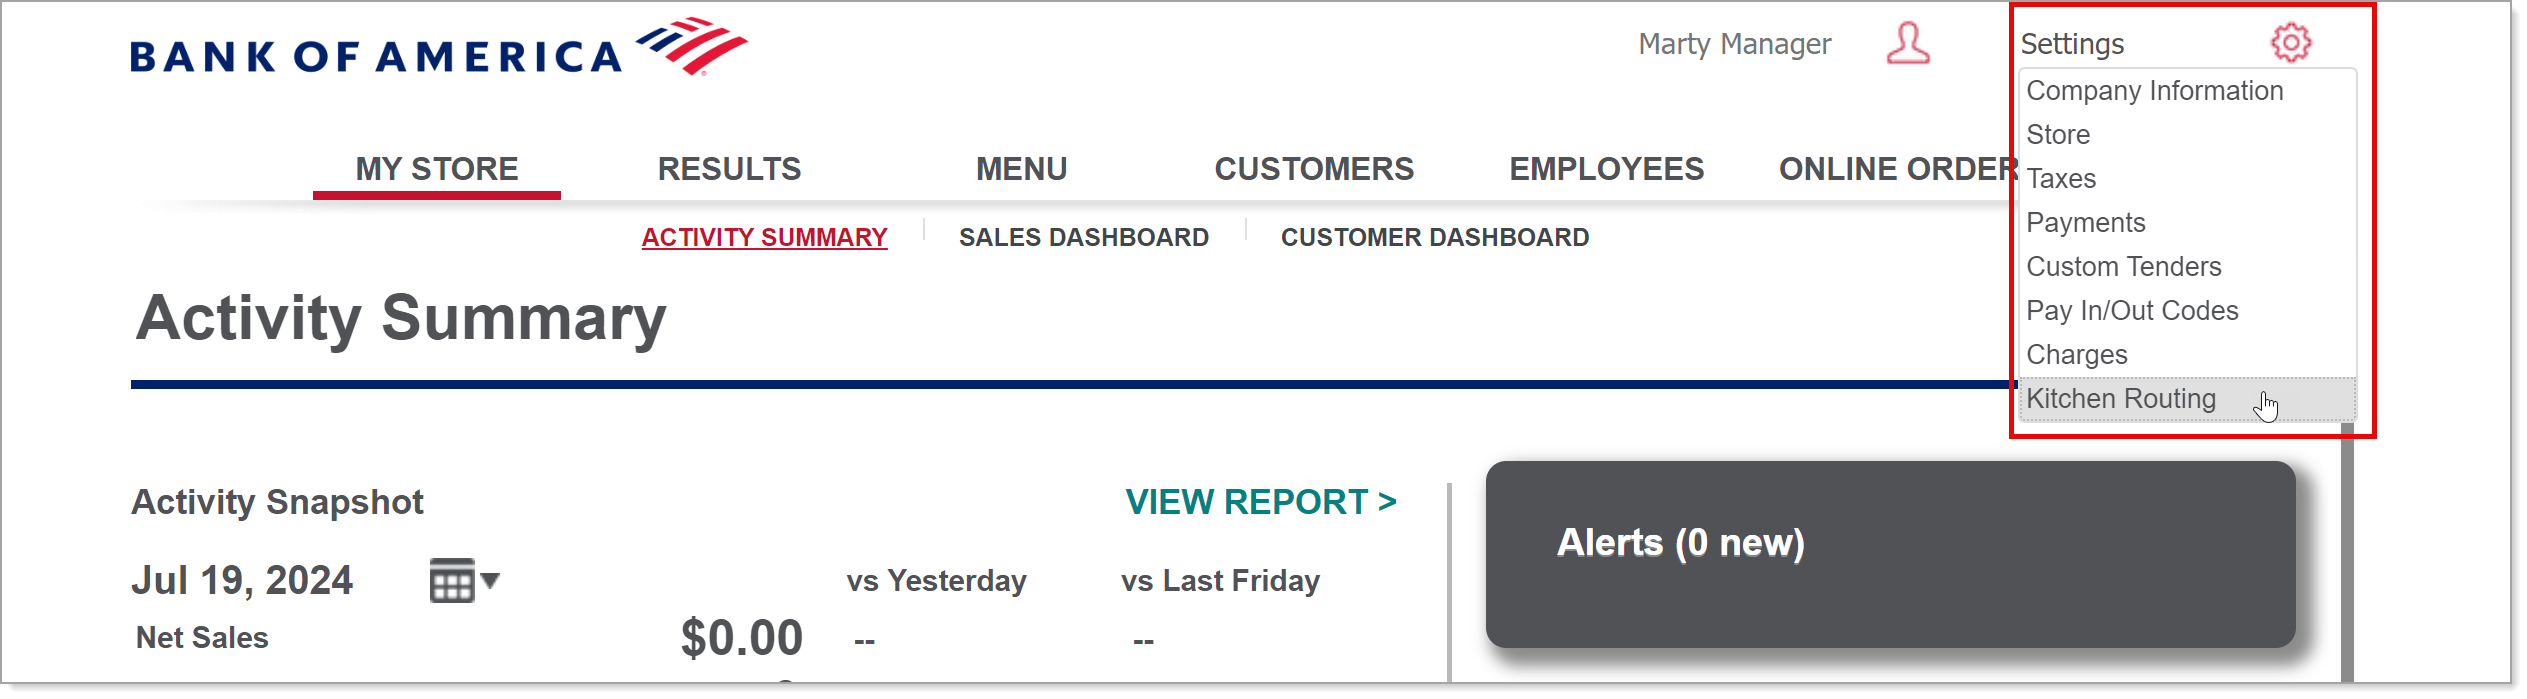
- In Back Office, select Settings > Kitchen Routing.
- Click Add Routing Group.
- Type a name for the routing group. For example, you could have a group for grill items or a group for drinks.
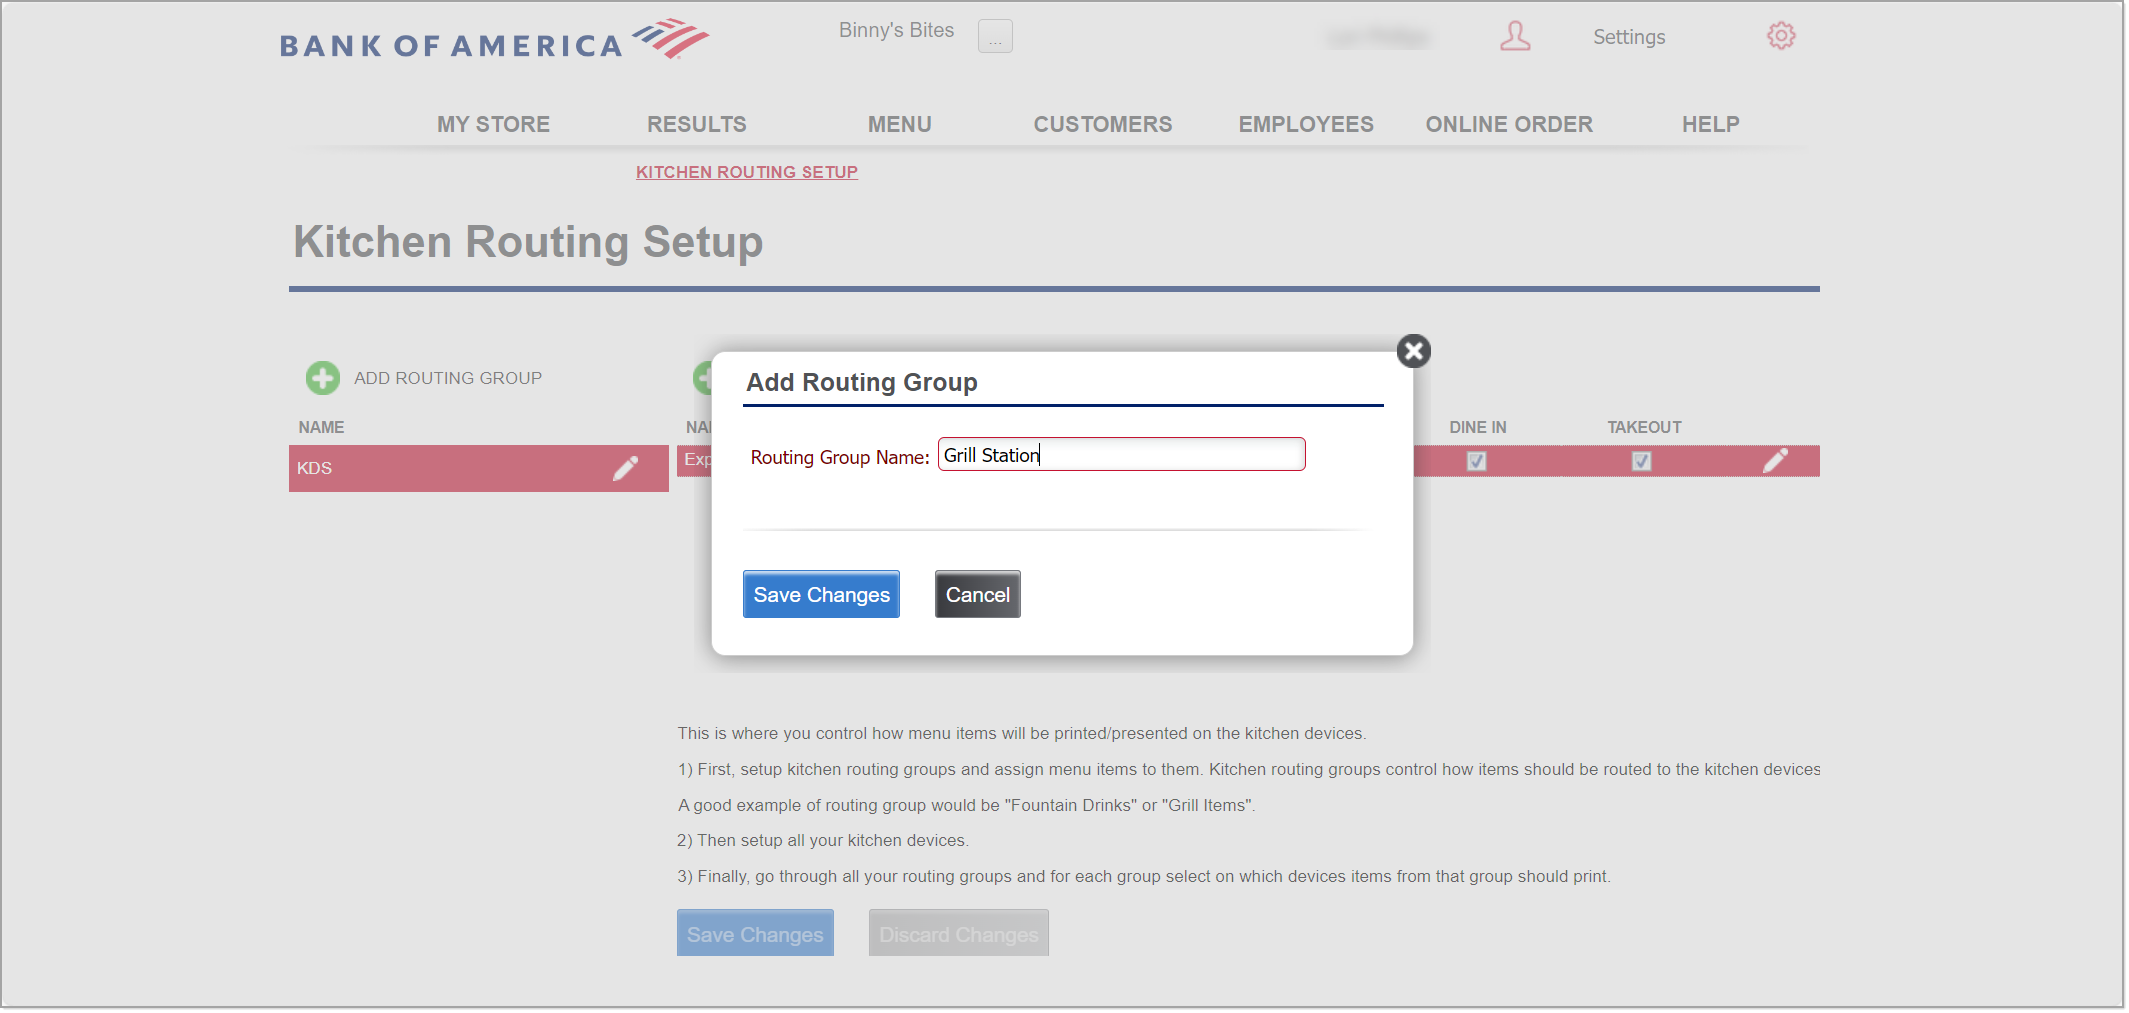
- Click Save Changes. Continue to create groups as needed. When your groups are created, continue to the next step to set up a kitchen device.
- In Back Office, select Settings > Kitchen Routing.
- 2. Set up a kitchen device
Kitchen devices are assigned to routing groups.
- Set up a kitchen group, as described above.
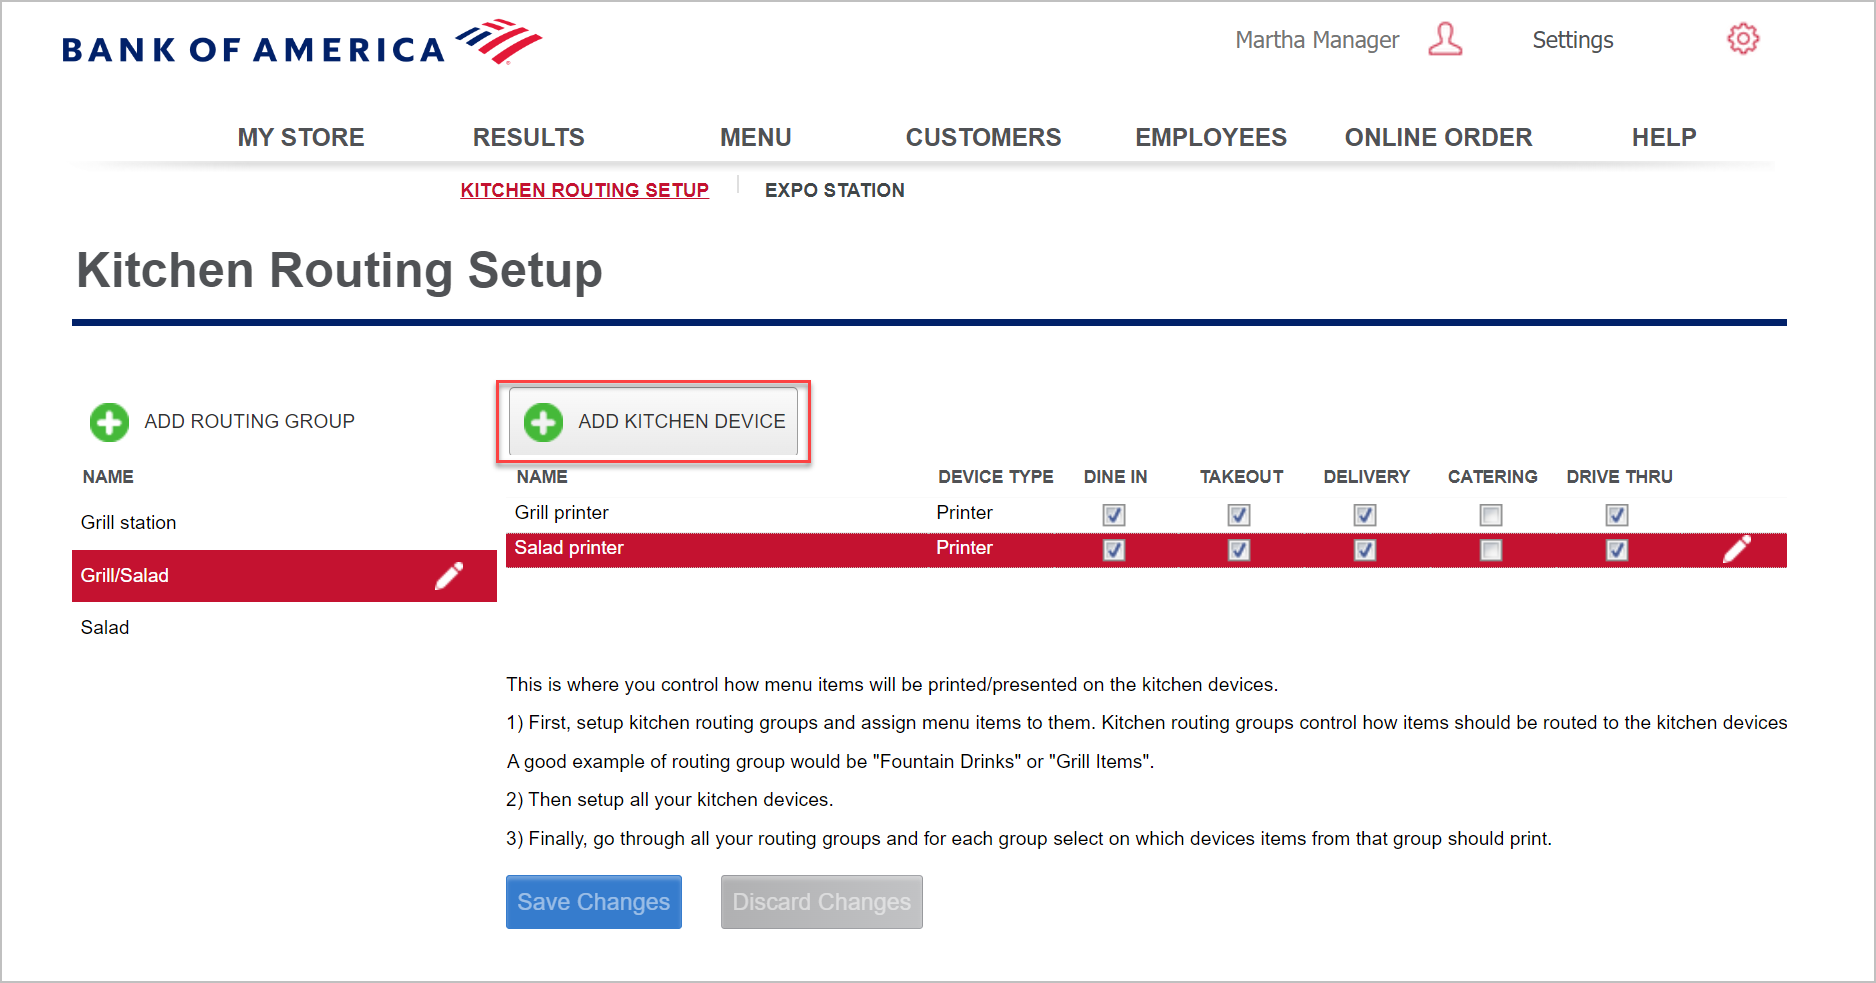
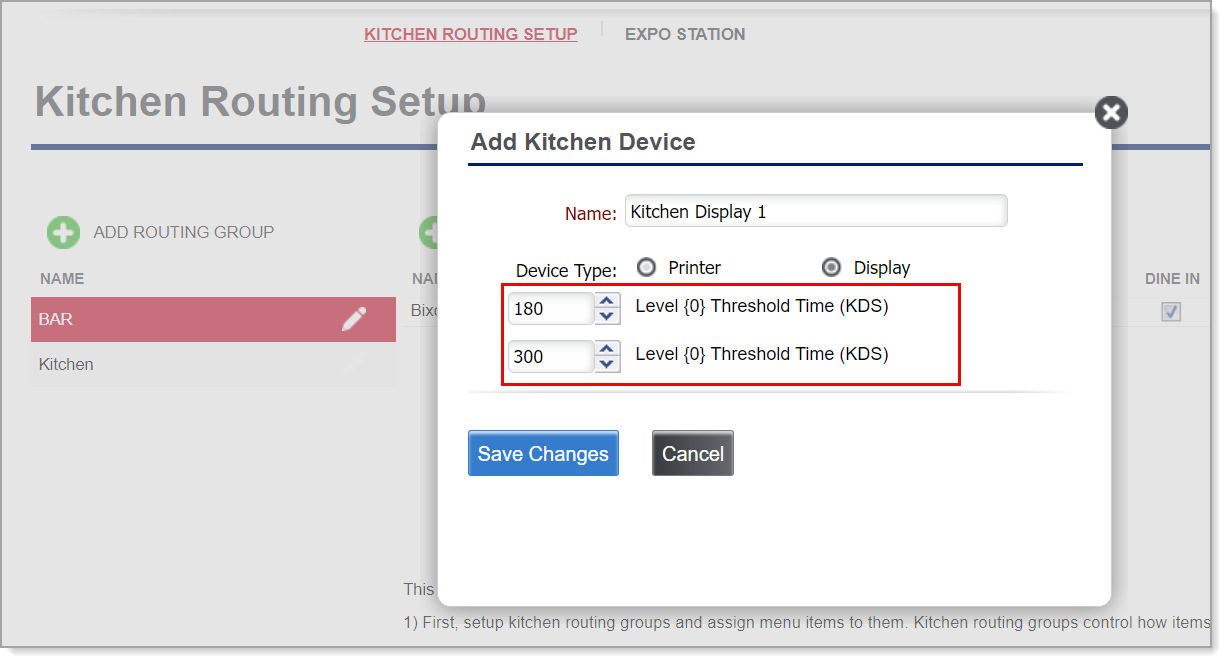
- From the Kitchen Routing Setup screen, click Add Kitchen Device.
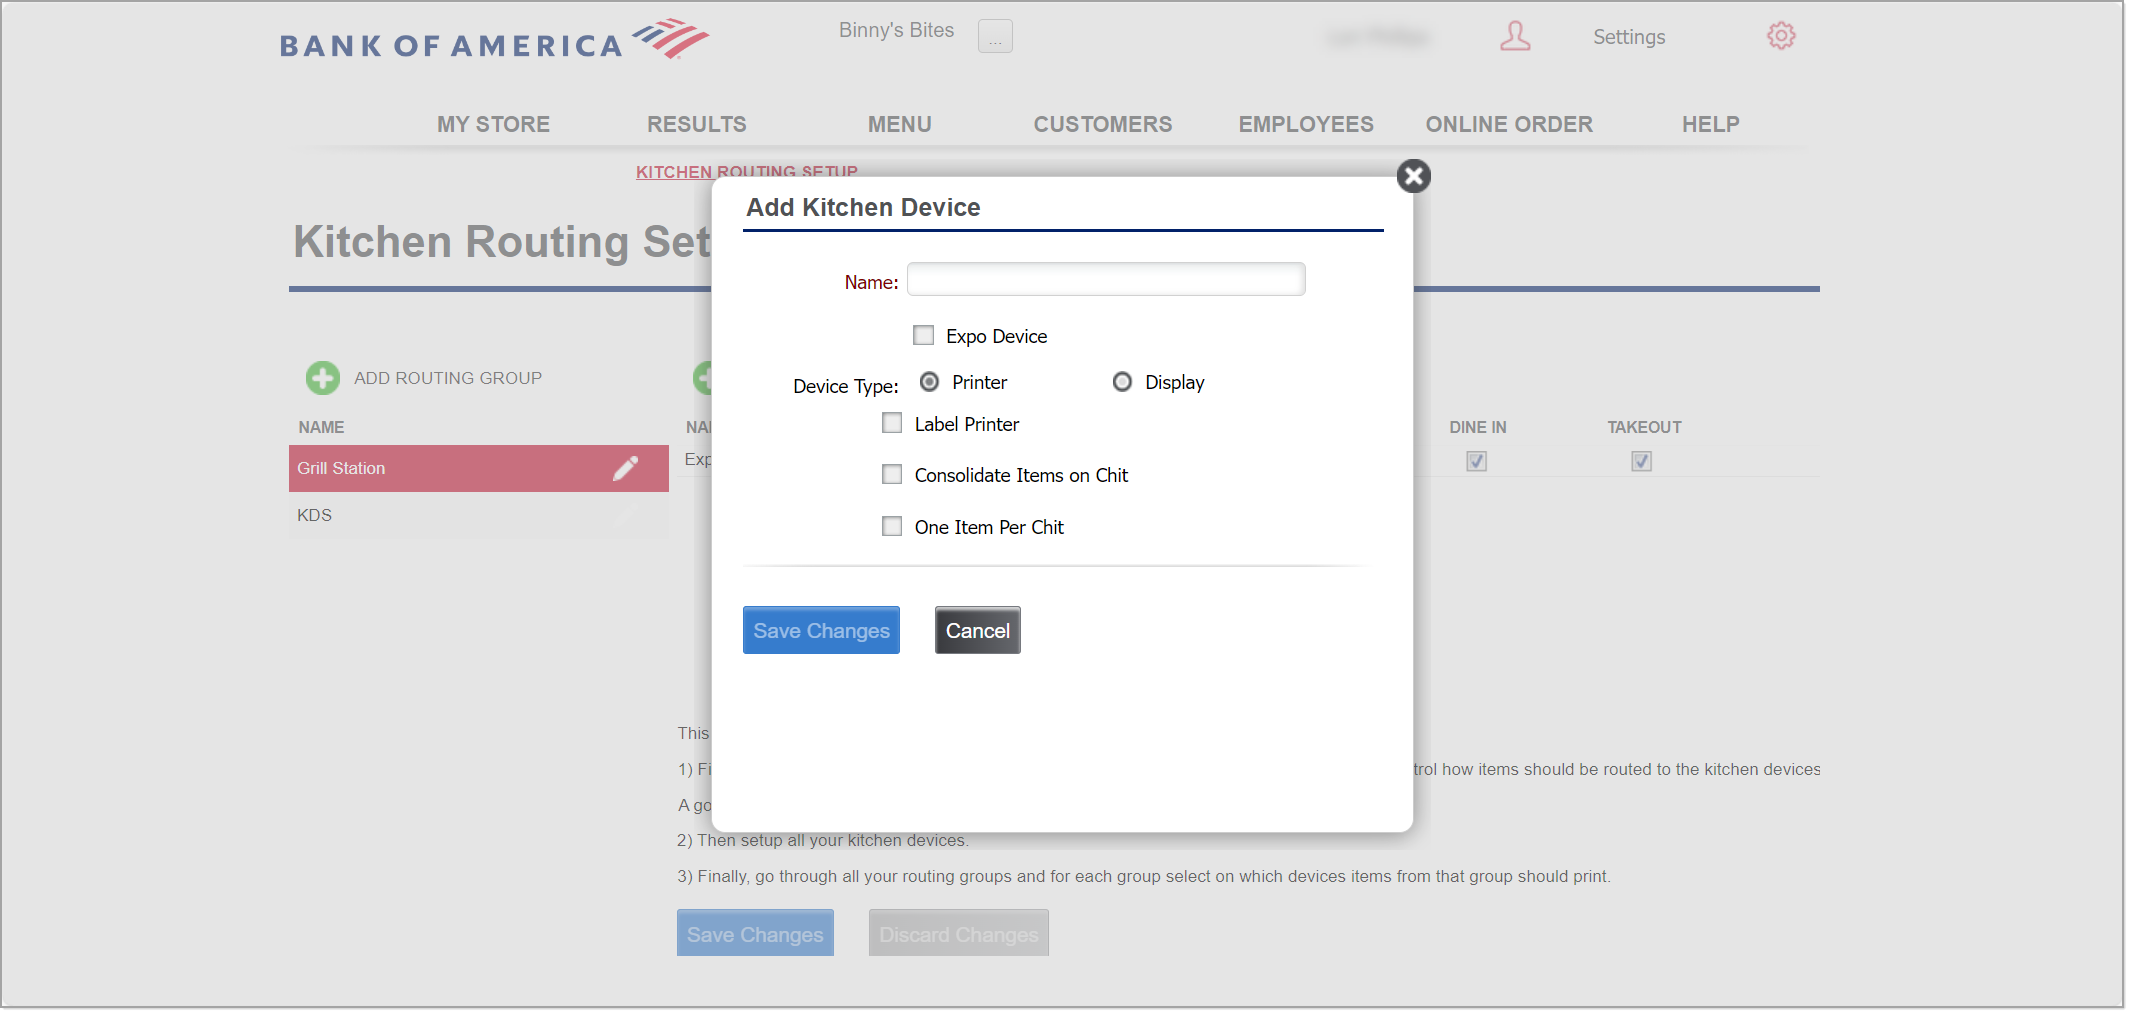
- Type a name for the kitchen device.
- Choose the Device Type you are installing, either a printer or display.
NOTE: If you are setting up an Expo Station, see Back Office Expo Station Configuration in Restaurant Solution
- Do one of the following:
- If installing a KDS display screen, you may choose to set threshold times in seconds. Orders that pass the threshold levels change color on the kitchen display so that your staff can monitor aging orders.
- If installing a printer, choose option settings for the device and then click Save Changes.
table listing Options and their descriptions Option Description Label Printer Not supported Consolidate Items on Chit Combine like items together on the chit. Indicates whether the device will print items as a single item to a chit or consolidate same items on the chit. For example, you may want to consolidate grill items (3 hamburgers, 4 fries) rather than list the items in the order that they were entered on the ticket. One Item Per Chit Print a chit for each item
- If installing a KDS display screen, you may choose to set threshold times in seconds. Orders that pass the threshold levels change color on the kitchen display so that your staff can monitor aging orders.
- 3. Associate a kitchen device with a kitchen printer group
Once you have created both kitchen routing groups and kitchen routing devices, you can associate the kitchen devices that the group will route to and the order modes. For example, you may have a routing group to send menu items to the grill, to the salad bar, and to both the grill and the salad bar.
IMPORTANT!
At least one device must be associated with a printer group or the chit will not be sent to the printer group and printed.- Select a kitchen printer group from the group list on the left side of the screen.
- For each kitchen device that should be associated with that group, select the order mode(s) to associate with the printer group.
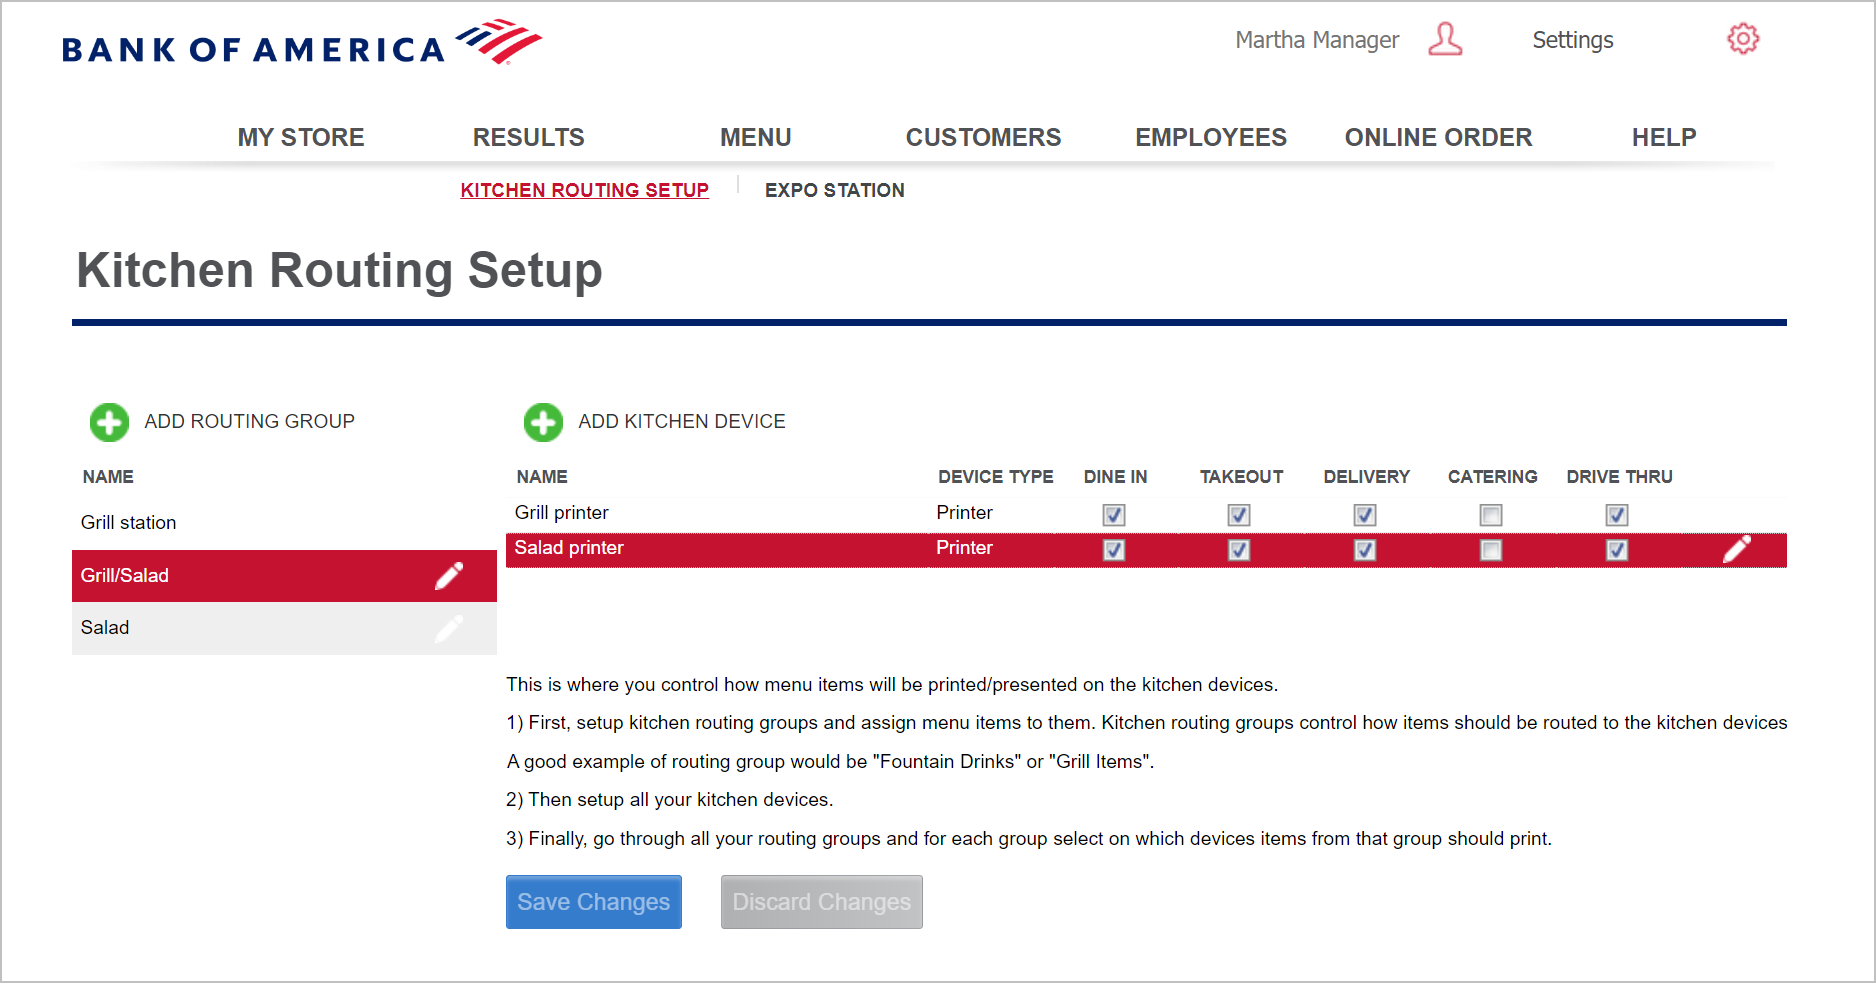
- Click Save Changes.
NOTE: To remove a kitchen device, click on the Pencil icon and select Delete.
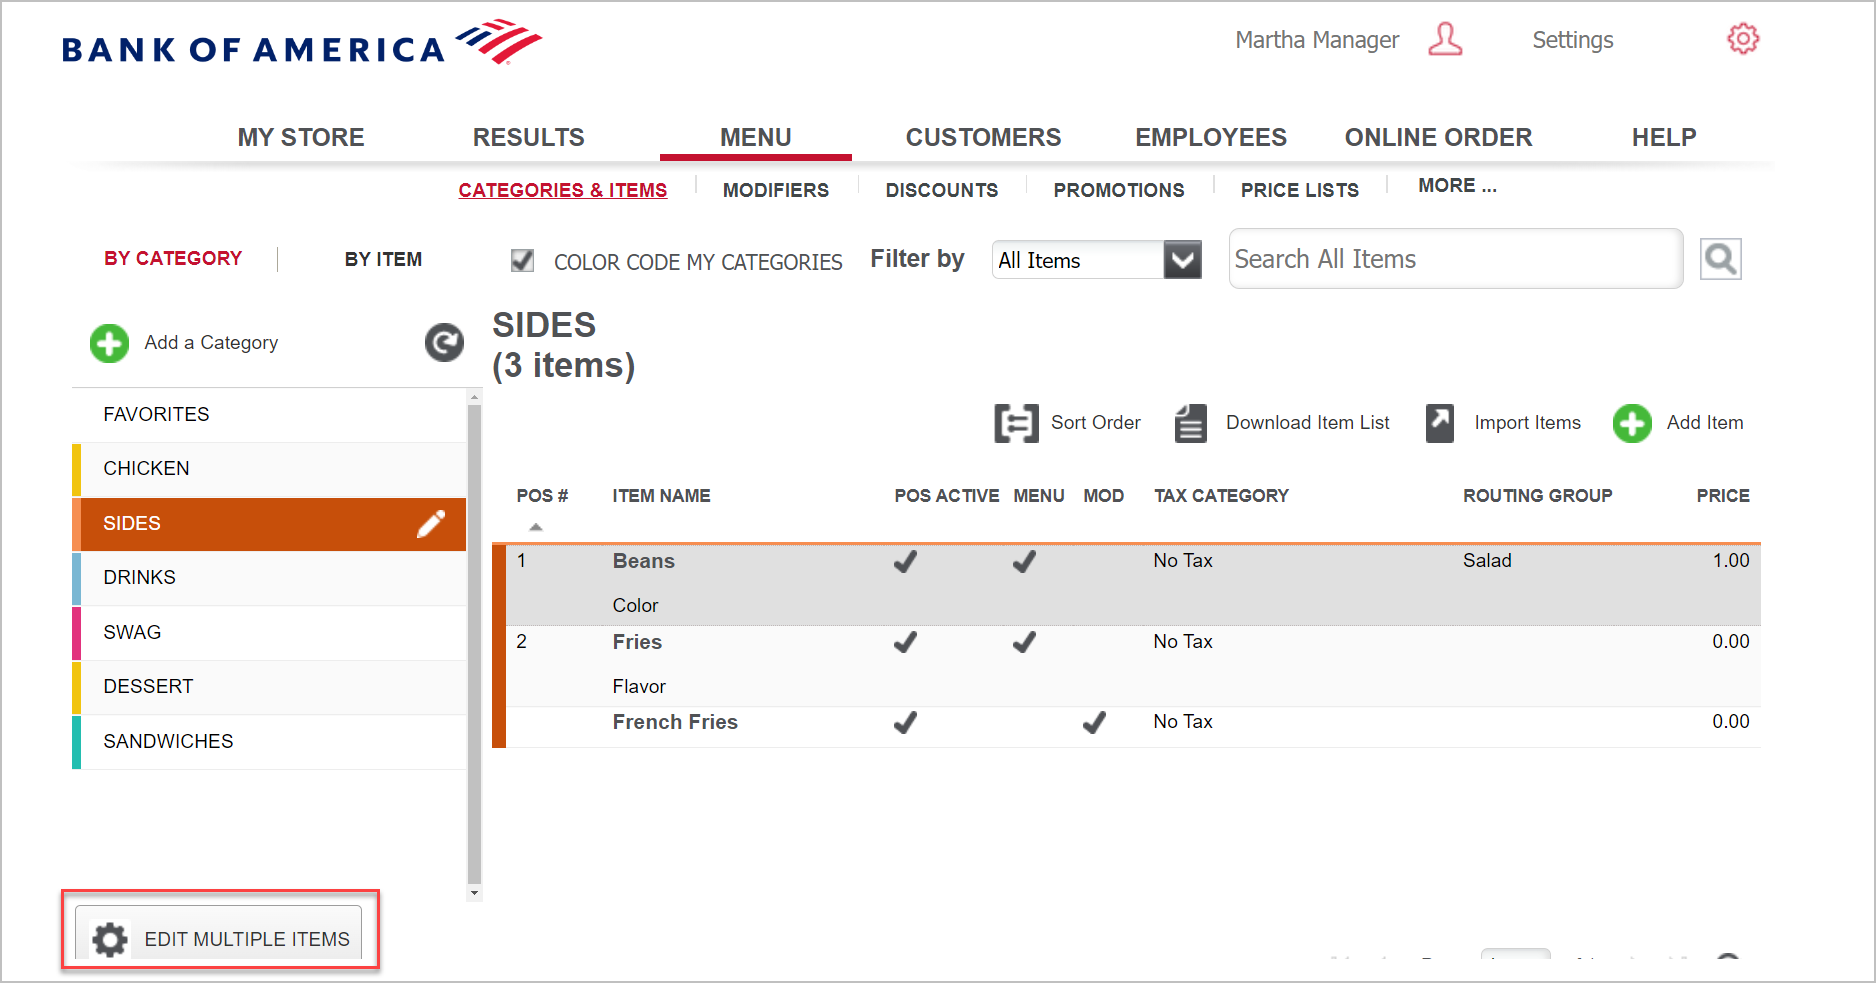
- 4. Assign menu items and modifiers to a kitchen routing group
Associate the item or modifier with a kitchen routing group. To create new items or modifiers, refer to Back Office Menu Item Setup in Restaurant Solution for more information.
- In Menu > Categories & Items, click Edit Multiple Items button to work with many items at one time.
- Click Search Category and select a specific category from the dropdown list, or type a text string in Search Name/Description and click the search icon to the right to locate the items to update.
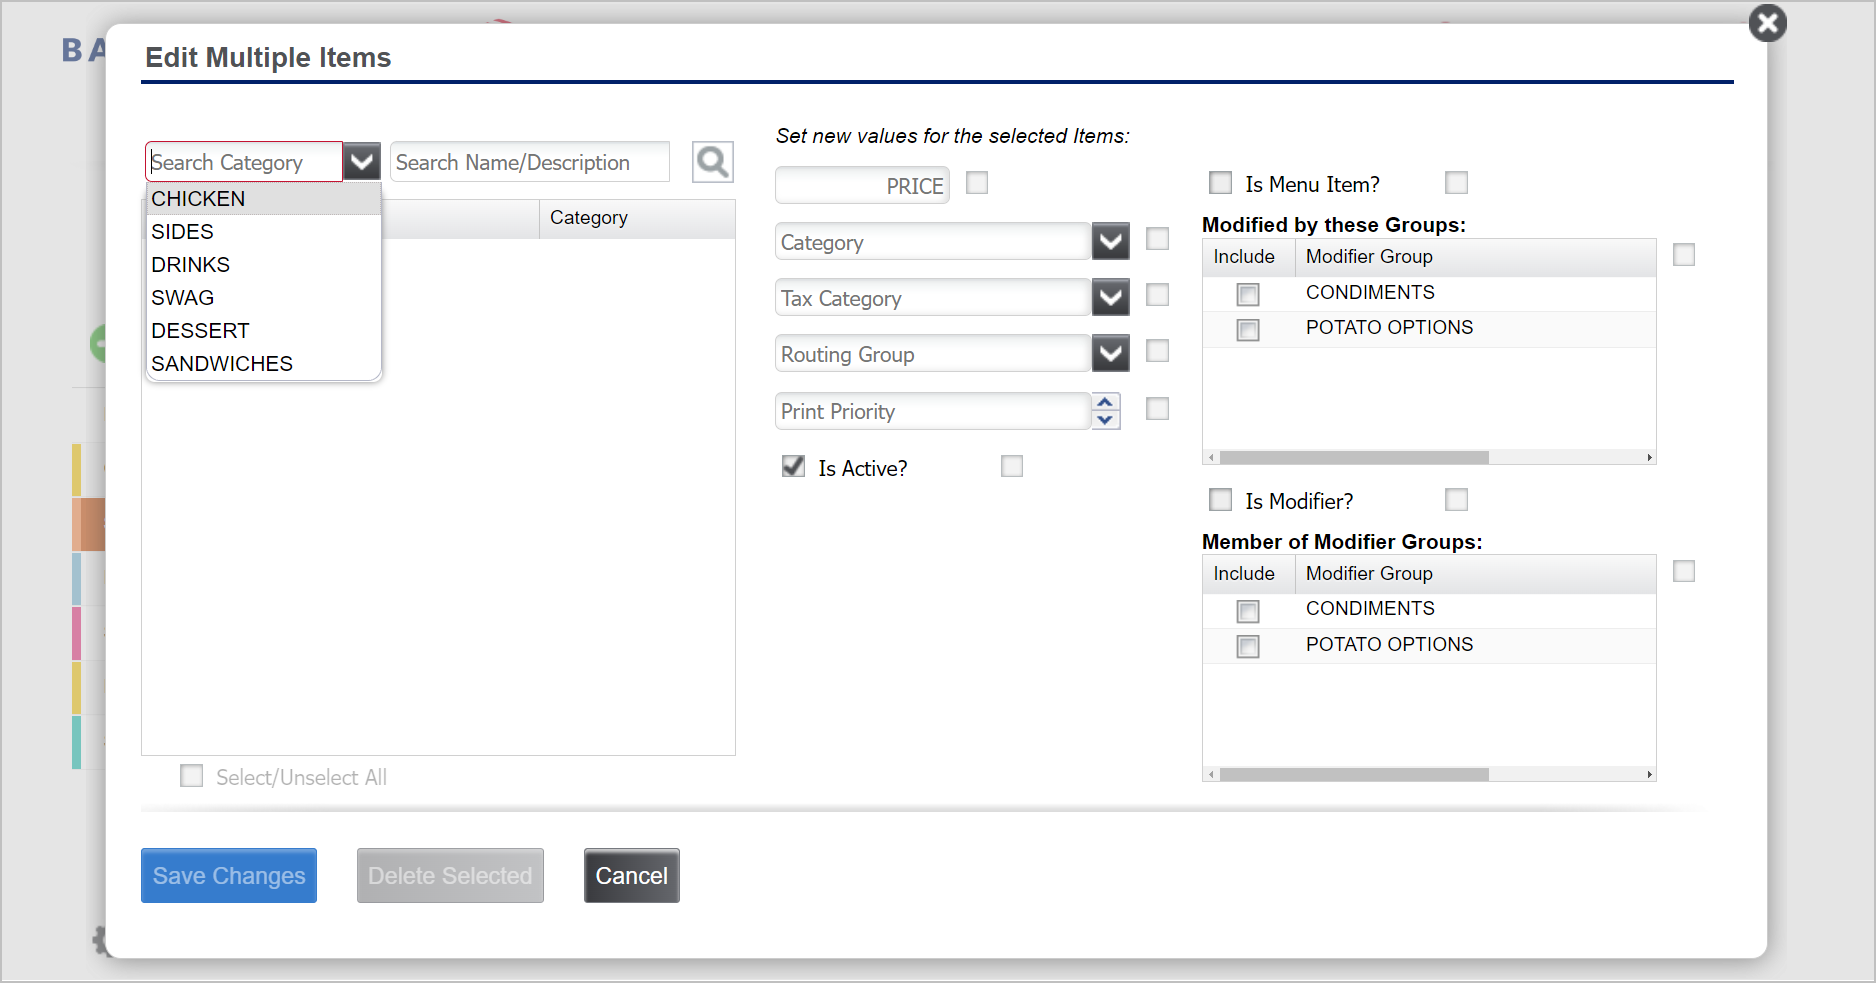
- Select the checkbox next to each item to change or click Select/Unselect All to easily select or clear every item appearing in the list.
- Select the Routing Group from the dropdown list to assign the items to it.
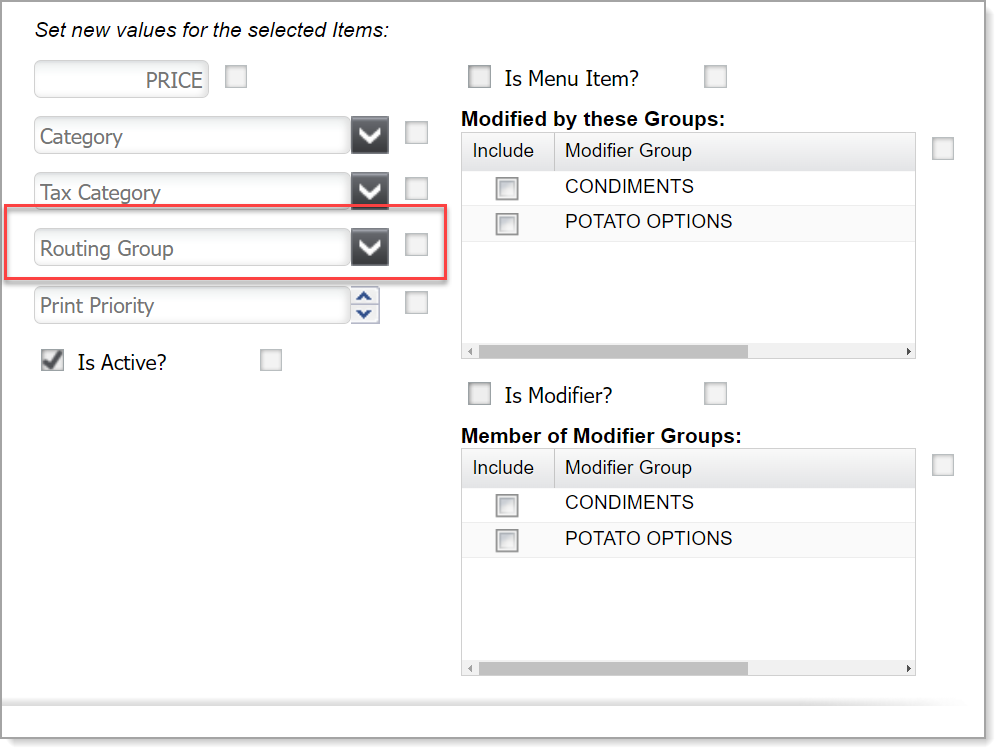
- Click Save Changes. Then click OK to confirm the update to multiple items.
- In Menu > Categories & Items, click Edit Multiple Items button to work with many items at one time.
You have the option to send each item to the kitchen automatically as soon as it’s entered by selecting One Behind as the Kitchen Routing Method. If One Behind is enabled, items will appear on kitchen displays after you add the next item in the order. This keeps the kitchen one step ahead and helps food prep start sooner, instead of waiting for the full order to be completed.
(Optional) Set kitchen routing to one behind
- Click on Store.
- Click on Store Options.
- Under Order Mode Preferences, you can set the Kitchen Routing Method to One Behind.
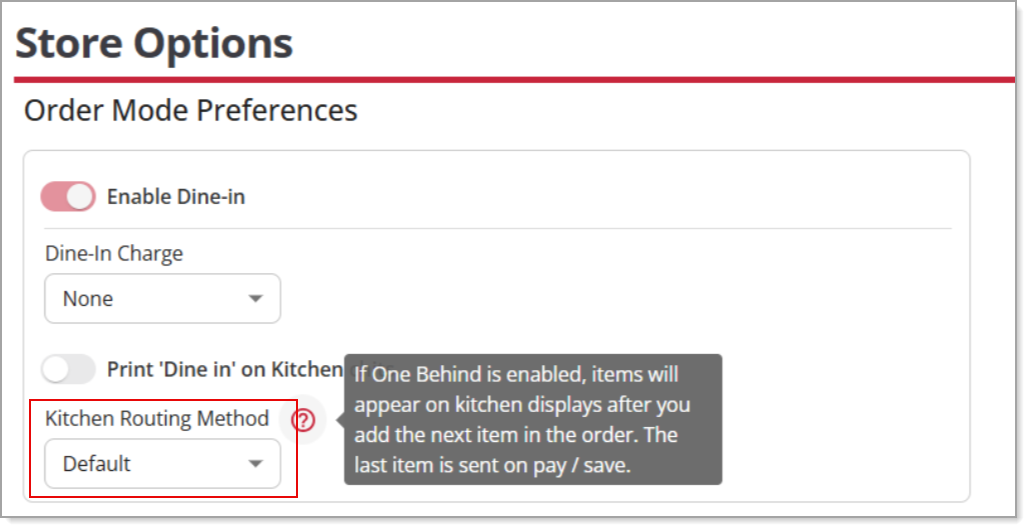
- Repeat under each Order Mode type as needed.
- Click Save.