How tokens work, how to create them and how to create and manage subscriptions
What's in this article?
Tokenization exchanges sensitive payment data for a token that has no value outside of the payment system. Tokenization removes sensitive payment data from your environment to safeguard customer data while reducing your security risk for accepting card payments. You can create tokens within your Merchant Services account in online banking using Token Management Services (TMS). You do not need to sign up for TMS. A fee is charged for the creation of each customer and billing token, as noted on the Order Confirmation email. The tokens you create will remain available in TMS until you delete them.
TMS helps you to comply with the Payment Card Industry Data Security Standard (PCI DSS). TMS can help reduce the PCI DSS compliance audit questionnaire to a few check boxes, enabling most merchants to manage PCI DSS compliance faster and with less cost.
A Token Management profile includes two tokens: the customer token to store information about the customer and the billing token to store information about the payment method. A customer token can have multiple billing tokens associated with it.
Customer token Customer tokens securely store information about your customer. Custom tokens are saved in a tokenized customer profile, storing information for repeat billing and other customer management purposes. A customer token saves a customer’s name, shipping address, billing address, contact information, and any custom fields you would like to collect. A customer token automatically creates a billing token.
Billing token A billing token securely stores the card information, like card number and expiration date. A single customer token can be associated to multiple Billing Tokens if desired. The functionality provided by Customer Tokens and Billing Tokens is commonly referred to as allowing merchants to keep “cards on file.”
Customer token
Creating or updating a customer or billing token will incur a fee, as noted on the Order Confirmation email.
In the left navigation, select Token Management > Token List.
Click Create token.
Enter in the customer information, including Customer Details, Payment Method, Billing Information and Shipping Information. All required fields are marked with an asterisk.
(Optional) Enter in Merchant Defined Data Fields.
Click Submit to save the Token Management profile (customer token and a payment token). The token payment method will be validated.
Token Management can automatically verify that a payment card is valid prior to tokenization by authorizing a zero or low value amount, depending on the card type. There is no additional charge for this service. If your account is configured for automatic pre-authorizations, Token Management automatically runs several fraud checks during a pre-authorization depending on the payment method for the new customer profile. If the verification fails, the token is not created.
When you create a customer profile with automatic pre-authorizations, the order of services is:
Credit card authorization service for the pre-authorization.
Token create service—only if the authorization is successful.
Full authorization reversal service—only if the authorization is successful and the pre-authorization amount is not 0.00.
You can disable the automatic pre-authorization for an individual token create or update request using the paySubscriptionCreateService_disableAutoAuth field.
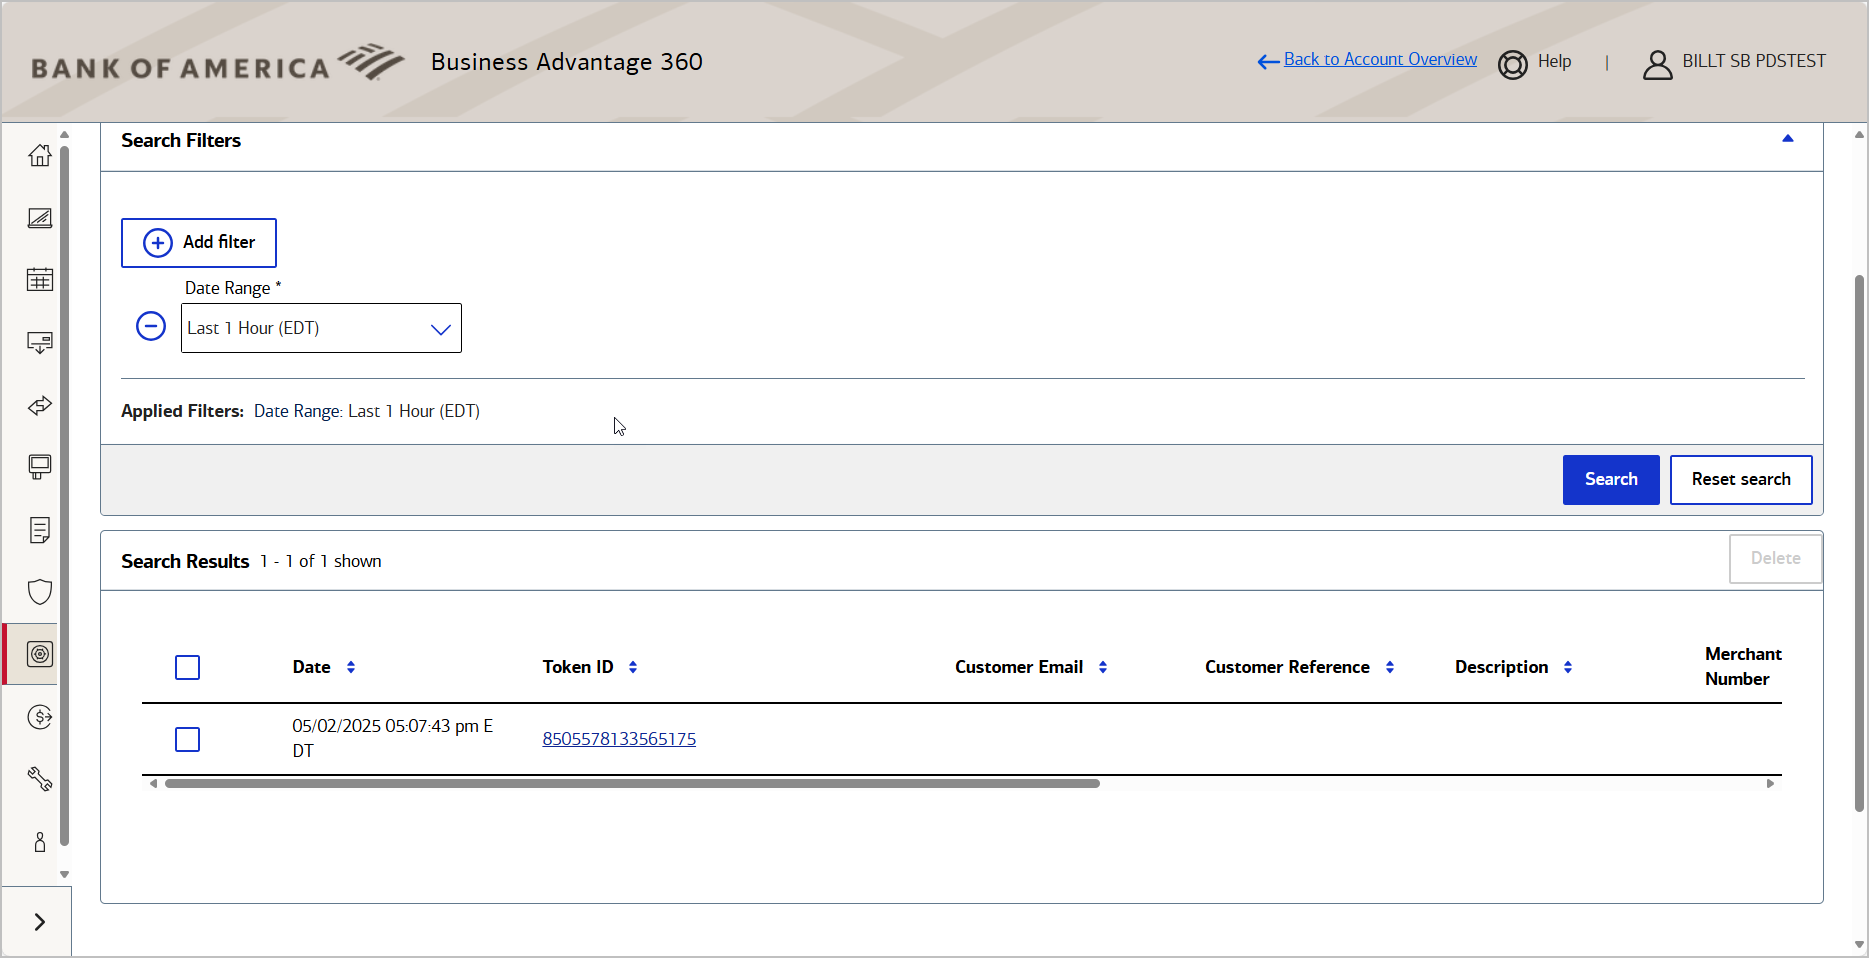
In the left navigation, select Token Management > Token List.
Filter by date, ZIP/Postal Code, Last Name, First Name or Merchant Defined to find the profile. First and Last Name filters will only filter on the Billing Information NOT the Shipping Information.
NOTE: Tokens will remain available until they are deleted.
Click the Delete (trash can) icon, then click Confirm to delete the token.
Payment methods
Once a customer token is created, use the Payment Methods tab to add or update payment methods available to that customer token. If there are multiple payment methods listed, there is an option to select a payment method as the Primary.
From the left navigation, select Token Management.
On the Payment Method tab, click Delete next to the payment method you would like to remove.
Confirm the request by clicking Delete in the popup confirmation box.
Shipping methods
The Shipping Methods tab allows you to see what shipping methods are available to that customer token. If there are multiple shipping methods listed, there is an option to select a shipping method as the Primary.
From the left navigation, select Token Management.
On the Shipping Method tab, click Delete next to the shipping method you would like to remove.
Confirm the request by clicking Delete in the popup confirmation box.
Subscriptions
A subscription assigns a customer token to a recurring billing plan. Subscriptions can only be created from an existing customer token. A customer token creates a tokenized profile for a customer and securely stores the information. Each customer token creates a billing token. A customer token is necessary to bill an end customer via Recurring Billing.
Recurring Plans are plans that you set up that have attributes (like billing amount and billing frequency) that you want to use over and over again. For example, you could set up a “gold” plan that charges your customer $100 a month ongoing, with no end date. And you could set up another plan, a “silver” plan, that charges your customer $50 a month for a total of 6 months. To create a Subscription, a customer token must be associated to a Recurring Billing plan.
NOTE: Viewing subscriptions through Token Management will show only subscriptions for the selected Customer Token. See Recurring Billing for more information.
In the left navigation, select Token Management > Token List.
Locate the Customer Token using the customer’s first and/or last name filters.
Click the Token ID hyperlink to open the Customer Token.
Click Create Subscription.
NOTE: The Customer Details, Payment Details and Shipping Address Details will be pre-populated and will NOT be editable. Verify payment and billing details. If the information is incorrect, you should not continue. You must create a new customer token with the correct information and then create the subscription.
Enter the subscription details:
The Subscription Name can be the customer’s last name, a customer number, or whatever is most helpful to the merchant. This is a required field.
The Start Date for when the merchant will begin being billed.
The Subscription Code if there is a unique code that should be assigned (otherwise, the system will auto-assign a consecutive subscription code number). The Subscription Code can be letters or numbers, depending on merchant preference.
From the Billing Plans dropdown list, select a subscription billing plan.
Click Apply. The Cycle (billing frequency) and Setup Fee for the Recurring Billing plan will display after the plan is selected from the dropdown.
NOTE: While the Cycle and Setup Fee can be updated at the subscription level, this is not recommended. To keep consistency for all subscriptions assigned to a specific plan, we recommend that this information not be changed. If necessary, create a new plan and then associate the plan to the subscription.
A one-time plan may be created when the subscription needed does not conform to one of the regular plans. A one-time plan can only be associated with one subscription.
To create a one-time plan, create a subscription and select New One Time Plan from the Billing Plans dropdown. All billing details must be entered if a one-time plan is selected.
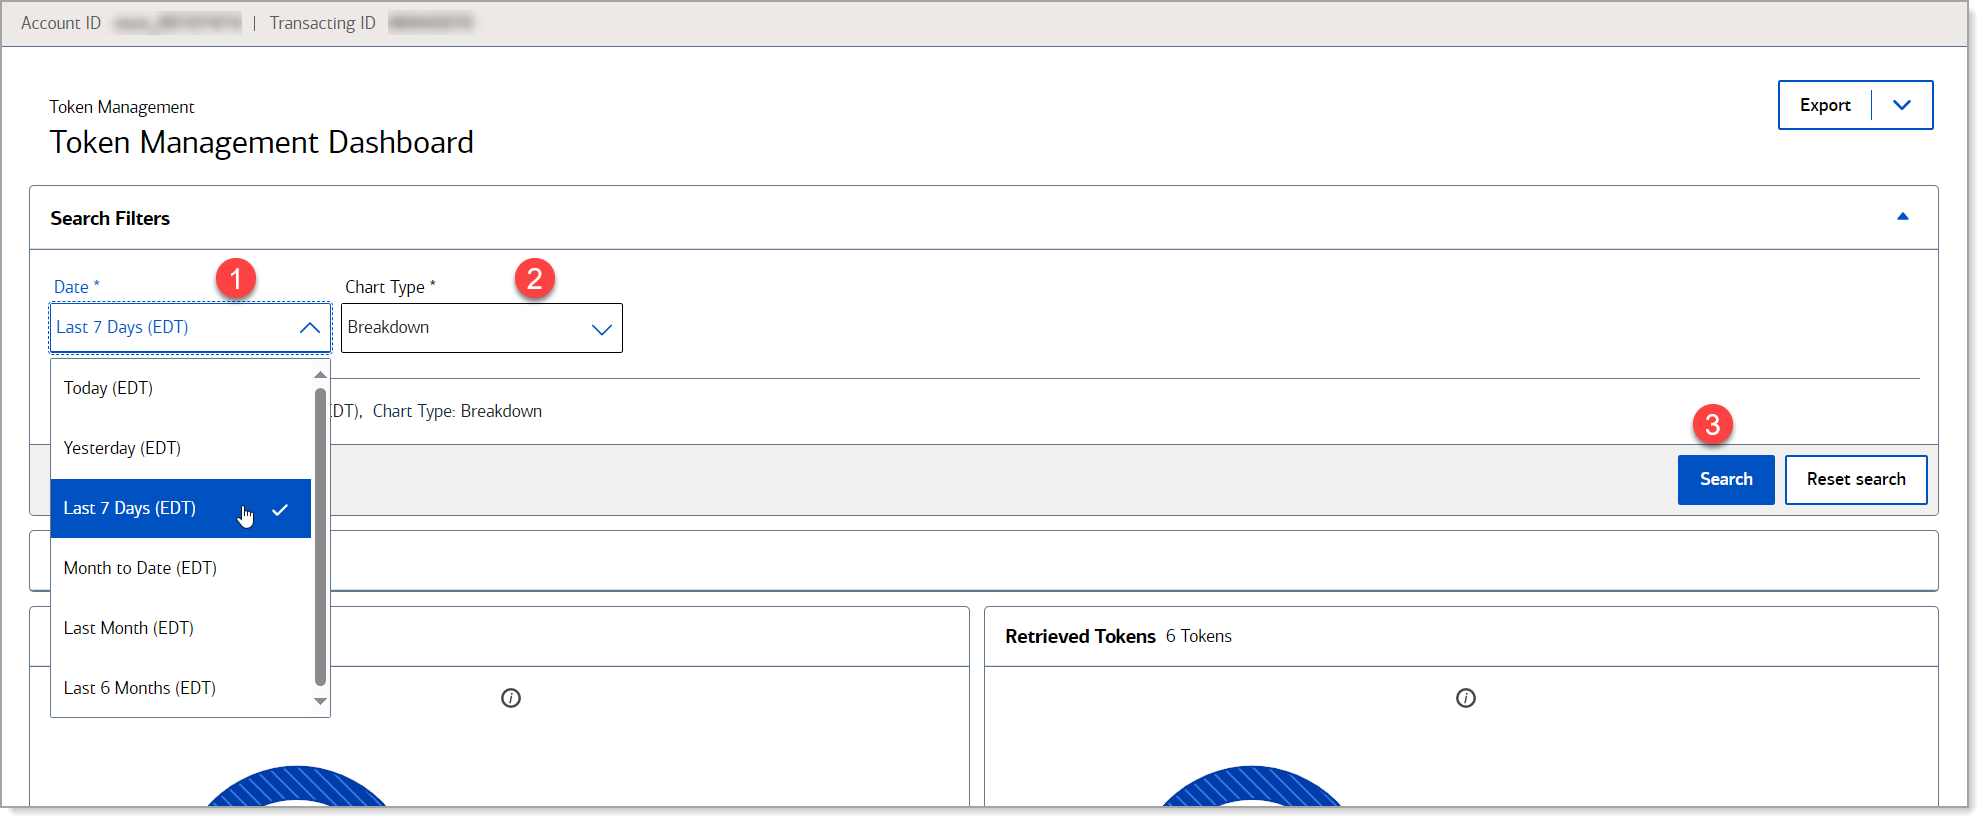
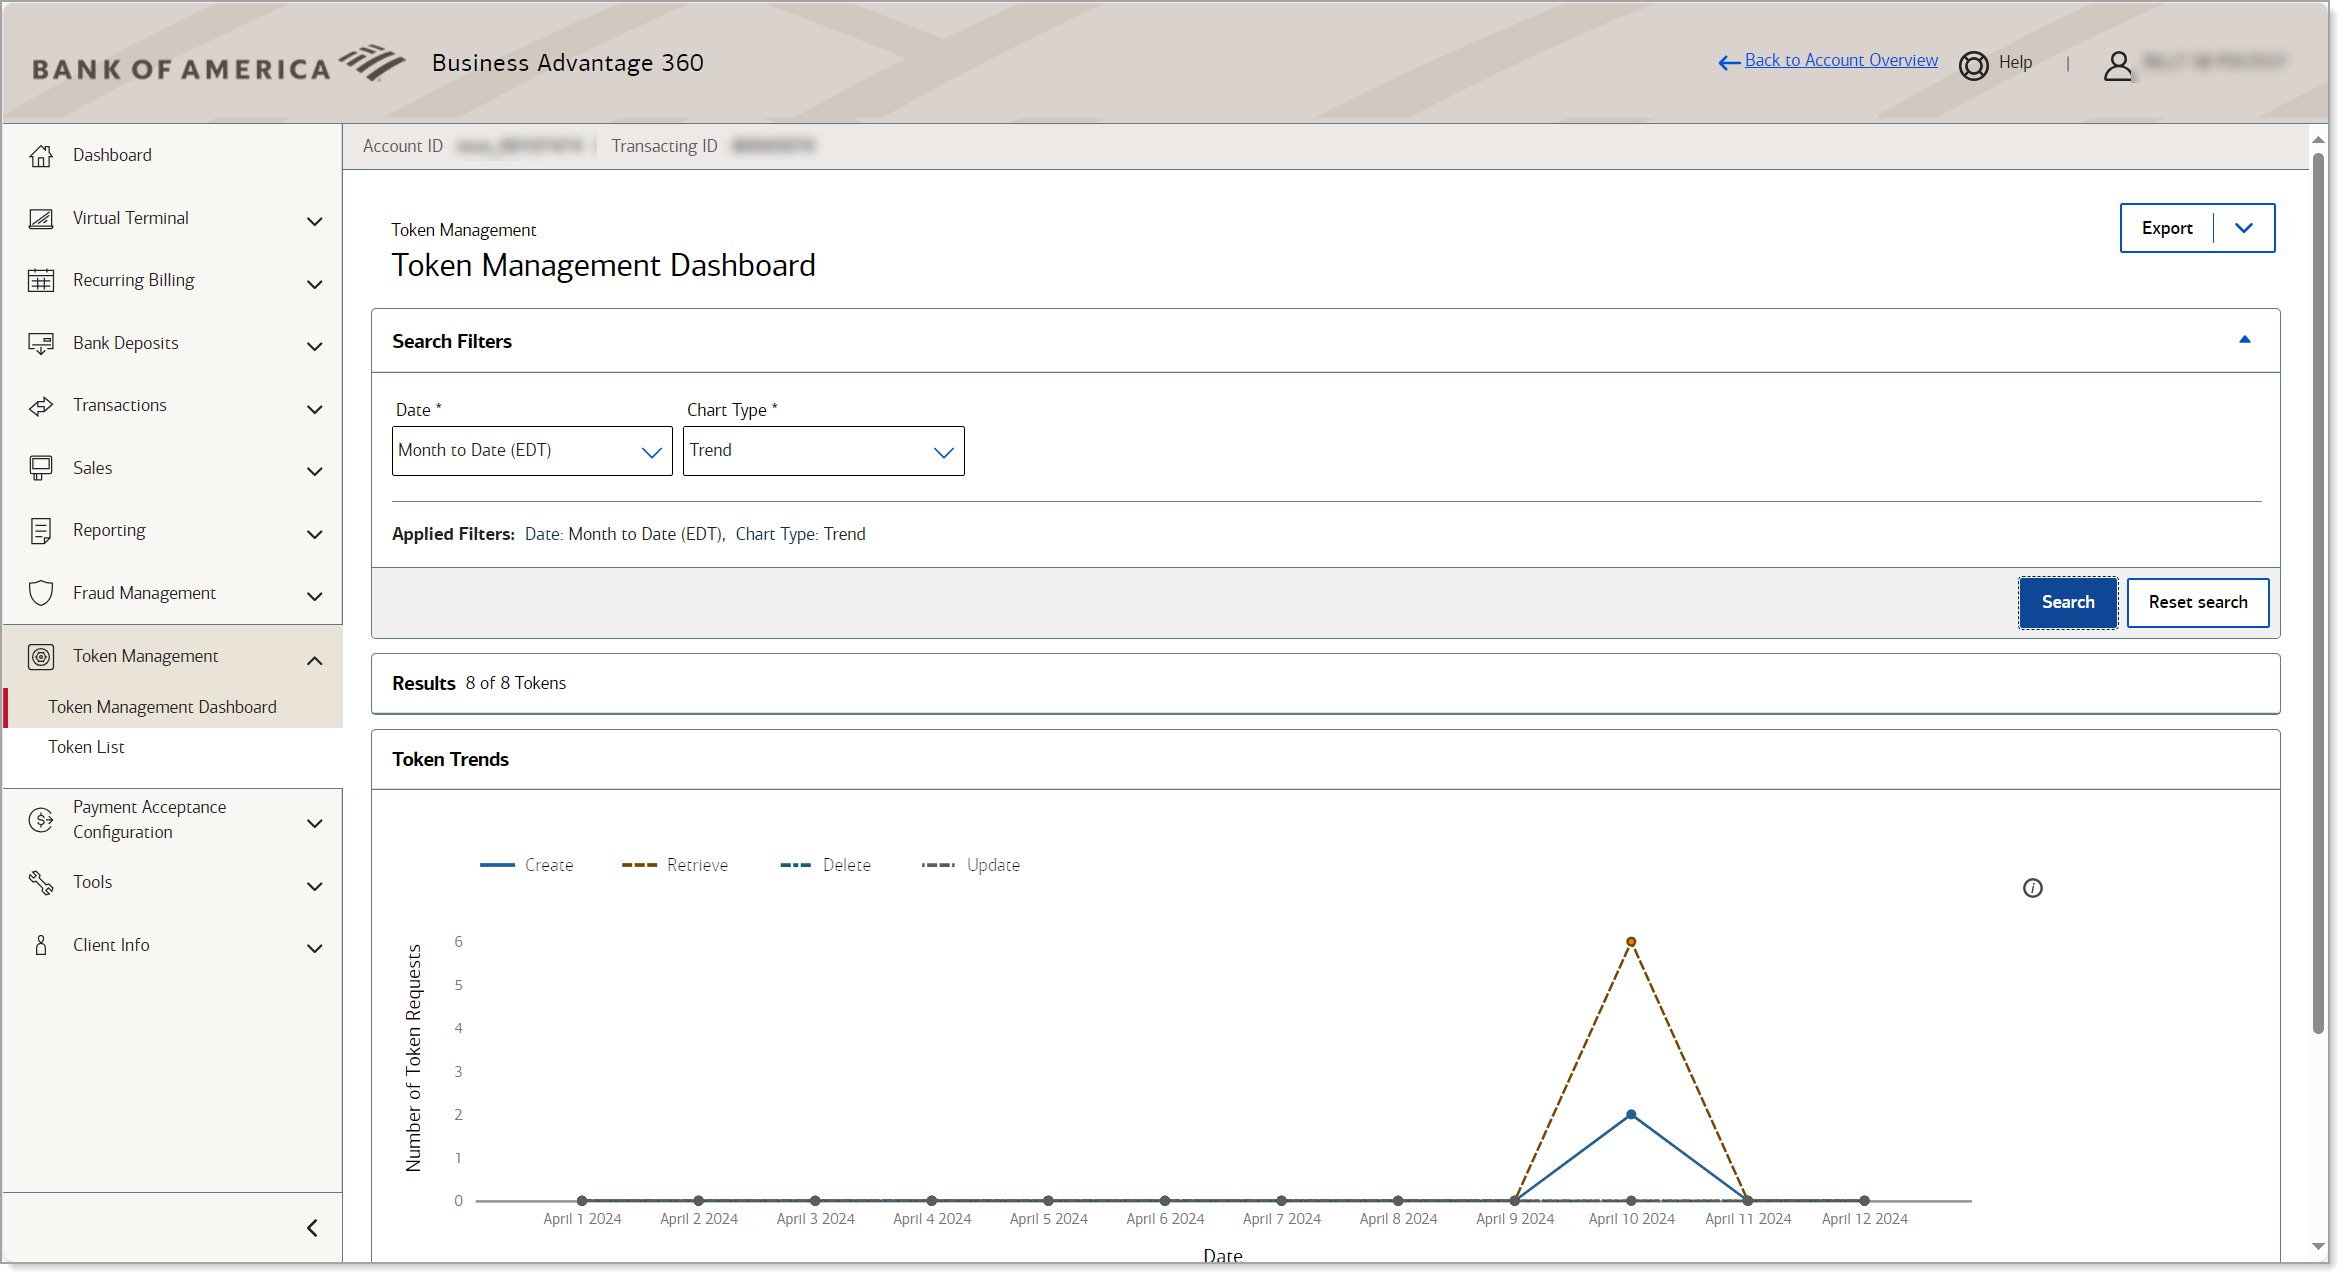
Token Management dashboard
The Token Management Dashboard has an overview of the number of tokens created, retrieved and updated within the selected time period. To get to the Token Management Dashboard, from your Merchant Services account in Business Advantage 360, select Token Management > Dashboard in the left navigation.