Merchant Services Online Banking Access and User Management
Description
What's in this article?
Access your Merchant Services account in online banking
Merchant Services, accessed through your enrollment in online banking, assists in the day-to-day management of your business. Access your Merchant Services account to track processing activity and reporting, manage transactions if needed, and access the Virtual Terminal. Your Merchant Services account also provides access to value-added services, such as Token Management, Fraud Management, or Recurring Billing.
IMPORTANT!
If you use Point of Sale Solution, access your virtual terminal, fraud management, recurring billing, and reporting from the Point of Sale Solution Back Office instead.
Watch the video:
- You can manage your Merchant Services account online through Business Advantage 360. Our small business online banking.
- [Narrator 1] You can manage your Merchant Services accountonline through Business Advantage 360, our small business online banking.
- In this video, you will learn about the features and applications that help you manage your Merchant Services relationship, as well as how to grant access
- to your Merchant Services account to additional users.
- To access your merchant account in Business Advantage 360, go to bankofamerica.com/business.
- Then, log into Business Advantage 360. In the Merchant Services Account section, select Manage your Merchant Service Account.
- Along the left-hand side of the merchant dashboard, you will see the available modules listed.
- This navigation menu may vary, based on your user role, as will the access to modules, depending on your company setup.
- The Virtual Terminal allows you to manually process one-time payments.
- Recurring Billing allows you to manage customer subscriptions, payment plans, and recurring billing settings.
- Bank Deposits allows you to view and report on pending and funded deposits for your settlement account.
- Transactions, depending on a user's role, allows you to search, void, and settle authorized transactions.
- Sales provides information on settled transactions, including activity details, as well as disputes and adjustments.
- Reports will allow you to create custom and recurring authorization reports, such as payment batch summaries and payer authentication summaries,
- and access a variety of downloadable reports. Token Management allows you to create and manage tokens that can be used to mask and protect card information.
- Payment Acceptance provides tools that allow you to manage digital payments or e-wallet solutions, Payer Authentication,
- Key Management, and Secure Acceptance.
- And finally, Client Information includes details about your merchant relationship with Bank of America.
- To grant a new user access to your Merchant Services accounts, select Business Services from the top banner.
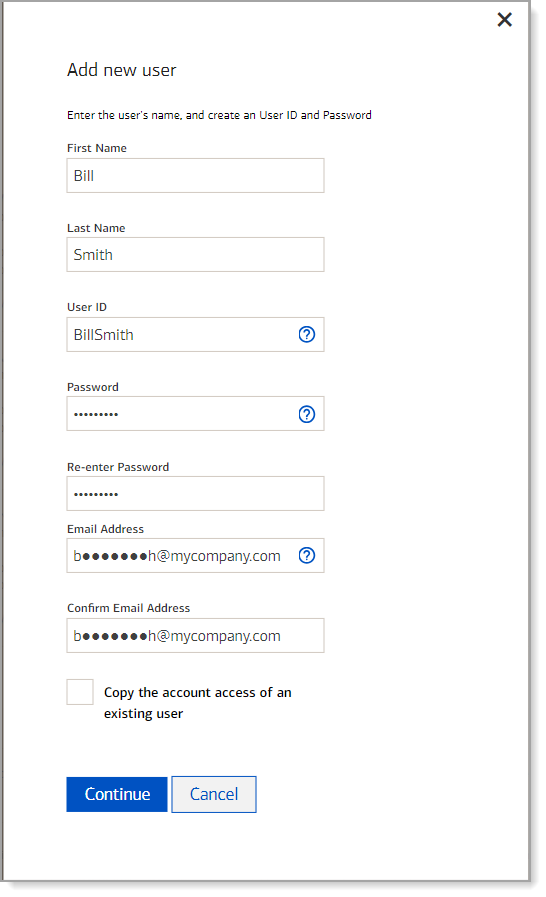
- Click the Add New user link under User Management.
- Enter the user ID, then create the user's online ID and the user's password and enter the user's email address.
- You can also copy the account access of an existing user to grant the same responsibilities as an existing user.
- Then, click Continue.
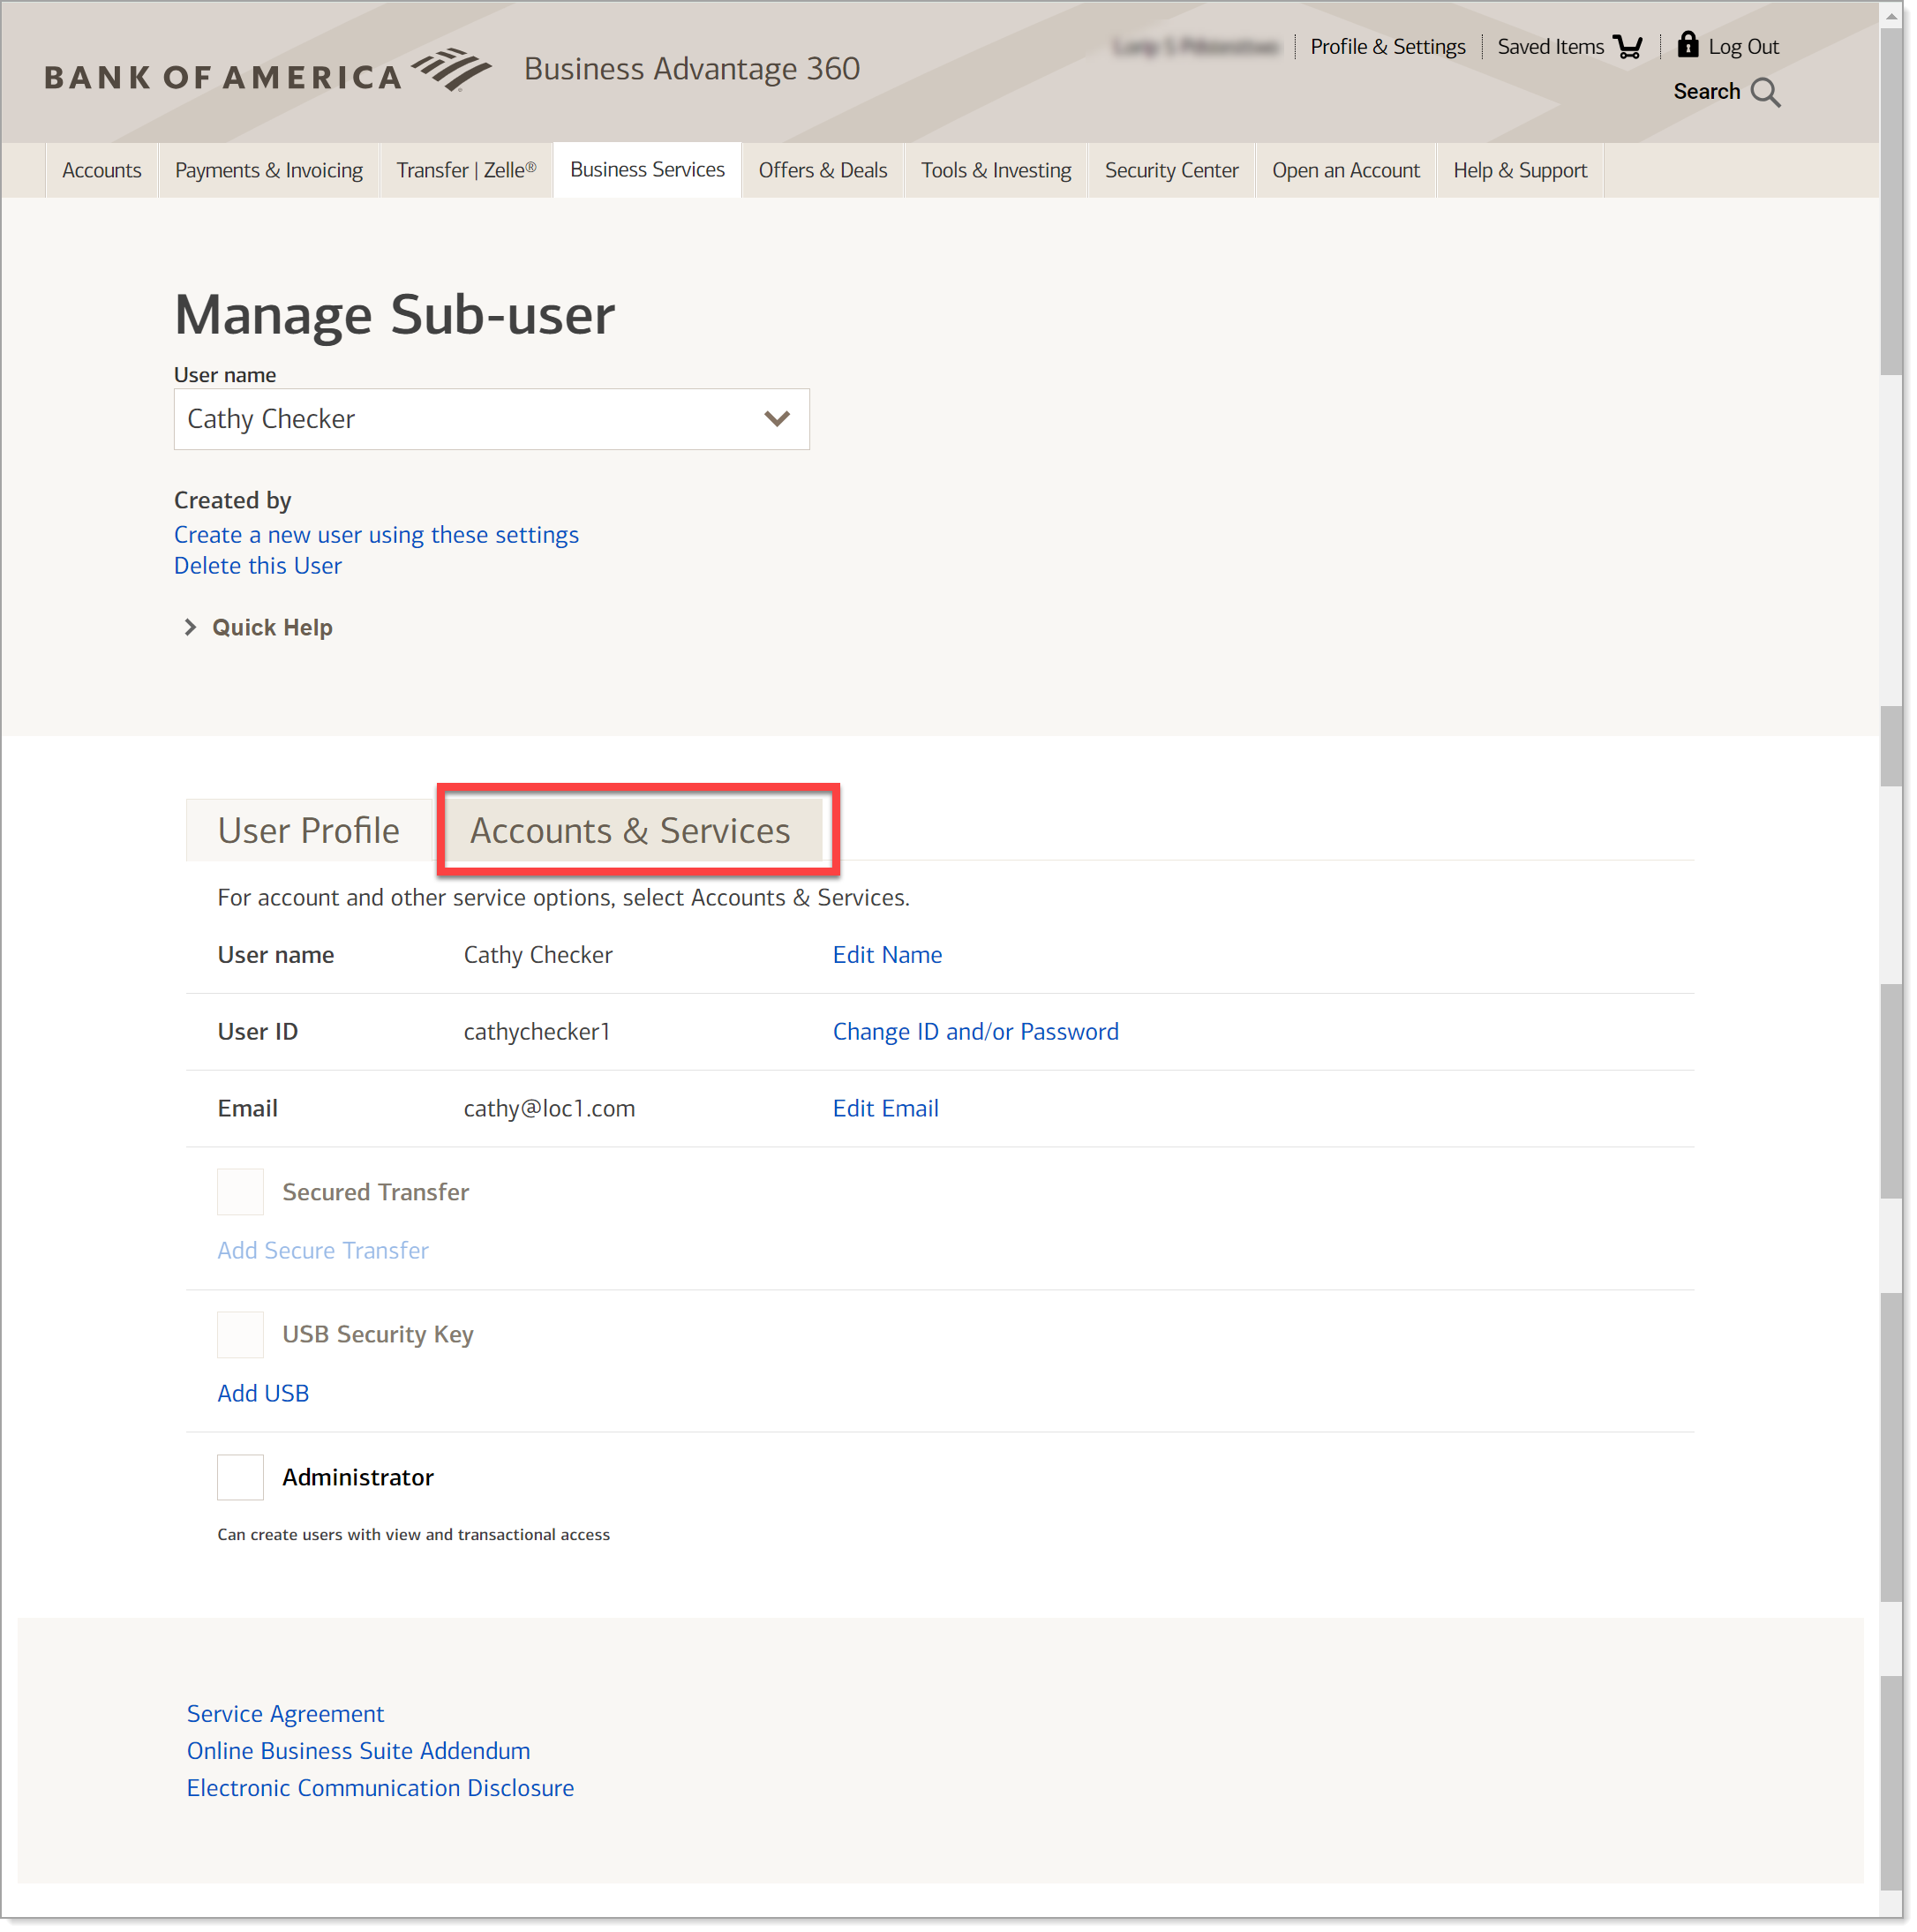
- After the user has been created, the Manage Sub-user dashboard will appear.
- Under the User Profile tab, you can edit the user name, online ID, and email address, if needed.
- You can also make that user an administrator, which means the user can create other users and grant them access to your account.
- Next, select the Accounts & Services tab to control the level of access for the user for each Merchant Services account.
- Access level definitions are provided. Select one of the three levels of appropriate access for the user for each location and click Continue.
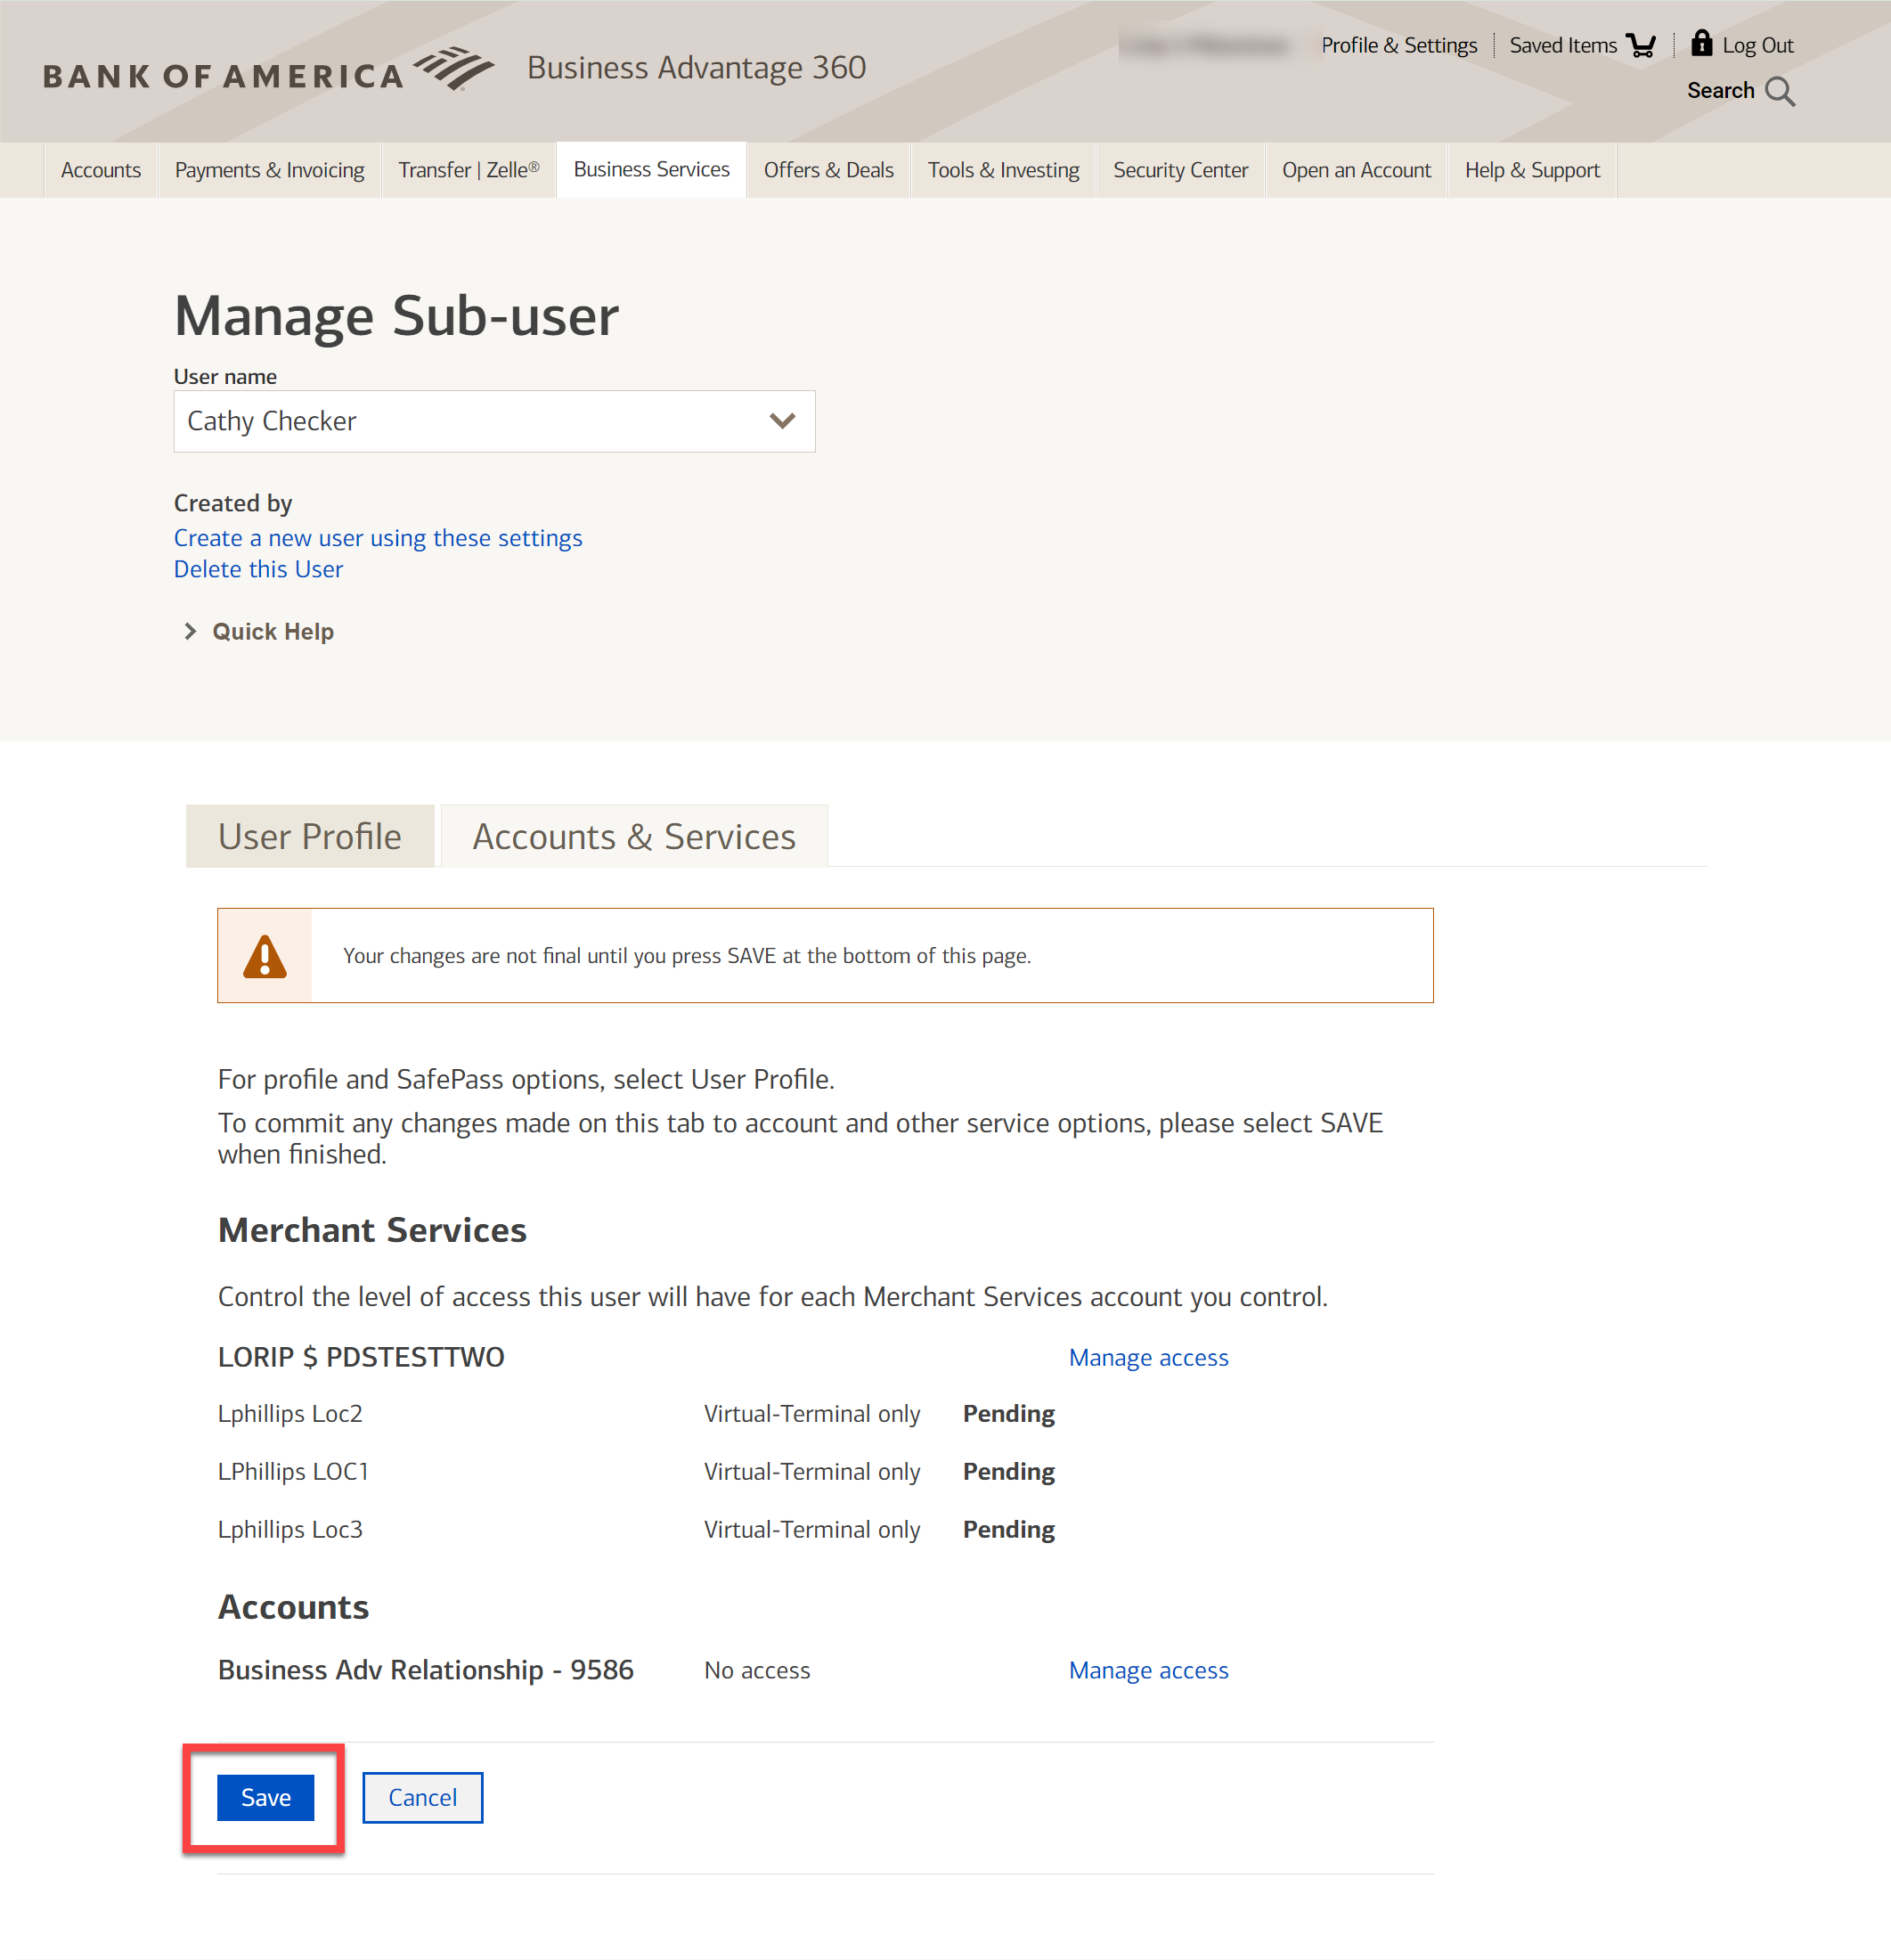
- Click the Save button to save all changes.
- For more information, visit bankofamerica.com/merchanthelp.
- [Narrator 2] What would you like the power to do?.
Supported browsers
We recommend using the latest production version of supported browsers and that you keep security settings up to date and enable JavaScript. The Merchant Services mobile and tablet experience is responsive but has not been certified for all browsers and devices.
Left-hand navigation
The left-hand navigation menu can be expanded and collapsed by clicking on the carrot icon below the menu.
- To access Merchant Services account in online banking
- Log in to https://www.bankofamerica.com/smallbusiness/ or bofa.com using a supported browser on your desktop or laptop.
NOTE: Merchant Services is not fully available on mobile devices. If using a mobile device, select the option to View Full Site for the best experience. The Virtual Terminal cannot be accessed through the Business Advantage 360 mobile app.
- Login with your business account online banking credentials.
IMPORTANT! Merchant Services will not be visible if you login with your personal account online banking credentials.
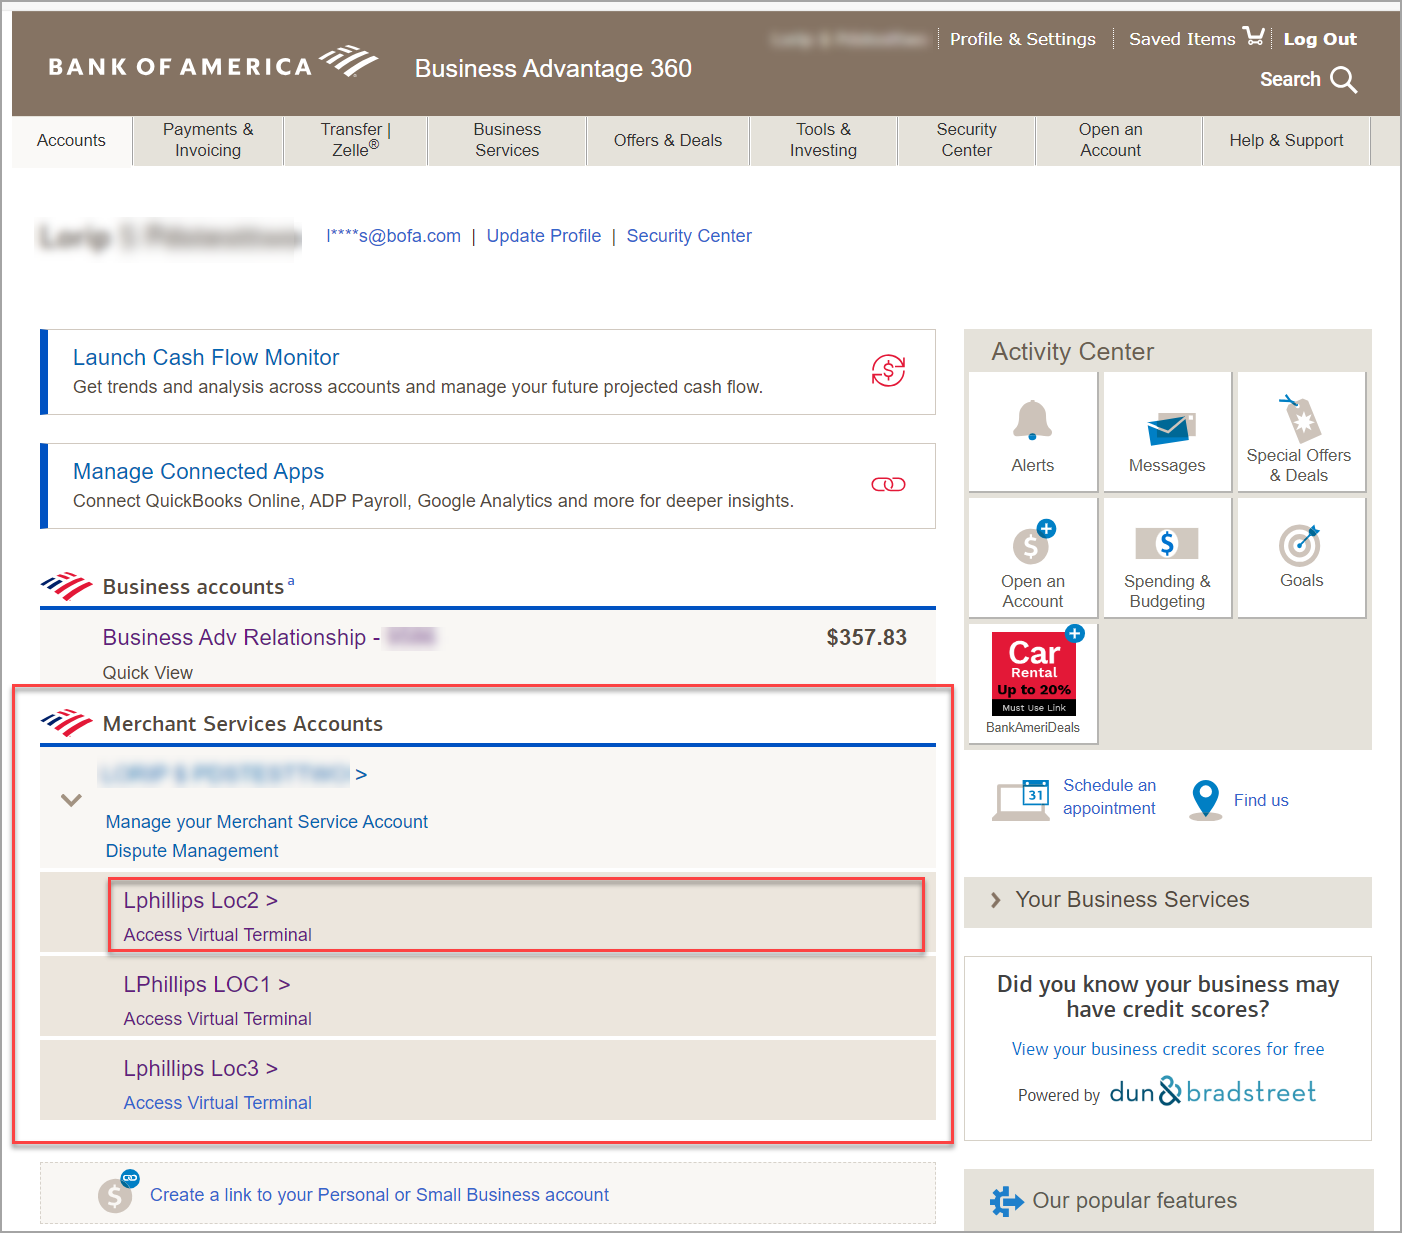
- From your Merchant Services Accounts, click the location you would like to manage. The Merchant Dashboard will open.
- Log in to https://www.bankofamerica.com/smallbusiness/ or bofa.com using a supported browser on your desktop or laptop.
- To access Merchant Services on a mobile or tablet device
We recommend a laptop or desktop computer for accessing your Merchant Services account through online banking; however, you may also access online banking using a mobile device or tablet.
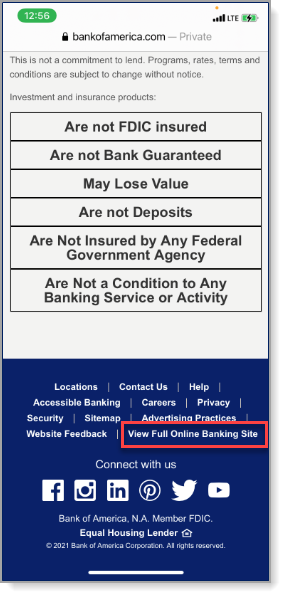
- In your device browser, visit bankofamerica.com.
- If using a mobile device, scroll to the bottom of the landing page and select View Full Online Banking Site. Tablet users should default to this option automatically.
- Log in to online banking.
NOTE:
If you log in to online banking and cannot see your Merchant Services account, use the steps above to ensure you are accessing the full online banking site.
Manage sub-users in online banking
To manage your business, you may need to allow additional users, also known as sub-users, to access your account, such as allowing your employees to use the Virtual Terminal as a backup payments system or adding users that can void or credit transactions, view statements or manage disputes on your behalf.
- To manage sub-users in online banking
- Log in to your Merchant Services account in Business Advantage 360 online banking.
- Select the Business Services tab from the top menu bar.
- If this is your first time adding users to your online banking account, select Account Maintenance sign up.
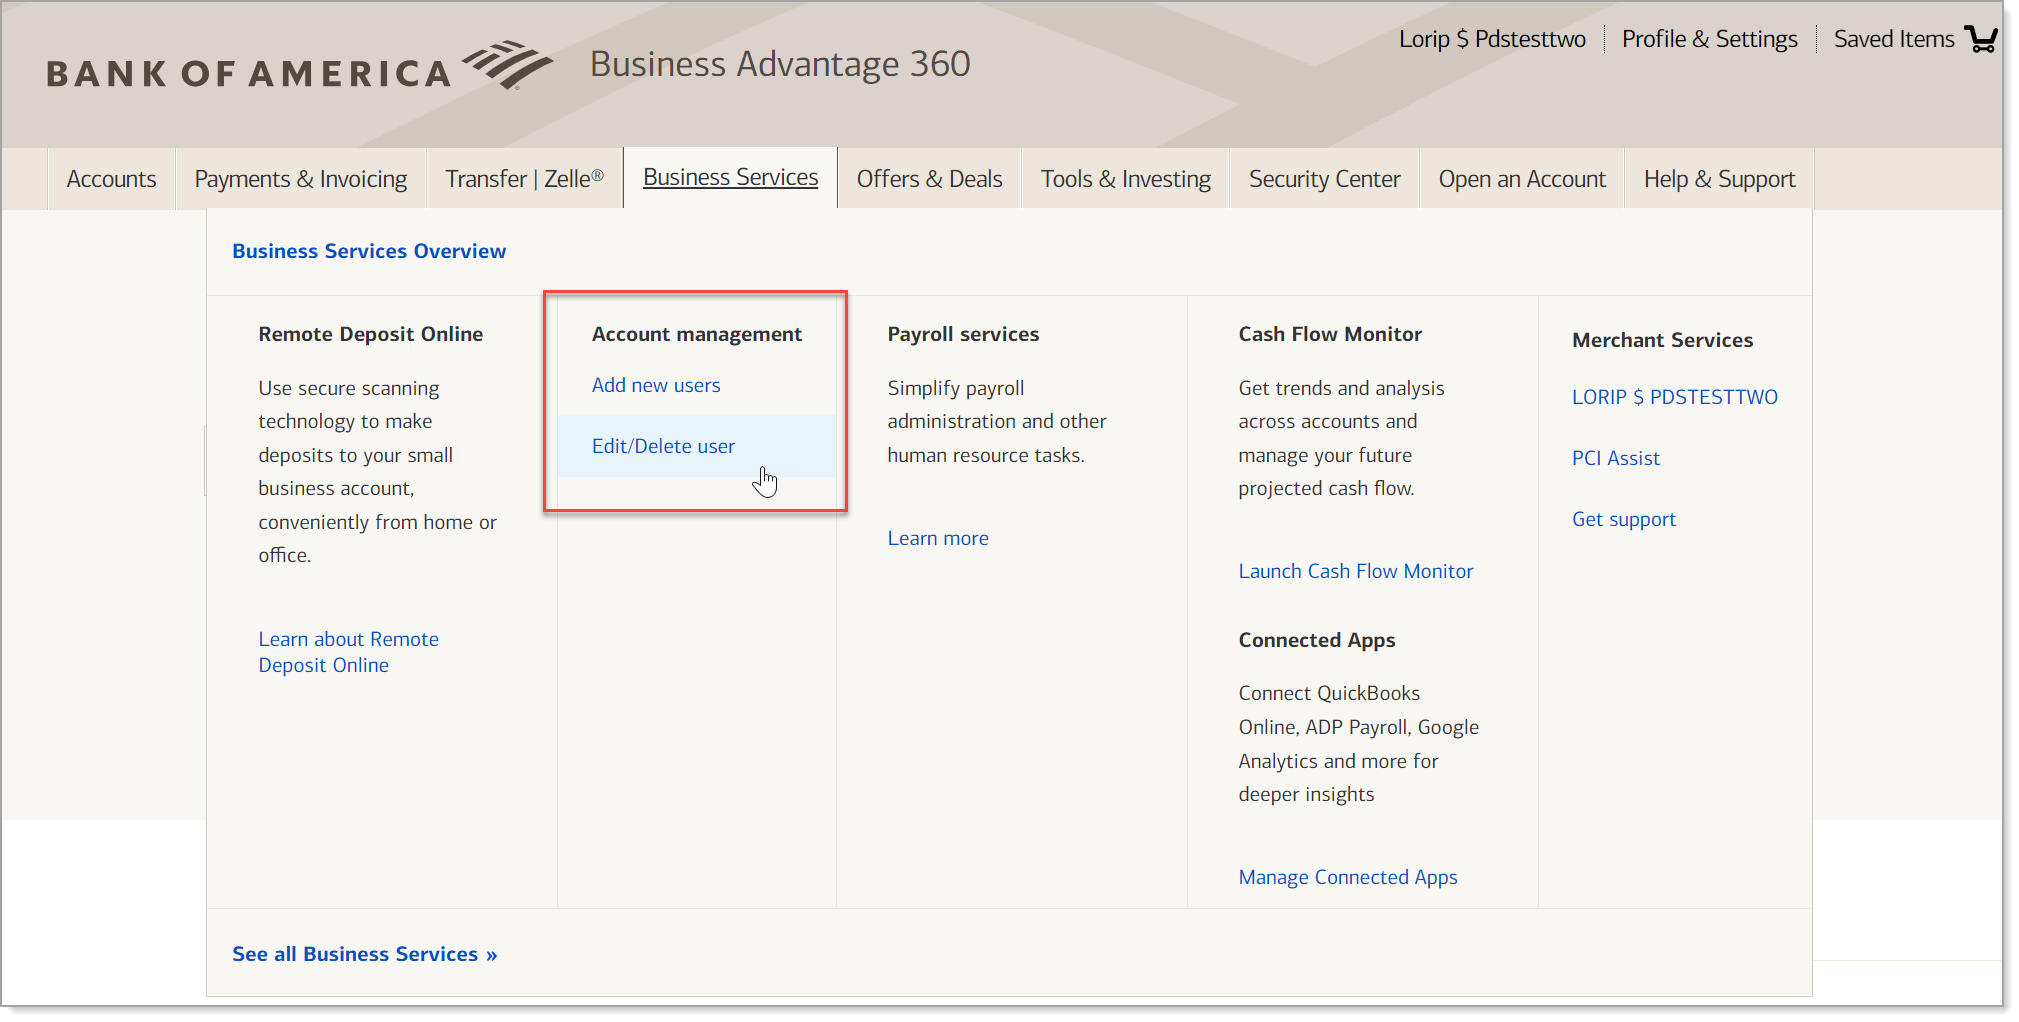
- In Account Management, choose an option:
- Add new users
- Select Add new user.
- Enter the first and last name, online ID, password, and email address for the new user you are adding.
IMPORTANT! The User ID must be unique.
- Choose whether to set account permissions for this user or to copy the account access of an existing user:
- Set permissions
- Click Continue.
- Select the Accounts & Services tab.
- Click Manage Access.
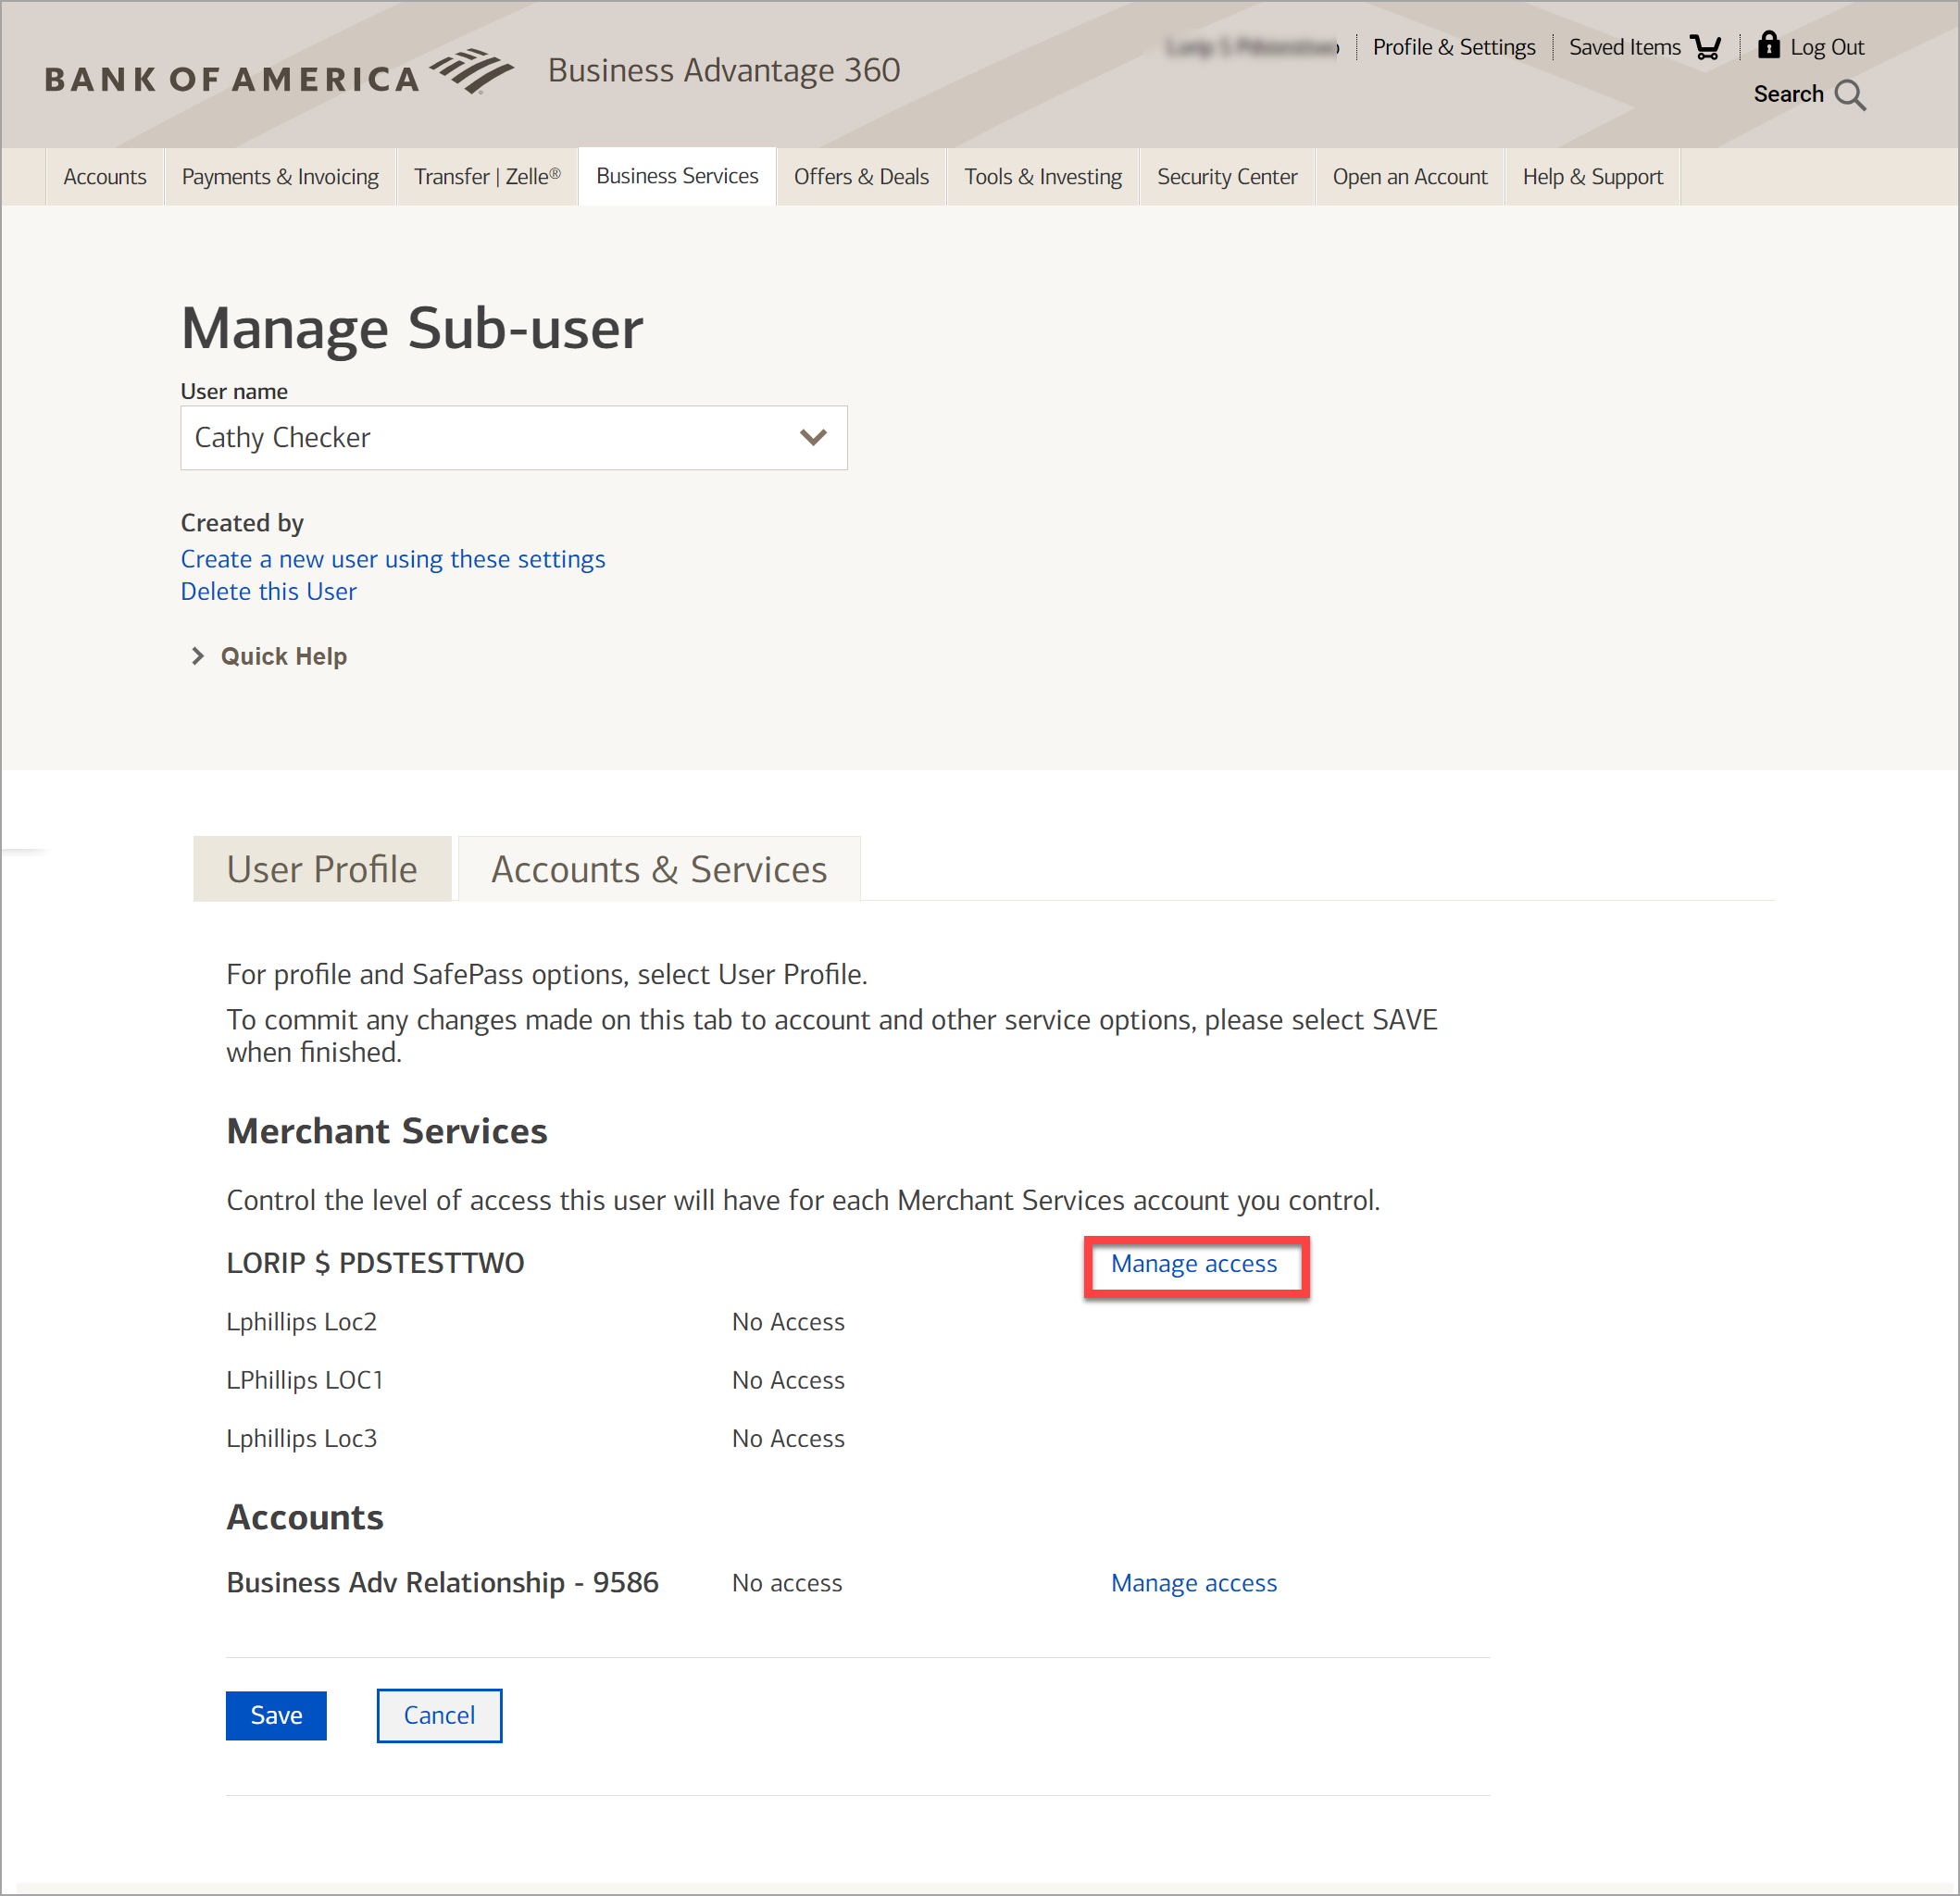
- Select access levels for the user.
Table showing access levels and descriptions Access Level Description Full Access Access to all of the features and functions of the Merchant Services dashboard. This level of access usually is reserved for the account owner to use the full suite of options provided by the bank. User can change or view sensitive data with this level of access. View-Only Access Access to view certain features inside of the Merchant Services dashboard. Virtual Terminal Only Access User can access Virtual Terminal process transactions, view reporting and process voids and returns. User cannot view or change other account features and functions. 
- Click Continue.
- Set permissions
- Click Save to save the permissions. Once the changes are saved, a green check mark appears under the Accounts & Services tab.
- Edit/Delete user
- Select Edit/Delete User.
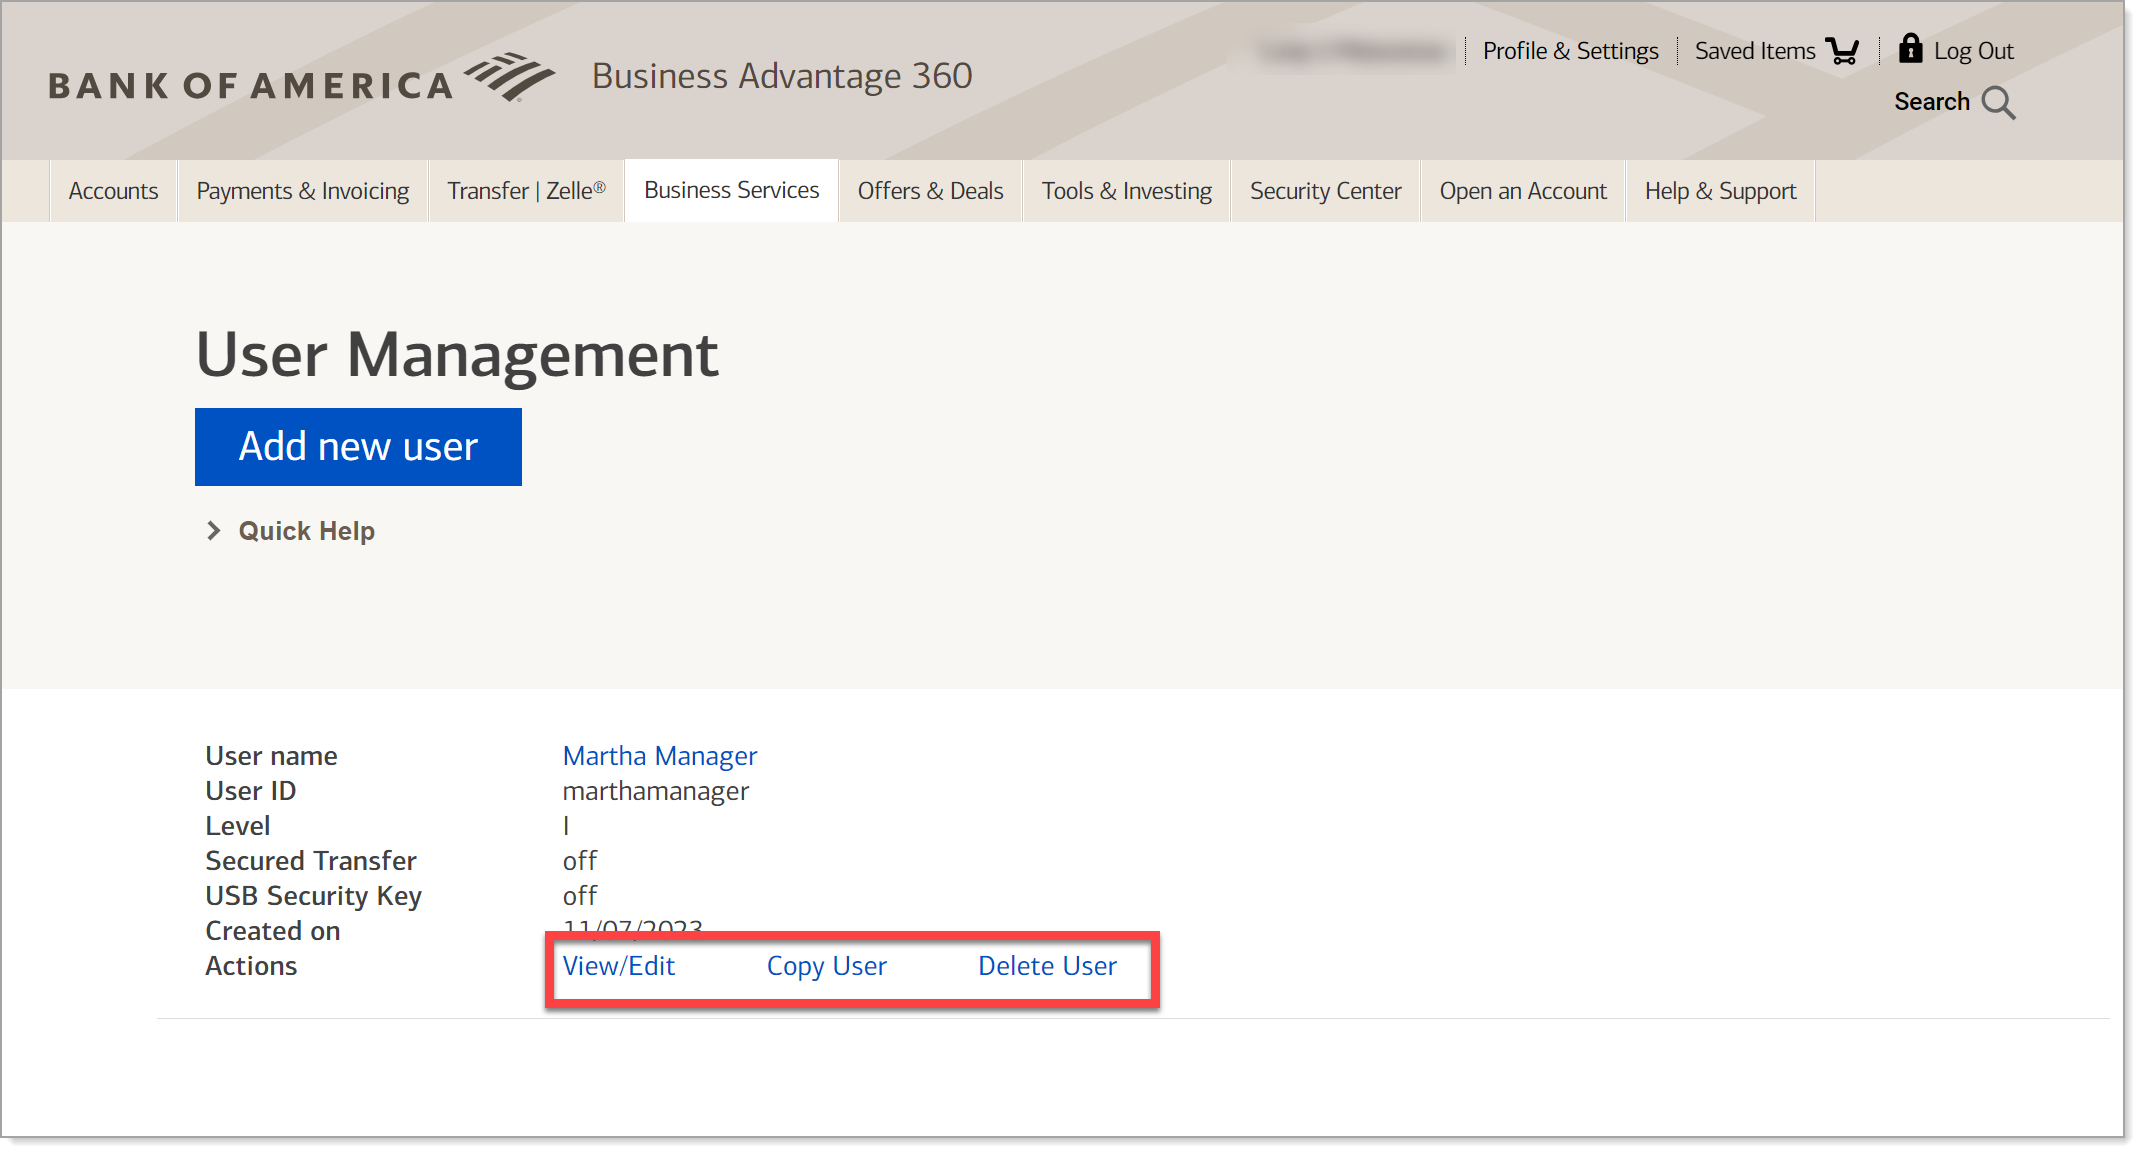
- Choose an option:
- Click View/Edit to update the user information.
- Click Copy User to create a new user based on this user.
- Click Delete User to remove the user.
- Click Continue.
- Select Edit/Delete User.
- Add new users