Online Ordering Order Fulfillment (Pickup, Dine In or Curbside)
Description
What's in this article?
Solution: Essentials | Retail | Restaurant
Online ordering offers three delivery options when ordering online:
- Pickup allows customers to order and pay online, as well as pick up their items in person at your restaurant location.
- Dine In allows customers to order, select their table, and pay for their meal from the convenience and safety of their own device.
- Curbside prompts the customer to enter their vehicle type, make and color so customers never have to leave their car.
IMPORTANT!
Taxes must be configured and synchronized before order fulfillment options can be set up.
Set your order options on the Online Order tab.
To enable Pickup settings
- In Back Office, select the Online Order tab.
- In the left navigation select Pickup Settings.
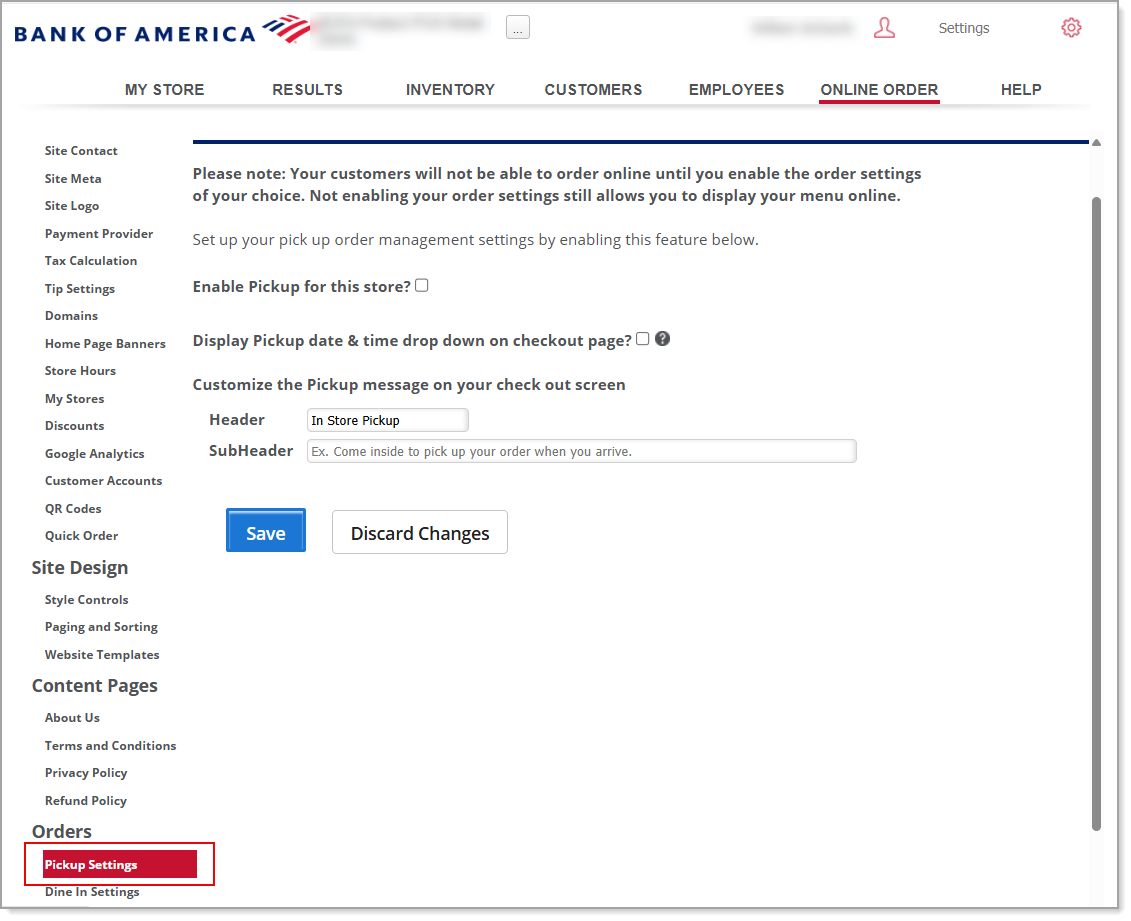
- Click the checkbox for Enable Pickup for this store?
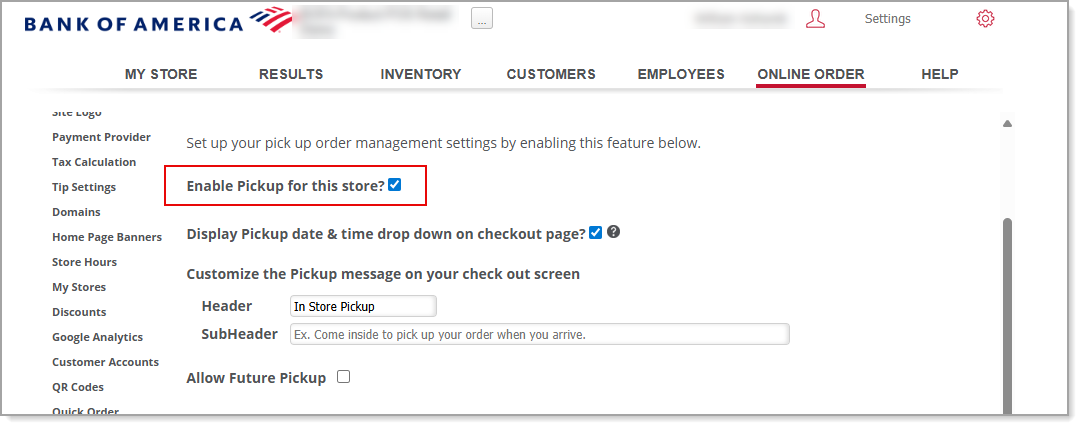
IMPORTANT! If not flagged, your customers will not be able to place orders online.
- (Optional) Click the checkbox for Display Pickup date & time drop down on checkout page? If this box is not selected, customer online orders will be available for pick up immediately. Time slice and max orders will not apply.
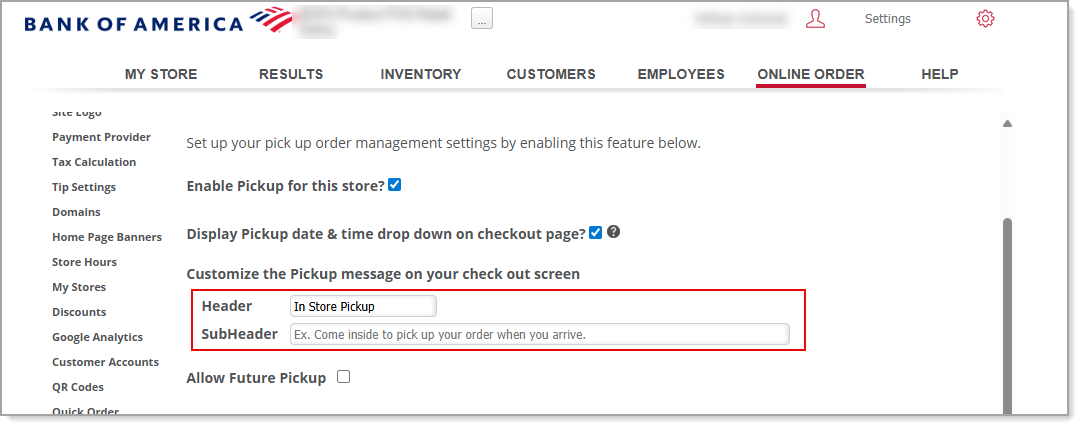
- Customize the Pickup message your customers will see at checkout by editing the message header and sub header.
- (Optional) Select the Allow Future Pickup to enable customers to place orders at a date in the future. Select how many days in advance a customer can select to pick up their order.
- Select the time within the Pickup Start and Pickup End columns to edit the times. Type the desired time, and when you are done, press Enter.

- (Optional) Select the + icon under the Edit Pickup Blocks column to add a new time block.
NOTE: You can have a total of four time blocks for a given day. For example: If your business is open for breakfast and dinner hours but not for lunch, you can utilize this feature to set up separate time blocks. Click the - icon to remove a time block.
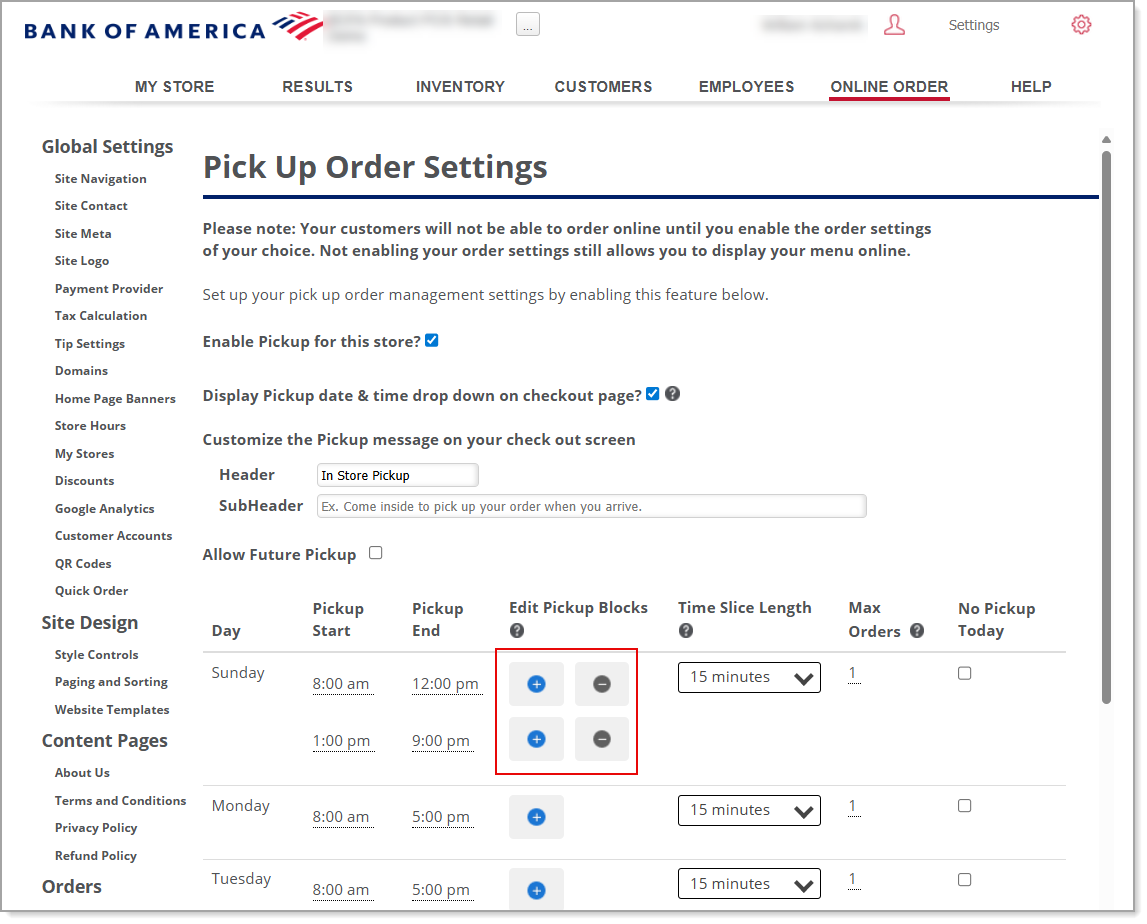
- Time Slice Length will divide your order hours into segments to help you determine how many orders you can take within a given time slice.
- You can divide your day into time slices of 15, 30, 45 or 60 minutes.
- Click the time slice length for a given day to edit the length. Press Enter on your keyboard when complete.
- Click the Max Orders number to edit the maximum amount of orders you can fulfill within a time slice.
NOTE: Consider not only the Pickup orders but also the incoming Curbside orders when setting your Max Orders for the Time Slice Length you have selected.
For example, if your day is segmented in 30-minute slices and you have entered 2 as your Max Orders, from 2:00 p.m. - 2:30 p.m. (a 30-minute time slice) for Pickup orders and also have 2 entered as you Max Orders in Curbside orders, you would only take 4 orders. When checking out on your Online Ordering site, customers can only see and select from pickup times that have not met their maximum orders.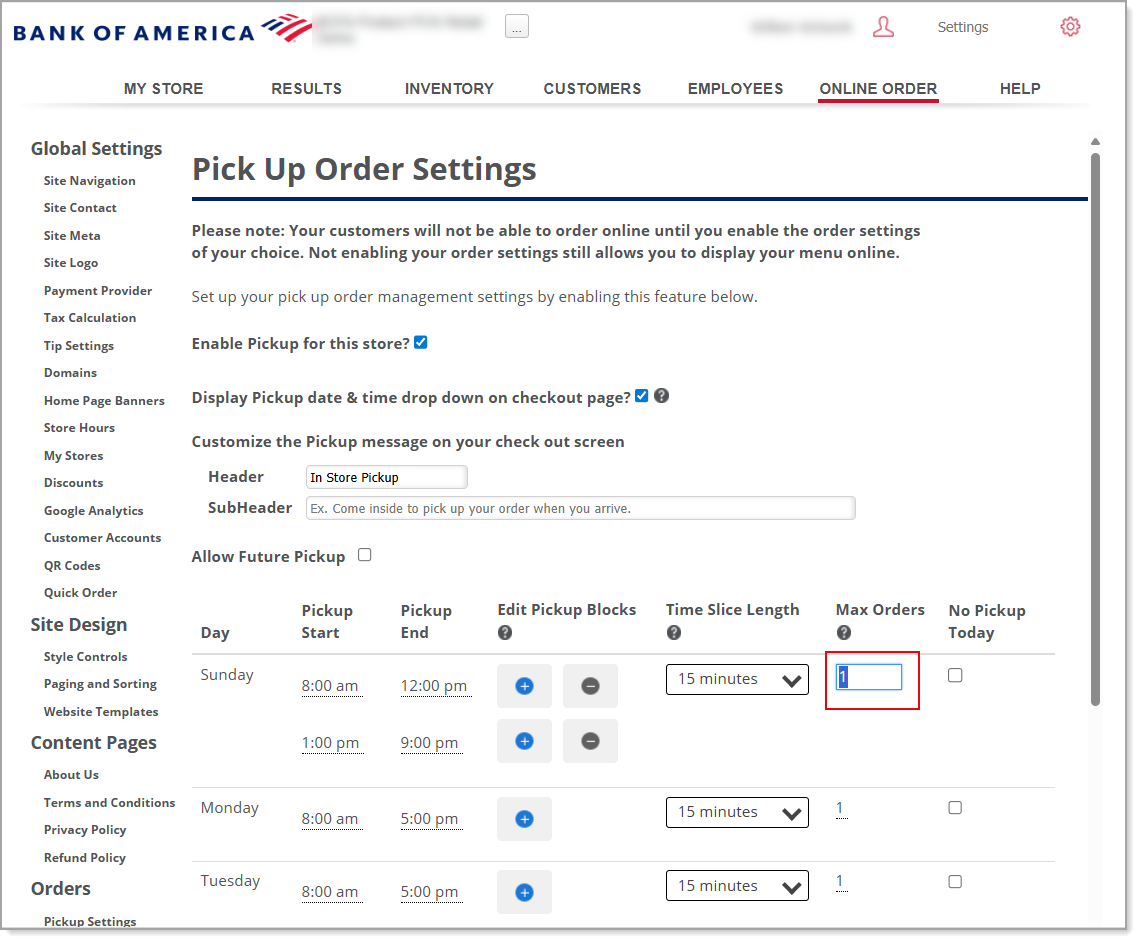
- (Optional) Enable No Pickup Today to prevent pickup order placement for that day on the Online Ordering site.
- Click Save.
IMPORTANT!
Now that your order fulfillments have been enabled, be sure to set up your order fulfillment method time blocks and product availability times in the item profile under the Online Ordering section.
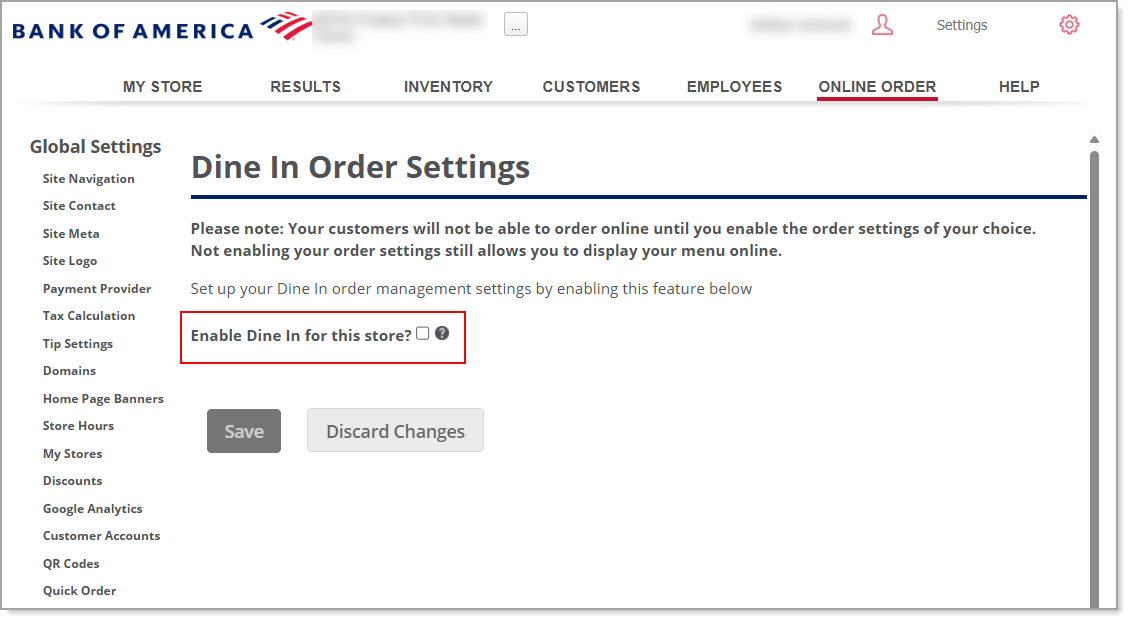
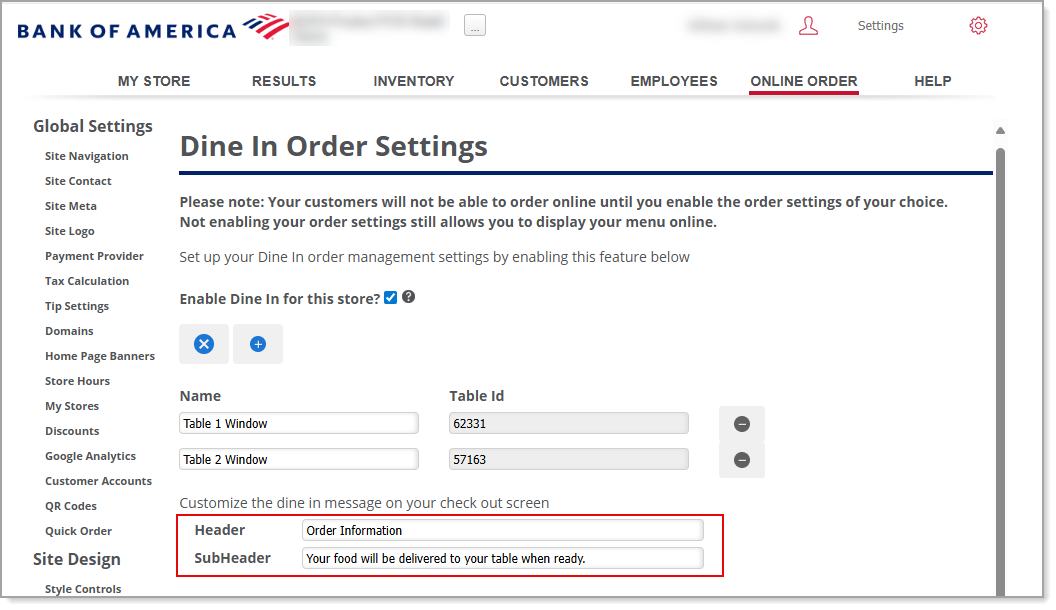
To enable Dine In settings
- In Back Office, select the Online Order tab.
- In the left navigation select Dine In Settings.
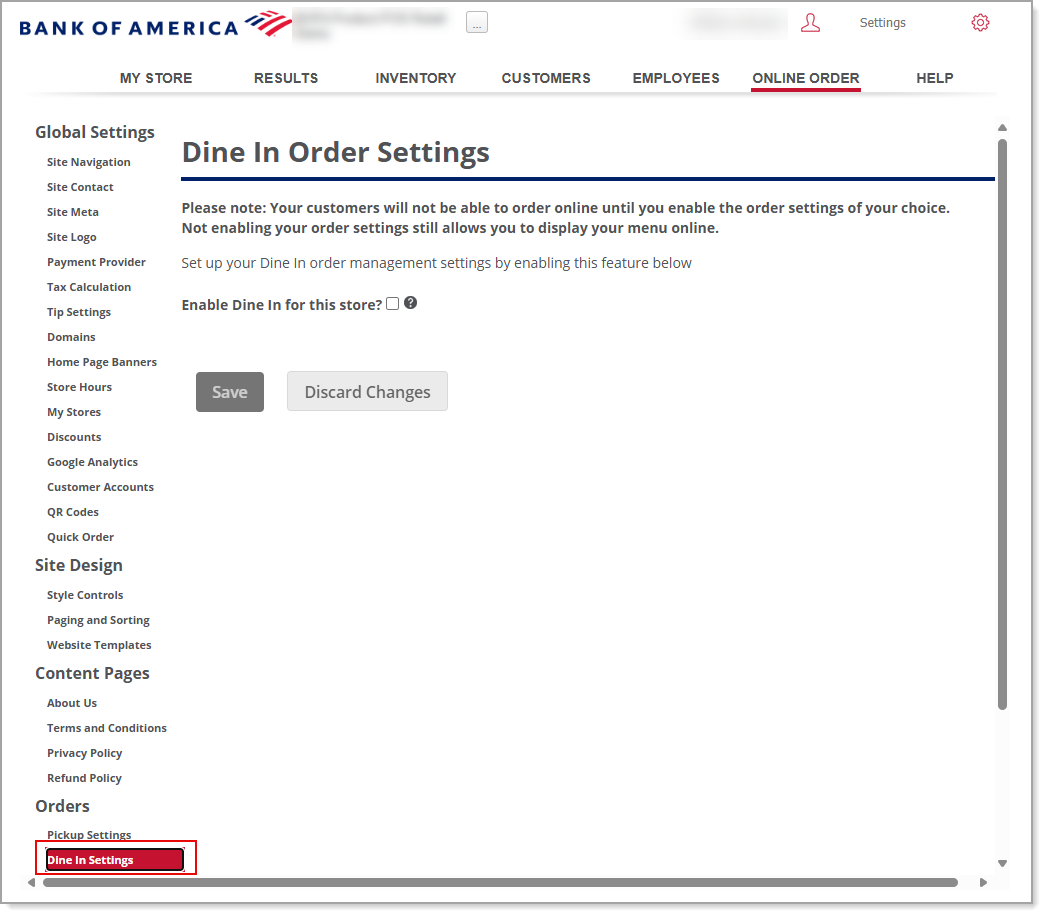
- Click the checkbox for Enable Dine In for this store?
- Click the + icon to add a table name for each table.
NOTE: Table Names & IDs are require for dine in ordering. These Names and IDs must be displayed on your dining tables, so customers can validate their table location and order information. Create a list of tables by adding table numbers or names (Special characters are not permitted.) A table can be removed by clicking the - icon.
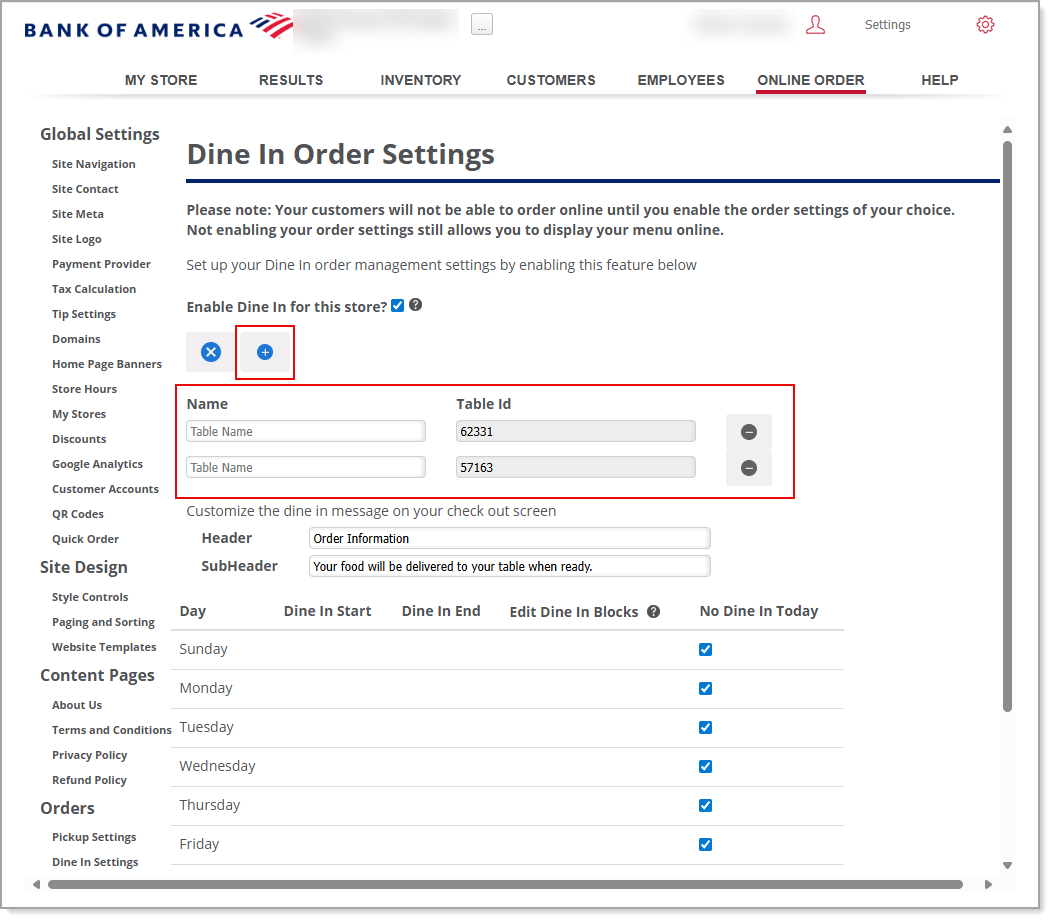
- Customize the Dine In message on your check out screen.
- Select the time within the Dine In Start and Dine In End columns to edit the times. Type the desired time, and when you are done, press Enter.
NOTE: The No Dine In Today checkbox must be deselected to set Dine In times and blocks.
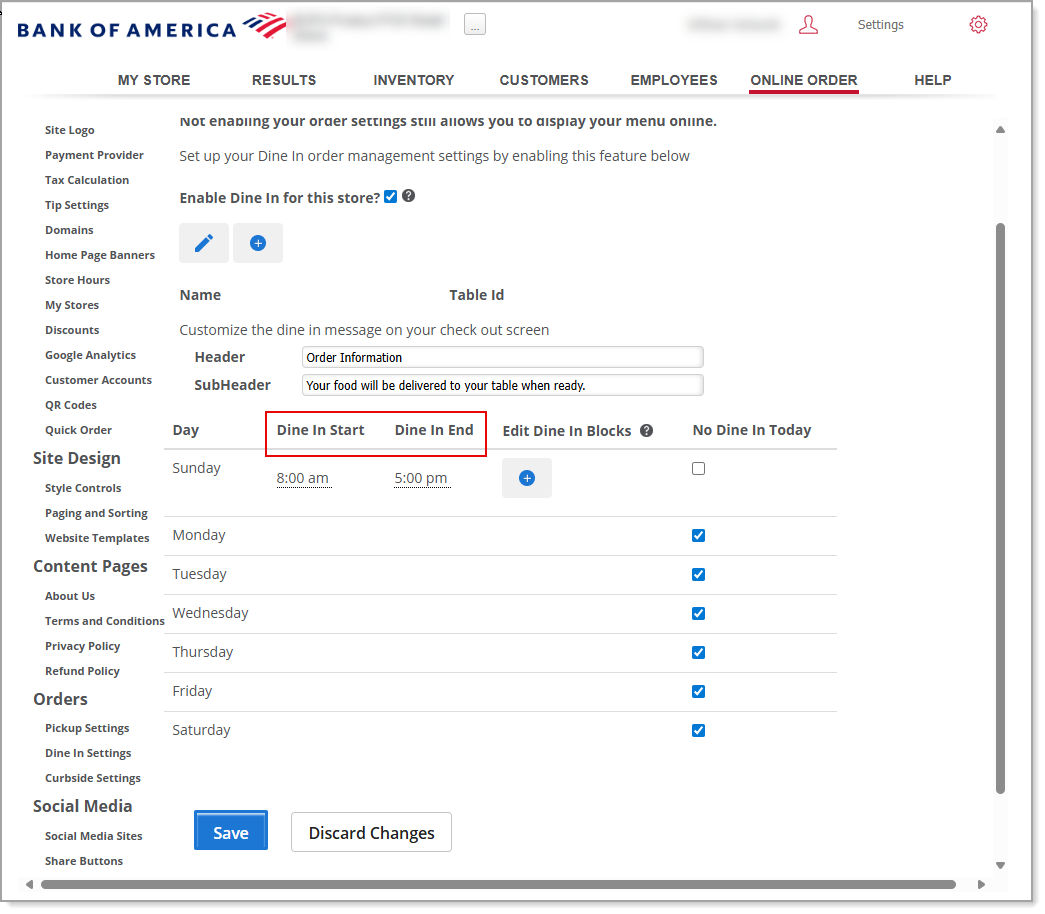
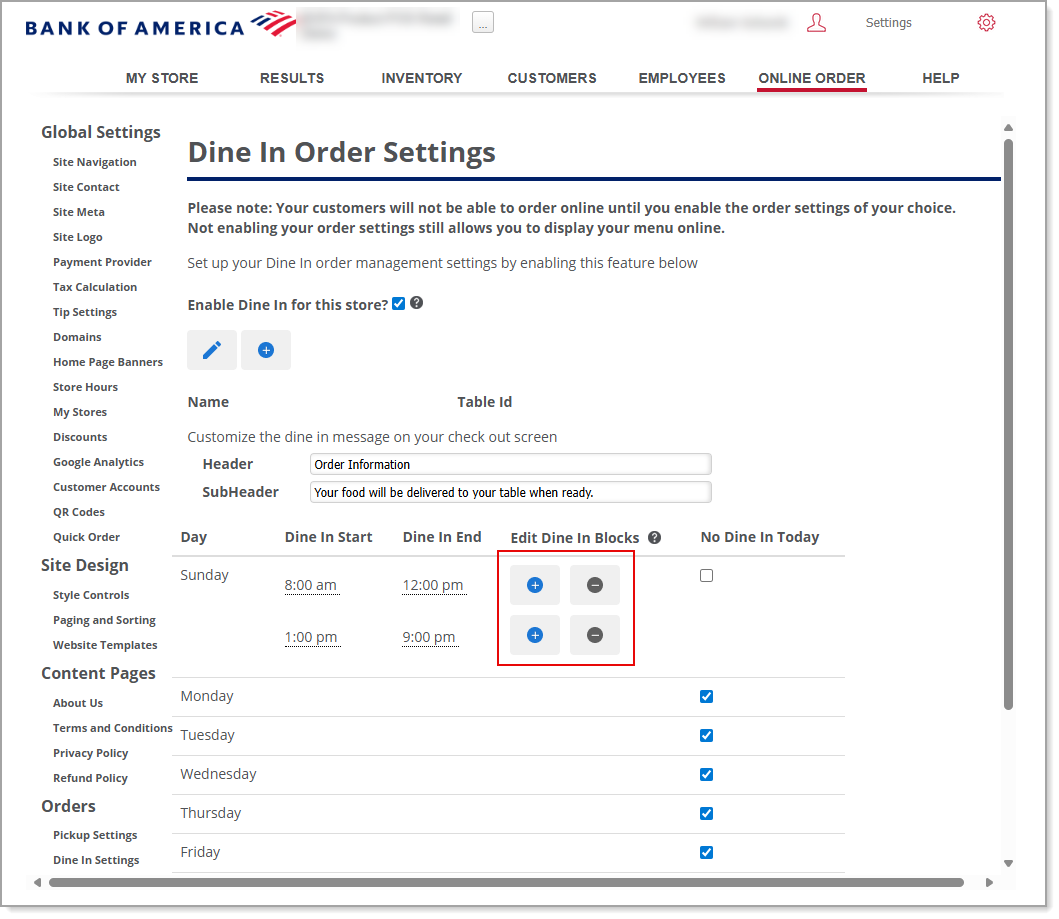
- (Optional) Select the + icon under the Edit Dine in Blocks column to add a new time block. You can add up to 4 different time blocks. Select the - icon to remove a time block.
NOTE: You can have a total of four time blocks for a given day. For example: If your business is open for breakfast and dinner hours but not for lunch, you can utilize this feature to set up separate time blocks. Click the - icon to remove a time block.
- (Optional) Enable No Dine In Today to indicate that dining in is not available for that day.
Click Save.
To enable Curbside settings
- In Back Office, select the Online Order tab.
- In the left navigation select Curbside Settings.
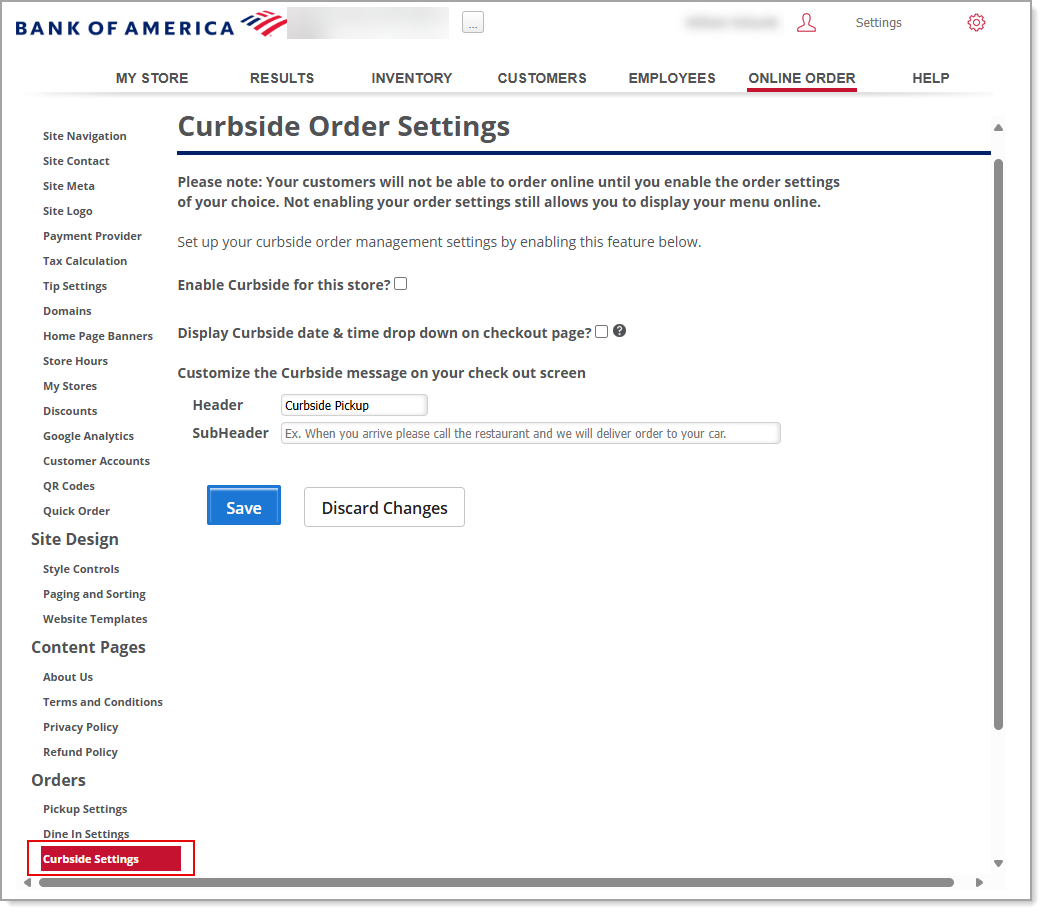
- Click the checkbox for Enable Curbside for this store?

IMPORTANT! If not flagged, your customers will not be able to place orders online.
- (Optional) Click the checkbox for Display Curbside date & time drop down on checkout page? If this box is not selected, customer online orders will be available for pick up immediately. Time slice and max orders will not apply.
- Customize the Curbside message your customers will see at checkout by editing the message header and sub header.
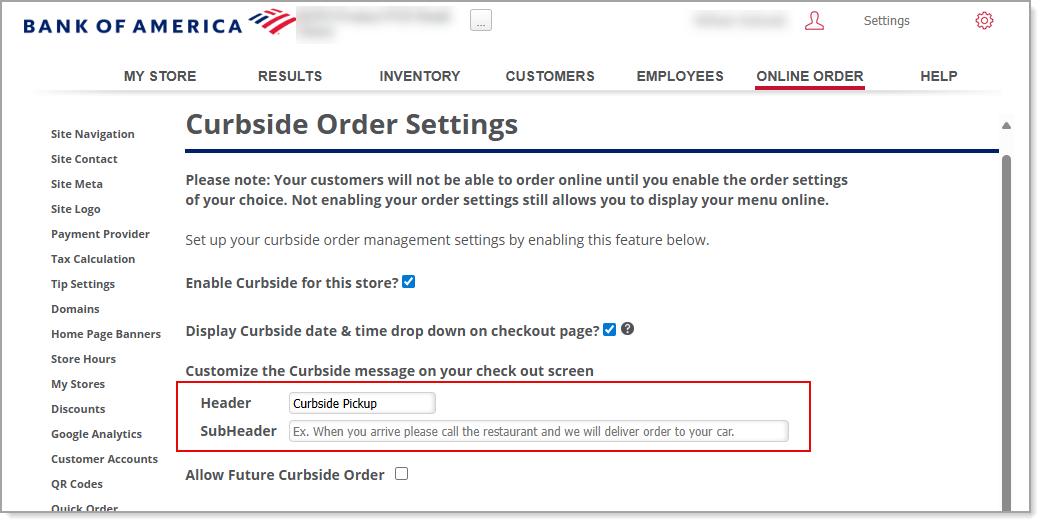
- (Optional) Select the Allow Future Curbside Order to enable customers to place orders at a date in the future. Select how many days in advance a customer can select to pick up their order.
- Select the time within the Curbside Start and Curbside End columns to edit the times. Type the desired time, and when you are done, press Enter.
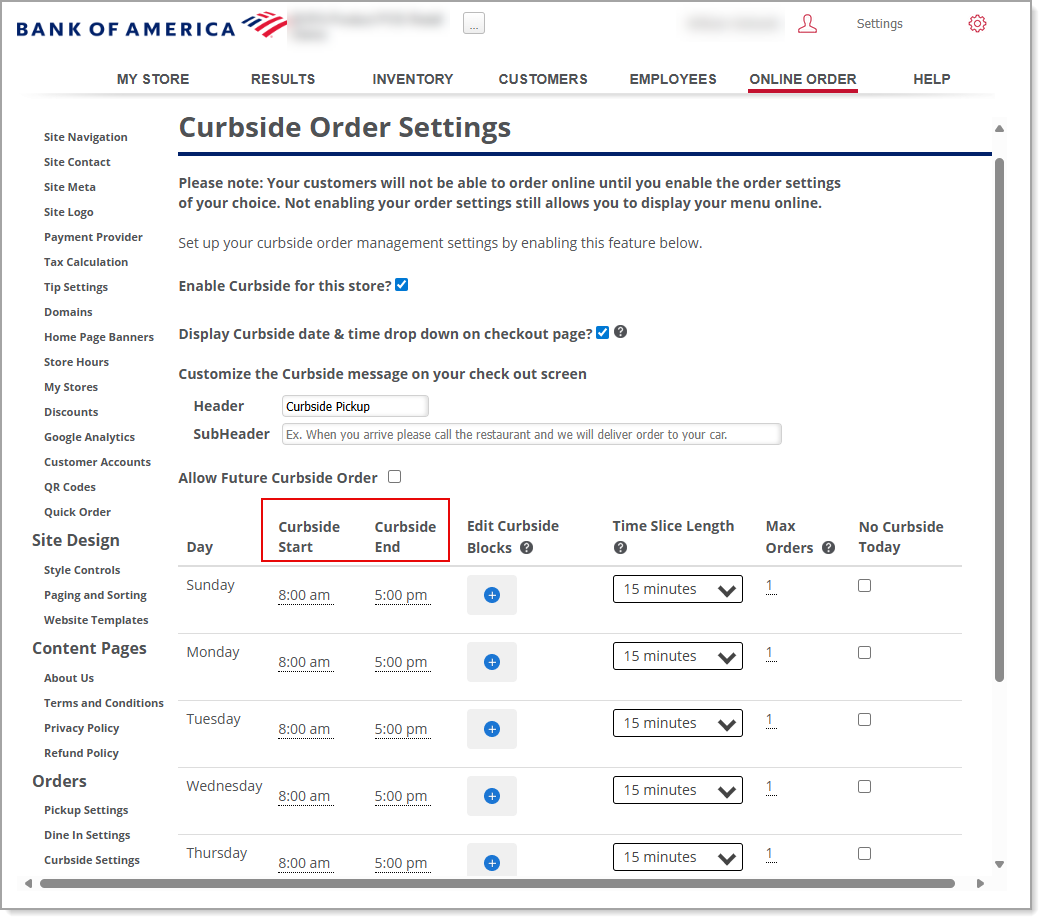
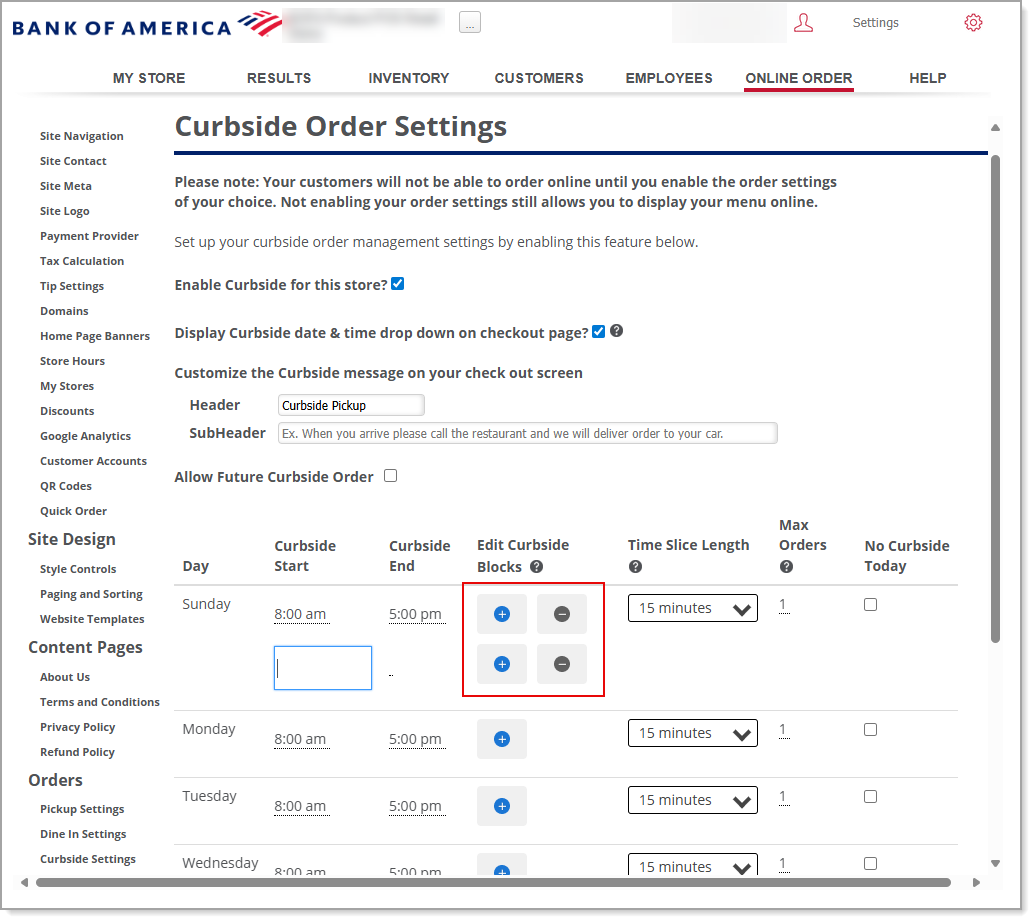
- (Optional) Select the + icon under the Edit Curbside Blocks column to add a new time block. You can add up to 4 different time blocks. Select the - icon to remove a time block.
NOTE: You can have a total of four time blocks for a given day. For example: If your business is open for breakfast and dinner hours but not for lunch, you can utilize this feature to set up separate time blocks. Click the - icon to remove a time block.
- Time Slice Length will divide your order hours into segments to help you determine how many orders you can take within a given time slice.
- You can divide your day into time slices of 15, 30, 45 or 60 minutes.
- Click the time slice length for a given day to edit the length. Press Enter on your keyboard when complete.
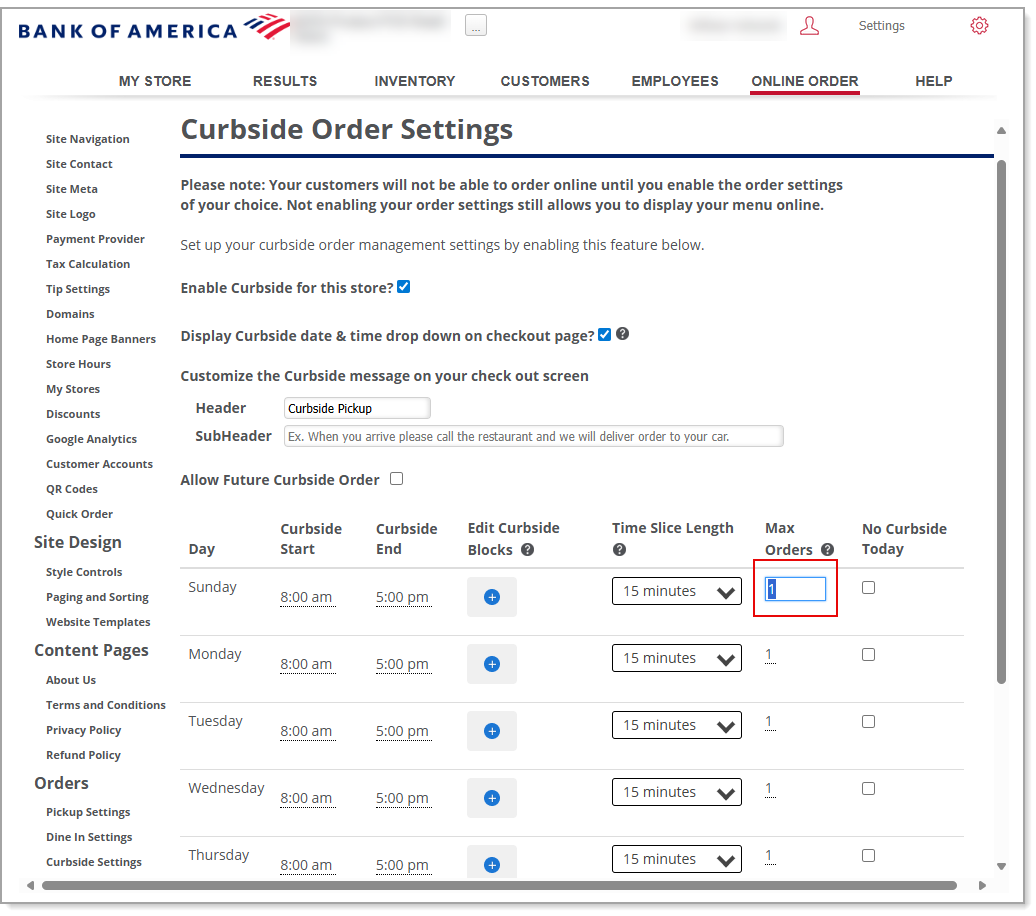
- Click the Max Orders number to edit the maximum amount of orders you can fulfill within a time slice.
NOTE: Keep in mind you will also have the Max Order settings for Pickup orders. You will need to take into consideration not only the Curside orders but also the incoming Pickup orders when setting your Max Orders for the Time Slice Length you have selected. For example, if you have your day segmented in 30 minute slices and you have entered 2 as your max orders, from 2:00 p.m. - 2:30 p.m. (a 30 minute time slice) for Curbside orders and also have 2 entered as you max orders in Pickup orders, you would only take 4 orders. When checking out on your Online Ordering site, customers can only see, and select from, curbside times that have not met their maximum orders.
- (Optional) Enable No Curbside Today to prevent curbside order placement for that day.
- Click Save.
IMPORTANT!
Now that your order fulfillments have been enabled, be sure to set up your order fulfillment method time blocks and product availability times in the item profile under the Online Ordering section.