Back Office Customer Information Management
Description
What's in this article?
Solution: Essentials Light | Essentials | Retail | Restaurant
Maintaining good customer records lets you track your customers’ sales, which helps improve customer service and allows you to take advantage of our system’s integrated email marketing features, if available in your solution.
Each customer record stores the customer’s contact information, including their email address and phone number. You can also record detailed notes, such as special shipping instructions, a birthday, or another important date reminder. In the Back Office you can create customer categories, allowing you to assign them to customers, and group customers for tracking and reporting in the Customers list report.
Import a customer list
If your existing customer data is stored in another file or format, such as Excel, you can easily transfer the information to your account.
CAUTION!
Before importing a file over an existing customer file, export and save the original customer list as a backup.
- To import a customer list
- In the Back Office , select the Customers tab.
- Select the Customers subtab.
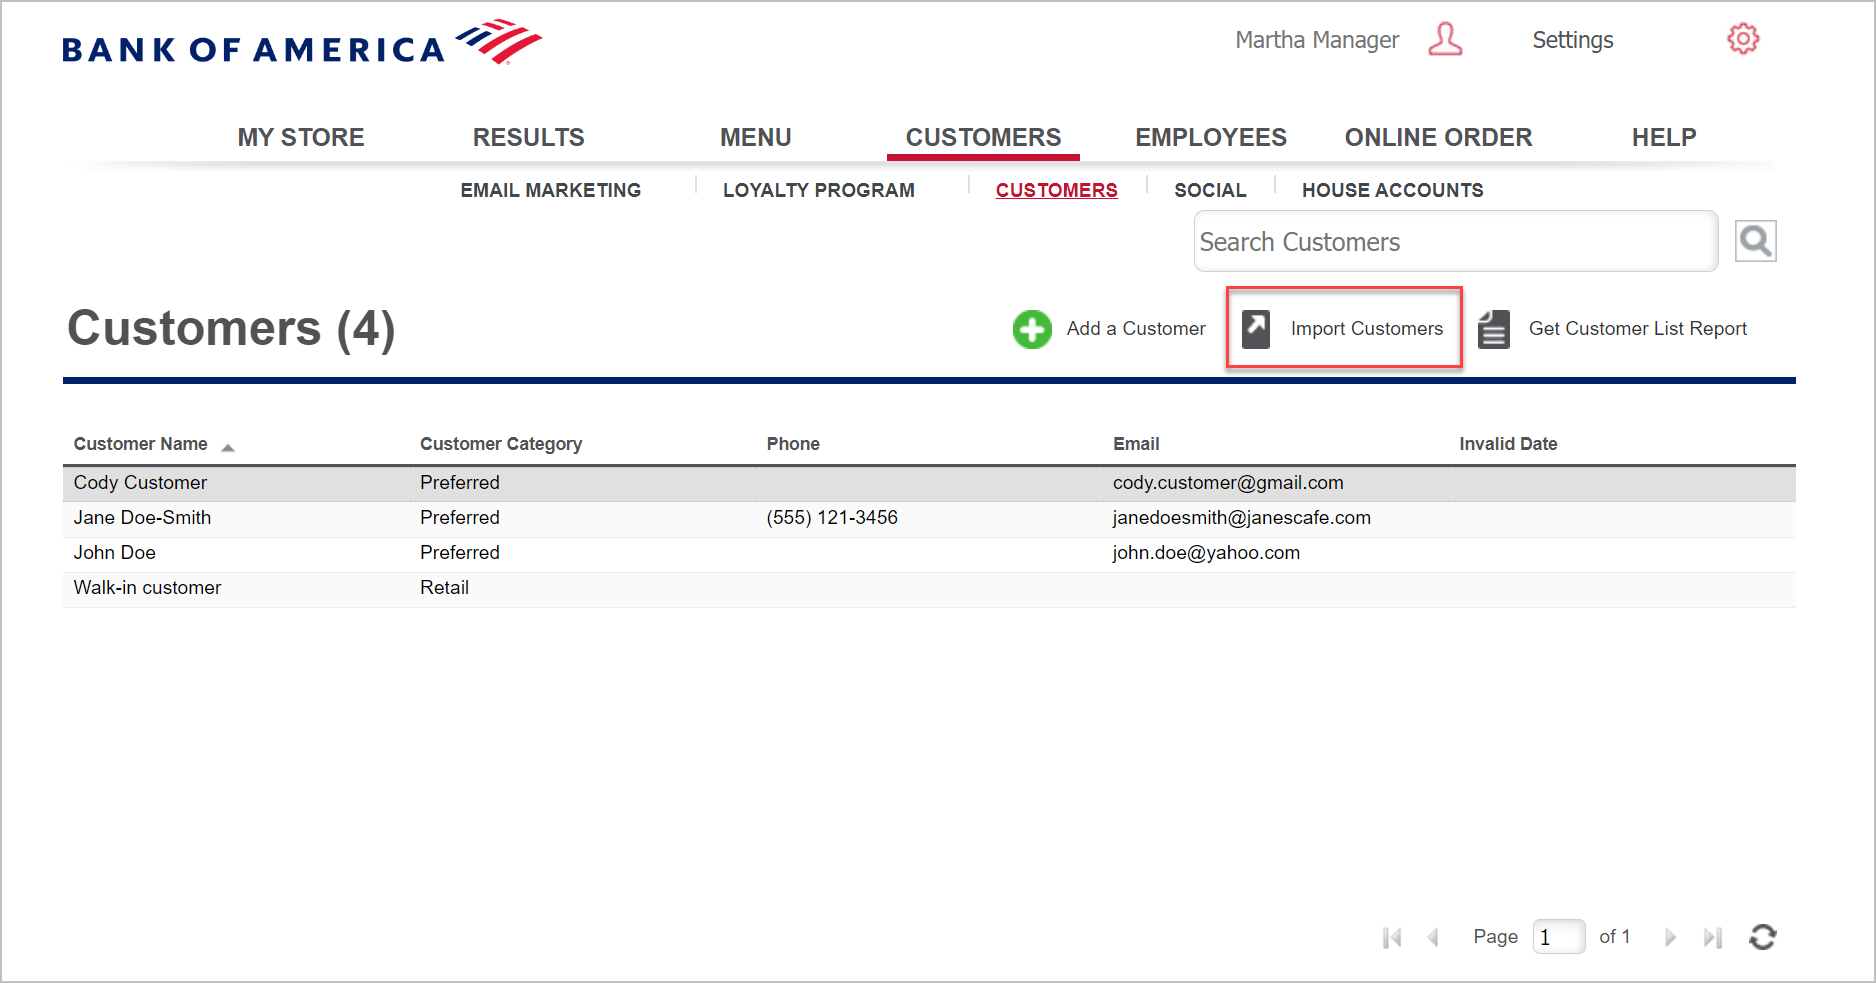
- Click Import Customers.
- Do one of the following:
- If you have no customers in your system
- Click the image to download the sample file titled "Customers.csv" to your computer.
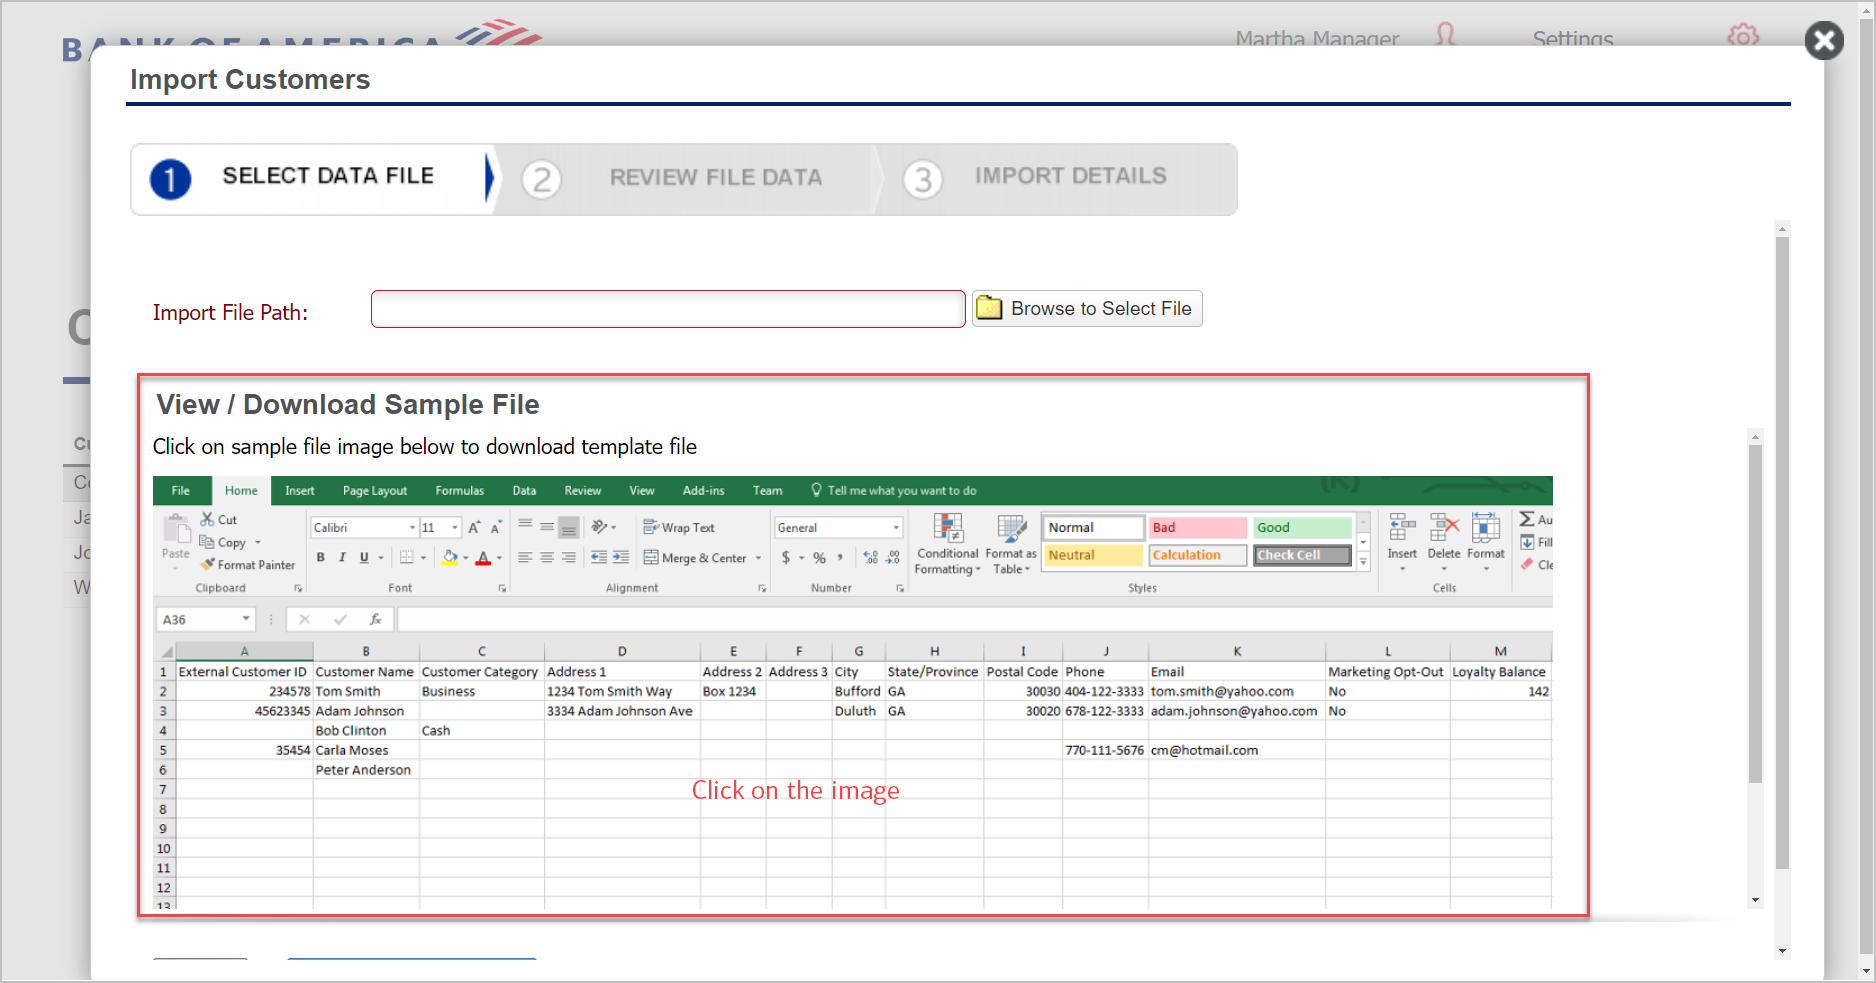
- Copy your customer data into the sample file or modify an existing customer list to match the format of sample file.
- Save the file to your local computer.
- Click the image to download the sample file titled "Customers.csv" to your computer.
- If you have existing customers in your system
- Click Get Customer List Report to export your current customer list report.

- Update your customer list with new customers or changes.
WARNING!
Be careful that you do not erase any fields, data or information that should not be changed or deleted from the original customer list because once the new list is imported, the edits will override the existing data. - Remove the first purchase and last purchase columns from the file.
- Save the file to your local computer.
- Click Get Customer List Report to export your current customer list report.
- If you have no customers in your system
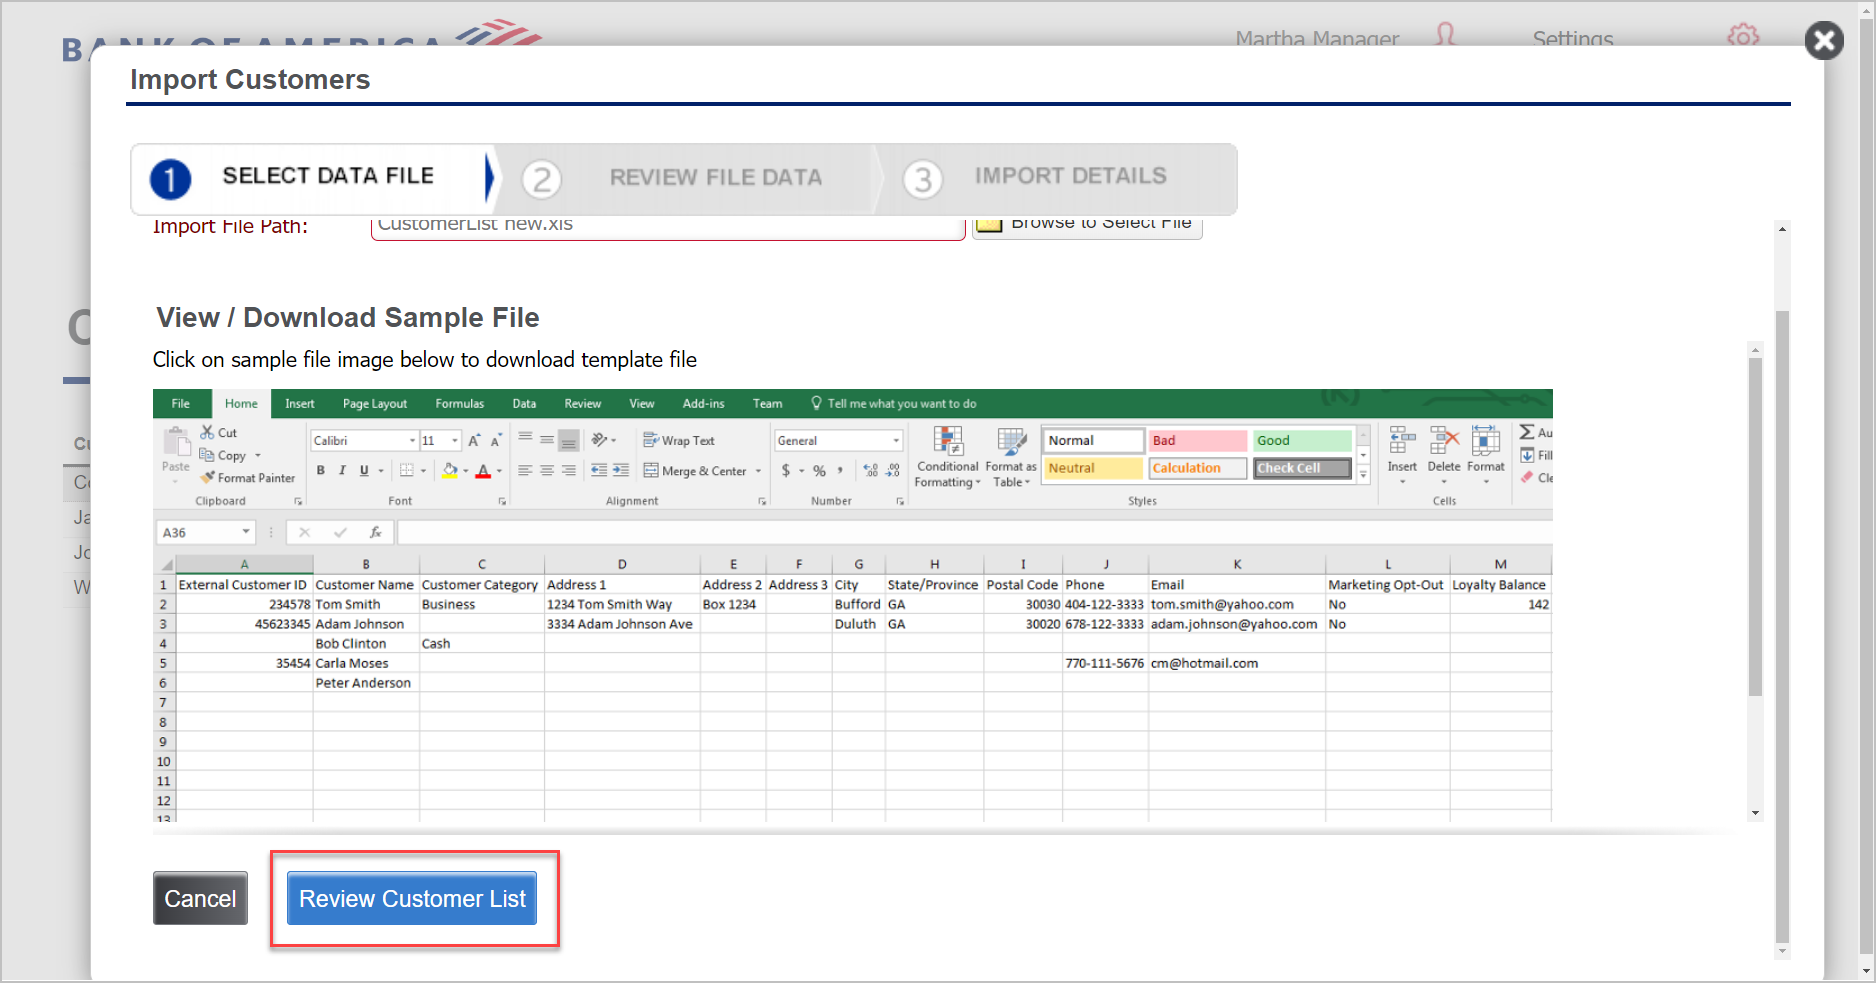
- Click Browse to Select File, select your customer data file and click Open.
- Click the Review Customer List button at the bottom of the screen and review the data in your customer file when it displays on the screen. Make any edits to the data on the screen.
- Click the Import Customer List button at the bottom of the screen. The system will then display a message that indicates the number of customers you are about to import.
- Click Yes to start the import. When the import is finished, the Import Details screen displays the results of the import, including the number of customers that were successfully imported and the number of customers that could not be imported.
- Review the customer records that were not imported, so you can make the necessary corrections to your customer data file and import them again.
- Click the Exit button at the bottom of the screen to close the Import Customers page.
- Click the refresh button at the bottom of the screen to display the newly-imported customers in the Customers list.
Add a customer
You can add a customer to your customer list in the Back Office. Additionally, when the prompt is enabled, new customers can be added at the POS during the checkout process.
- To add a customer in the Back Office
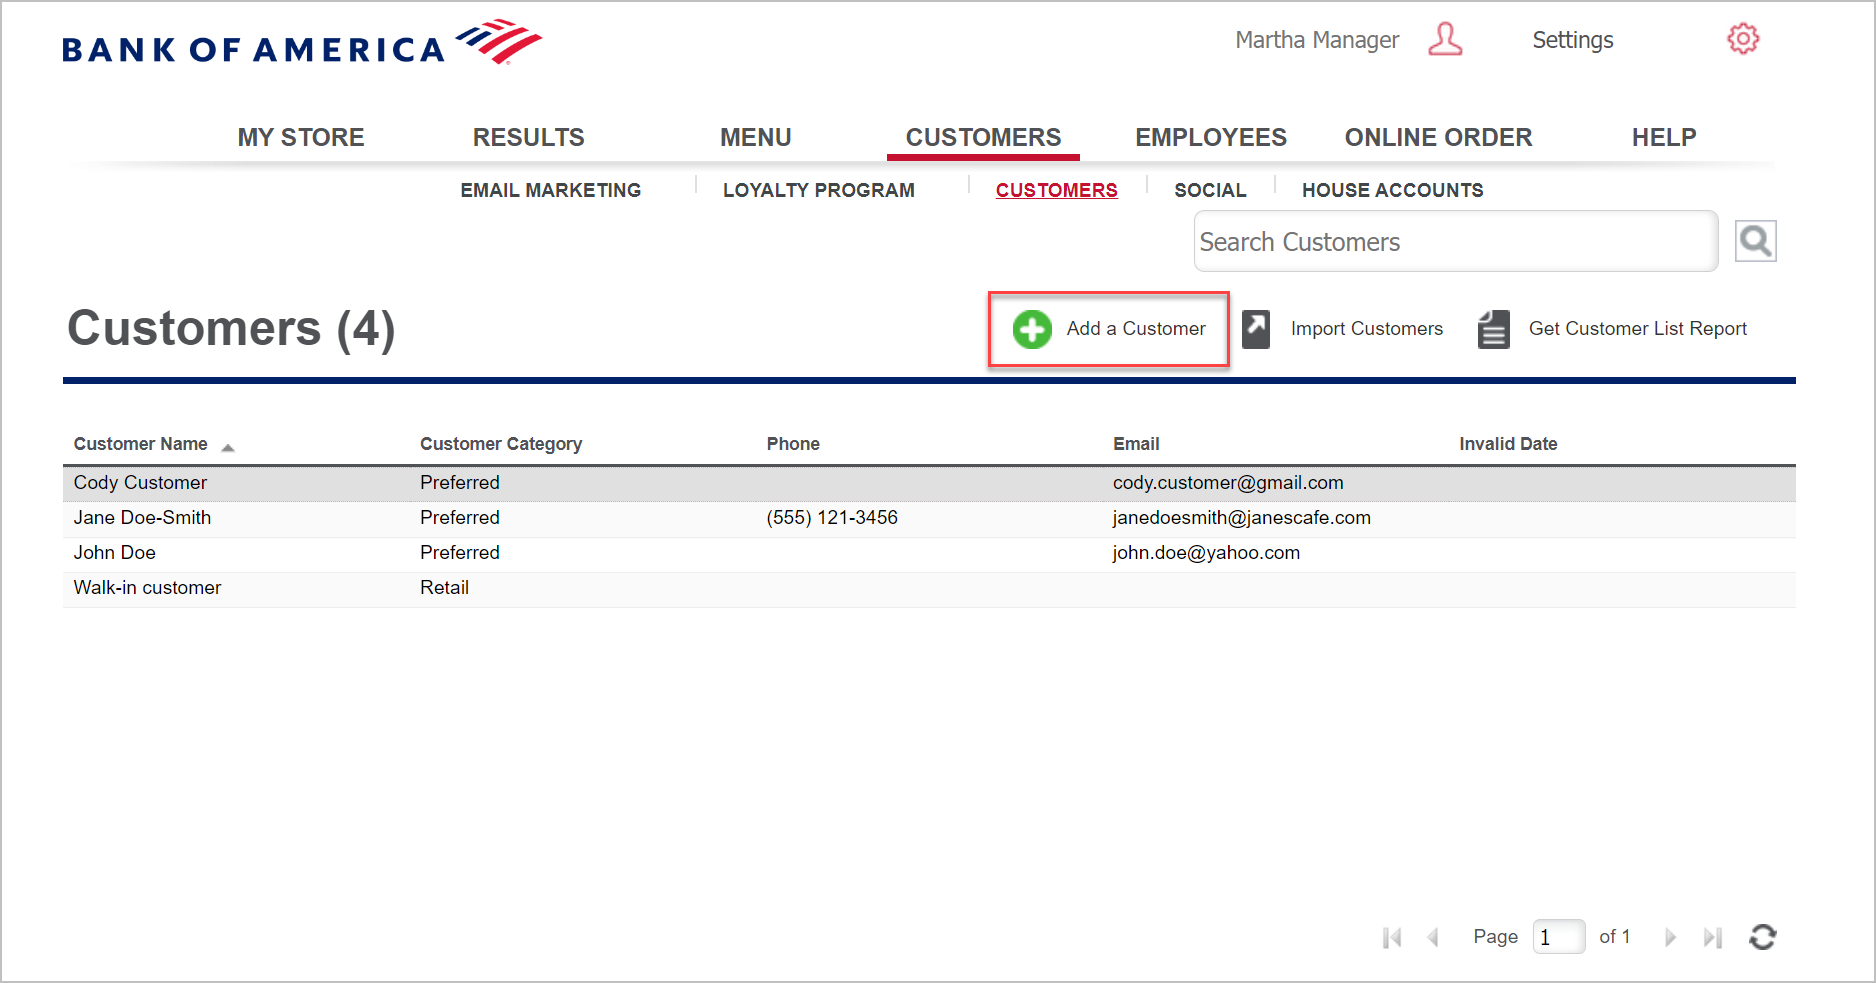
- In the Back Office , select Customers > Customers.
- Click Add a Customer to create a new customer record.
- Enter the Customer Name.
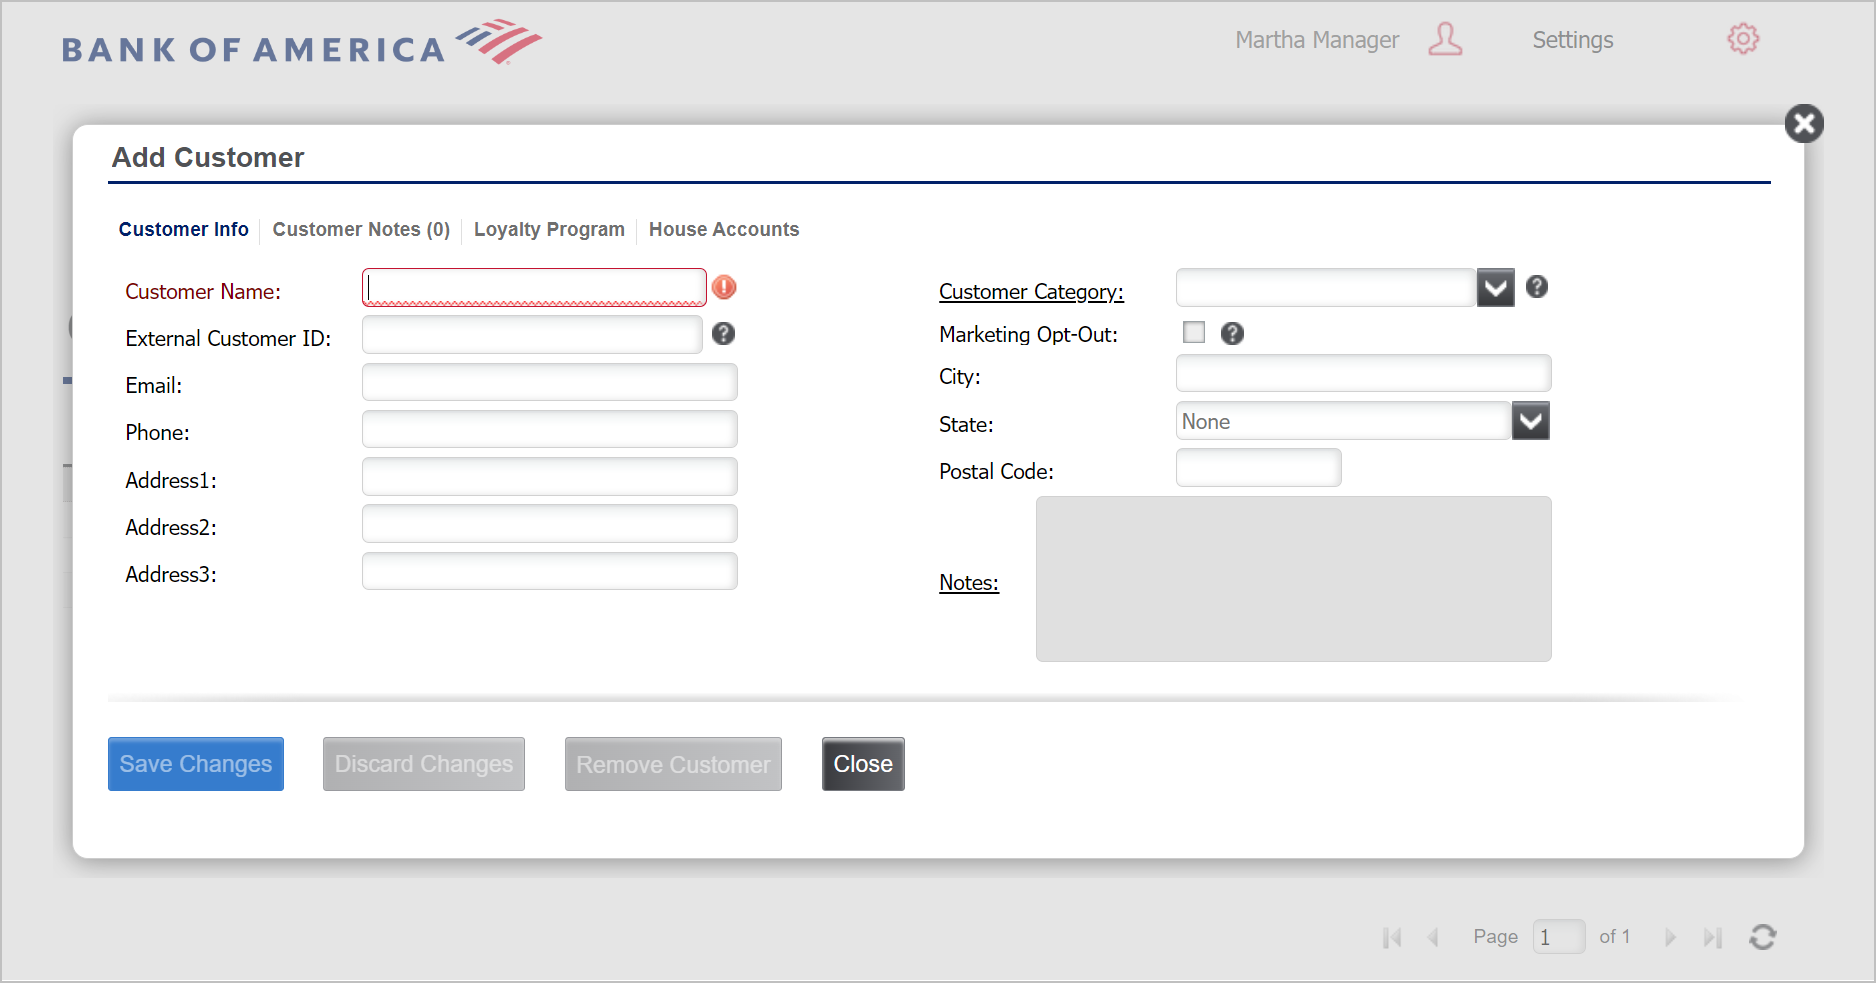
- (Optional) Enter their email address and mailing address information.
- (Essentials/Essentials Light) Enter a birthday and/or an anniversary date for your customer.
- (Optional) Select a Customer Category. See Back Office Customer Category to create customer categories for your business.
- (Optional) Select the Marketing Opt-Out checkbox only if the customer does NOT want to receive email marketing messages from your store.
- (Optional) Click Notes to create a custom note for the customer.

- Click the Save Changes button to save the new customer record.
- Repeat these steps for each customer you want to add.
NOTE
If the customer's email address is highlighted in red, that means that we have detected that it is an invalid email address. The date that the system last attempted to send an email to that email address can be found in the Invalid Date column. Look at the email address to make sure it has a valid format.
Edit or remove customers
You can edit an existing customer as needed. Removing a customer is a "soft delete". This means that although the customer is removed from your view, all the data and activity associated with that customer is still shown in reports, transactions, etc.
- To edit or remove a customer from your customer database
- In the Back Office , select Customers > Customers.
- Select a customer.
- Do one of the following:
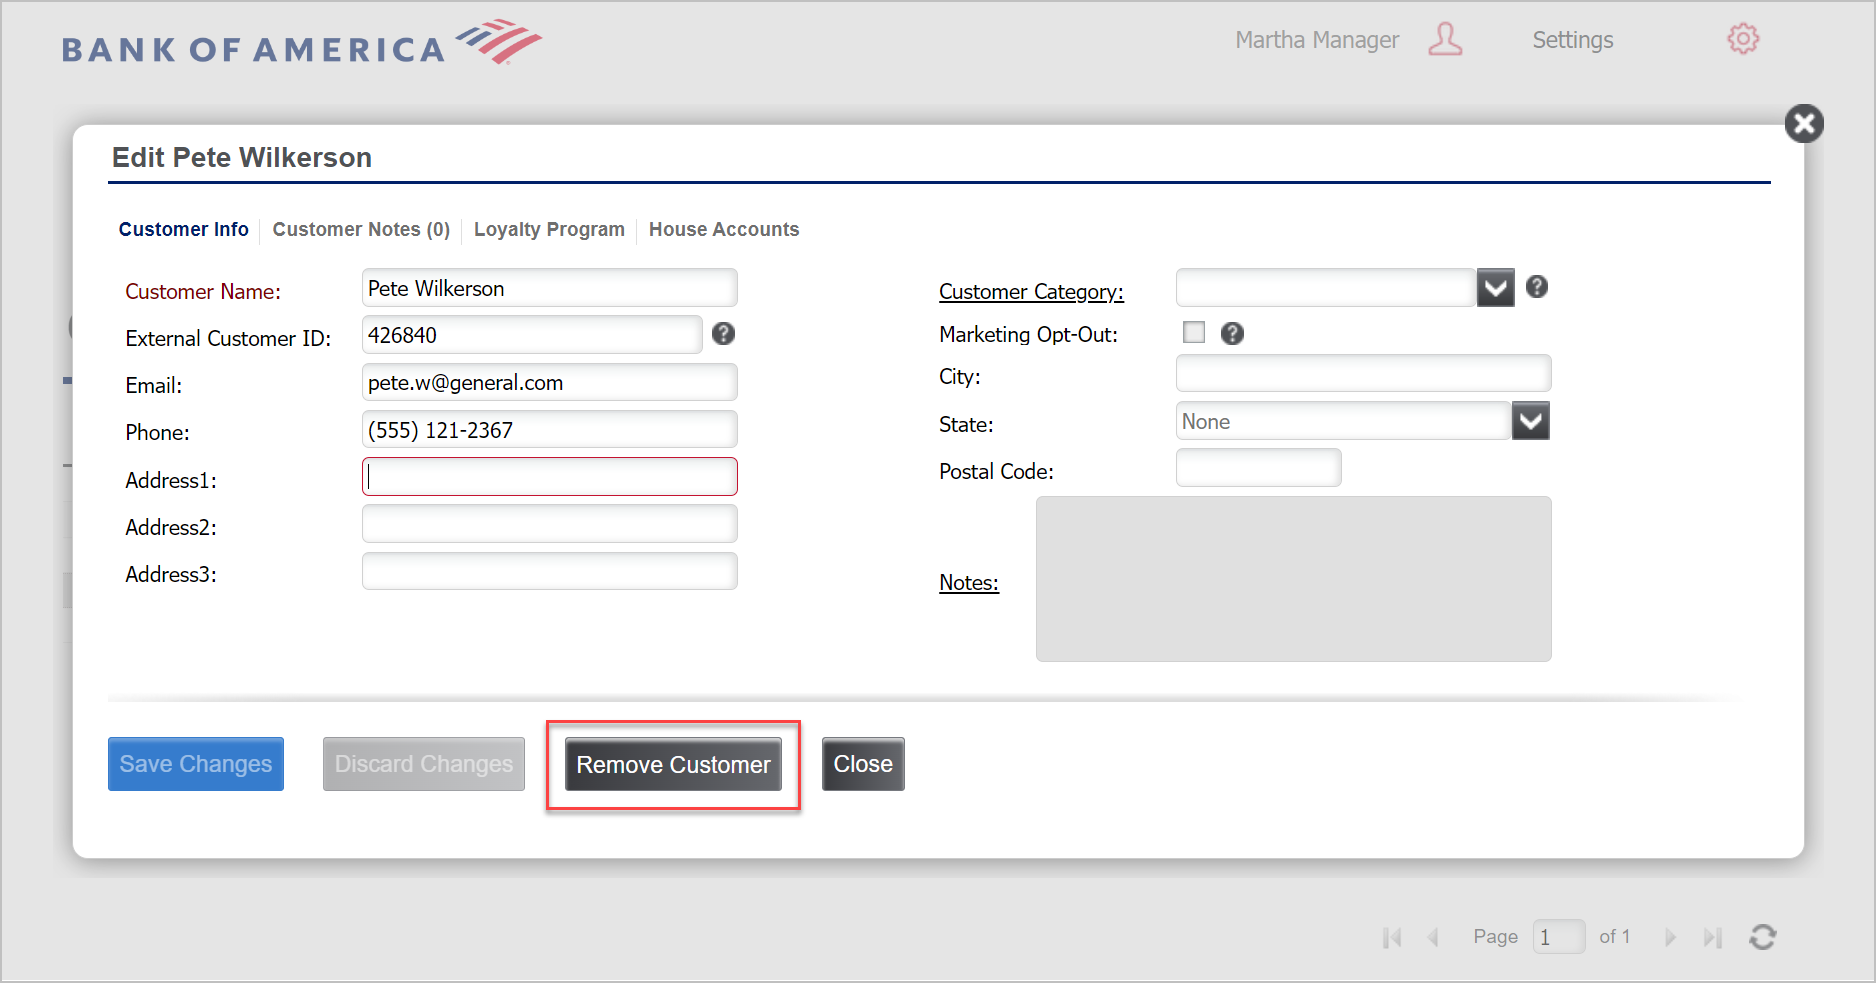
- Make any necessary changes to an existing customer's information. Click Save Changes when you are done.
- To remove the customer, click Remove Customer and then click OK to confirm. If the selected customer has any sales activity, the system will let you know.
NOTE:
If your user role is enabled for bulk customer delete, you can select multiple customers and remove them at one time.
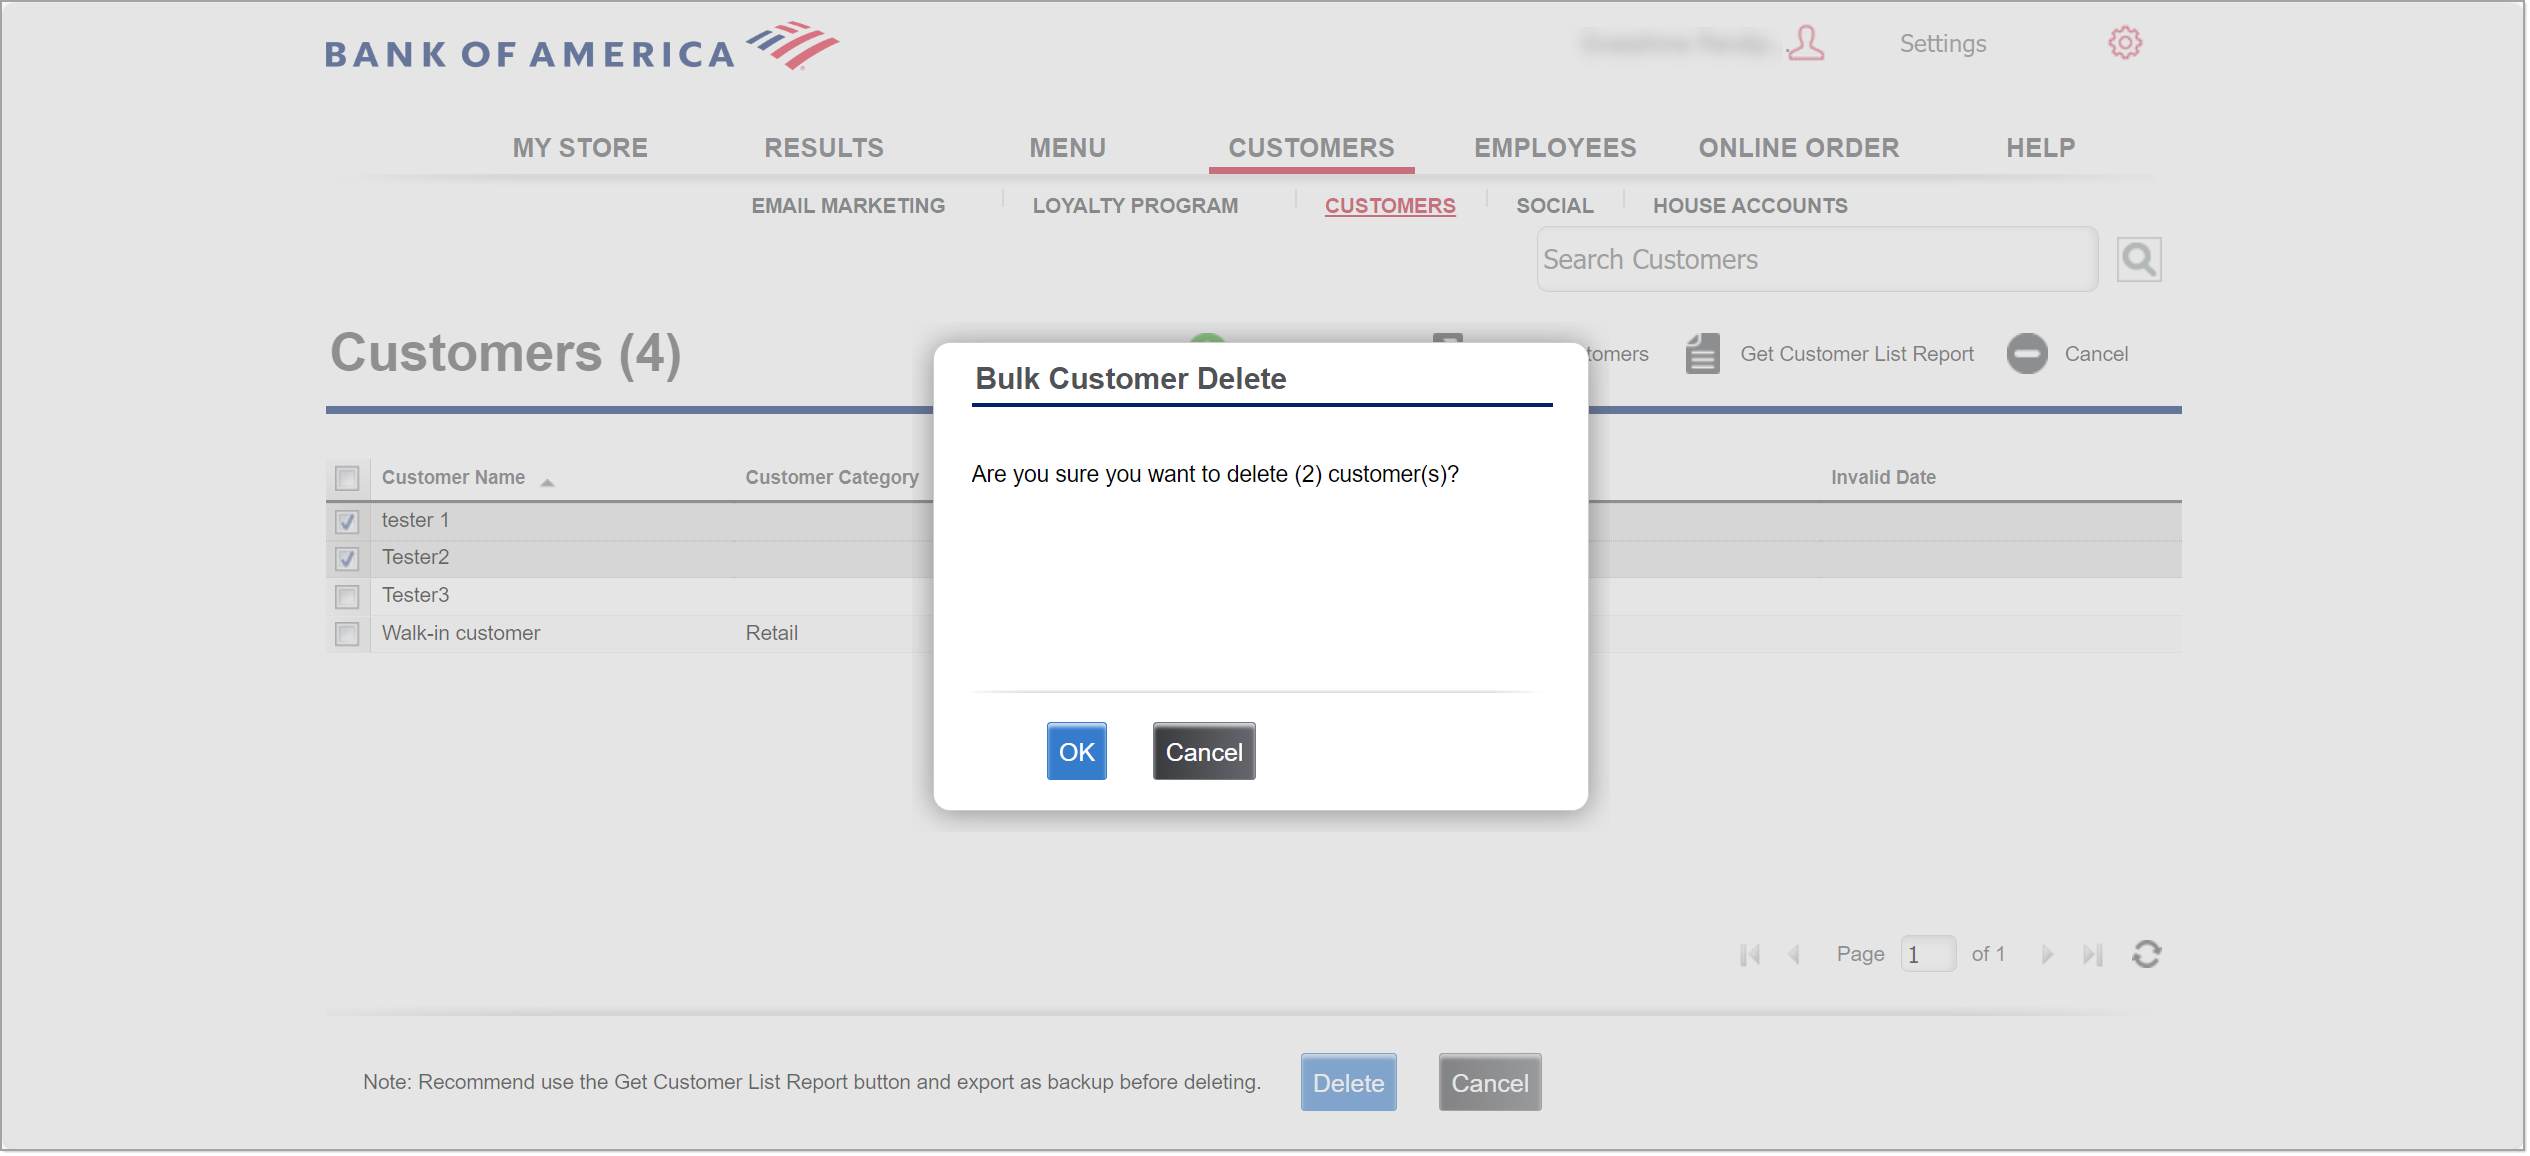
- To bulk delete customers
- In the Back Office , select Customers > Customers.
- Select the Select Customers button.
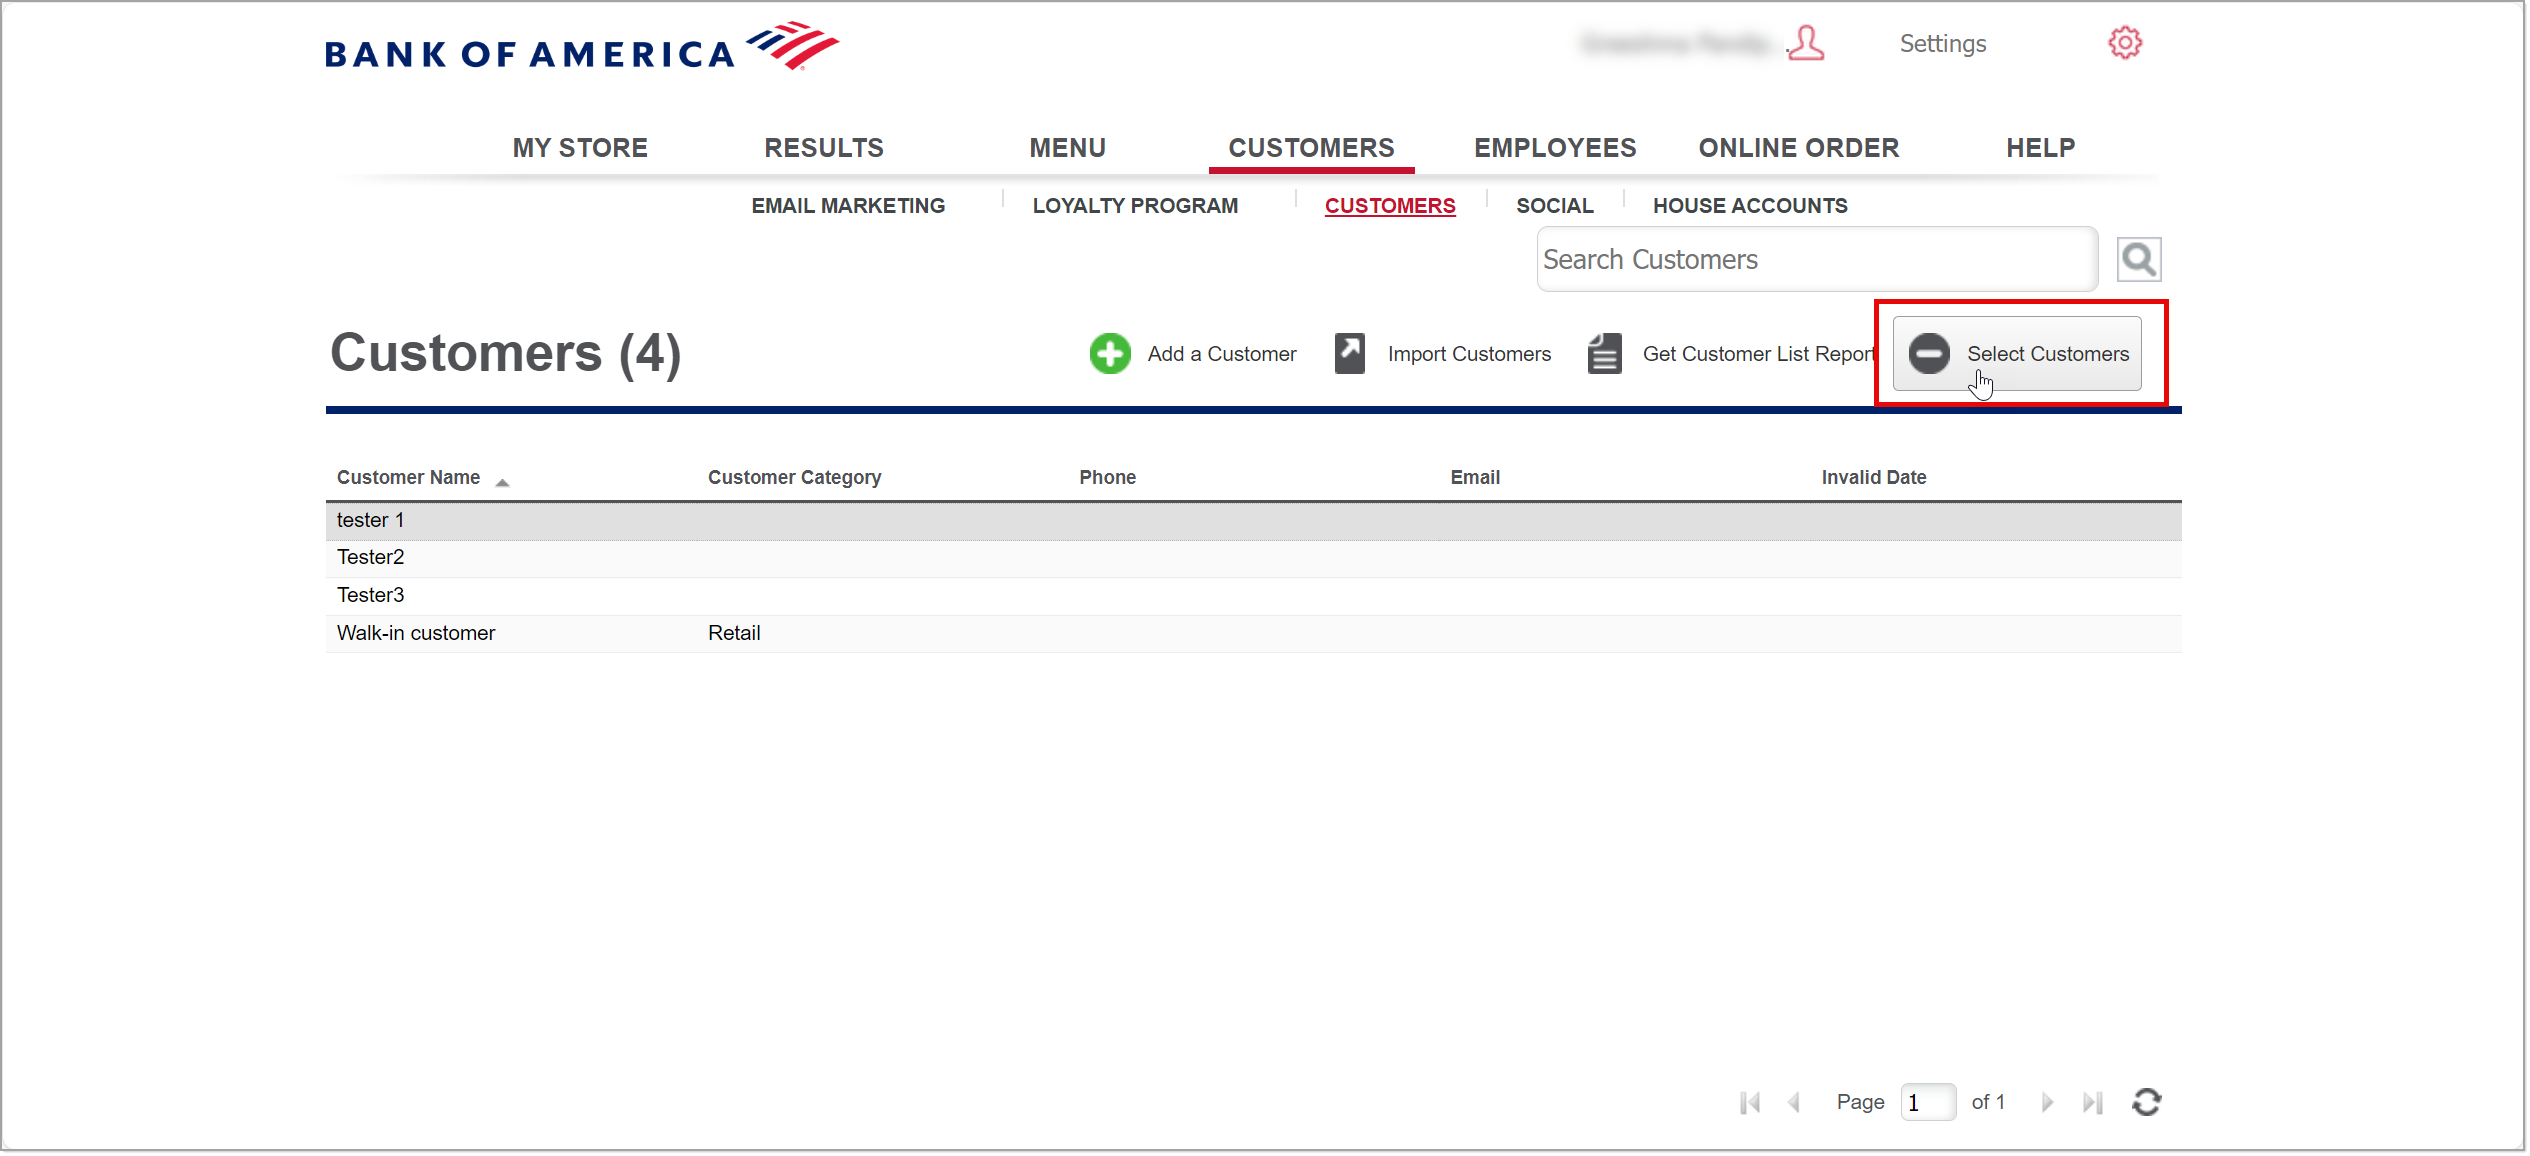
- Select the checkbox for each customer you wish to remove.
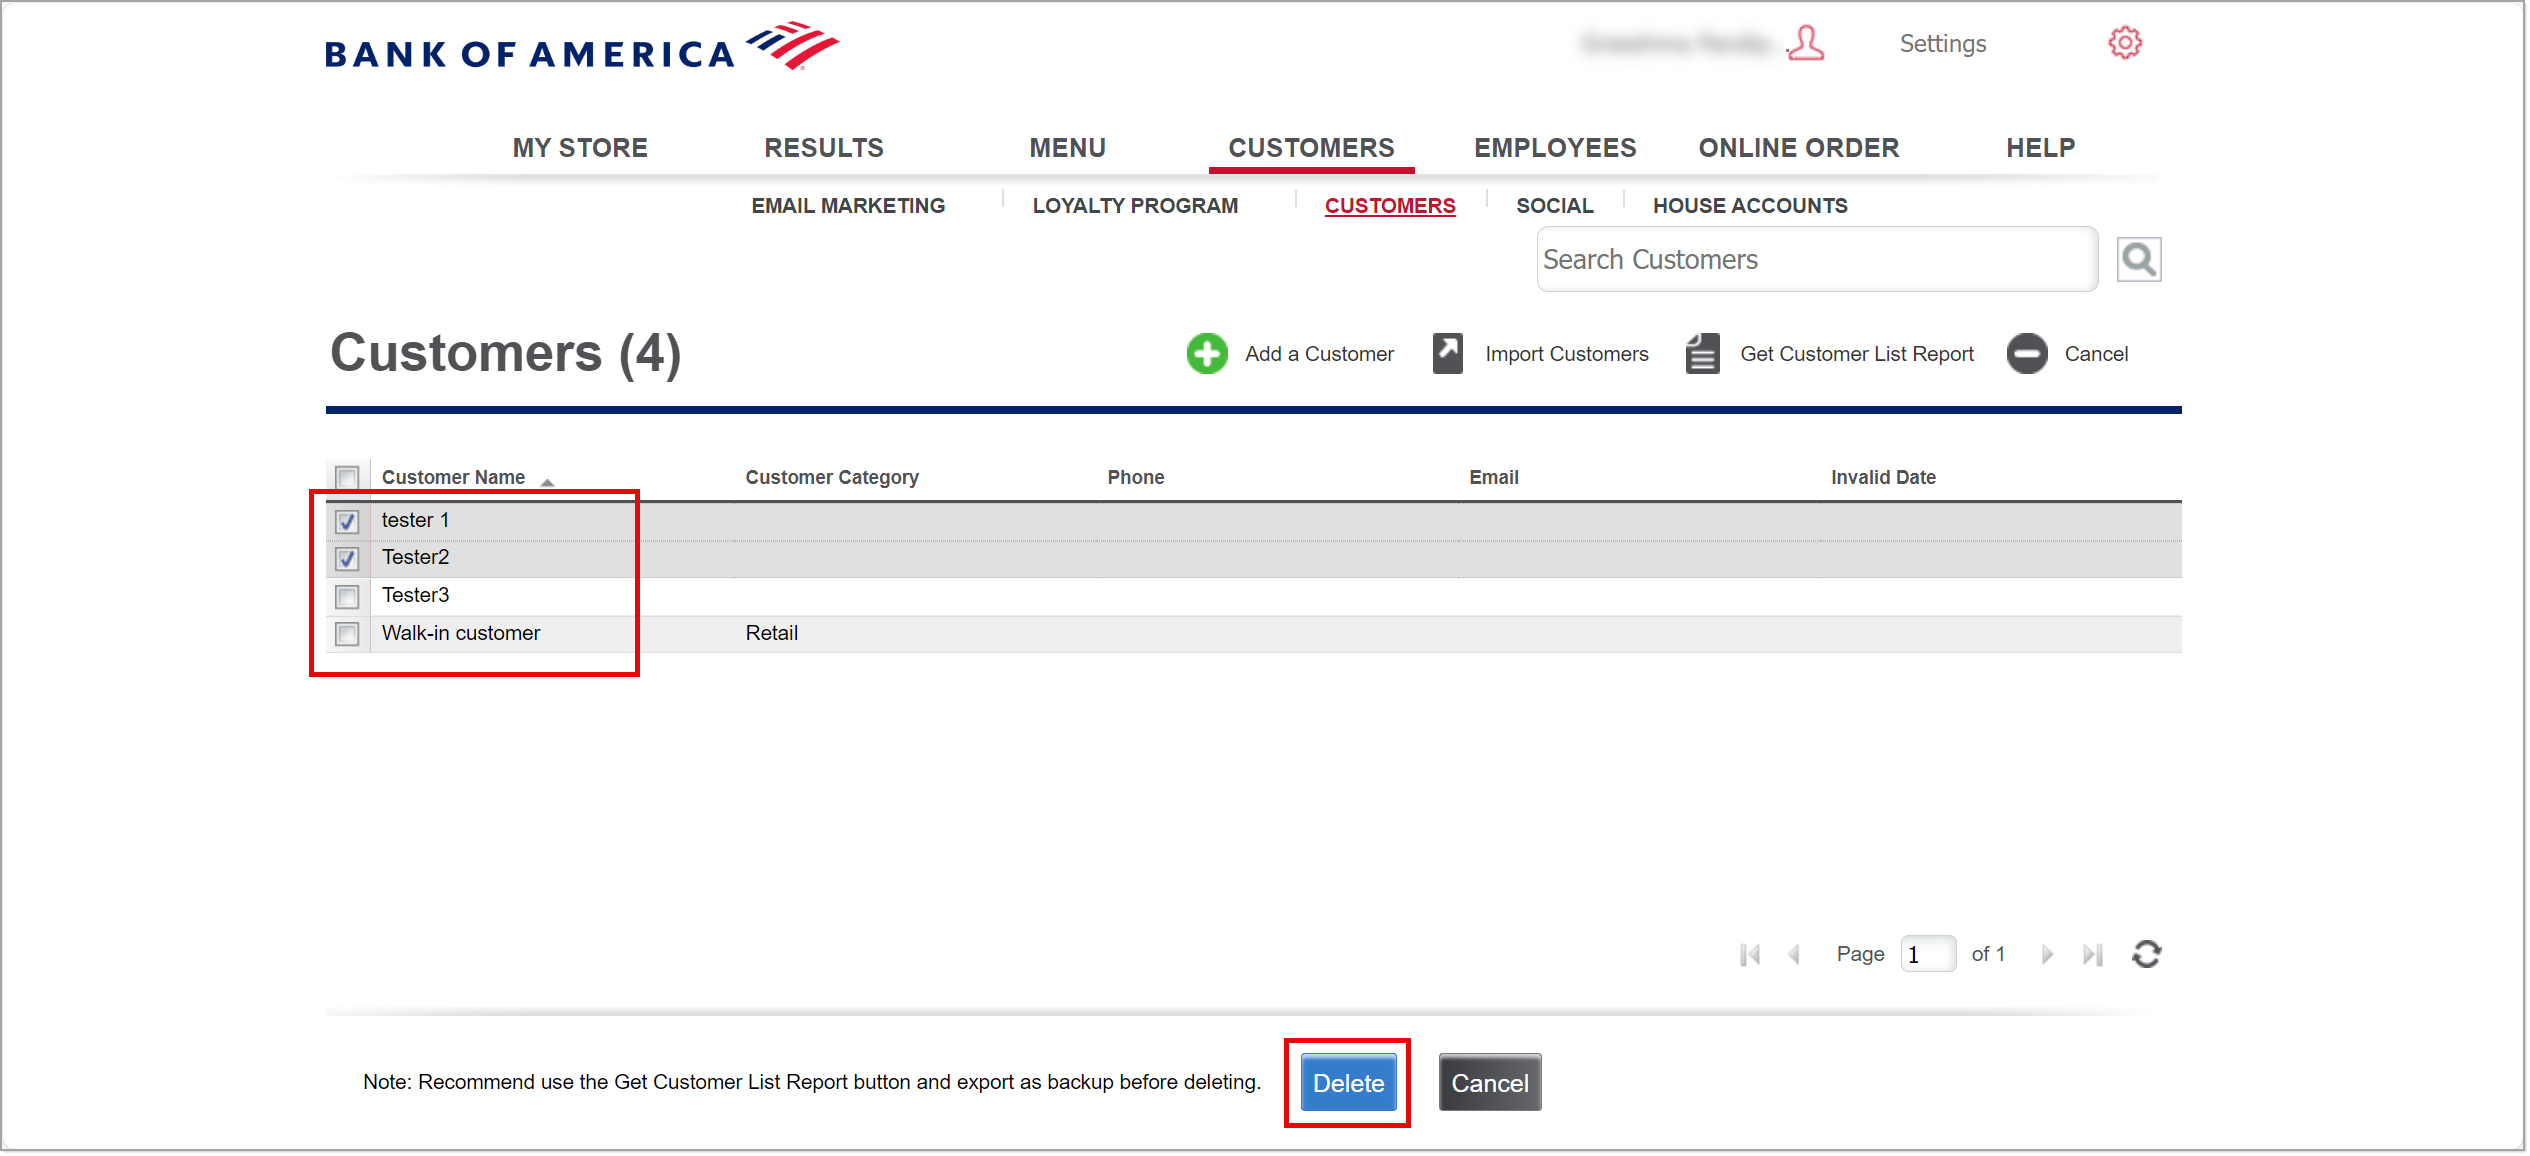
- Click Delete, then click OK to confirm the Bulk Customer Delete.