Kitchen Display Solution (KDS) Setup for Restaurant Solution
Description
What's in this article?
Solution: Restaurant
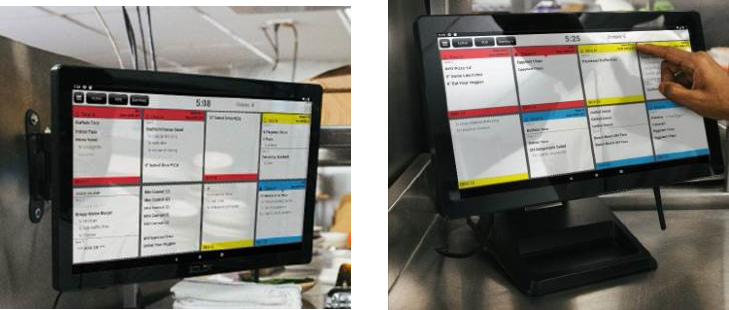
The Kitchen Display Solution (KDS) integrates with your Restaurant POS account in order to digitally display order details to your kitchen staff. Instead of a printer or hand written chits, the KDS follows the kitchen routing configured in Back Office to send the order to the display so kitchen staff have full details for the items to prepare. The KDS supports multilingual order items and indicates order aging. The kitchen staff can touch the display or use the bump bar to mark an order complete or to "bump" the order to work later.
You need the following to run KDS with your Restaurant Solution:
- Restaurant Solution point of sale with a connected Primary POS server. This is the E-series terminal that is acting as the server for the other devices in your Restaurant Solution
- Kitchen Display screen
- Kitchen Display Solution app that comes pre-installed on your Kitchen Display screen
- A stable, password-protected network with internet access
- Access to the Back Office for kitchen routing setup
- Menu items associated with a kitchen routing group
Expect a setup call from our Merchant Activation and Training Team
The Merchant Activation and Training team will be calling to assist you in configuration of the KDS to add the device to your system.
What's in the box?
There are two kitchen display screen model options: the K2160 with a 16" display and the K2220 with a 22" display. The KDS comes preloaded with the KDS application, which connects to your Restaurant Solution point of sale.
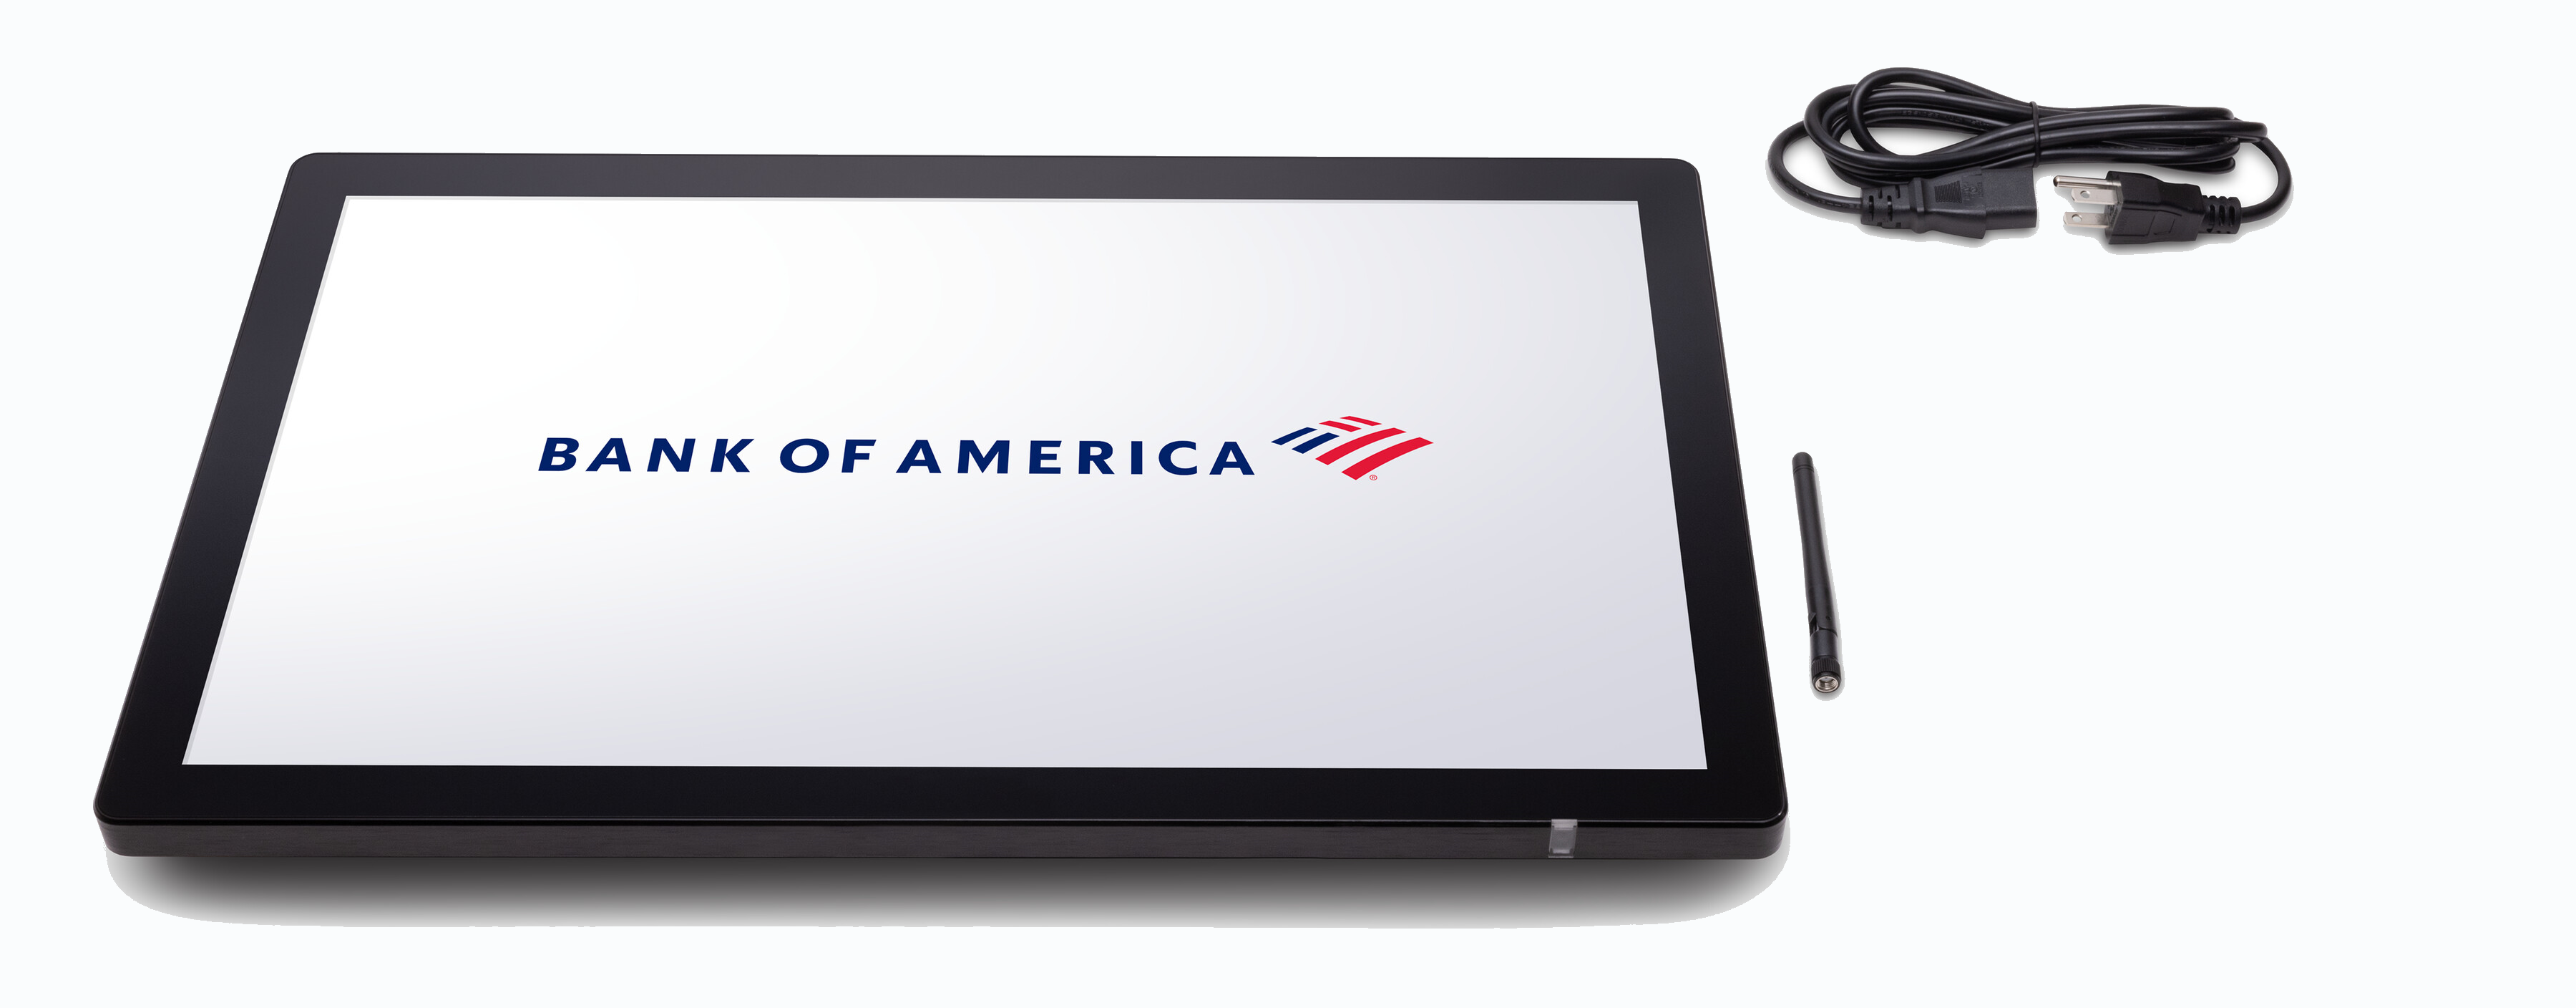
You will receive the following for each display:
- 1 Display
- 1 AC power cable
- 1 external antenna
- 4 backup screws
Optional table or wall mounts are sold separately.
1. Configure Back Office
Complete kitchen routing configuration in your Restaurant Solution Back Office to add the KDS Display prior to installing the KDS Display and registering the application.
2. Install the KDS
After completing the Back Office configuration, you will be ready to install the KDS Display. You can choose to connect the KDS to your network via either wireless or Ethernet connection. An antenna to improve wireless signal is provided with the display. Installation is the same for both models of Kitchen Display.
- To set up your Kitchen Display
- Remove the display from the box and place it face down on a level, protected surface. The foam padding that covers the KDS in its box can be used to protect the screen.
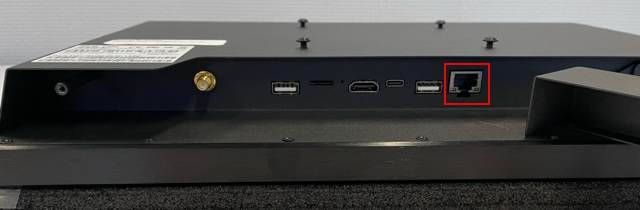
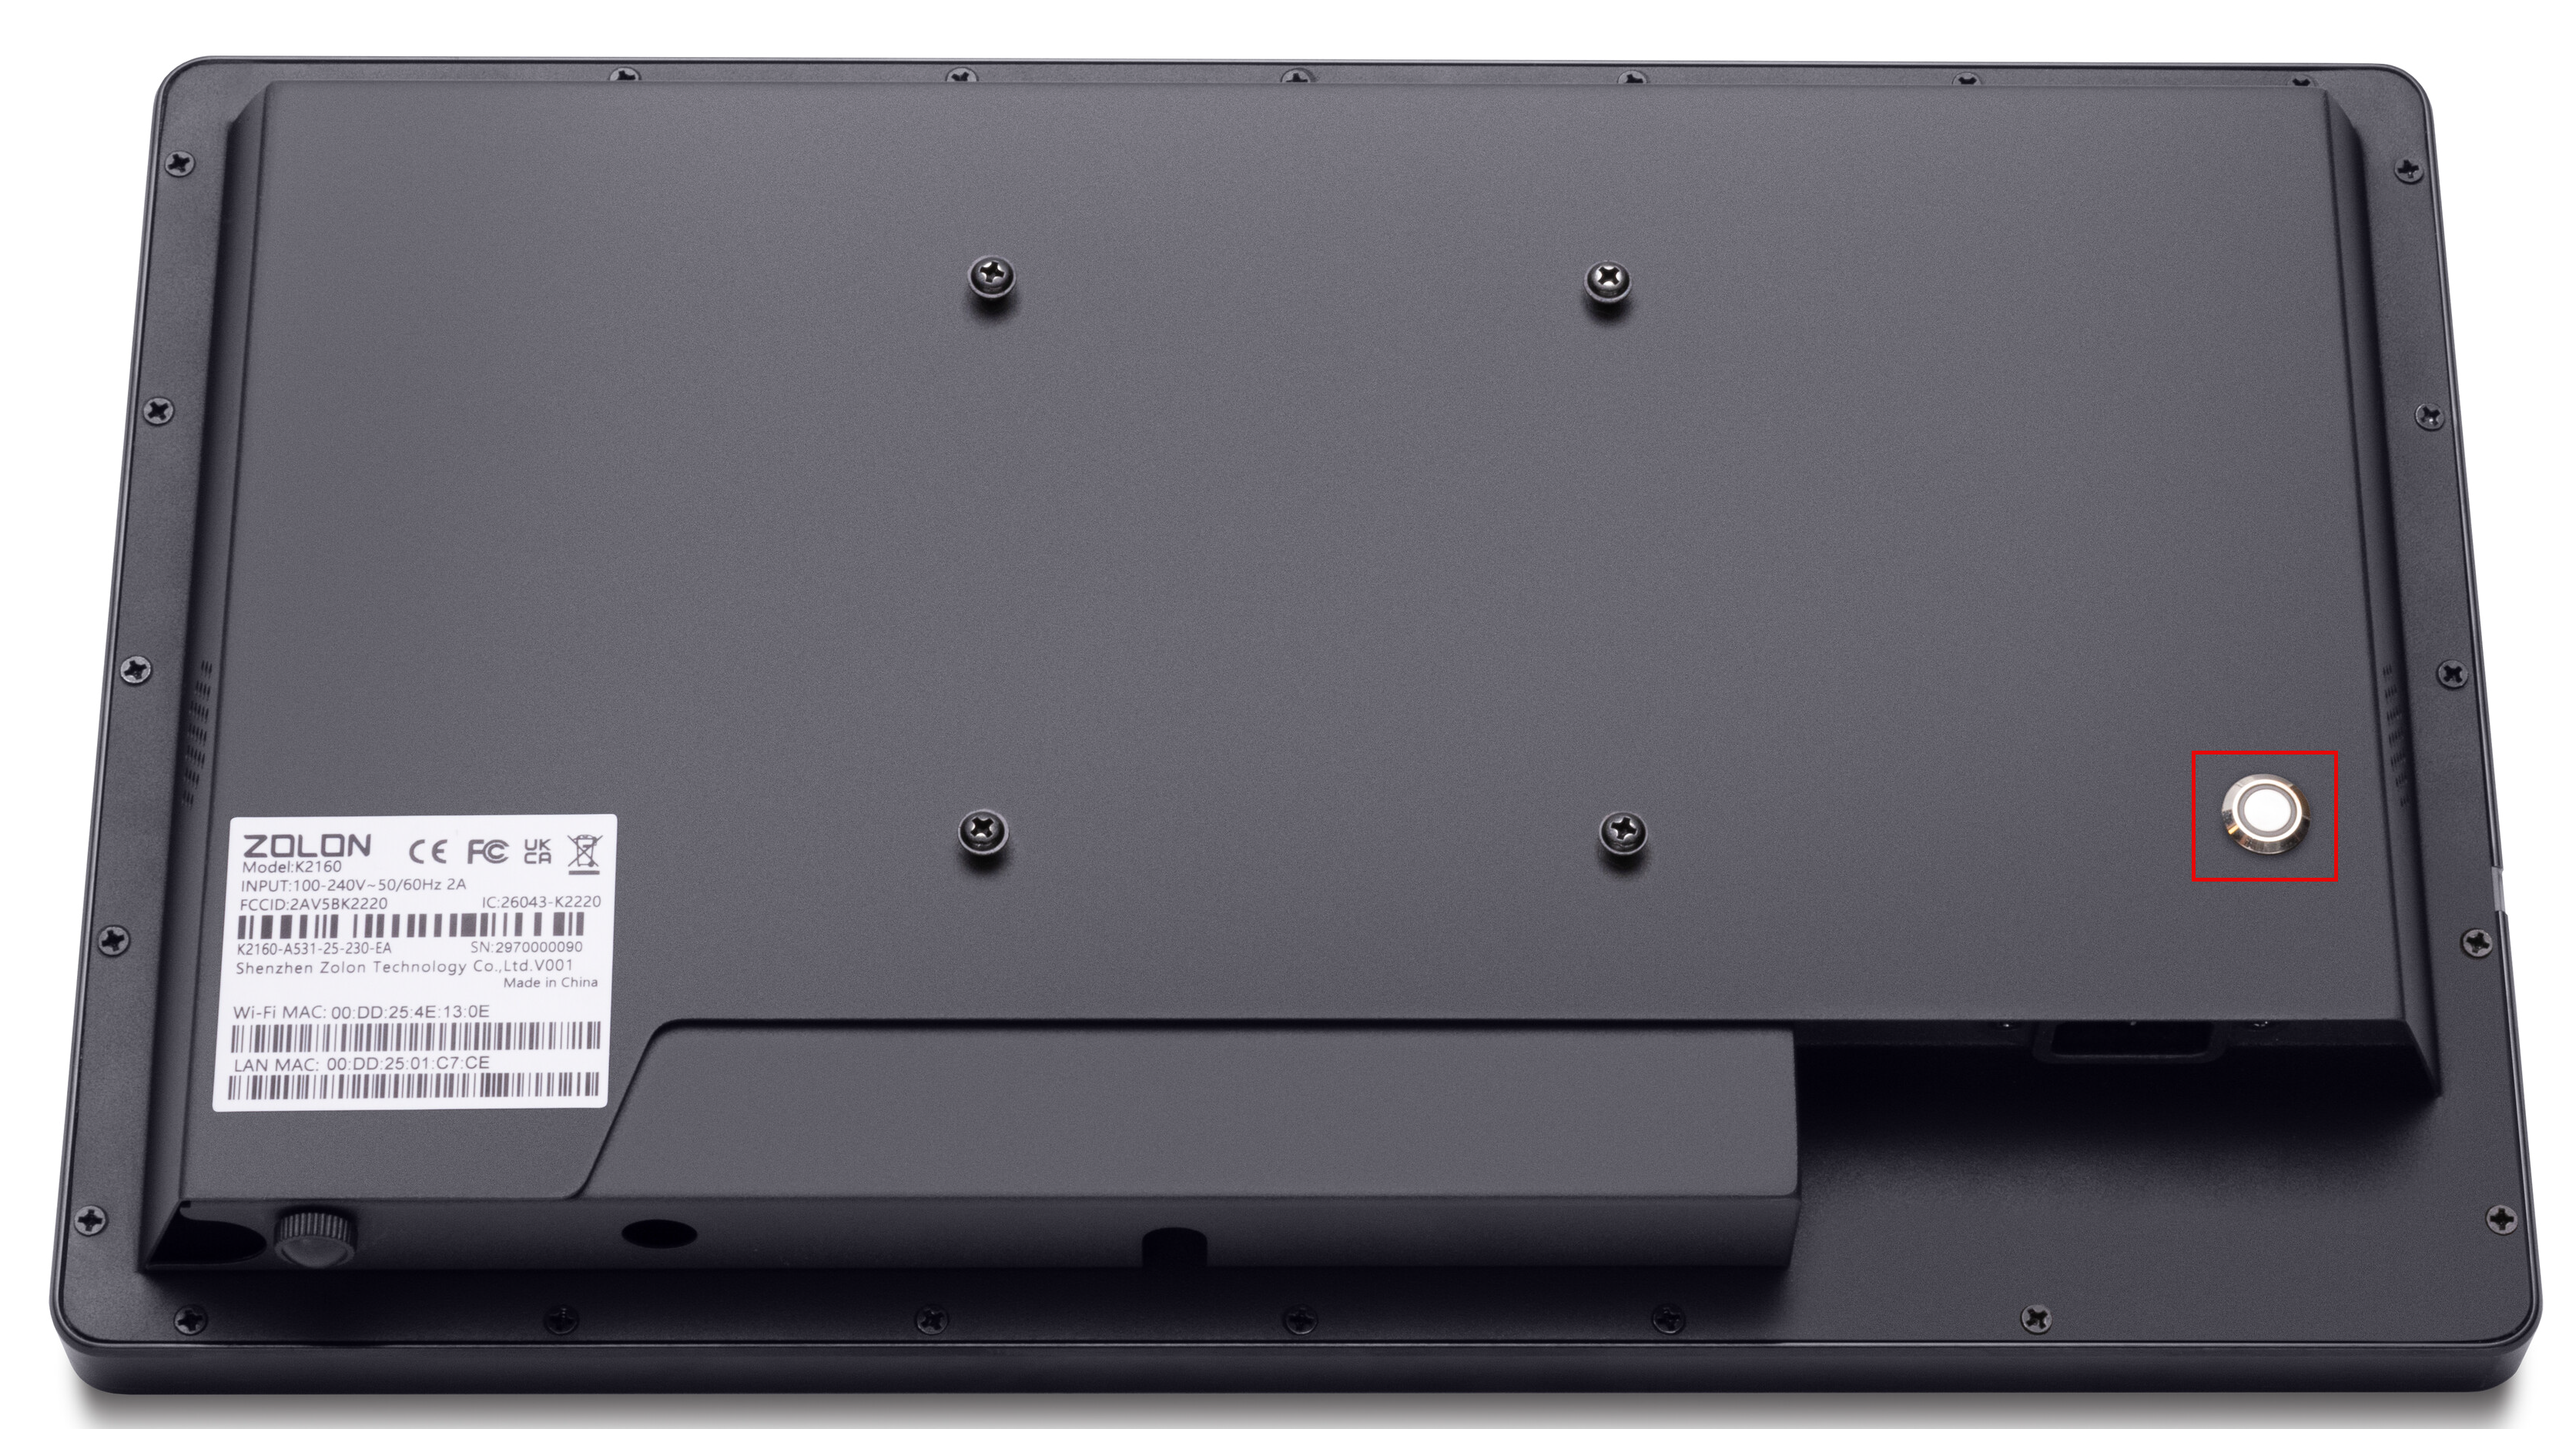
- On the back of the display, plug the AC power cable into the display power port on the bottom right side.
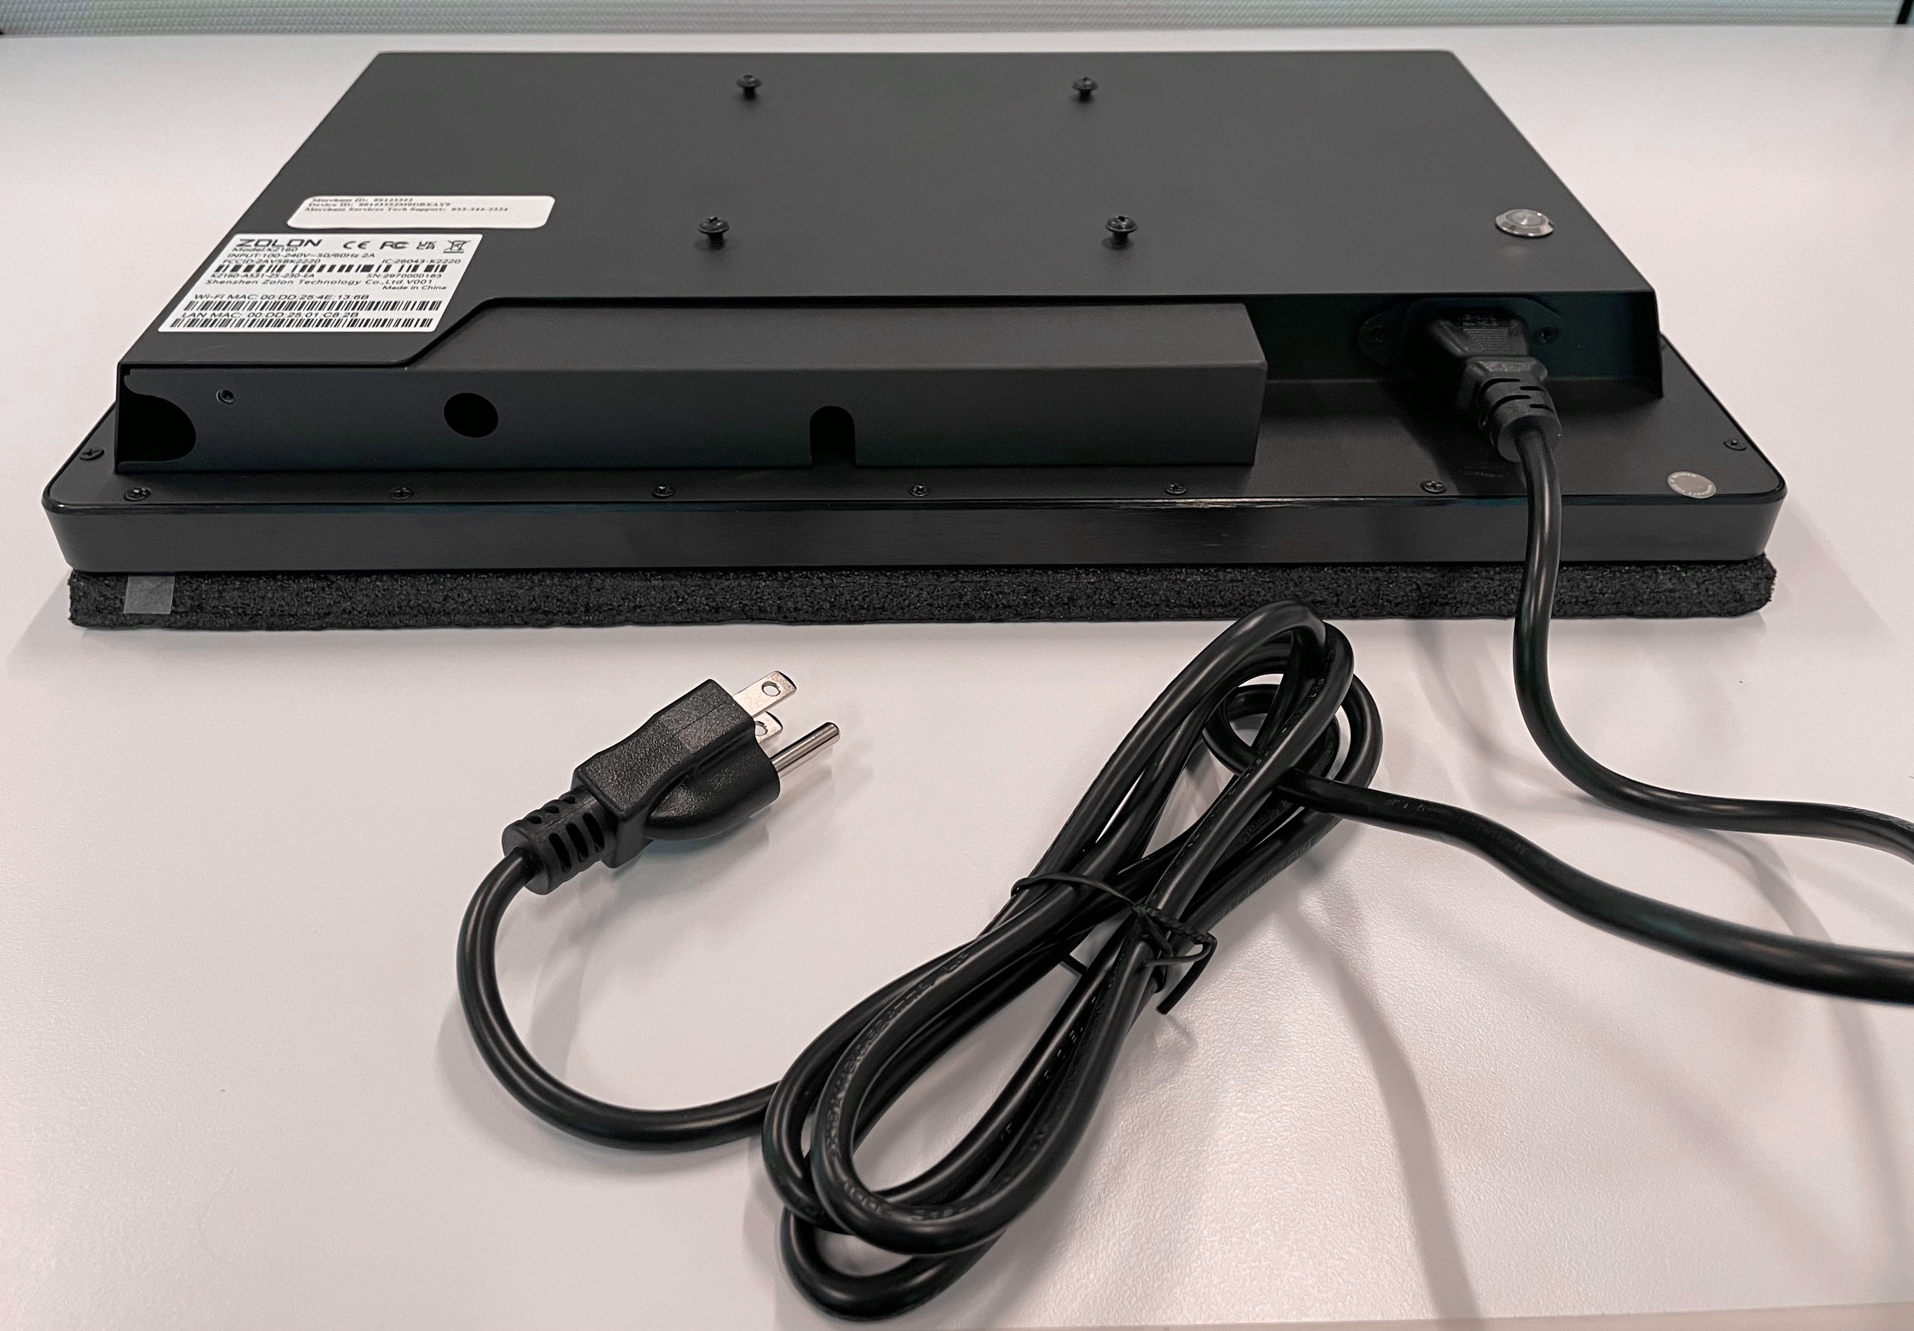
- Remove the hand screw at the corner of the interface baffle to swing out the baffle.
- (Optional) If connecting the display screen to your network using Ethernet cable, insert the Ethernet cable into the RJ45 Ethernet port until the retaining clip clicks into place.
- (Optional) If using a wireless connection, attach the antenna, then bend the antenna slightly to route it through the hole in the baffle. Your antenna is packaged separately in the KDS shipping box.
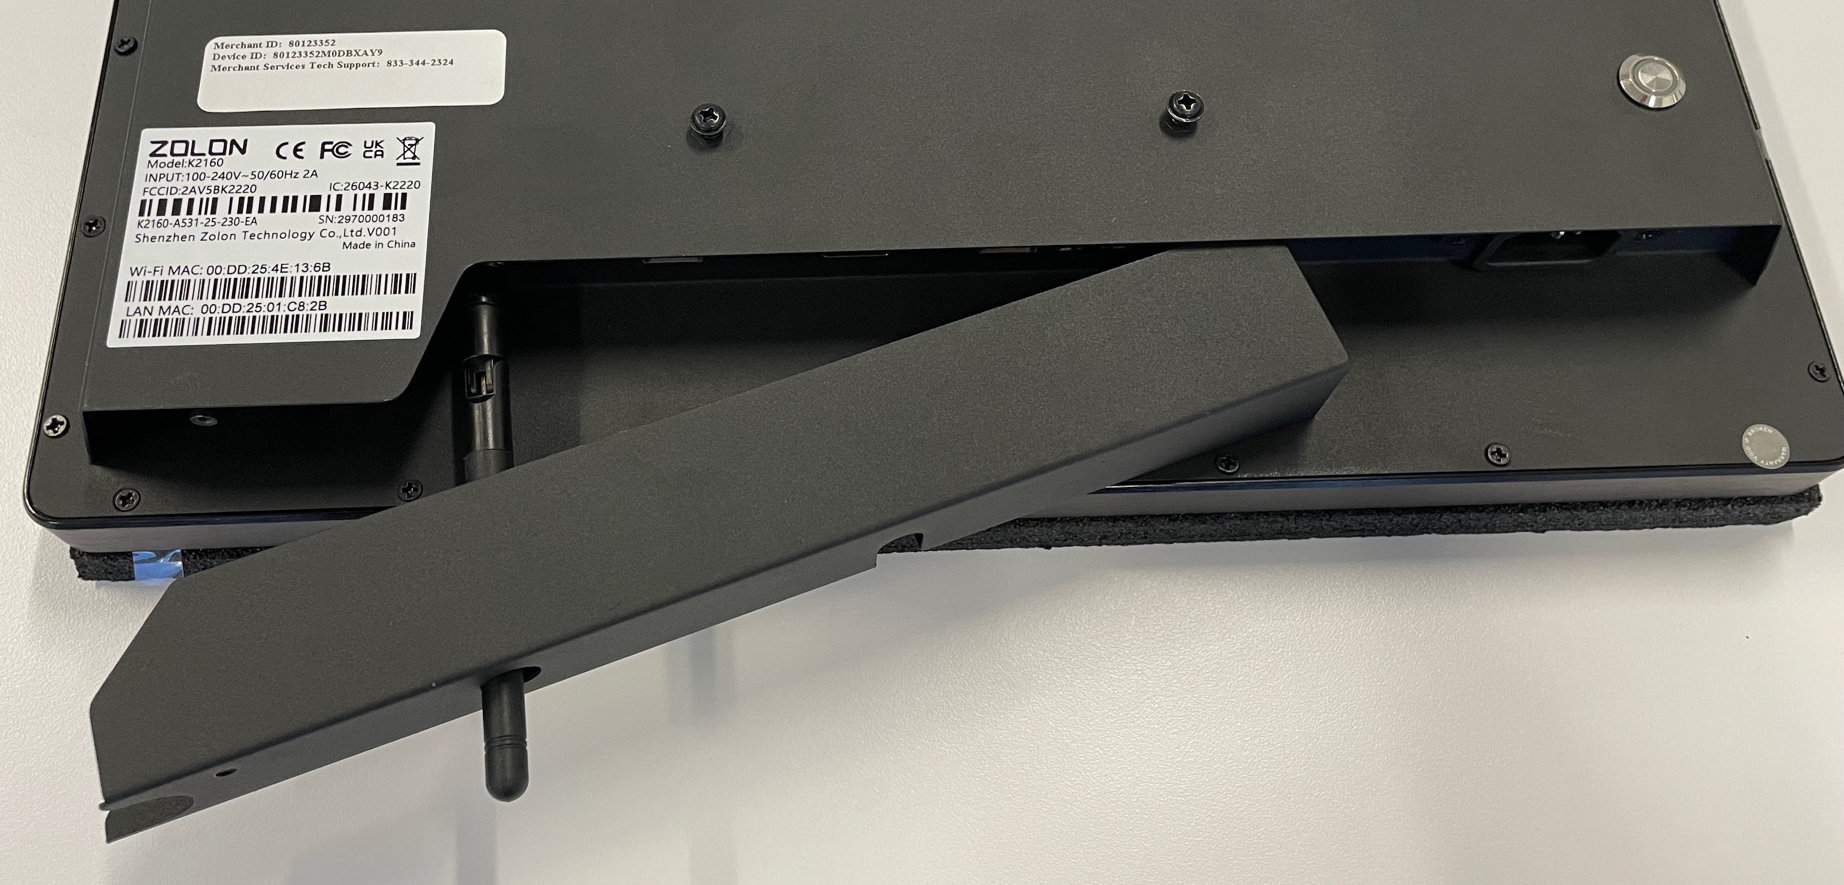
NOTE: If you will use the desk mount for your Kitchen Display, the antenna is flexible and may be bent to fit inside the baffle.
- Close the interface baffle, routing the cables out of the openings at the side of the baffle, if needed, then screw the cover on with the hand screw.
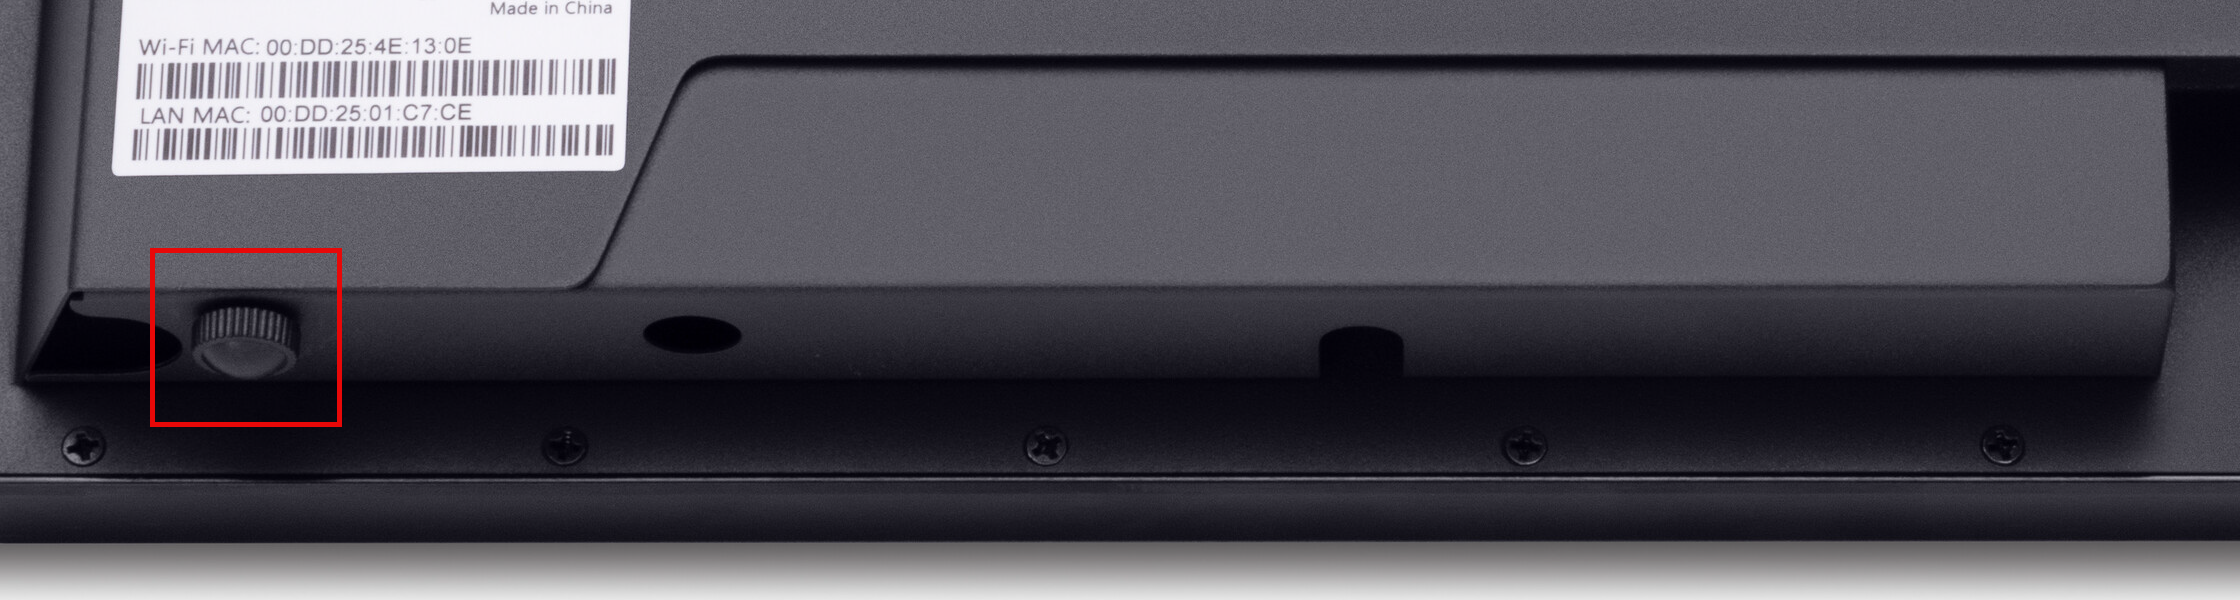
- Press the power button for three seconds until the main screen displays.
- (Optional) If connecting the Display Screen to your network using wireless connection, connect the device to your network:
- To connect Wi-Fi
- On the Display, pull down from the top to open the Control Center.

- Tap Wi-Fi.
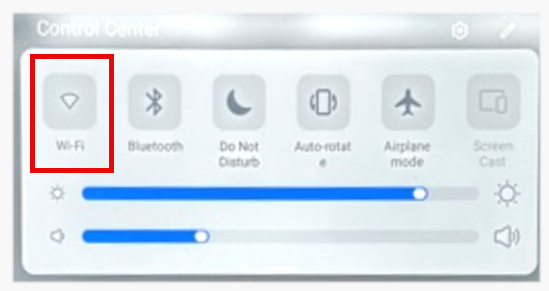
- Tap Wi-Fi to toggle on the Wi-Fi.
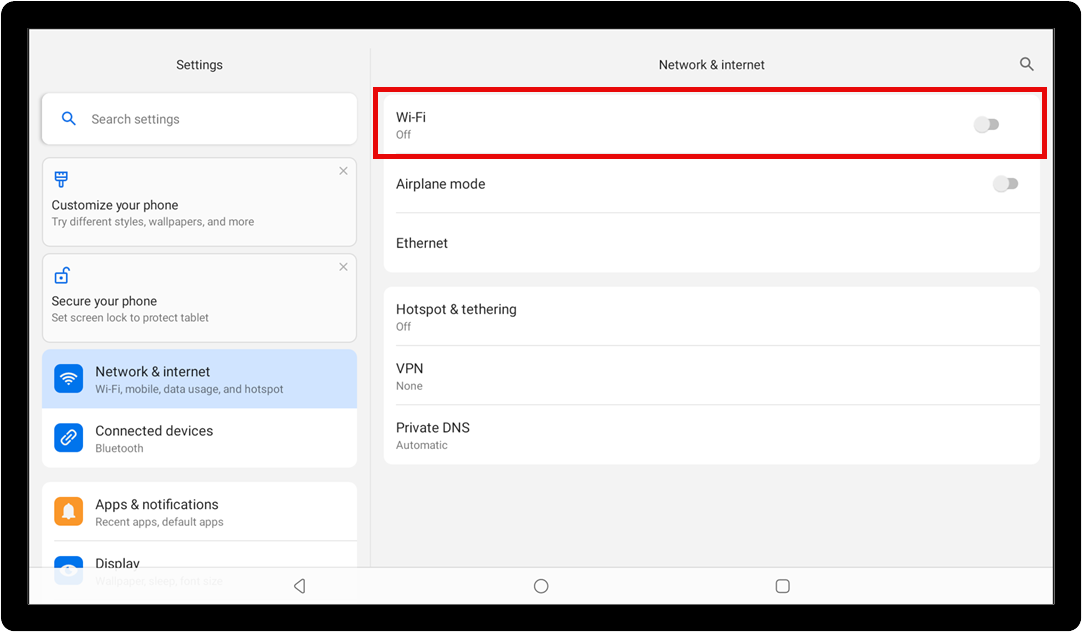
- Select your Wi-Fi network from the available list.
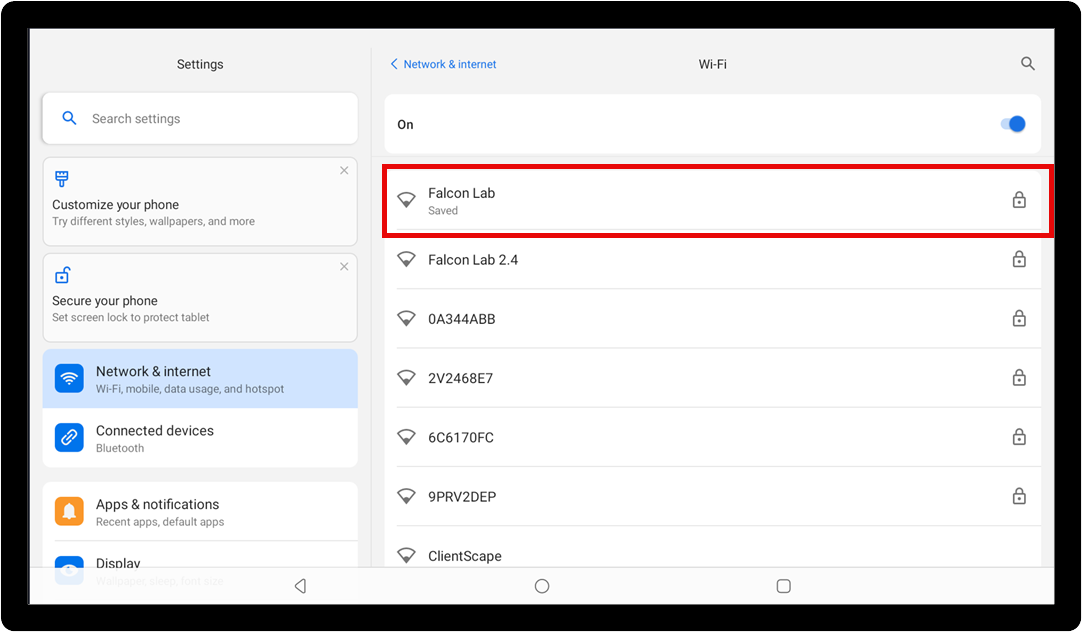
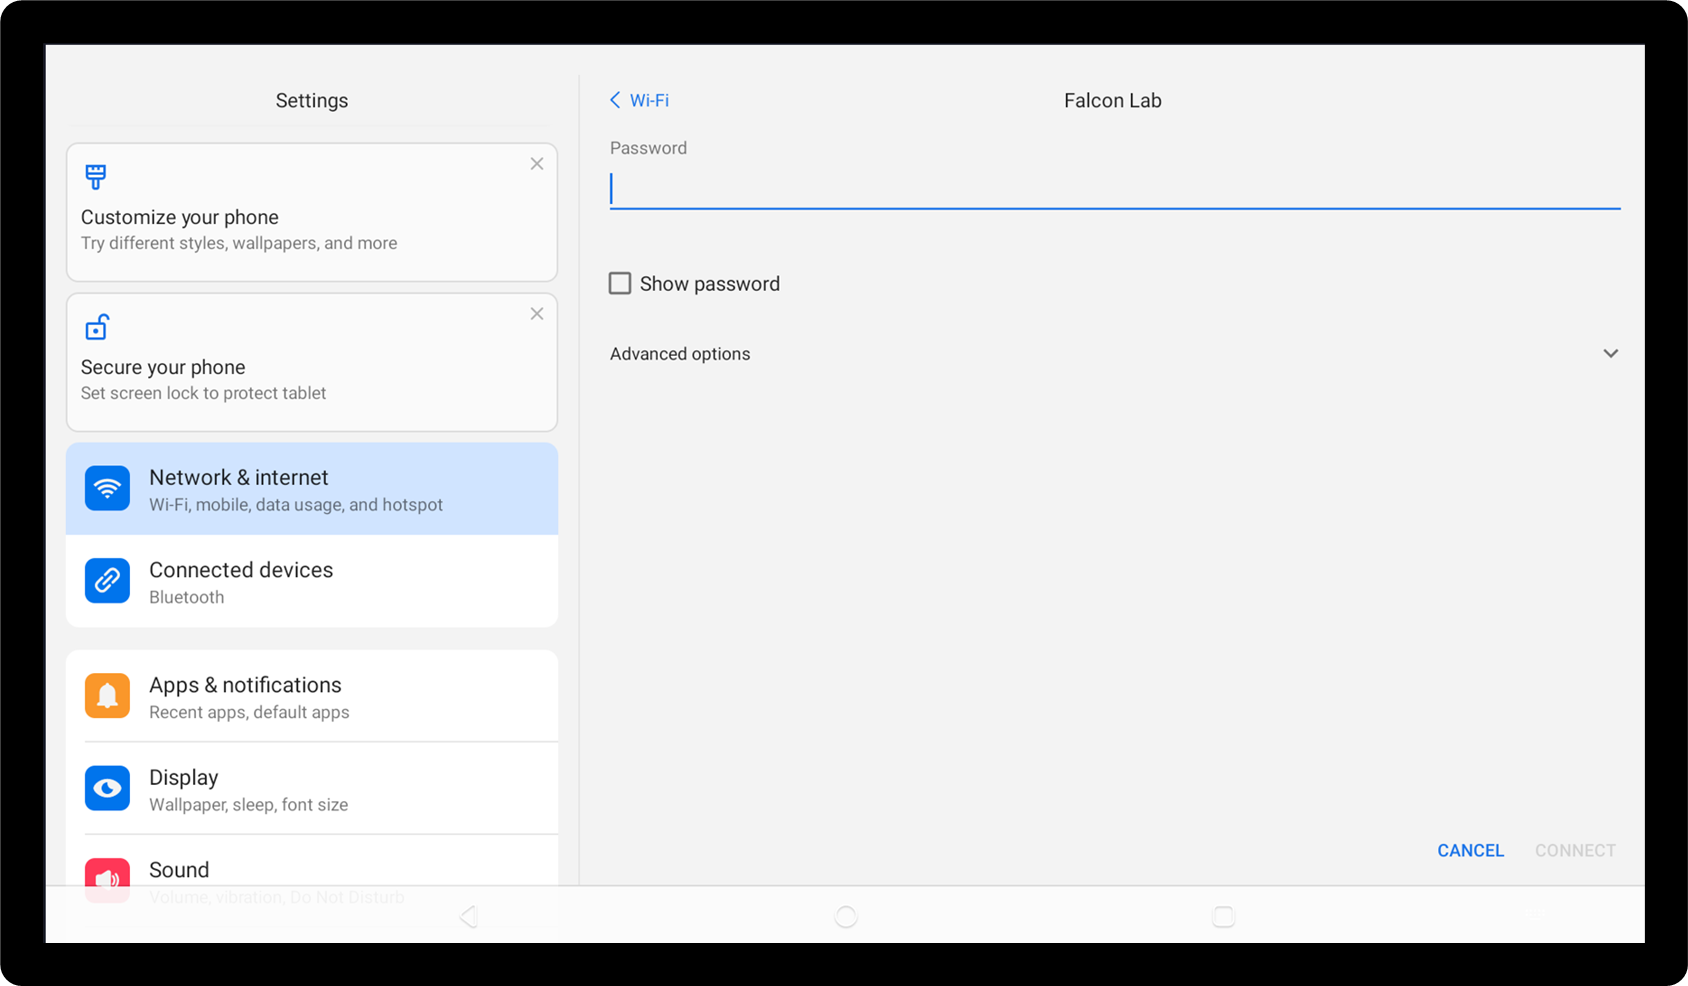
- Enter your Wi-Fi password and tap Connect.
- When connected, tap the circle icon at the bottom of the screen to return to the main screen.
- On the Display, pull down from the top to open the Control Center.
- To connect Wi-Fi
- Install the table stand or wall mount:
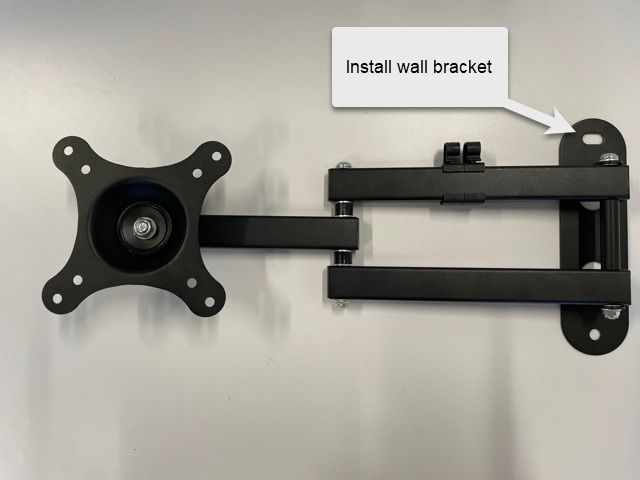
- Wall mount
- Install the wall mount bracket on your wall in the desired location using the provided hardware or hardware appropriate for your wall type. Ensure your wall is able to support the weight of the wall mount and KDS, approximately 22 lbs.
WARNING!
Failure to provide adequate structural strength for this component can result in physical injury and/or damage to equipment. It is the installer's responsibility to make sure that the structure to which this component is attached can support the combined weight of all equipment. Reinforce the structure as required before installing the component. It is the installer's responsibility to mount the hardware with anchors and screws that are appropriate for the wall type. Improper installation can result in serious physical injury. Observe safety measures at all times when installing this product and ensure that proper safety gear and tools are used to prevent physical injury. - Remove the four screws on the back of the KDS display and set them aside.
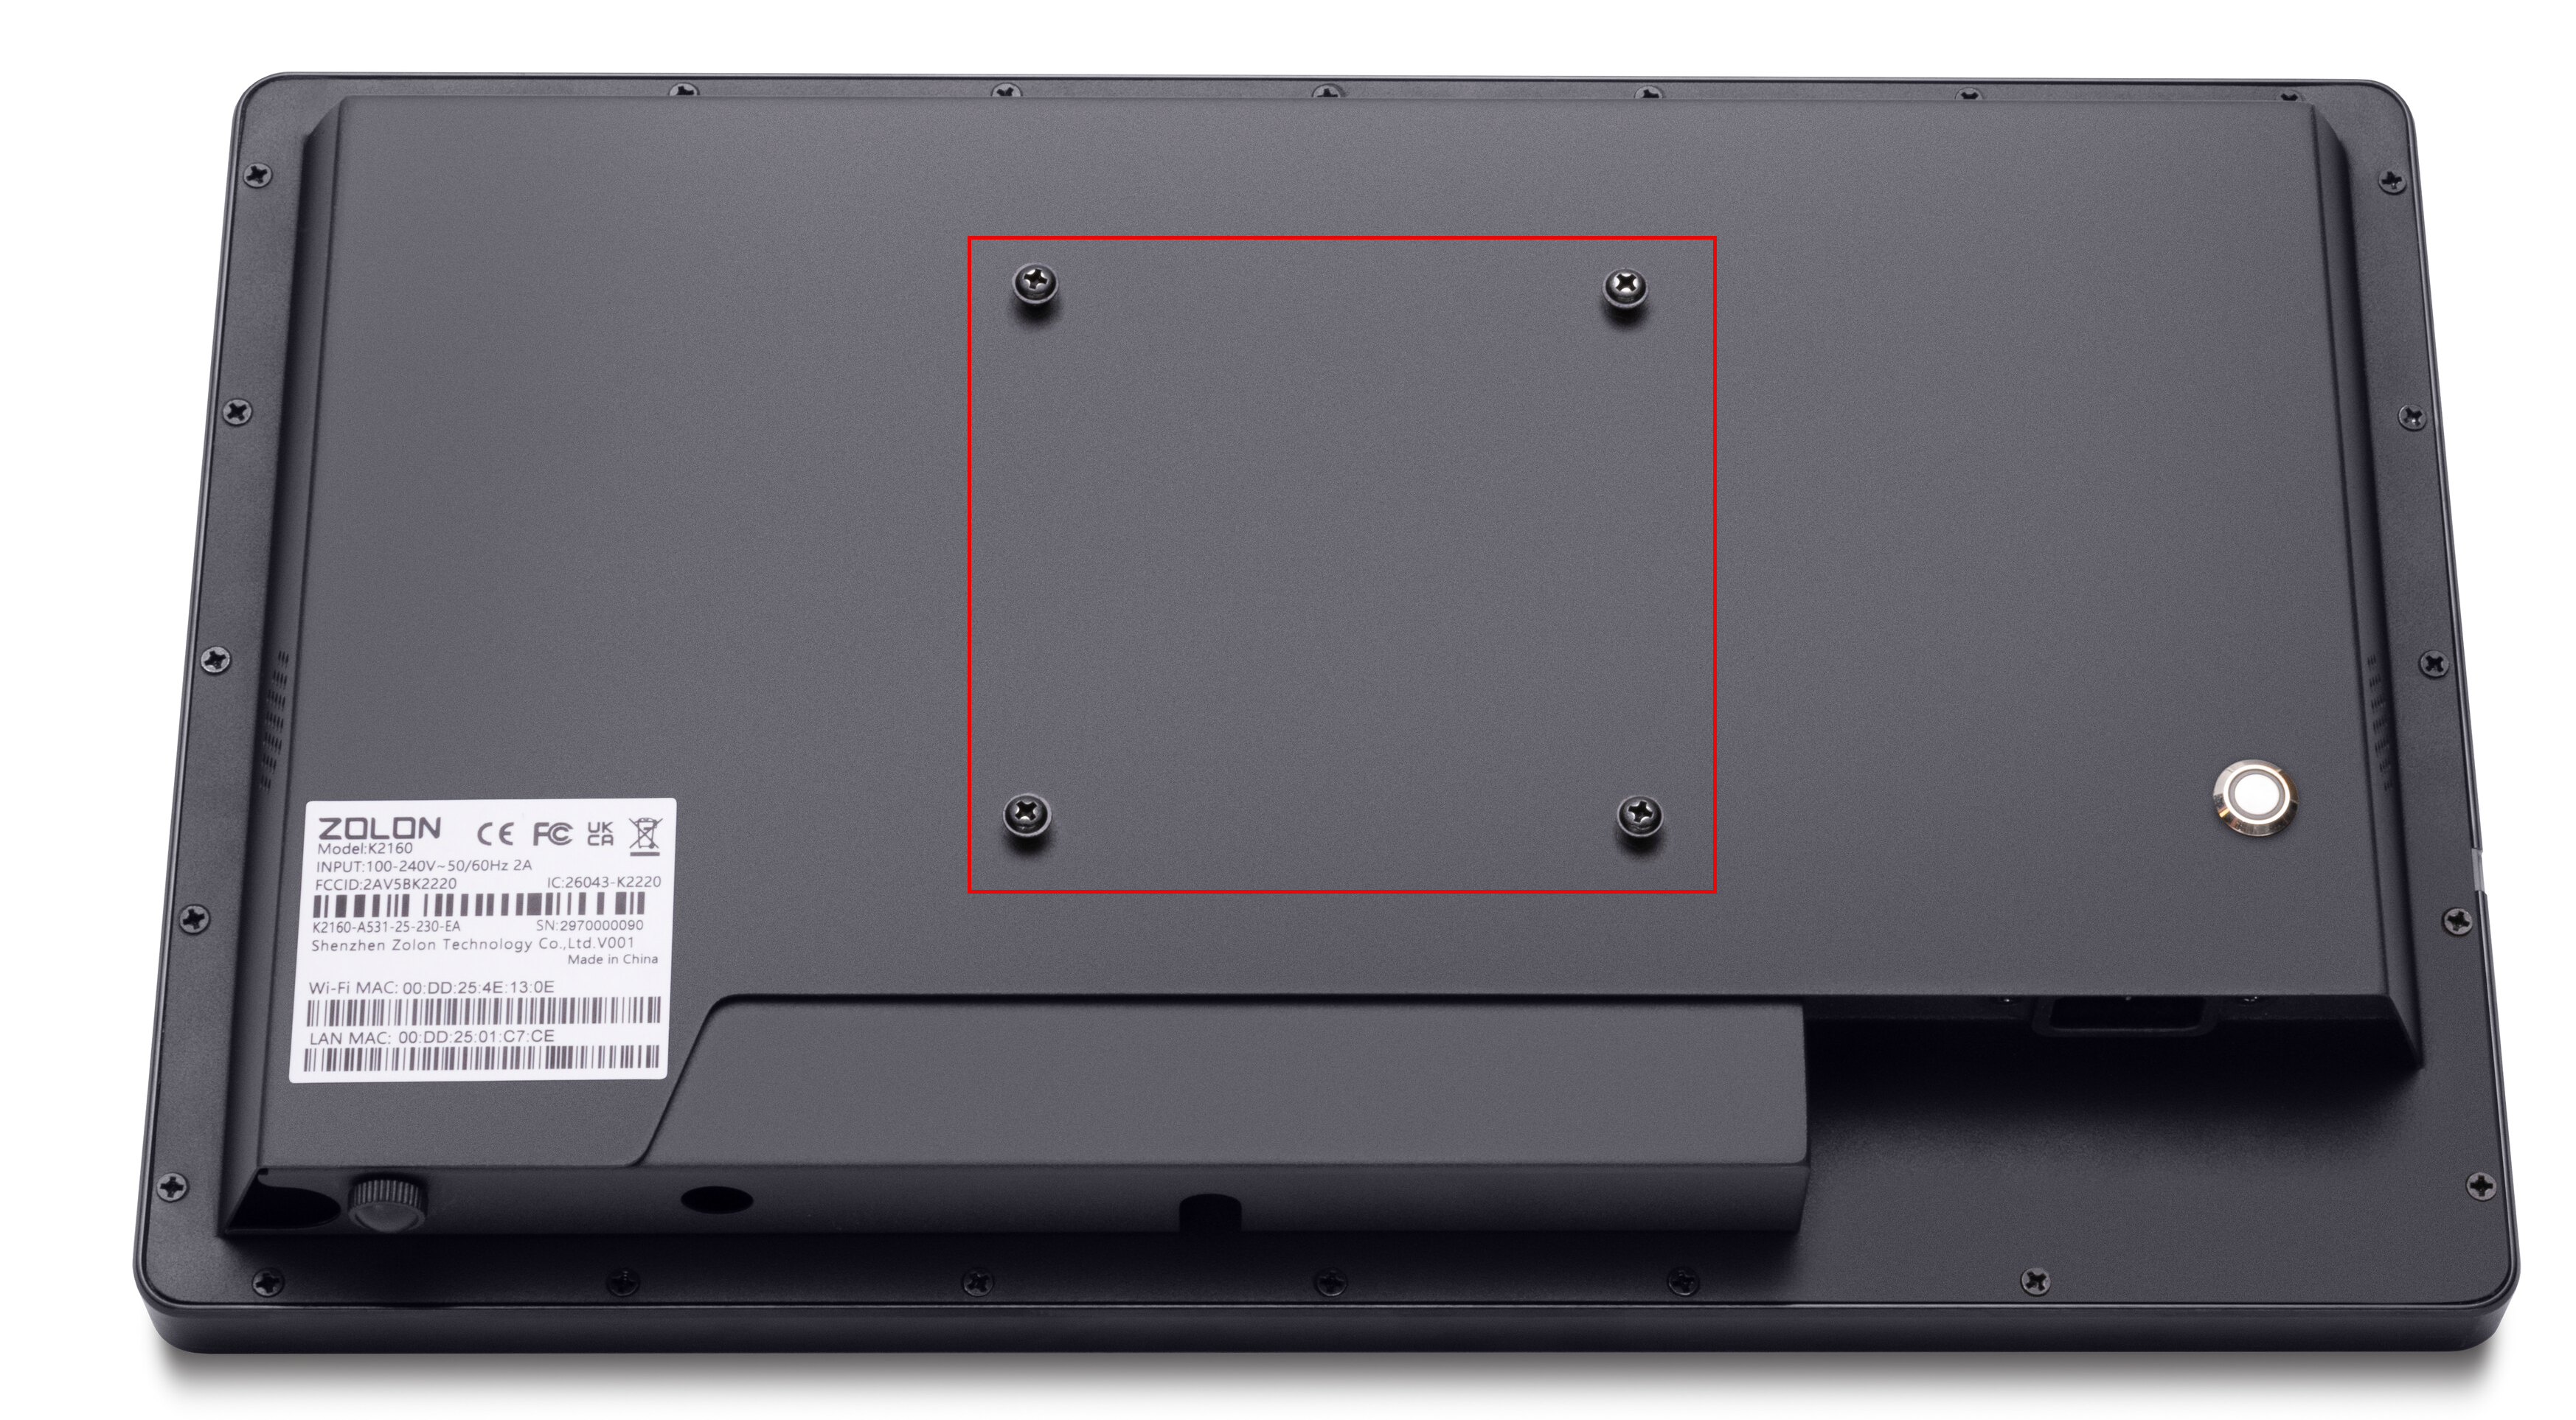
- Install the wall mount display bracket on the KDS display using the screws removed from the KDS.
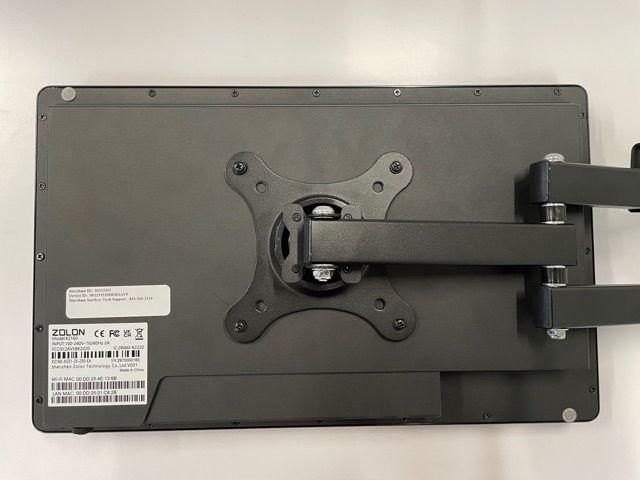
- Install the wall mount bracket on your wall in the desired location using the provided hardware or hardware appropriate for your wall type. Ensure your wall is able to support the weight of the wall mount and KDS, approximately 22 lbs.
- Table stand
- Place the KDS screen face down on a level, padded surface. You can use the flat foam packing material in the KDS box as a pad.
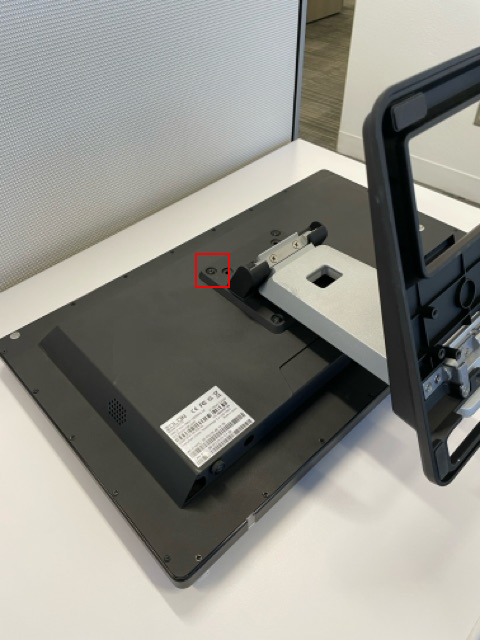
- Remove the four screws from the back of the KDS display.
- Remove the table stand from the box.
- Using the small silver screws provided in with the stand, screw the table stand bracket to the back of the KDS. Do not fully tighten the screws until all of them are inserted into the KDS. You can move the arm of the stand as needed to access each corner of the bracket.
- Pull firmly to unfold the table stand arm away from the base. The table arm will be tight and may require some force to unfold.
- Screw two flat head screws provided with the stand into the bottom of the base to secure it in position.

- Rotate the arm of the stand over the KDS and then set the KDS and stand upright on your table, tilting the KDS display into the desired position.
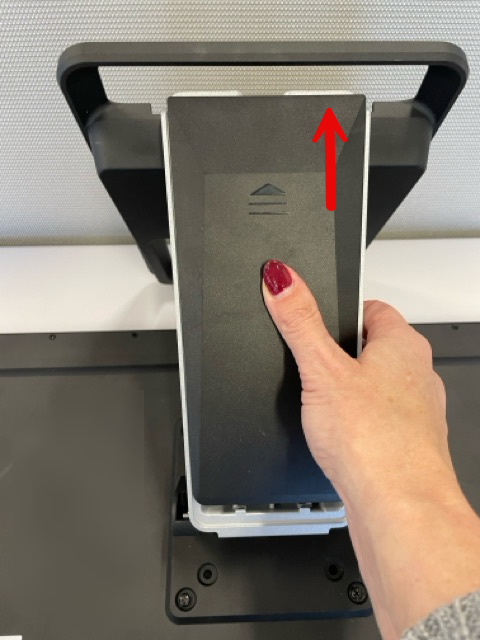
- Remove the lid from the table base arm by sliding it upward.
- Install three flat head screws to secure.
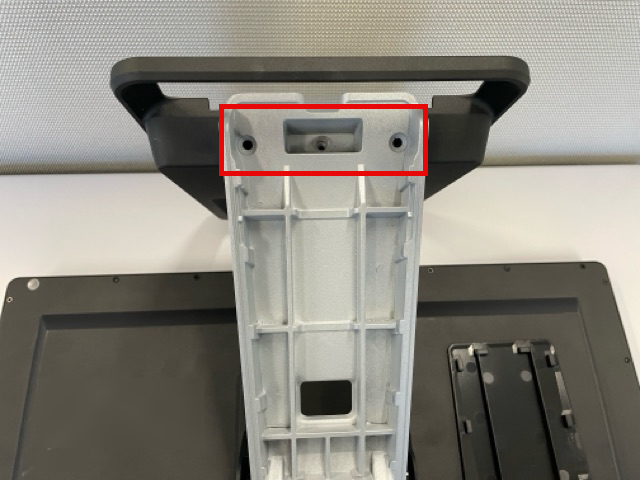
- Replace the lid on the arm of the stand, turn the KDS and stand upright on your countertop.
- Wall mount
- You are ready to register the device with the Back Office.
3. Register the KDS application
When the KDS application launches for the first time, you will need to connect the application to your Back Office by going through a registration process.
- To register the KDS with your Back Office
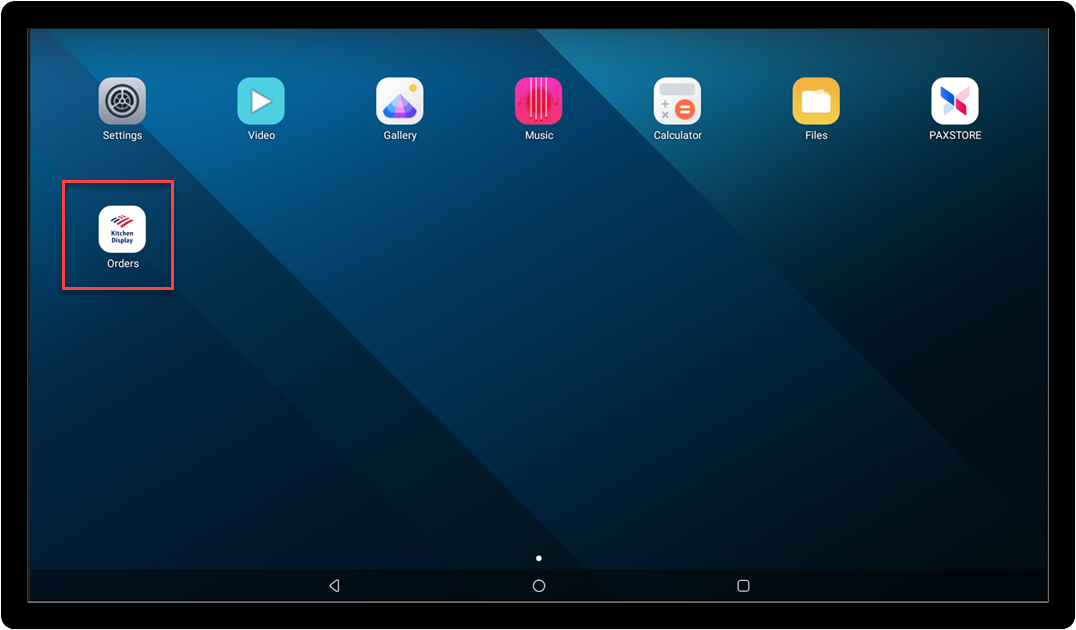
- Power on the Kitchen Display. The application should be pre-installed on the Kitchen Display and will launch automatically.
NOTE: If the app doesn't open automatically, tap the Kitchen Display icon to launch it.
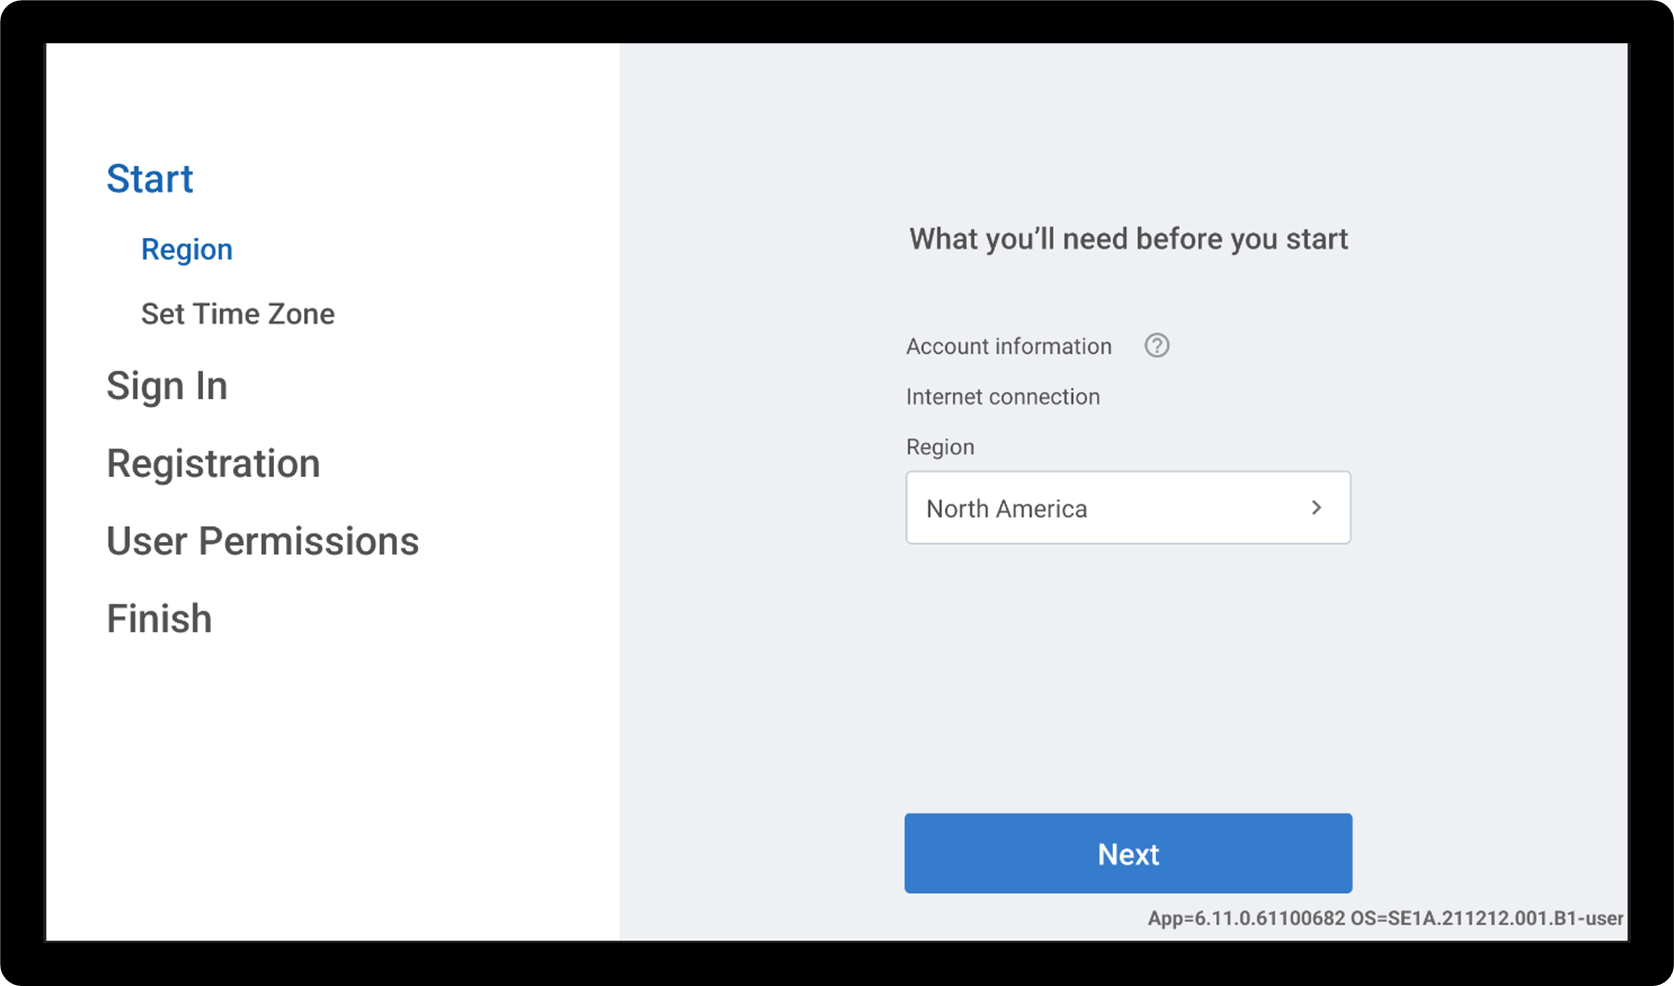
- Tap Next.
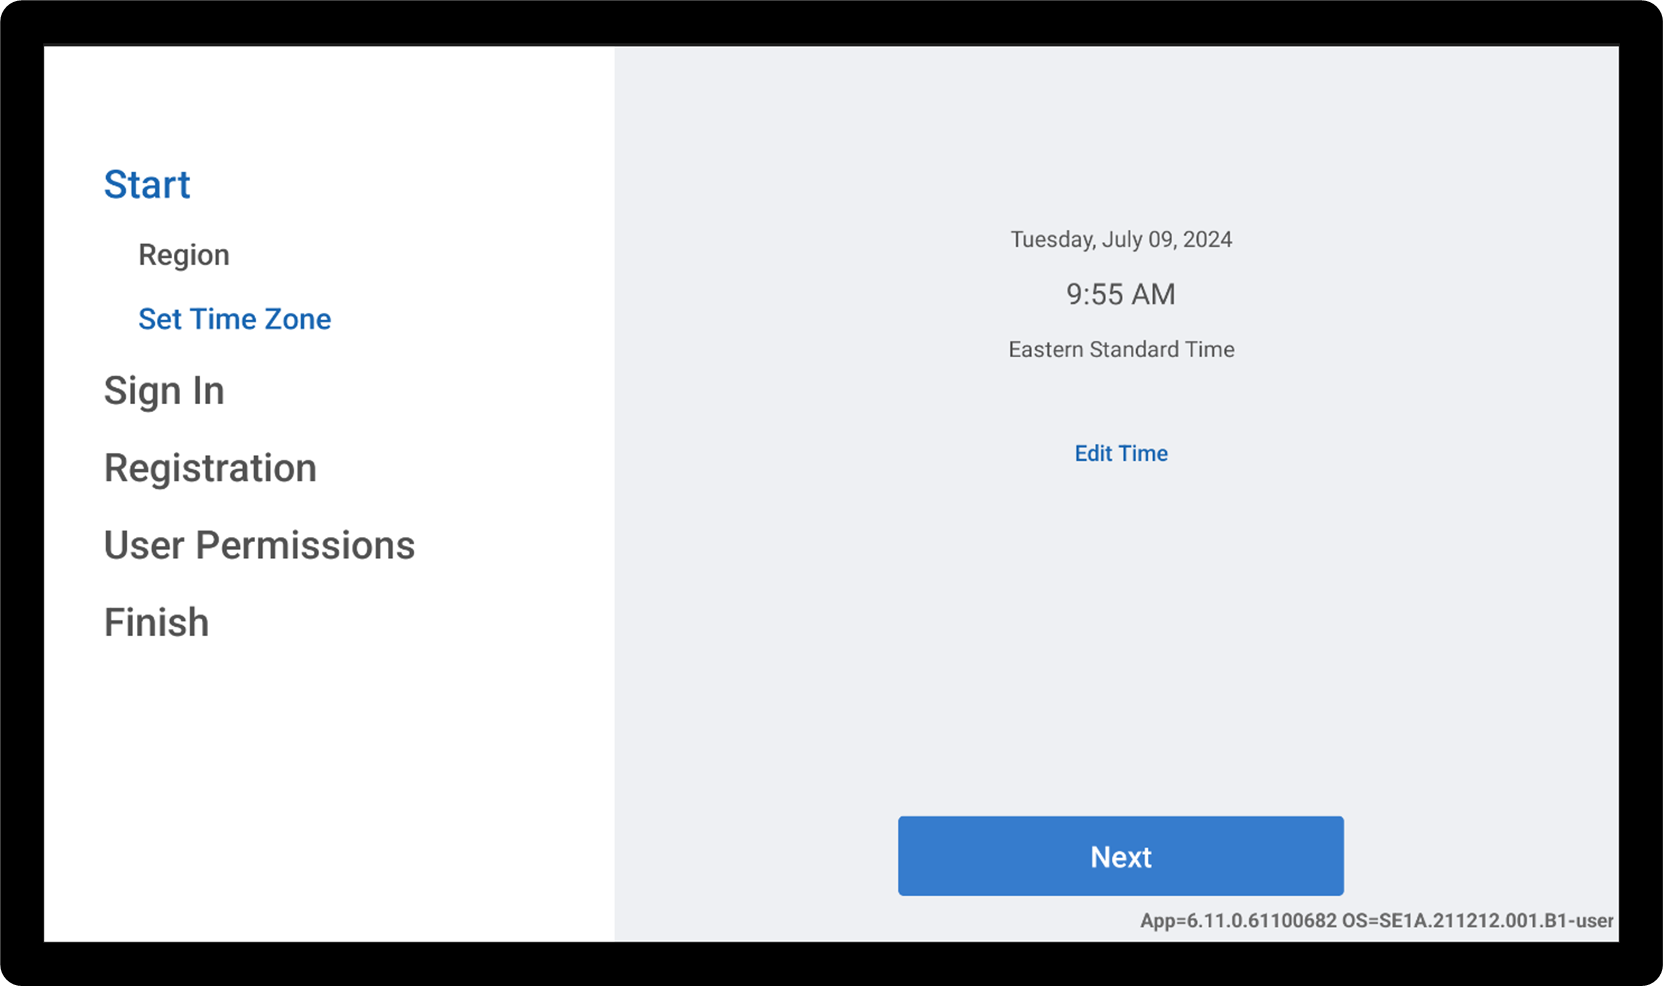
- Confirm that the time zone and time is correct. If needed, you can tap Edit Time to update. Click Next.
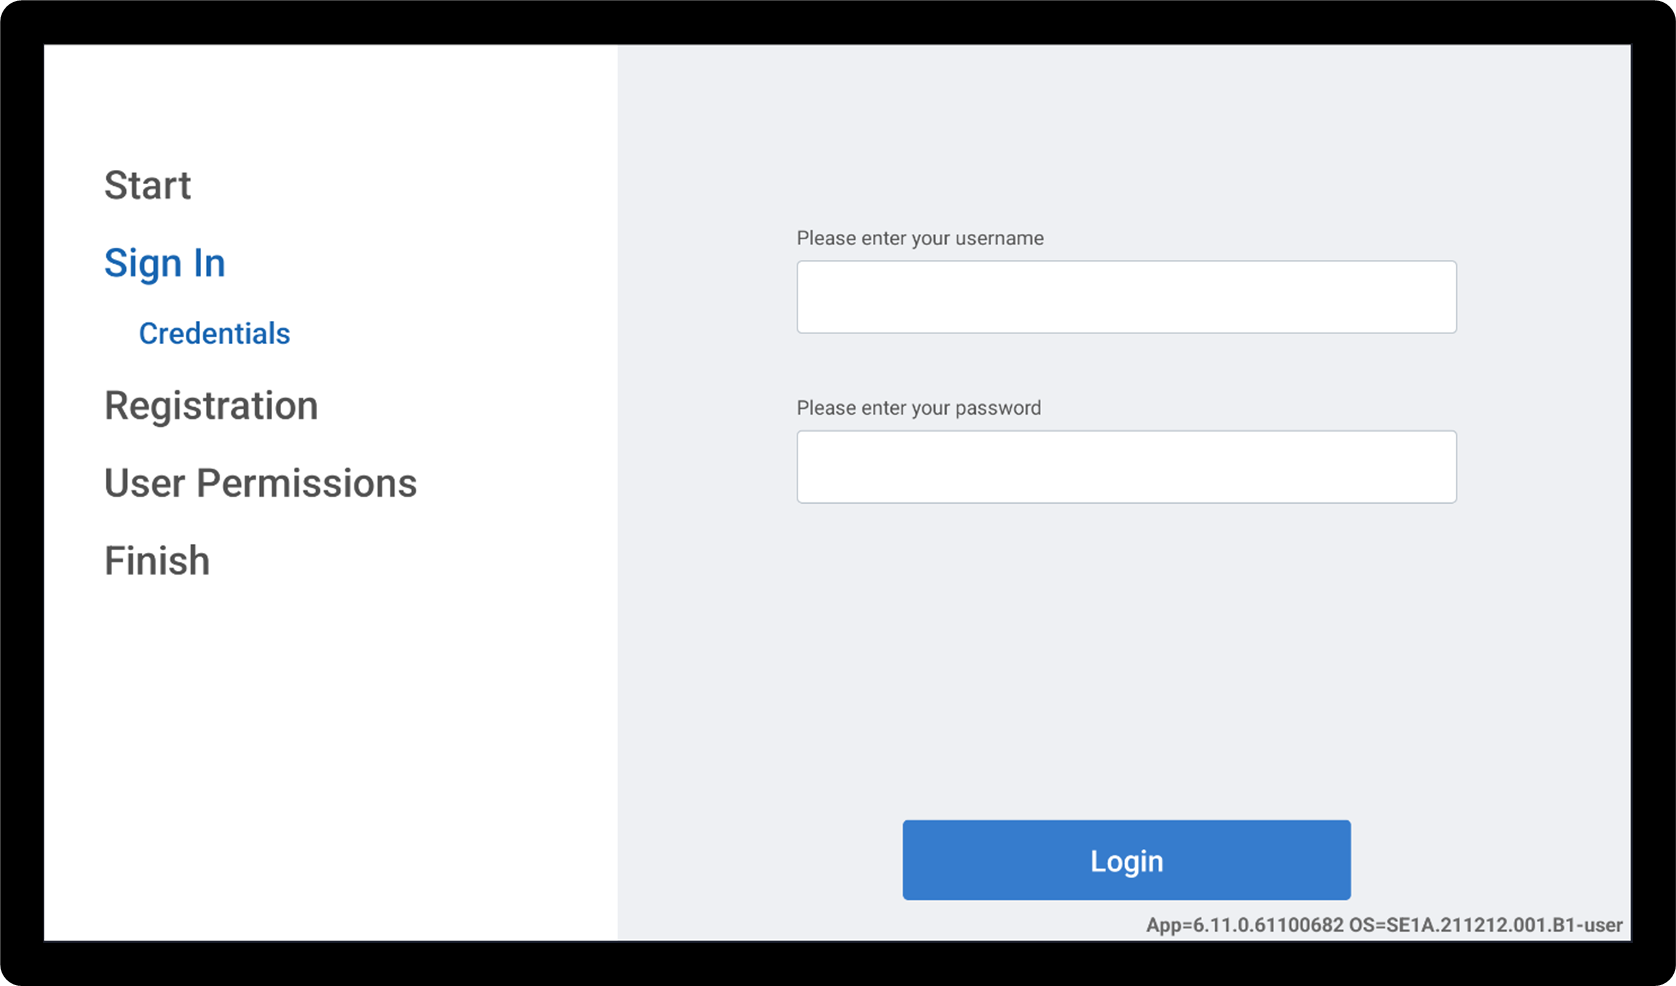
- Enter your Back Office username and password, then tap Login.
- If you have multiple stores, choose the store when prompted, then tap Next.
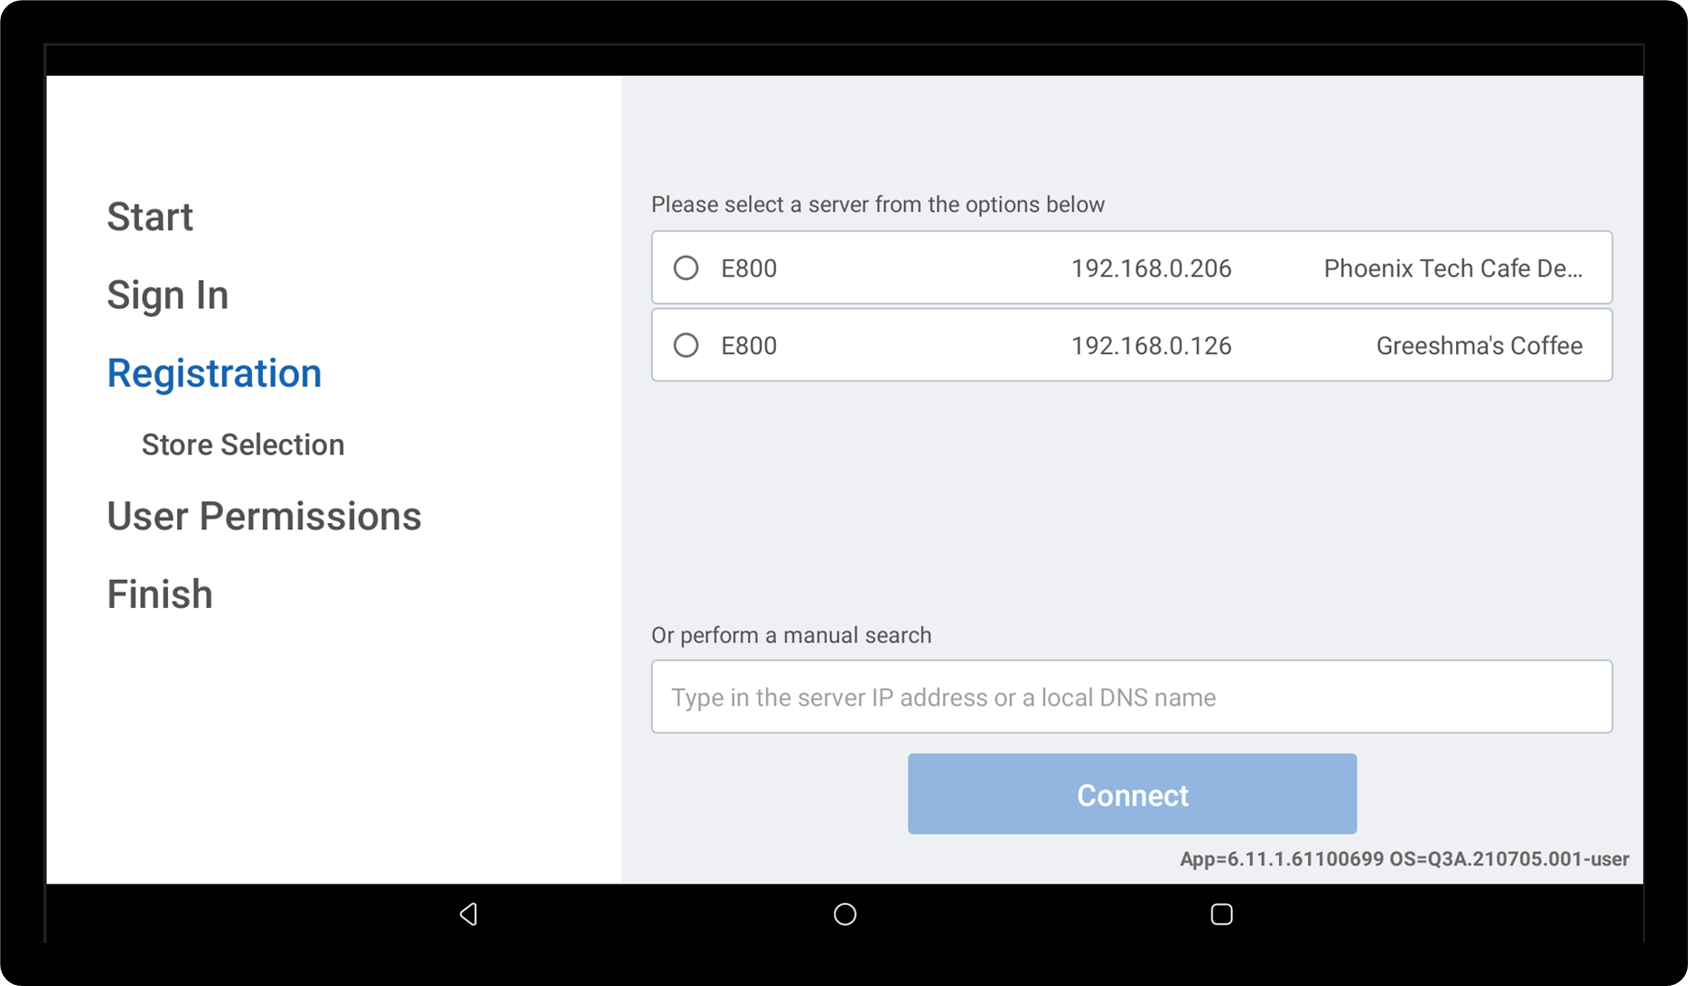
- Select a server from the options.
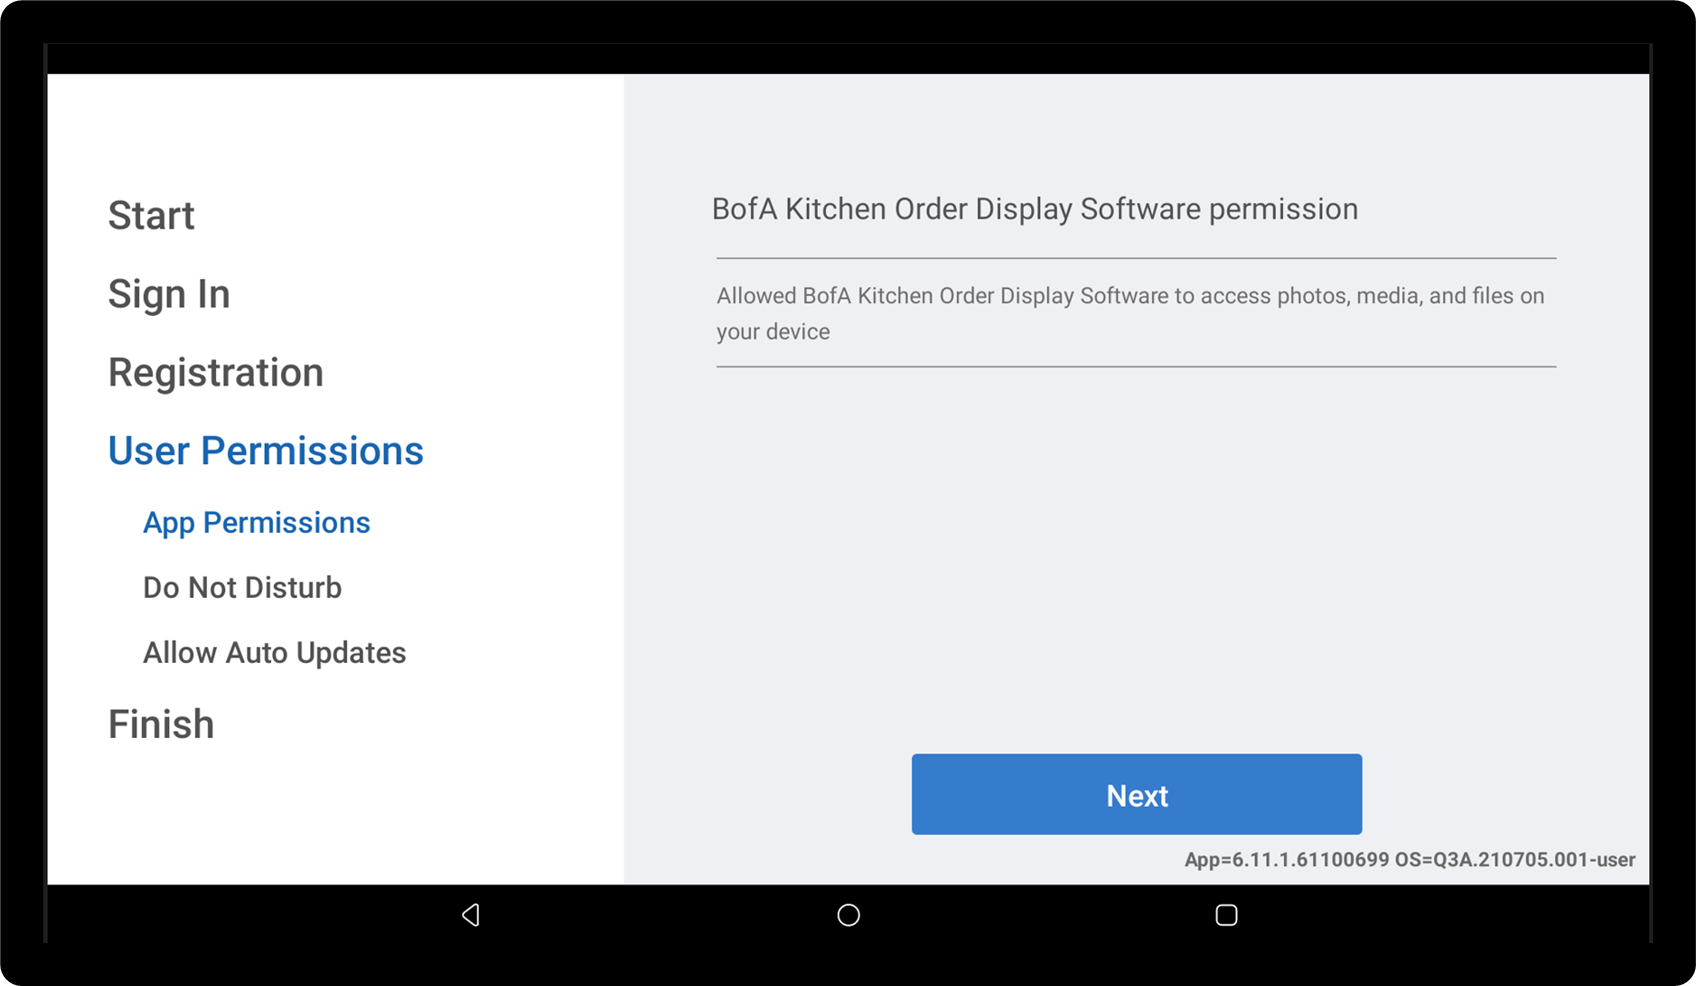
- Tap Next to allow all user permissions, then tap Allow to allow access.
- Tap Allow to allow access.
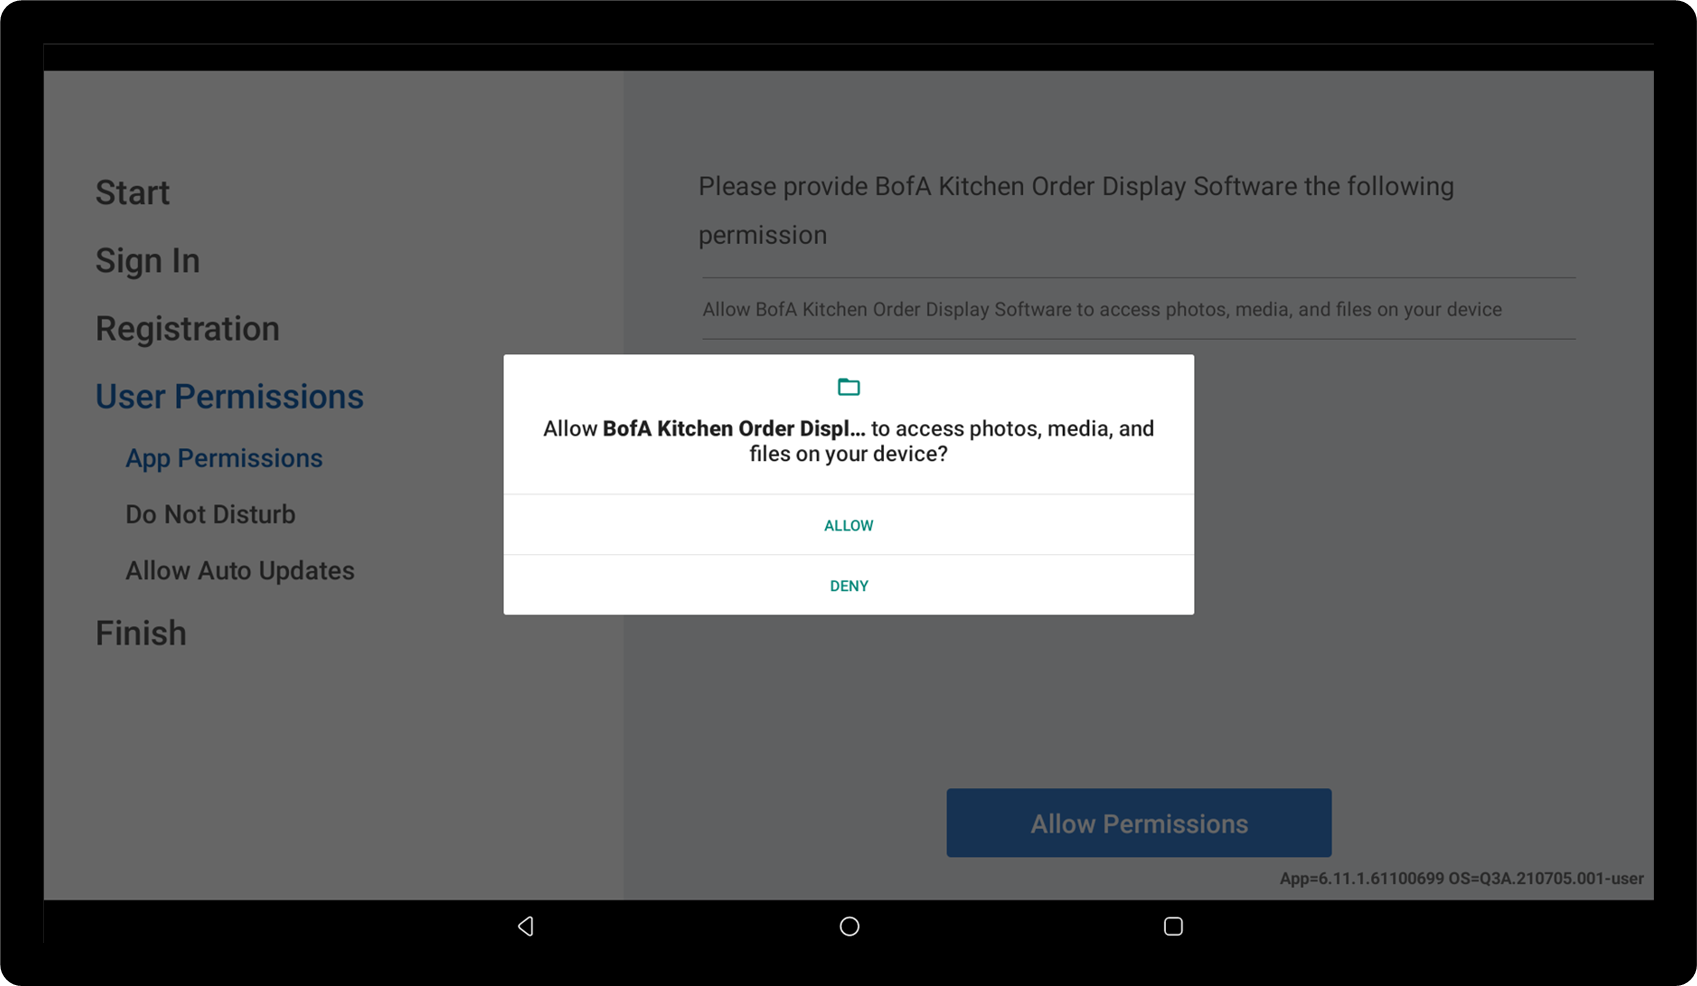
- Tap Allow Permissions.

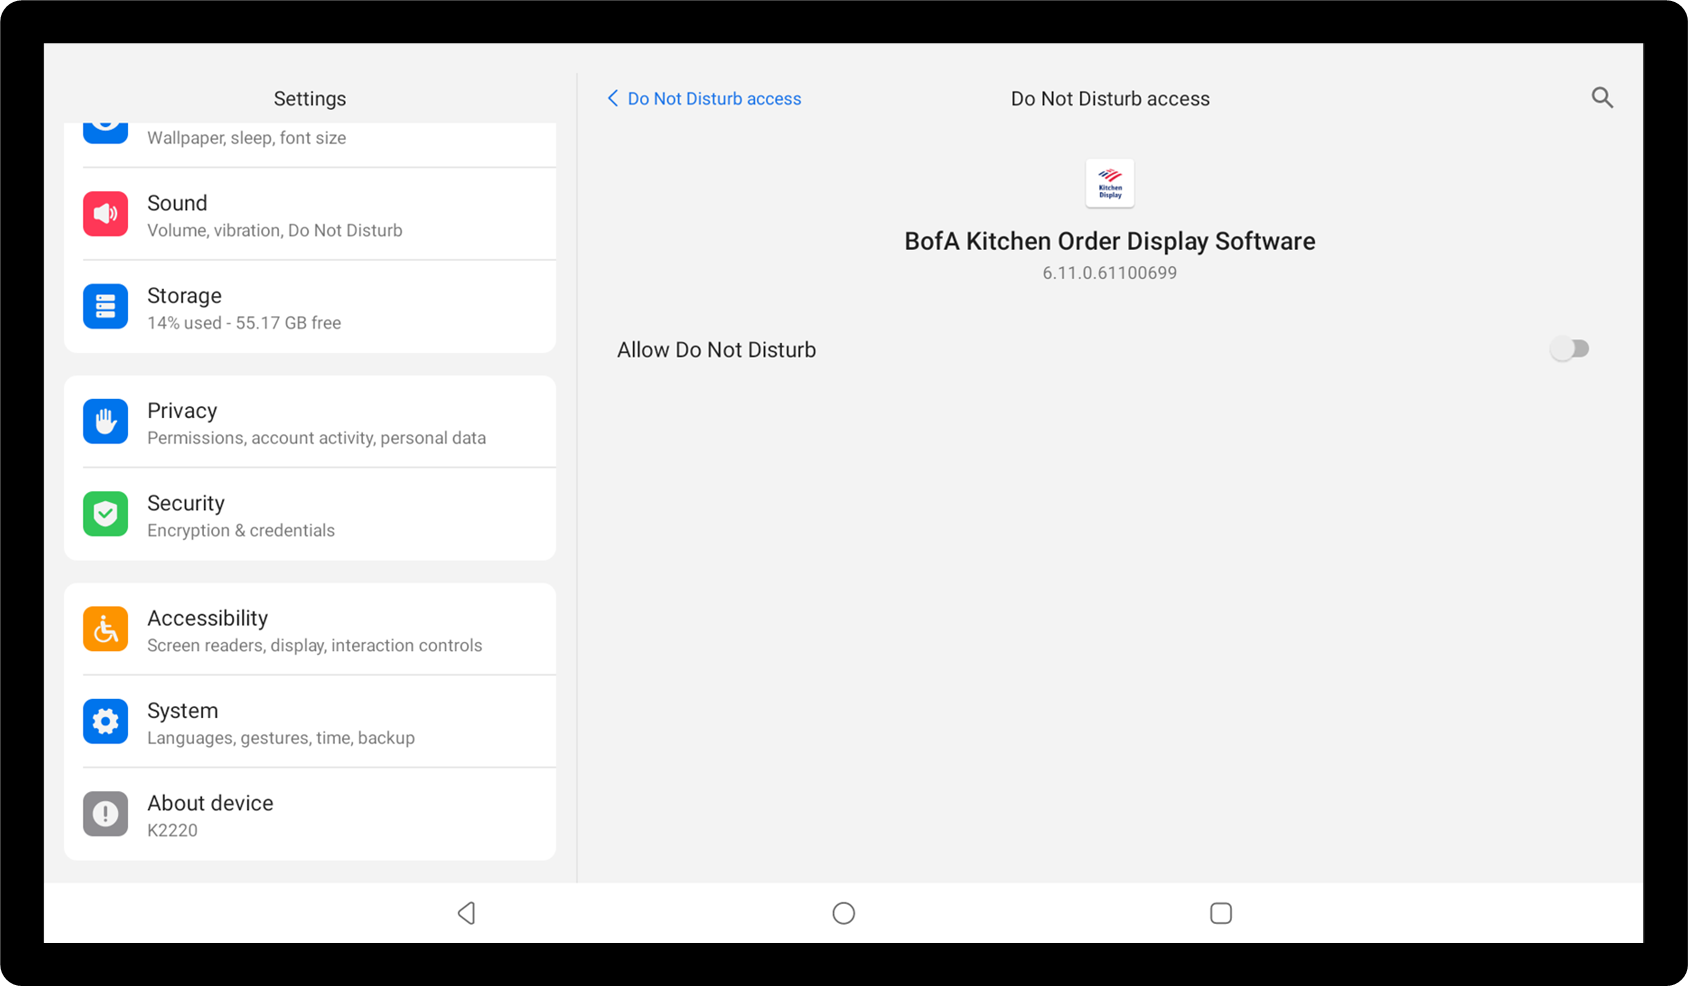
- Tap the BofA Kitchen Order Display Software icon.
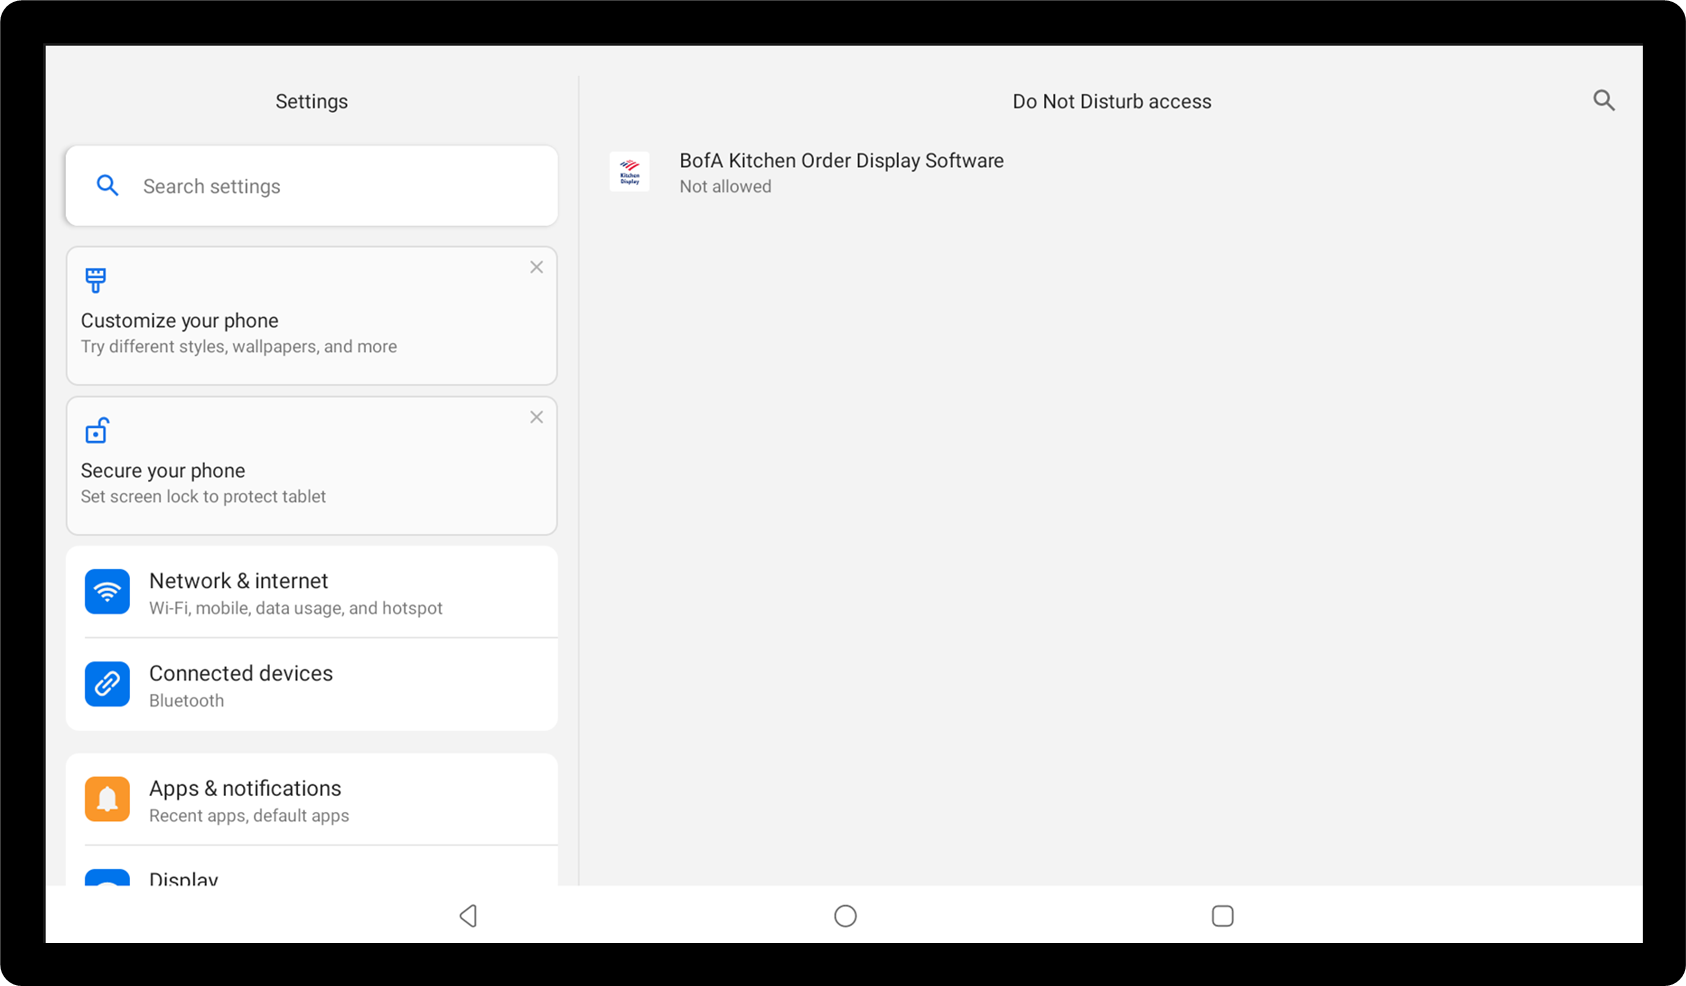
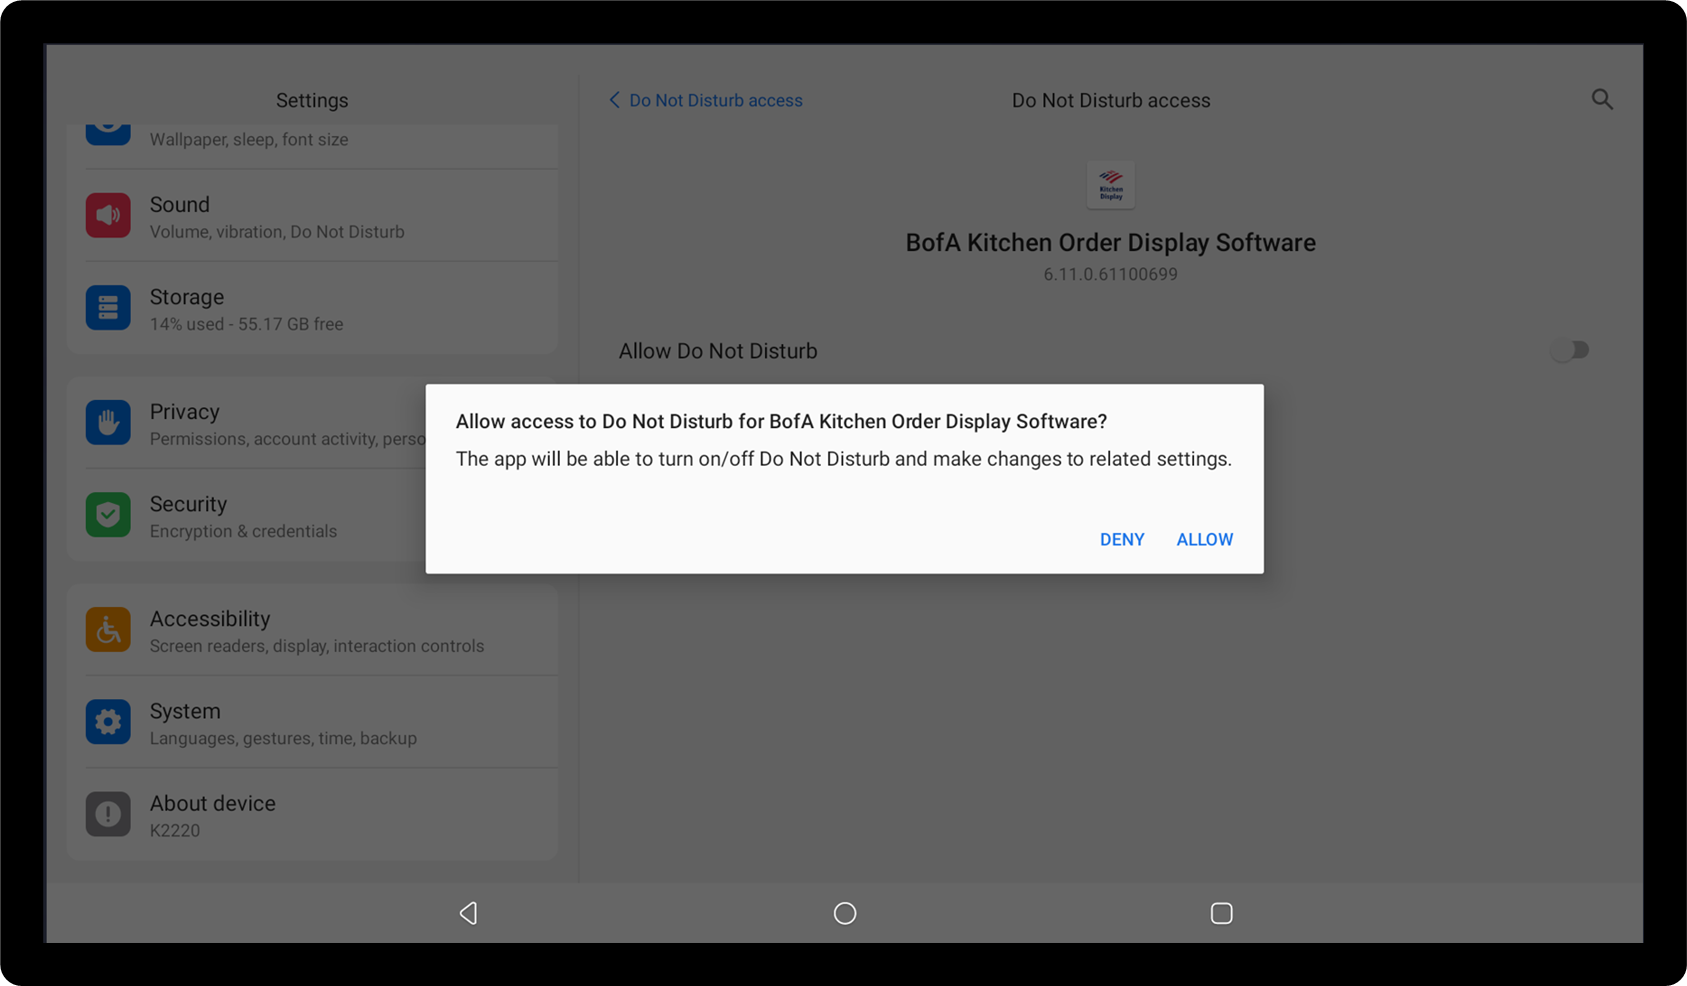
- Tap to toggle on Allow Do Not Disturb.
- Tap Allow.
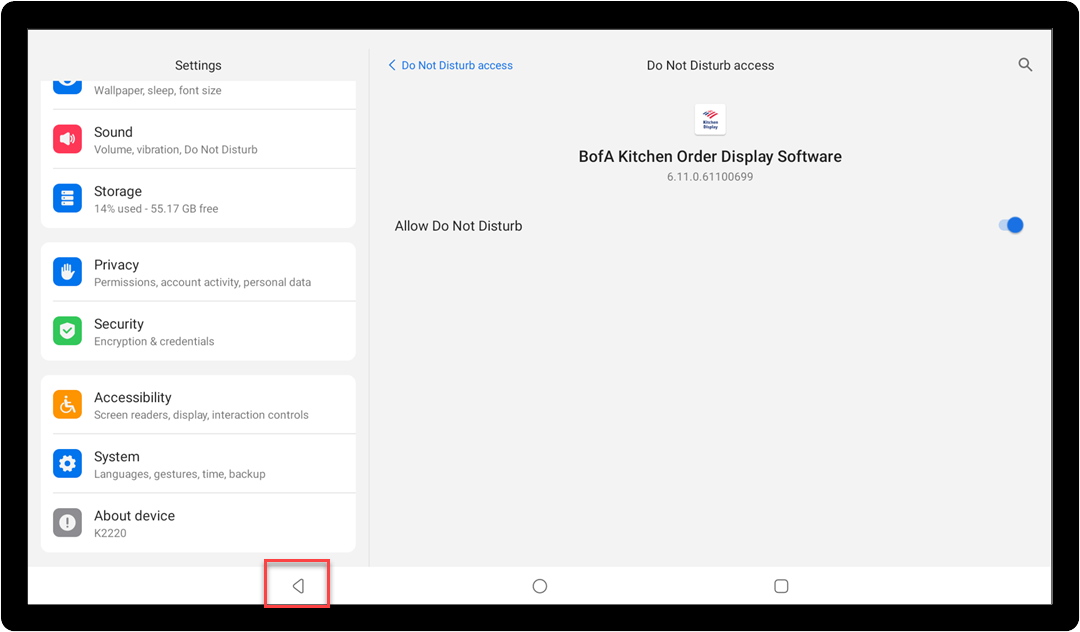
- Tap the back arrow to return to the main registration screen again.
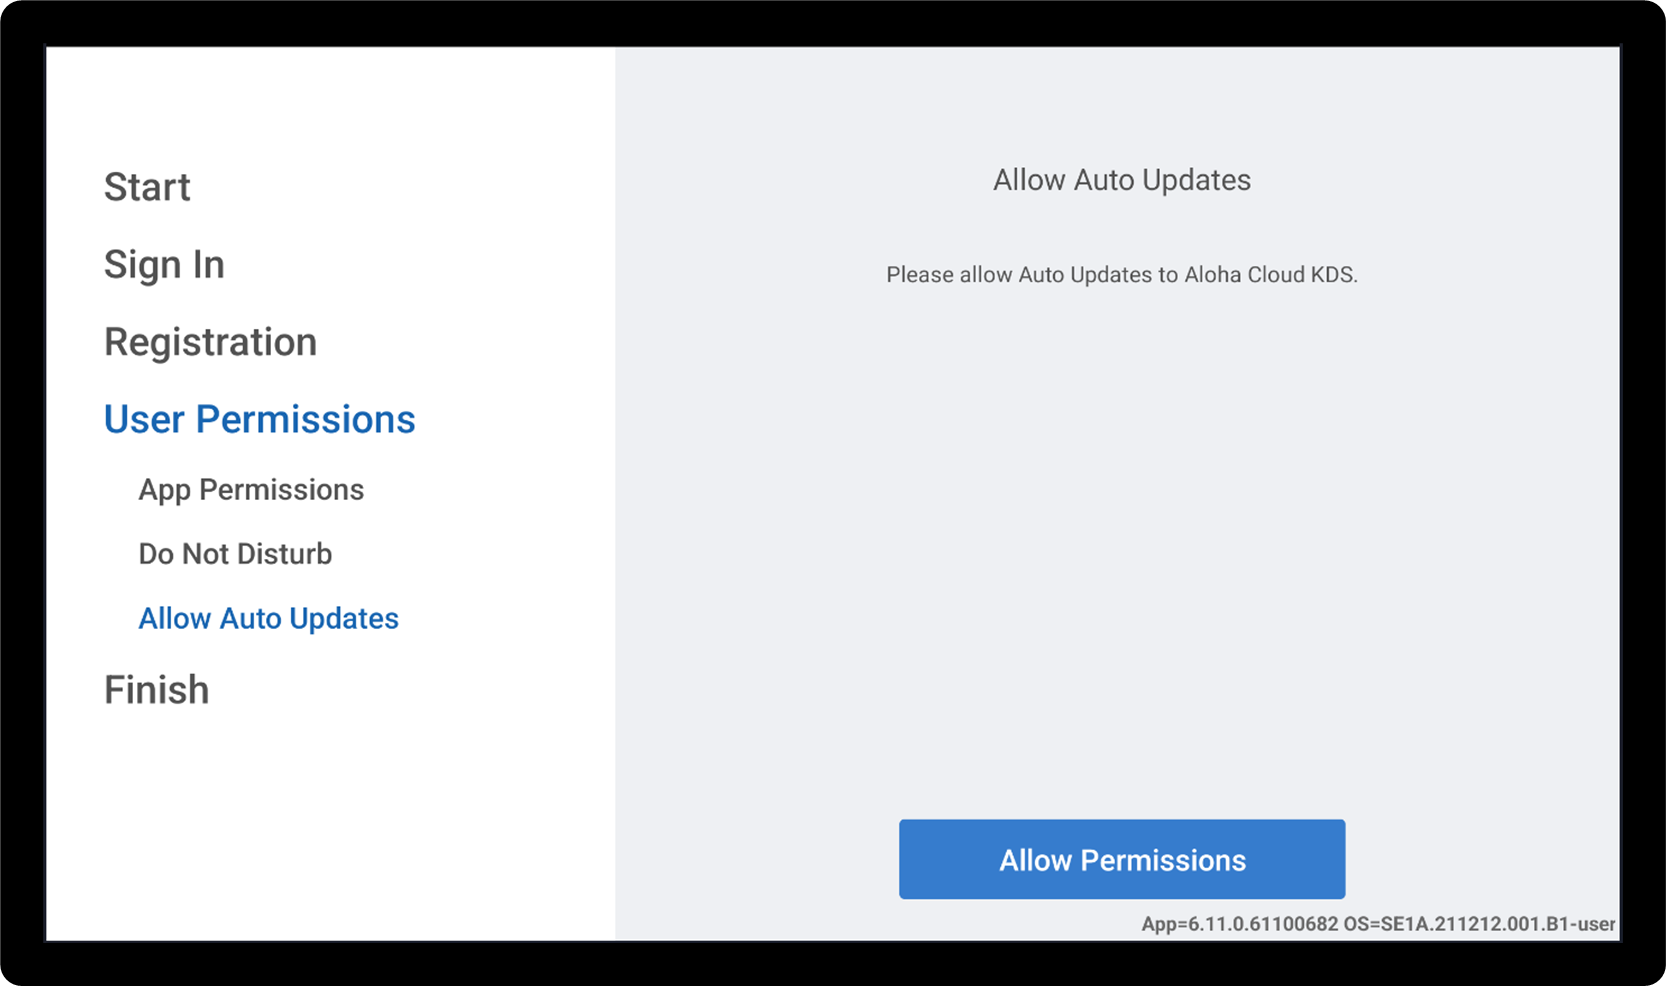
- Tap Allow Permissions to allow auto updates.
- Configuration wills start. When it completes, tap Continue.

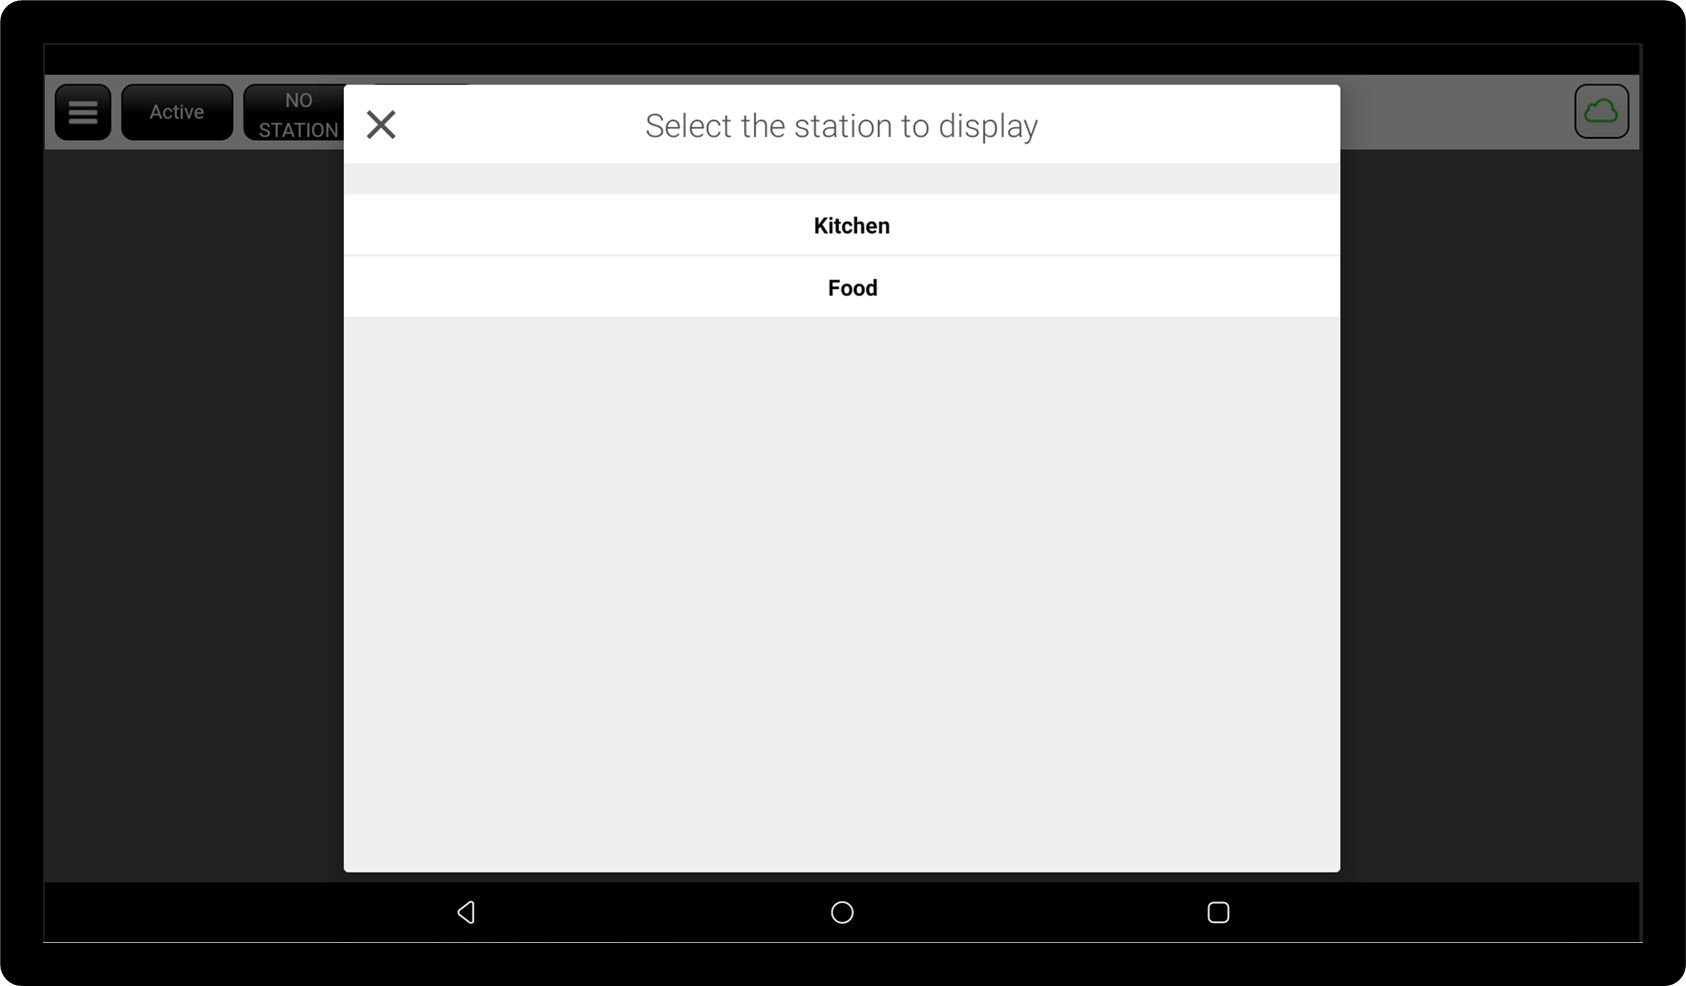
- Choose which kitchen routing group should display on the device. When an item assigned to that routing group is ordered, the item ticket will display on the KDS.
- You are ready to route orders to the KDS. Learn about how to manage orders on the KDS.
- Power on the Kitchen Display. The application should be pre-installed on the Kitchen Display and will launch automatically.
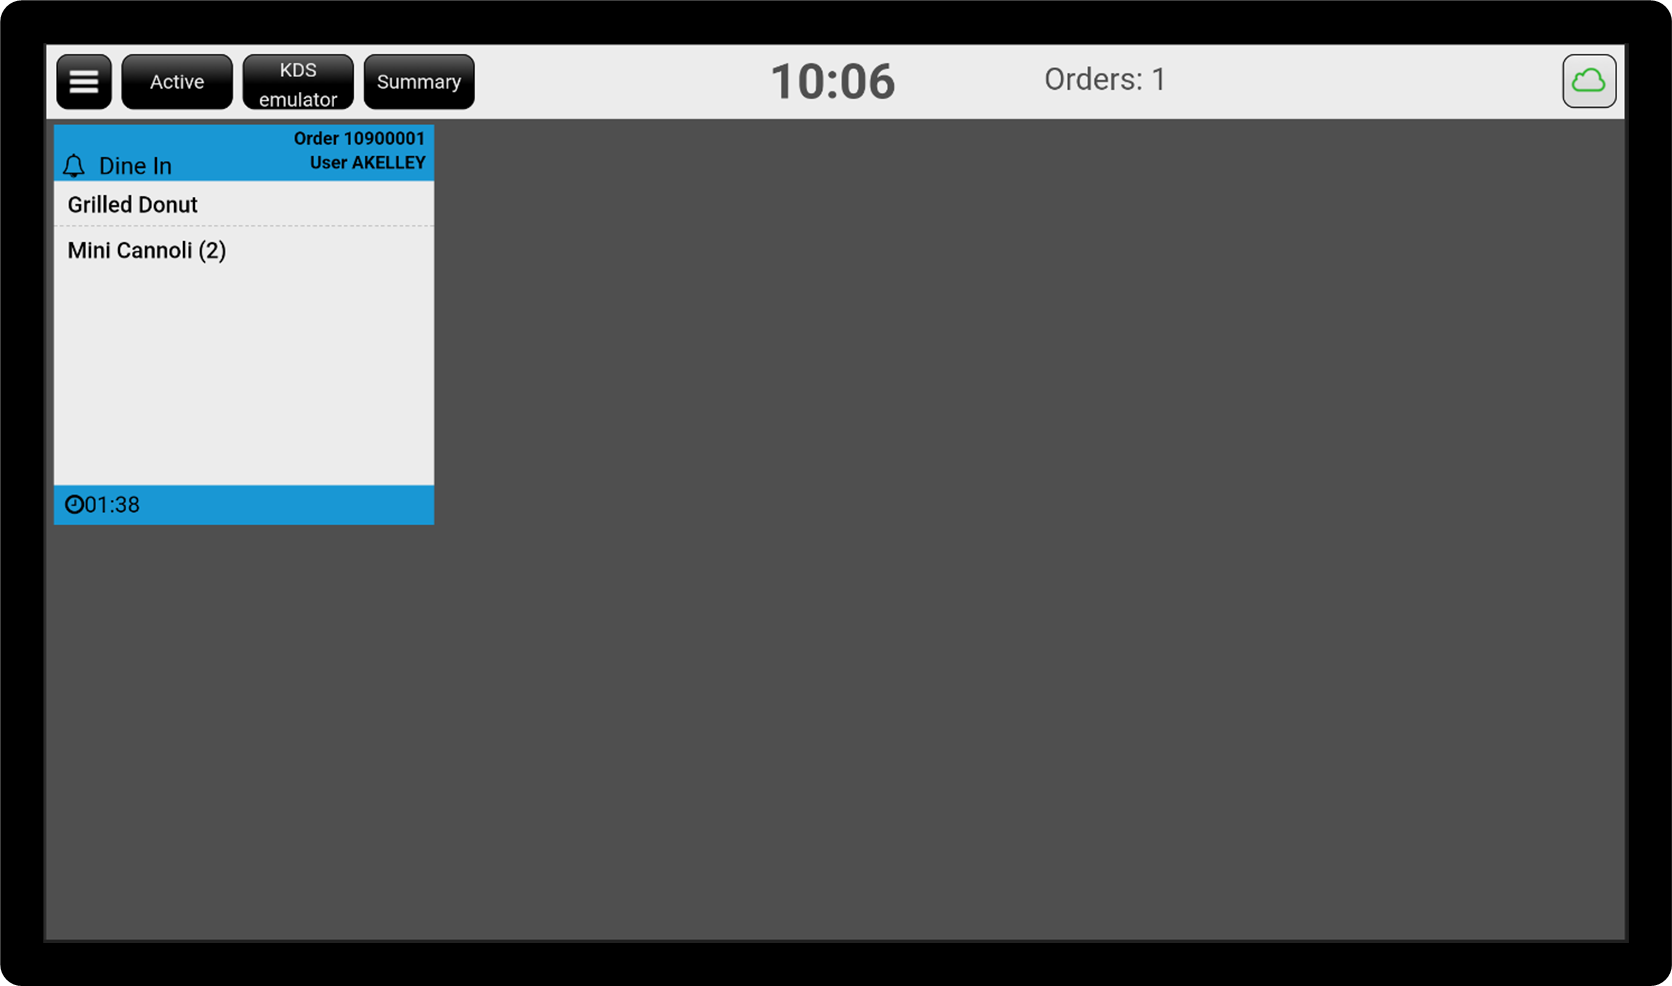
4. Manage KDS orders
Once registered, your KDS is ready to use. Learn about managing orders on your Kitchen Display Screen.
KDS power and settings
You can adjust the brightness and volume of the KDS using the Quick Settings menu on the display.
To restart
Press and hold the Power button for three seconds until the Power Off and Restart options appear. Tap Restart. The KDS will go dark and then reboot after a few seconds.
To adjust brightness
Swipe from the top right corner of the Display. The Control Center menu appears. Locate the Brightness slider and adjust to desired brightness. 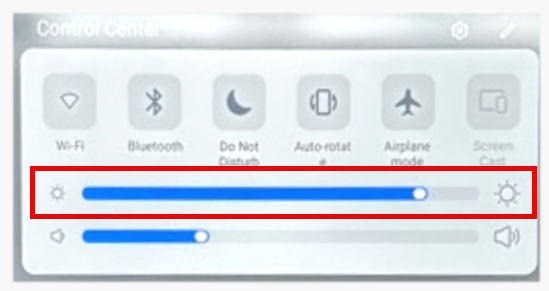
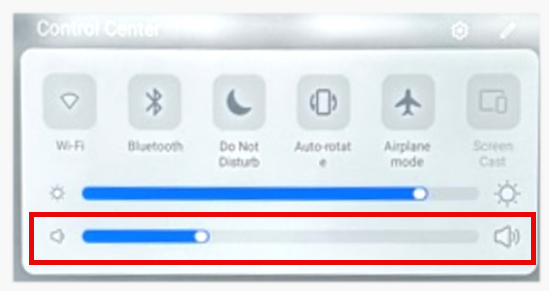
To adjust volume
Swipe from the top right corner of the Display. The Control Center menu appears. Locate the Volume slider and use the sliding bars to adjust to the desired volume.
To change font size
You can adjust the font size that displays on the KDS in the Android settings. A font increase will allow the KDS ticket information to look larger, but text cropping may occur.
To adjust font size
- In the KDS app, tap the menu icon ☰.
- Tap Android Settings.
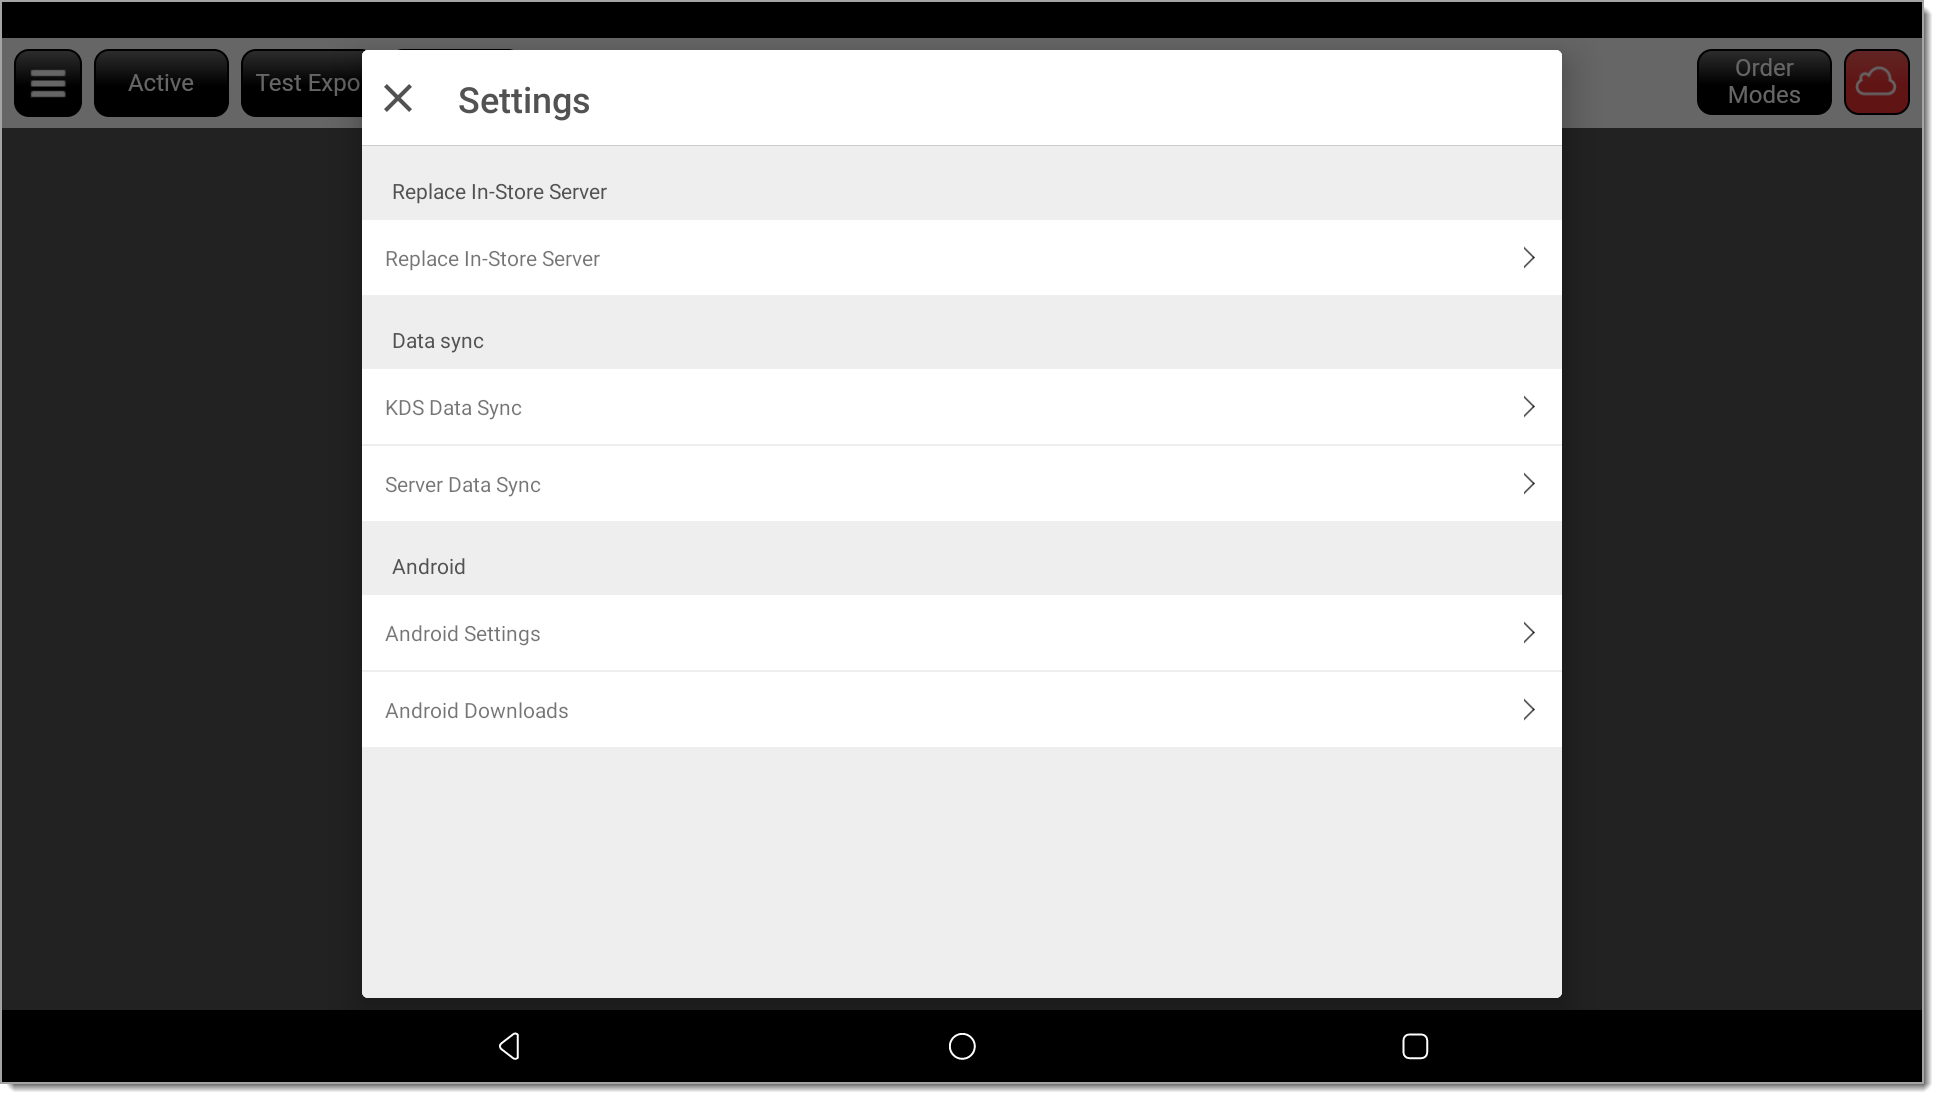
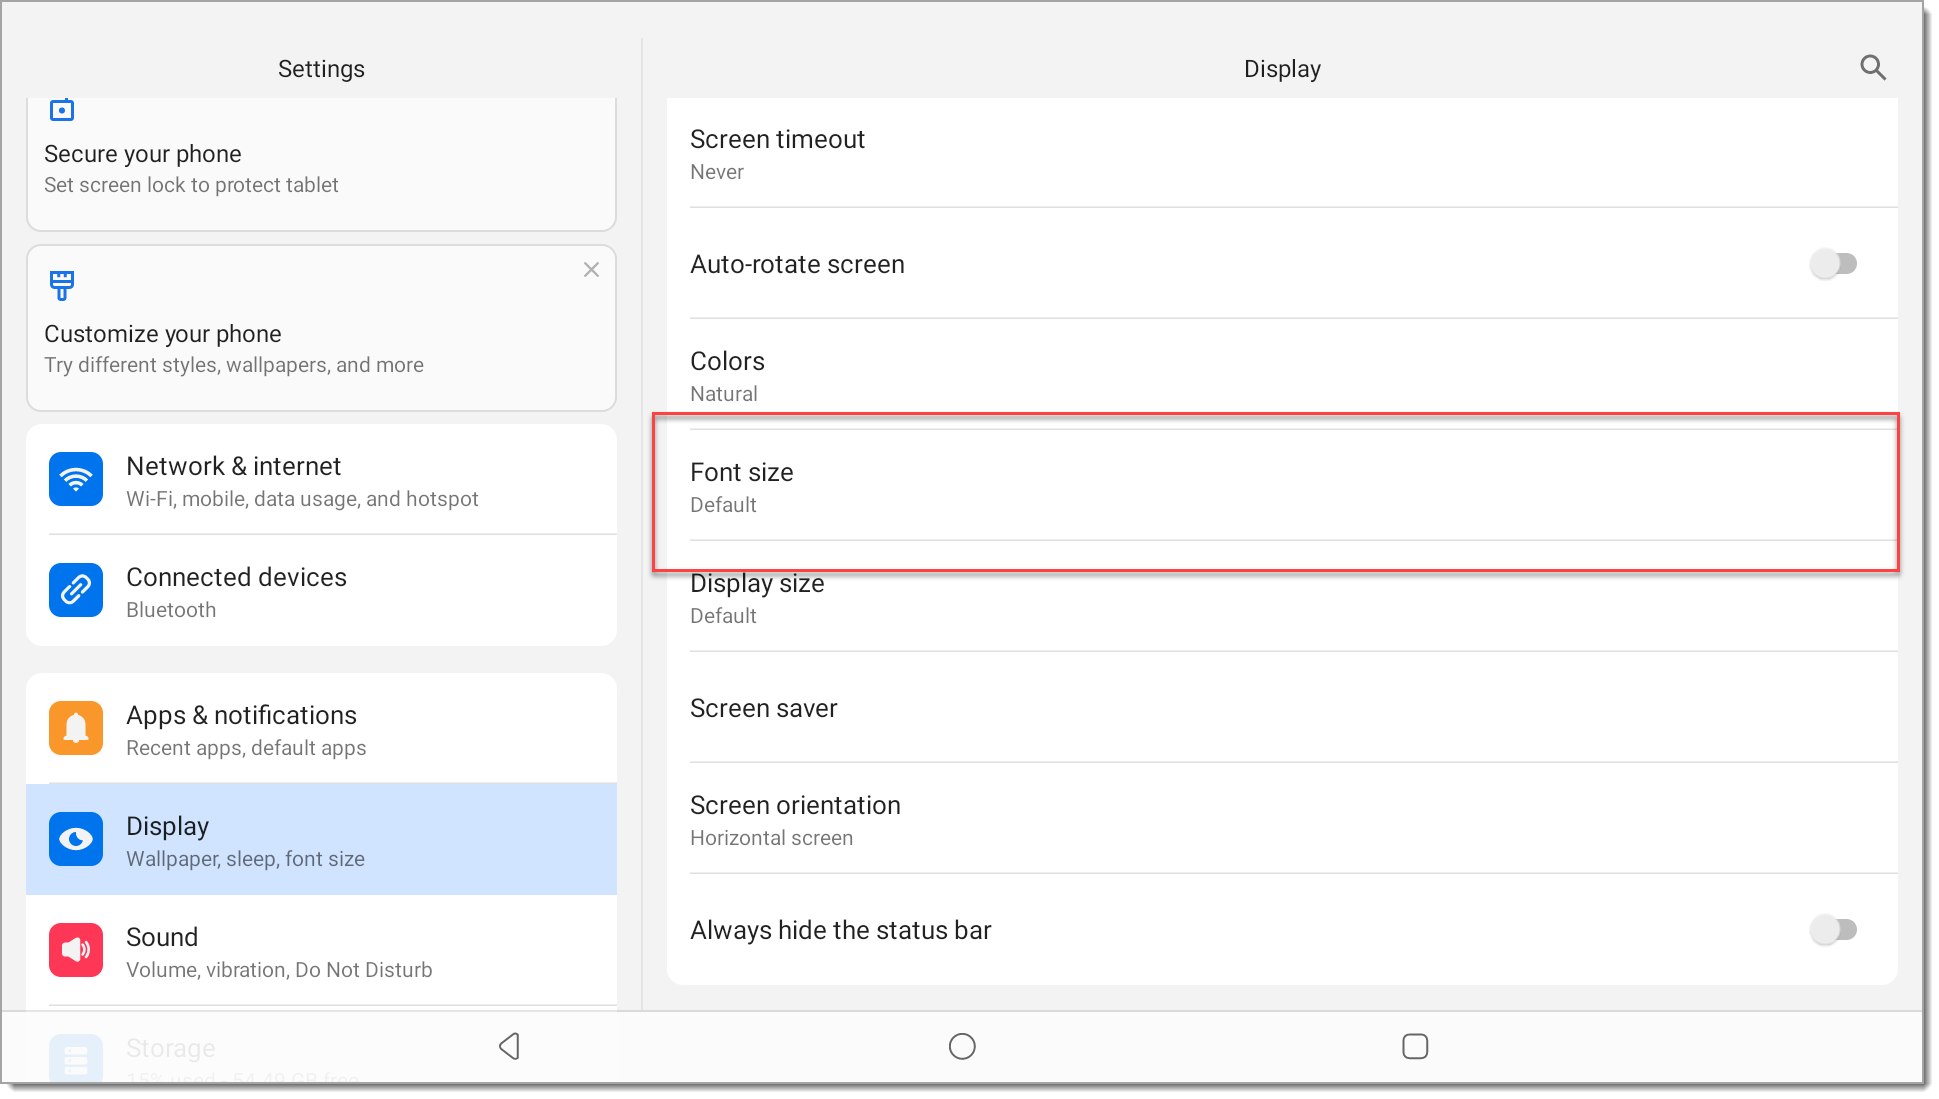
- Tap Display > Font Size.
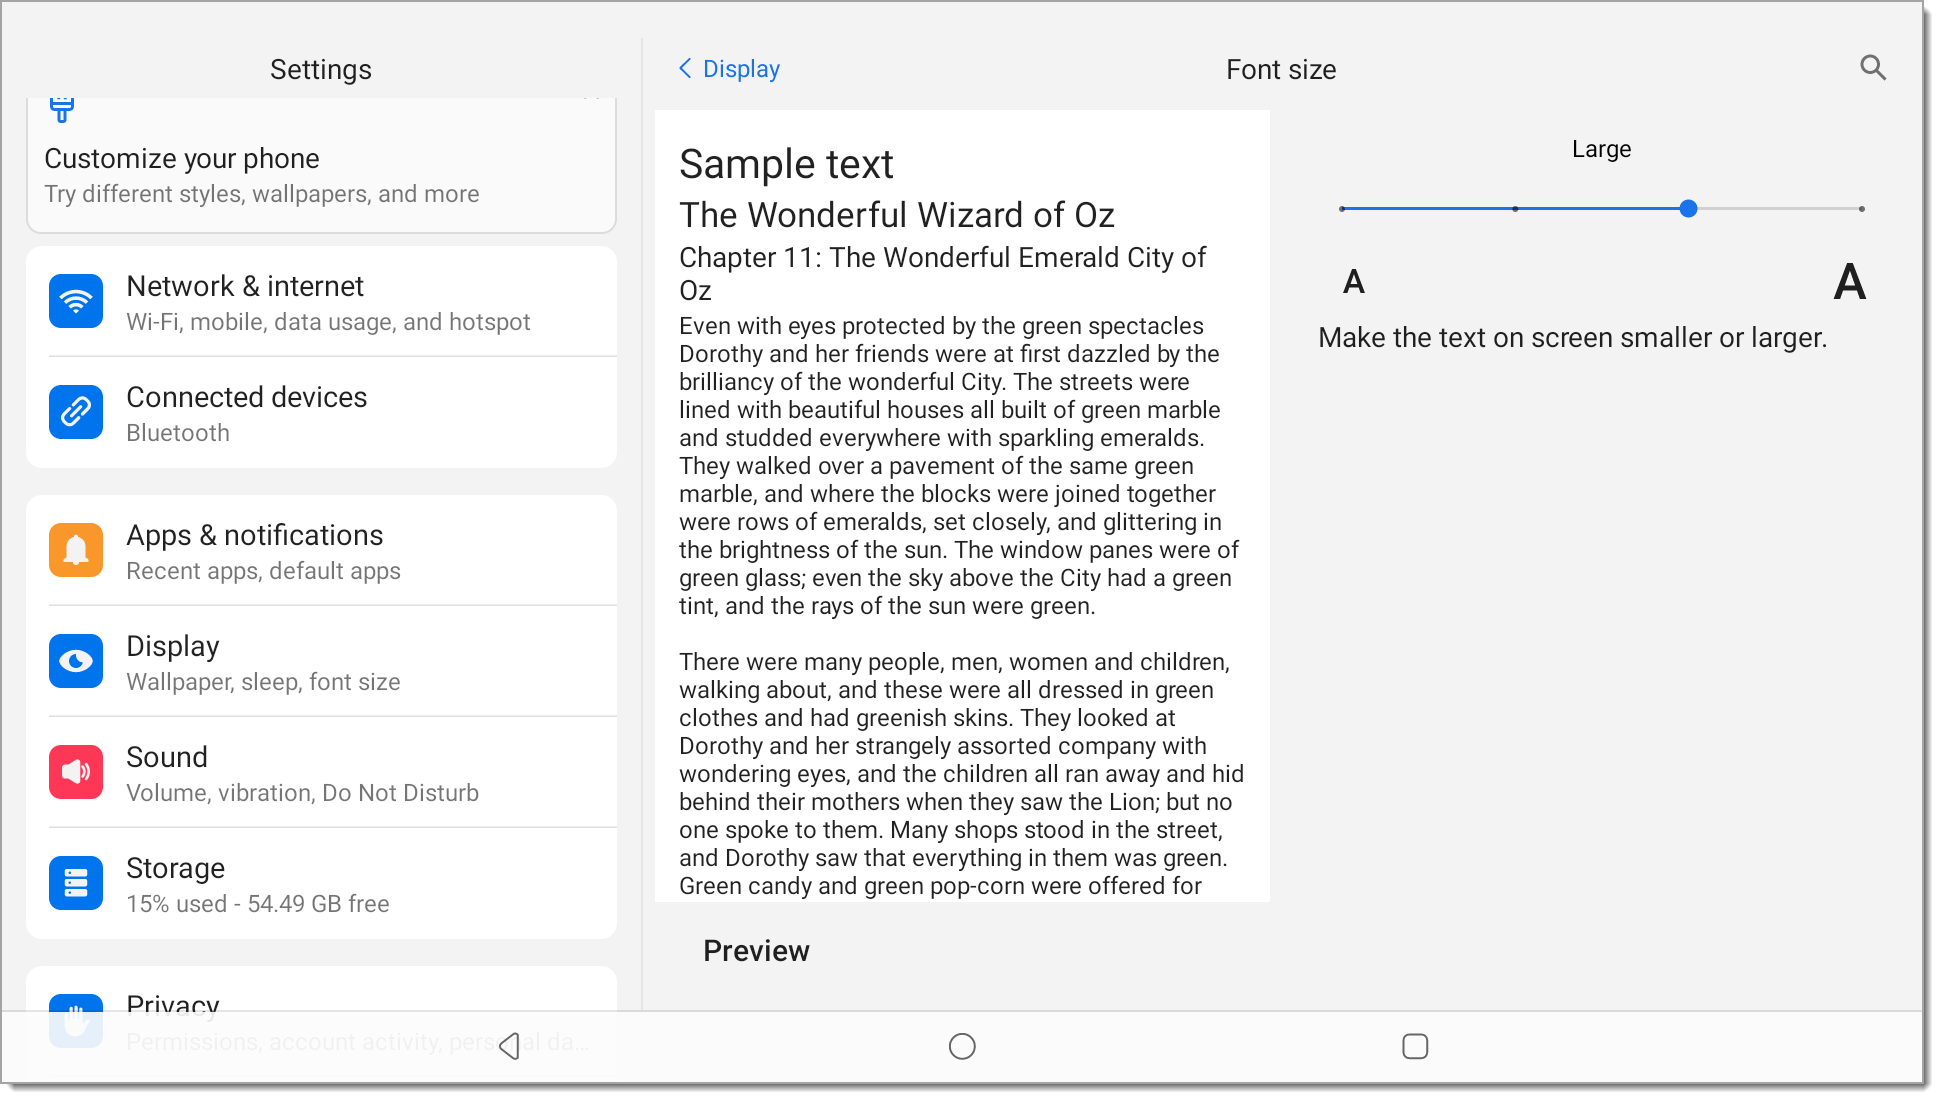
- Adjust the slider to change the font size as desired. The font size selection will automatically be saved.
KDS care
To clean the KDS, apply distilled water or mild glass gleaner onto a soft, lint-free cloth and gently wipe the KDS.
WARNING!
Do not spray water or cleaner in ports or immerse the KDS in water or other liquids.