Back Office Tax Categories
Description
What's in this article?
Solution: Essentials Light | Essentials | Retail | Restaurant
Taxes
Configure as many tax categories as necessary for the items you sell, and designate a specific tax category to use as the default while creating a new item. Otherwise, the system defaults the tax category to a 'No Tax' category.
The taxes that apply to your business may vary depending on the type of items you sell. For example, you might create a tax category called Food Tax and assign it to food items, such as hamburgers and fries. You might create another tax category called Alcohol and assign it to your alcoholic beverages, such as beer and wine. When you create a guest check for a hamburger, fries, and a beer, the system calculates the applicable tax based on the tax rate associated with the tax category assigned to each item.
NOTE:
By default, your store already has a No Tax tax category for use with tax-exempt items.
- Add a tax category
NOTE:
Essentials Light supports a maximum of two tax categories.- In the Back Office, select Settings at the top-right corner of the screen.
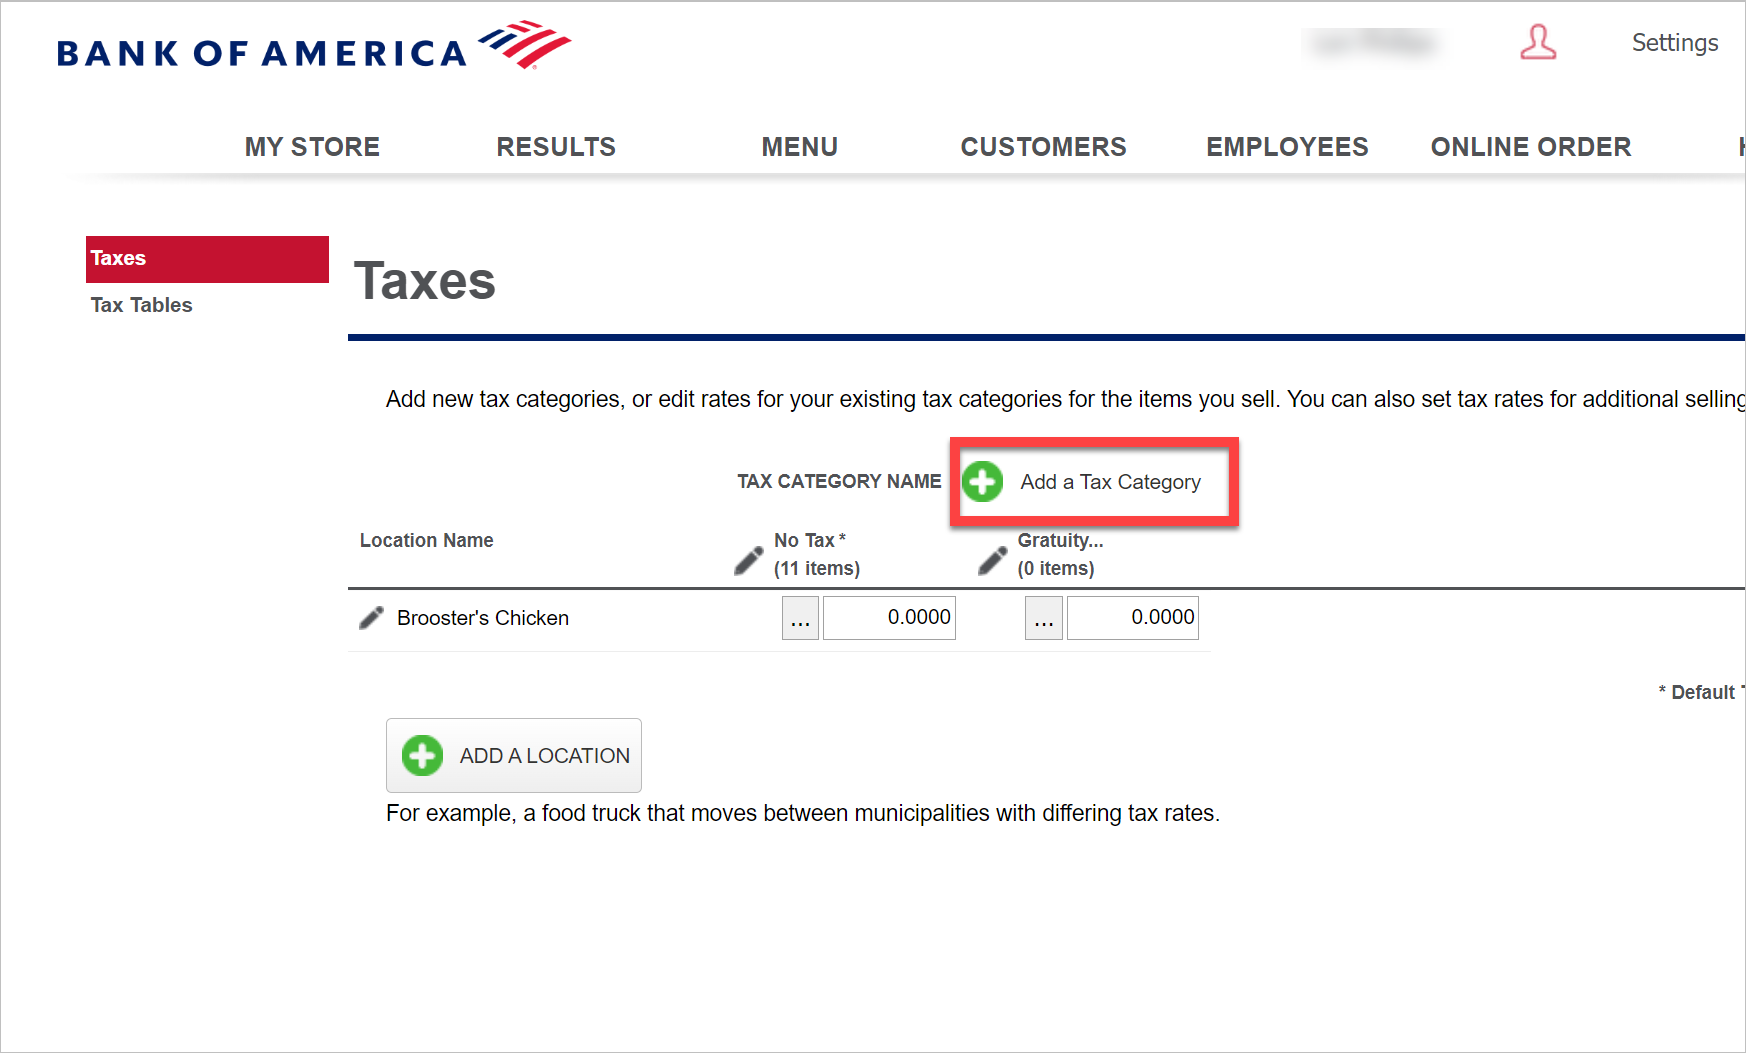
- Select Taxes.
- Click Add a Tax Category.
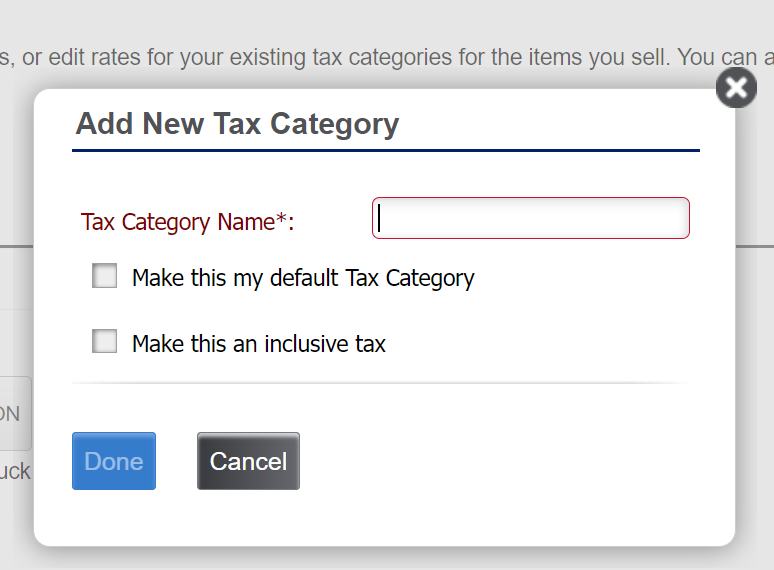
- Enter a descriptive name and select whether the new category will be the default or an inclusive tax.
- Make this an inclusive tax combines the tax amount and the item price to show one total as opposed to tax amount and item amount; however, your reporting will still show separate totals.
NOTE: Including the tax amount in the purchase price, also known as an "inclusive tax", is an available option for all POS solutions except Essentials Light. For Essentials and Retail, the default or "first" tax category may not be designated as inclusive, but additional tax categories can be. Restaurant Solution allows any tax, including the default tax, to be an inclusive tax.
- Make this my defaultTax Category indicates that this tax category is your default tax rate. When you create a new item, the system will apply this tax rate by default.
- Make this an inclusive tax combines the tax amount and the item price to show one total as opposed to tax amount and item amount; however, your reporting will still show separate totals.
- Click Done.
- Enter the tax rate percentage that applies to the items in the tax category (such as 3.250).
- If you have multiple selling locations, you will need to enter the tax rate for each selling location.
- If your selling location requires a tax jurisdiction breakdown, you can edit the tax location name to add jurisdictions. For example, you may want city, state, and county jurisdiction breakdown for reporting.
- Click Save. If your merchandise requires multiple tax categories, repeat this process for every tax category you need to create.
Tax Brackets for Retail Solution
Adding multiple tax brackets per item allows you to apply different tax rates to a single item. For example, in New York, a $300 item could be taxed at 0% for the first $110, then taxed at 4.5% for the remaining amount.
To create Tax Brackets
- Select Taxes
- Select Tax Brackets.
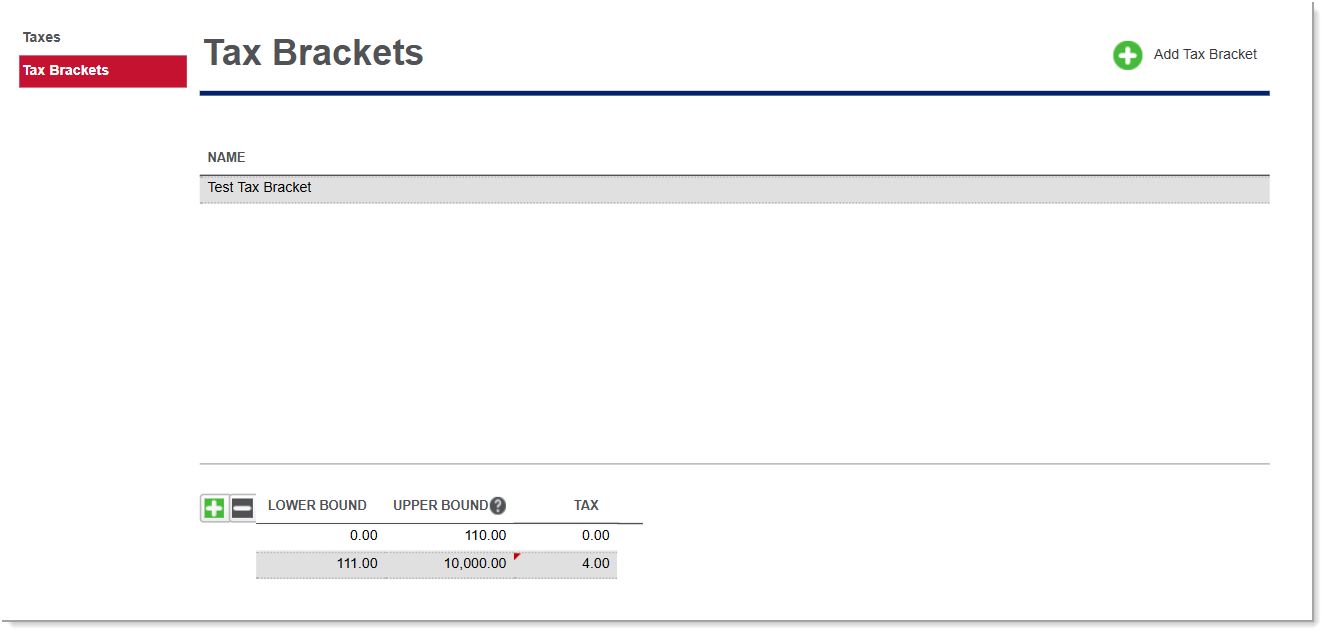
- Select Add Tax Bracket.
- Name the tax bracket.
- Enter the lower and upper bound values that associate to the tax range (i.e. lower bound $0.00 upper bound $110.00: tax would be 0%: the next range would be $111.00 ad the upper bound would be $10,000.00, with the tax being 4% for this range.)
NOTE: Maximum range for the upper bound field $99,999,999.00.
- Save your tax bracket changes and navigate back to the Taxes page.
- Select ... to choose a tax category box and indicate the tax bracket.
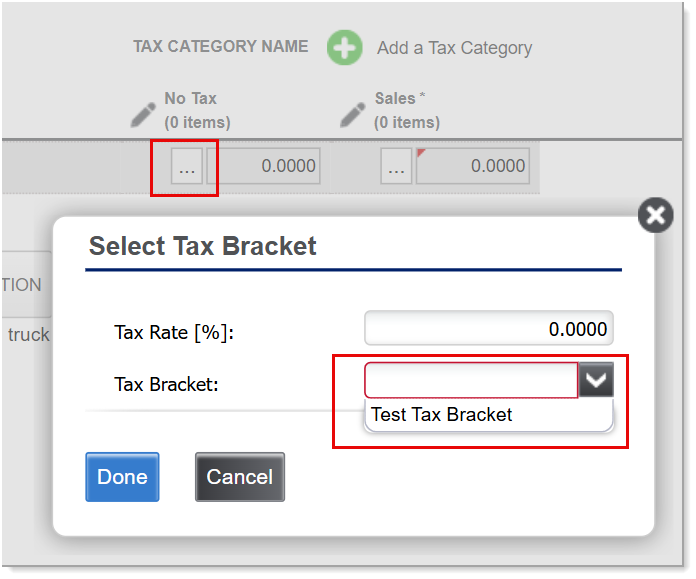
- Click Done, then click Save.