Point of Sale Solution Back Office Calendar Customer Appointments
Description
How to view, schedule, and manage appointments
What's in this article?
Software Plan: Growth | Pro
The Customer Appointments view in the calendar allows you to see all appointments that have been booked for employees (a specific one or any available one) – or resources and the services booked that are assigned to those resources. You can manage these appointments and schedule new ones. Only staff members can create or update appointments.
Enable your preference for viewing appointments by either Employees or Resources in the Back Office Calendar > Settings.
View customer, employee, and resource appointments
Viewing the calendar assists with knowing when customers are scheduled – as well as the availability of employees or resources and the services assigned to them – for scheduling new appointments.
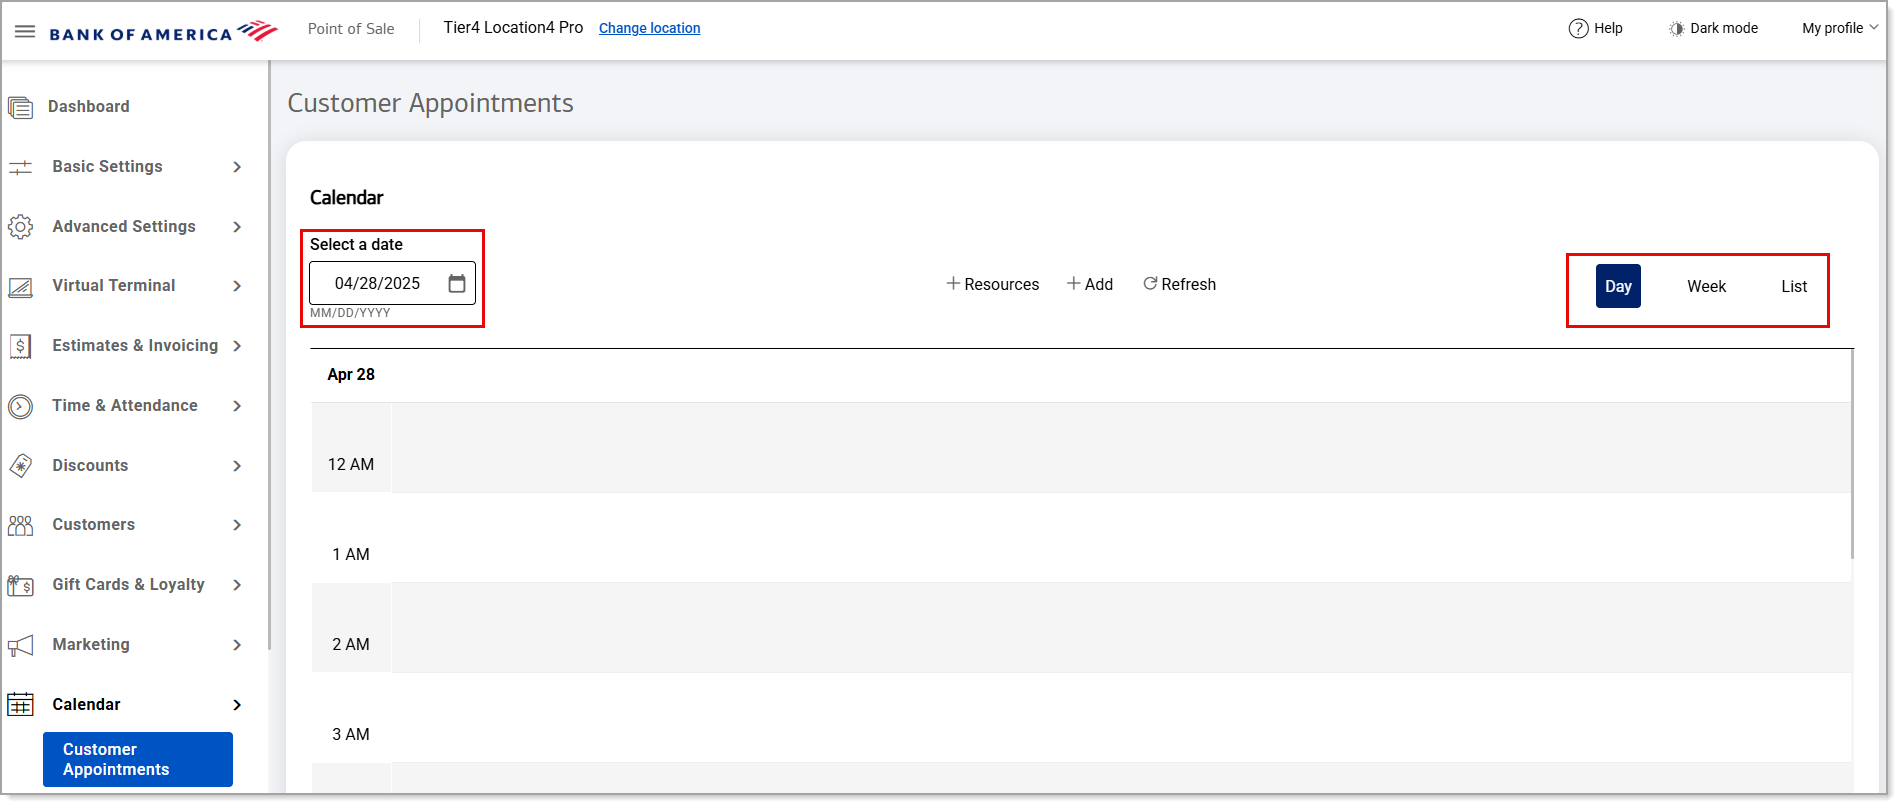
- In the Point of Sale Solution Back Office, select Calendar > Customer Appointments.
- Click Refresh if you support online appointments.
- Choose to view the calendar by Day, Week, or List. To view by day or week, select a date/date range.
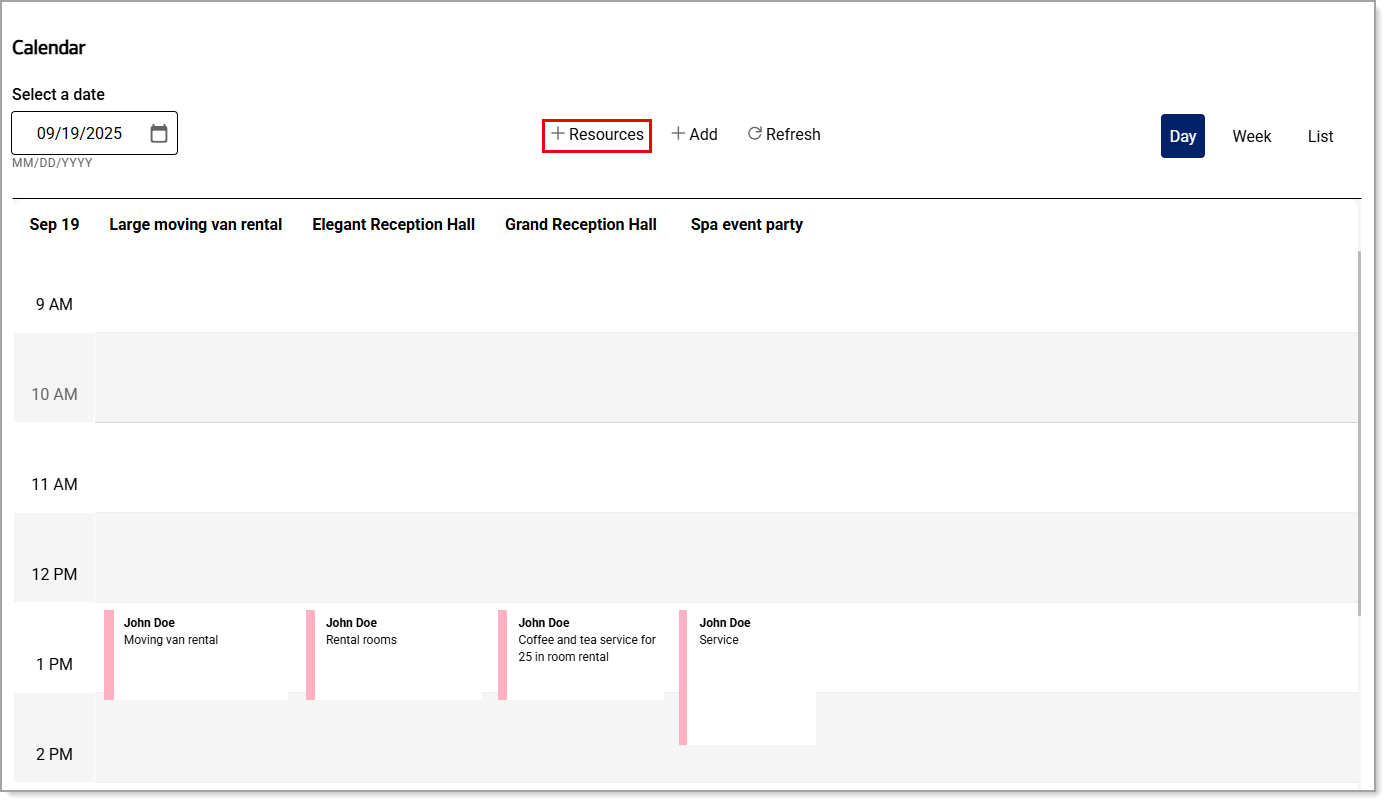
- To view appointments for a specific resource, while in Resource view, click + Resources, search on the Resource group name, and click Done. Resource appointments are organized by the service booked and the Resource item it is assigned to.
 To view appointments for a specific employee, while in Employee view, click Employee, select the employee name, and click Done.
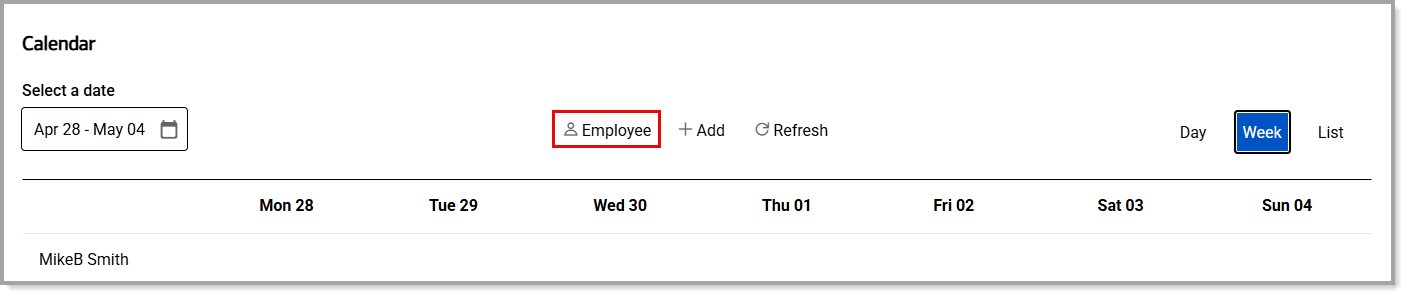
To view unassigned appointments after viewing appointments by employee(s), click Employee, deselect any employee(s) that were previously selected by clicking on their name, and click Done.
Schedule a customer appointment
- In the Point of Sale Solution Back Office, select Calendar > Customer Appointments.
- Follow the steps to View customer, employee, and resource appointments to learn the availability of an employee or service (and its assigned resource) for a customer appointment, if needed.
- To add a customer to the appointment calendar, click + Add.

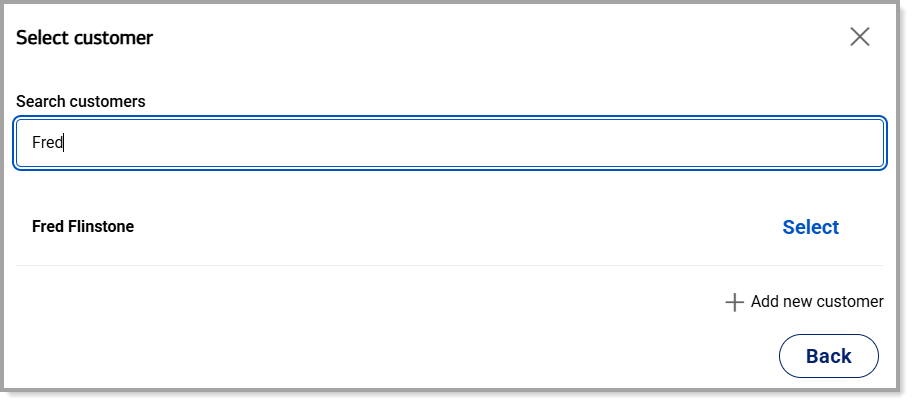
- Enter the customer's name.If the customer has already been added to the system, search for their name and click Select next to where they appear in the search results. Once selected, you can edit the customer's profile with any changes, view their note history or add to it, or view their order history. Click Next.
 If the customer is new, click + Add new customer, complete a new customer profile, and click Add customer. This will return you back to the New Appointment screen.
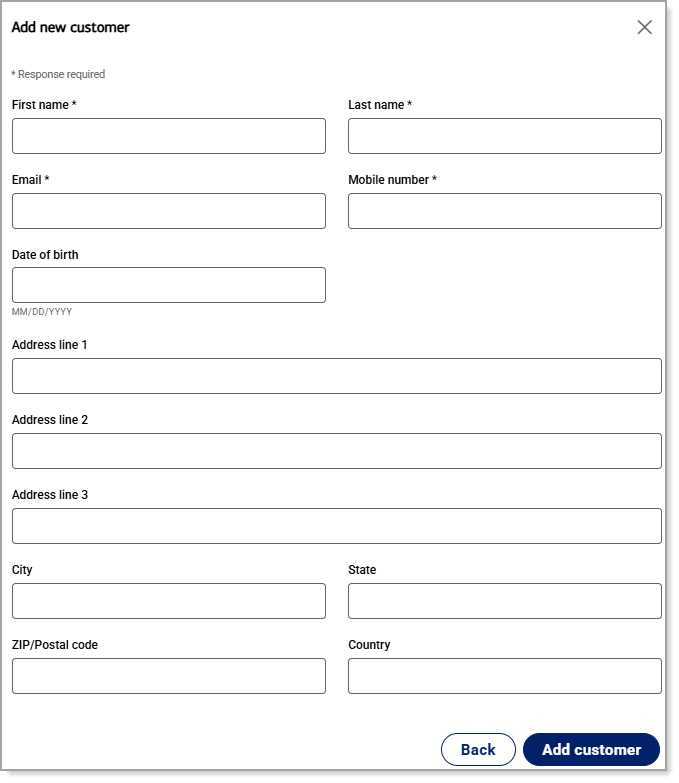
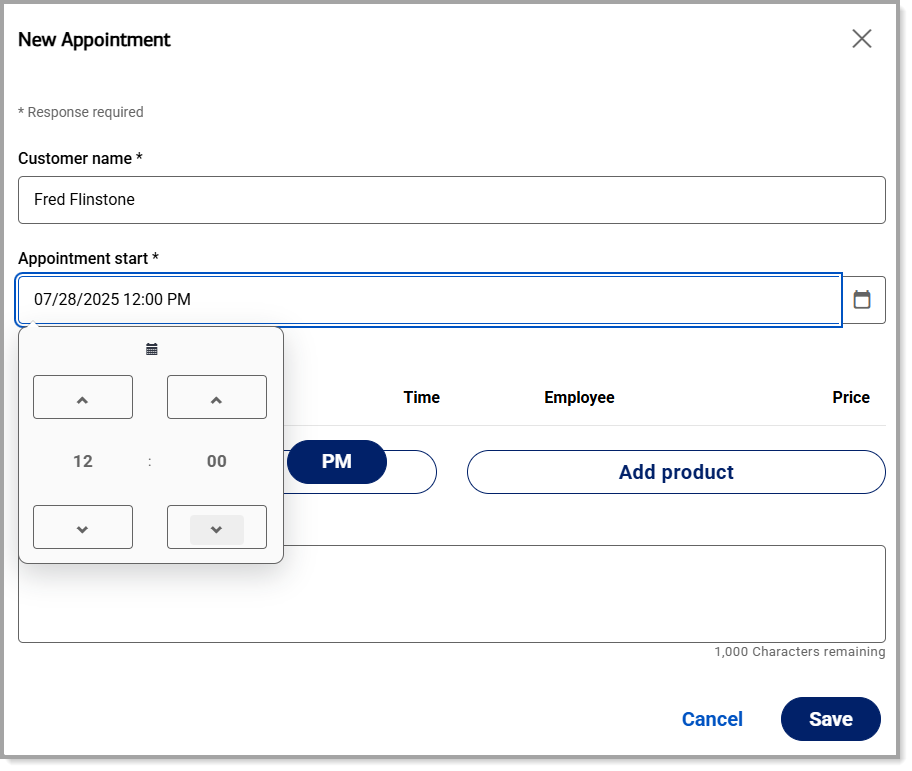
- Click in the Appointment start field, select an appointment date from the calendar, then click the clock icon.

- Select an appointment start time using the hour and minute arrows. Click the PM/AM indicator to select the correct timeframe. Click Save.
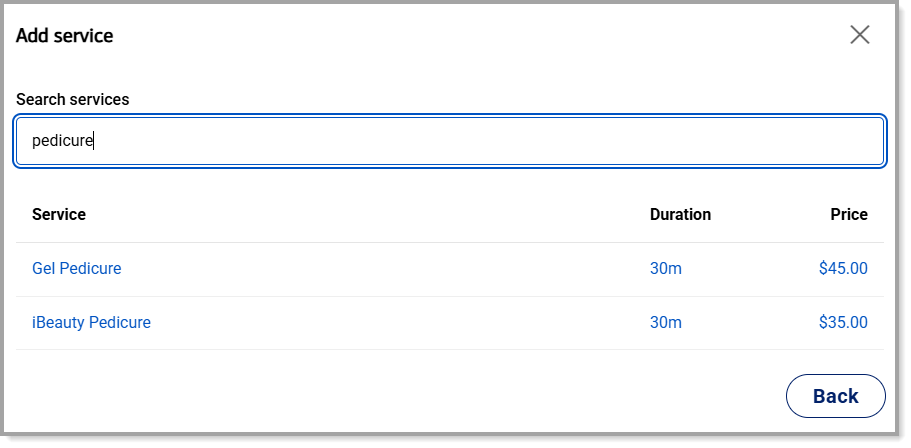
- Click Add service to search for a service to add to the appointment. Services not assigned to a resource appear in the dropdown list.
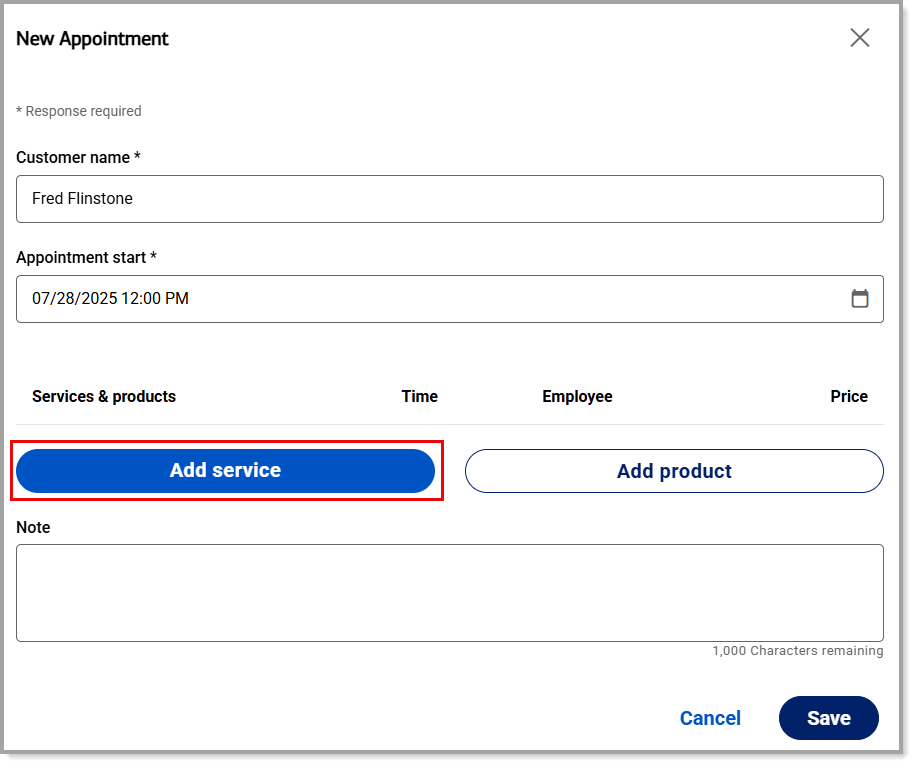
- Click Save.
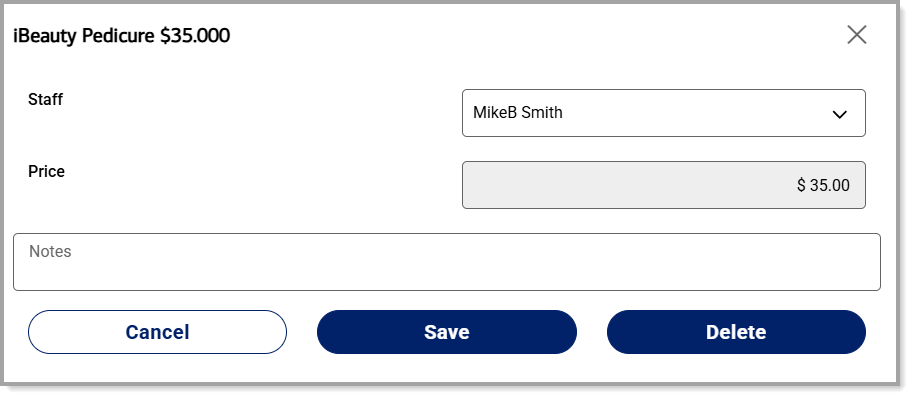
- To add a staff member to the service, click on the service name, then select the staff member's name from the dropdown list and Save. You must assign the service to an employee before a staff member can be selected.
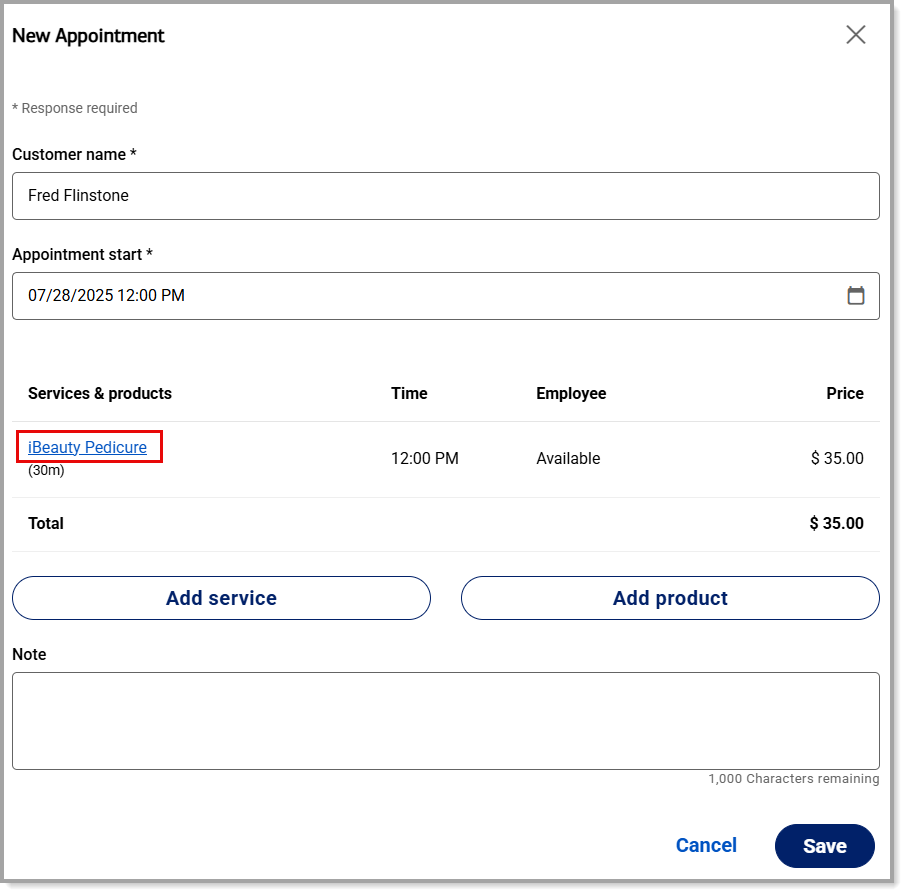
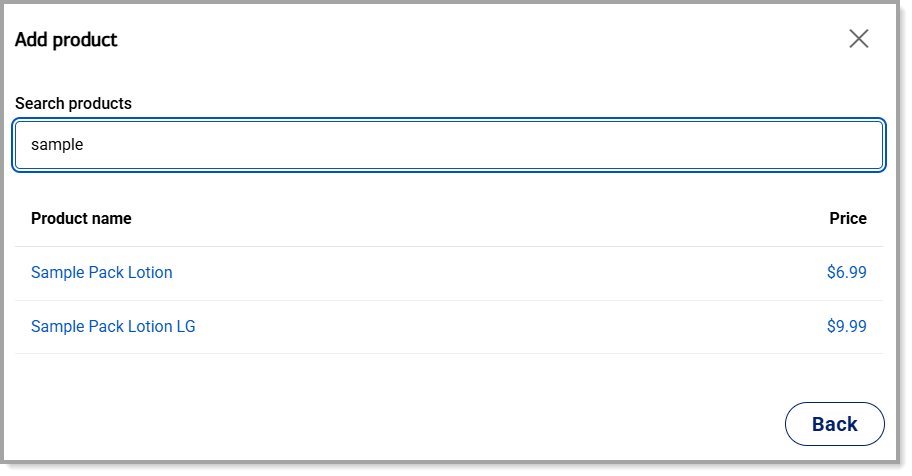
- If needed, click Add product to search for a product to add to the appointment and Save.
- If needed, add a note in the Note field.
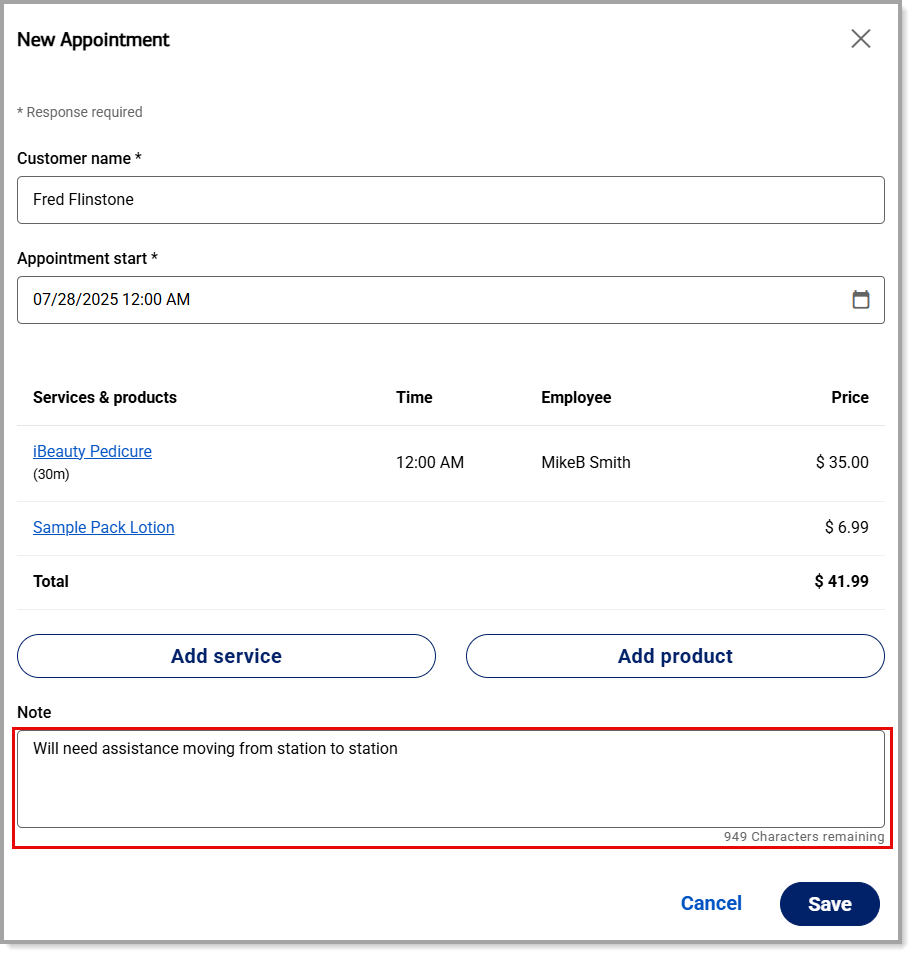
- Click Save and close out of the appointment window.