Point of Sale Solution Back Office Services
Description
What's in this article?
Like products, services can be added to your inventory. Once a service is created, it can be assigned to employees who are qualified to perform it.
Before setting up services, we recommend creating any applicable categories, tax settings, and printers so that they are ready to be assigned to the service.
- *music*
- This video covers how to add and manage services in the Point of Sale Solution Back Office.
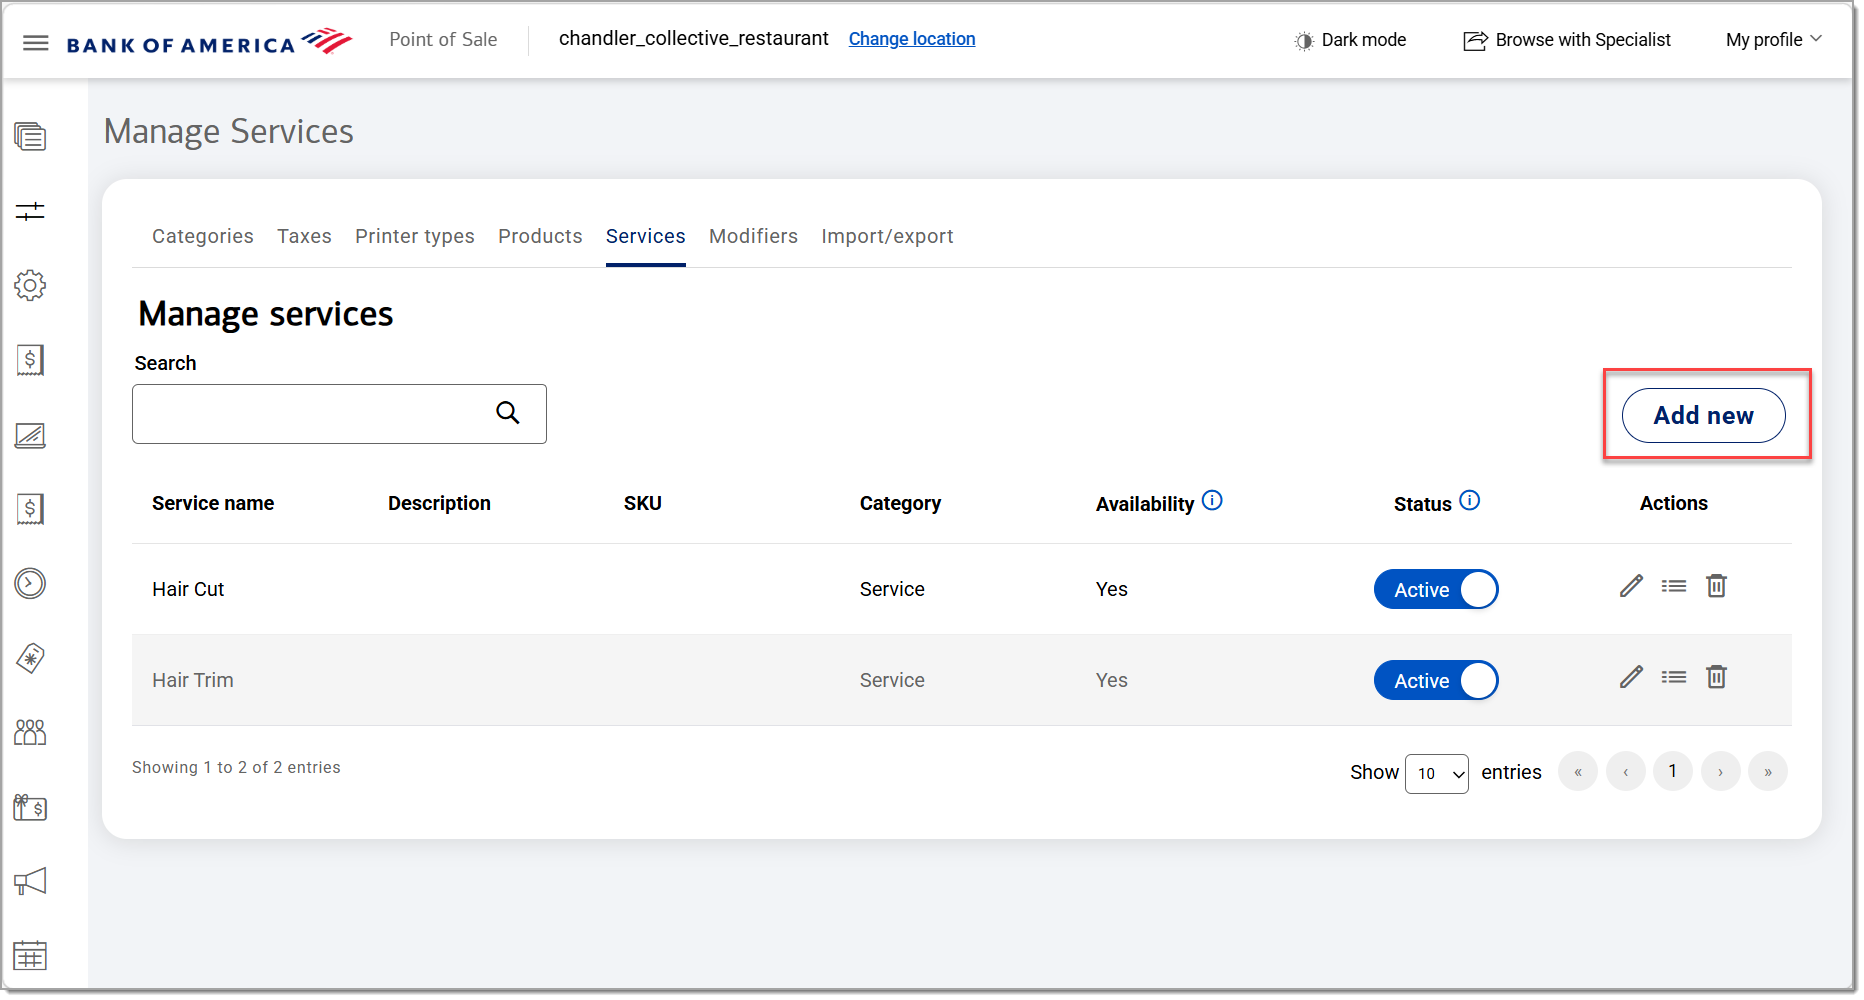
- To add a service, click Basic Settings, then Items. Click the Services tab, then Add new.
- The Add Service form includes mandatory fields marked with an asterisk, that must be completed before proceeding, as well as optional fields that can be filled out during creation or afterward.
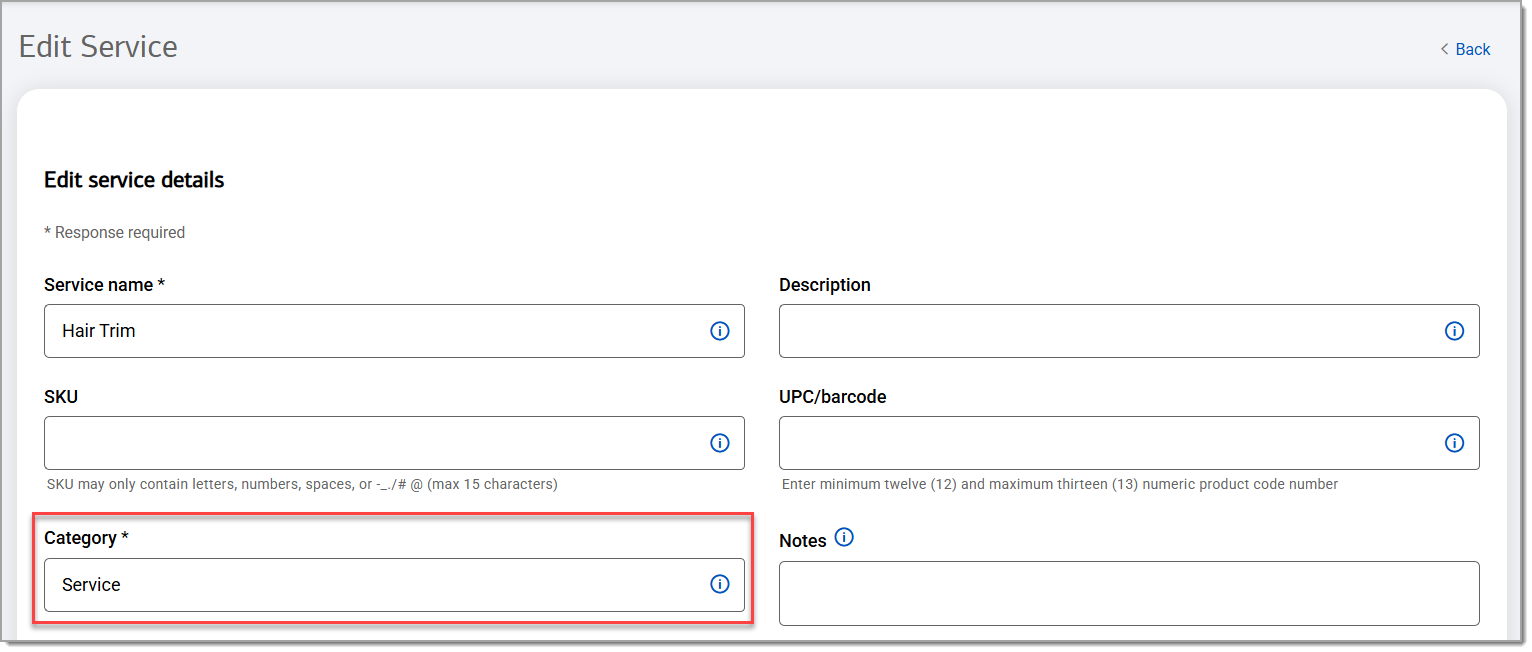
- In the New service detail section of the form, enter a name for the service and select a category.
- Additional information like the service description, SKU, UPC and notes can be added.
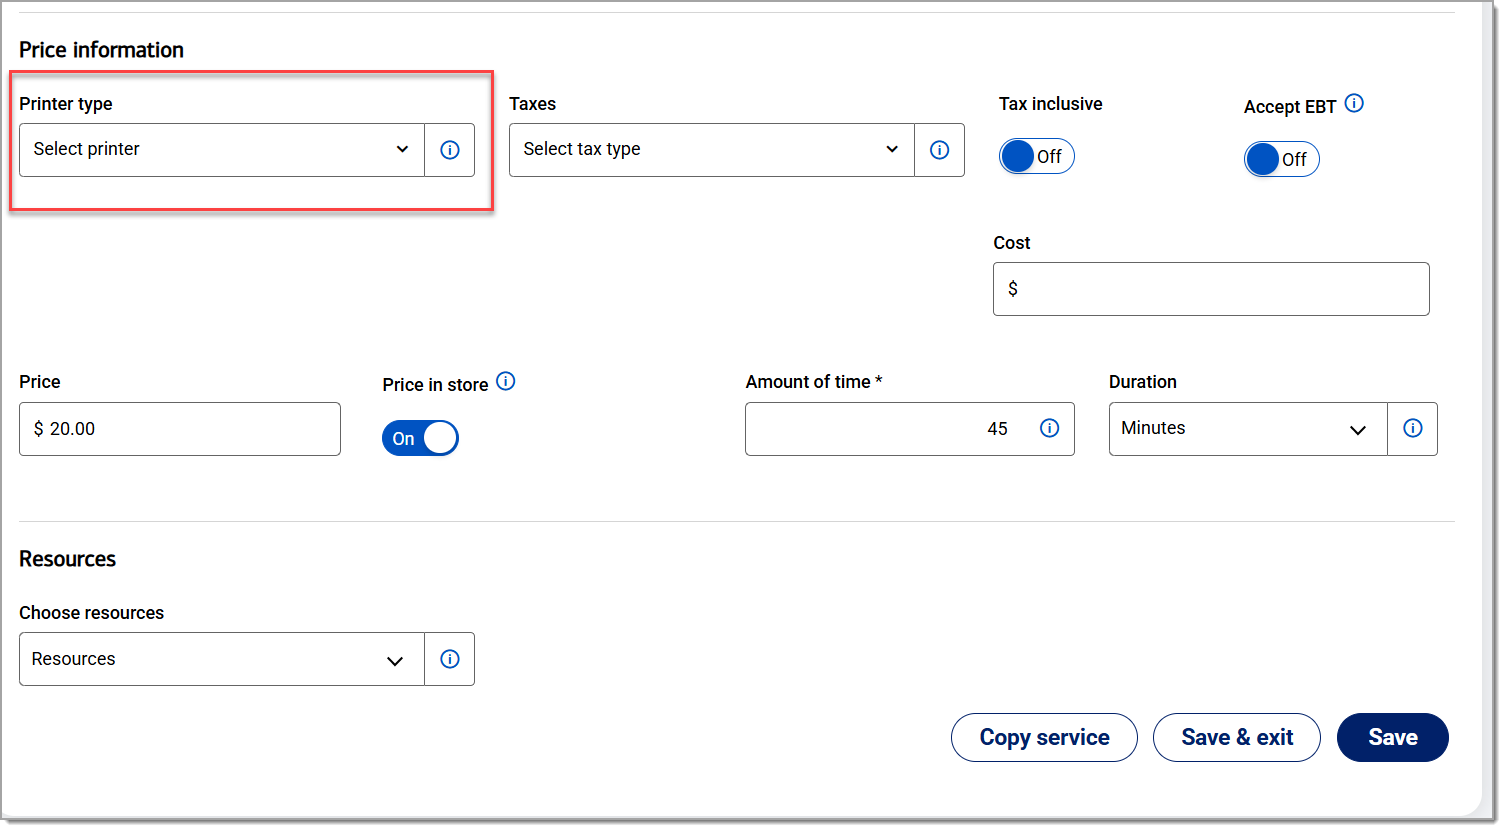
- In the Price information section, you can select a printer type to determine where the service receipt will be printed, set tax and EBT eligibility, define the cost, choose whether the price is a default or custom amount and specify the service duration to block the required time when booked.
- If your service availability is determined by resources, then you must assign it to a resource group. Click Save.
- To edit a service, click the Edit icon, align to the desired service. Make the change and click Save.
- To delete a service, click the Delete icon. If prompted, specify if you'd like to delete the service from one or all locations, then click Remove service.
- *music*
Add a service or add-on to a service
Services are created using the same management process as items. You can also add service add‑ons if they have been configured as modifiers.
To add a service
- In the Point of Sale Solution Back Office, select Basic Settings > Items, then select the Services tab.
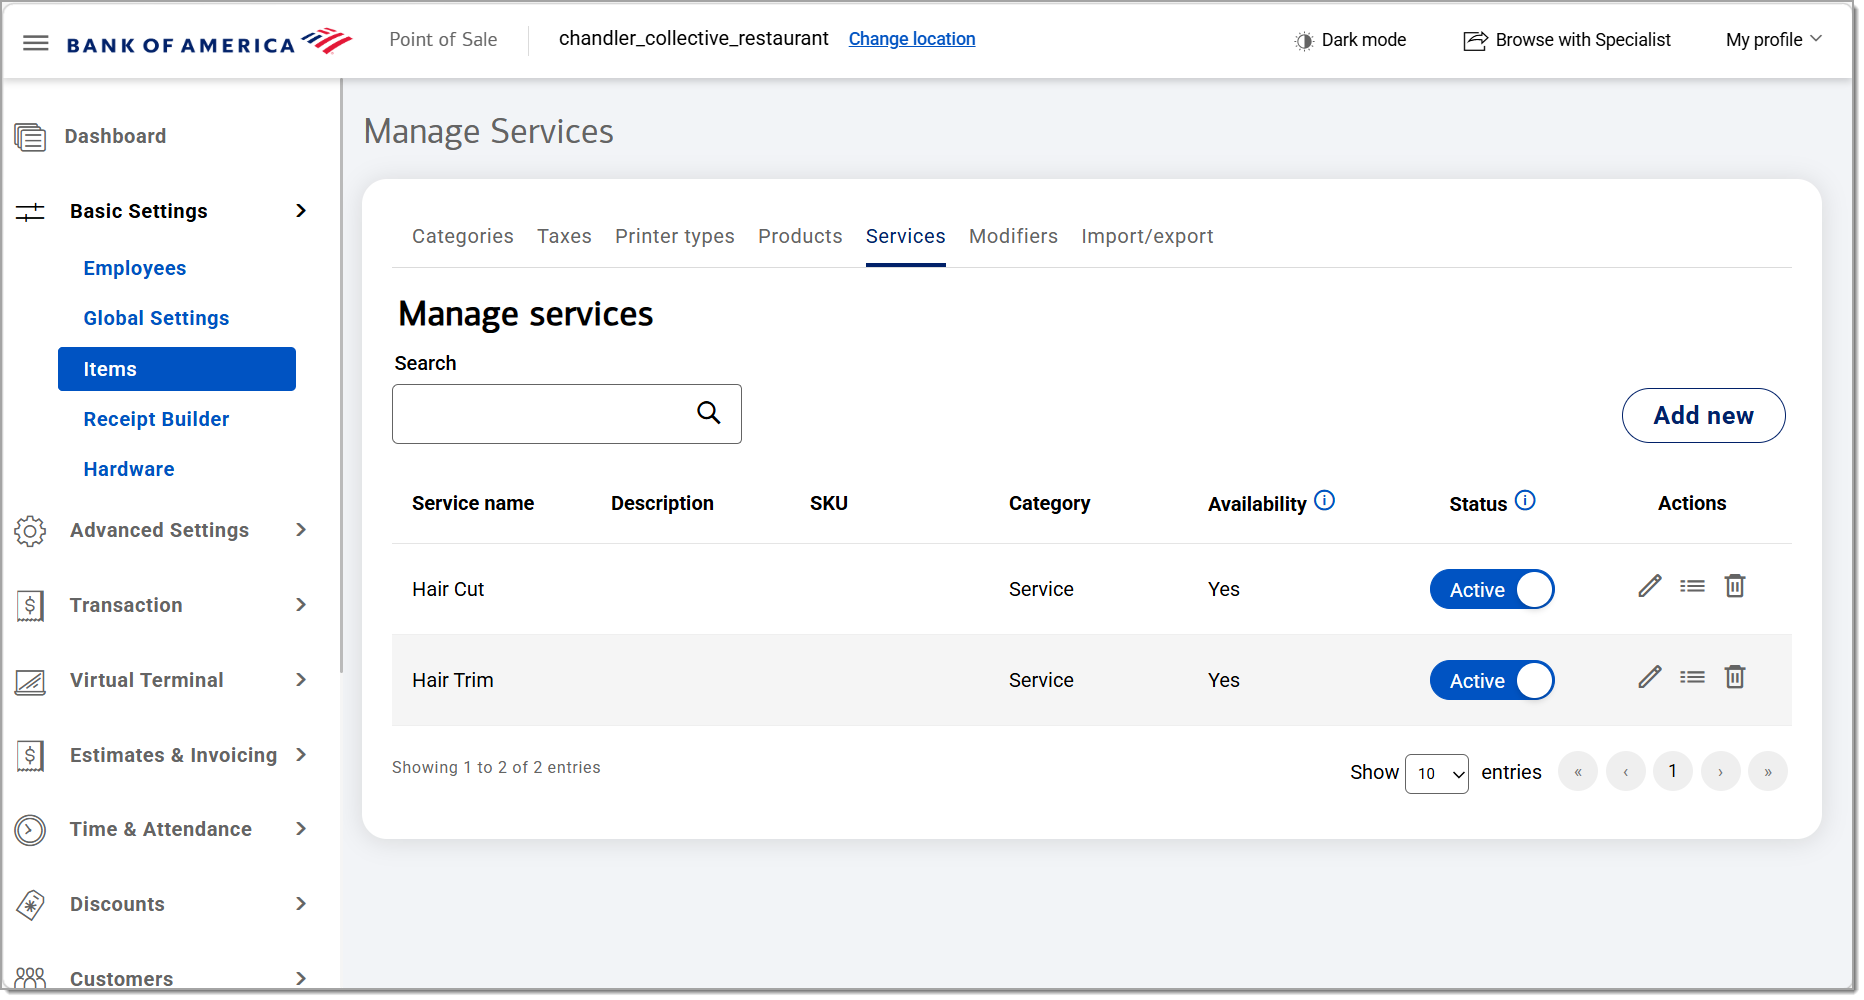
- Click Add new.
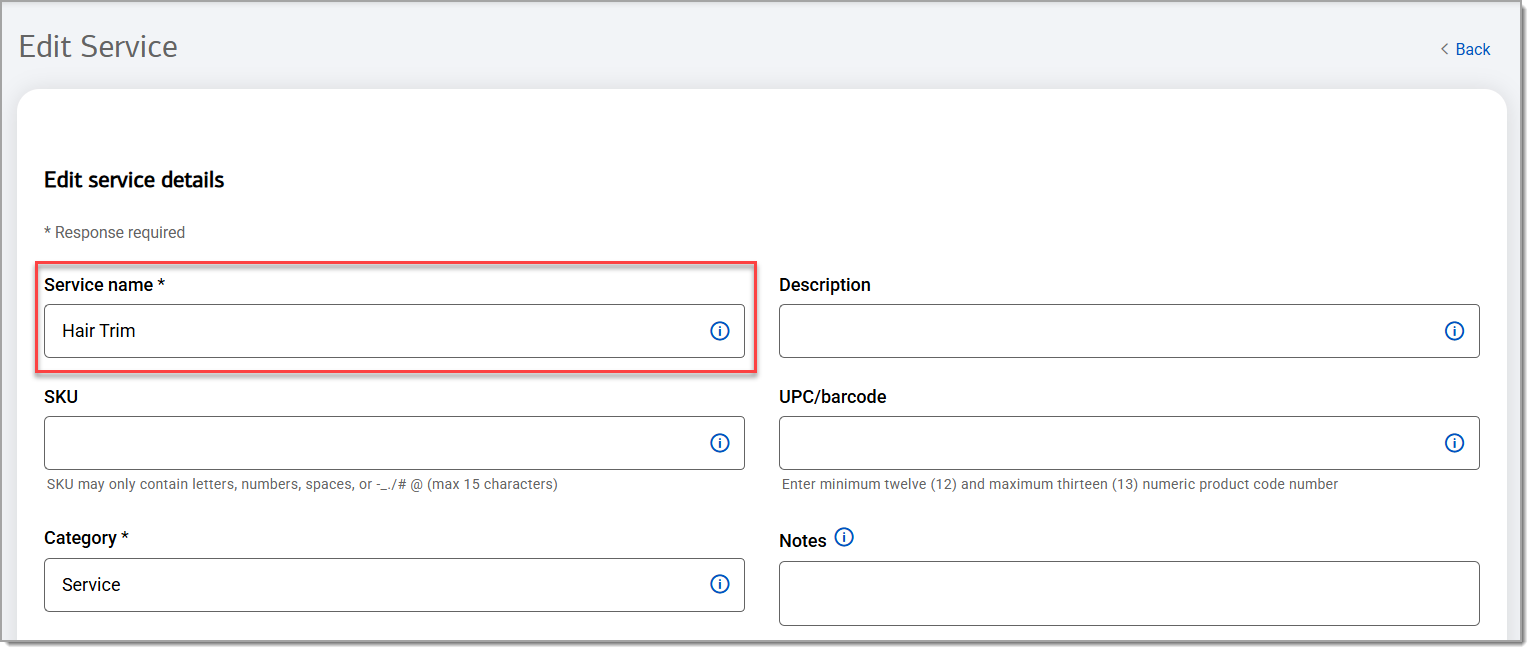
- In the New service details section:
- Enter a Service name.
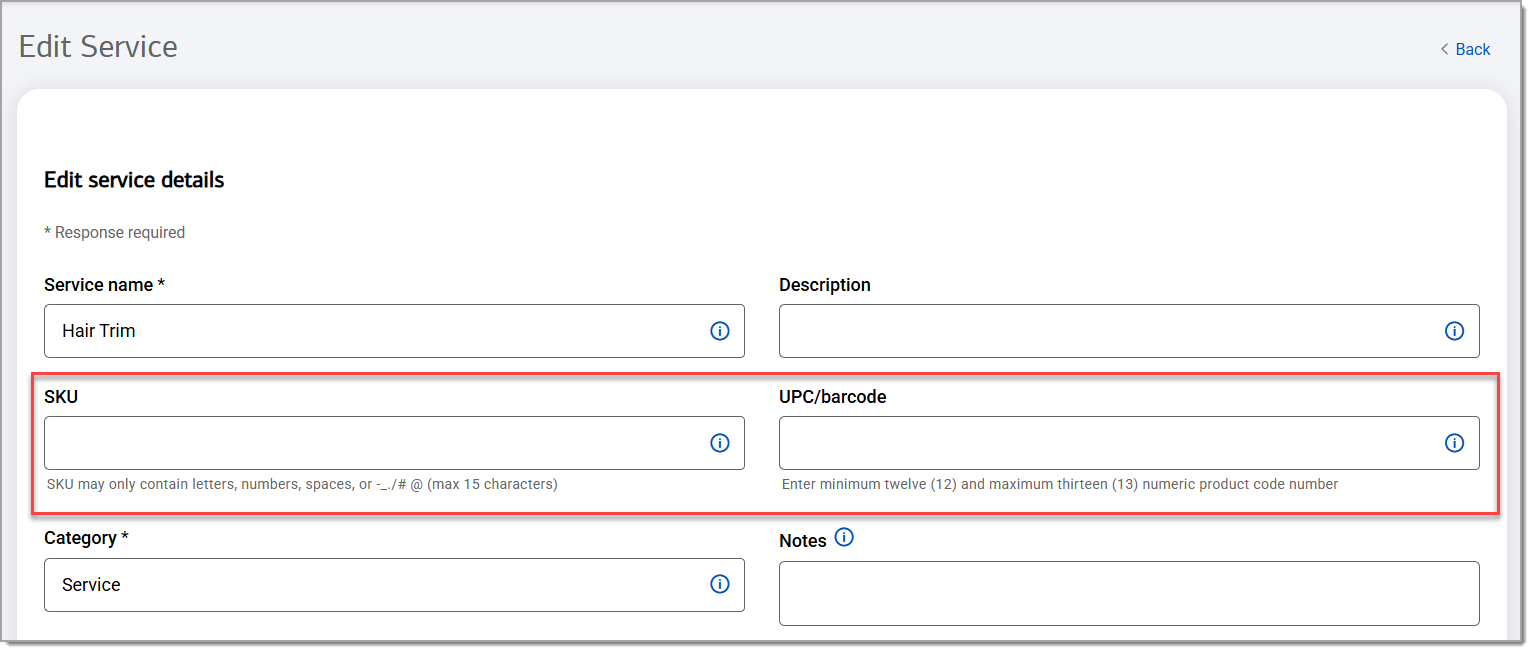
- (Optional) Add a description for the new service, a SKU, and/or UPC/barcode.
- Select a category by starting to type the category name and then selecting it from the dropdown list.
- Enter a Service name.
- (Optional) In the Price information section:
- Select a Printer type from the dropdown list.
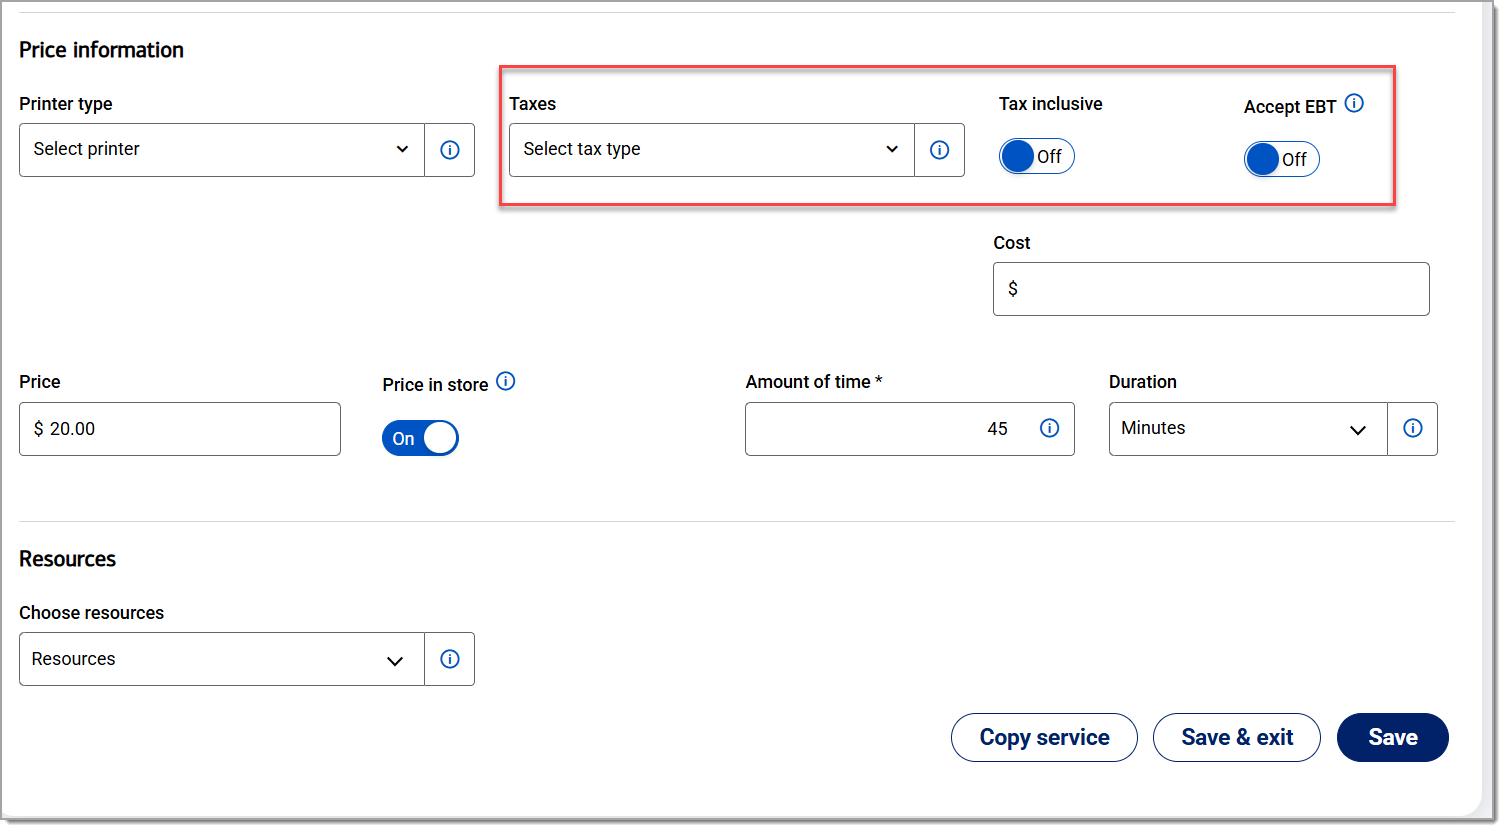
- If the service is taxable:
- Select a Tax from the dropdown list and enable Taxable item.
- If not taxable, keep this option disabled.
- Enable Accept EBT, if applicable.
- If you would like to charge for the service, enter a Price.
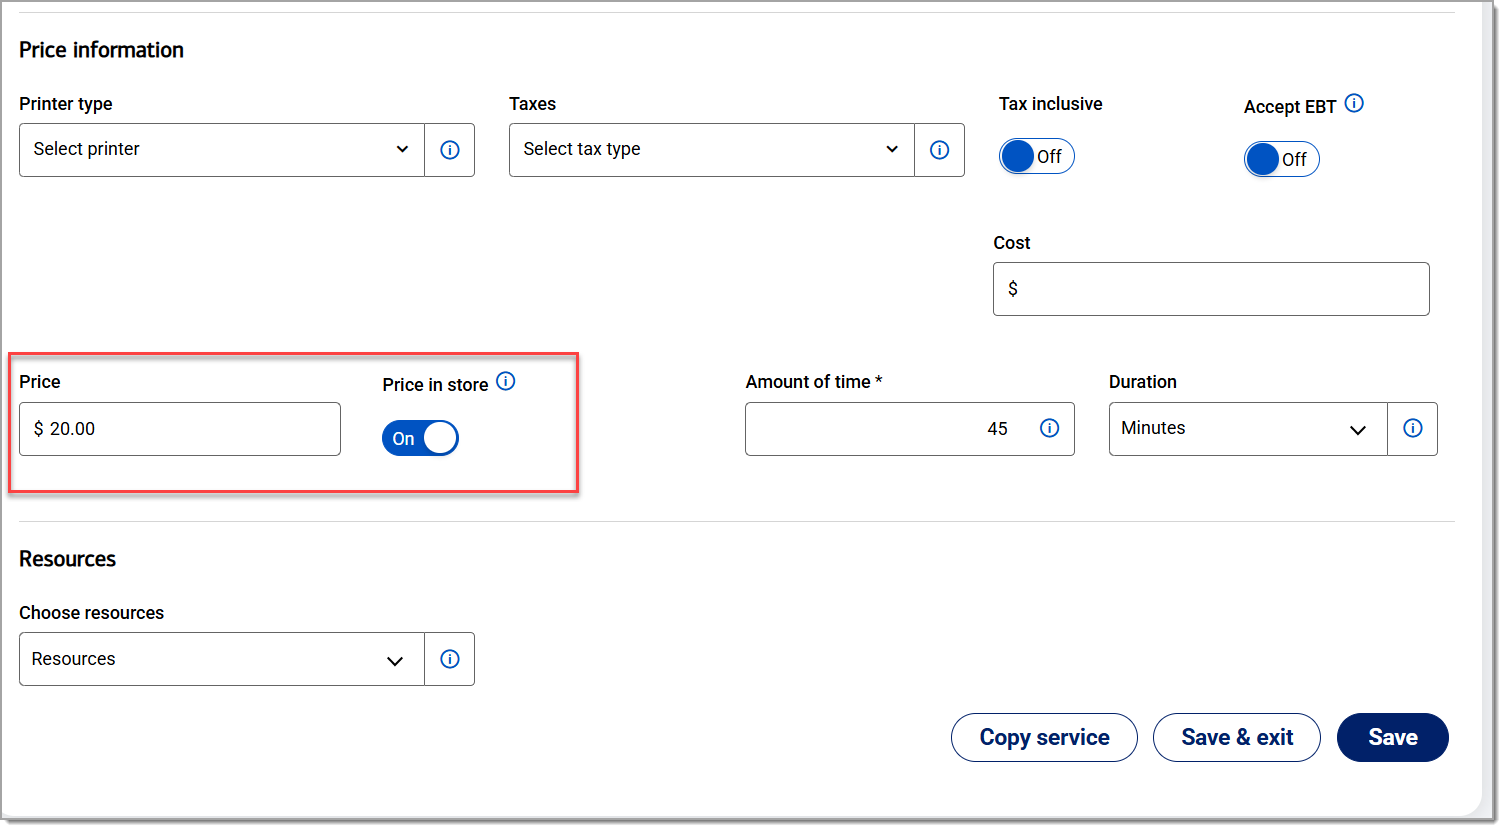
- If you would like to be able to set the price at the point of sale, enable Price in store.
- Select a Printer type from the dropdown list.
- Enter the Amount of time for the service and select the Duration (minutes, hours, days, etc.) from the dropdown list.
This ensures that time can be scheduled and blocked accordingly on your Customer Appointments Calendar and, if you have one, your Online Appointments site.
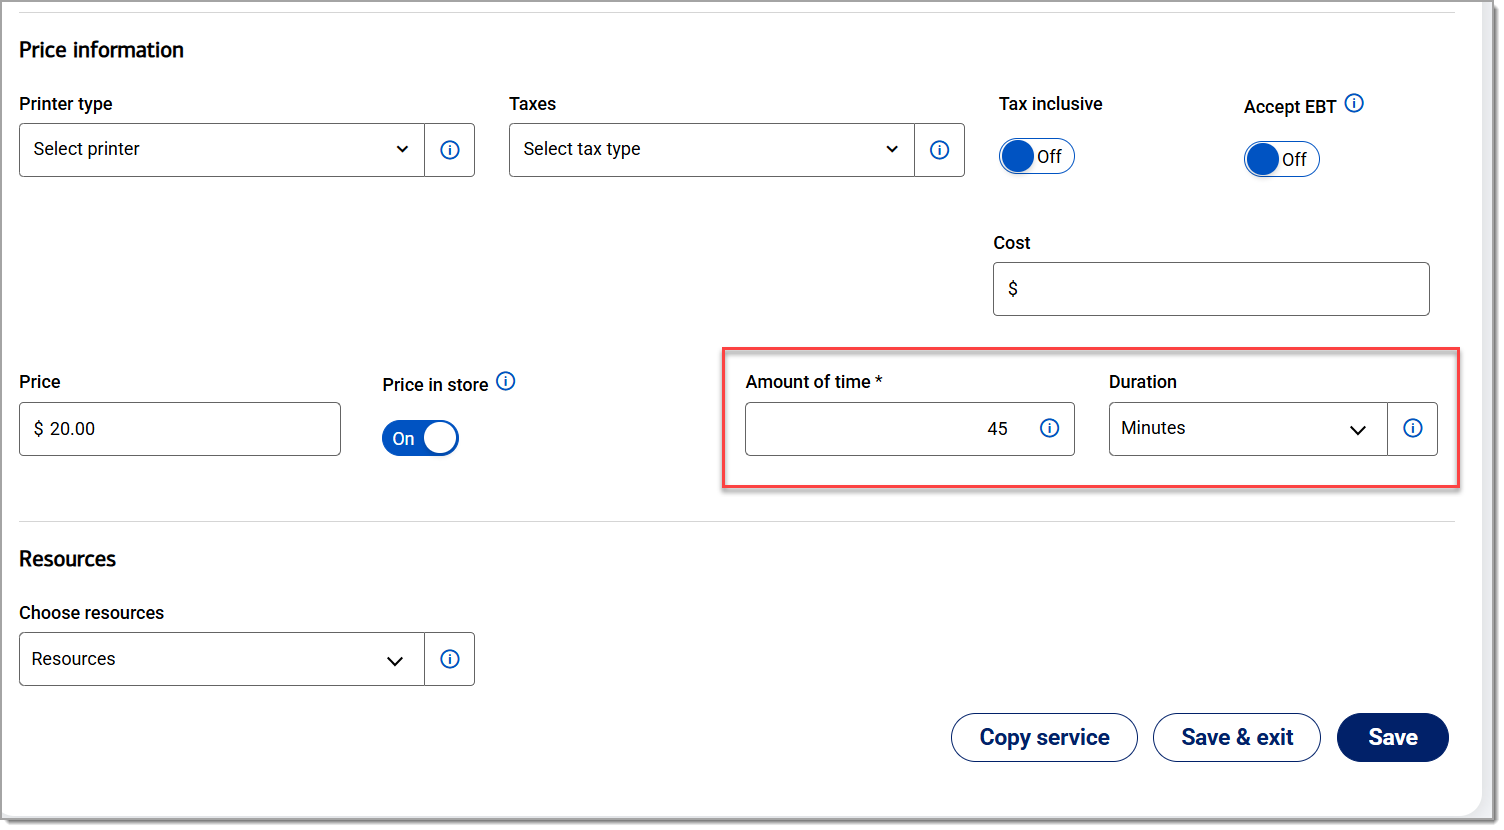
- (Optional) Assign the service to a Resource group by selecting it from the Choose resources dropdown list. A resource group must be created before it can be assigned to a service.
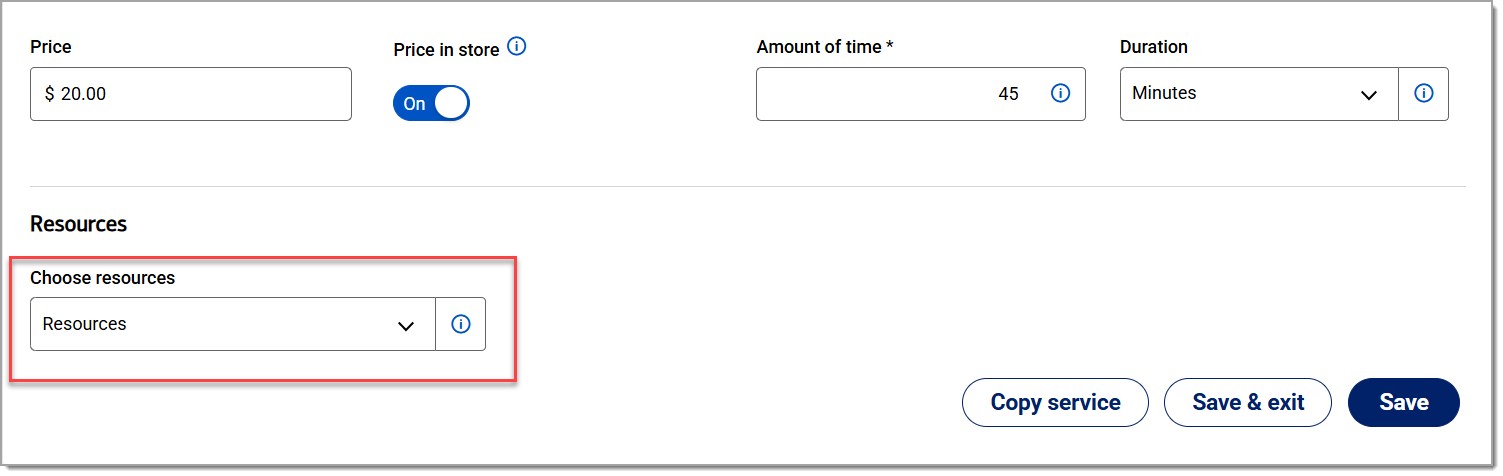 Click Save.
To copy an existing service
- In the Point of Sale Solution Back Office, select Basic Settings > Items > Services tab.
- Search for the service you would like to copy.
- In the Actions column for that service, click the Edit icon.
- Click Copy service.
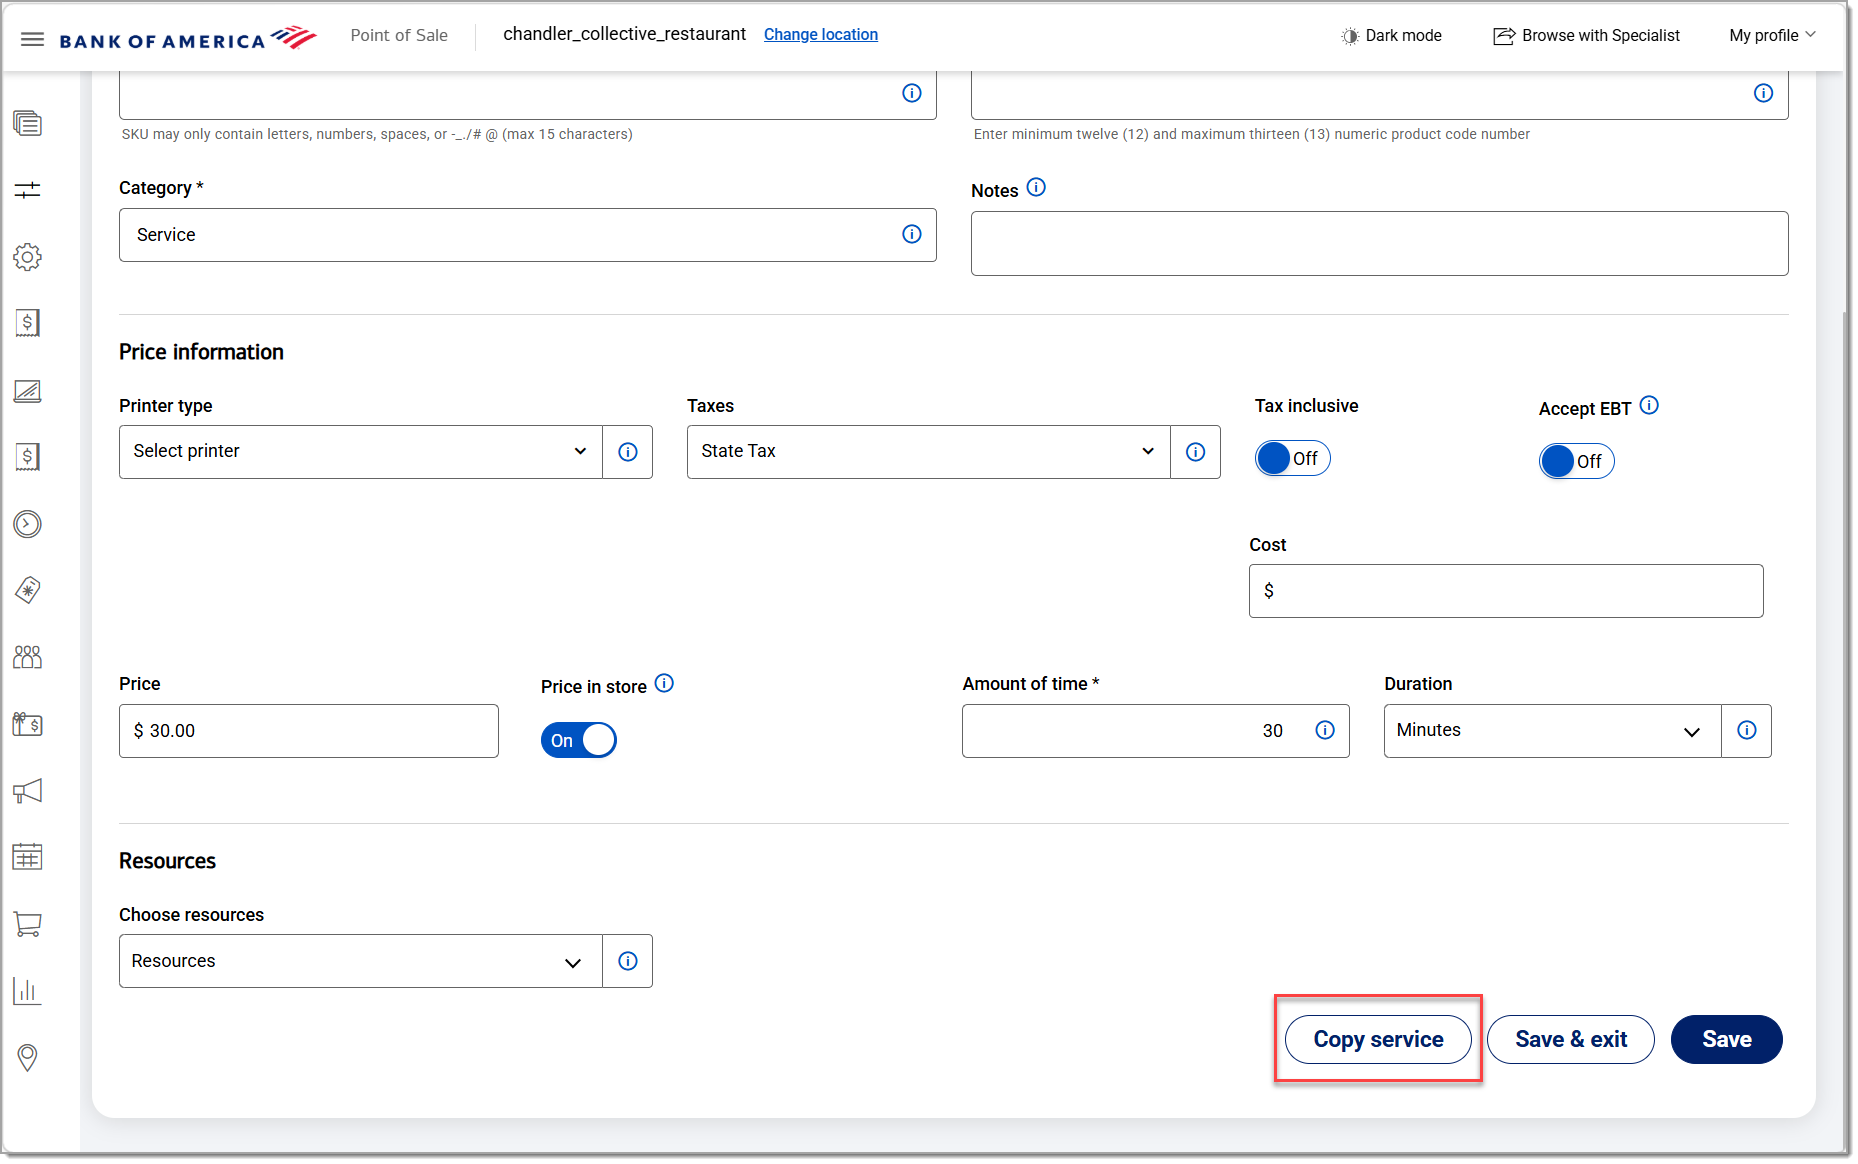
- Enter or edit the service details on the top half of the form
- Update the price and duration information on the bottom of the form. The fields with an asterisk indicate a required field.
- Click Save and Exit.
To create a service add-on
- In the Point of Sale Solution Back Office, select Basic Settings > Items.
- From the Services tab, click the Service Add-on icon.
- Begin typing in the add on you wish to add to your service and select it. The add on option(s) available are those you have set up as modifiers.
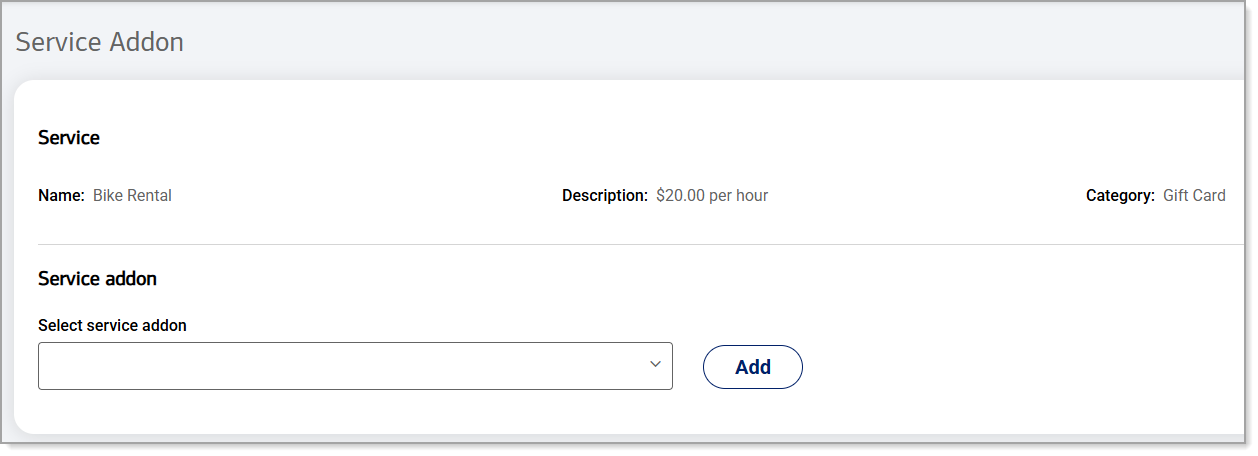
- Click Add.
Assign a service to an employee
Once you've created a service in your inventory, you can link it to an employee that is able to perform the service so a customer can be scheduled with that employee. For example, you might have a salon that provides hair and nail services, but your employees either perform hair services or nail services.
To assign a service to an employee
- In the Point of Sale Solution Back Office, select Basic Settings > Employees.
- Locate the employee you will assign services to.
- Click the Staff Services icon.
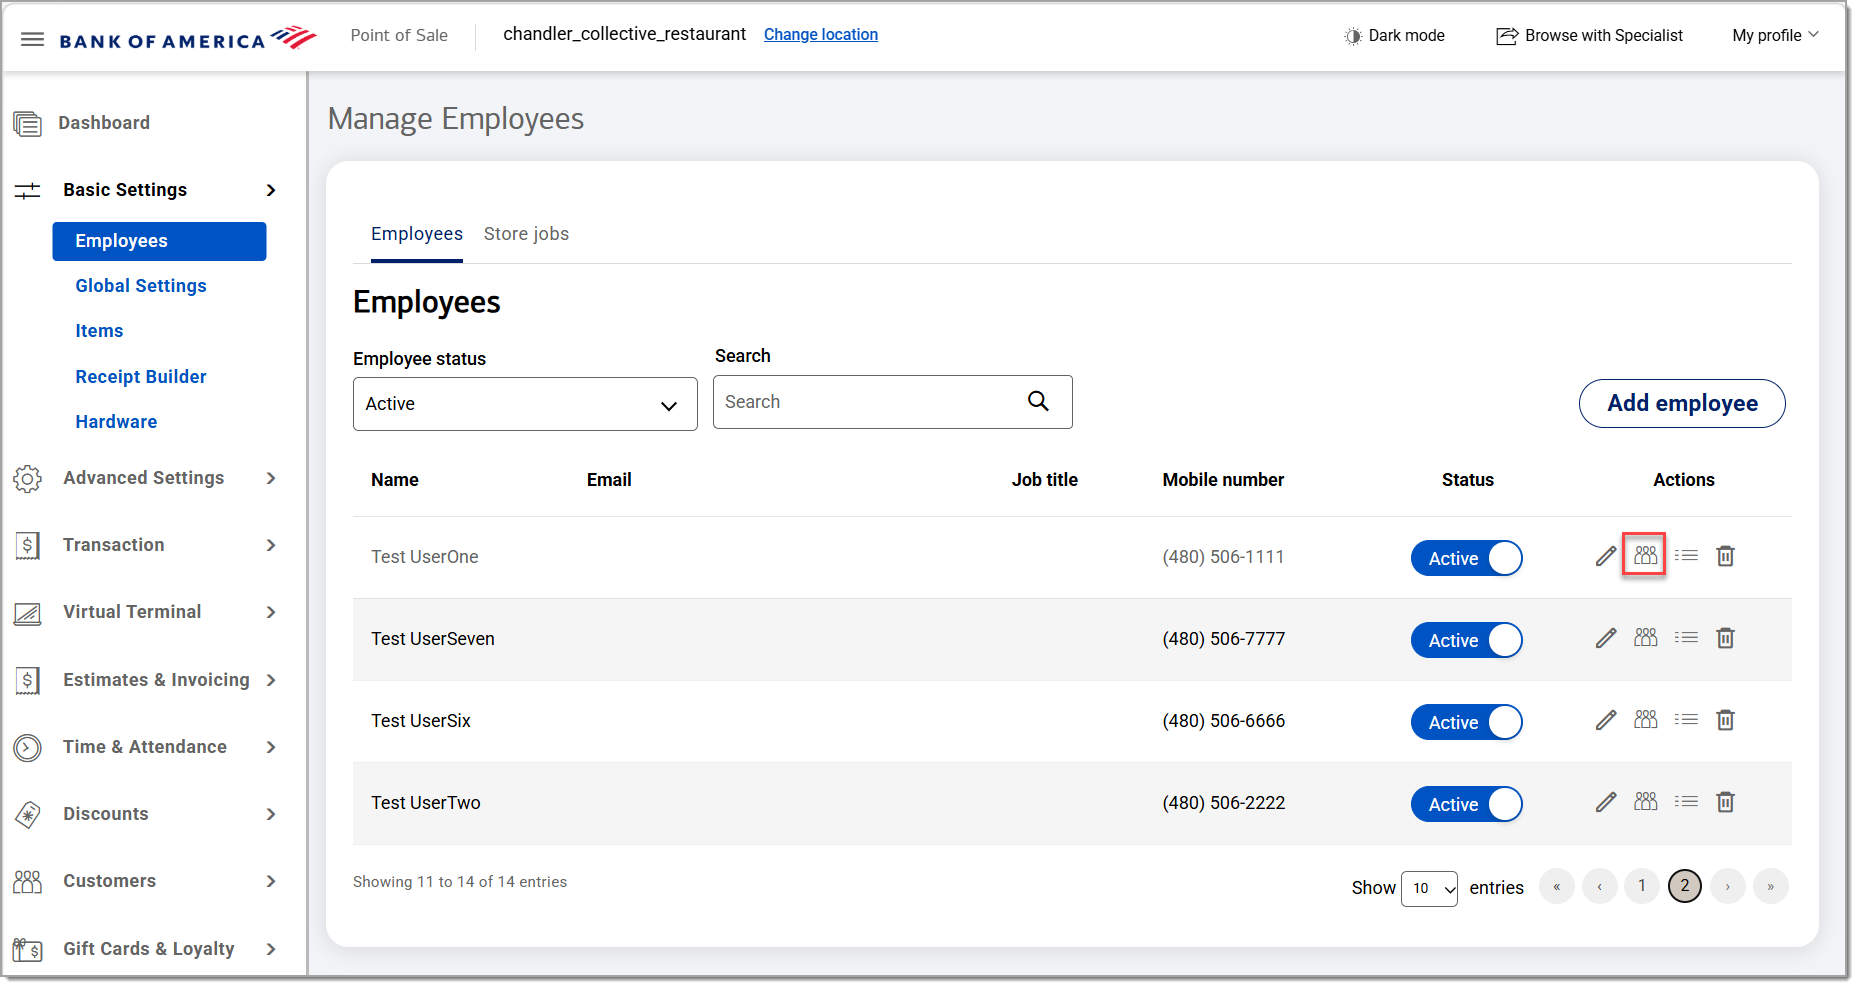
- Begin typing in the Services field the name of a service you previously created and then select it.
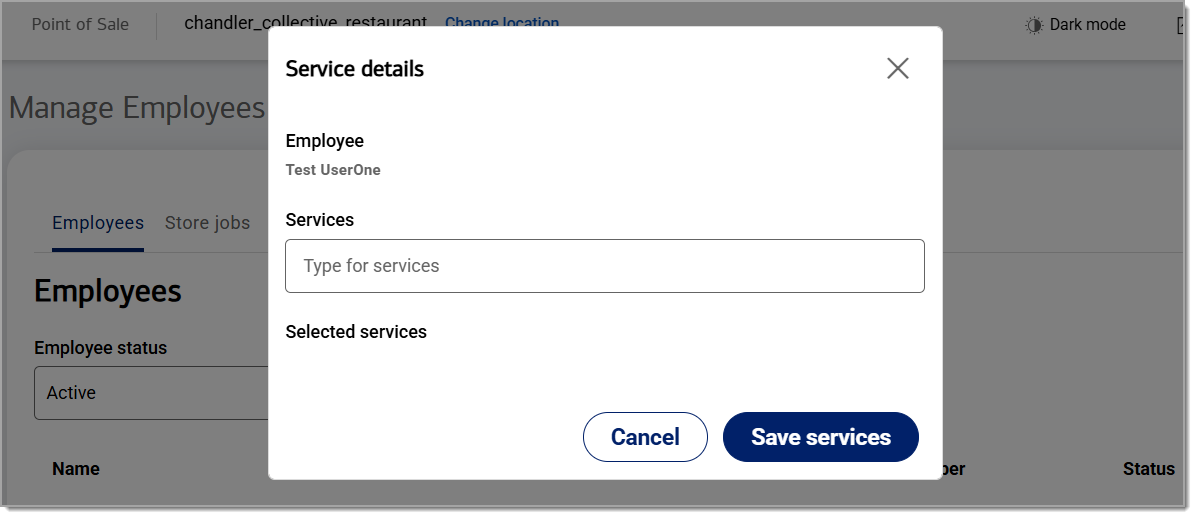
- Click Save services.
Edit or delete a service
A service that has been created can be edited or deleted.
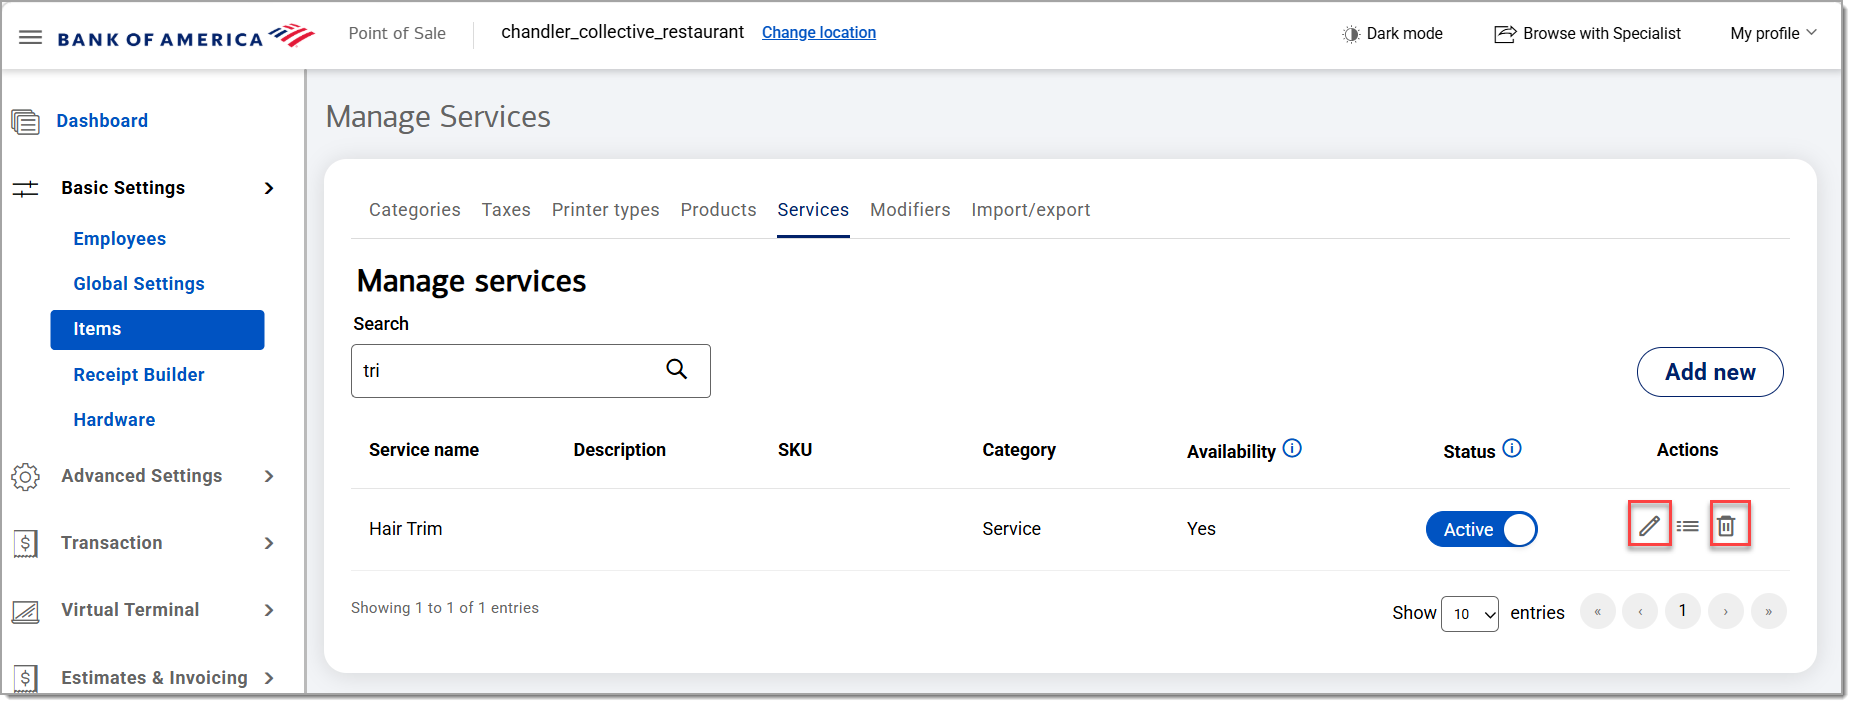
To edit or delete a service
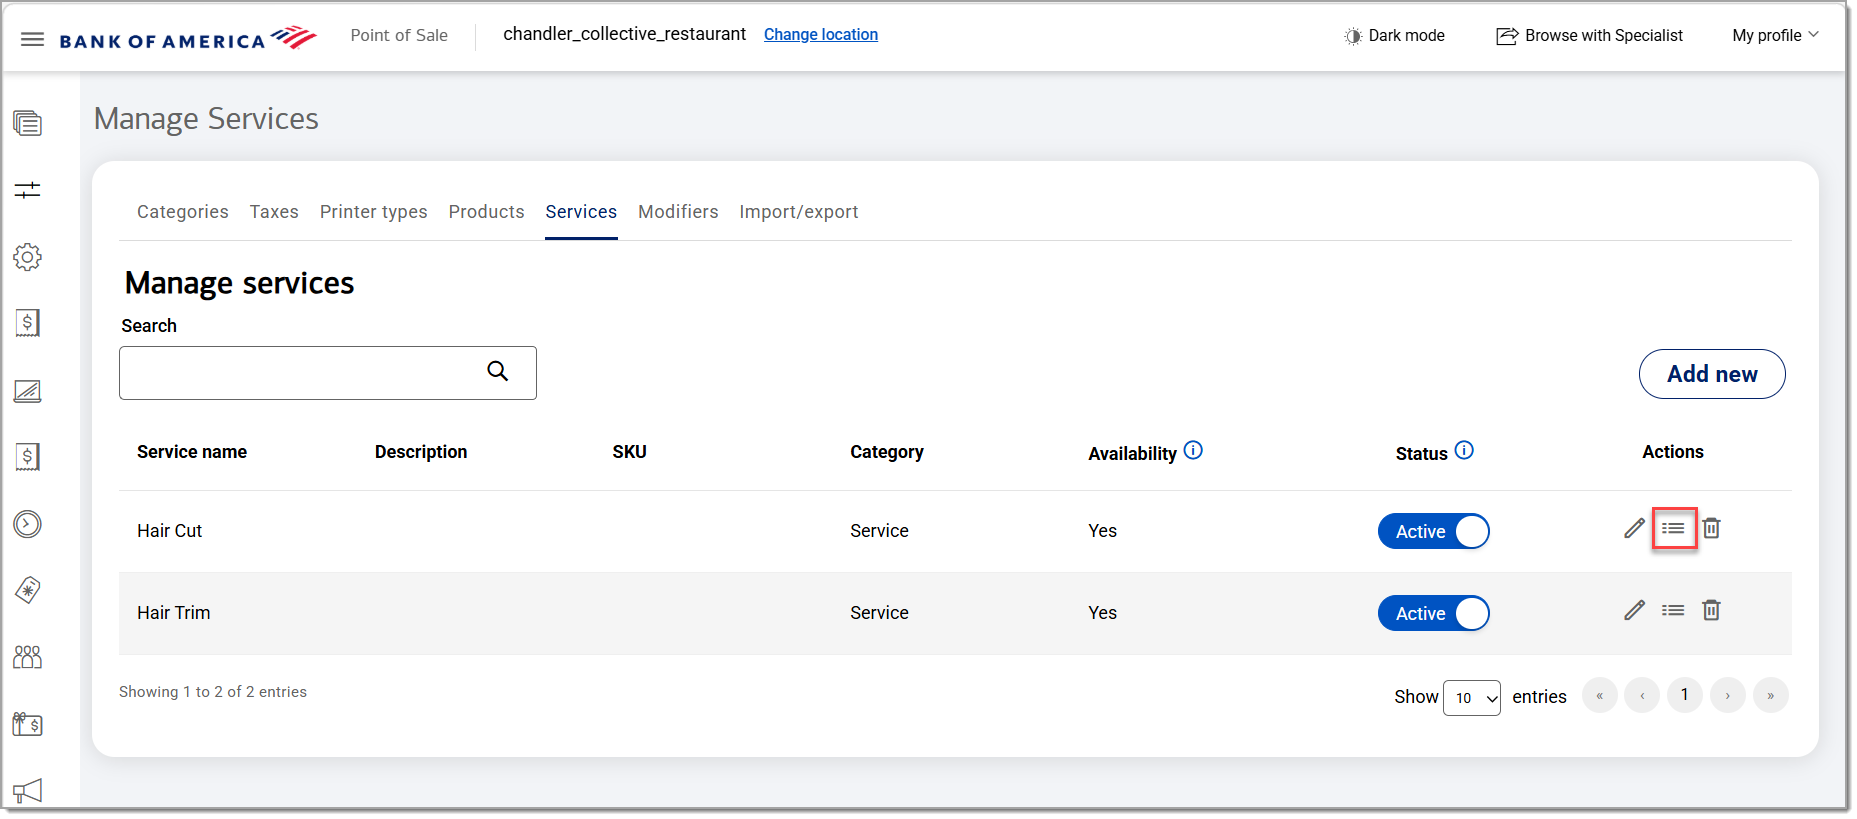
- In the Point of Sale Solution Back Office, select Basic Settings > Items.
- From the Services tab, search for the service you wish to edit or delete.
- In the Actions column next to the Service name, click the Edit or Delete icon to make the desired change to the service.
Schedule a service for a customer
Services can be scheduled for customers by staff in the Back Office Customer Appointments Calendar. If you set up an Online Appointments site, customers can schedule services for themselves.