Thermal Printer T3180 Setup
Description
What's in this article?
The Thermal Printer T3180 is an optional external printer for the Point of Sale solution. The Thermal Printer T3180 offers fast printing and a user-friendly design. It supports English language printing only.
What's in the box?
Your Thermal Printer T3180 will arrive with a power adapter and 6" power cord, a 5' USB cable, and extra paper rolls. The printer arrives with 80mm thermal receipt paper, which can be purchased from most office supply retailers or through Bank of America.

Connect to power
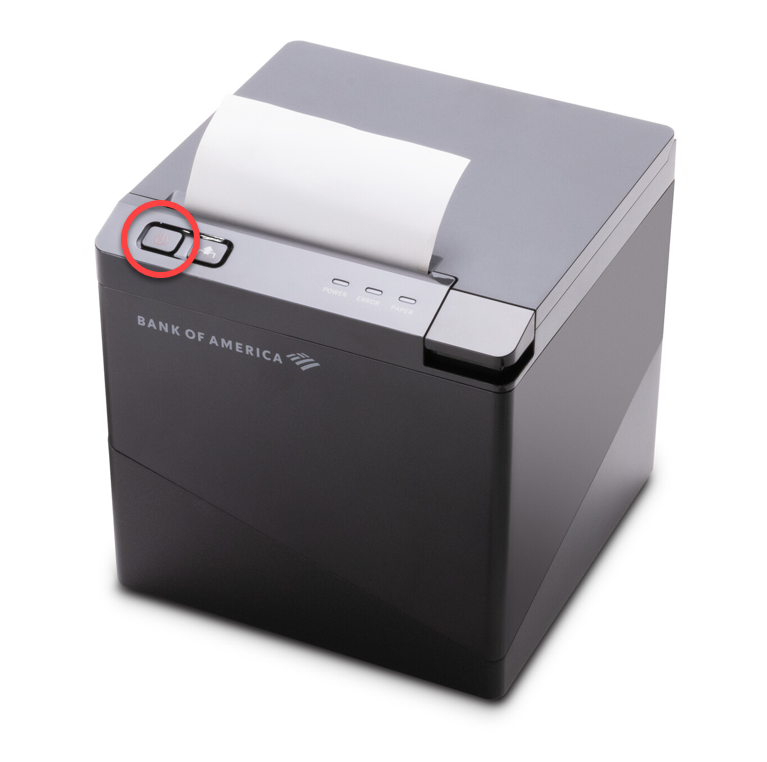
Power the Thermal Printer T3180 by connecting the power cable to the DC24V port on the back of the printer. Then, connect the power cable to the power adapter and plug into an AC outlet. Power on the Thermal Printer T3180 by pressing the Power button.
Connect the printer
You can connect the Thermal Printer T3180 to your Point of Sale solution system directly using the provided USB cable. You can also connect using Bluetooth. Connection to the Station L1400 or Mini Station A3700P will require the Communications Hub. Once the printer is connected, complete the configuration in Point of Sale Solution Back Office to link the printer and register.
If you are connecting a cash drawer to your system, connect the cash drawer to the printer and the printer to the point of sale register.
Connect via USB
- Ensure printer is powered off.
- Plug the USB cable into the USB interface port on the back of the of the printer.

- Connect the other end of the USB cable to the Communications Hub connected to your point of sale register.
- Power on the printer by pressing the Power button on the top left side.
- Log in to the Point of Sale Solution App on the register.
- In Settings > Hardware, the printer should be listed with the printer icon in yellow, indicating that the printer is available on the network but not set up yet in Point of Sale Solution Back Office.
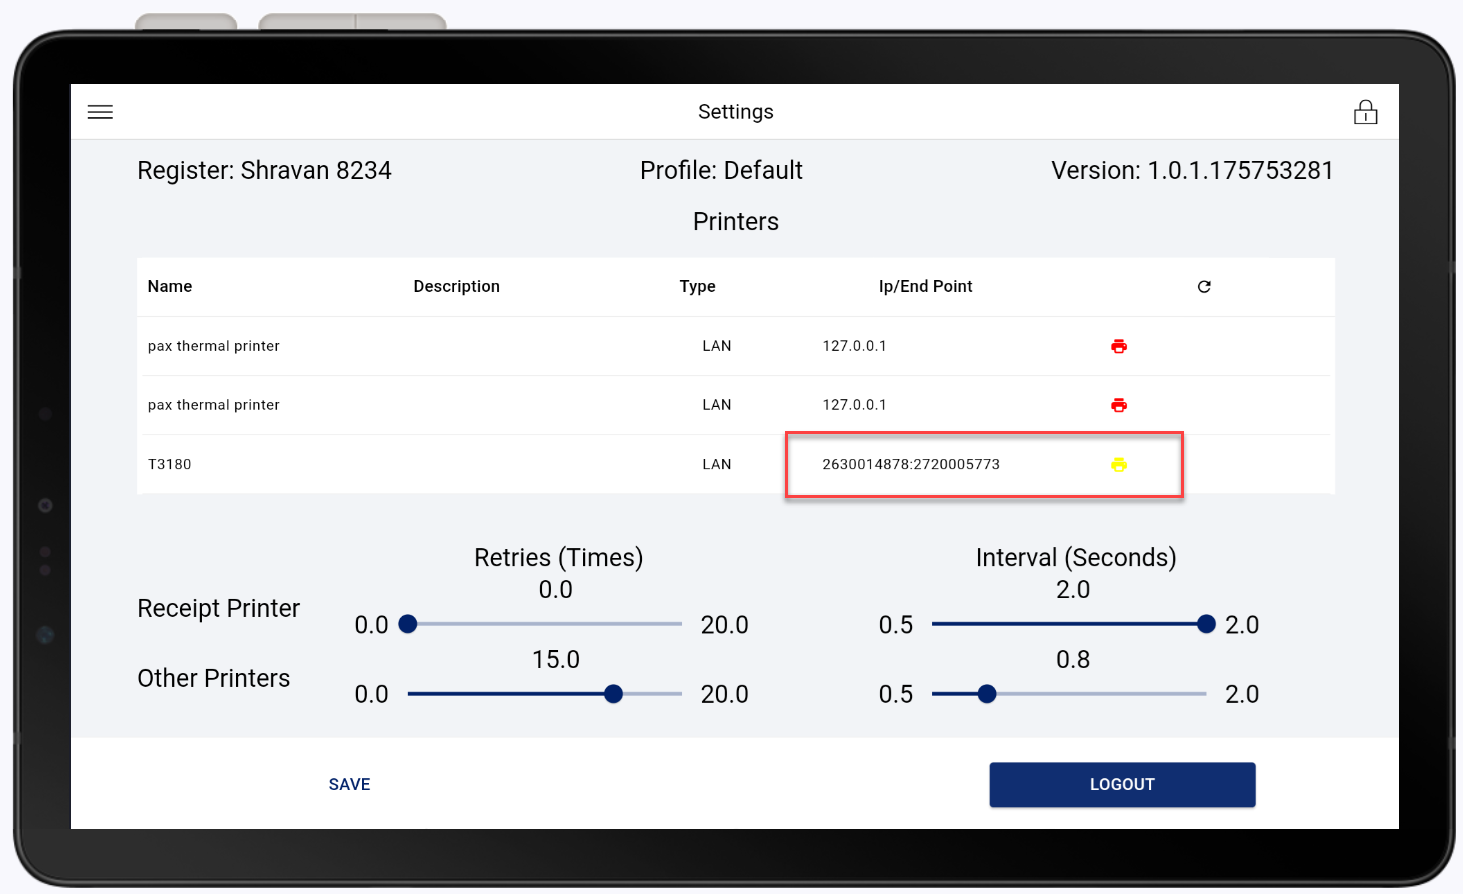
- Write down the IP/Endpoint field number.
- Add the printer in Point of Sale Solution Back Office.
- Synchronize the register with Point of Sale Solution Back Office. The printer should appear as a green icon. If desired, click the printer icon to test print. This confirms that the paper is loaded in the printer correctly.
Connect via Bluetooth
- Power on the printer by pressing the Power button on the top left side.
- On the register, open Settings.
- Tap on Bluetooth.
- Tap Pair new device.
- From the list of printers that displays, select the T3180 that matches the serial number of the printer.
- Enter the default PIN code of either 0000 or 1234 when prompted, then click OK. The printer should now be fully connected.
- Log in to the Point of Sale Solution App on the register.
- In Settings > Hardware, the printer should be listed with the printer icon in yellow, indicating that the printer is available on the network but not set up yet in Point of Sale Solution Back Office.
- Write down the IP/Endpoint field number.
- Add the printer in Point of Sale Solution Back Office.
- Synchronize the register with Point of Sale Solution Back Office. The printer should appear as a green icon. If desired, click the printer icon to test print. This confirms that the paper is loaded in the printer correctly.
| Printer Icon Color | Color Meaning |
|---|---|
| Green Printer Icon | Printer is connected and set up in the Back Office. |
| Yellow Printer Icon | Printer is connected but not set up in the Back Office. |
| Red Printer Icon | Printer is not connected. |
Load printer paper
The Thermal Printer uses 80 mm thermal paper. Printed receipts will have a margin of about 5 mm on each side of the paper. The receipt will cut approximately 11.6mm from the first line of the receipt.
Load printer paper
- Press the printer latch to open the printer.
- Install the paper roll in the middle with the paper feeding from the top of the roll.
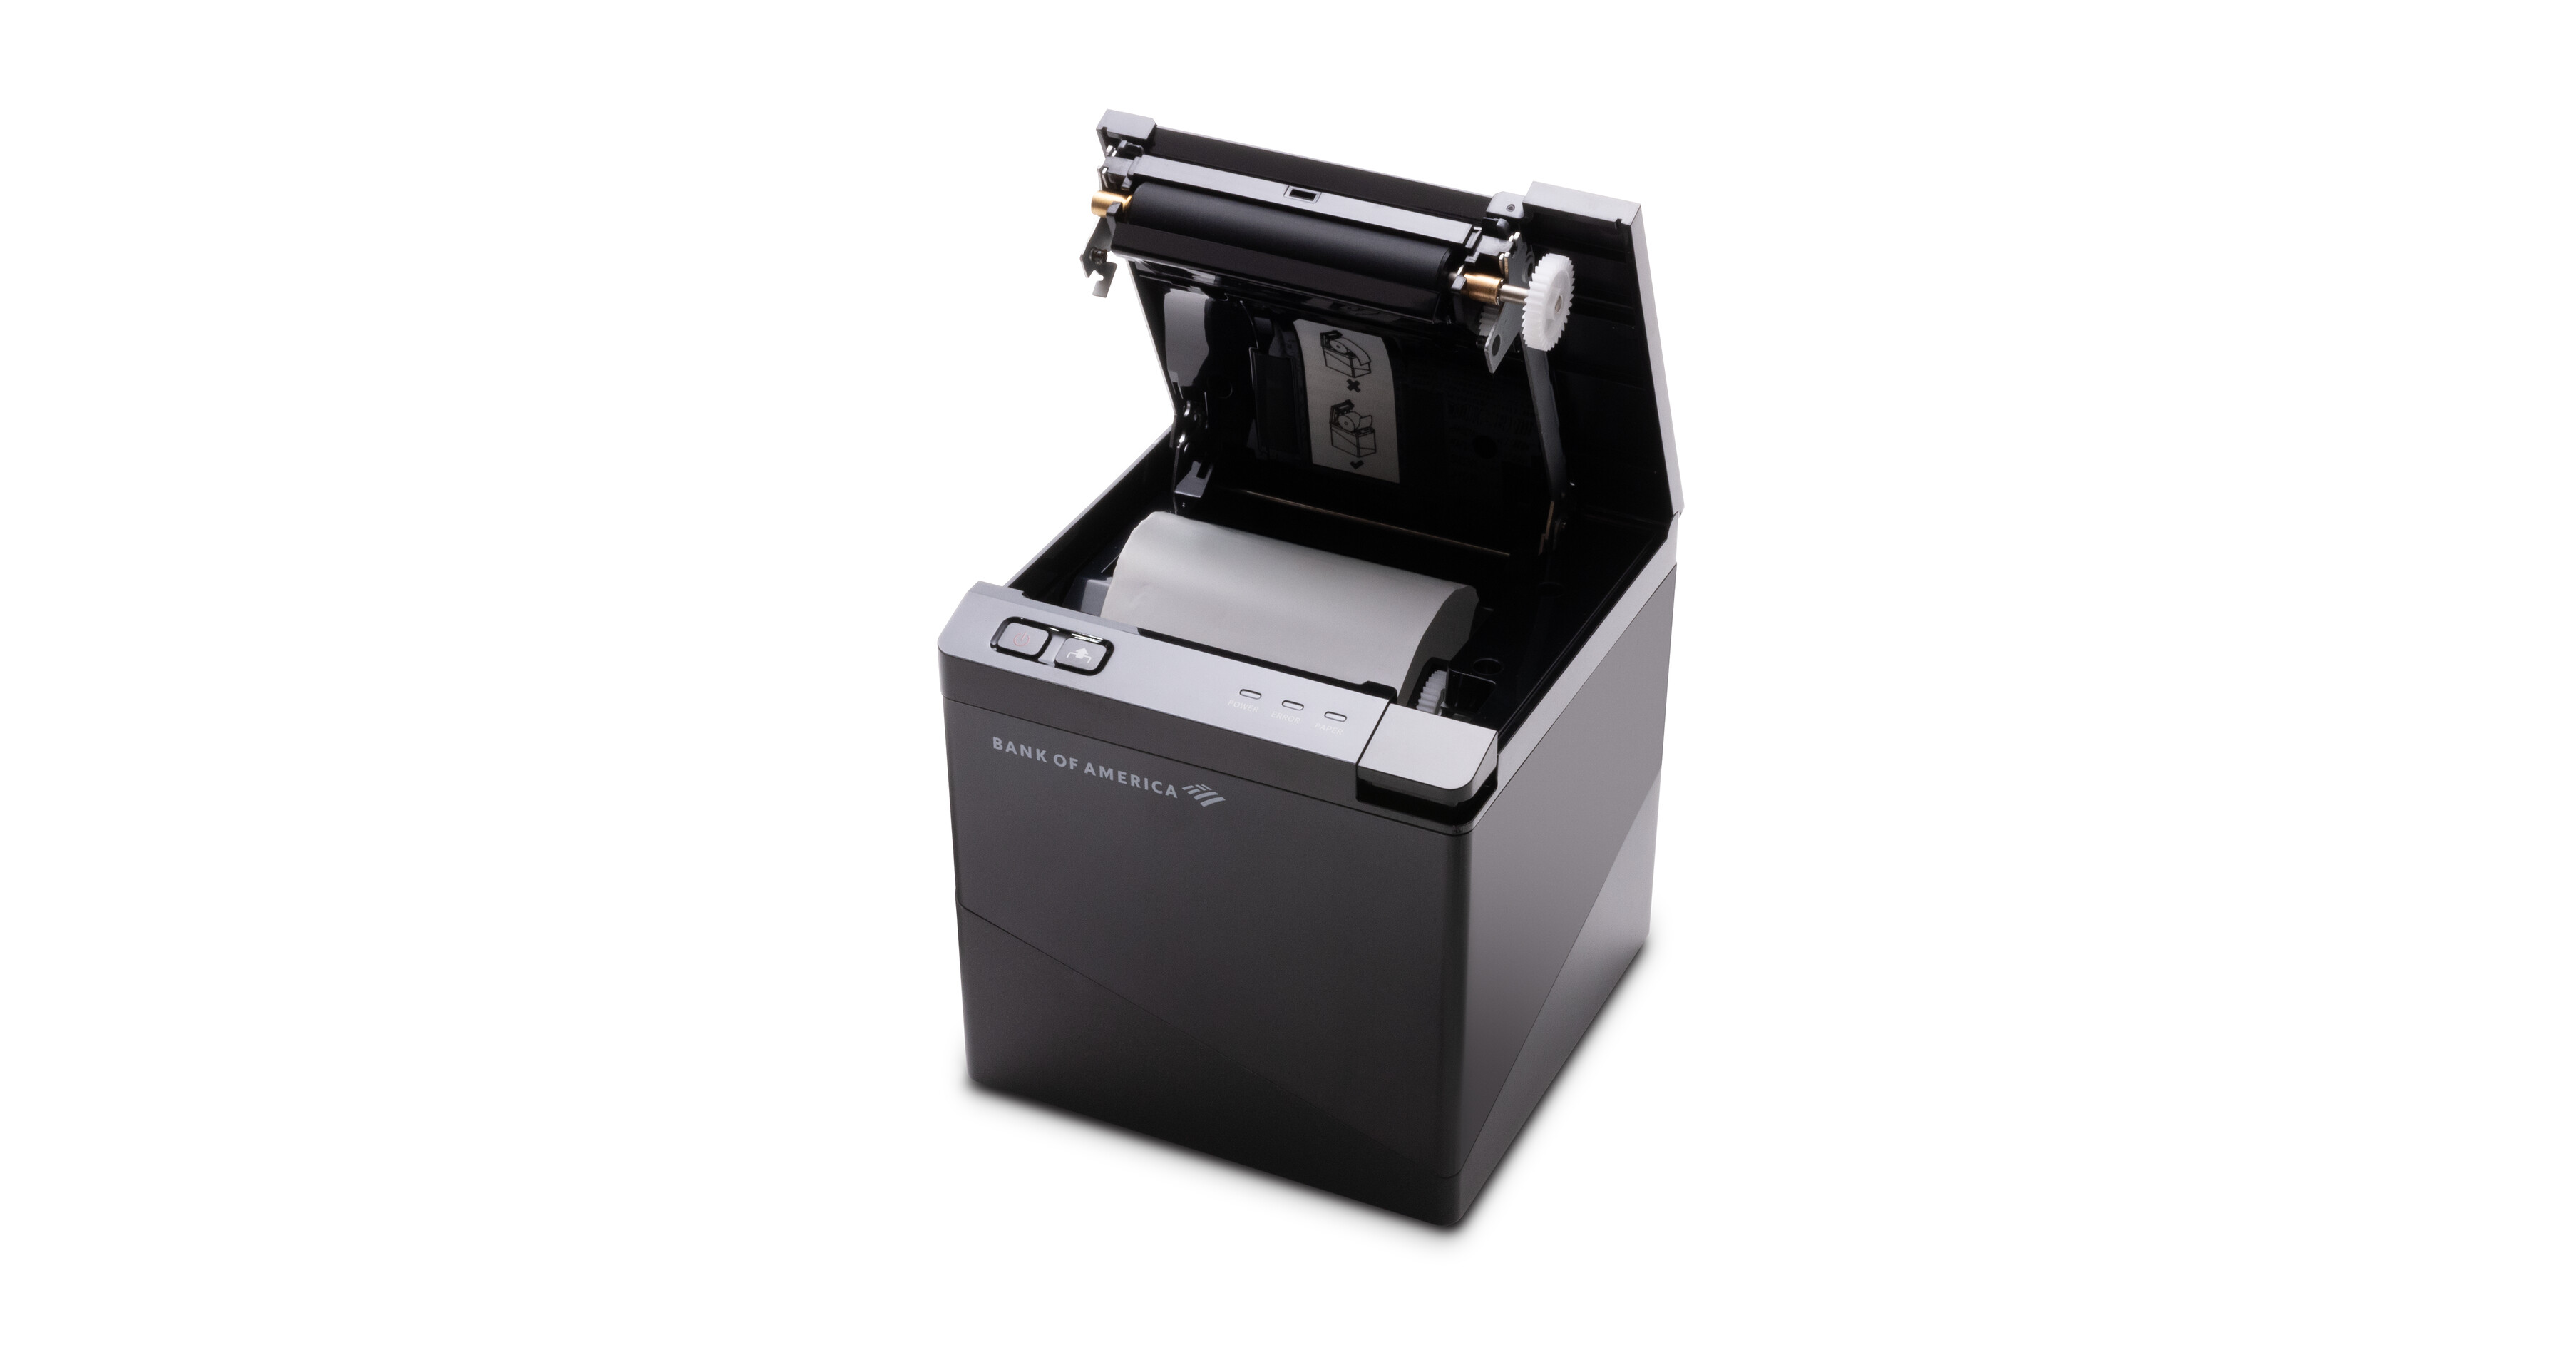
- Shut the printer cover, ensuring that it snaps completely closed.
Troubleshoot errors
When powered on, the green Power LED should be lit and the red Error LED should be off. If the printer is out of paper, the blue Paper LED will light. If the printer is not working, check that the power connections are all firmly in place, the printer is powered on, and that the printer cover is latched.
NOTE:
If the printer is connected but still not printing, check to make sure that it is set up in the Back Office.