Back Office Kits for Retail Solution
Description
What's in this article?
Solution: Retail
A kit is a bundle of existing non-interchangeable item components in the inventory. Customers can purchase kit items in person or online. When you sell the kits, the count of components (items) that constitute a kit decreases from the inventory. This allows you to sell more products in person and online.
A kit/bundle feature enables you to:
- Create a specific kit item.
- Reduce the inventory gradually.
- Generate report on the sales of kits.
If you need kits that have variations, such as a kit that includes a t-shirt that comes in different sizes, create a kit for each variation. For example you might create the medium t-shirt kit and a large t-shirt kit. On the payment terminal, kits will appear like an item. The items in the kit will not be individually listed. Tap a kit to add it to the ticket.
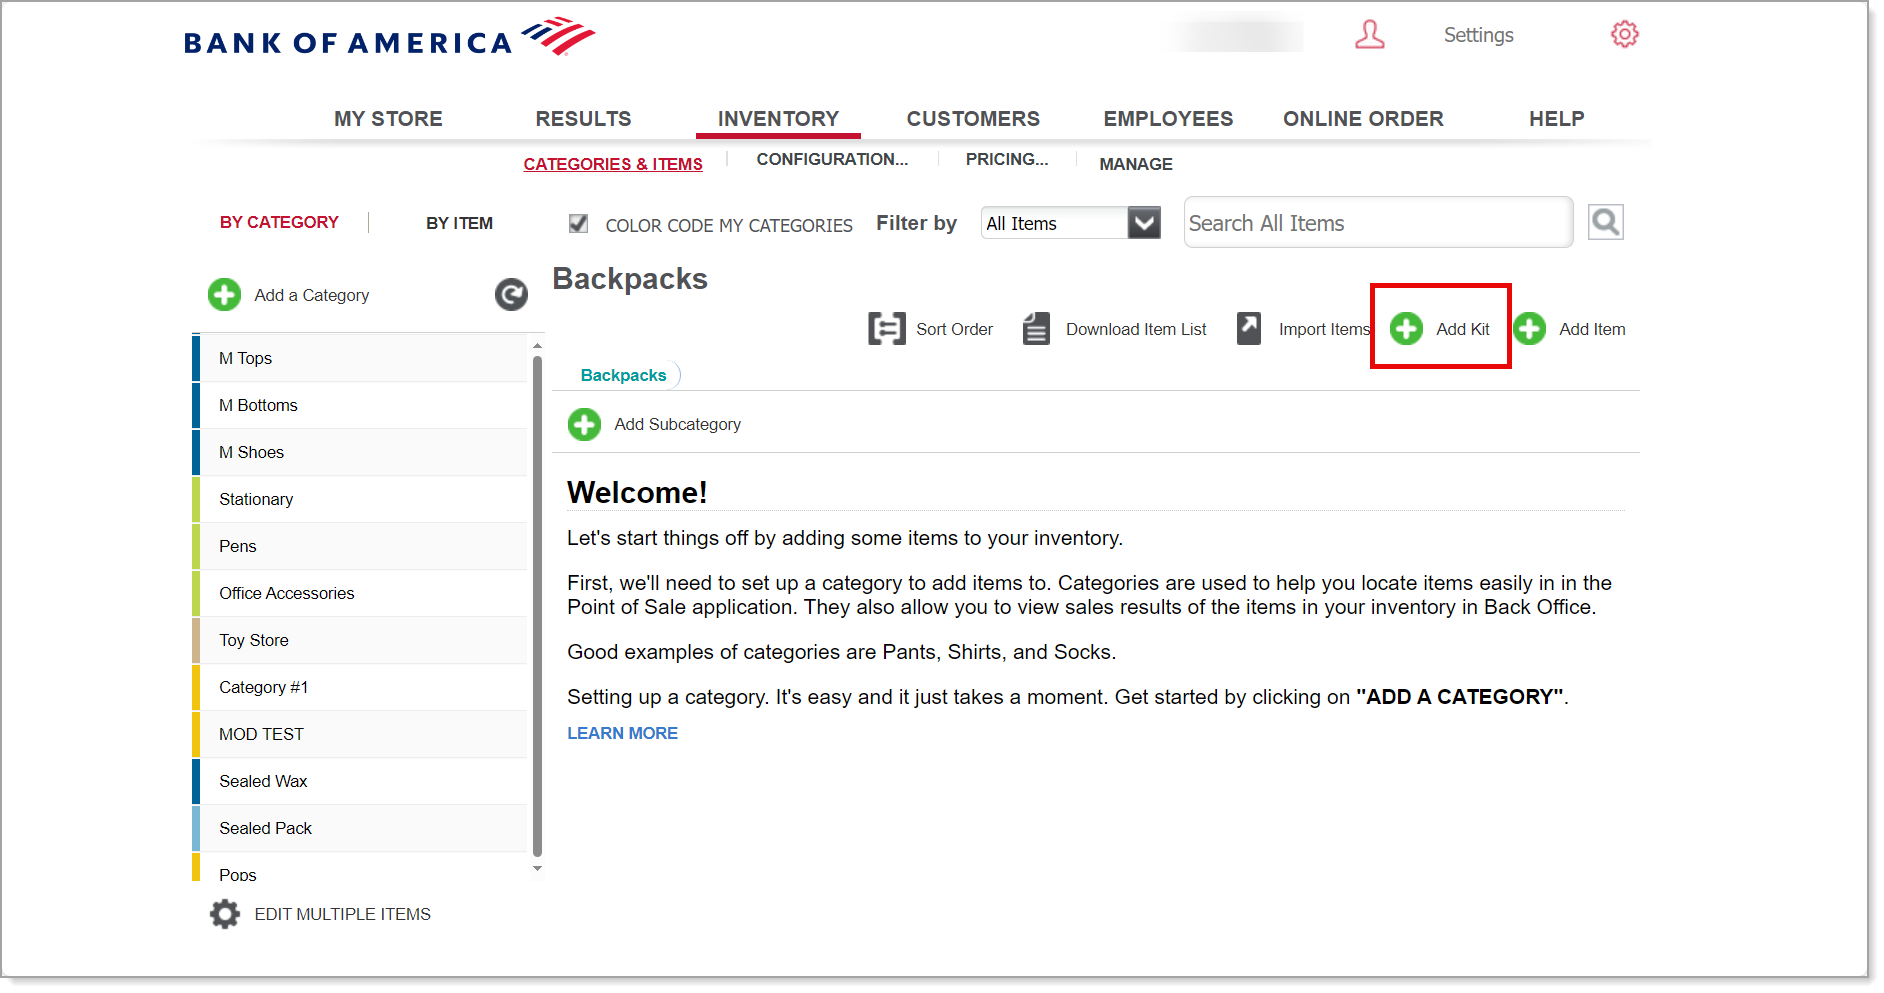
- To create a kit of inventory items
- In the Back Office, select the Inventory tab.
- Select the Categories & Items subtab.
- Click Add Kit.
- Enter the general information about the kit:
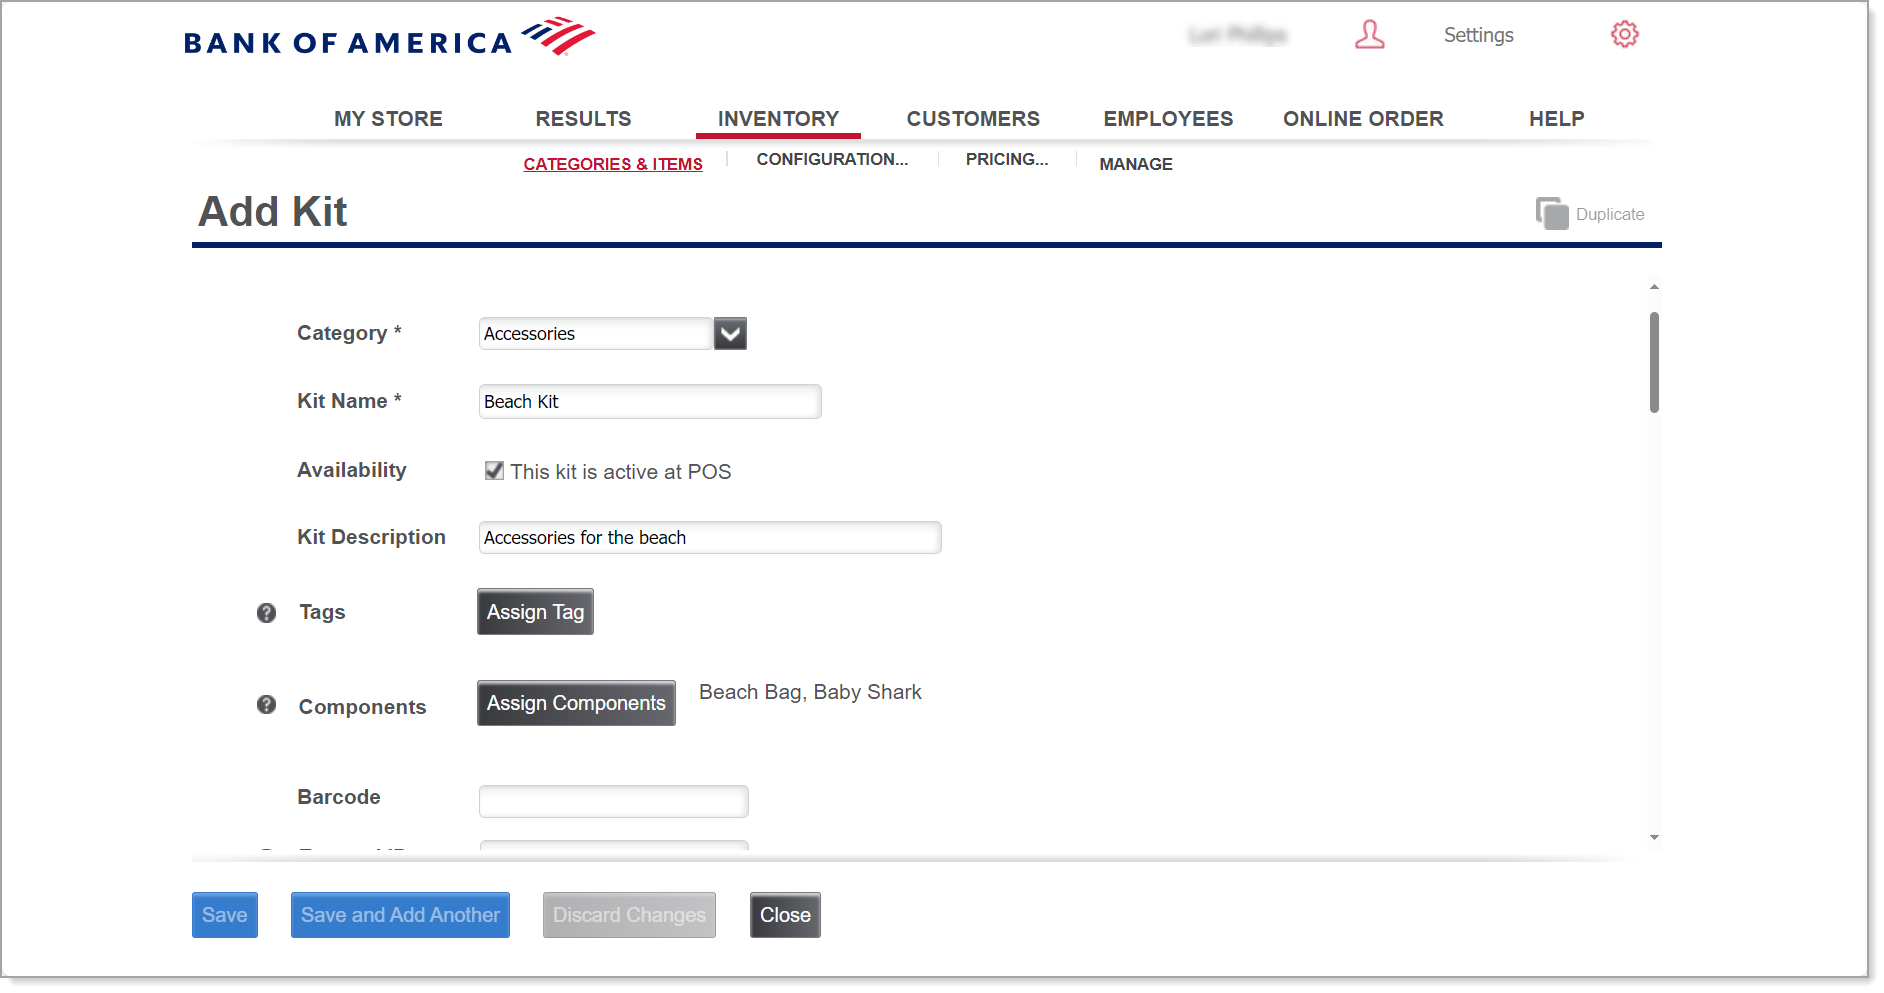
Field Description Table of general information fields and descriptions Category
Enter the name of the category and subcategory (if any) of the kit.
Kit Name
Enter the name of the kit.
Availability
Choose the kit availability.
- The kit is active at POS: Select the checkbox to make the item active on the payment terminal.
- The kit is active Online: Select the checkbox to make the item active online.
Kit Description
Additional information about the kit.
Barcode
Enter a barcode and or scan a bar code for that kit variation.
Printer Group Indicate which printer group to use for the receipt. - Assign tags. Refer to Back Office Tags in the Retail Solution for more details on how to set up tags.
- Assign components:
- Click Assign Components.
- Assign items from the inventory to the kit by selecting the item and clicking Add.
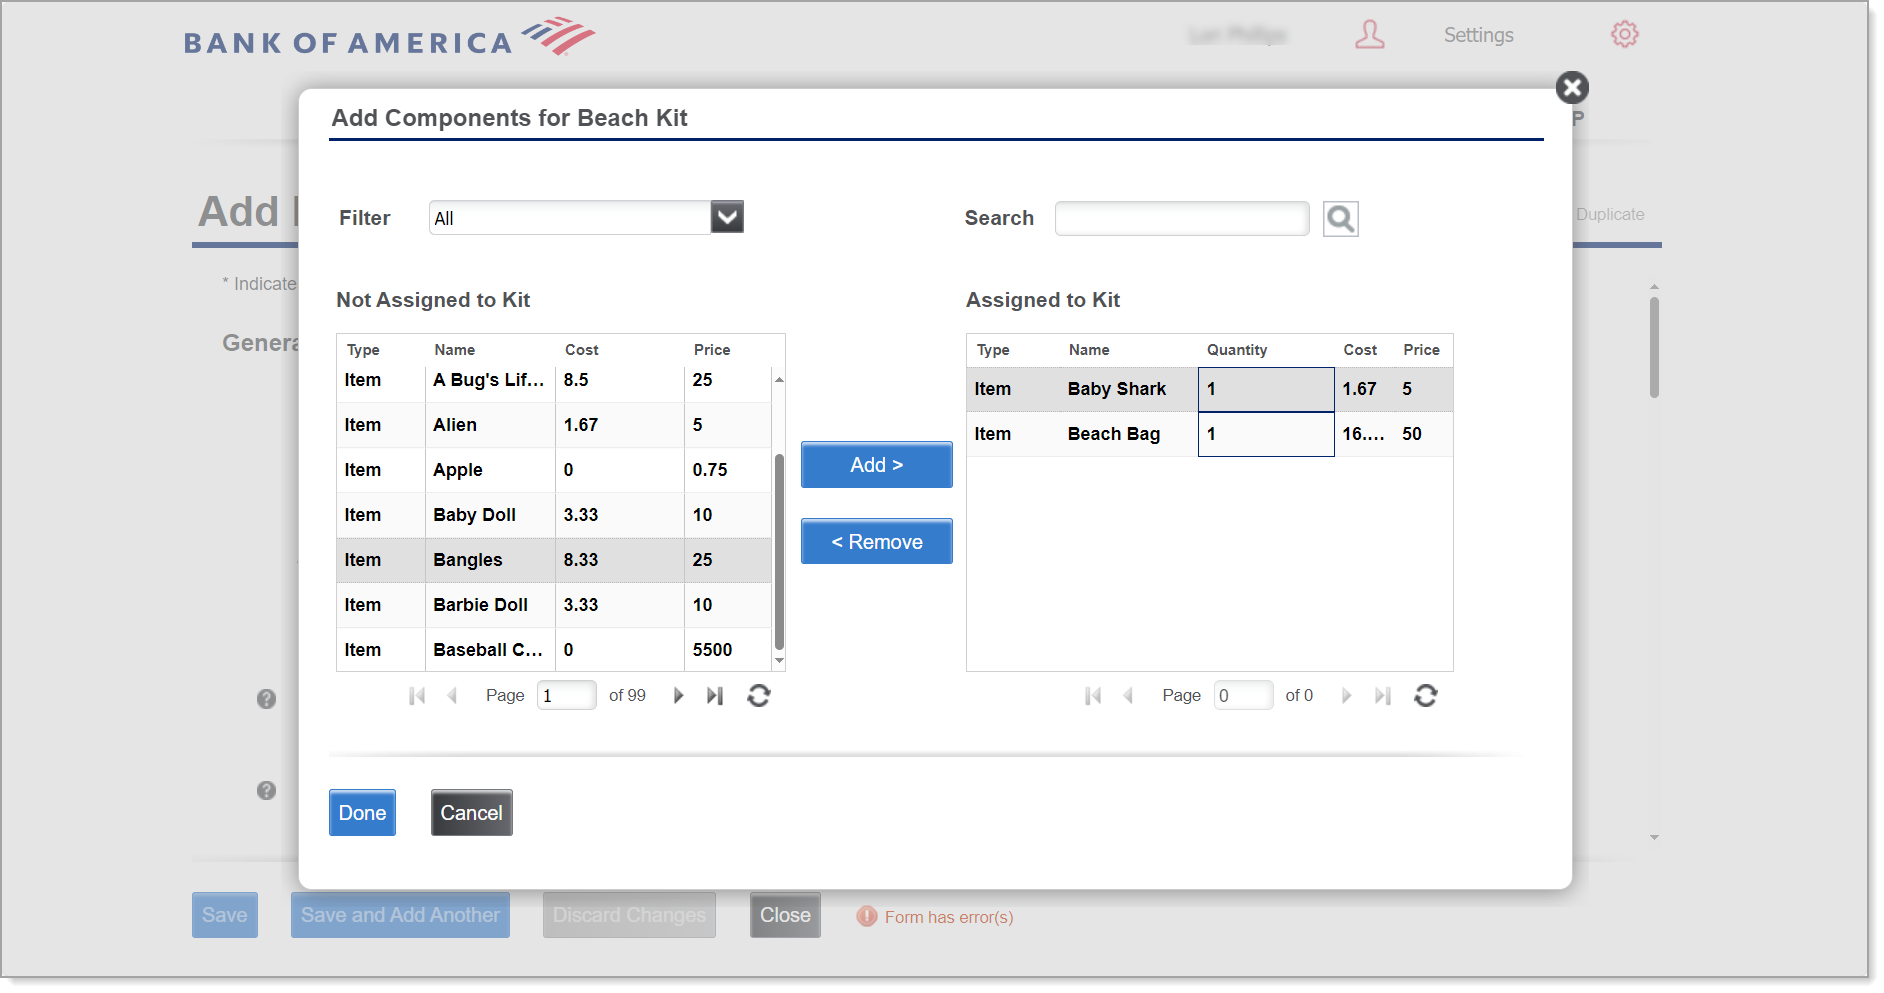
- Click Done to save the component list.
- Enter the pricing, cost and taxes for the new kit:
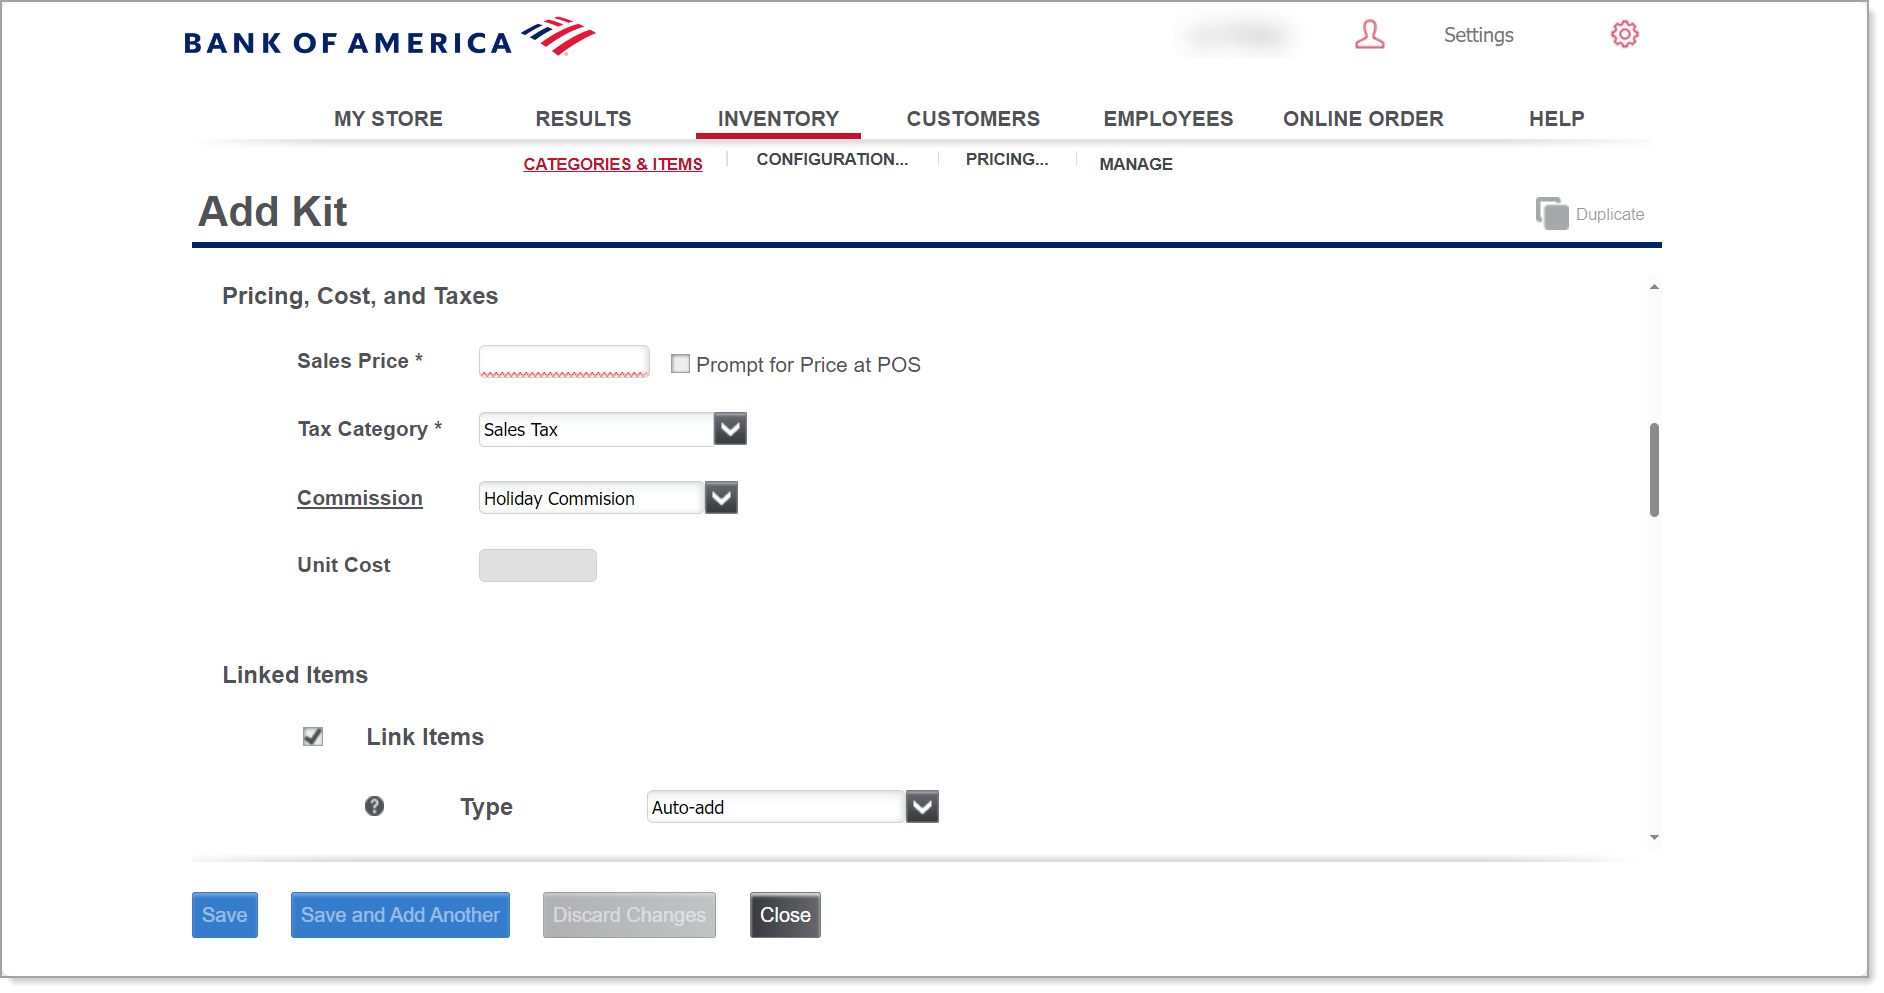
Table of Pricing, Cost, and Taxes fields and descriptions Field Description Sales Price
Enter a sales price for the kit.
Prompt for Price at POS
Select the checkbox to prompt for the kit price at the point of sale.
Tax Category
Select a tax category from the dropdown list.
Commission
Select a commission from the dropdown list or select <<Add New>> to add a new commission. If adding a commission, enter a commission name, commission rate (either amount or percentage) and then the amount or percentage of the commission. Provide the dates that the commission is effective.
Unit Cost
(Optional) Add the unit cost for calculating cost and margin.
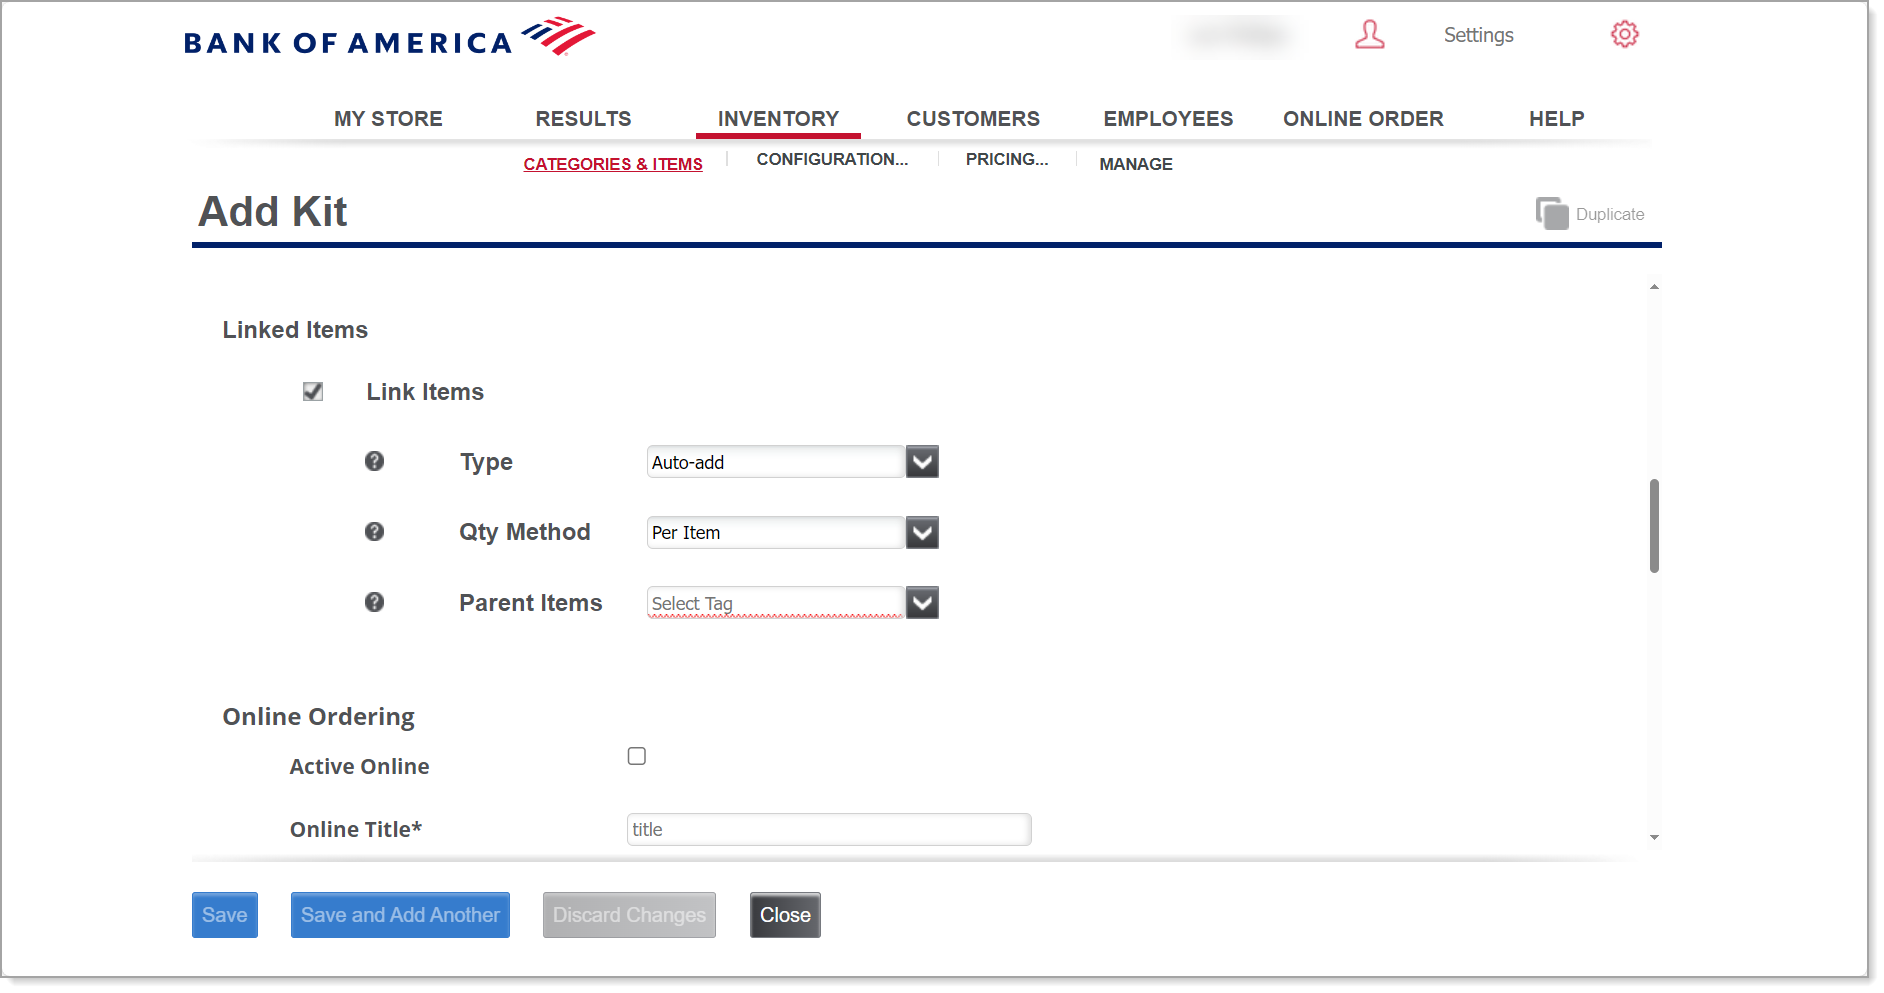
- To link the kit with the item by Type, Qty Method, and Parent Items, select the Link Items checkbox. If linking the items, select the link type from the dropdown list options.
- If applicable for your business, set the Online Ordering options.
- Click Save to add the kit.