Portable A920 Setup
Description
What's in this article?
The Portable A920 delivers the power of an Android tablet and advanced payment terminal. It can function as a payment only device using our Basic Payment Solution, or can integrate with our Essentials Light, Essentials, Retail and Restaurant solutions.
Watch the video:
- [Music in background throughout] Thank you for choosing the Portable A920 Terminal from Bank of America.
- This video will show you how to set up your terminal and prepare to take payments,
- so feel free to stop, rewind and rewatch any sequence.
- To start,
- remove the sleeve, then open the box.
- Inside, you'll find a welcome kit including a welcome letter, a quick set-up guide and a card acceptance decal for your location, along with other useful and important information.
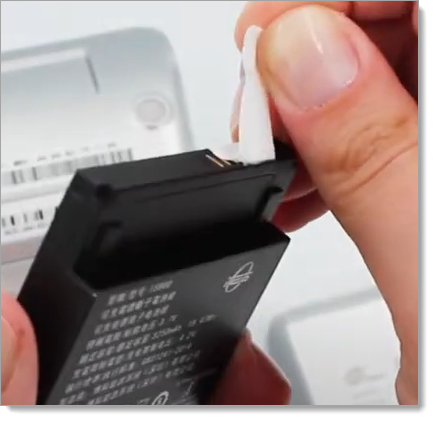
- Now, remove your terminal, which is powered down, and before trying to turn it on, flip the terminal over, unlock the battery case,
- and if you see a small white paper tab under the battery, remove it.
- Your battery will not charge if it's still inside. Then, close and lock the battery case.
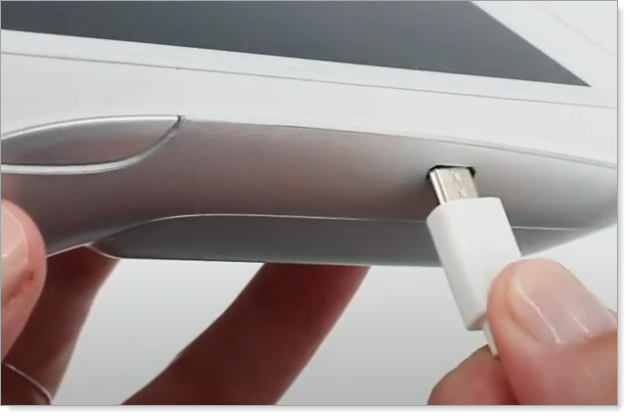
- You'll need to fully charge the terminal, preferably overnight, using the micro USB port plugged into either a PC or the included charging cord and plug.
- Also please note, for the health of your A920, never plug the terminal in or unplug it mid-charge while the unit is powered on.
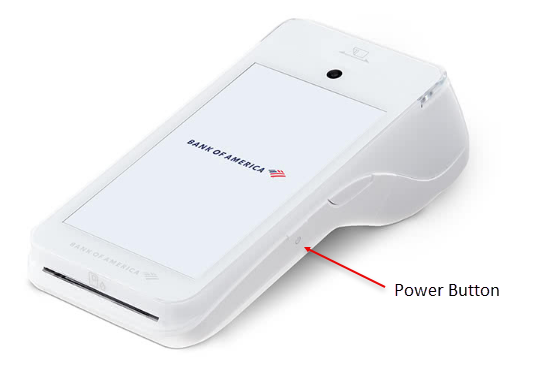
- Once the terminal is fully charged, you can turn it on by holding the power button on the side for two to four seconds.
- Also, holding the same button for that duration again is how you can turn the unit off or reboot it.
- Now, it's time to get your unit online.
- If you ordered your terminal with the optional cellular capability, it will activate the cellular connection once it's turned on.
- If you didn't order the cellular service and would like to add it, please contact your Merchant Consultant. For all others,
- you'll need to connect with a Wi-Fi® network.
- Swipe down from the top of your terminal screen and you'll see the controls to toggle cellular service on and off,
- and to turn on your Wifi connection. You will need to have the name and password for your secure Wi-Fi network.
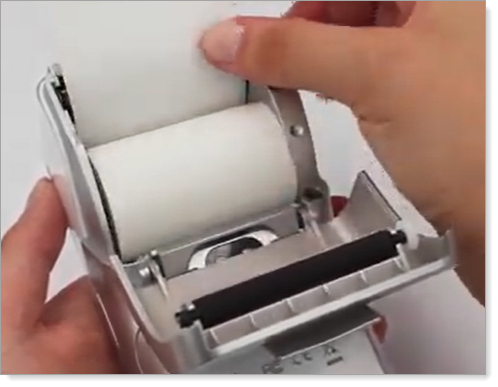
- But once you have connected, you only have one more step before you're ready to go. On the underside of the terminal, gently lift the tab of the printer paper door.
- Place a fresh roll of the included paper with the end extending from the top about two inches above the roll.
- Then close the door, leaving the top of the paper extended outside the door, and tear off the excess.
- Now you are able to accept payments and give receipts.
- Touch the Bank of America app icon on the screen to begin a card transaction with a customer. To pay,
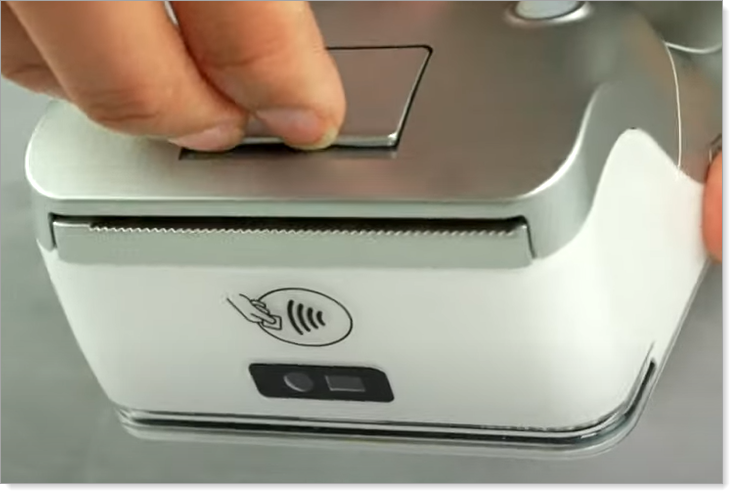
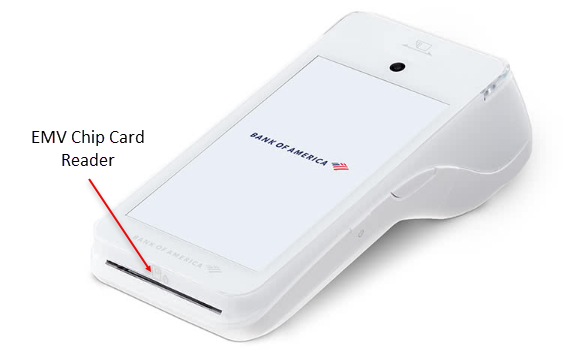
- they can tap their card or mobile device on the front of the terminal. Or insert a chip card, face up and chip side first, into the bottom of the terminal.
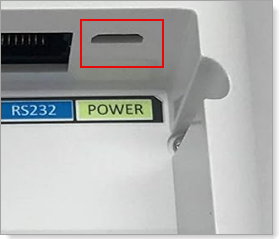
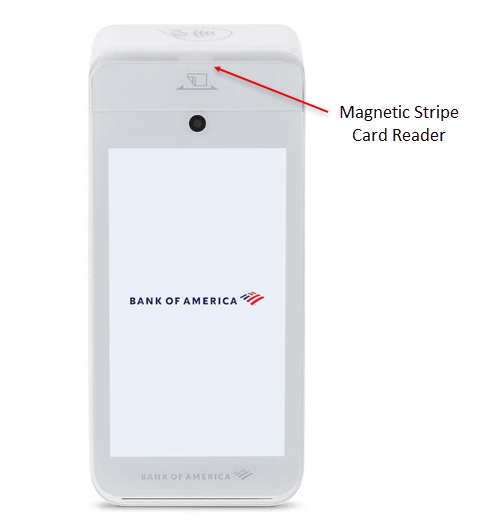
- Or, if the terminal can't read the chip, swipe the card with the magnetic stripe facing down using the groove at the top.
- Now, you should be ready to take payments with your new Portable A920 terminal.
- If you have any difficulties or questions, call technical support at 833.344.2324, or visit bankofamerica.com/MerchantHelp.
What's in the box
Inside the box you will find the following items:
- Portable A920
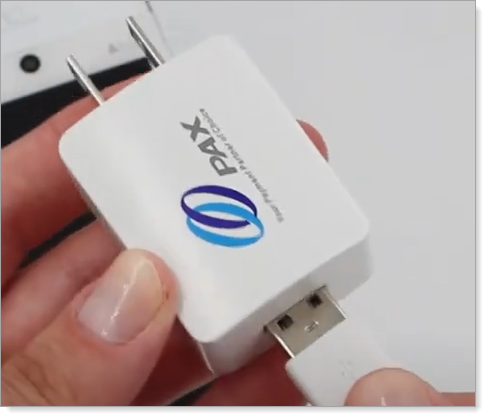
- AC power adapter
- USB to Micro USB cable
- Thermal paper rolls
A merchant information sticker, featuring your unique merchant identification number (MID#) and the Technical Support phone number, has been affixed to the terminal. Your MID will be needed to identify your account any time you contact Customer Service or Technical Support.
1. Connect the battery
When you receive the Portable A920, the battery will not be connected and charged. Use the following steps to install the battery and fully charge it for the first time. After being fully charged, the terminal can run on battery power or by being plugged into power.
- Open the battery cover on the bottom of the terminal by sliding the open/close slide latch to the right.
NOTE: Both the slide switch and the battery may be tight. That is normal.
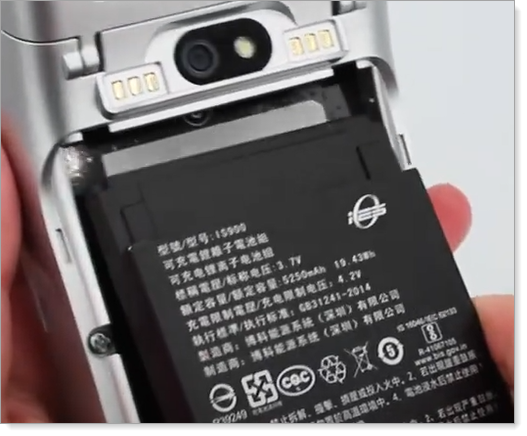
- Take out the battery.
- Locate the protective covering on the battery and peel back carefully until the covering is fully removed from the battery connectors.
- Align the battery connectors at the top of the compartment and gently push the battery in place.
- Replace the cover and slide the battery slide latch to the left.
- Connect the USB end of the USB to micro USB cord to the AC power adapter.
- Connect the Micro USB end of the power cord to the Micro USB port on the left side of the terminal.
- Plug in the AC power adapter to power. Use of a surge protector is recommended.
- Fully charge the battery.
If using an optional charging base, connect the the Micro USB end of the power cord to the Micro USB port on the underside of the charging base. Set the device on the base and fully charge the battery.
2. Power up
To power up the terminal, press and hold the Power button on the right side of the terminal for 2-4 seconds.
To power off, press and hold the Power button until the shutdown menu appears, then tap Power Off on the display, then tap Power Off again to shut down. The terminal will power off after a few seconds.
3. Connect to the internet
You can use a Wi-Fi network and/or the internet with your Portable A920. You will need to know the name of your network and the password. For Ethernet connection, the optional charging base with communications ports is required. Learn more about connecting to your network.
Cellular Service, an optional value-added service for the Portable A920 terminal, enables payments app transactions to pass through cellular communication networks to the bank for processing. The monthly service fee for Cellular Service is assessed for each month that a terminal has activated service. When a device activates service, a charge will appear on the monthly statement for that device, regardless of when during the month the service activates. The service fee is not prorated.
Cellular Service is provided by a private 4G GPRS cellular network, which is the same network used by AT&T/T-Mobile. Learn more about connecting to cellular service.
4. Load printer paper
The A920 terminal comes pre-loaded with a roll of printer paper, along with an additional three rolls in the box. Additional printer paper may be purchased from any office supply store.
- At the top of the back of the terminal, gently lift the paper lid release lever and pull the entire lid away from the terminal. The empty paper roll should come out easily.
- Insert a new paper roll so the paper extends from the terminal, extending from the underside of the roll. Pull about 2” of paper out and close the lid until it snaps into place.
- Fully close the lid to ensure that the paper roll fully engages with the mechanism.
- Tear off any excess paper, leaving a small length extending from the printer.
NOTE:
If the paper is installed incorrectly, you will receive an error message.
Take a payment
The Portable A920 supports contactless card and mobile device "tap to pay" payments. Chip card insertion, and magnetic stripe swipe payments are also supported. If necessary, you can troubleshoot card swipe or insertion errors.
Insert the card into the chip card reader, chip end first, with the chip facing upwards. When prompted, remove the card.
Swipe the the card through the magnetic stripe reader with the stripe facing toward the bottom of the terminal.
Tap or hold the card to the contactless card reader on the top of the terminal.
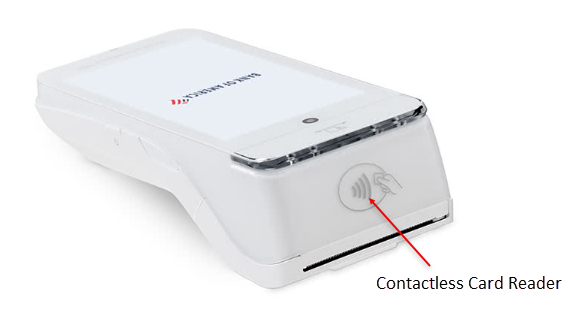
Hold the mobile phone/device to the contactless card reader on the top of the terminal. Your mobile device will then prompt you to approve the payment.
Terminal settings
You can adjust your terminal settings to your preference, including; terminal volume and key sound, brightness and timeout (sleep).
Terminal care
For care guidelines, cleaning recommendations and other best practices, see Terminal Care.