Restaurant App Table Service or Quick Mode Orders
Description
What's in this article?
Solution: Restaurant
The Restaurant app offers two order taking modes: Table Service mode when taking orders at the table or creating a tab, Quick Service mode mode for drive thru, takeout, and other quick service options. 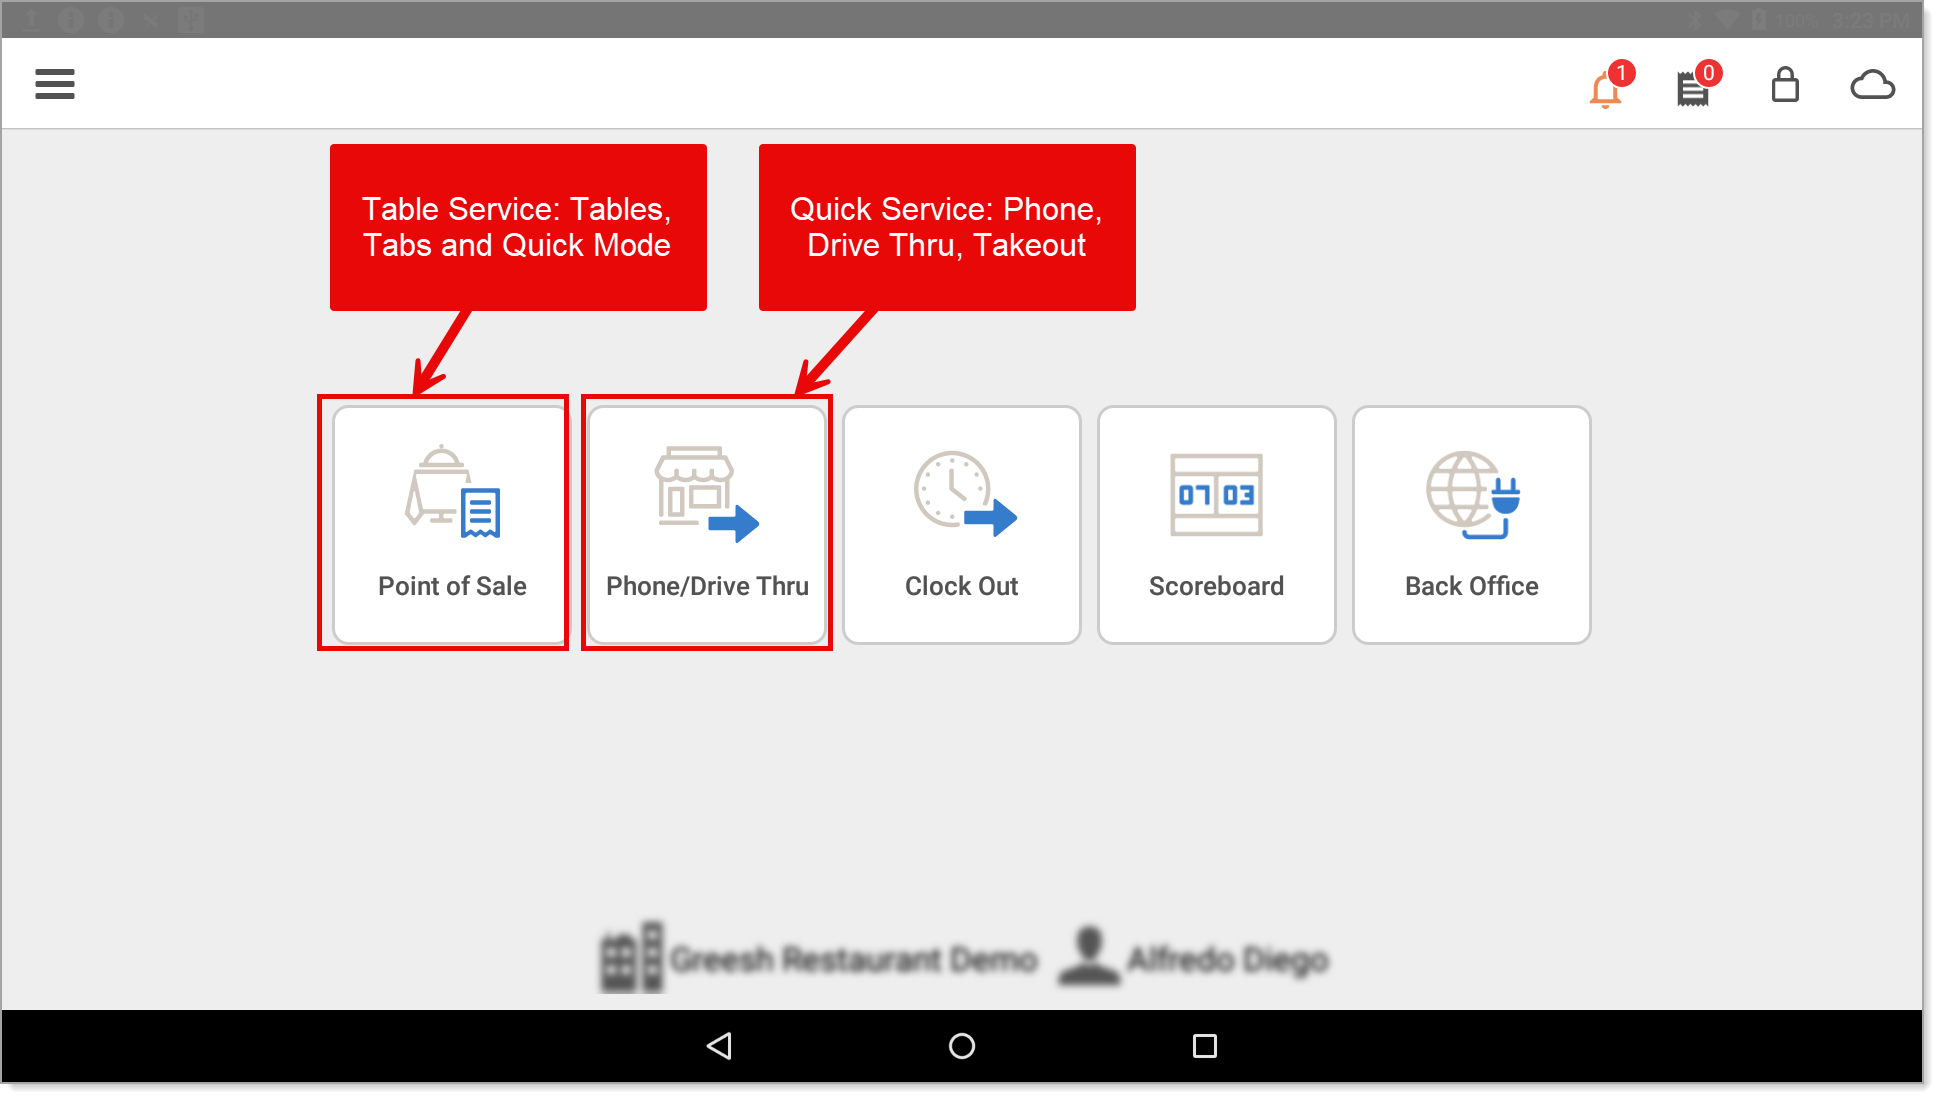
Table Service (Dine In) mode
Table Service mode has three options: taking a table order, taking a tab order, and using the Quick Mode option, which allows you to take an order without assigning it to a tab or table. Table Service mode is accessed by selecting the Point of Sale button on the main screen.
- To take an order in Table mode
From the app screen, tap Point of Sale.

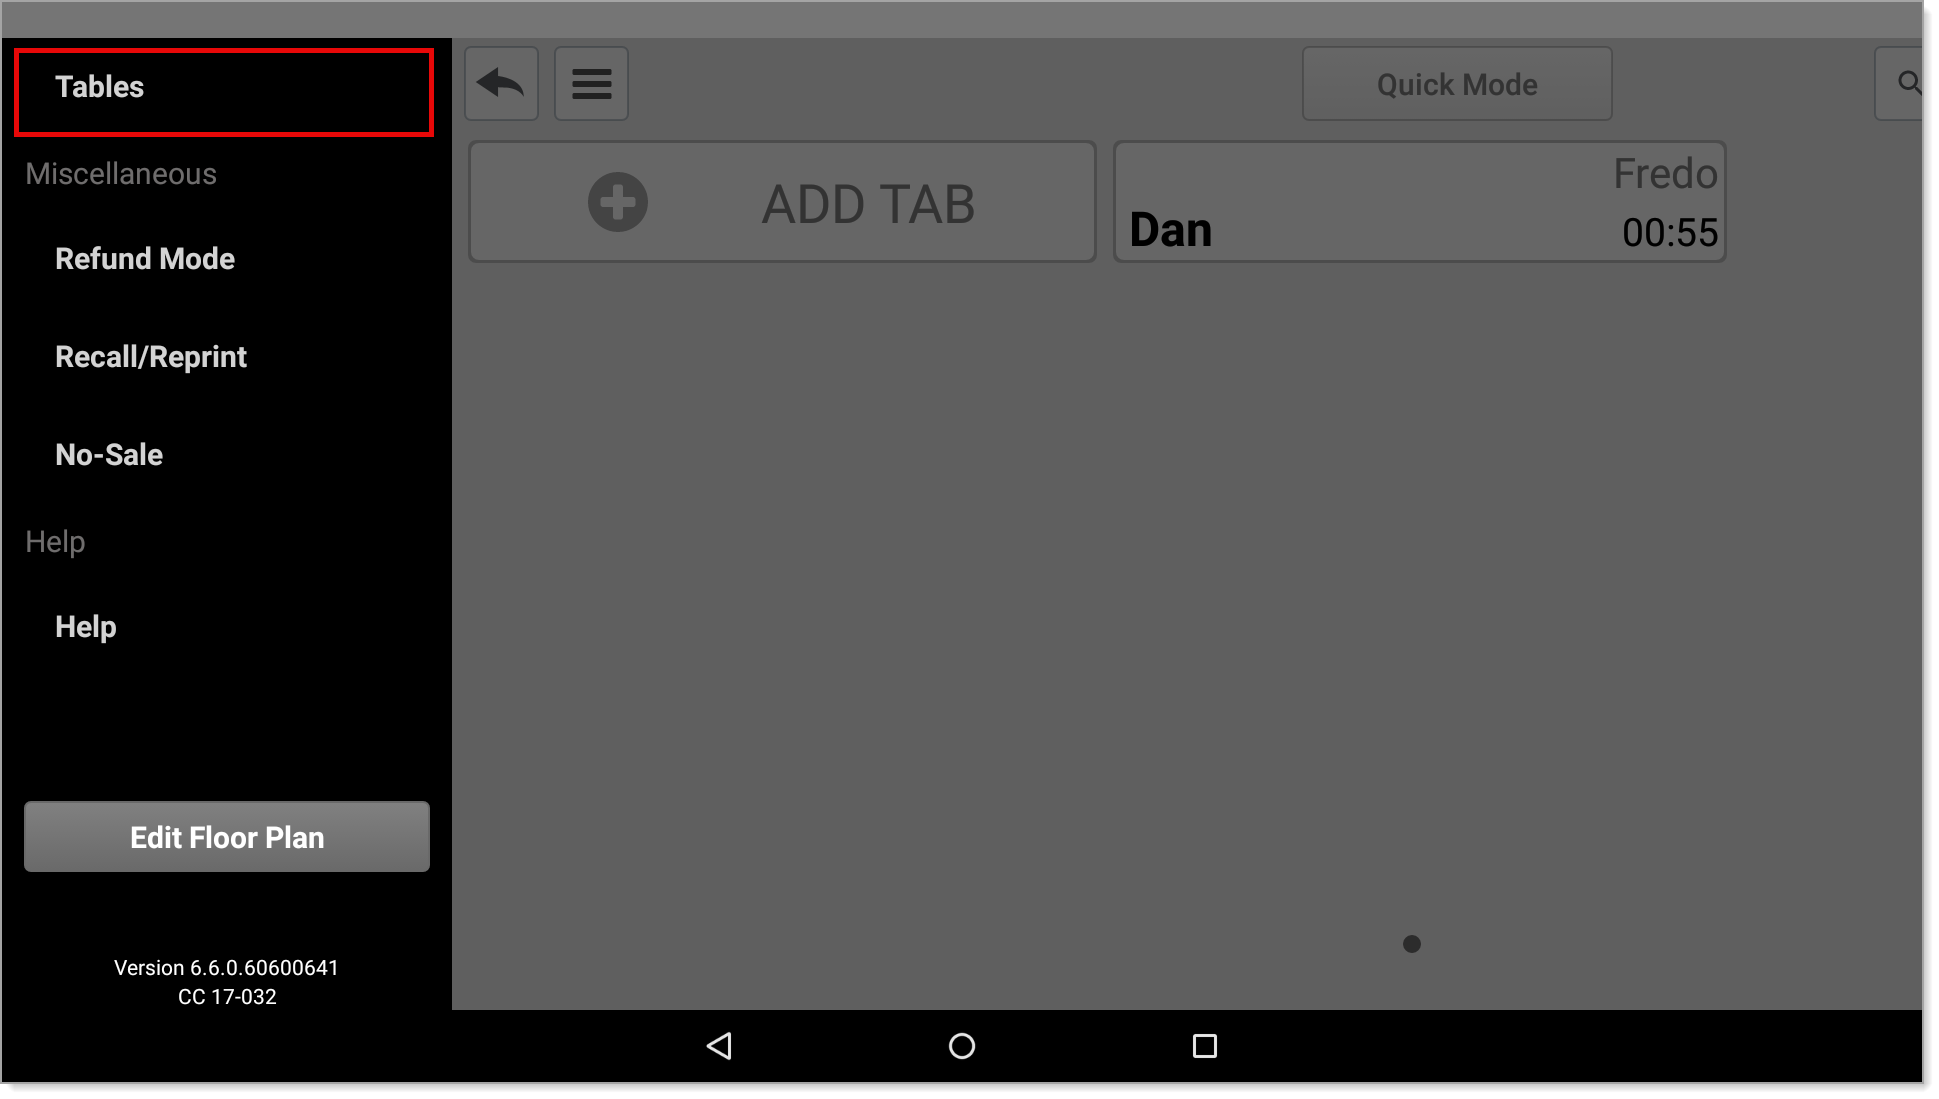
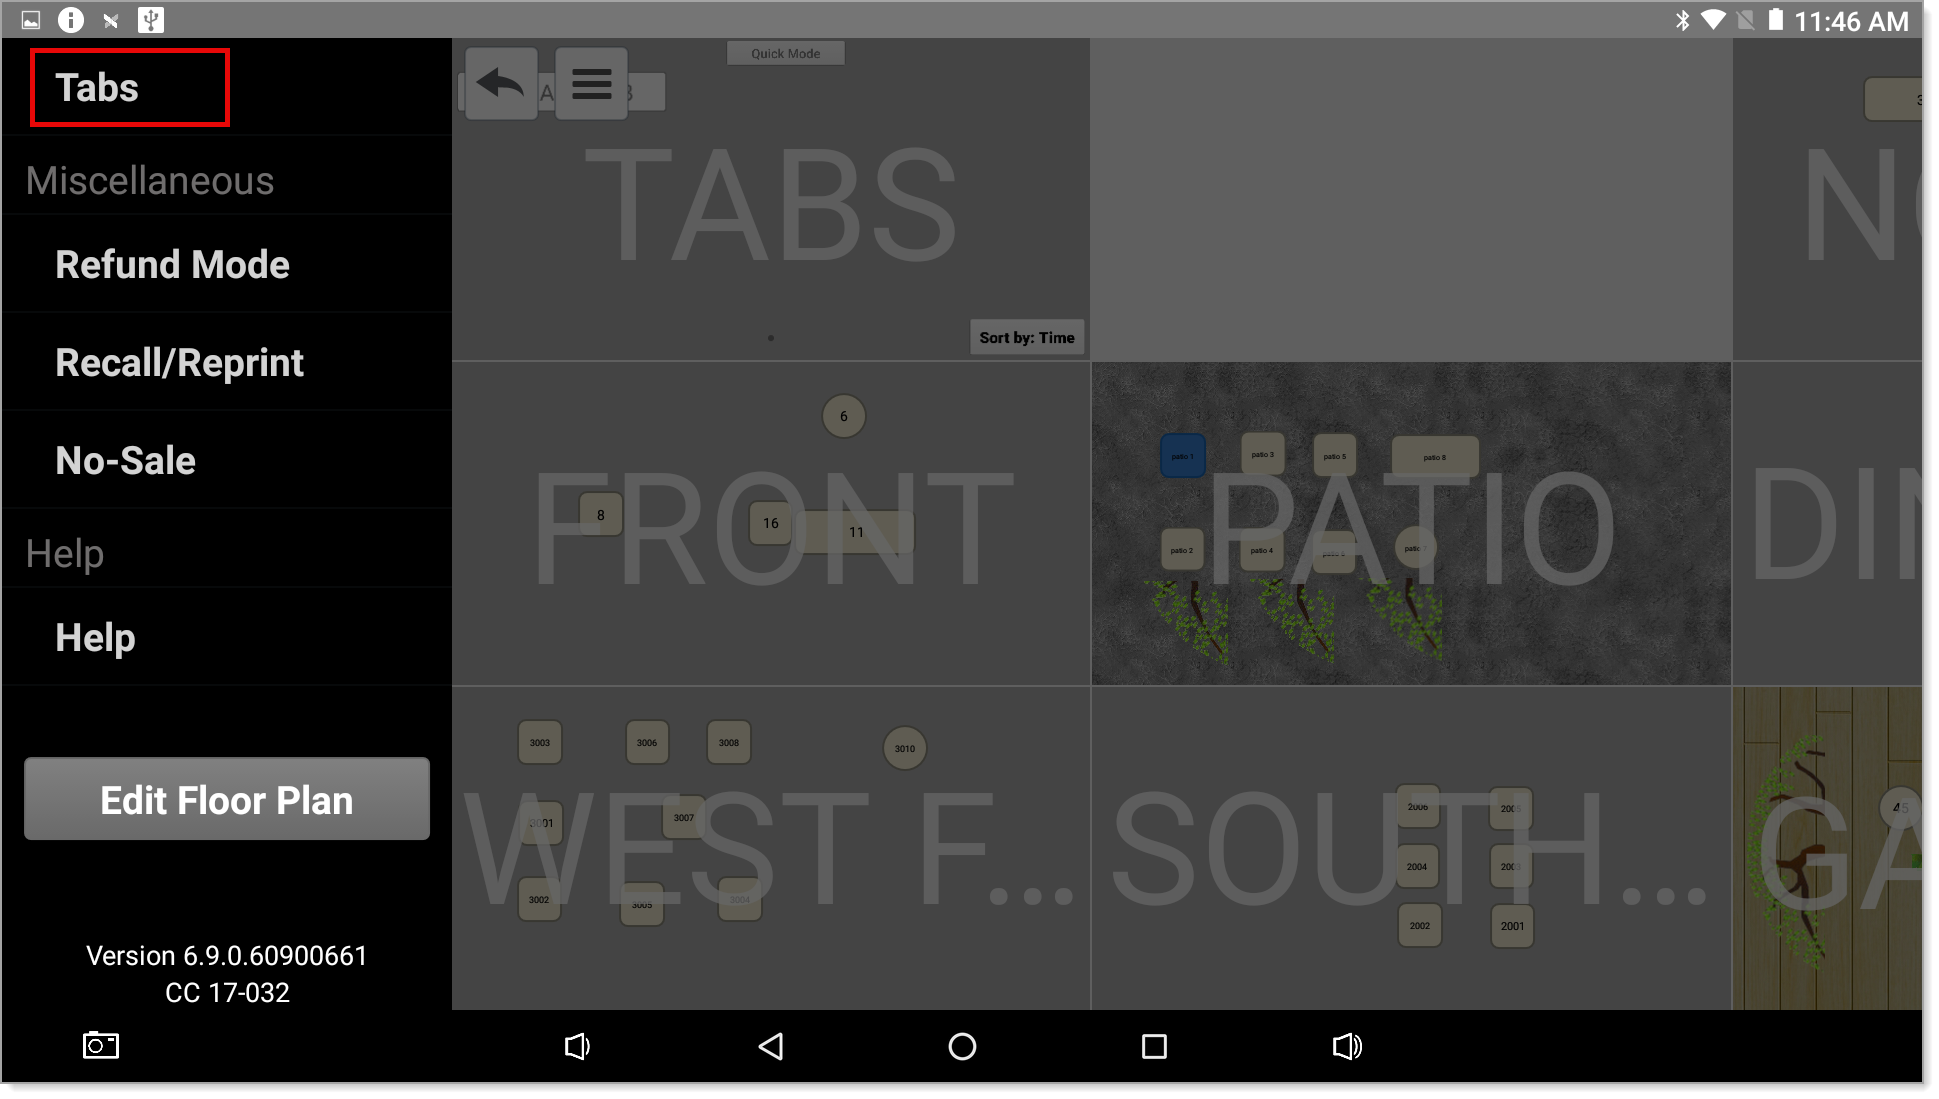
- If Table mode is not active and you see the Tabs screen, tap the slide-out menu and tap Tables.
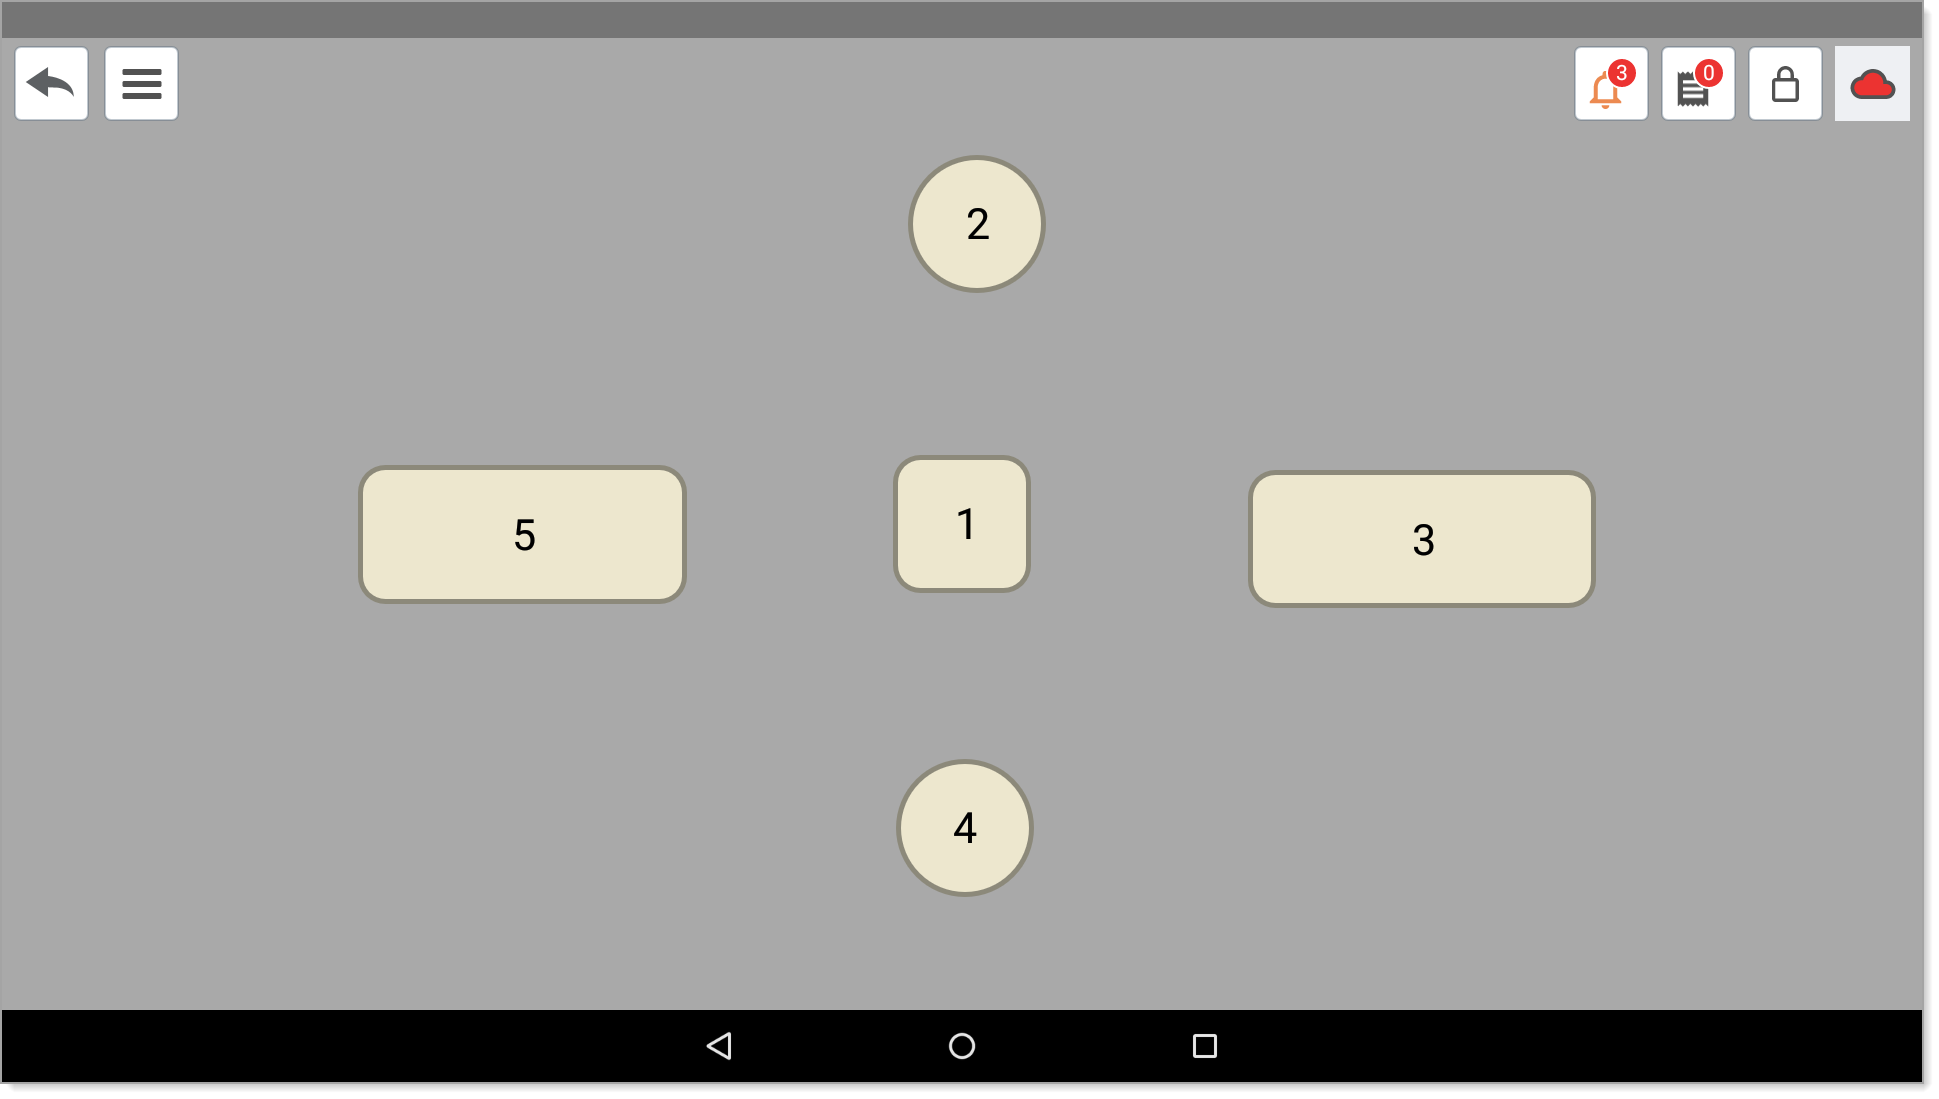
- To start an order in tables mode, tap the guest's table on the floor plan. When you start an order for a table, it will turn blue to indicate that you own it.
- The order entry screen appears with a new open guest check, ready to enter items for the first seat. Tap a seat and then add items, selecting from the categories and items on the right.
- As you add items ordered to each seat, they will appear on the left side of the screen.
- You can also add an item for the entire table to share and the cost will be split by all of the seats.
- You can add additional seats to a table, such as when a party of five is seated at a four-top table and you need to add a seat for the fifth guest. Tap the table, then tap + to add a seat.
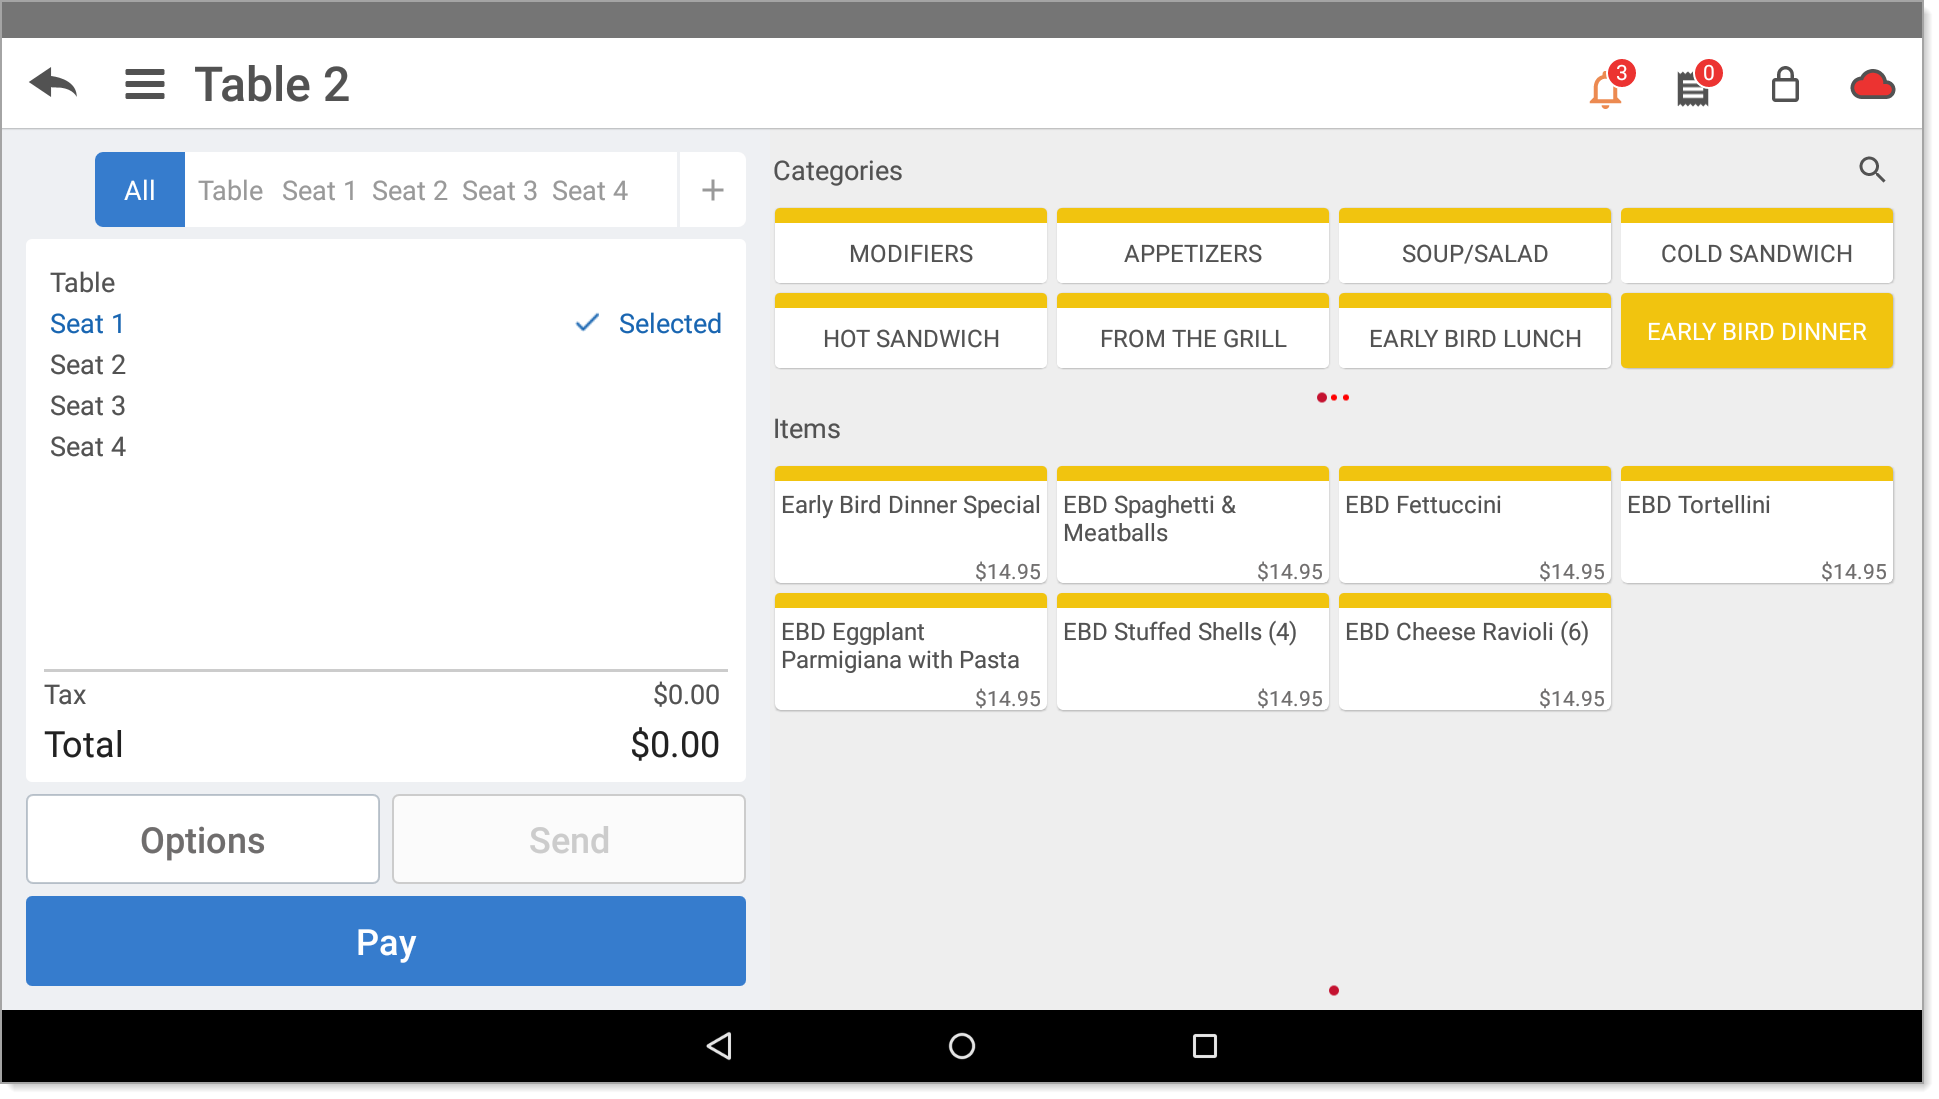
- (Optional) Tap Send to send the order to the kitchen printer. The kitchen chit will print.
- If the table isn't ready to pay yet, tap the Back arrow on the top left to save the order.

- To return to a saved order, from the order mode screen tap the active order.
- When ready to close the order, tap Pay to print the receipt and take the payment.
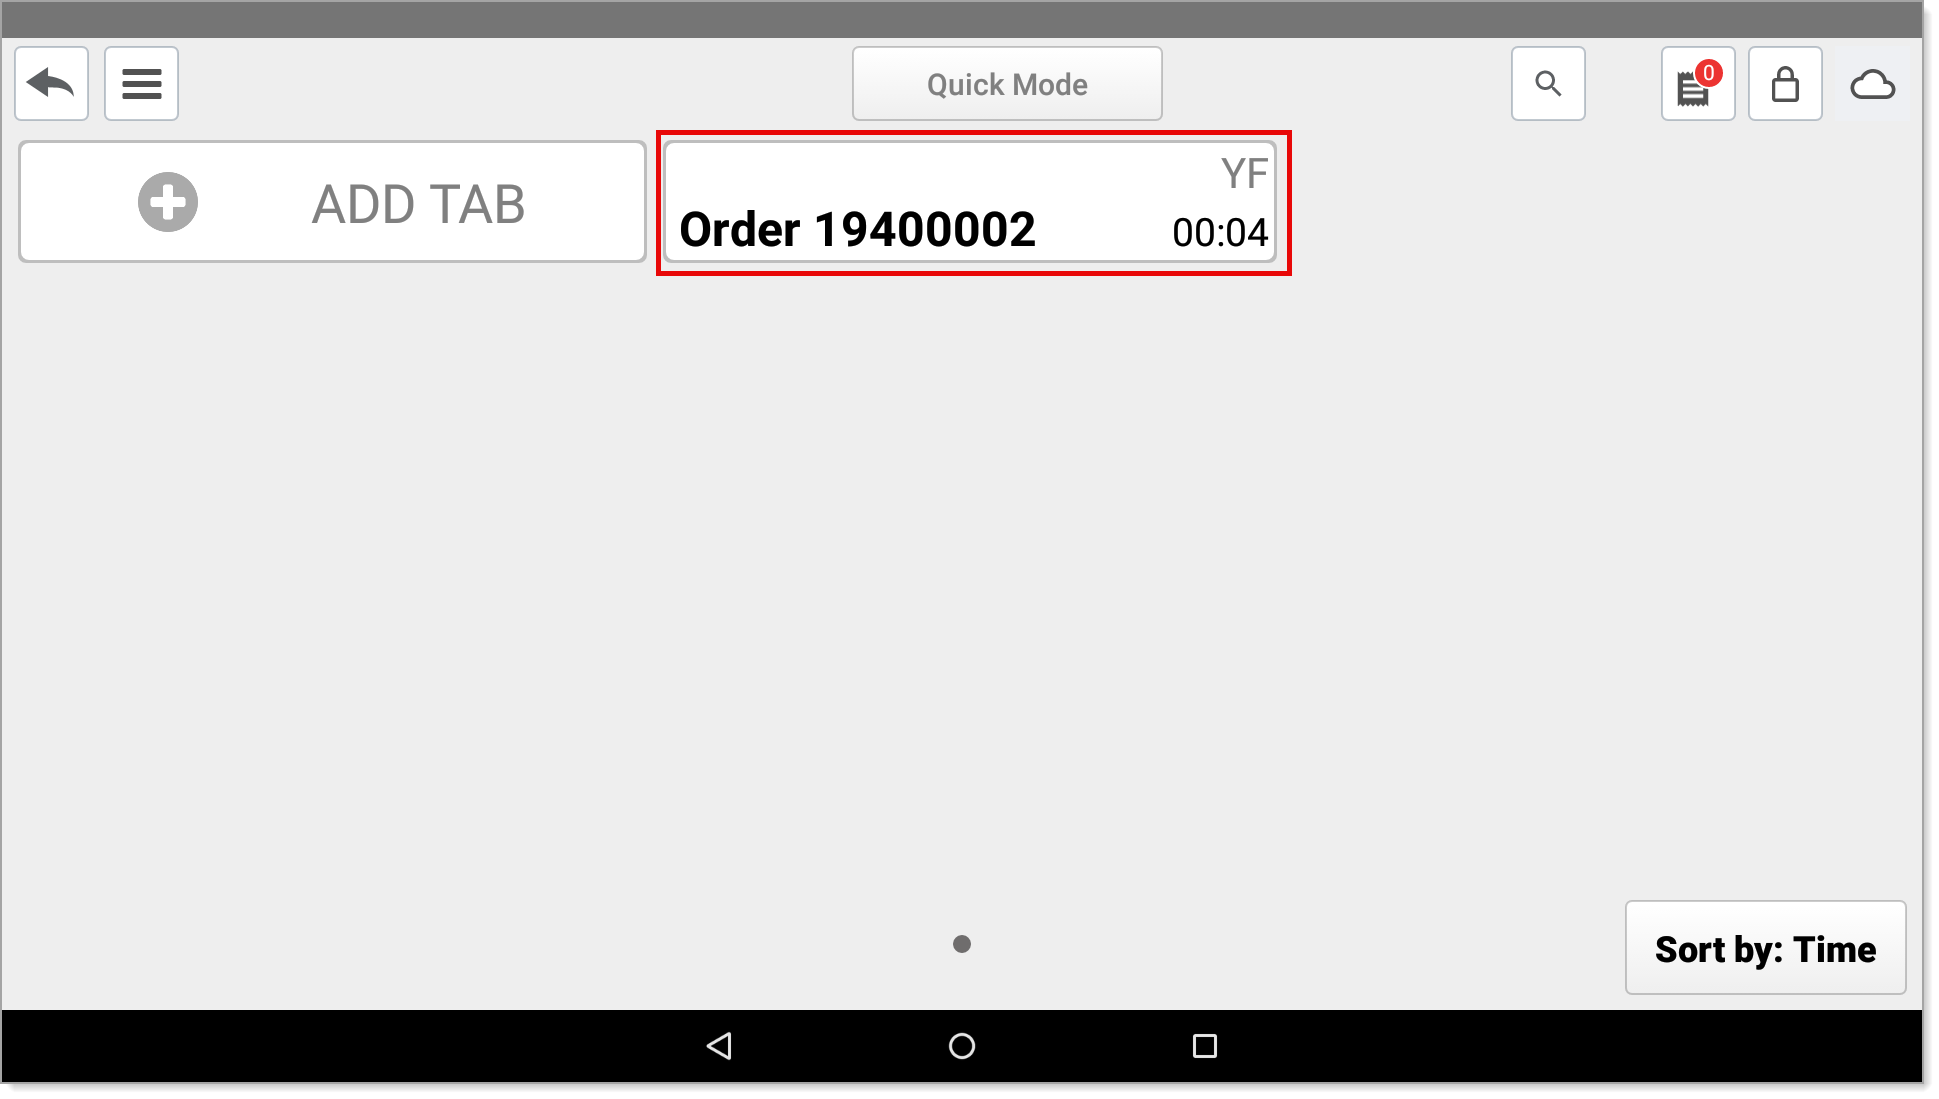
- To take an order in Tab mode
From the app screen, tap Point of Sale.
- If Tab mode is not active and you see the Tables screen, tap the slide-out menu and tap Tabs.
- Tap Add Tab to start a tab order.
- Use the Categories and items buttons on the right to add items to the order. If prompted, enter the modifiers for the item selected.
- (Optional) Tap Send to send the order to the Kitchen.
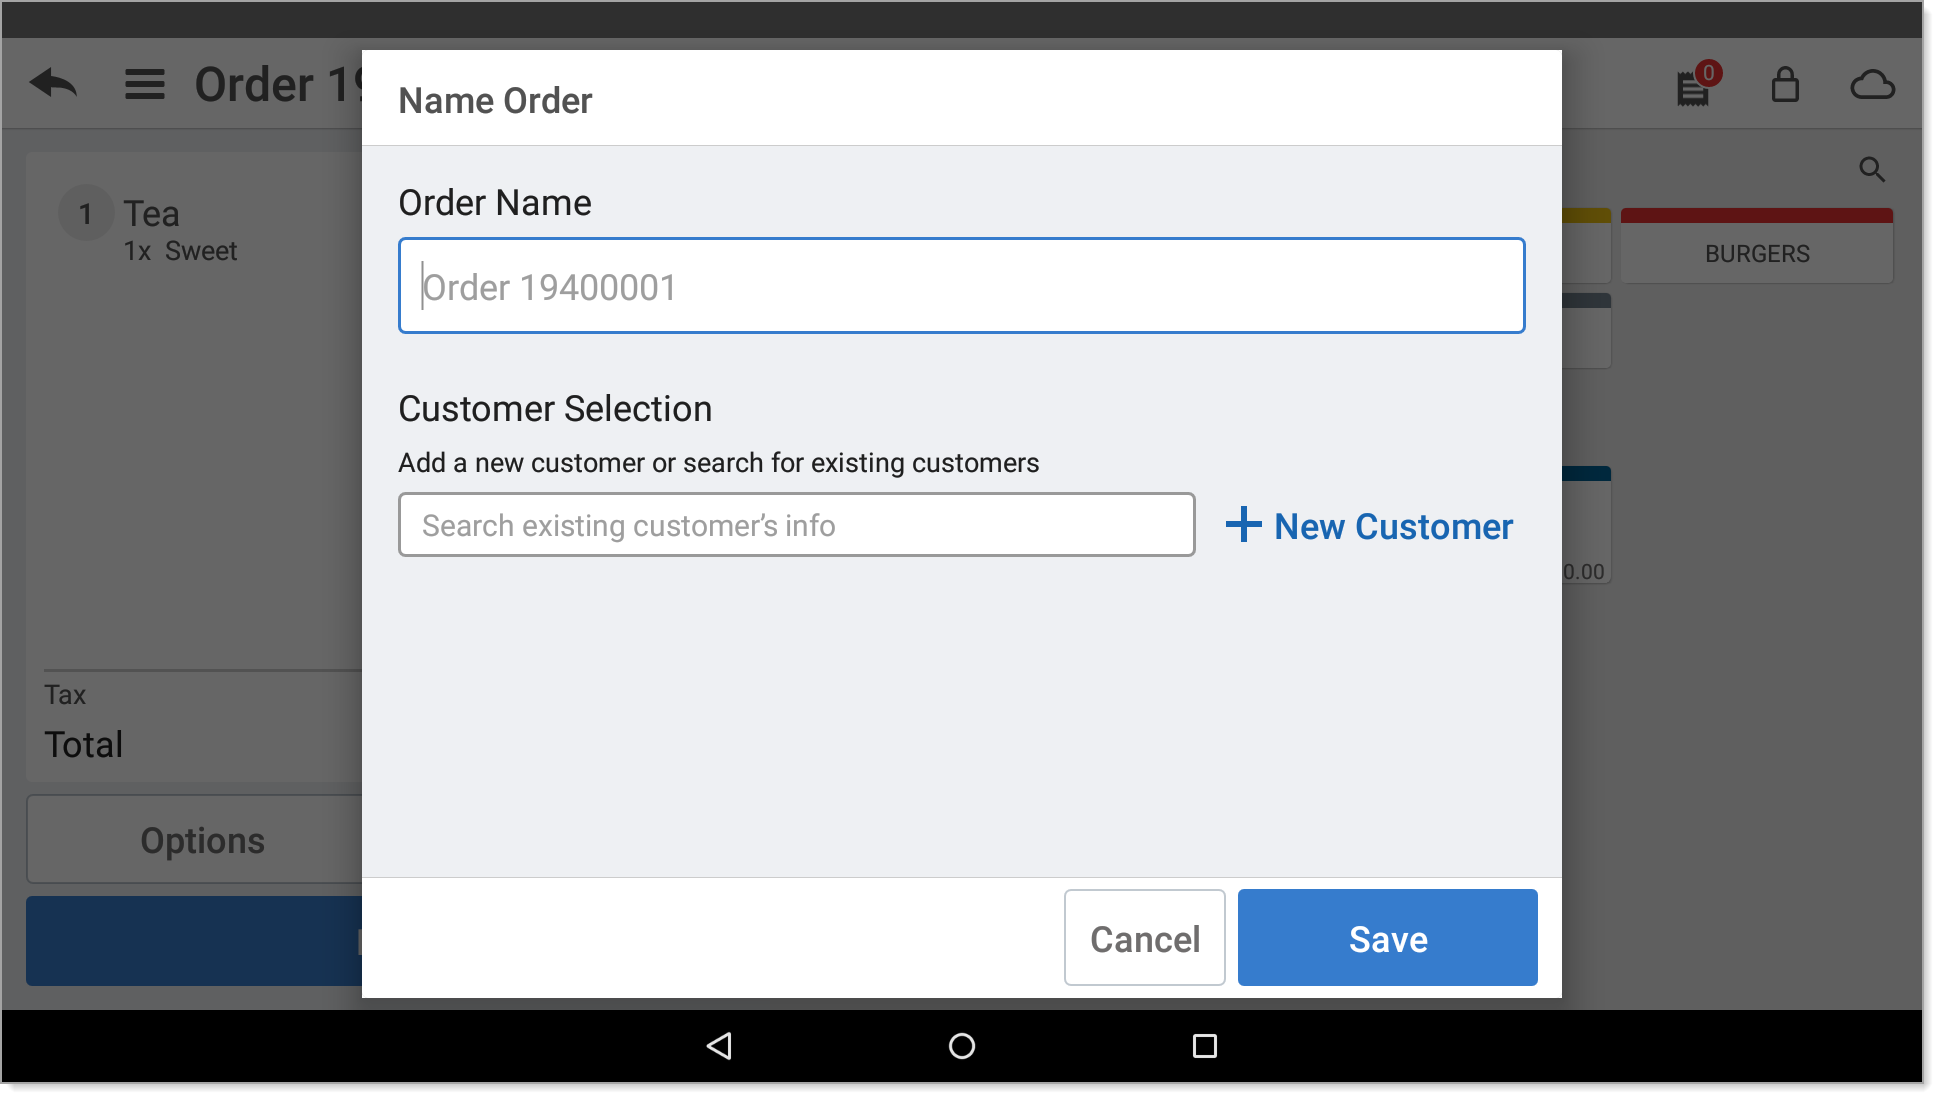
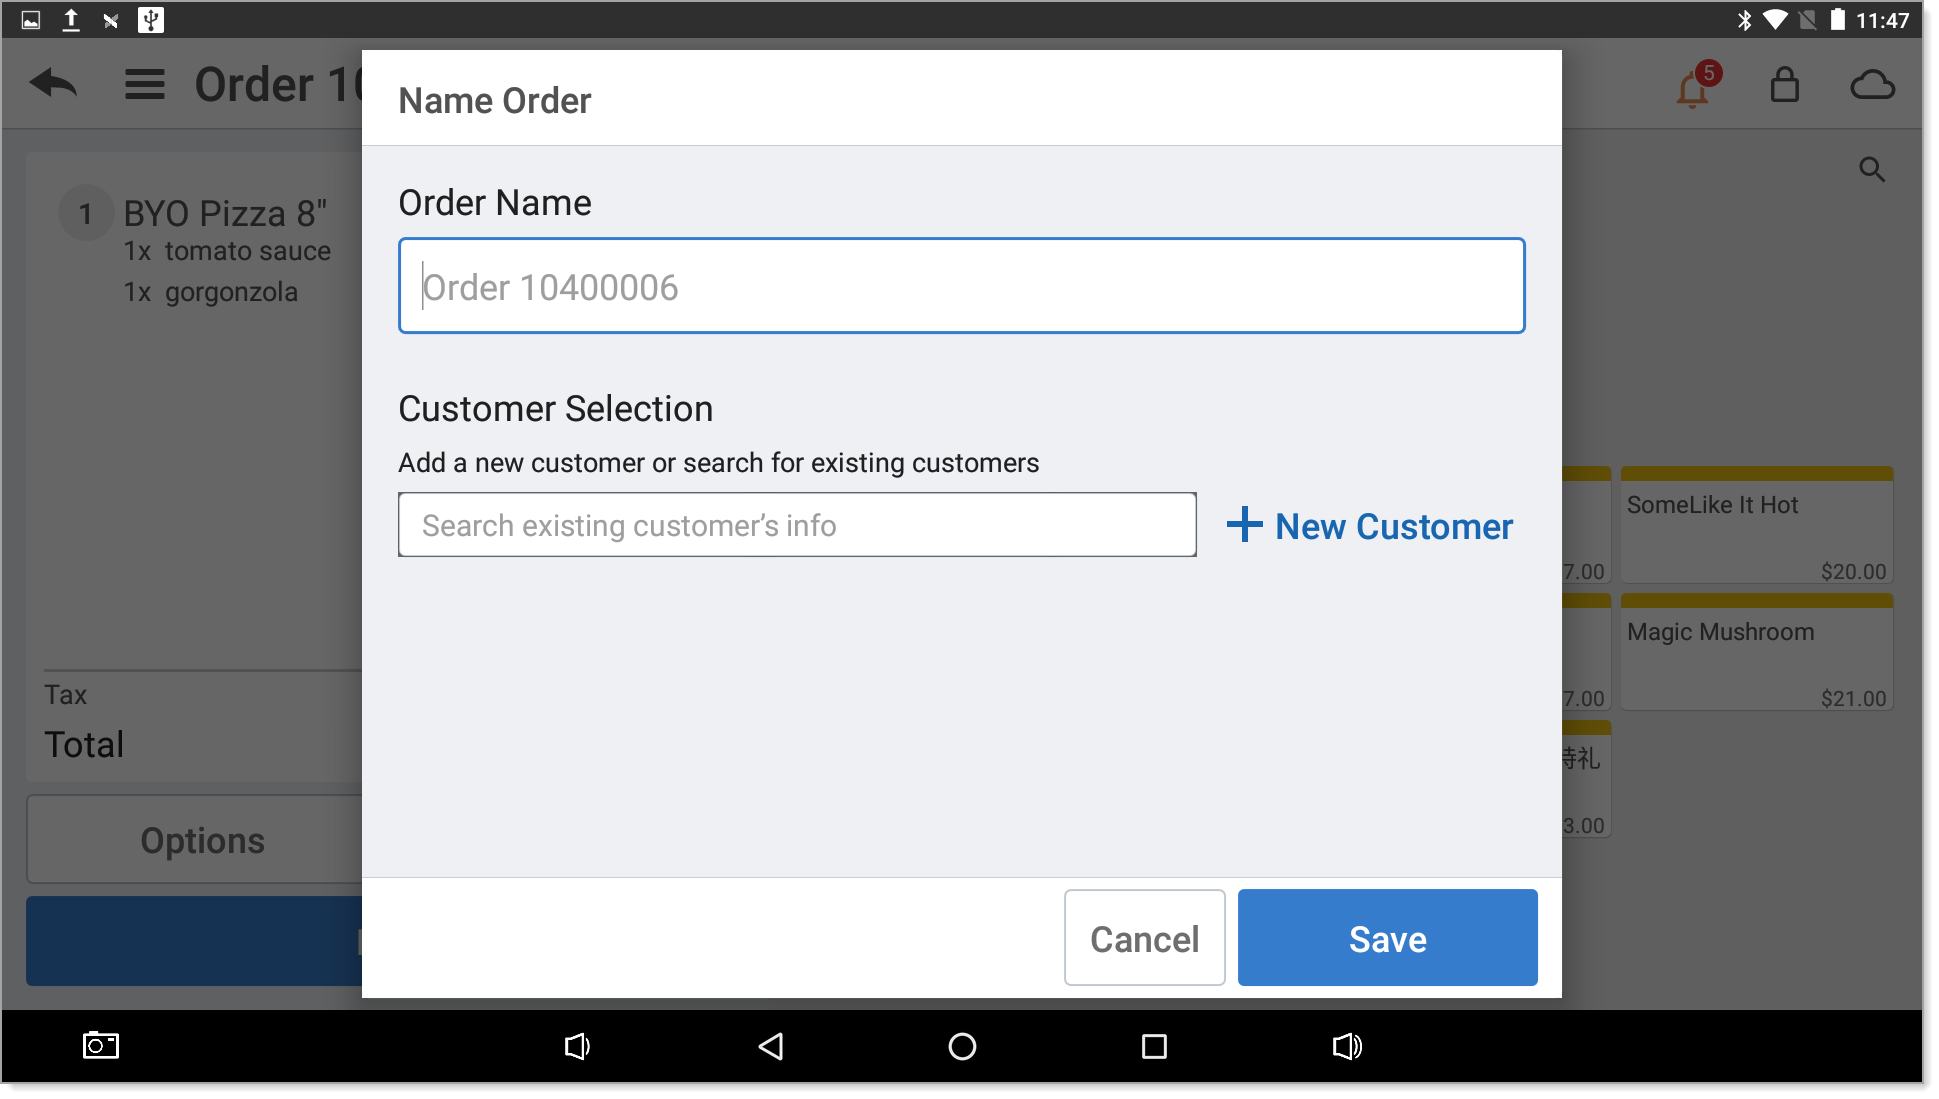
- Create an order name or leave the system created order number. You can also choose a customer to assign to the order (link to customers).
- Tap the Back arrow to save the order. The order will be listed on the Tabs screen to return to if the customer adds additional items to their tab.
- (Optional) If configured in your Back Office to save a credit card to an order, you may take a credit card to hold the tab open. Tap Hold Card, then follow the prompts to run the card and enter a pre-authorized amount. You can pre-authorize a card up to $100.
- When ready to close the order, tap Pay to print the receipt and take the payment.
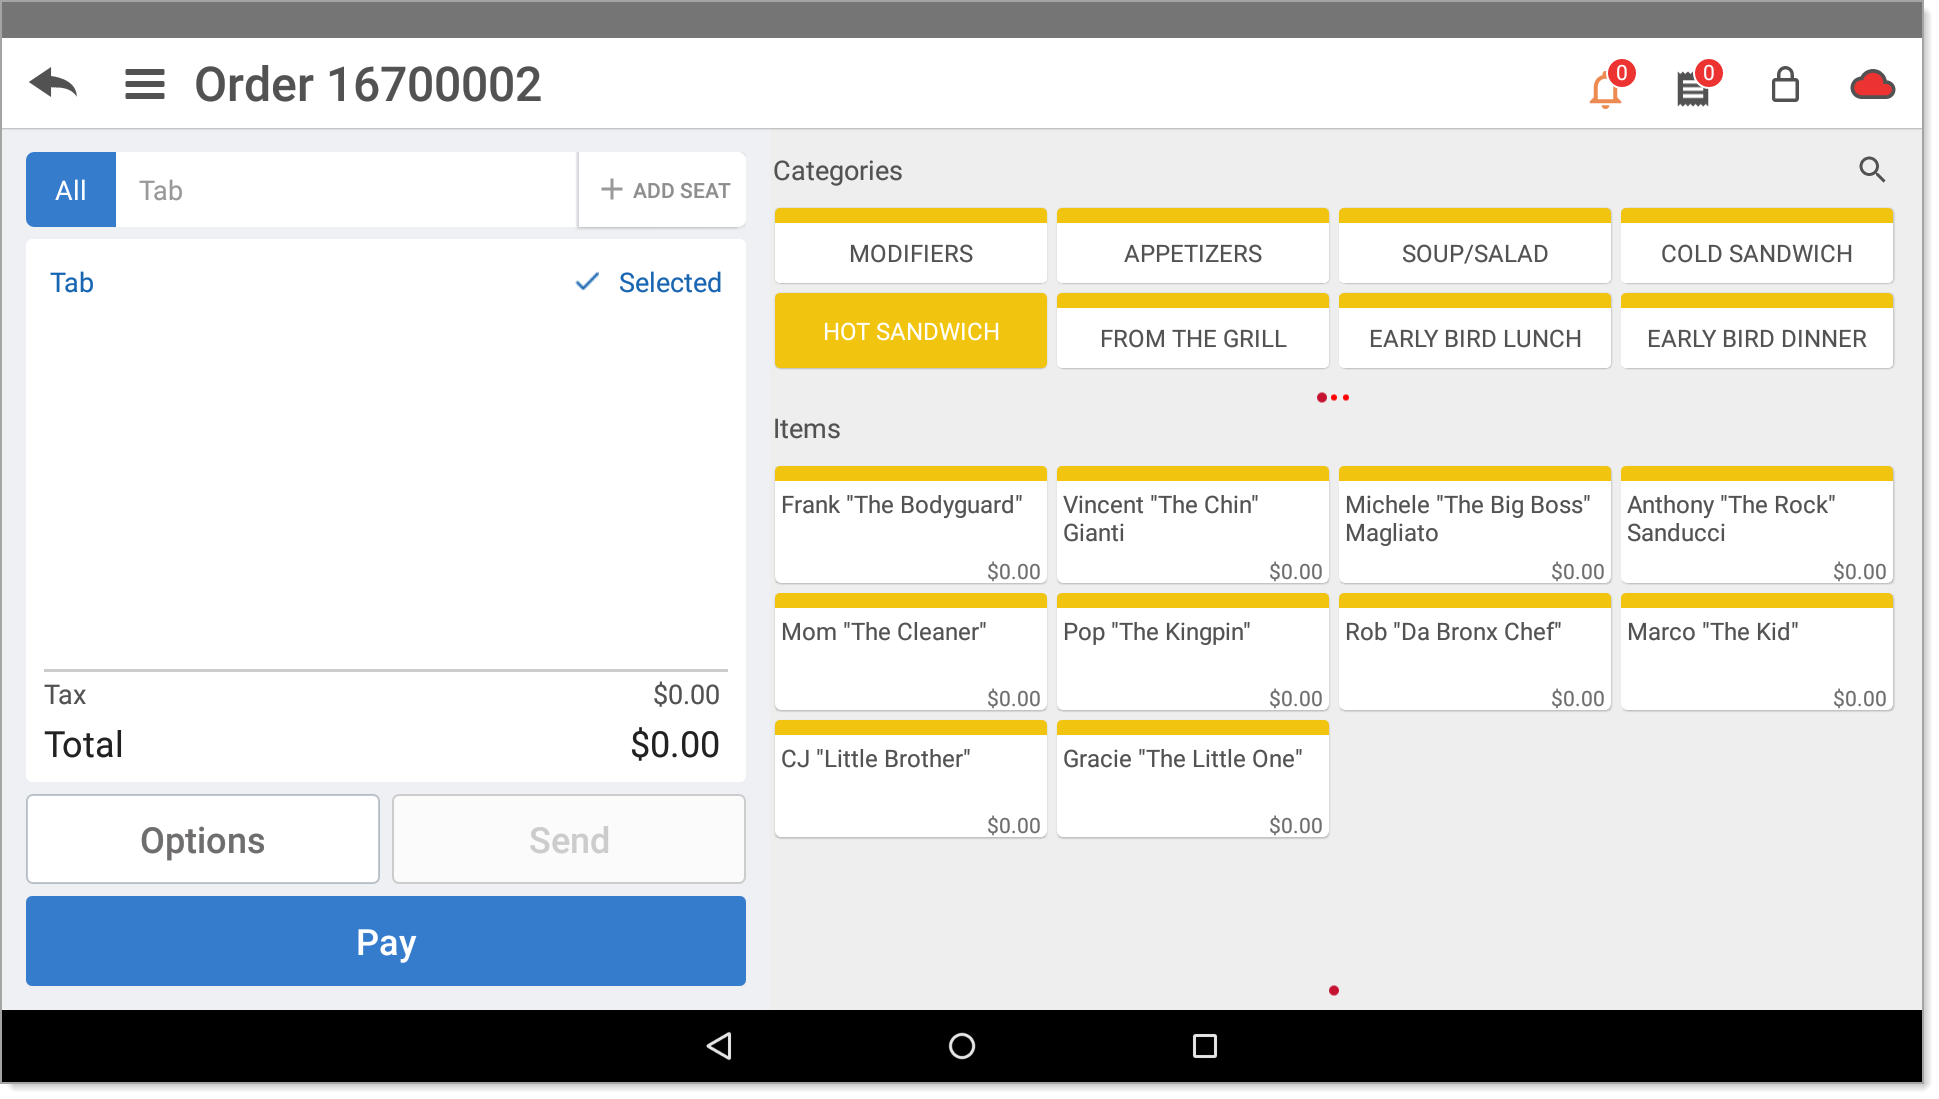
- To take an order in Quick Mode
Quick Mode allows you to take an order without creating a new table or tab. It is similar to the Quick Service order mode options, but accessed through the Point of Sale option on the main screen.
- Tap Point of Sale on your screen.
- Tap the Quick Mode button located at the top center of the screen to view the Order Entry screen.

- Use the categories and items buttons to add items to the order.

- To send items to the kitchen printer, tap Send. The kitchen chit will print on the kitchen printer.
- When ready to close the order, tap Pay to take the payment.
- Tap Point of Sale on your screen.
Quick Service (Phone/Drive Thru) order mode
Quick Service order modes are additional order types that may be available depending on how your Back Office is configured.
NOTE:
Enable additional order modes in Back Office. Access Settings > Store > Store Options, select the order mode you wish to enable, and click Save. You can configure additional charges associated with the order type if needed. Access the Phone/Drive Thru home screen on the device by tapping Phone/Drive Thru at the home screen. It is necessary to activate a financial shift prior to accessing the Phone/Drive Thru home screen.
- To take a Quick Service (takeout, drive thru, delivery dine in or catering order)
Depending on the quick service order mode, a customer name and phone number or address. You will be prompted to enter a target time for the order, which is the time the order will be ready for pickup or for a driver to leave the store with the items. The app does not calculate a promise time.
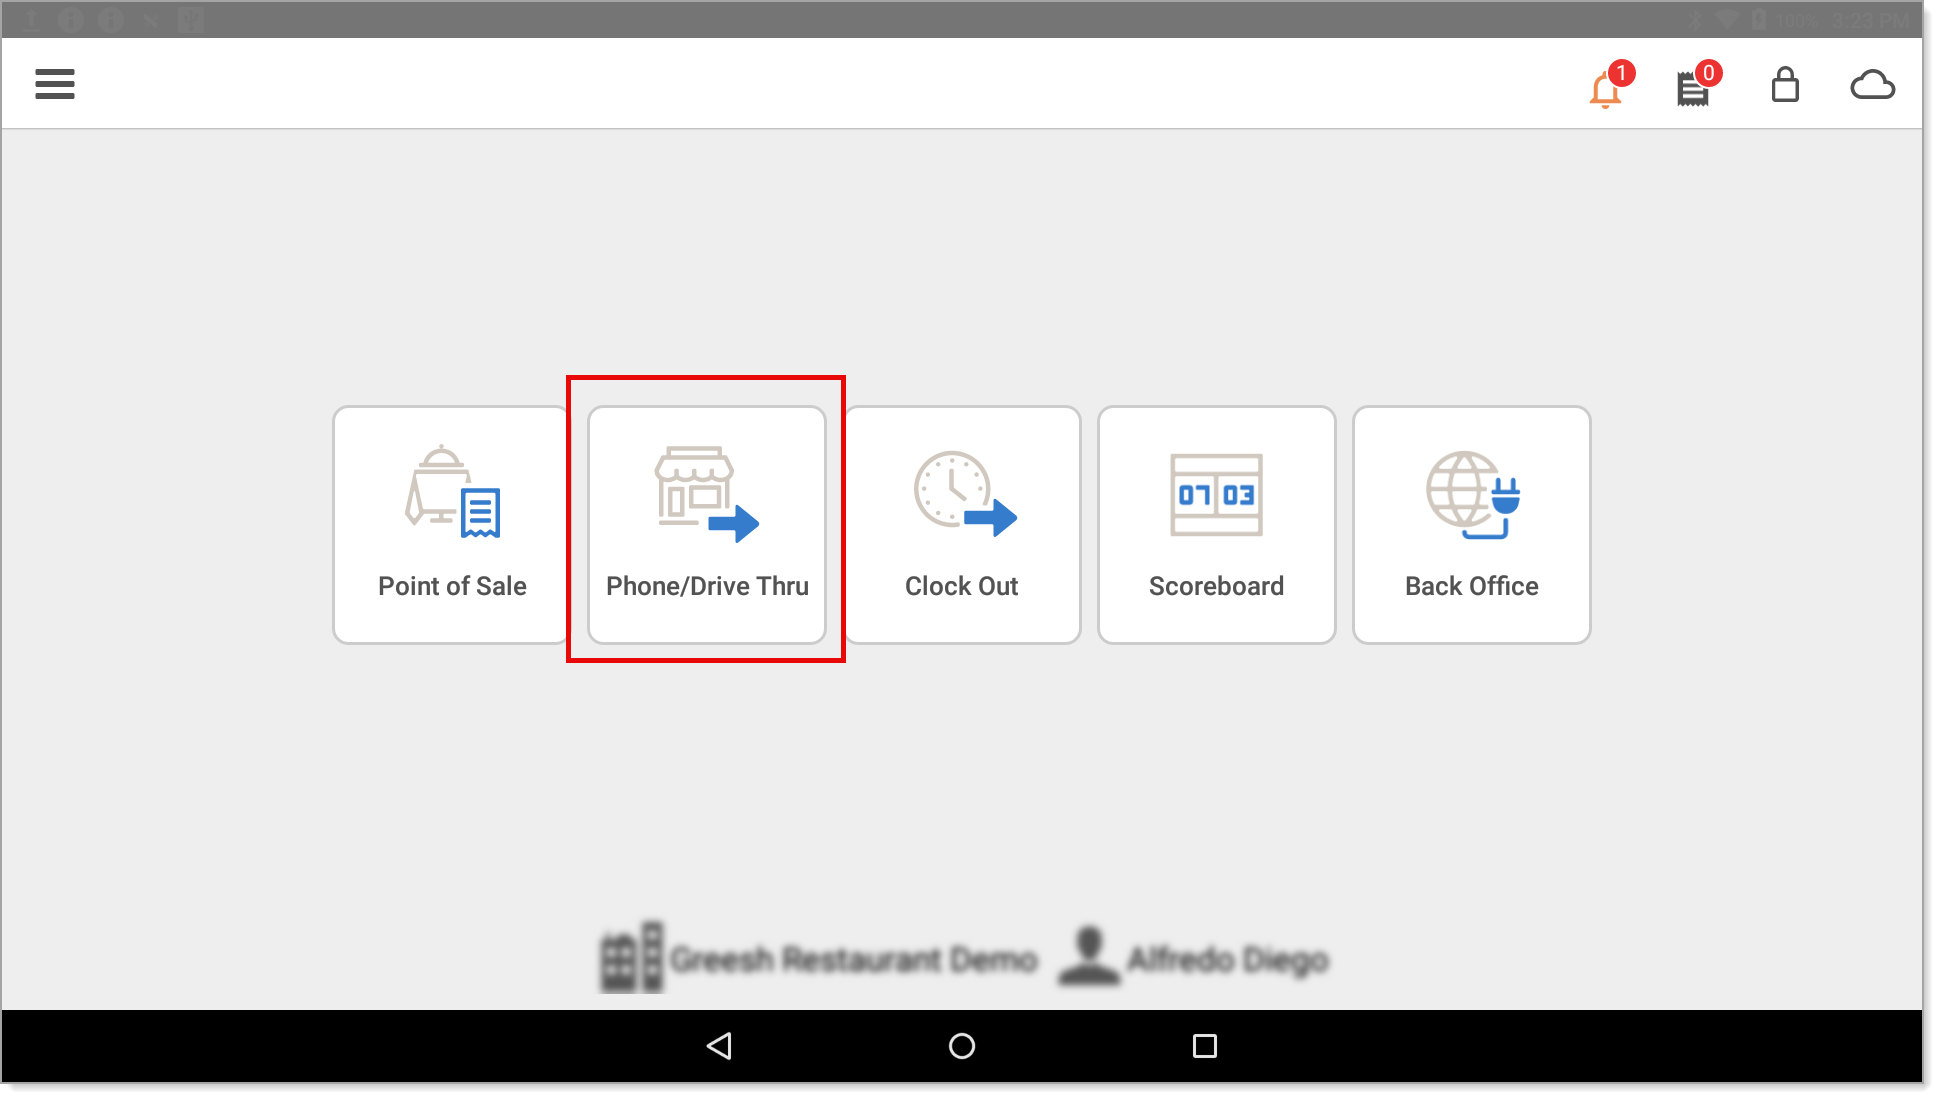
- From the home screen, select the Phone/Drive Thru button.
- Select a new order button from the right side of the screen. The options that display are configured for your business in Back Office and might differ from what is shown below.

Option Description Navigation options Return to the previous screen, open the slide out menu, or log out of the app. Open orders View a list of open orders for the specified order mode, the number of open orders is indicated in parentheses. Search field Enter a customer name or phone number to search for an existing takeout or delivery order. Order target time Indicates the promise time for the order. New order buttons Initiate a new order. Available order types are configurable in the Back Office. Pending online orders Review online orders which have not yet downloaded to the takeout or delivery queue. - Name the order by entering a name for the order in Order Name or add the customer to the order by selecting the customer from your customer list. Depending on the type of Quick Service order, customer information such as a phone number or address may be required. You can add a new customer by tapping New Customer and entering the customer's name and phone or email information. Tap Save.
- Tap the items to include on the order. If the item is a weighed item, a popup will display.
- Tap Pay. The Order Target Time screen appears. Phone orders require a target time.

- Scroll to select the targeted delivery time or use - and + buttons.
- Tap Done.
- When ready to close the order, tap Pay to take the payment.
- From the home screen, select the Phone/Drive Thru button.
- To change an order target time
In some instances, you may need to adjust the order target time for an open order.
- From the home screen, select the Phone/Drive Thru button.
- At the Phone/ Drive Thru home screen, tap the desired new order button on the right of the screen.
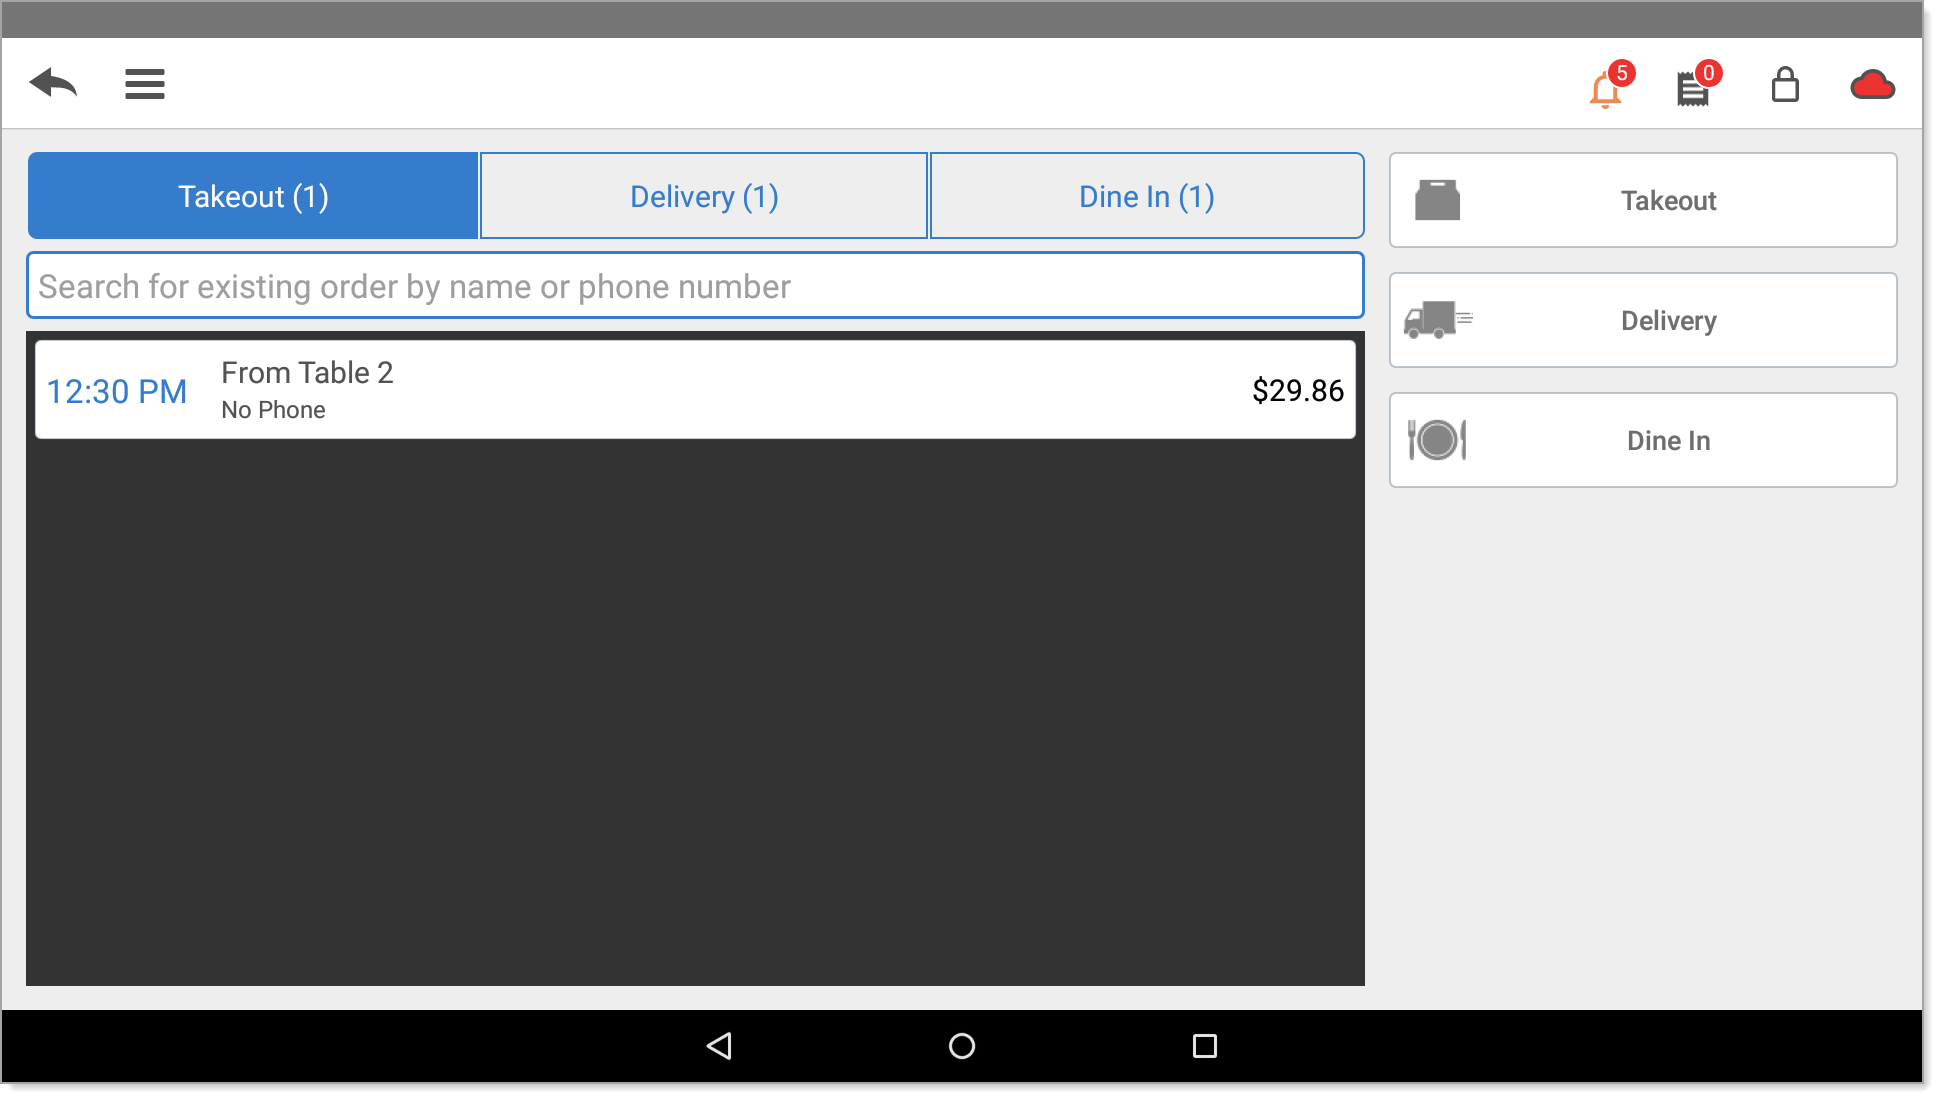
- Search for the customer order.
- In the search results, tap the time next to the customer name. The Order Target Time screen appears.
- Scroll to select the hours, minutes, and time period, or use - and + to select a target time for order completion or delivery.
- Tap Done.
- From the home screen, select the Phone/Drive Thru button.