Point of Sale Solution App Calendar Appointments
Description
What's in this article?
Use the calendar as a scheduling system for your business and a simple booking tool for your clients. New and existing clients can easily find details about your services, view your availability, and book appointments from your online store. Calendar settings can be adjusted in Back Office.
- *music*
- This video covers how to view, add, and manage scheduled appointments in the Point of Sale Solution application.
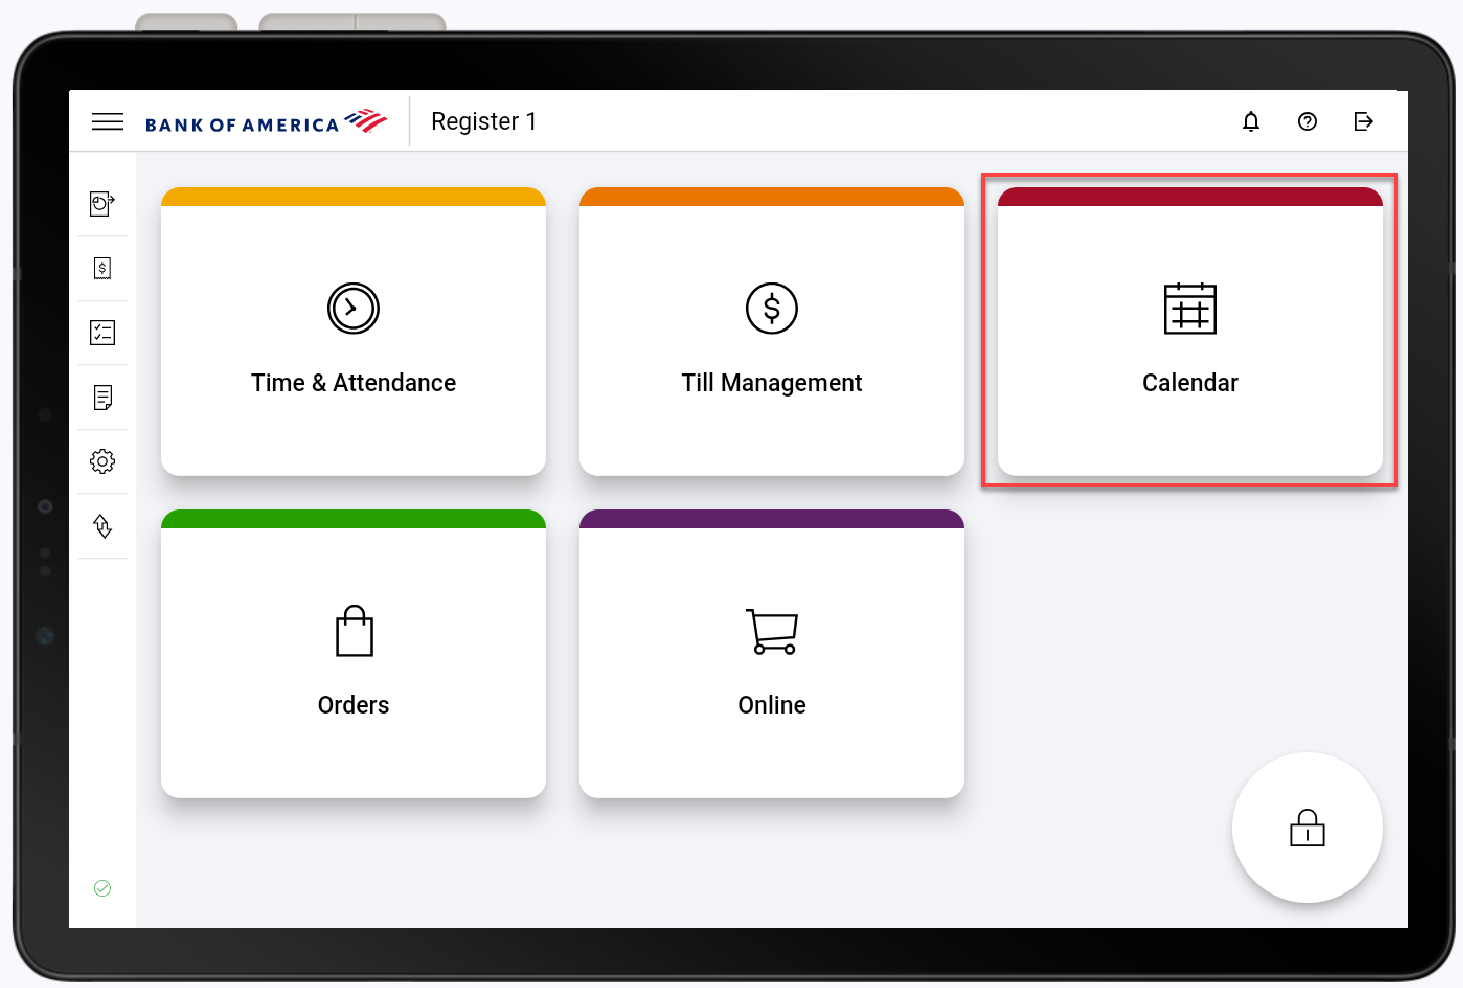
- To view scheduled appointments, tap Calendar.
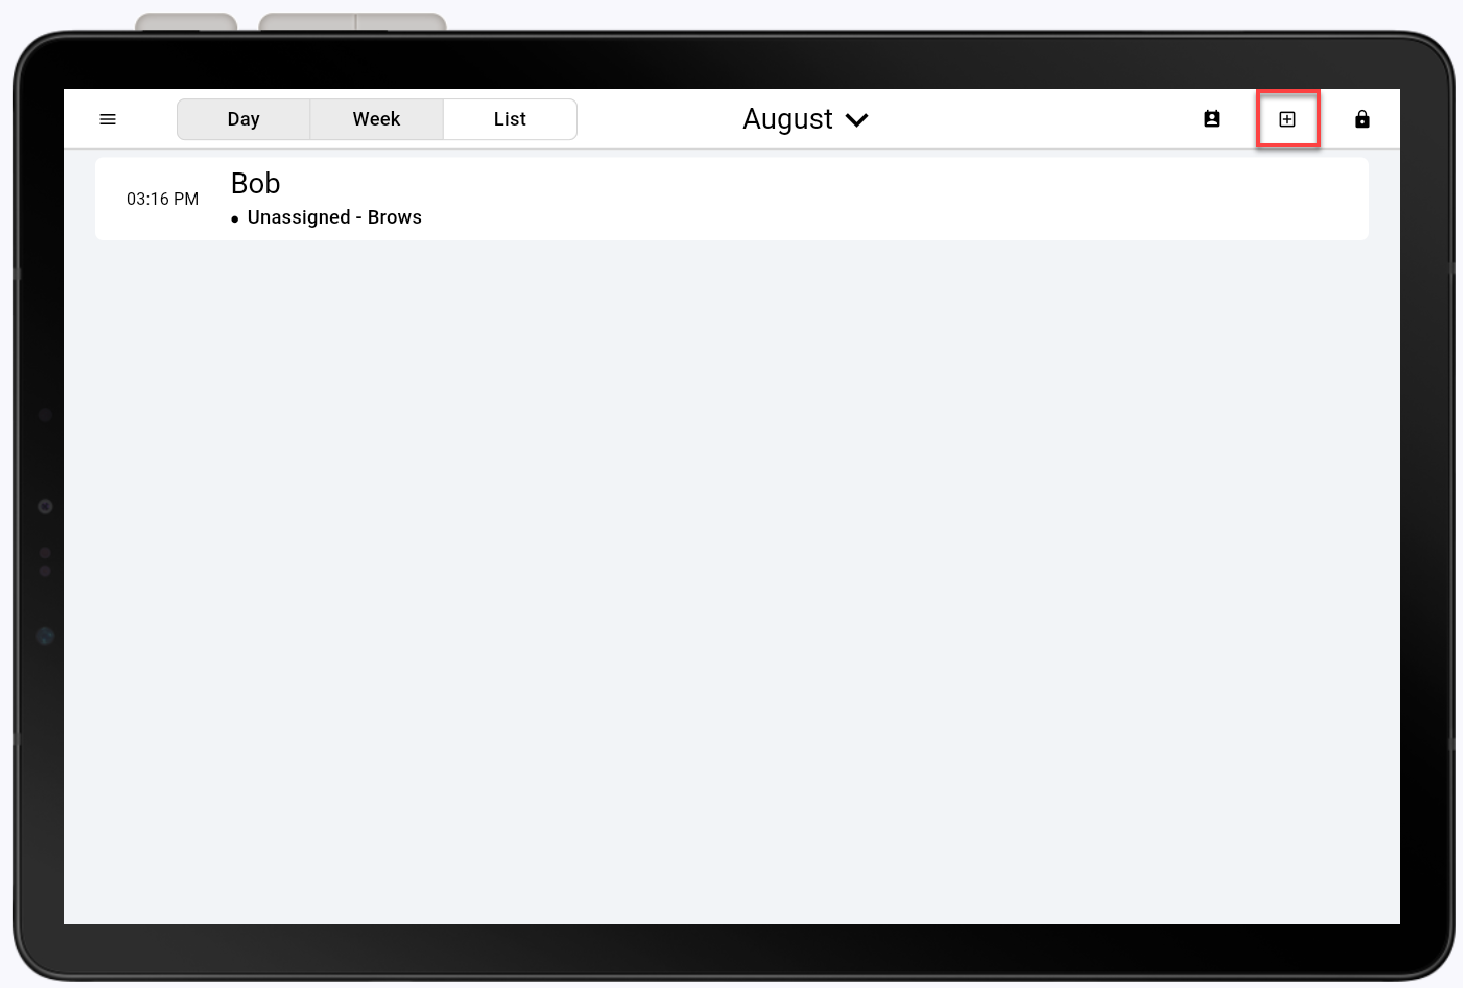
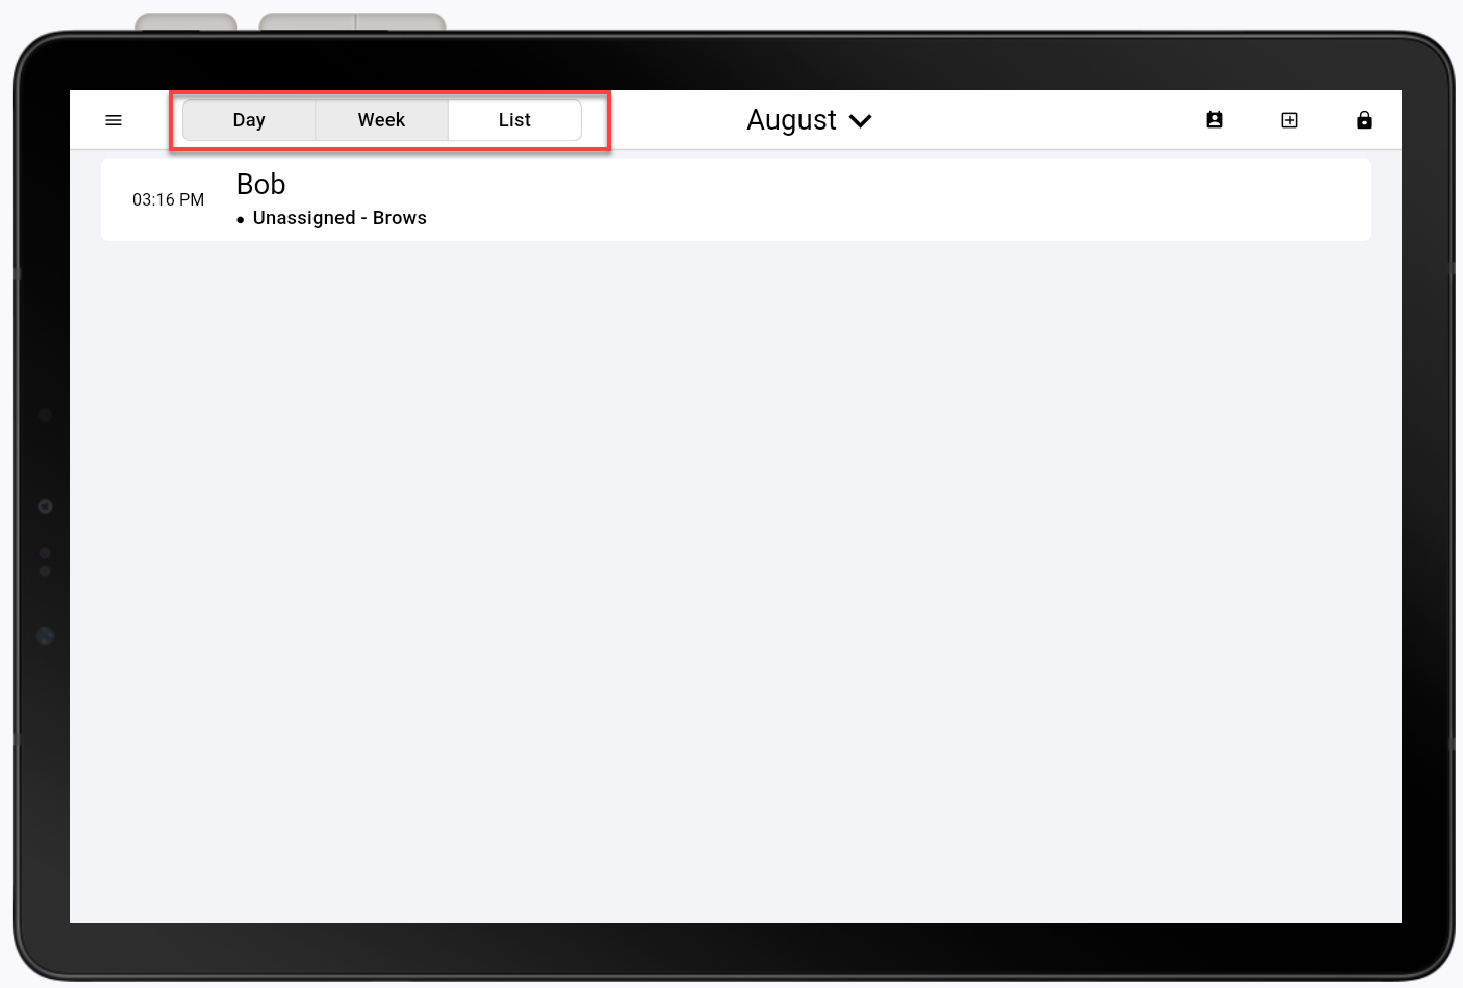
- Calendar details and availability can be sorted by day, week or list. To view future availability, tap the current month at the top of the calendar, swipe to select the desired month and date and tap Okay.
- To add a new appointment, tap the add icon in the upper right corner.
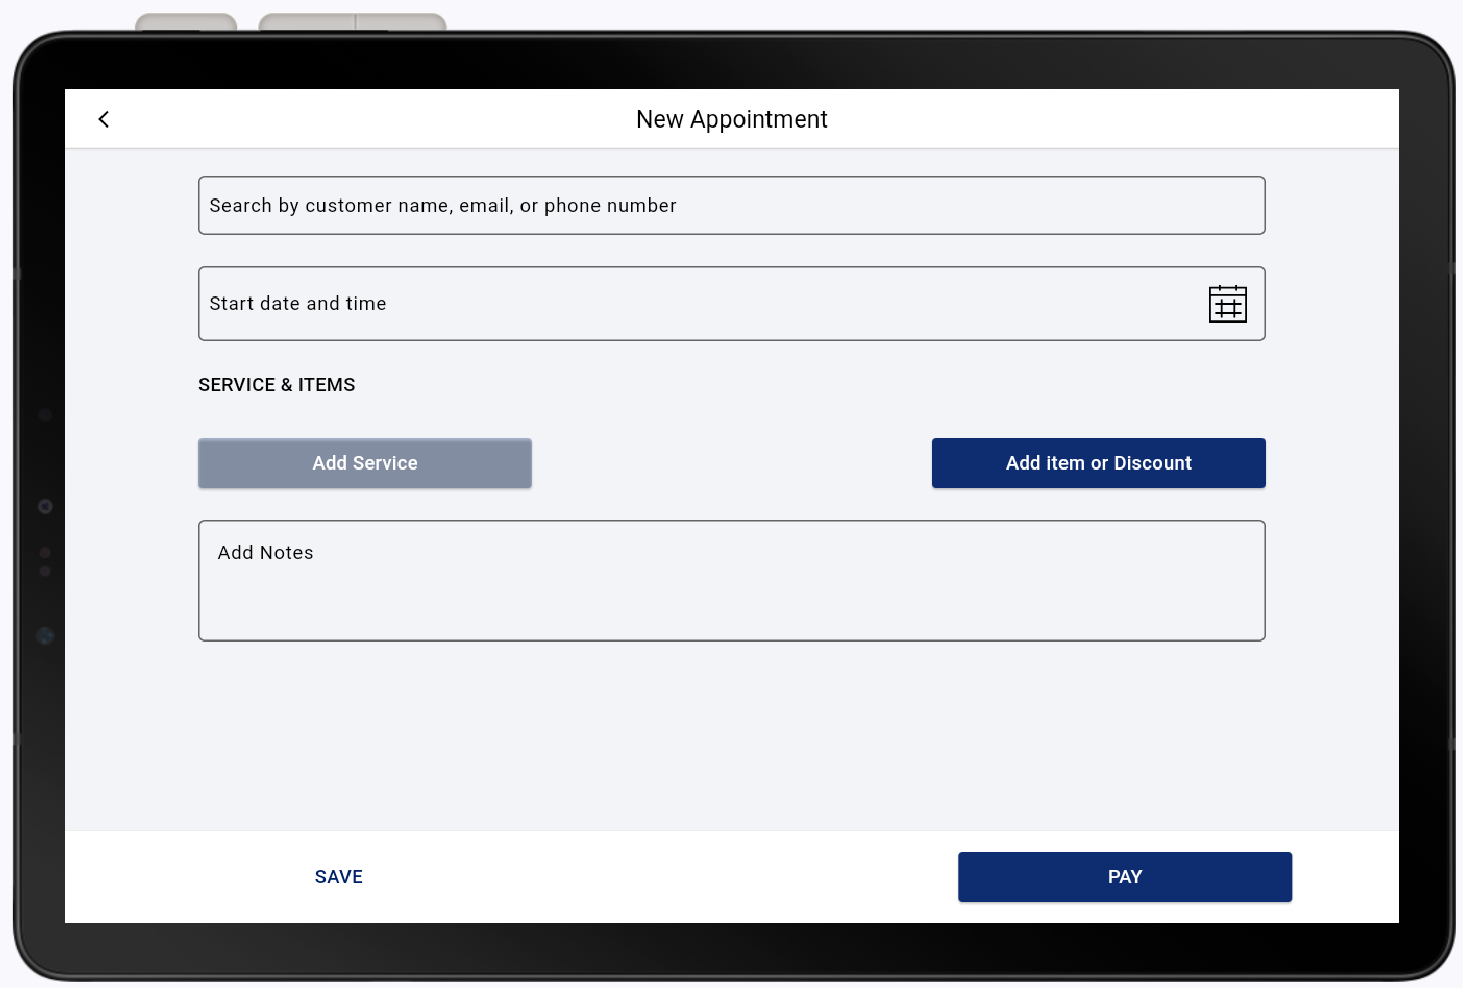
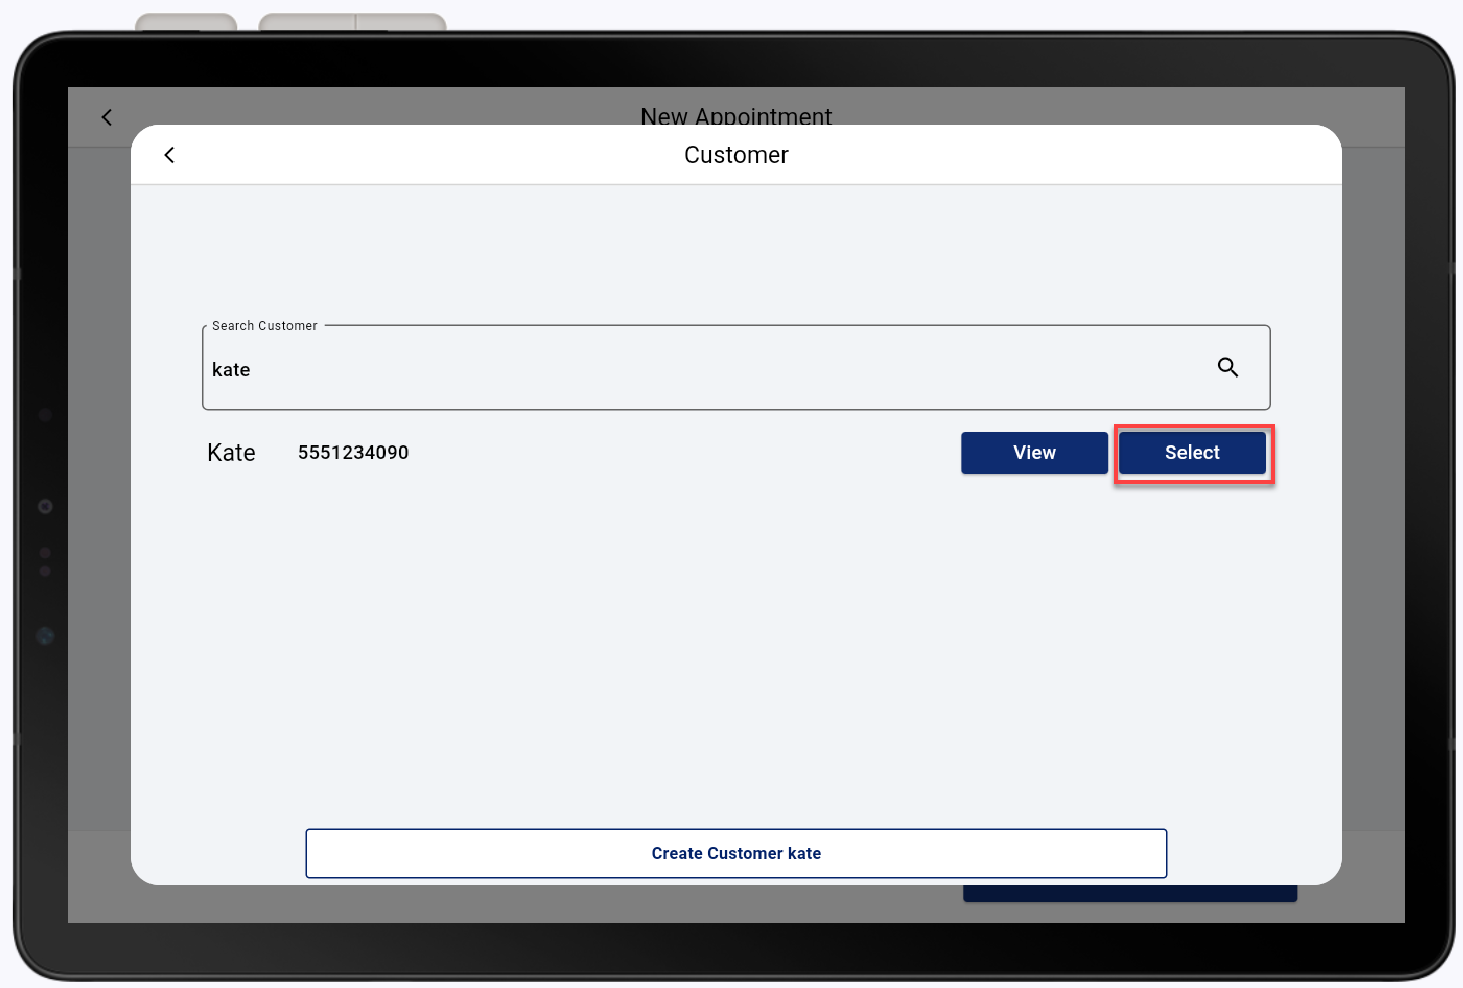
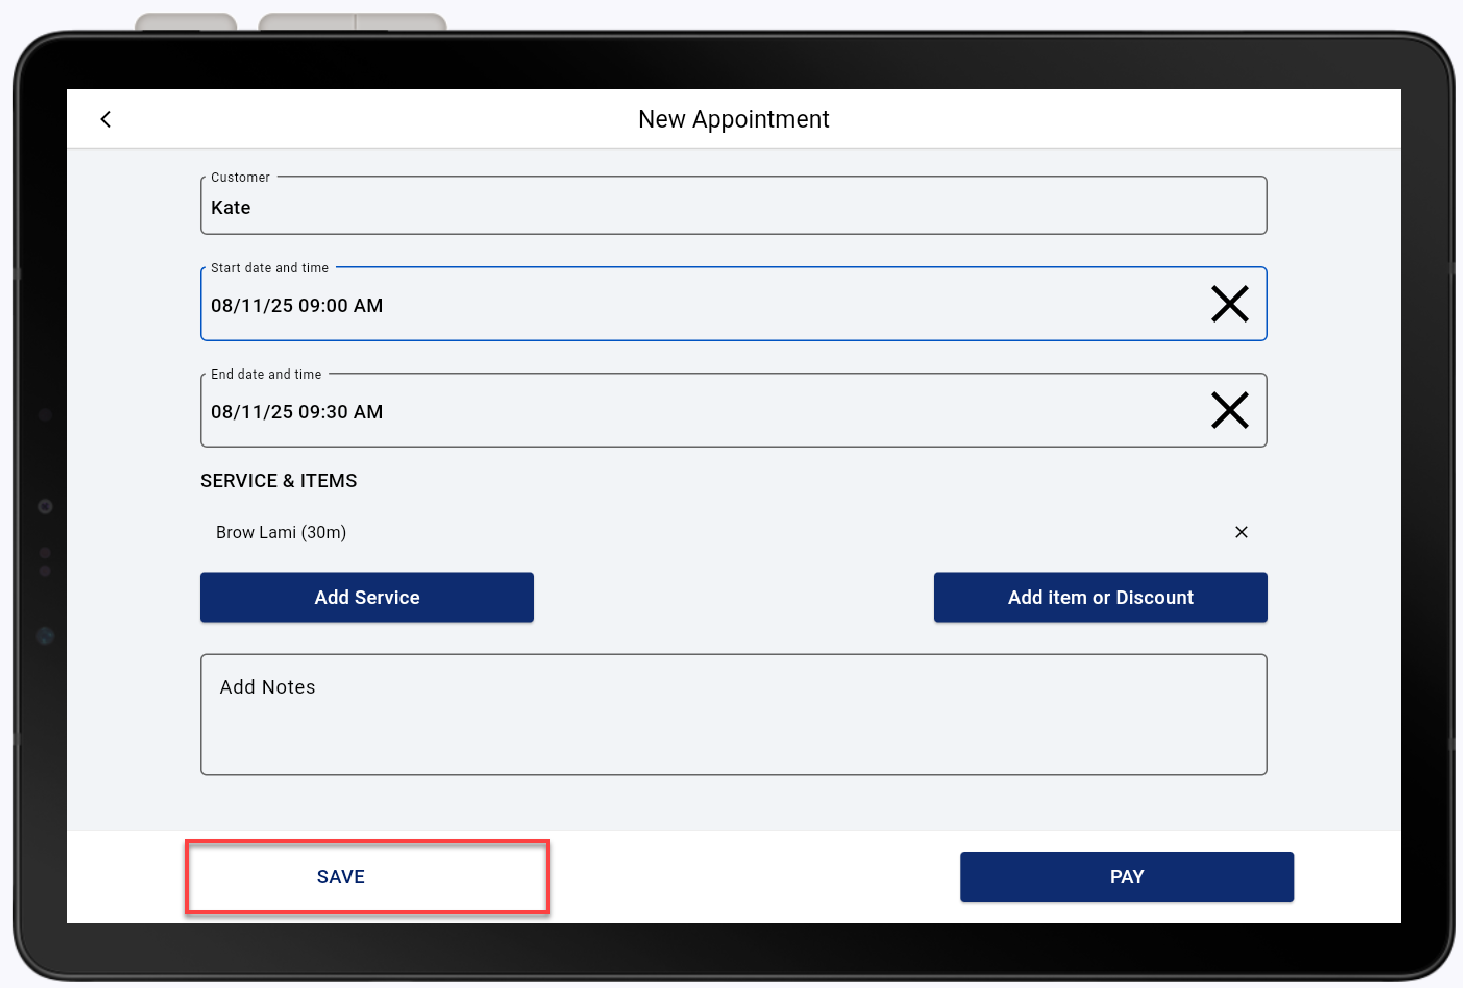
- In the New Appointment form, select a customer by searching their name, email, or phone number. If the customer is new, they must be created before proceeding.
- Tap the Select button, aligned to the correct customer, set a Start date and time by selecting a date from the calendar and tapping Done. Set the hour and minute from the display clock and tap Done.
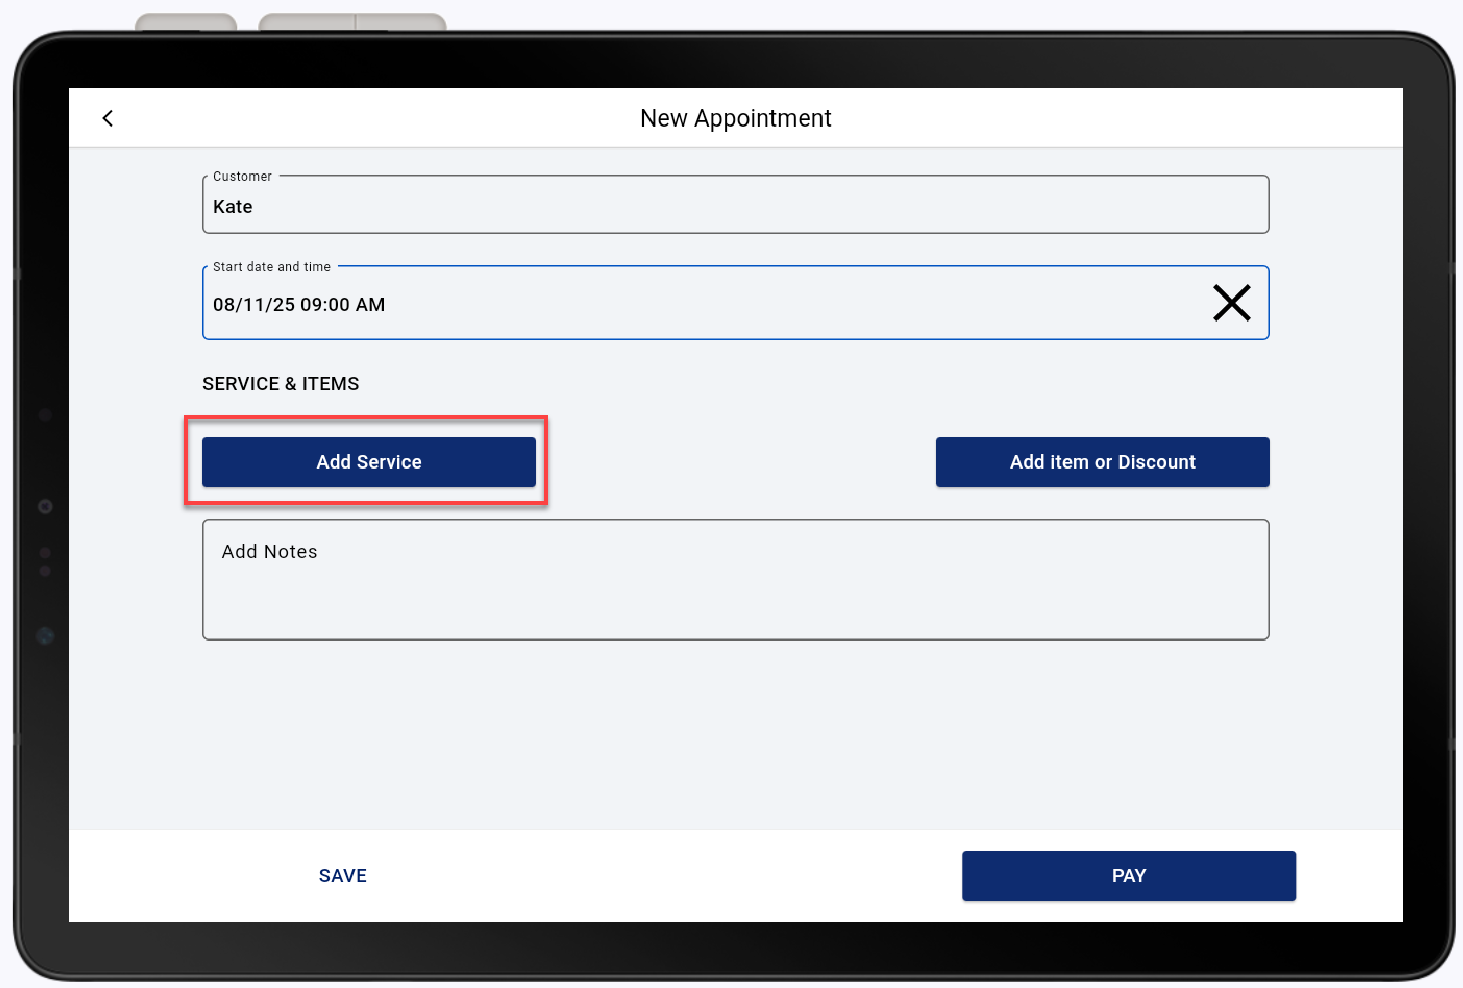
- Tap Add Service and select the service from the list.
- To assign a staff member to the appointment, tap the service entry, select an employee and tap Save.
- If desired, product add-ons and promotional discounts can be added to the appointment.
- Tap Save to complete the new appointment.
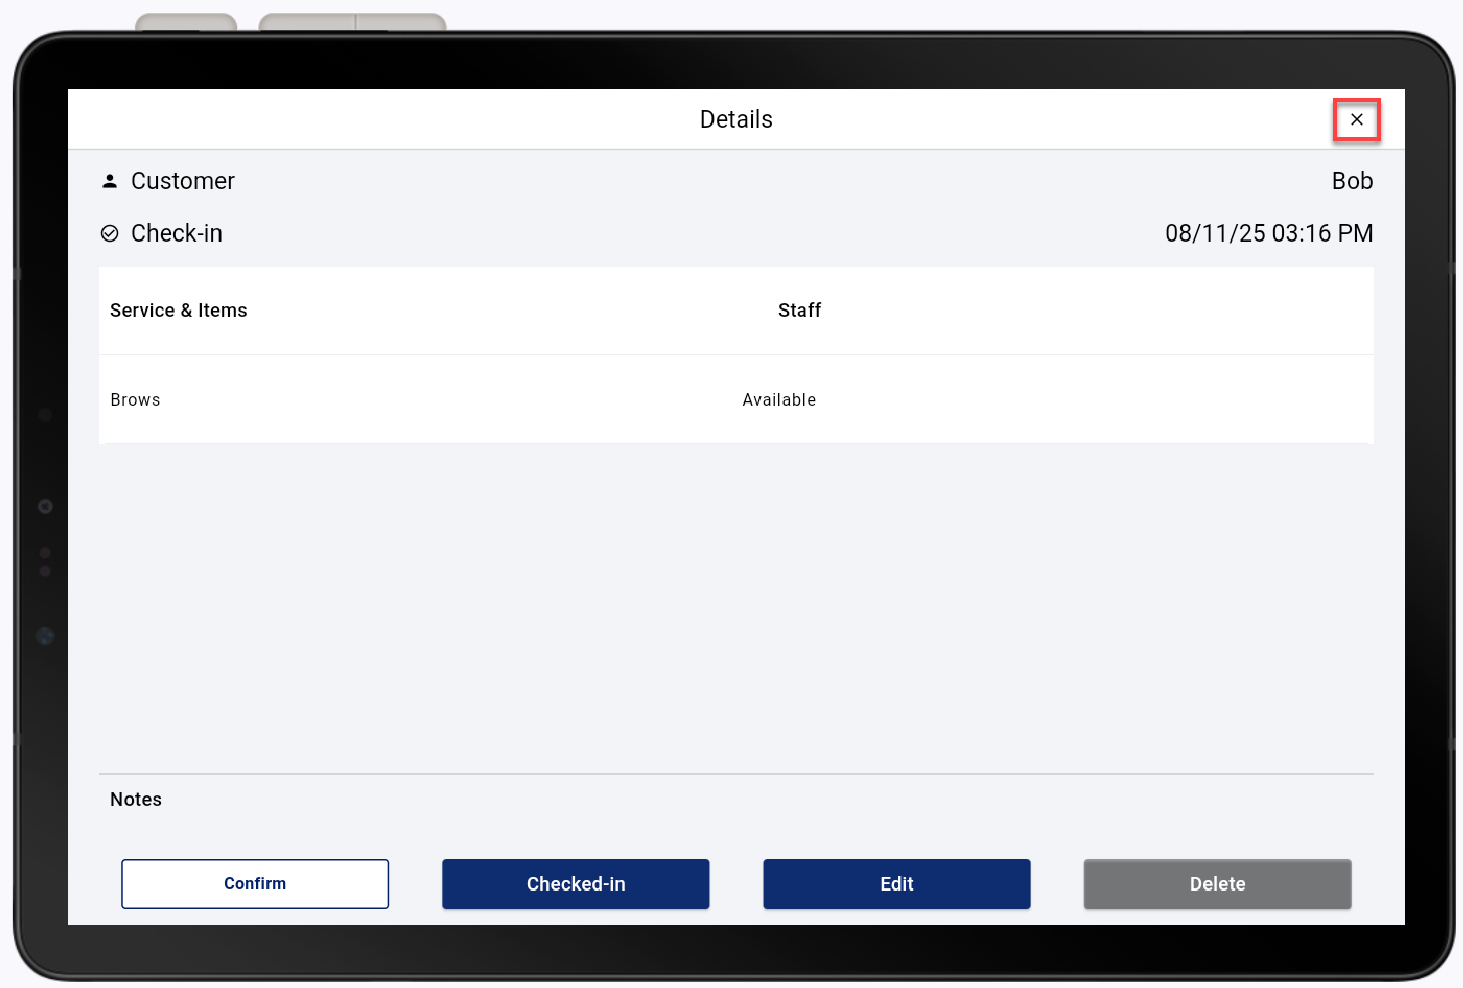
- To edit a scheduled appointment, tap the desired appointment in the calendar. In the appointment details, tap Edit.
- After making the necessary changes, tap Save.
- *music*
Create a new appointment
You can create an appointment for new or existing clients at the register or in the Point of Sale Solution Back Office. Appointment details will include, customer name, service, date, and time. Further details can include add-ons, notes, discounts, and employees.
To create a new appointment
- In the Point of Sale Solution App, tap Calendar.
- Tap the add icon.
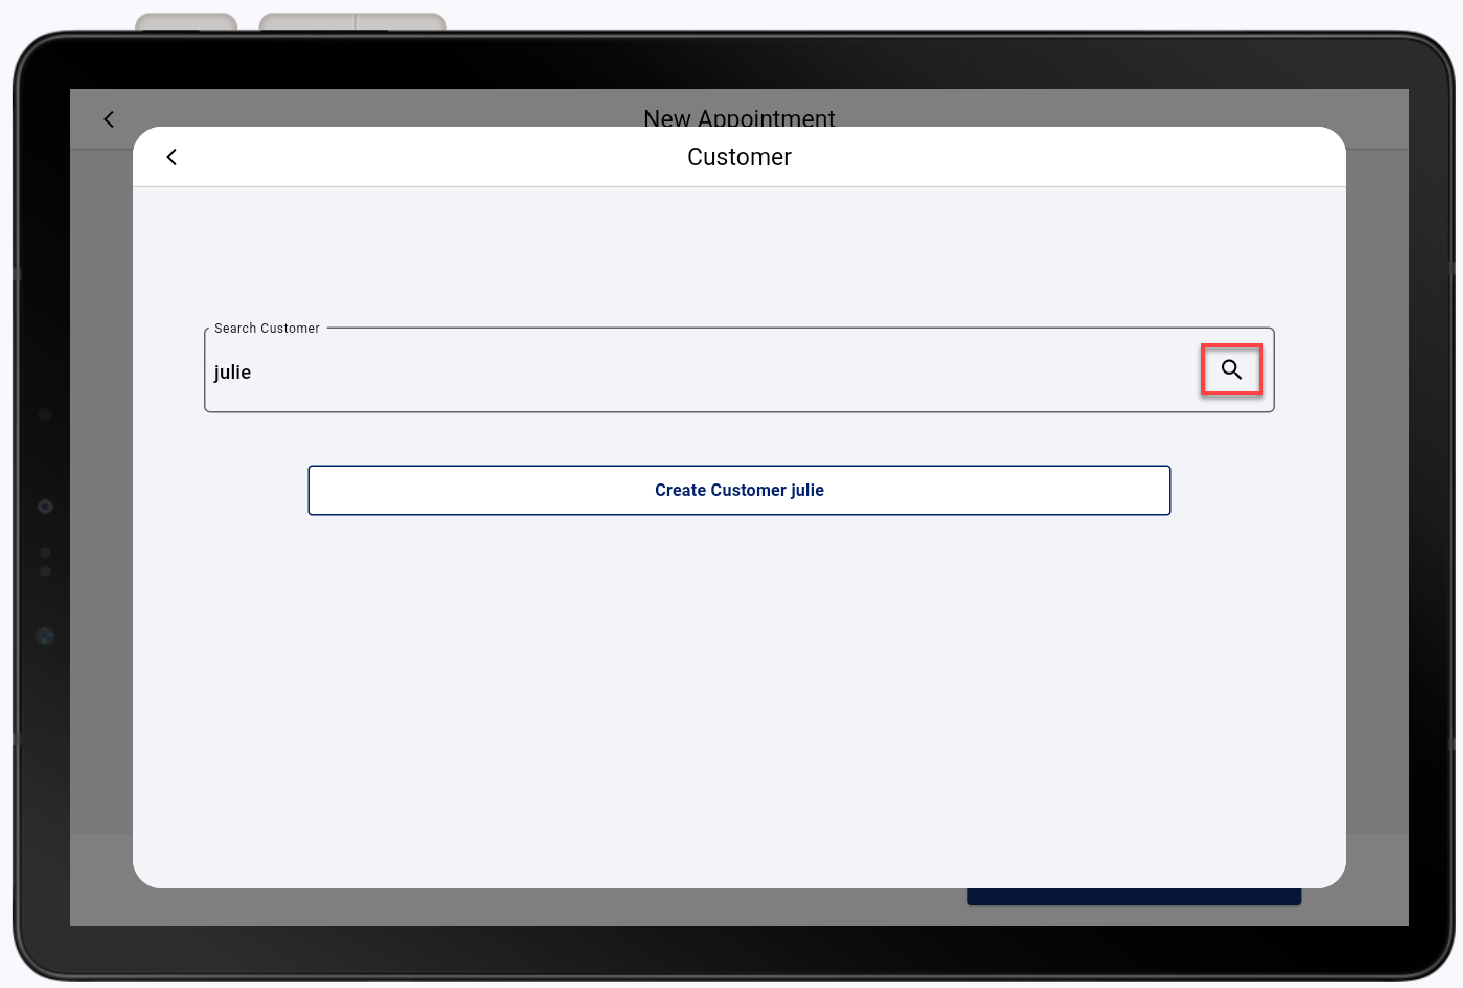
- Tap Search by customer name, email, or phone number.
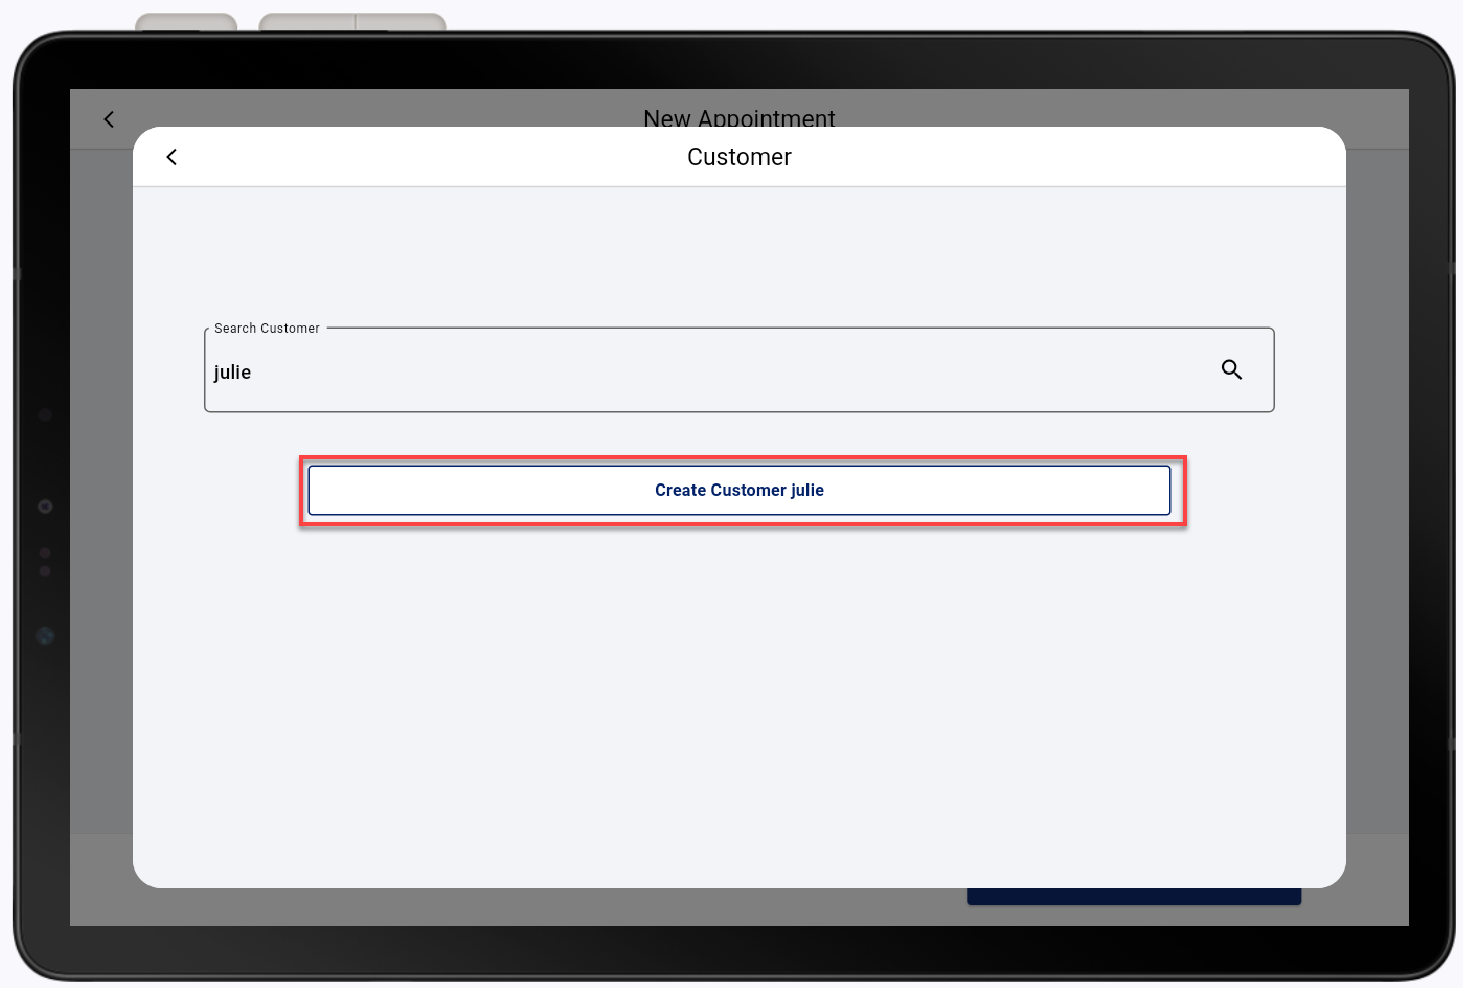
- Enter a customer's name, email, or phone number, then tap the Search icon. If the customer is new, they must be created before proceeding.
To create a new customer
- Tap Create Customer.
- Complete the Customer information fields.

- Confirm your customer's preferences, then enable the Receive Messages toggle and the Receive Emails toggle, as desired.
- Tap Save.
- Tap Create Customer.
- Tap Select on the customer.
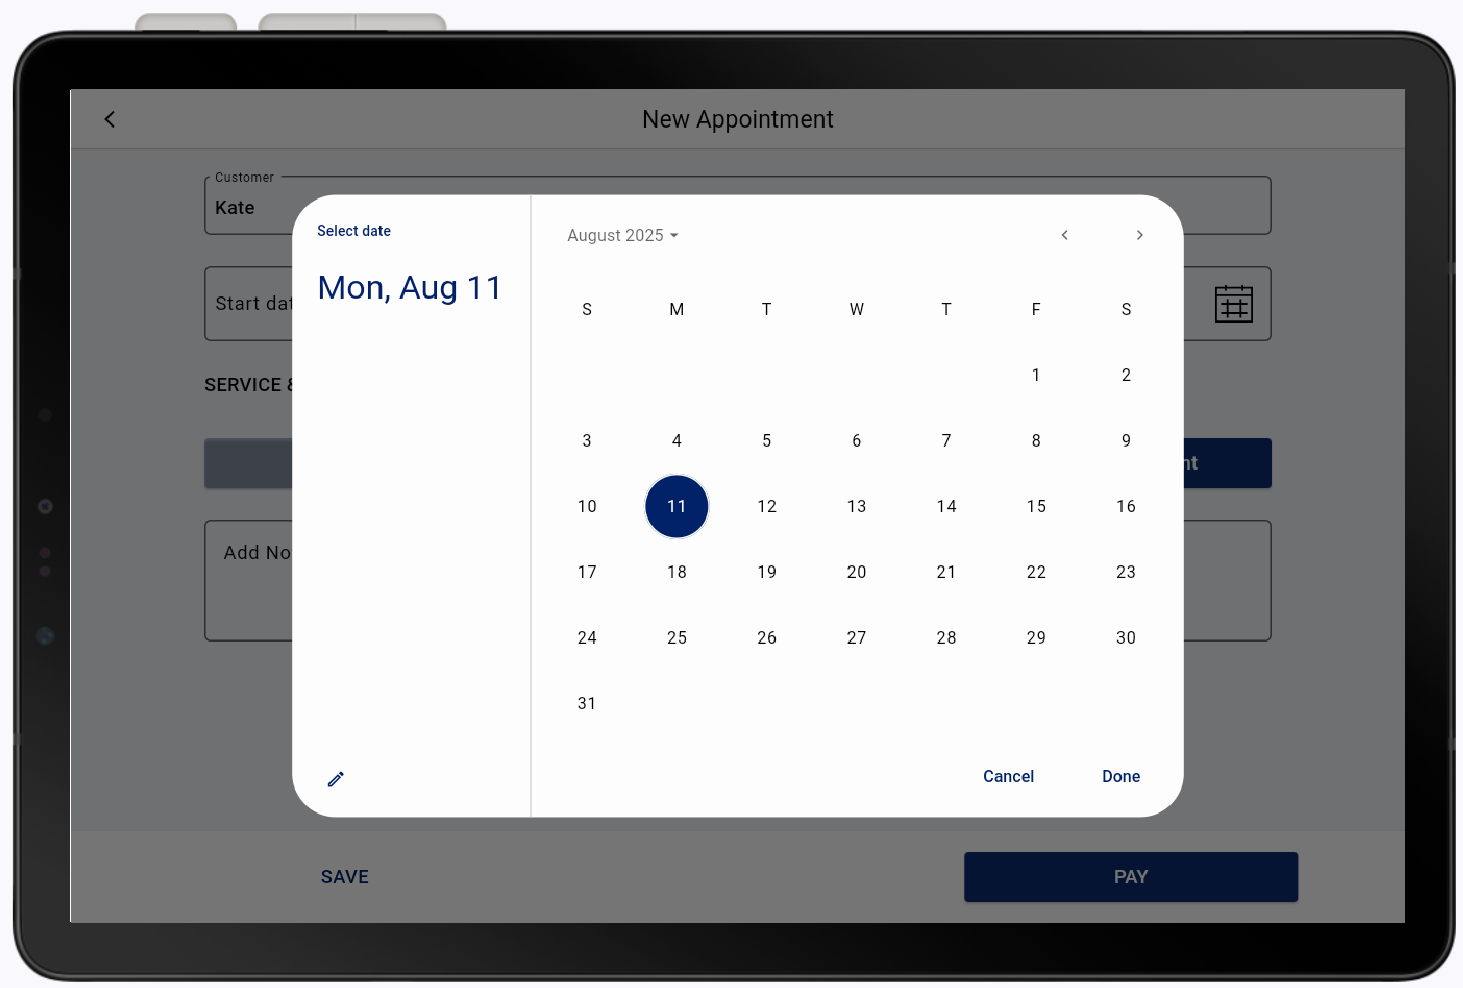
- Tap Start date and time.
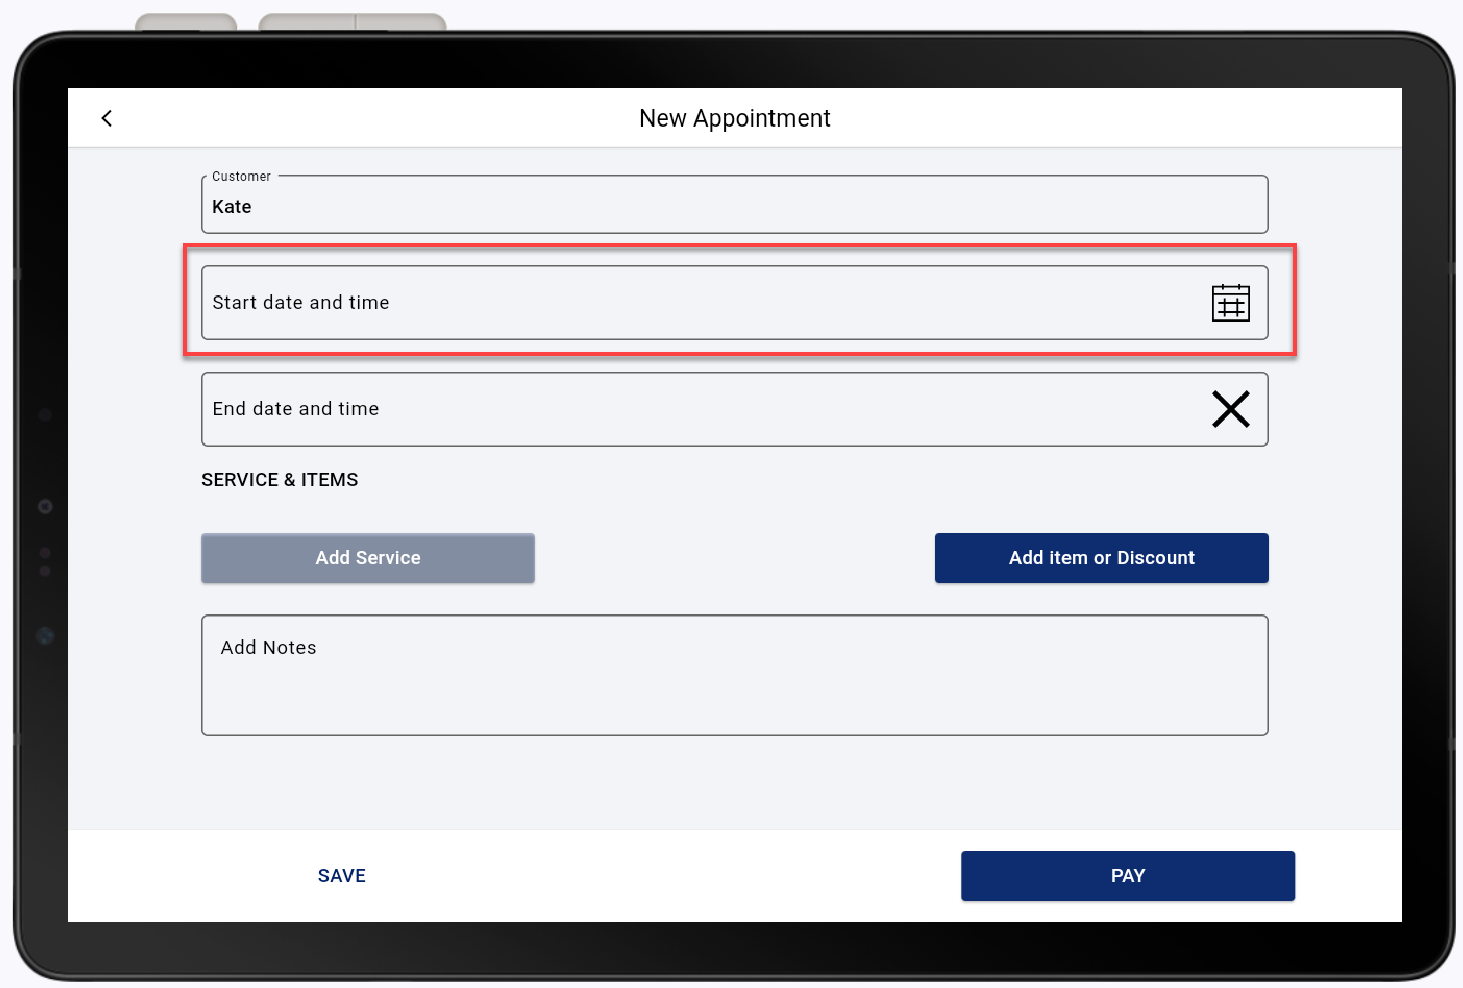
- Select a date from the calendar. Tap Done.
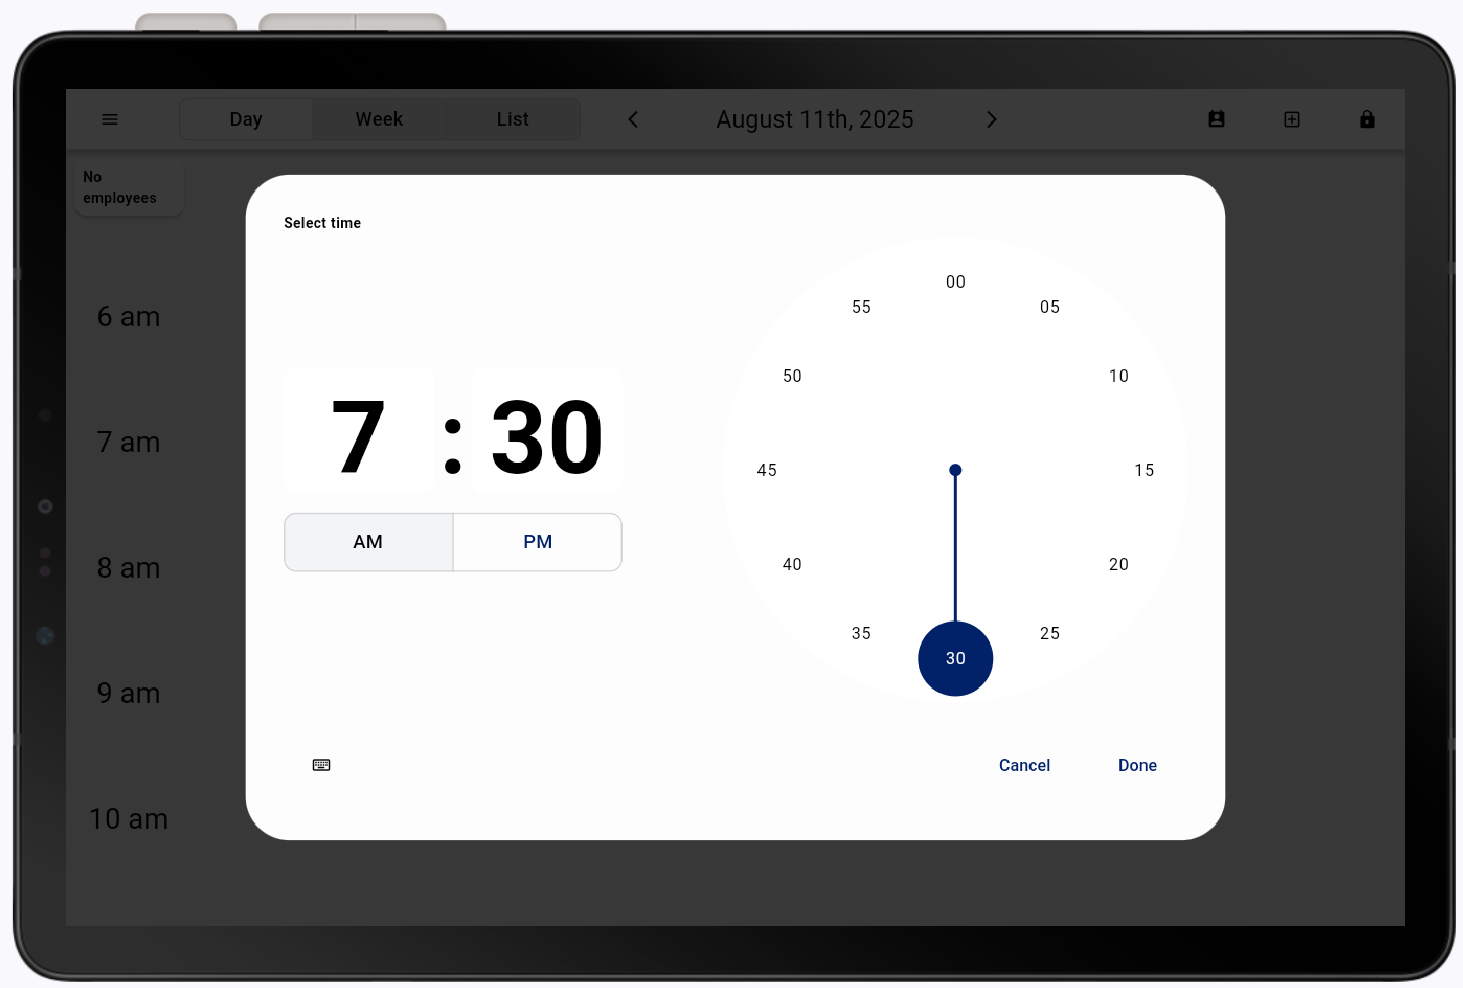
- Select the hour and minute on the displayed clock. You can use your finger to drag the time to a specific time or tap on the clock number itself to quickly select. Tap Done
- Tap Add Service.
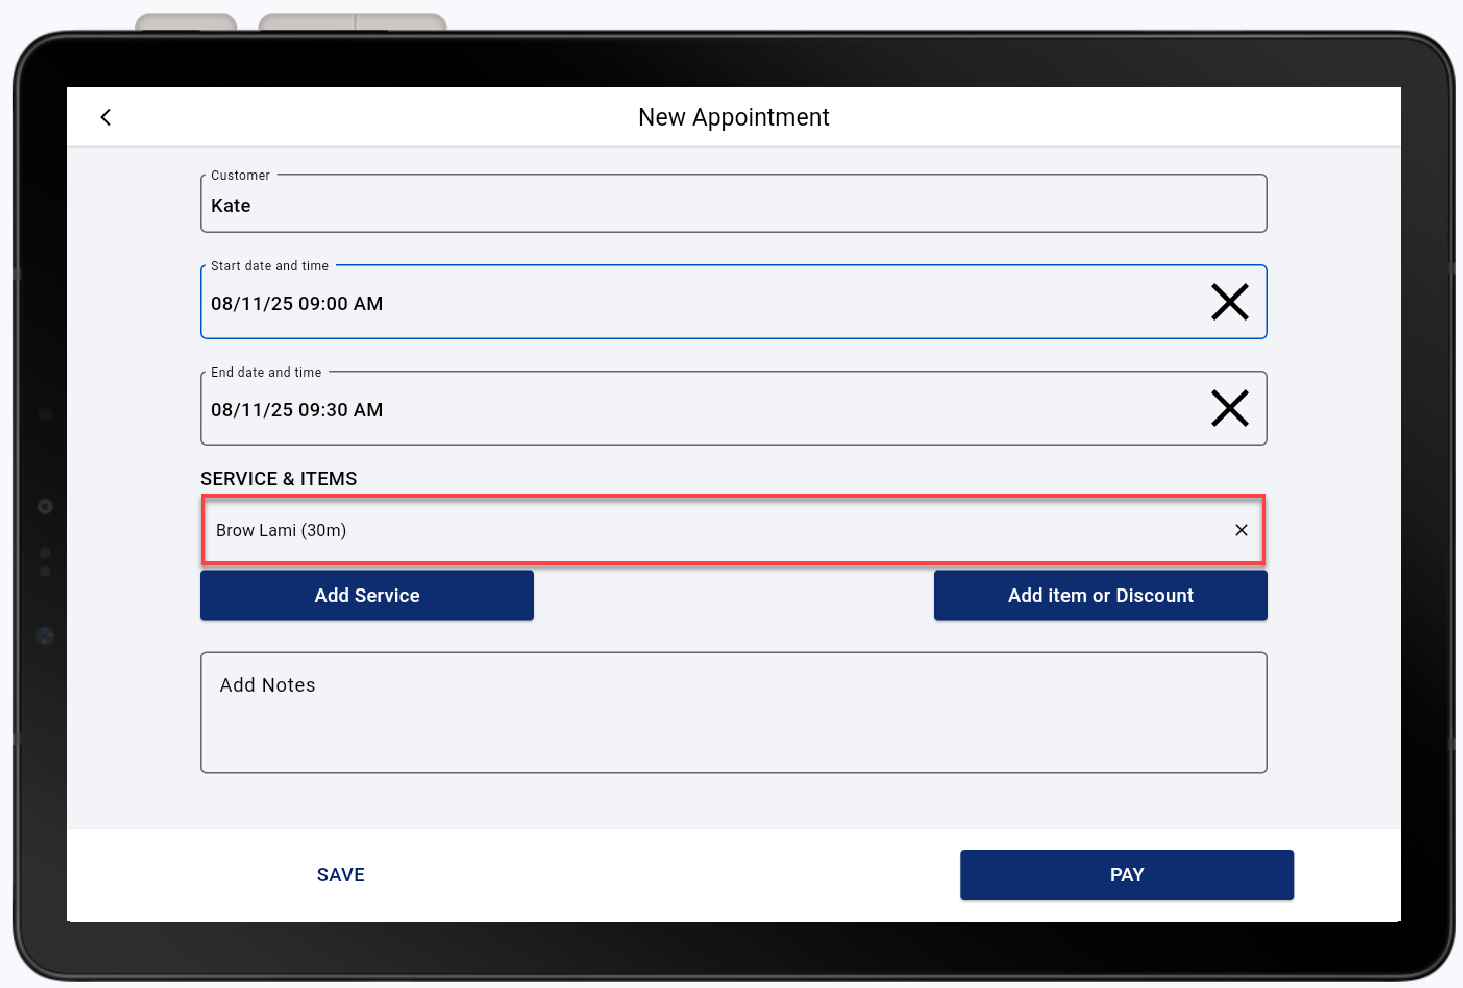
- Tap Select on the desired service.

- If applicable, select an add on, then tap Done. An add on is a modifier for a service. Learn more about creating services.
- (Optional) Assign a specific employee to complete the service. If an employee is not assigned to the service, it will be assigned for anyone available at that time and appear as "Anyone" in the appointment details.
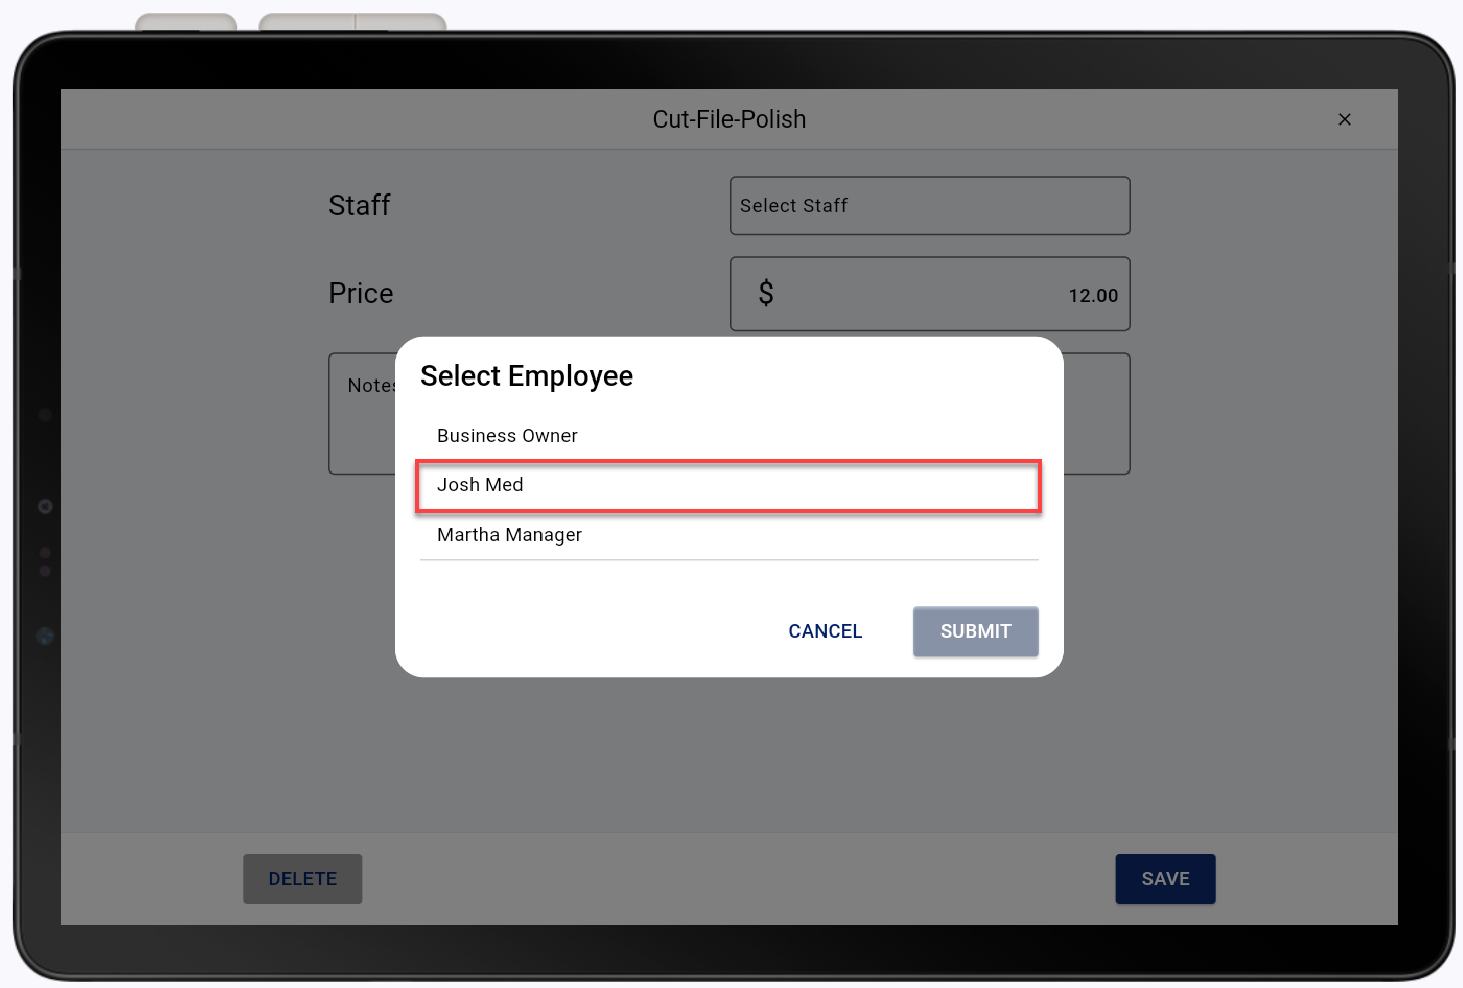
To assign an employee to the service
- Tap the added service to assign an employee.
- Tap Select Staff.
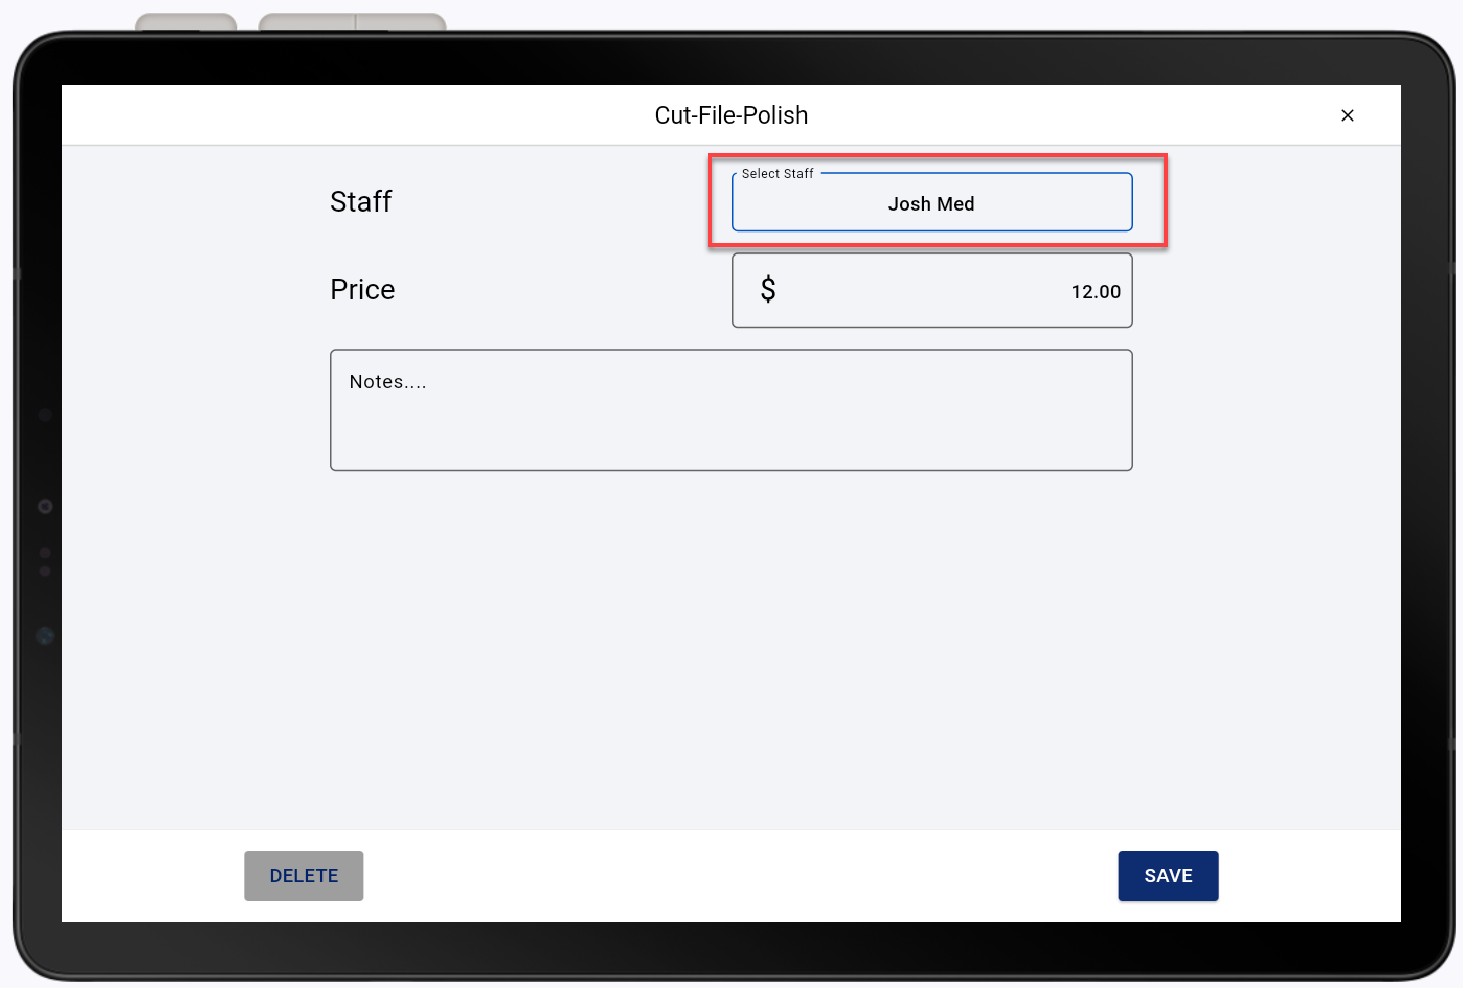
- Select an employee and tap Submit.
- Tap Save.
- Tap the added service to assign an employee.
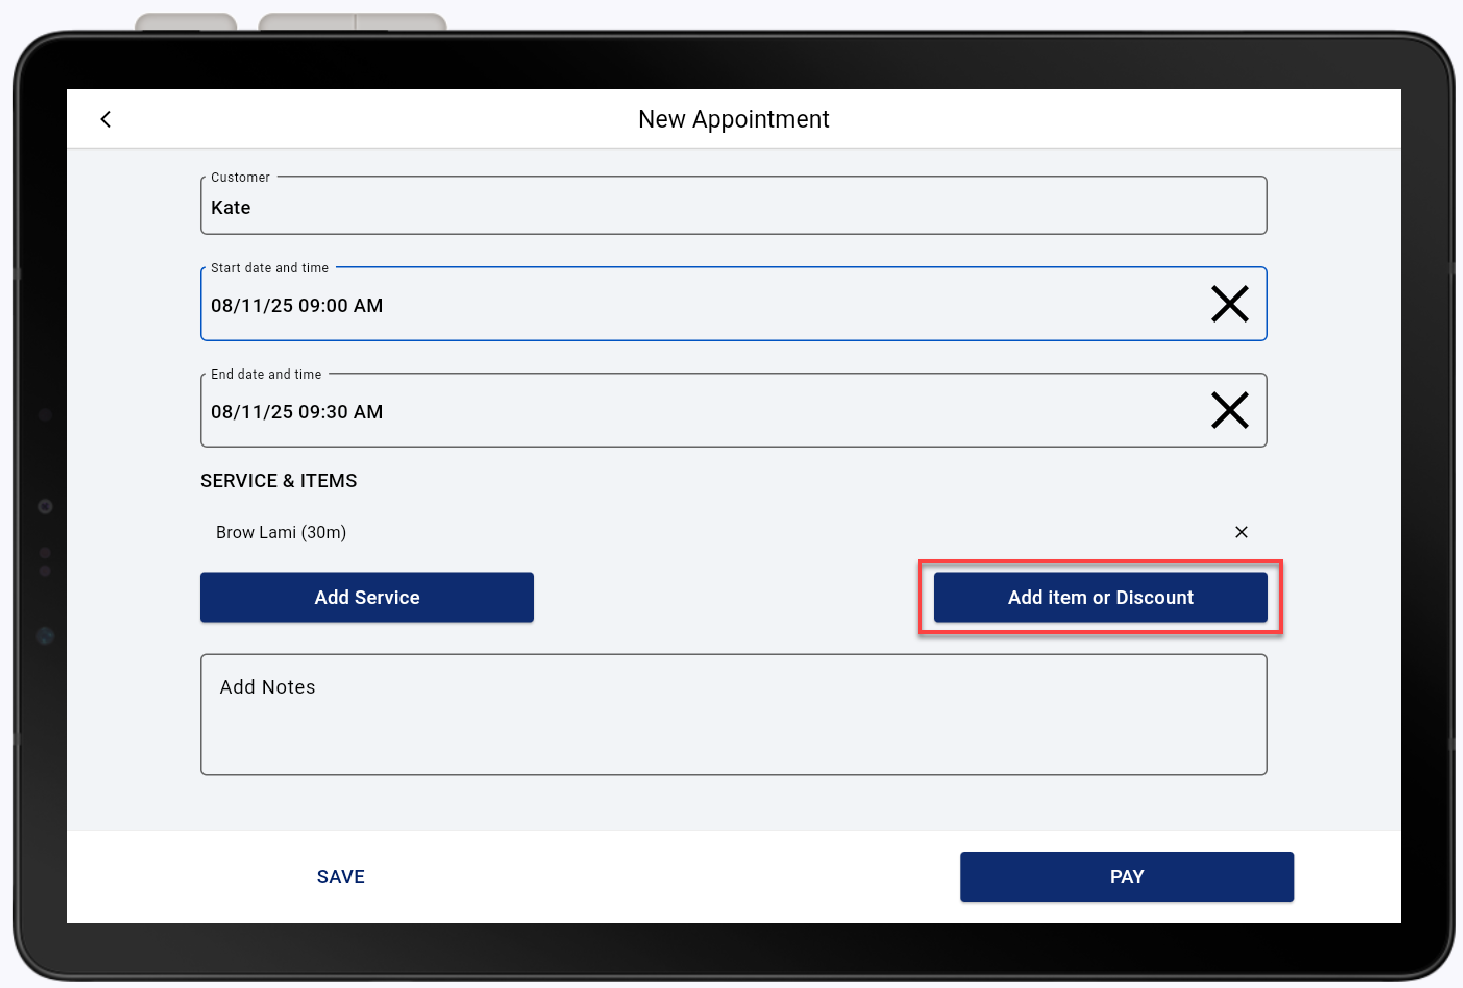
- (Optional) Add an item or discount.
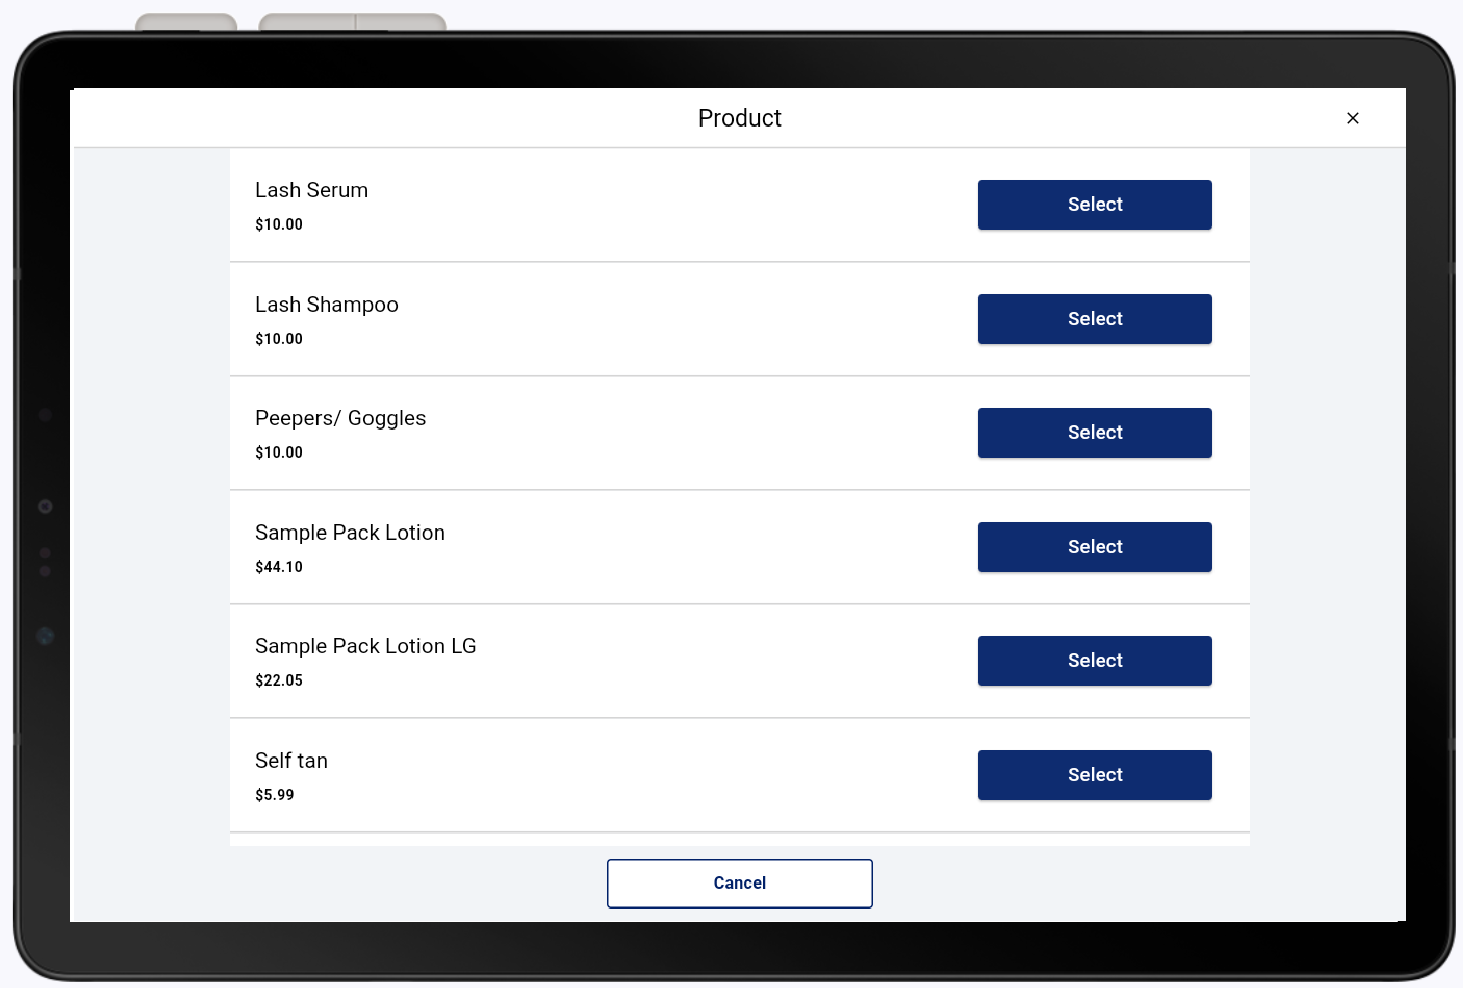
To add an item or discount
- Tap Add item or Discount.
- Tap Select for the desired product.
- Tap Add item or Discount.
- (Optional) Enter notes in Add Notes to be linked to the appointment.
- Select Pay and check-out to collect payment or Save to save the new appointment.
View and edit an appointment
You can view your calendar as a list, by day, or view an entire week.
To view the appointment calendar
- In the Point of Sale Solution App, tap Calendar.
- Sort through the Day, Week, and List tabs and tap the desired appointment.
- Tap the close icon when you are done viewing your appointment details.
To edit an appointment
- In the Point of Sale Solution App, tap Calendar.
- Locate and tap the desired appointment.
- Tap Edit.
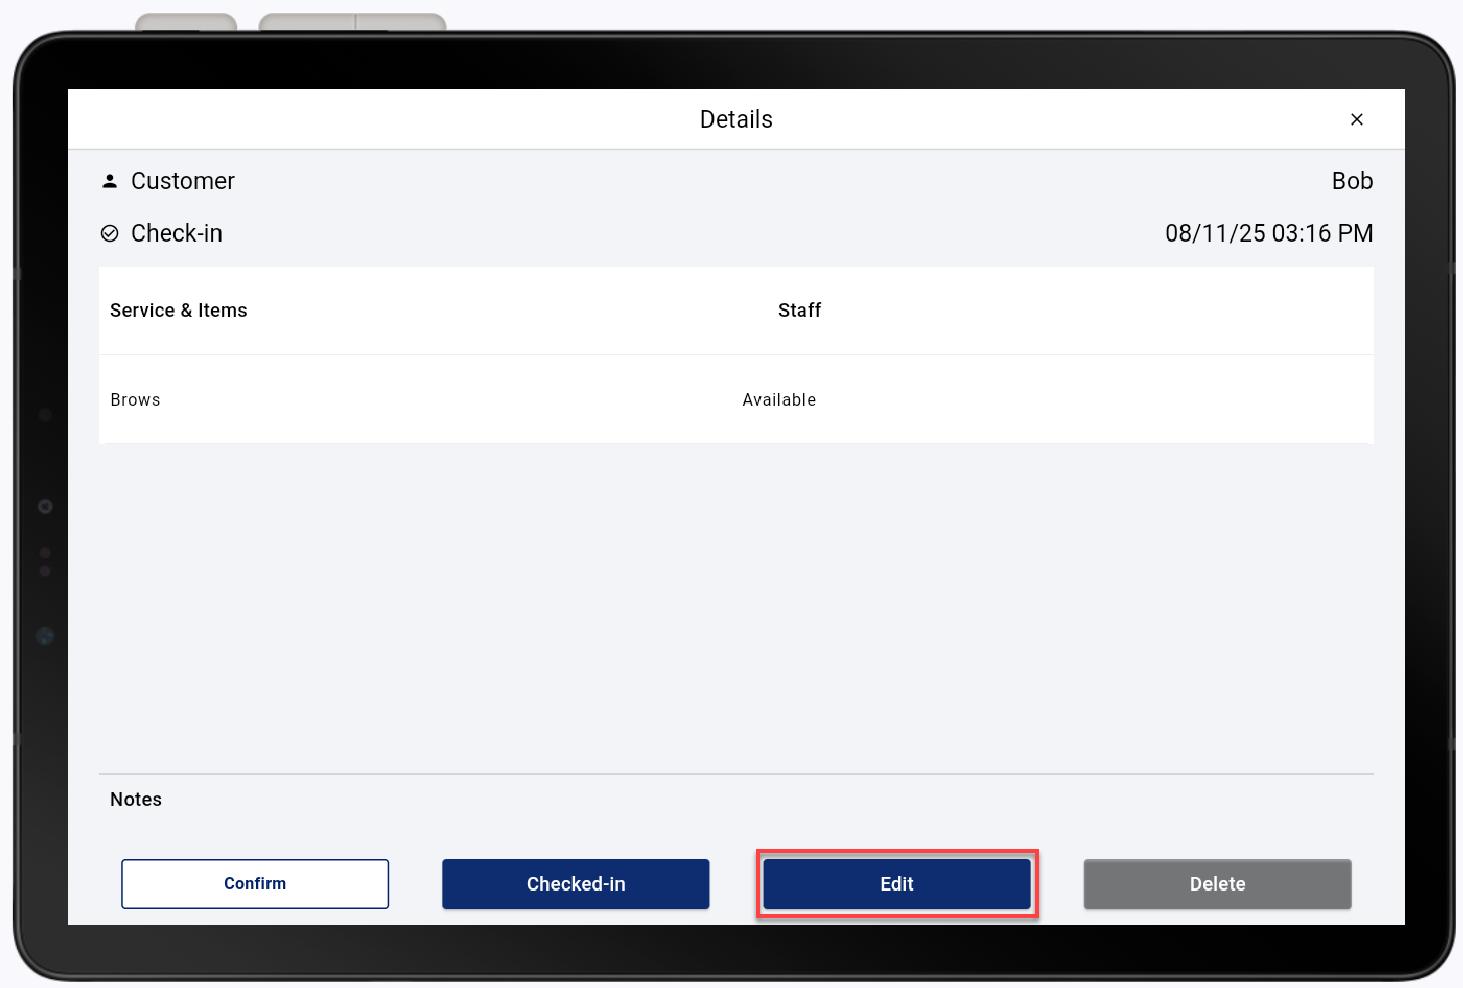
- To edit, tap any of the fields, items, or appointment details.
- Tap SAVE.
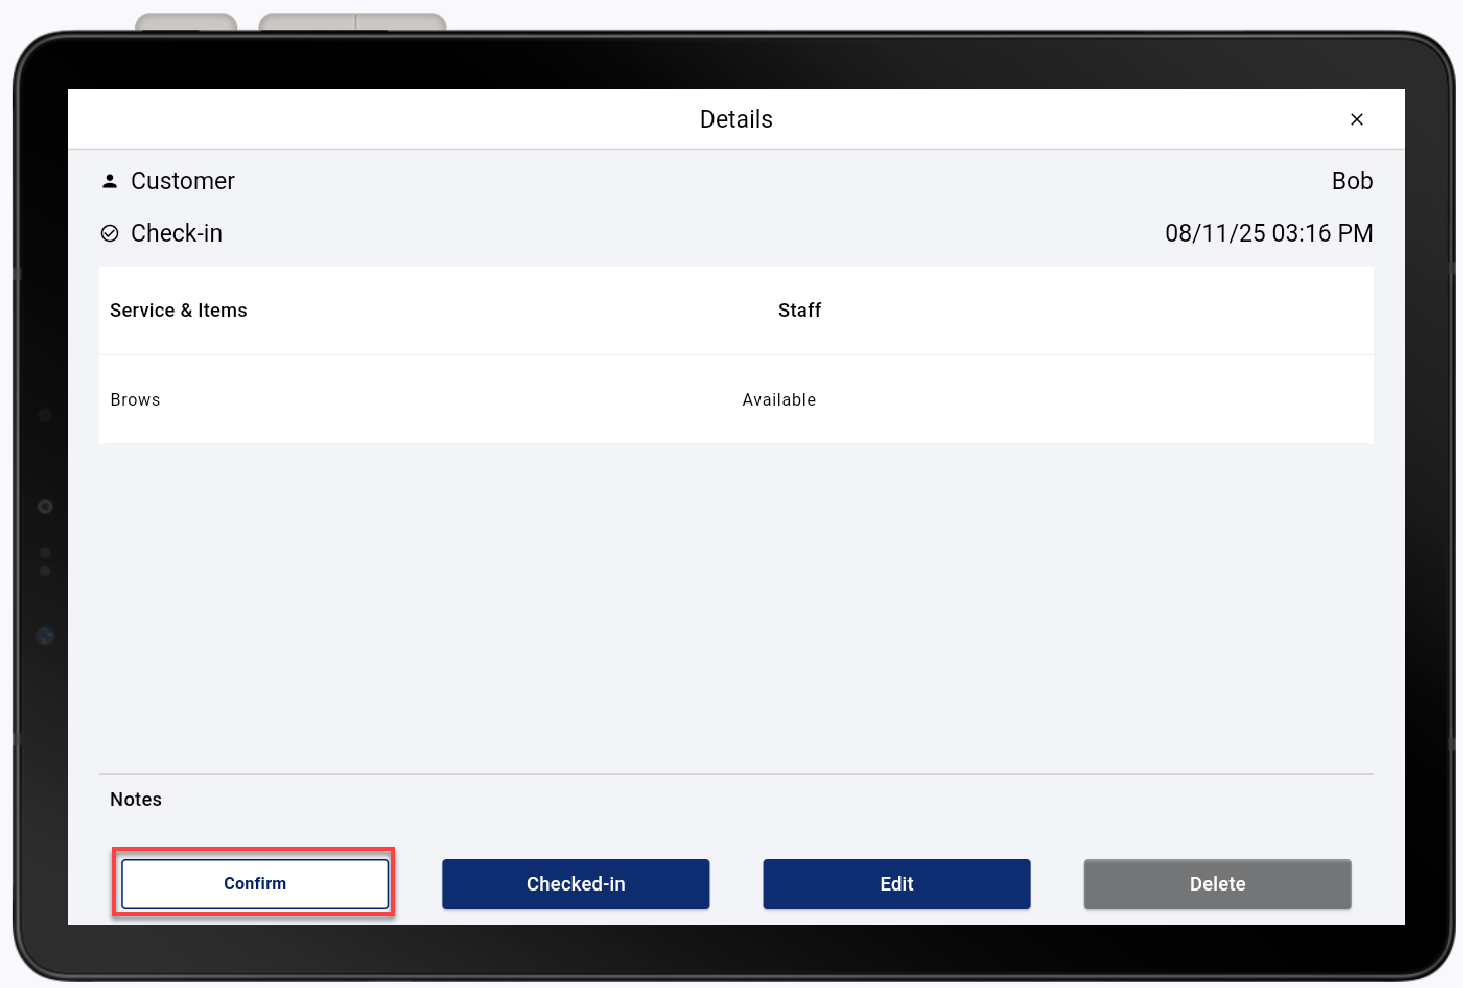
Confirm an appointment
When an appointment is created, the customer will receive an email or text prompting them to confirm the appointment details. If the customer does not confirm through either, it can be done manually through the Point of Sale Solution App.
To confirm an appointment
- In the Point of Sale Solution App, tap Calendar.
- Sort through the Day, Week, and List tabs and tap the desired appointment.
- Tap Confirm.