Point of Sale Solution Back Office Products
Description
What's in this article?
You can add new products to your system or manage existing products and their modifiers. You can also manage the status of the product, controlling whether items are available at the point of sale by activating or deactivating them. Before setting up your products, we suggest creating your item categories, tax options, and printer types so that they are ready to be assigned to the product. Depending on your solution plan, after you inventory has been set up, you'll be ready to build the profiles for your point of sale register.
TIP!
The below instructions are for adding and managing products one by one. If you need to add many items at one time, use the import/export option to upload a spreadsheet of items.
- *music*
- This video will demonstrate how to add, edit and inactivate a Product from your Point of Sale Solution Back Office.
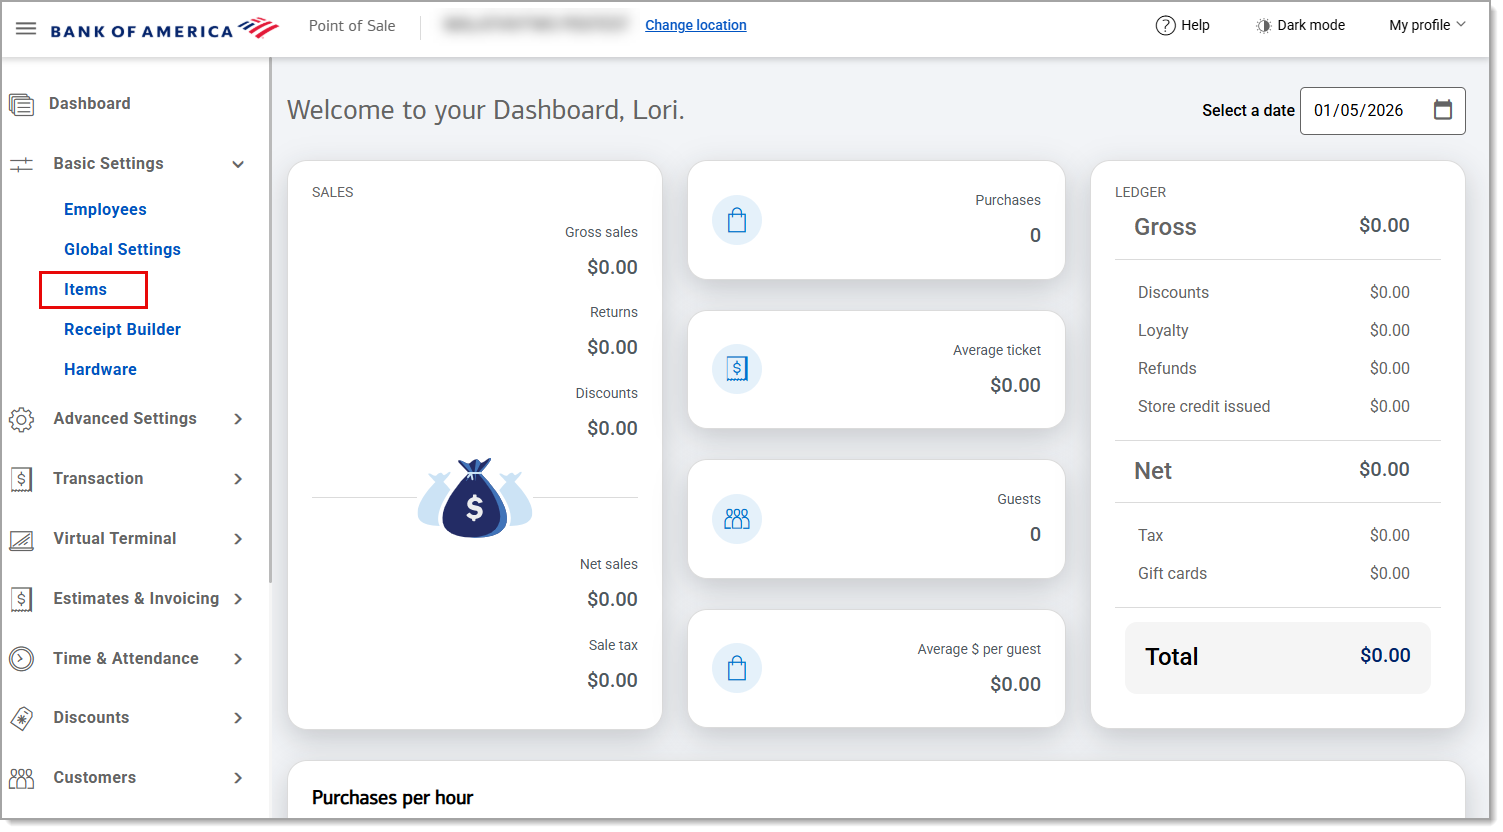
- In Point of Sale Back Office, select Basic Settings > Items.
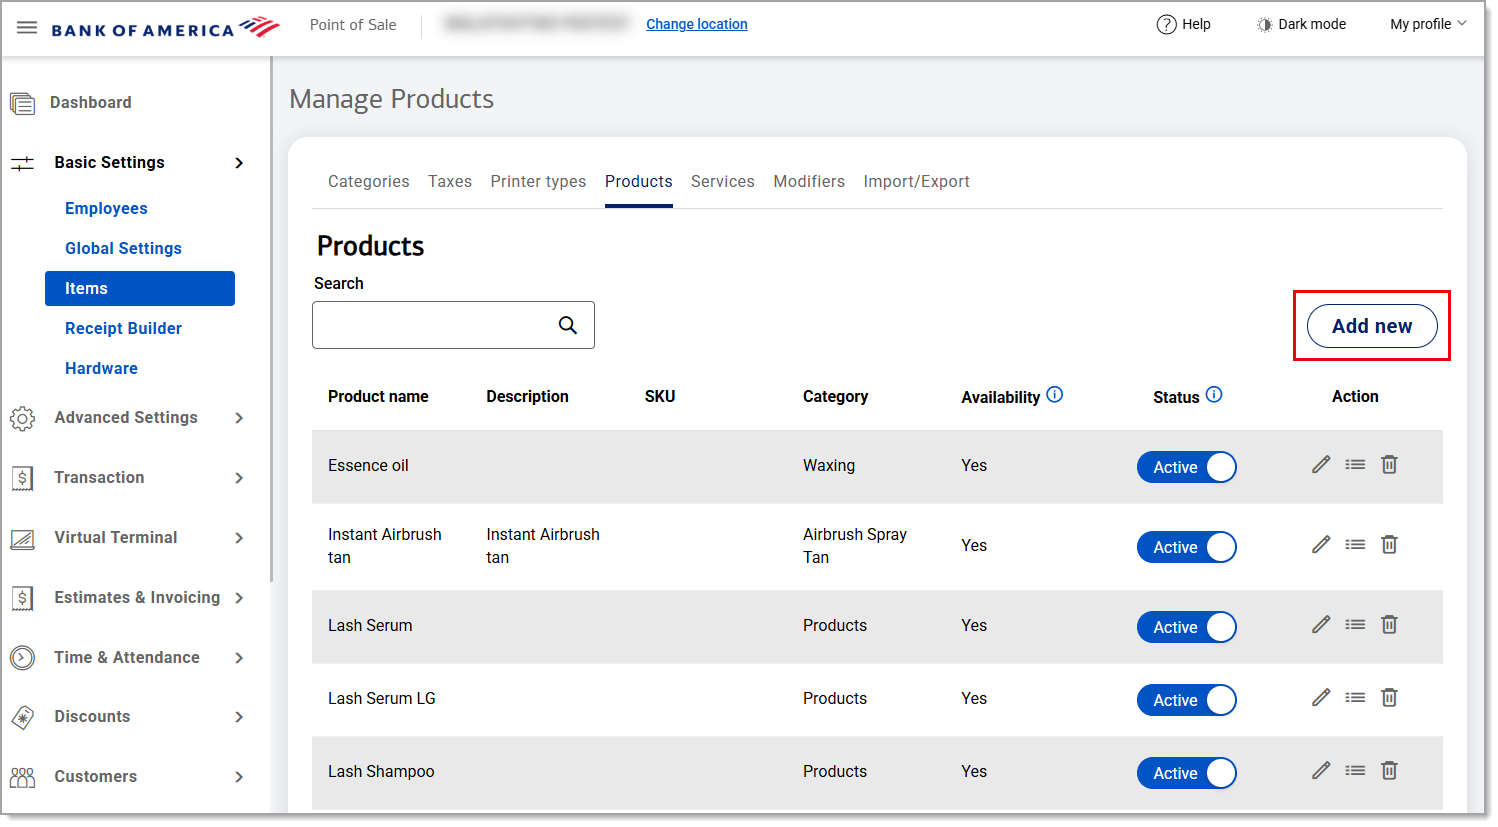
- Select the Products tab.
- Click Add New.
- Enter in the product information.
- NOTE: Fields with an asterisk indicate a required field.
- Description options include: Product name, description, SKU, UPC/barcode, category, consumed units, gift card accepted, type, and notes.
- Enter the inventory and price information.
- Description options include: Printer type, taxes, tax inclusive, cost price, price in store, track inventory, advanced inventory, accepts EBT, reorder quantity, reserved quantity, supplier, available quantity, purchase quantity, physical quantity, purchase unit, physical unit and relieve unit.
- Click Save & Exit or Save & Go to Modifier.
- To edit or remove a product in Point of Sale Back Office, locate the desired product in the list, then click the "Edit" icon to update product information.
- NOTE: To remove an item, click the "Trash" icon.
- NOTE: That this will remove the item from the system permanently. Use with care.
- To activate the product in Back Office, set the product to active.
- *music*
Add products
The Products tab allows you to add a product to your inventory and assign that item a category, tax, and printer type, if applicable.
- To add a new item
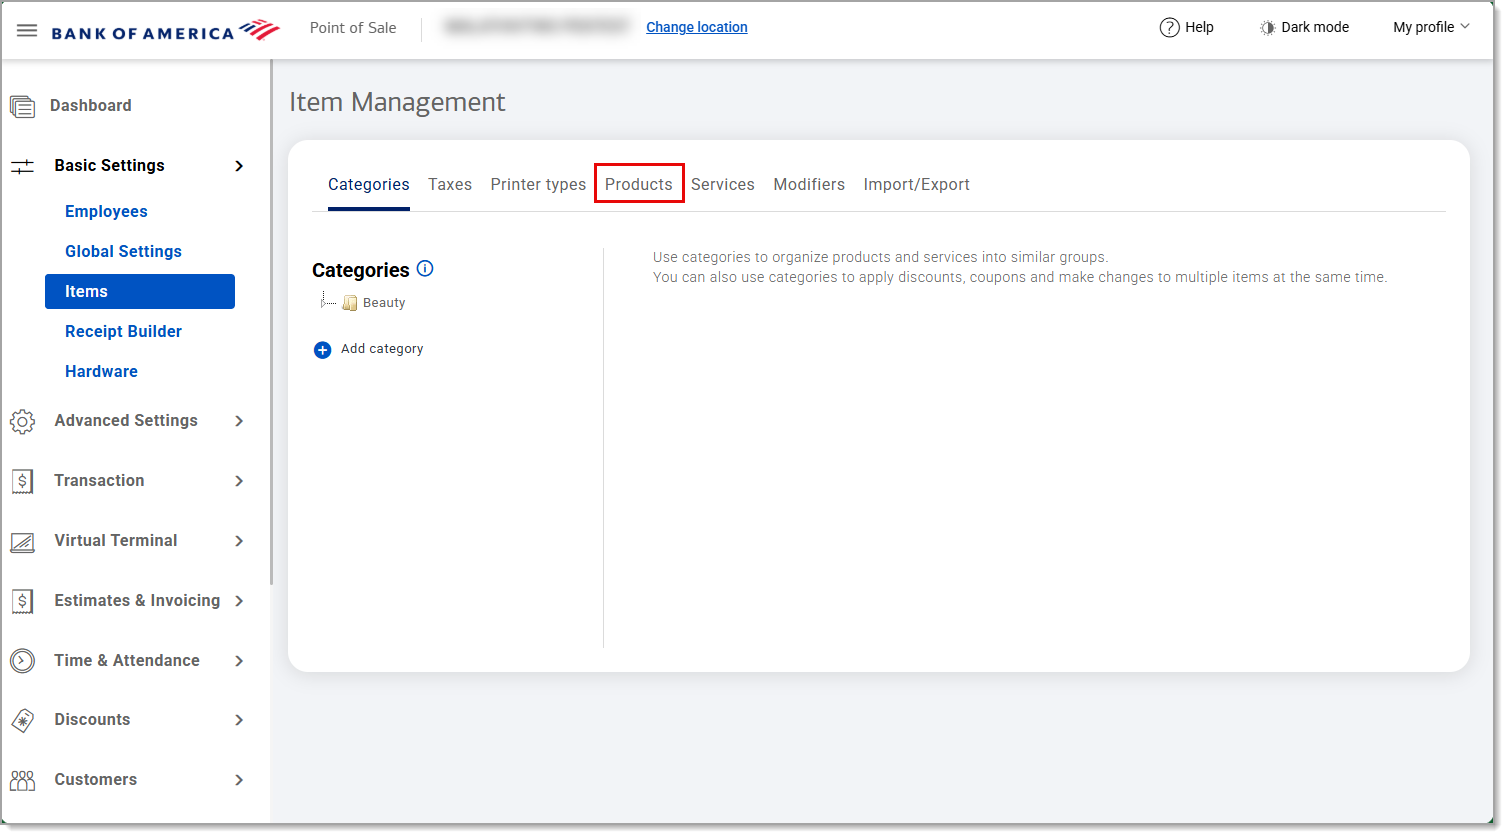
- In the Point of Sale Solution Back Office, select Basic Settings > Items.
- Select the Products tab.

- Click Add new.
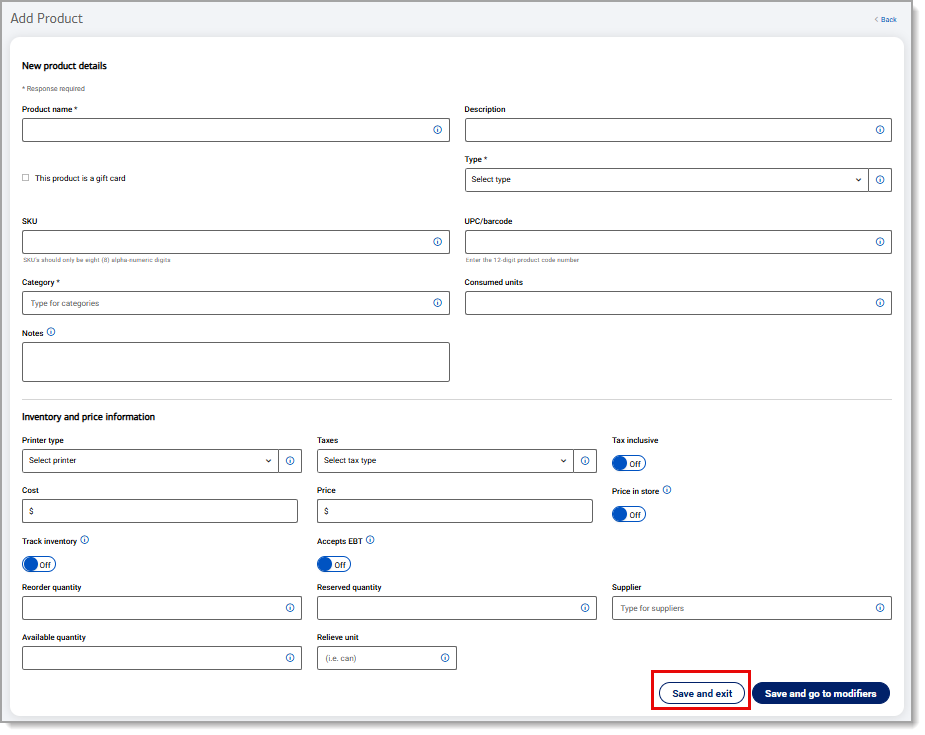
- Enter the New product details on the top half of the form. Fields with an asterisk indicate a required field.
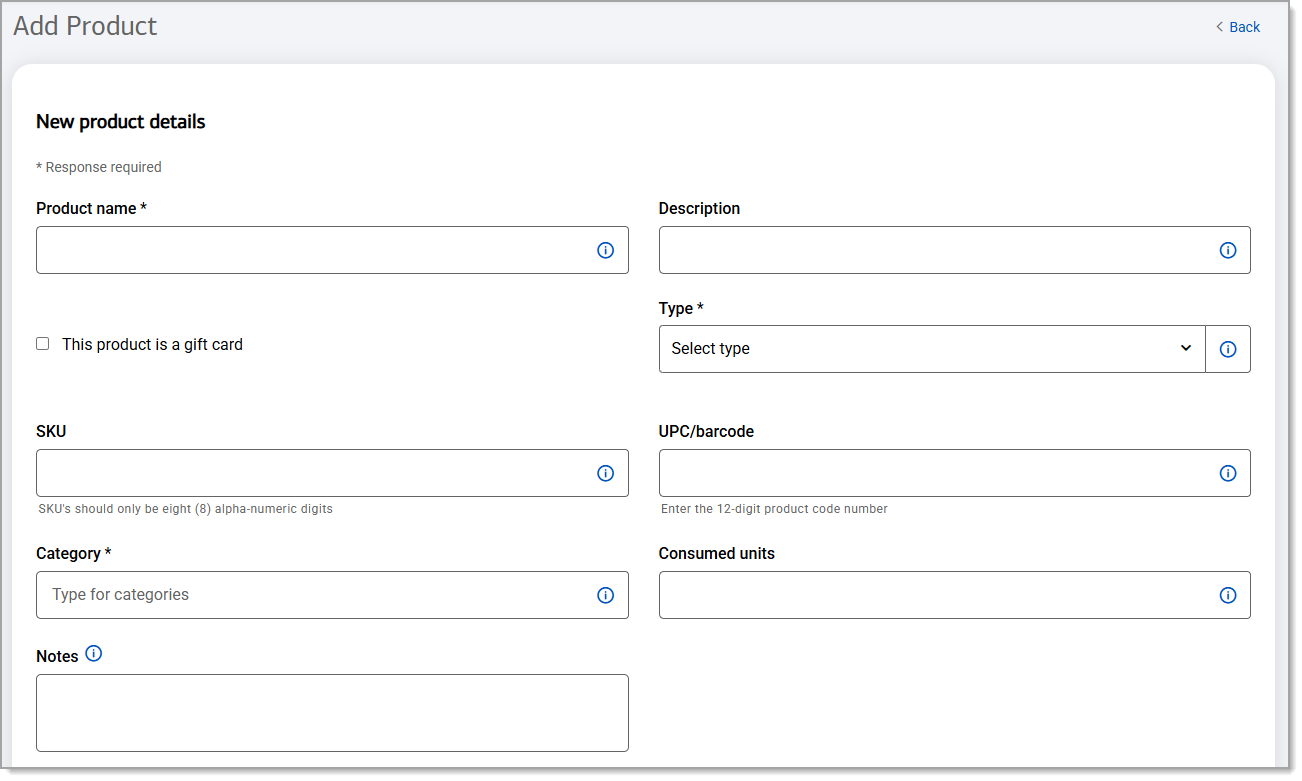
New product details fields and descriptions Field Description Product name Required. The name of the item, which will appear on receipts and reports. Description The description of the product. The description appears within Back Office but does not appear on receipts. This product is a gift card Select to indicate that the item is a gift card and will require the gift card number to be entered. Type Required. Indicates whether the item is a raw ingredient or a product, or both.
Select this option depending on how you plan to inventory the product. If you track the product as inventory but don't sell it as an individual item, choose Raw. If you only track the product as a sold item, select Product. If you use the item as both a raw ingredient and as a product, select both.SKU A SKU, or Stock Keeping Unit code, is a unique 8-alphanumeric digit code for the product. This is a number assigned by, and unique to, your business. UPC/barcode A UPC, or Universal Product Code, is a 12-digit number that identifies a product and its manufacturer. UPCs are usually displayed as a barcode on product packaging. Category Required. Begin typing to select from a list of your item categories. Consumed units Indicates the number of units consumed from the inventory for each item sold. Notes Optional internal notes. - Enter the Inventory and price information on the bottom of the form.
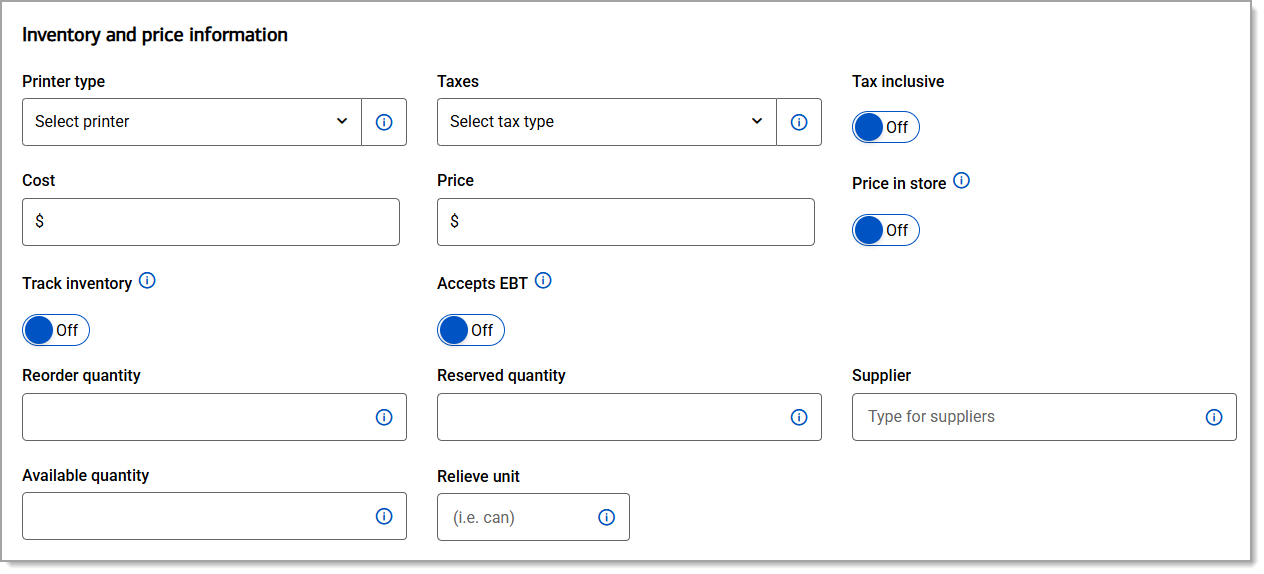
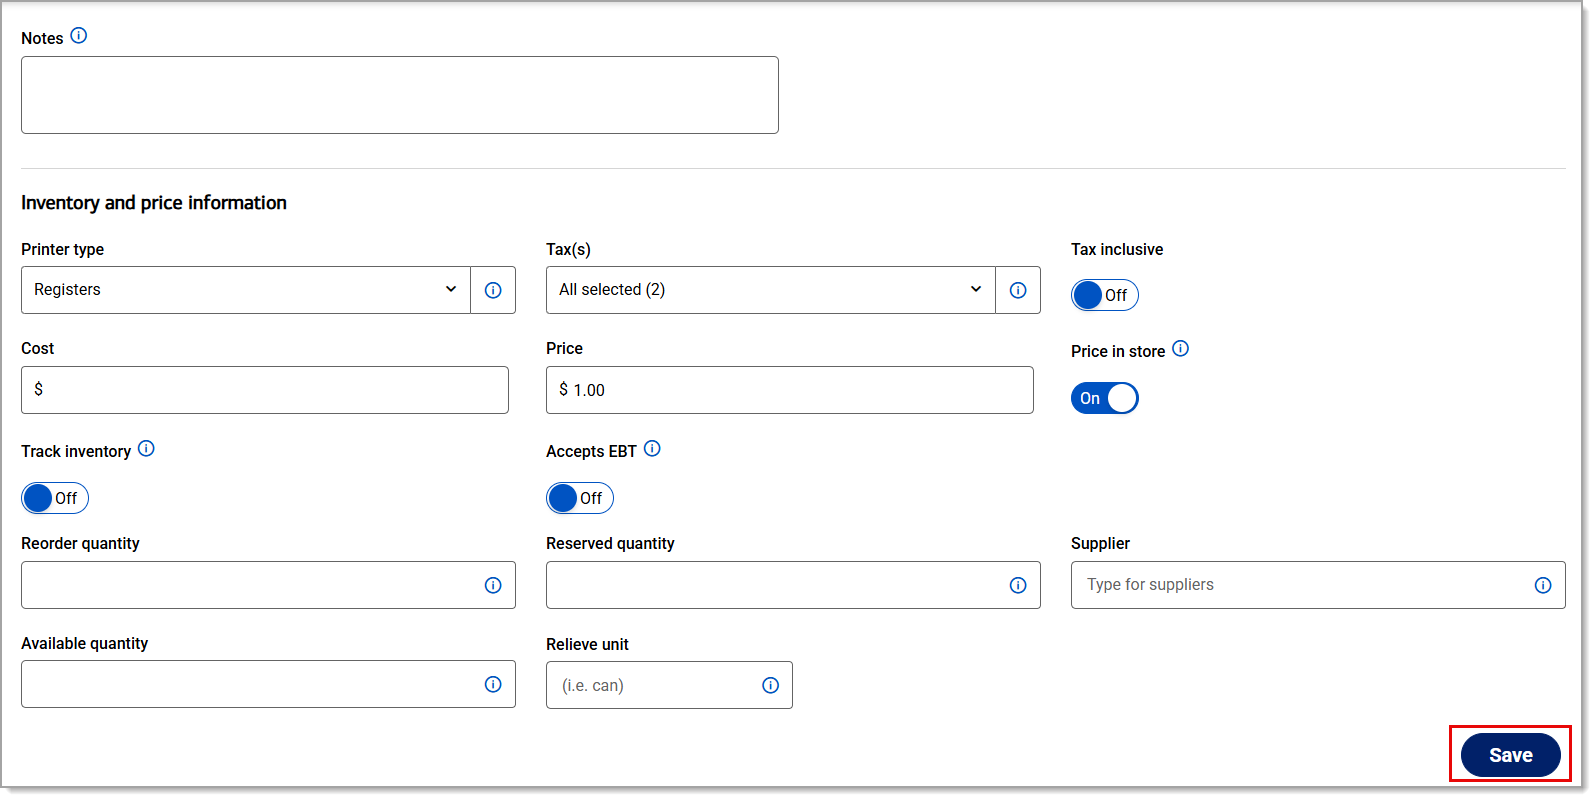
Inventory and price information fields and descriptions Field Description Printer type Select the printer this item will be sent to. For example, you may want to send bar drink orders to your bar printer, grilled items to your kitchen grill, etc. Learn more about setting printer types. Taxes Select the tax categories that apply to this product. Learn more about setting your tax categories. Taxable item Indicate whether the item is taxable. Cost The cost to your business for the product. Price The price of the item when it is sold. Price in store If enabled, allows the price of the item to be set at the register at the time-of-sale. Track inventory If enabled, inventory for this product will be tracked and reflected in Inventory reports. If enabled, an Advanced inventory option will appear and Reorder quantity, Reserved quantity, Available quantity, and Relieve unit become required fields. Advanced inventory If enabled, additional inventory tracking details can be accessed such as a pallet of goods, to the cases on the pallet, to the product sold, and breakdown the case and pallet as the product is sold. Accepts EBT Indicates item may be purchased using EBT. Reorder quantity When the inventory reaches this count setting, the product will appear on the Inventory Reorder report. Reserved quantity Number of items that are tracked in the inventory but not for sale, such as floor models or demonstration items. Supplier Begin typing the supplier name and select from the list. Learn more about managing the supplier list. Available quantity The quantity available for sale. This amount needs to be updated when inventory is replenished, either through manually updating this field or using a bulk Items Import or Inventory Management file. It represents the unit of measurement that is being sold in-store (i.e., 1 soda sold from the physical unit (12 pack case) from the purchased unit (pallet)). This amount is auto-deducted upon a sale, based on the Relieve unit. Relieve unit The unit of measurement that is being replaced when an inventory item is ordered. (i.e., an individual soda sold would be 1 relieving unit (1 can) from the physical unit (12-pack cases) from the purchased unit (pallet)). - Click Save and exit or, if you will need modifiers for the product and have already set them up, click Save and go to modifiers.
- In the Point of Sale Solution Back Office, select Basic Settings > Items.
- To edit or remove an item
- In the Point of Sale Solution Back Office, select Basic Settings > Items.
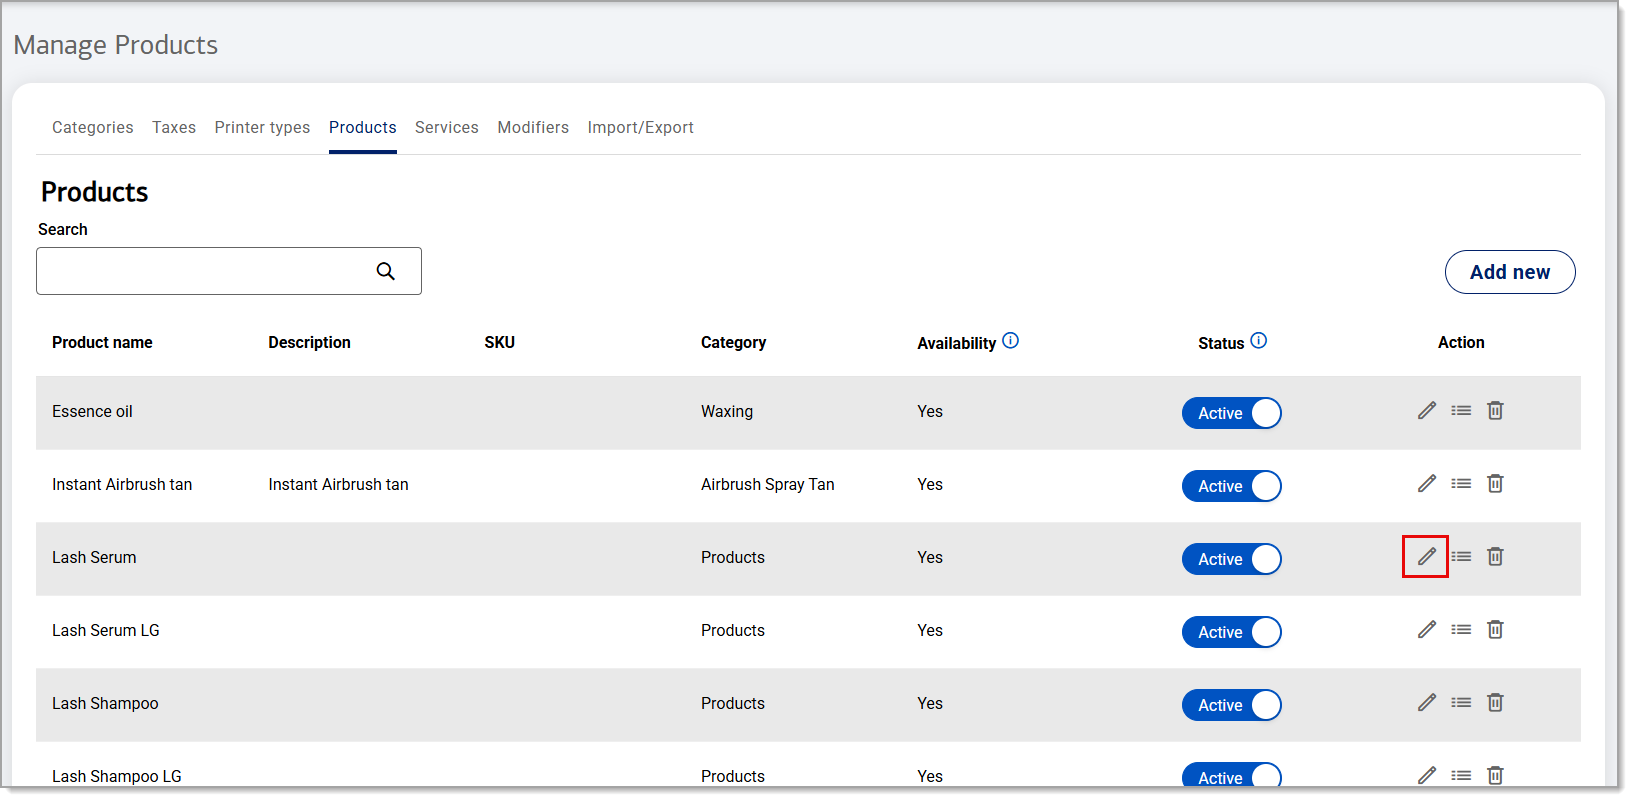
- Select the Products tab.
- Search for the item name and select it from the dropdown list.

- In the Actions column next to the name of the product, click the Edit icon to update the product information.
NOTE: To remove an item, click the Delete icon. This will remove the item from the system permanently, and should be used cautiously.
- Click Save.
- In the Point of Sale Solution Back Office, select Basic Settings > Items.
Activate or inactivate an item
You can control whether a product in your inventory is available for sale or not in the Point of Sale Back Office.
- In the Point of Sale Solution Back Office, select Basic Settings > Items.
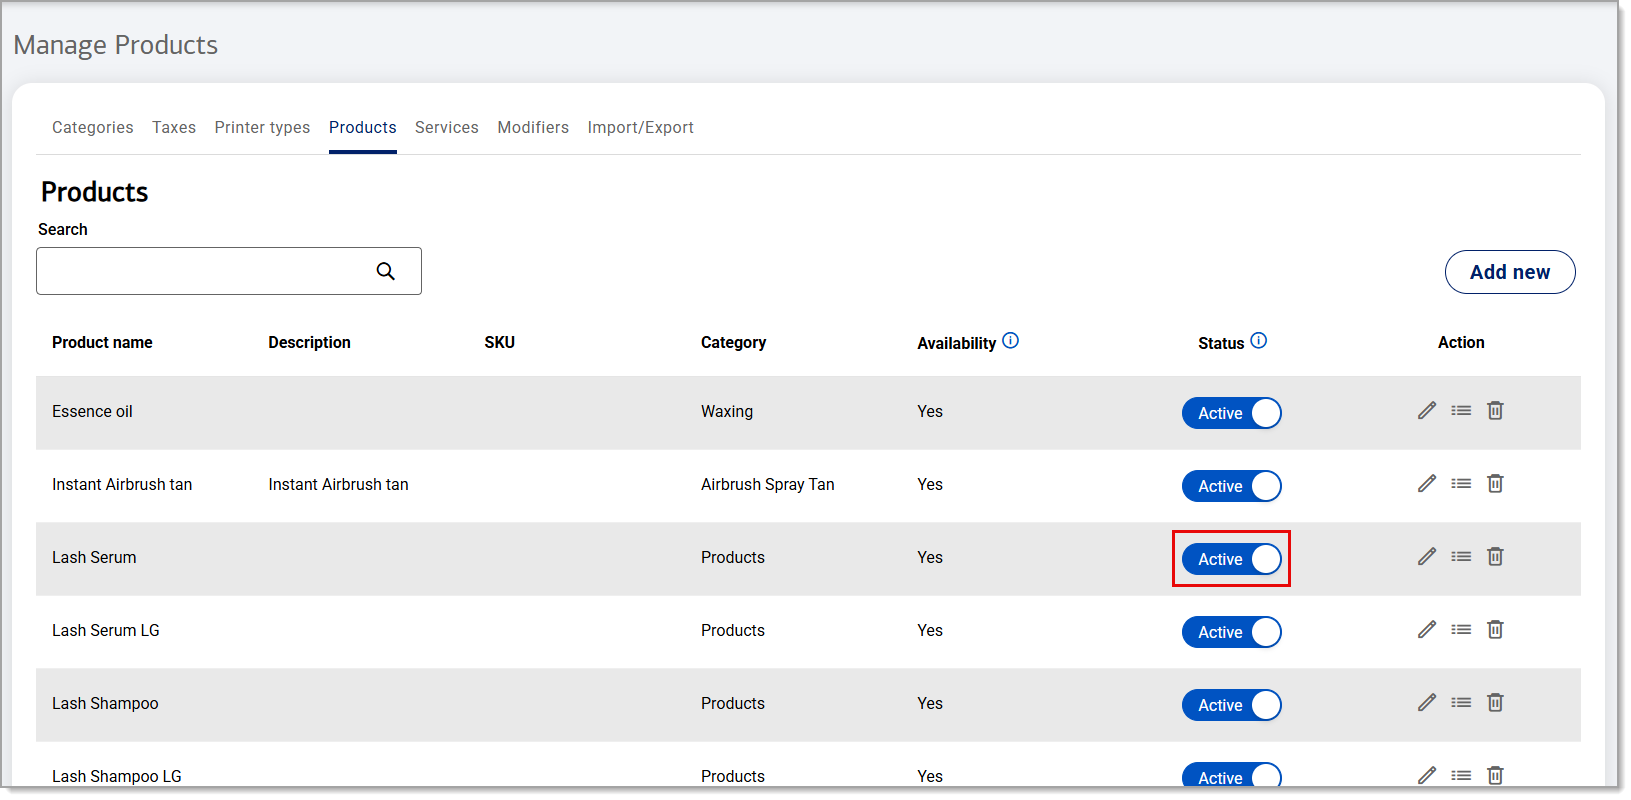
- Select the Products tab.
- Search for the item name and select it from the dropdown list.
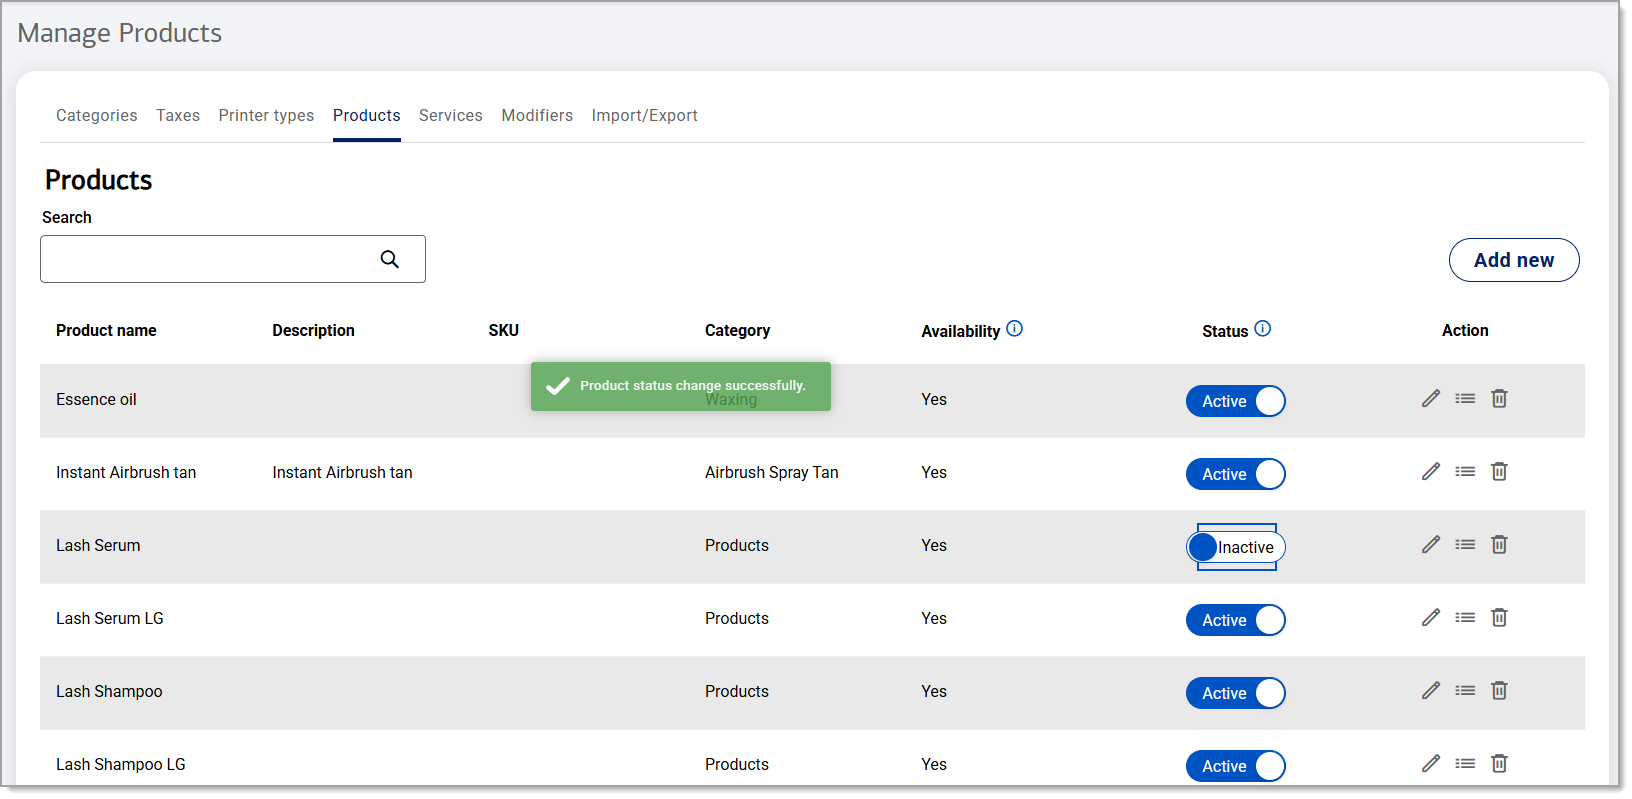
- In the Status column next to the name of the product you wish to activate or inactivate, set the status to Active or Inactive.
 A notification will appear to indicate the product status was updated.
TIP!
The Product Modifier Groups icon is a quick link to Modifiers.
Bulk add or edit items
If you have many items to add to your inventory at once, it may be more efficient to use the bulk import option to create or update your products.