Restaurant Solution User Roles

November 18, 2024

Description

How to manage access to features in the Restaurant Point of Sale app and in the Back Office of Restaurant Solution by user role

What's in this article?

User Roles define the access available to each employee in both the Back Office of Restaurant Solution and the Restaurant Point of Sale app. The size, layout, and policies of an operation, as well as the number of employees, determine the user roles you need to create and the access you need to assign to each user role.

The system provides three default user roles; however, you can add additional user roles. You can also remove the default user roles, except for Account Manager. Assign the appropriate level of access to each user role and assign one or more user roles to each employee. Additionally, you can rank the user roles that access Back Office. This prevents an employee with a lower ranked user role from changing their user role to one with a higher ranking. User roles appear in order of ranking from lowest to highest, from left to right.

User roles provide a way to grant or limit access to certain features in both the Restaurant Point of Sale app and the Back Office.

  • User roles define the features a user can access. A user role is then assigned to an employee.
  • If an employee has limited access to features in the Back Office, those features will be hidden from the employee.
  • For most features on the POS, when a user tries to use a feature to which they don't have access, the system will alert the user and prompt them to enter the PIN of a user who does have access to continue.

Pre-defined user roles

There are three pre-defined user roles, and each one has a set of features assigned to it by default. You cannot remove or edit the pre-defined user role names. However, you can customize the features available to each role based on how you run your business.

table showing user roles and who they are designed for
RoleDesigned for
CashierEmployees who ring up sales on the POS device, but do not access the Back Office.
Store ManagerManagers who need full access to all of the features in the Restaurant Point of Sale app and full access to the Back Office, with the exception of account setup, purchasing, and billing features.
Account ManagerAssigned all features. The system assigns the Account Manager user role to the individual who signs up for the account; however, you can re-assign the Account Manager user role to another individual, as well as assign this user role to multiple individuals. This user role is a Back Office user role only. Assign a user with the Account Manager role an additional role to allow access to the Restaurant Point of Sale app.


Back Office and POS features

User roles control user access to both the Restaurant Point of Sale app and to the Back Office.

POS Access Levels

Assign appropriate access to user roles for employees to perform their job in the Restaurant Point of Sale app. Every employee has access to the Point of Sale app for time clock functions. This is important for employees, such as a cook and a dishwasher, who only need to clock in and out. It is not necessary to define levels of access for these employees.

table listing access levels and availability per employee role
Point of Sale app access level Description
POS (All)Able to access to all POS settings in this section.
Time Clock OnlyAble to access to the POS to clock in and out. For employees who have no other requirement to access the POS. 
Ring Up Sales (All)Enables employees access to the order entry screen, for actions such as adding items to the guest check and accepting payments.
  Can Accept Payments
Enables employees access to the order entry screen, for actions such as adding items to the guest.
  Can Close Orders
Enables employees access to the order entry screen, for actions such as accepting payments.
  Print/Show End Shift TotalsWhen enabled, the end of shift summary will display on the POS and be printable on the POS.
Cash DrawerAllows employees with Ring Up Sales and Cash Drawer access to open a cash drawer during the course of a normal transaction.
Declare TipsRequires employees to declare credit card tips at the end of a labor shift.
No Sale (Open Drawer)Able to open the cash drawer by tapping No Sale at the order entry screen.
Void Items/TicketAble to void individual items or an entire guest check.
Void Online OrdersAble to void online orders
Apply Discounts/PromotionsAble to apply a discount or promotion to an item or a guest check. An employee with this ability can apply any active discount or promotion available to a guest check.
Approve Discounts/PromotionsAble to approve a discount or promotion to an item or a guest check. An employee with this ability can apply any active discount or promotion available to a guest check.
Apply DonationsAdd a donation to a guest check.
Change TaxPermits Able employees to change the tax rate on a guest check to a different rate.
Exempt TaxAble to change the tax rate to ‘0’ on a guest check.
Perform RefundsAble to perform a refund for a customer.
Recall Any OrderAble to recall orders created by other employees. By not enabling this access, an employee can only recall their own orders.
Reopen TicketAble to reopen any guest check to add items or to change the payment tender.
Adjust TipsAdjust credit card  tips on a guest check.
Adjust Tips for OthersAble to adjust the credit card tips of other employees.
Category/Item ManagementNot available
Set Item AvailabilityAble to manage item availability on the POS.
Pending Credit Able to view data in the Pending Credit screen.
POS Settings Able to access the Settings screen and change the settings for the device they are actively using.
Scoreboard AccessAble to access to the POS Scoreboard report.
Offline Mode ManagementAble to put a device into offline mode when a device becomes disconnected from the server.
Business Date ManagementPermits employees to manage previous business dates in the POS app, and perform functions such as closing open labor and financial shifts, reopening a financial shift, and closing a previous, open business date.
Restrict Tabs to Current UserEnables employees with this access to restrict tabs to the current user.
Take Order OwnershipAllows employees to take ownership of a table owned by another employee, and to modify the order. When an employee assumes ownership of a table, they become financially responsible for the table. By not enabling this access, the order is read-only to the employee, and the employee can only print a guest check that belongs to the table of another employee.
Add Charge to TicketPermits employees to manually add a charge to a guest check.
Enter Manual Weight for Scale ItemsPermits employees to enter a manual weight for scale items.
Approve Early Break Return Permits employees to approve an early break return.
POS UpgradeEnables an employees with this access to upgrade the POS application, if prompted.
Release Notes NotificationsReceive notification when a new release is available
Modify Team ChecksEnables employees with this access to make changes to a check owned by another employee. Financial ownership is decided based on the Return Financial Ownership access. If disabled, the employee cannot edit checks owned by another employee.
Return Financial OwnershipAfter editing a check owned by another employee, financial ownership automatically returns to the ticket originator. If disabled, financial ownership transfers to the employee performing the edit.
Break with Active TablesEnables employees with this access to take a break with an active tab/table without transferring the financial ownership.    
Open Checks Limit OverrideAllows user to override a limit on open checks
Refund Limit OverrideAllows user to override refund limit
Refire Order OverrideAllows user to override refire orders
Remove Payment From TicketNot available
Clear ItemsNot available
Clear Items Limit OverrideNot available
Delete TicketsNot available
Delete Tickets Limit OverrideNot available
Training ModeNot available
Back Office Access Levels

For all of the features listed below, if a user does not have access to a feature, they will not see the link for the feature when they log in to Back Office. Features are grouped. To enable a user role to access all of the features in a group, select the group (All) option. The Account Manager is enabled for all features.

Table listing back office feature and what it allows the user to do
Back Office Access Level  Description
My Store (All)Access all features in My Store
Activity Summary and AlertsView the activity and alerts
Sales DashboardView the Sales Dashboard
Customer DashboardView the Customer Dashboard
Results (All)Access all Results reporting
Operations (All)Access all Operations reporting
View and print Store Summary
View and print device activity report
View and print employee activity report
View and print location activity report
View and print discount and promotion reporting
View and print the Taxes report
View and print Labor Shifts report
View and print Tips report.
Void AuditView and print the Void Audit Report
Sales (All)Access all sales reporting
Department SalesView and print department sales reporting
Item SalesView and print the item sales report
Non-Sales Revenue
View and print non-sales revenue reporting
Modifier SalesView and print modifier sales reporting
Sales SummaryView and print a summary of sales activity
Hourly SalesView and print hourly sales activity
DonationsView and print donations activity
Customers (All)Access all customers features
Bulk EmailView and print email campaign activity
Customer NotesView and print customer notes report
Customer SalesView and print customer sales activity
House AccountsView and print house account list
House Account ActivityView and print house account activity
Lists (All)Access all lists
ItemsView a list of items in your inventory
ModifiersView a list of modifiers
CustomersView a list of customers
EmployeesView and print a list of employees
DevicesA list of all devices assigned to your business
EOD Reports Email (All)Provide all reports below in the End of Day report email
Operations (All)Provide all Operations reports below in the End of Day report email
Store SummaryProvide the store summary report in End of Day report email 
Sales (All)Provide all of the sales reports in End of Day report email
Department SalesProvide the Department Sales report in End of Day report email
Item SalesProvide Item Sales report in End of Day report email
Non-Sales RevenueProvide Non-Sales Revenue report in End of Day report email
Modifier SalesProvide Modifier Sales report in End of Day report email
Hourly SalesProvide Hourly Sales report in End of Day report email
POS Transactions
View transactions for a specific time and reprint customer receipts
Cash ManagerView and print cash balance activity.
Financial ShiftsView and print the Financial Shifts report
Labor ShiftView and print the Labor Shift report
Credit SettlementView the link to Bank of America Business Advantage 360 online banking to access Merchant Services account
Menu (All)Access all menu features
Categories & Items (All)Access all categories and items features
Full AccessView, add, and edit categories and items
Limited Edit OnlyLimited edit of item information
ModifiersView, add, and edit modifiers and modifier groups
DepartmentView, add, and edit departments
TagsView, add, and edit tags
DiscountsView, add, and edit discounts
PromotionsView, add, and edit promotions
Price ListsView, add, and edit price lists for items
EventsView, add, and edit events
DonationsManage donation acceptance
Customers (All)Access all customer features
Email MarketingView, edit, and create email marketing campaigns
Loyalty ProgramConfigure and manage loyalty program options
Edit Rewards BalancesAdd points or punches manually to a customer account
CustomersManage customer information
SocialLink your social sharing sites to your email marketing campaigns
House AccountsManage house accounts
Employees (all)Access all employee features
EmployeesAdd and remove employees.
User RolesAssign access levels to user roles and create new user roles
Security ControlsSet security control limits on open checks, refund amount, clearing items and deleting tickets
Full AccessAbility to set security controls
Read OnlyAbility to view security controls that are in place
EcommerceEnable e-commerce setting if using Online Ordering add-on option
Settings (all)Access all settings features
CompanyManage company information settings
StoreConfigure store options
TaxesAdd tax location and jurisdictions, set up tax tables
PaymentsConfigure payment types and features such as tipping.
Custom TendersAdd and manage custom tenders (generic payment types)
Pay In/Out CodesManage codes used for cash management activities on the POS
ChargesConfigure charges for non-sales revenue items
Kitchen RoutingConfigure how items are routed to the kitchen printer
Bulk Customer DeleteDelete multiple customers at one time. 
Account Information (All)Access all account information features
My AccountAccess My Account information.
Buy HardwareNot available
Register DeviceDeactivate devices from Back Office.

Set up and edit Restaurant Solution user roles

You can add new user roles to fit the needs of your business. Once you have defined your user roles, then you can assign each employee a role from the Employees screen in the Back Office. 
To create a custom user role
  1. In the Back Office, select the Employees tab.
  2. Select the User Roles tab. 
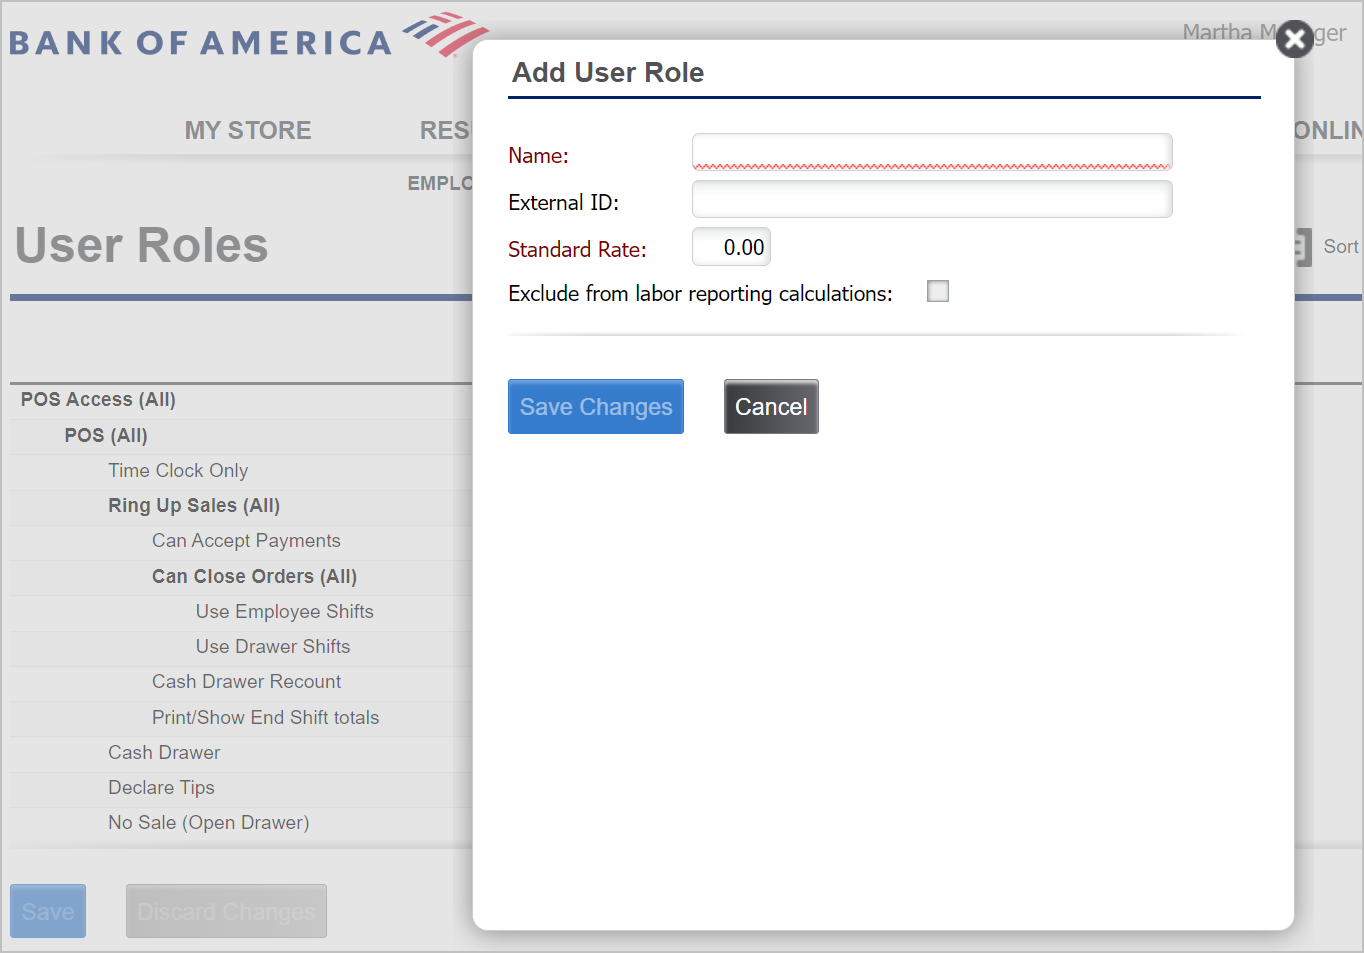
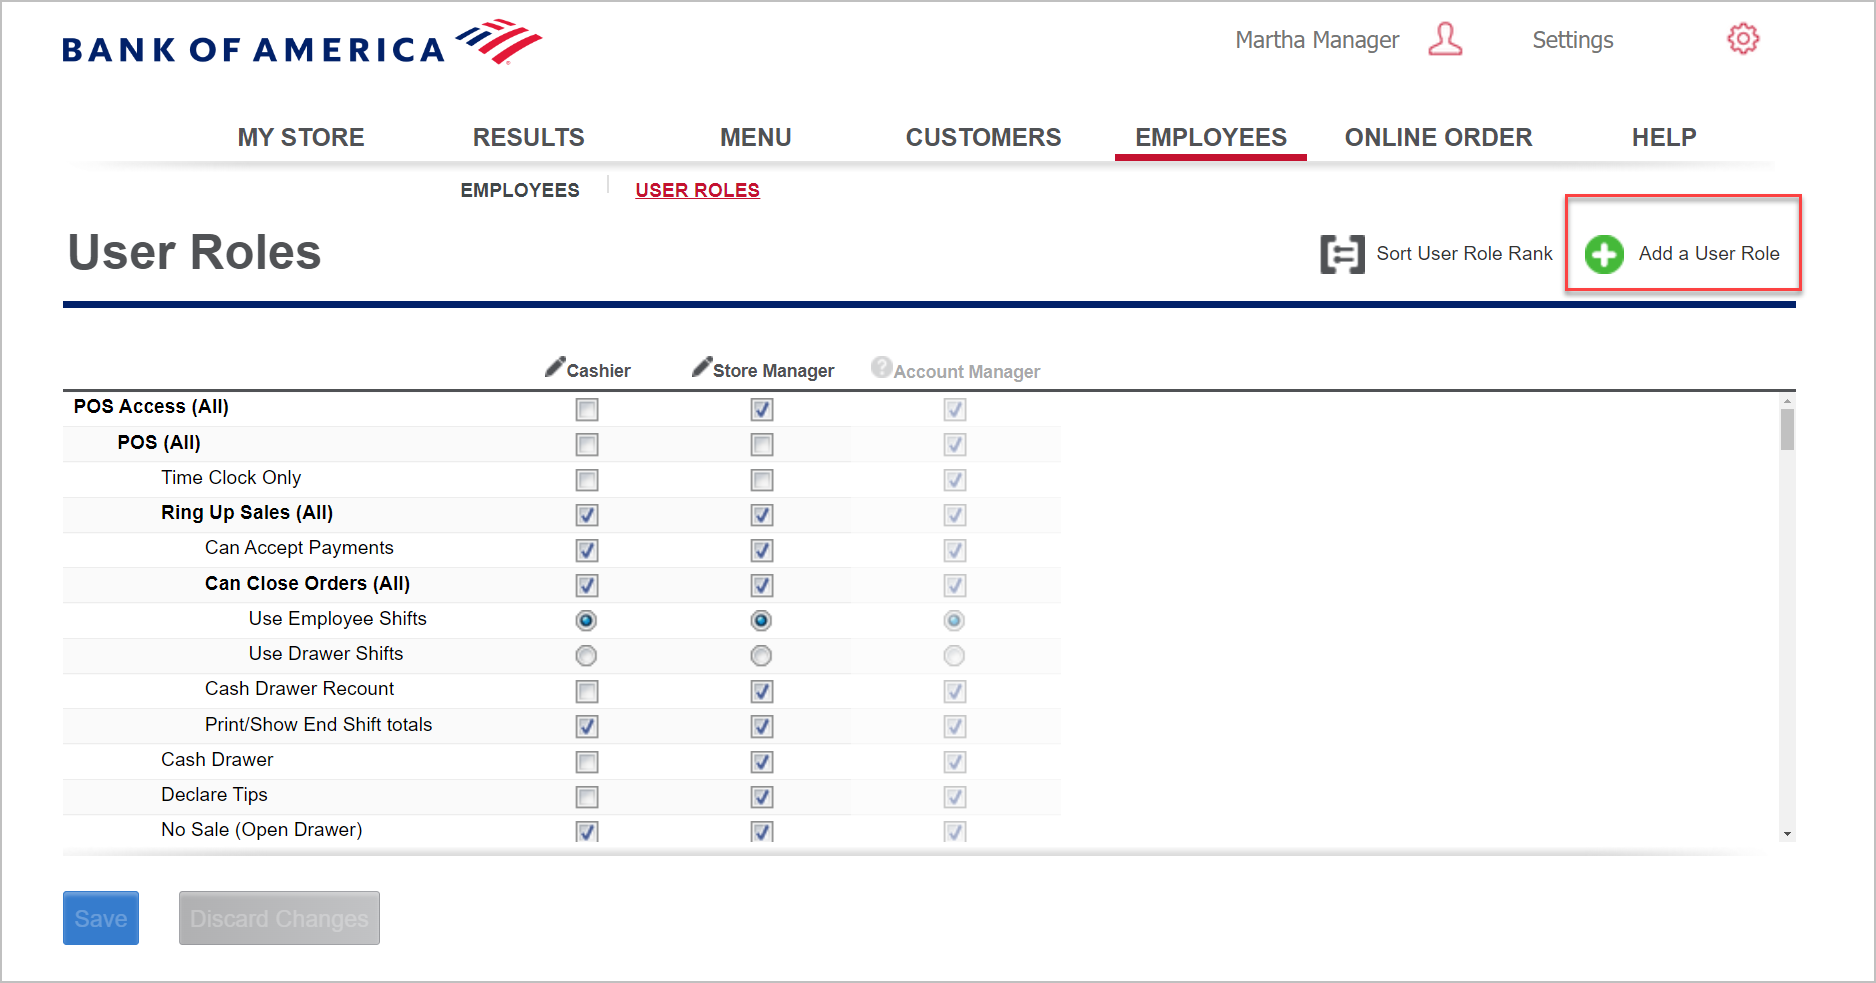
  3. Click Add a User Role.

    add user role window with fields to complete
  4. Enter a name for the new user role.

    add user role
  5. (Optional) Enter a standard rate of pay for the user role. The pay rate you specify here becomes the default payment rate for the user role; however, you can override the standard rate for an employee at the Employee screen. This pay rate will be used to calculate labor costs for your business.
  6. (Optional) Select Exclude from labor reporting calculations to prevent users in this role from impacting labor calculations. For example, you may have a user role that is a salaried employee that you do not want to use for calculating costs.
  7. Click Save Changes.
To rank user roles
  1. In the Back Office, select the Employees tab.
  2. Select the User Roles tab. 
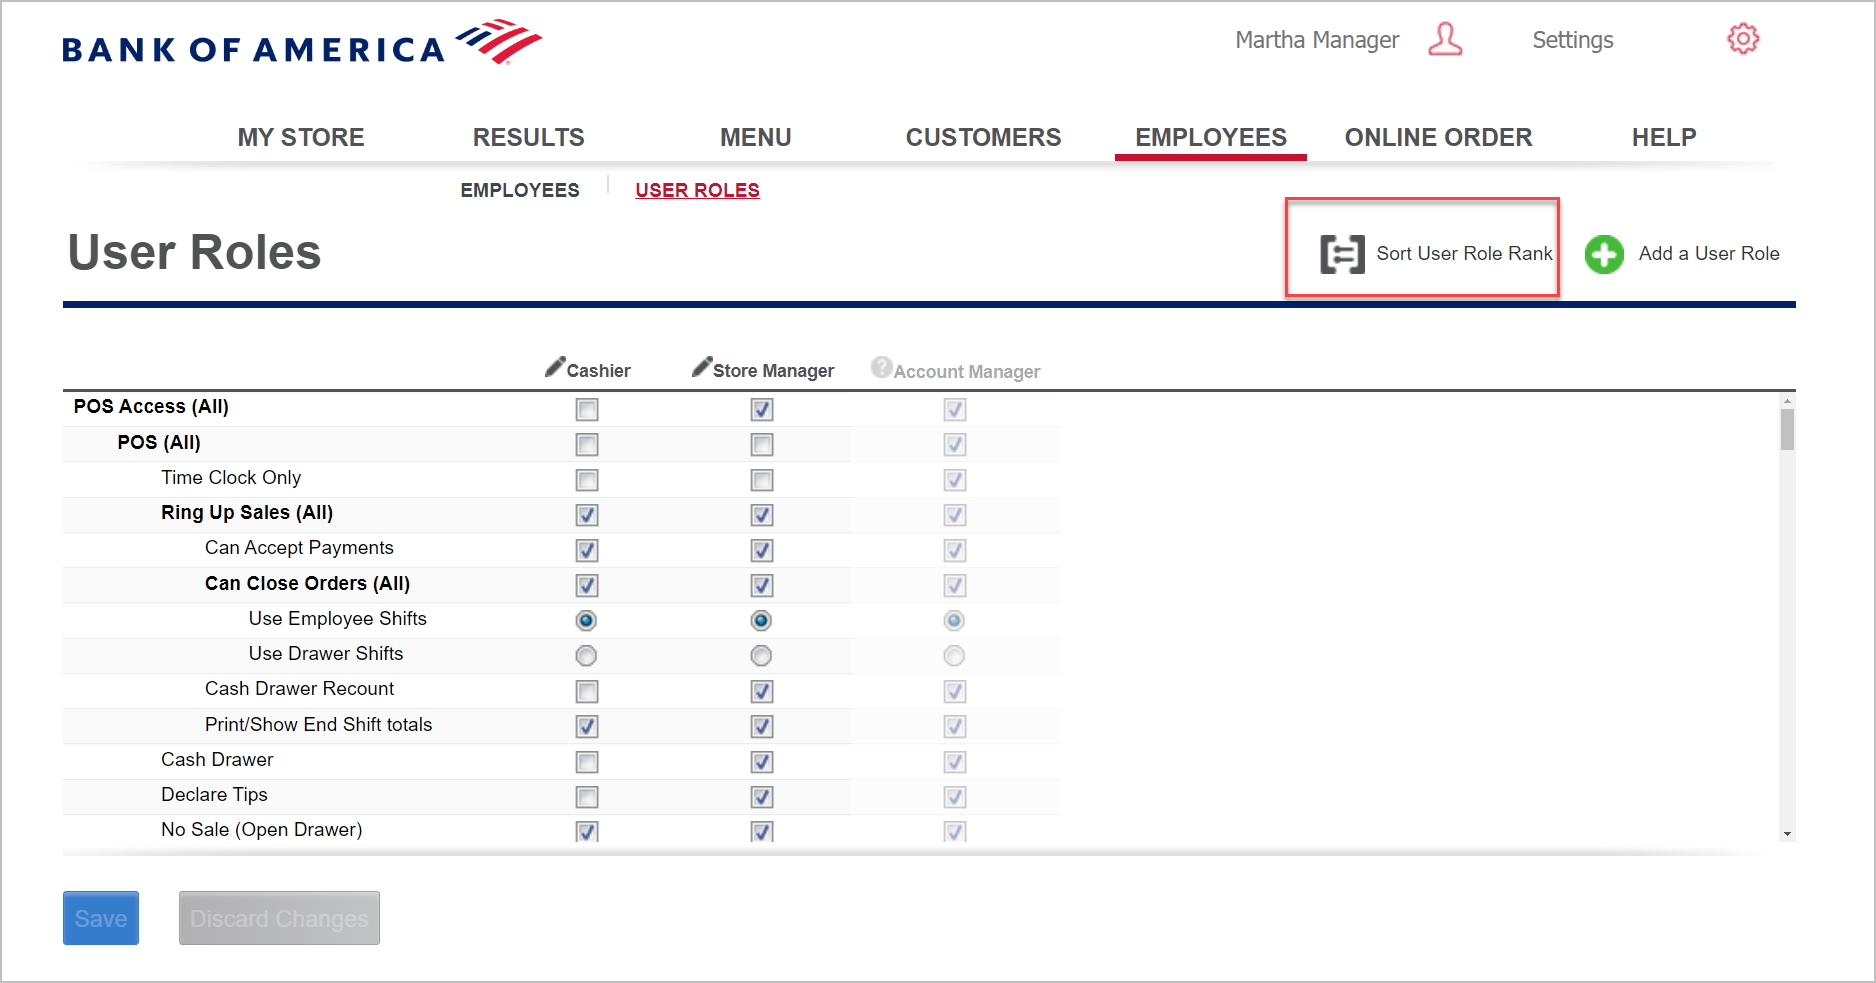
  3. Click Sort User Role Rank.

    User role screen with Sort User Role Rank button selected
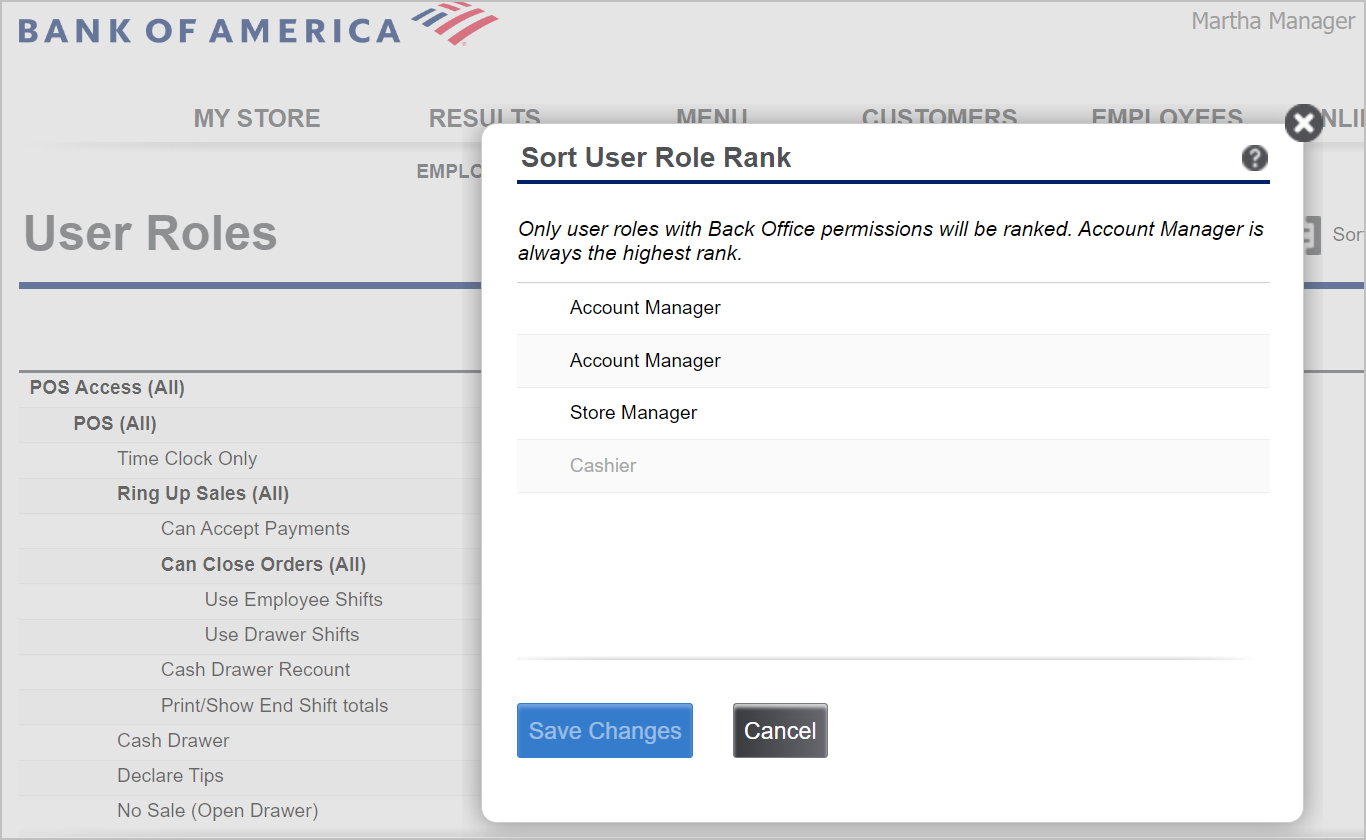
  4. Use the arrow buttons to increase and decrease the rank of the role. 

    Sort user role rank window
To assign access to each user role
  1. In Back Office, select the Employees tab.
  2. Select the User Roles tab. 
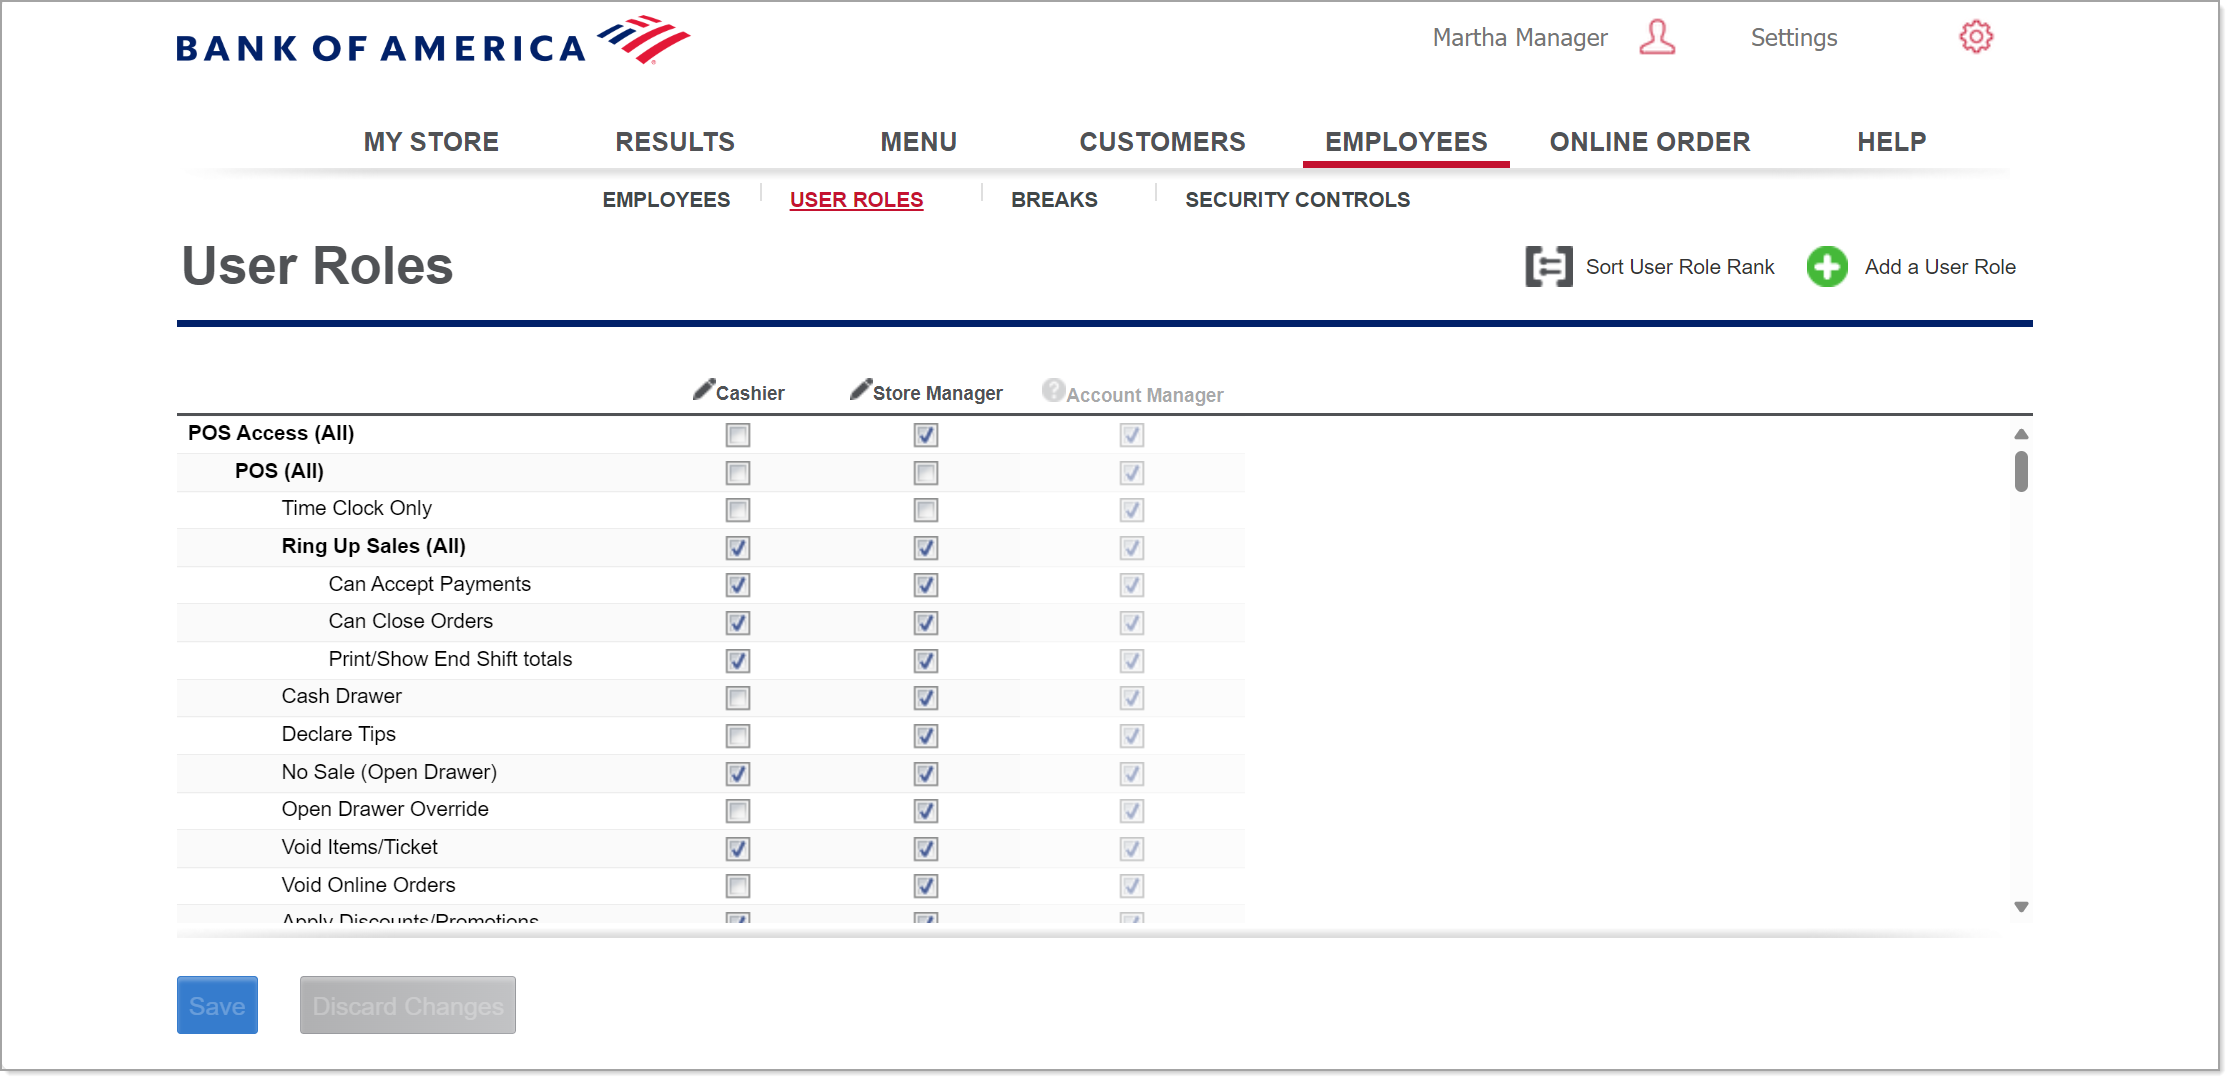
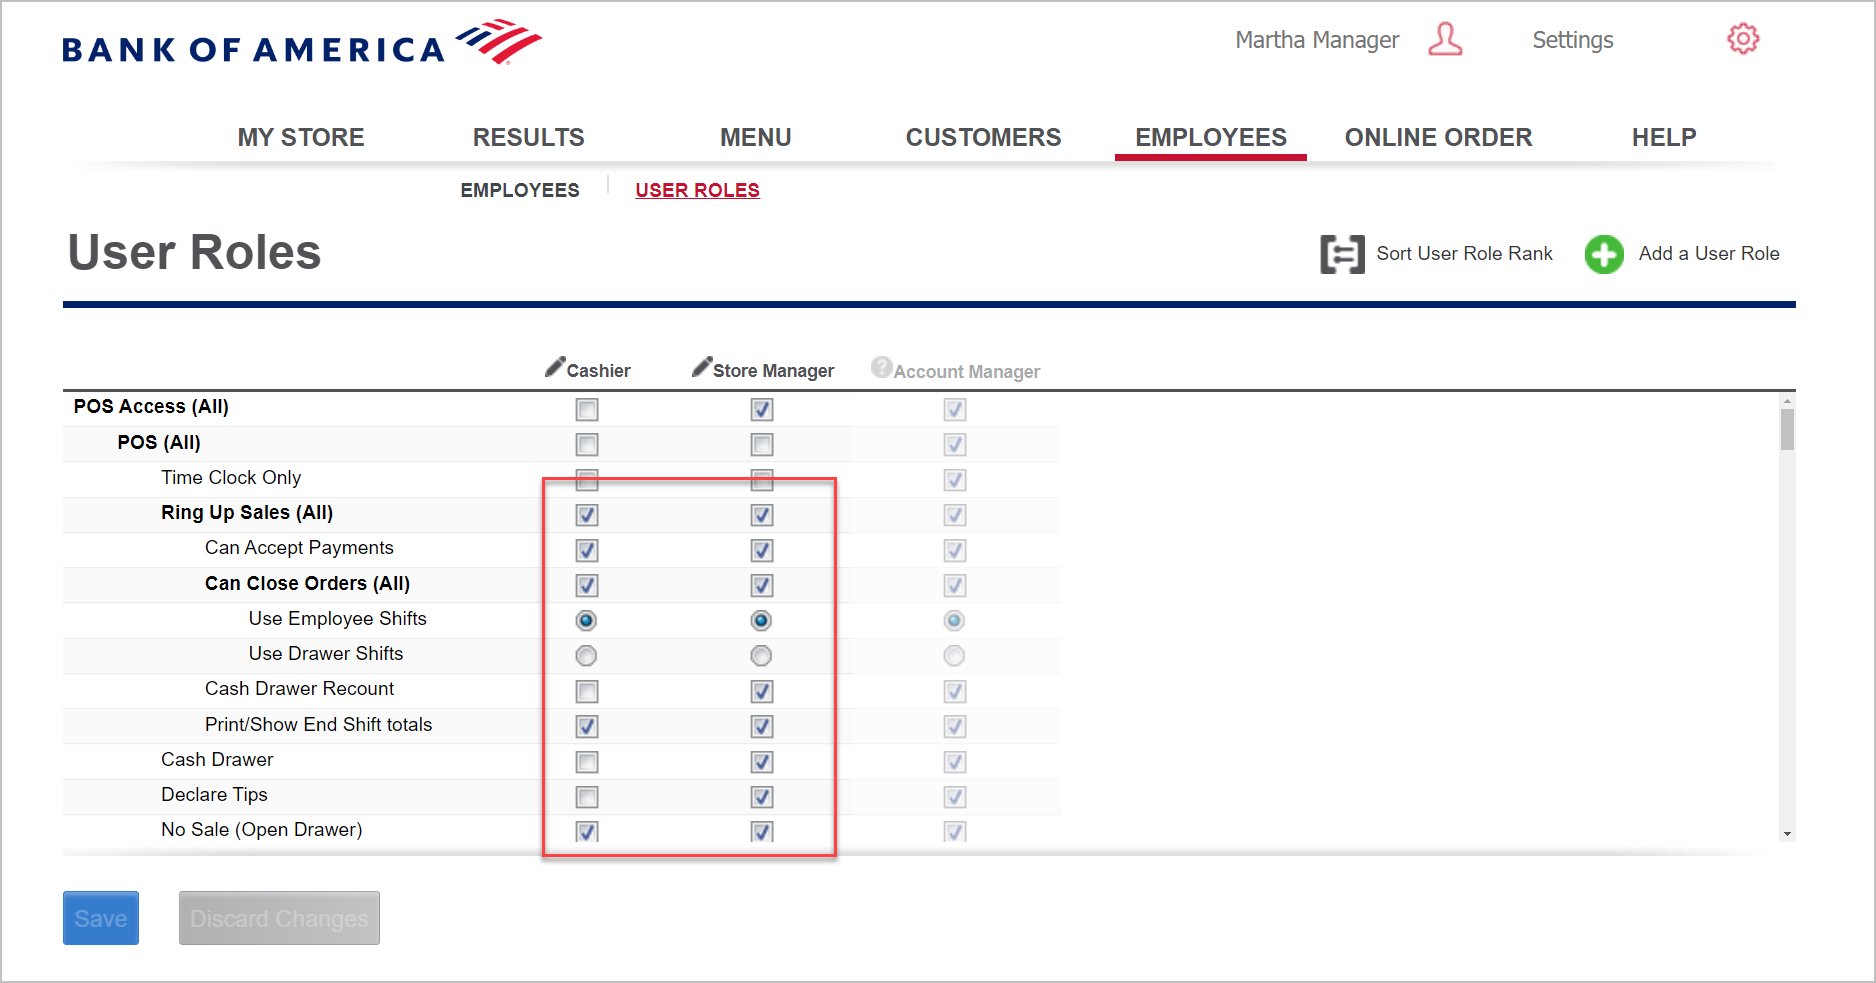
  3. In the User Roles screen, select the features each role should be able to access on the POS and in the Back Office.

    User roles screen where permissions are selected per employee role
  4. Click Save.
Did you find this article helpful?